Act Three, Chapter 7: Cargan’s Ultimatum
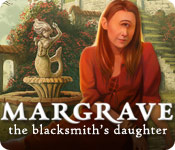
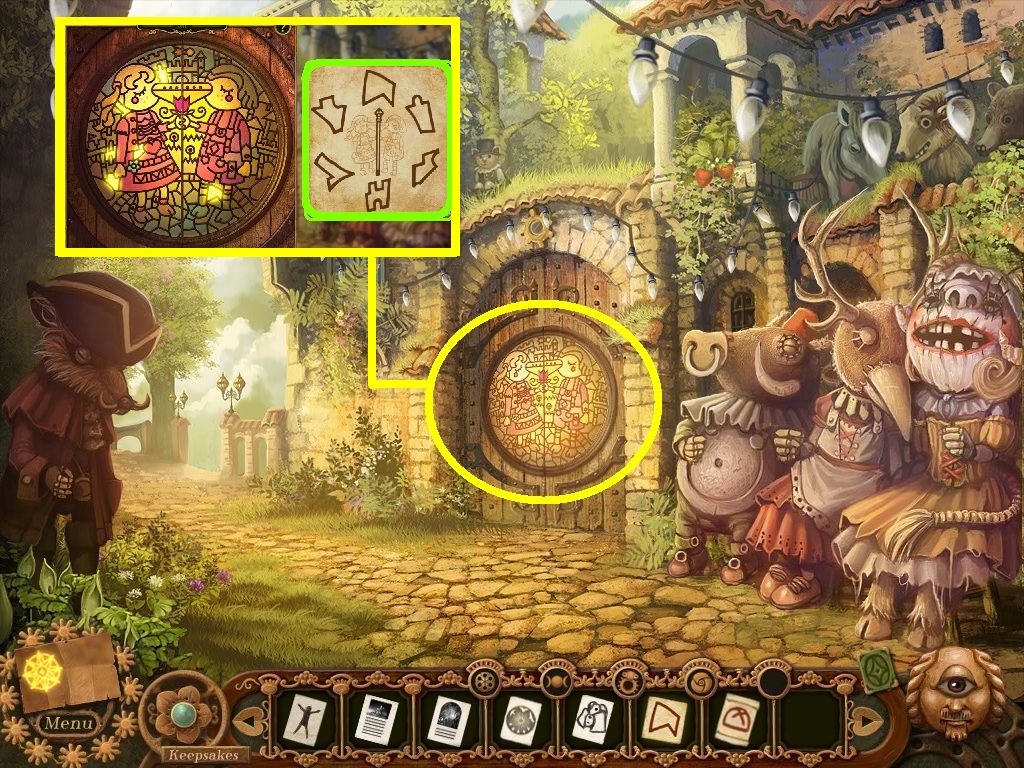
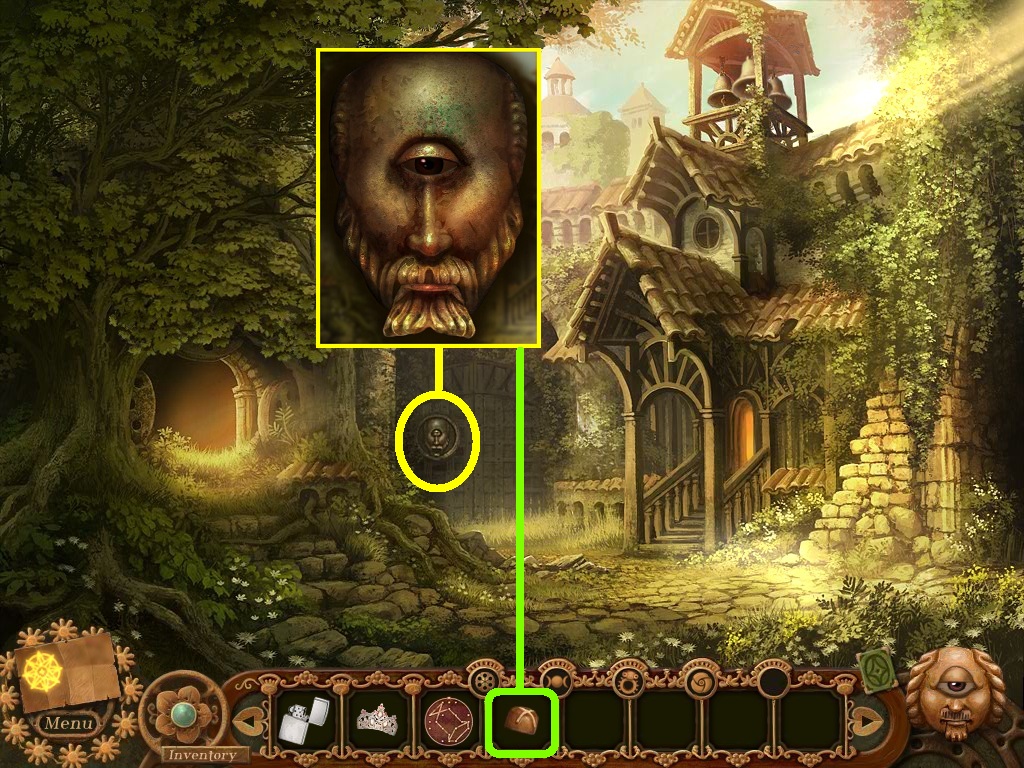
- Zoom into the bone sculpture (orange circle) on the gate.
- Click your rose eye (green circle) swirl it across the bone sculpture to uncover the truth.
- Pick the divination tool (pink circle) to wake up the Seer.
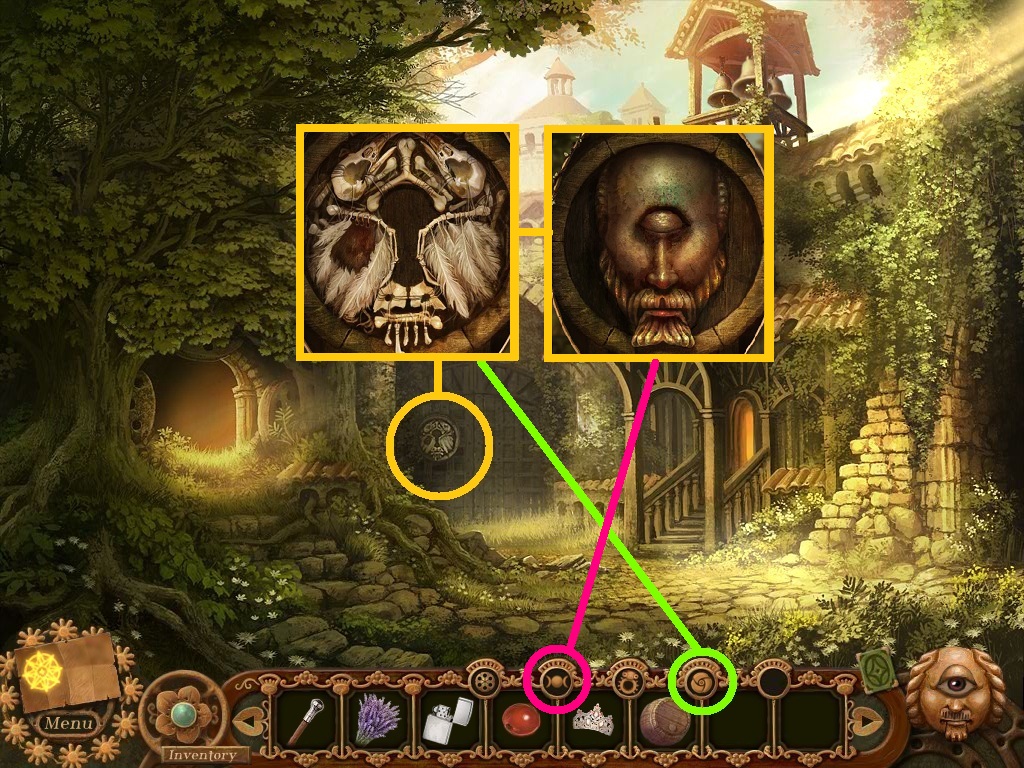
- A game will trigger.
- Place the cards as shown above.
- Match the rune stones with the picture shown (aqua square) the solutions vary.
- Collect the truffle recipe.
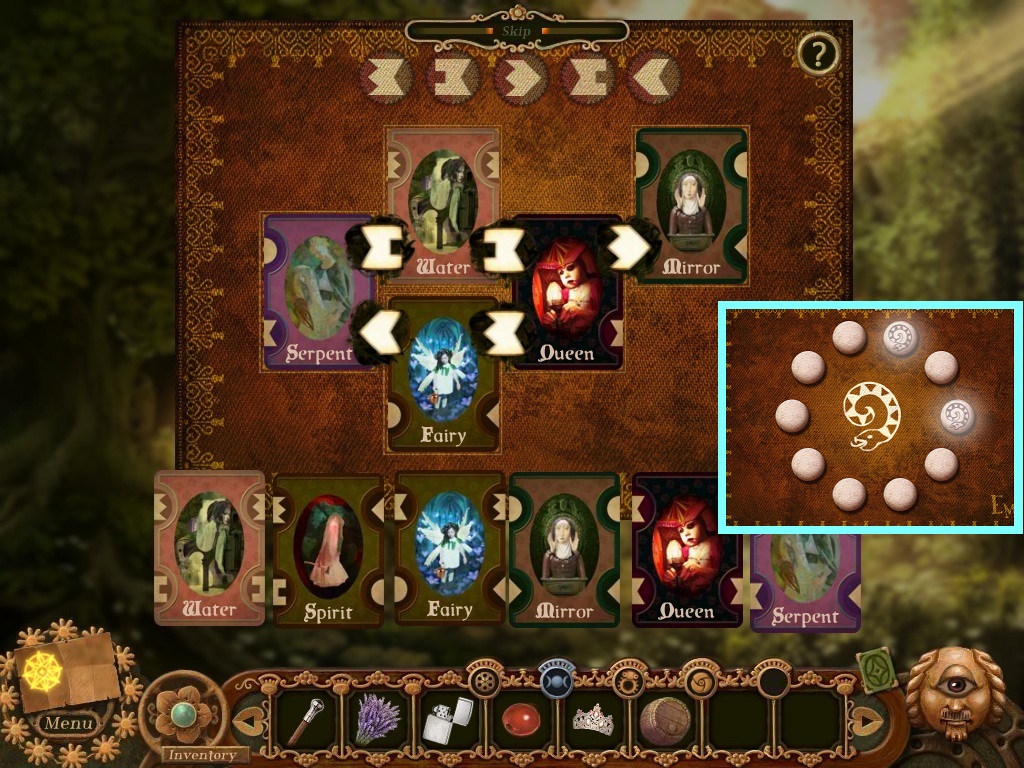
- Go to the windmills.
- Pick the rose eye (yellow circle).
- Use it on the ruins (pink circle).
- Go through the doorway to the wardian chamber.
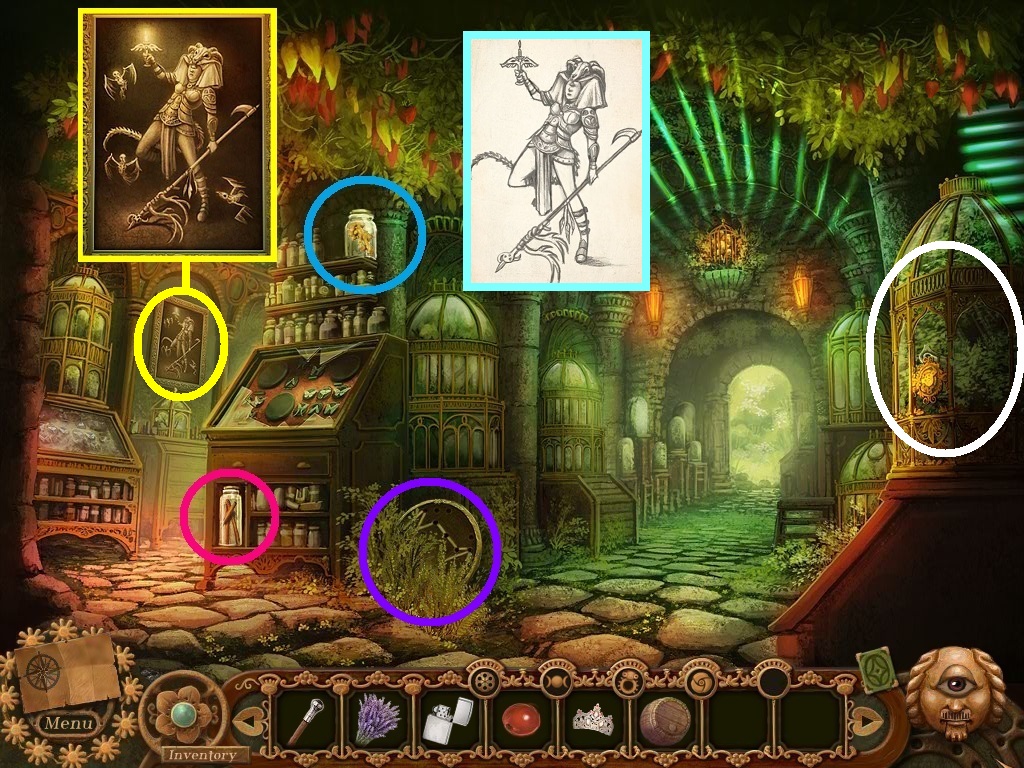
- Collect the cinnamon (pink circle).
- Collect the ginger root (blue circle).
- Zoom into the painting (yellow circle).
- Collect the goddess of life (aqua square).
- Collect the bell shield (purple circle).
- Zoom into the case (white circle).
- A puzzle will trigger.
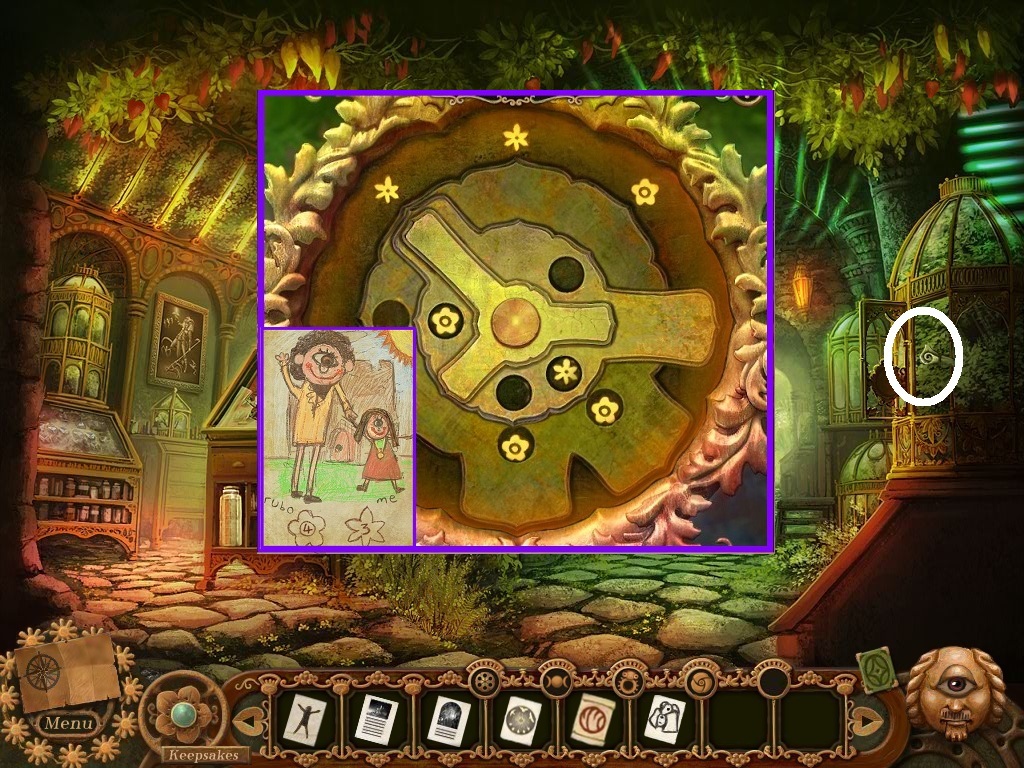
- Refer to Keelin’s drawing (purple square) to obtain the goal of the puzzle.
- Solve as shown above.
- Collect the automata code (white circle).
- Go into the dome garden.
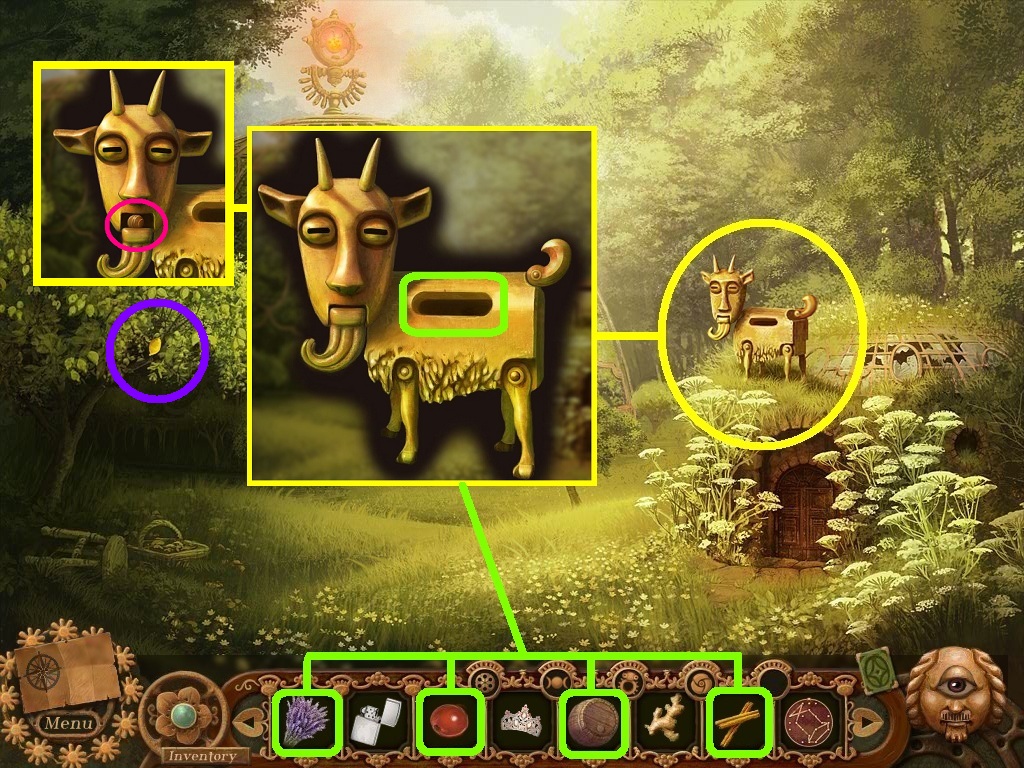
- Zoom into the goat chocolatier (yellow circle).
- Pick the red currants, the rum, the lavender, and the cinnamon (green squares).
- Place them into the slot.
- Collect the truffle (pink circle).
- Collect the ripe lemon (purple circle).
- Go to the market square.
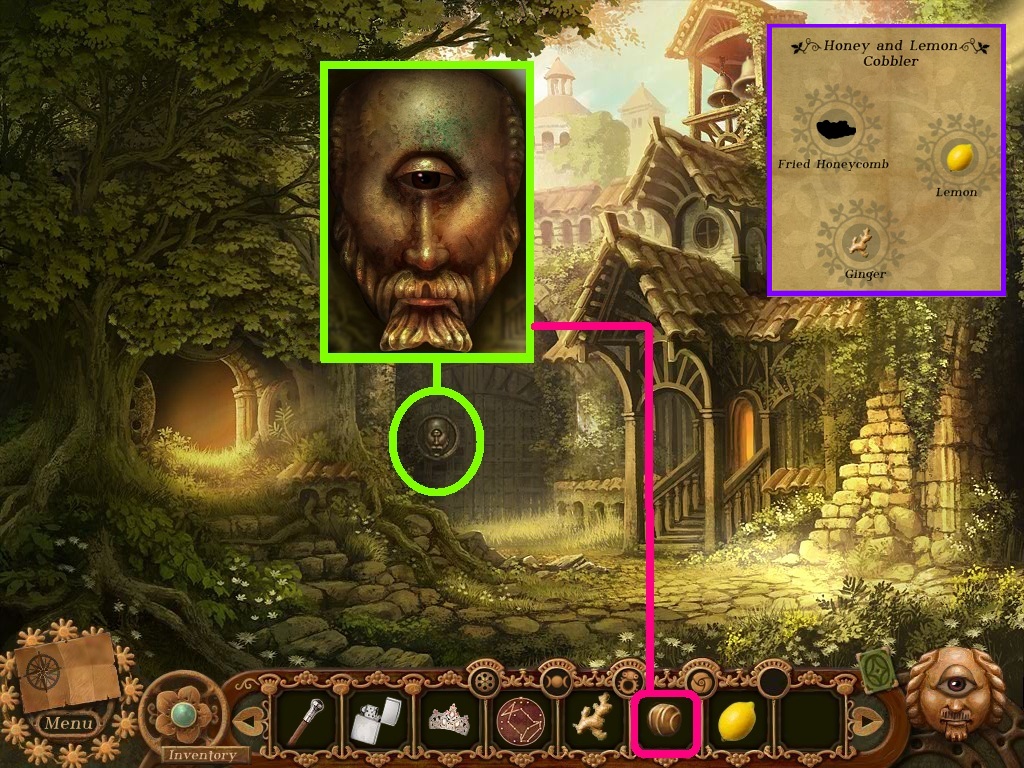
- Zoom into Cargan (green circle).
- Pick the chocolate (pink circle) and give it to Cargan.
- Collect the honey and lemon cobbler recipe (purple square).
- Go to the automata courtyard.
- Zoom into the horologist’s workshop door (yellow circle).
- A puzzle will trigger.
- Pick the automata code (green square) and Miss Thorn’s staff.
- Click the matching shapes on from the automata code with the staff.
- Follow the patterns as shown above.
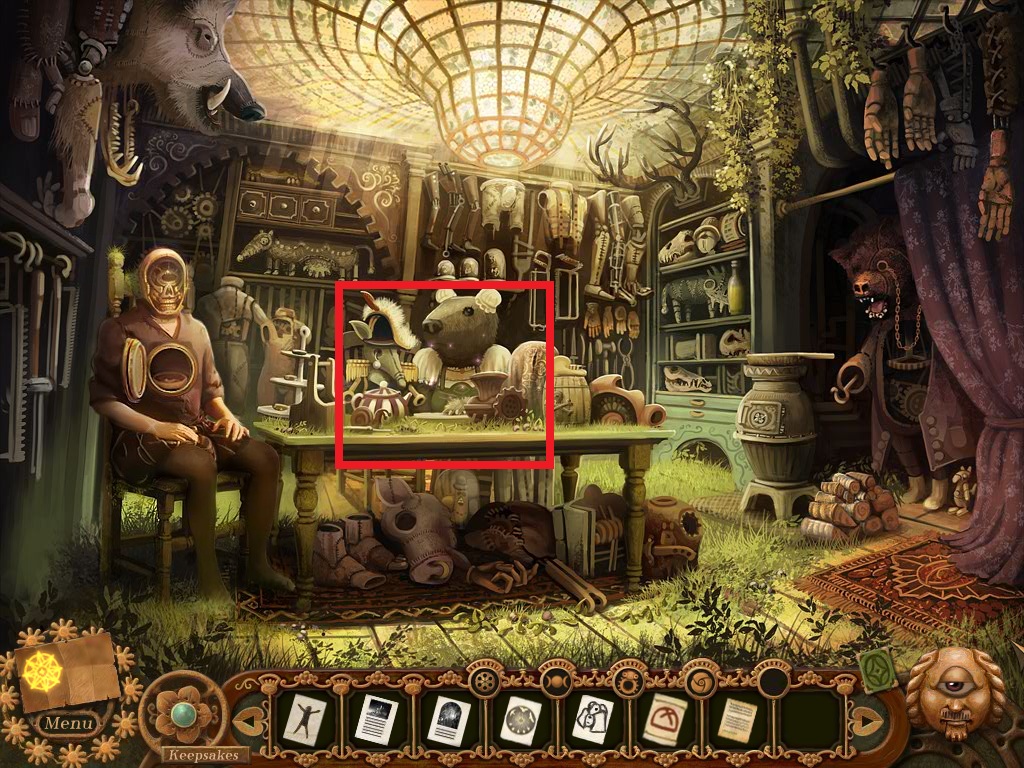
- Go into the horologist’s workshop.

- Zoom into the hidden object area (red rectangle).
- Find the listed items (yellow circles).
- Collect the ivory key.
- Exit the workshop and go across the bridge to the Isle of Lacrimosa.
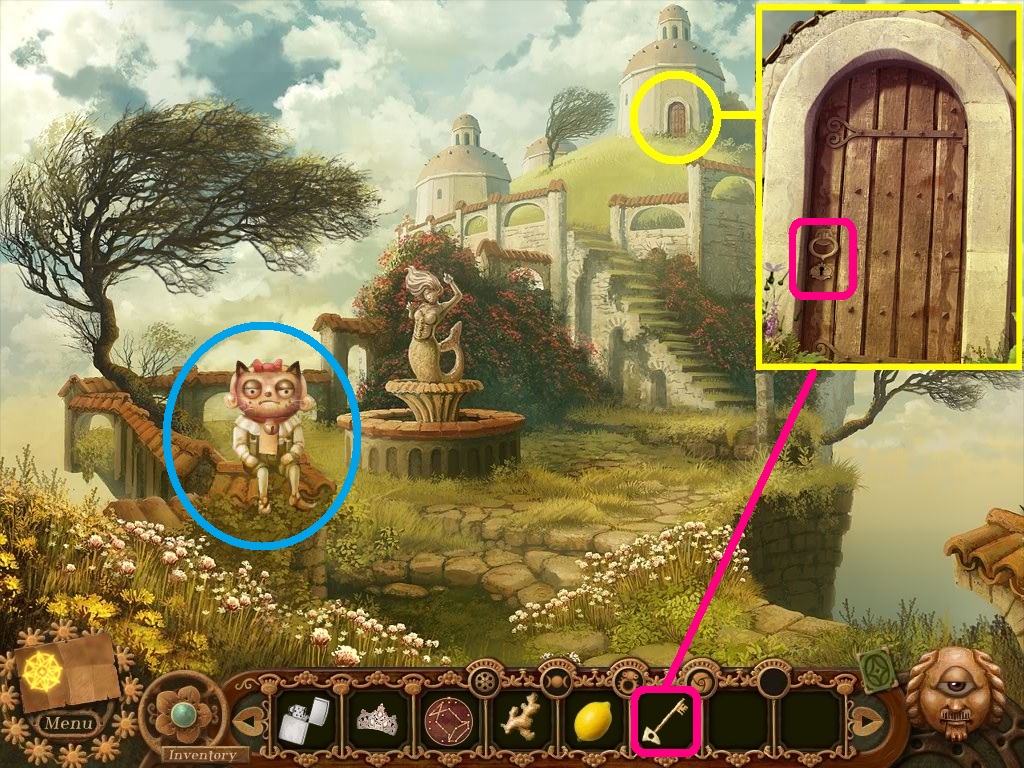
- Zoom into the door (yellow circle).
- Pick the ivory key (pink square) and insert it into the door.
- Click the automation (blue circle) and collect the note and read it.
- Go to the horologist’s workshop.
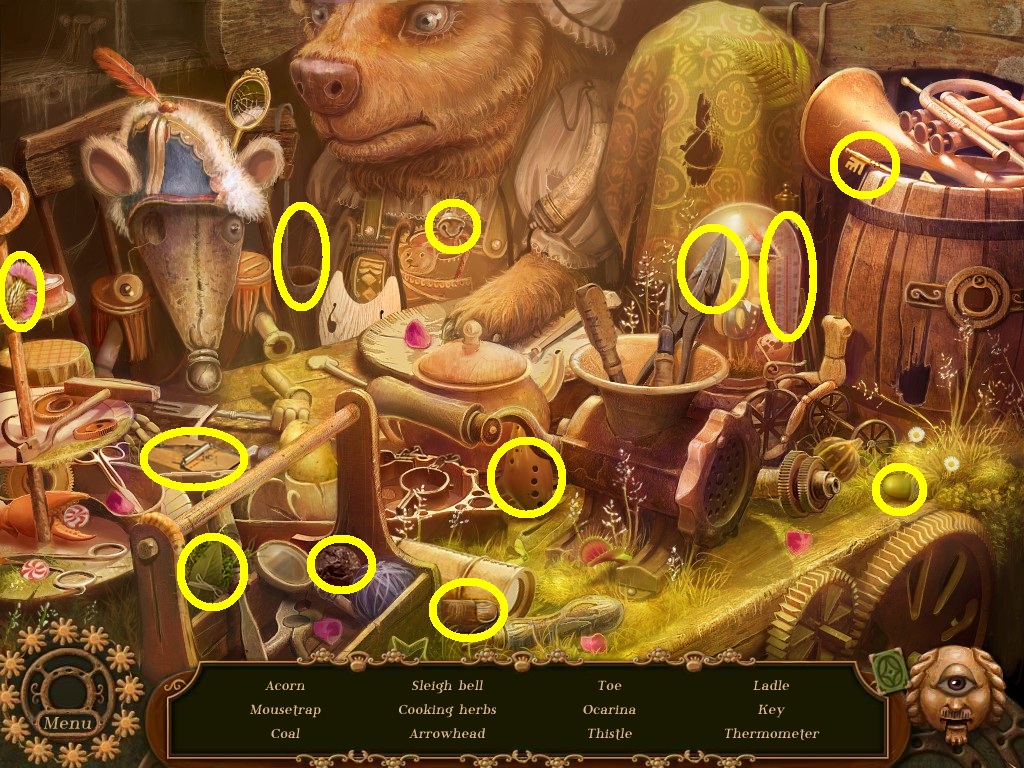
- Zoom into the hidden objects area (red rectangle).
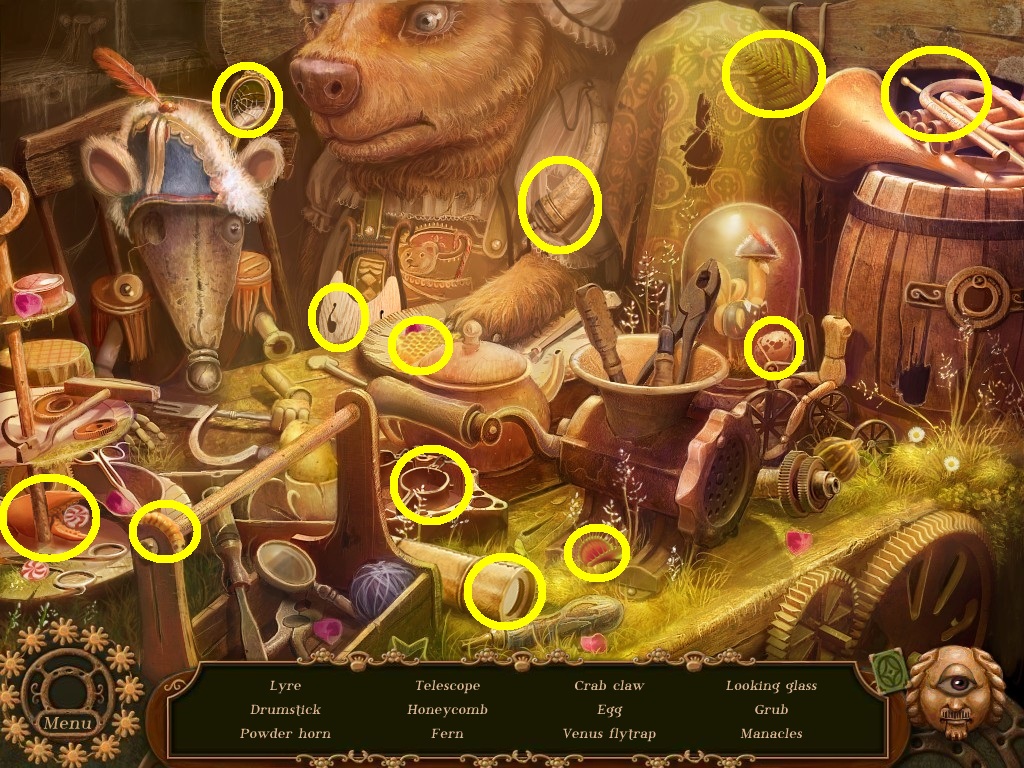
- Find the listed items (yellow circles).
- Collect the honeycomb.
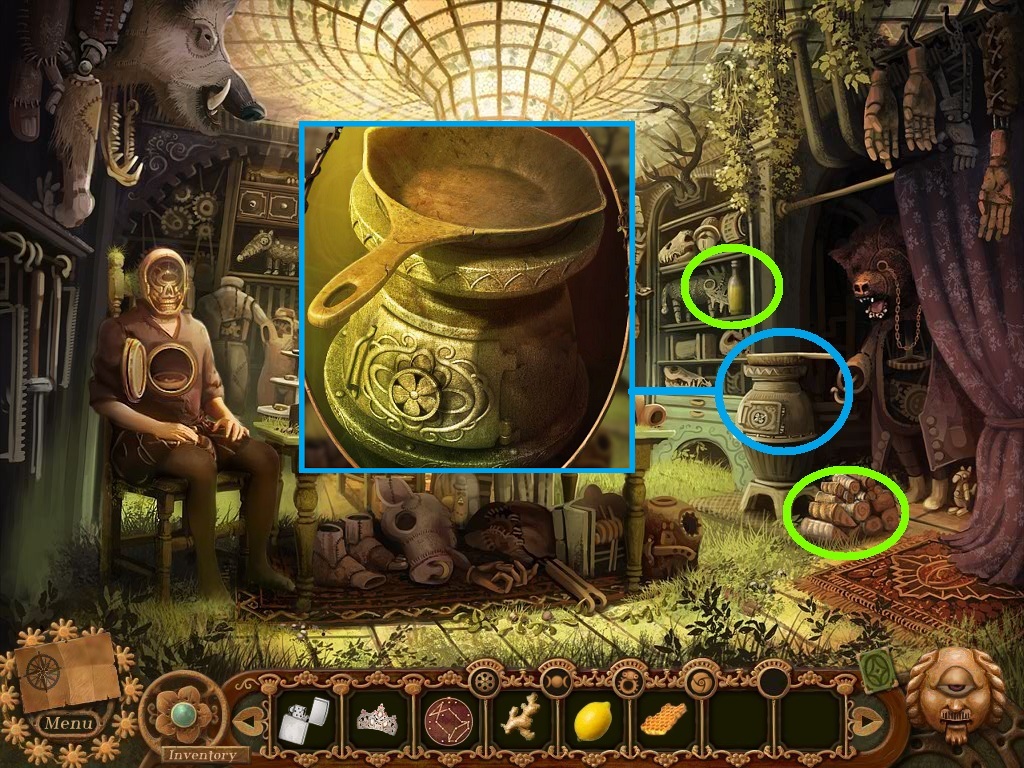
- Collect the firewood and olive oil (green circles).
- Zoom into the pot stove (blue circle).
- Click the hatch (purple circle).
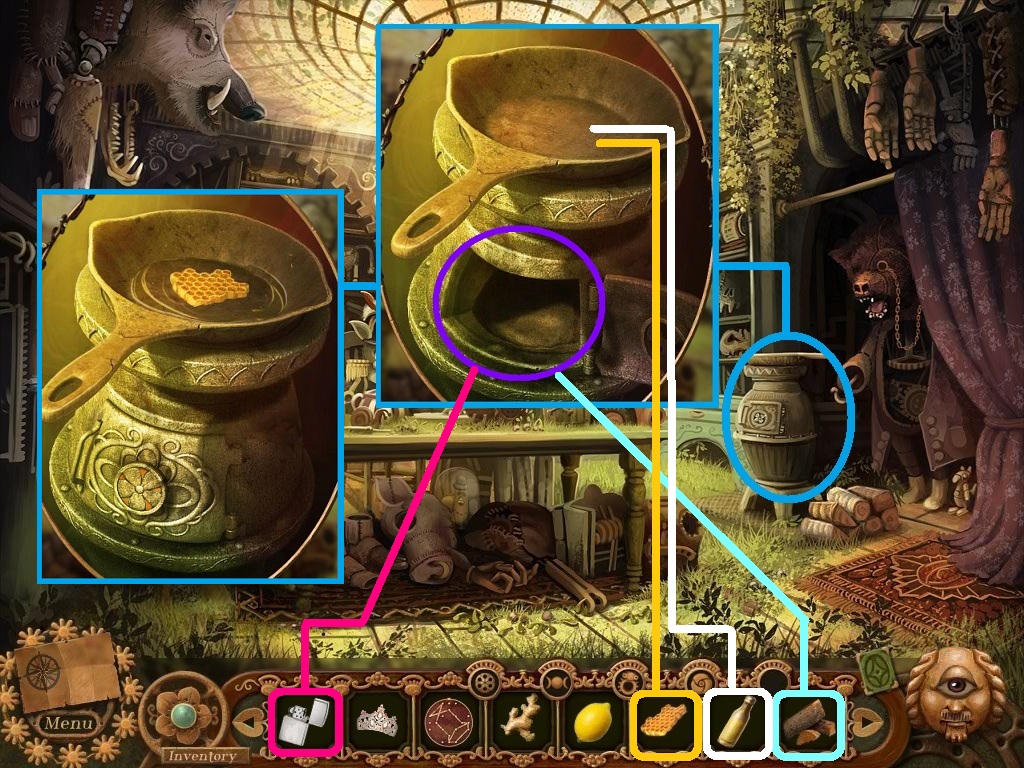
- Pick the firewood (aqua square) place it into the hatch.
- Pick the lighter (pink square) use it to light the firewood, click the hatch.
- Pick the olive oil (white square) pour it into the pan.
- Pick the honeycomb (orange square) and add it to the pan.
- Collect the fried honey comb.
- Go to the goat chocolatier in the dome garden.
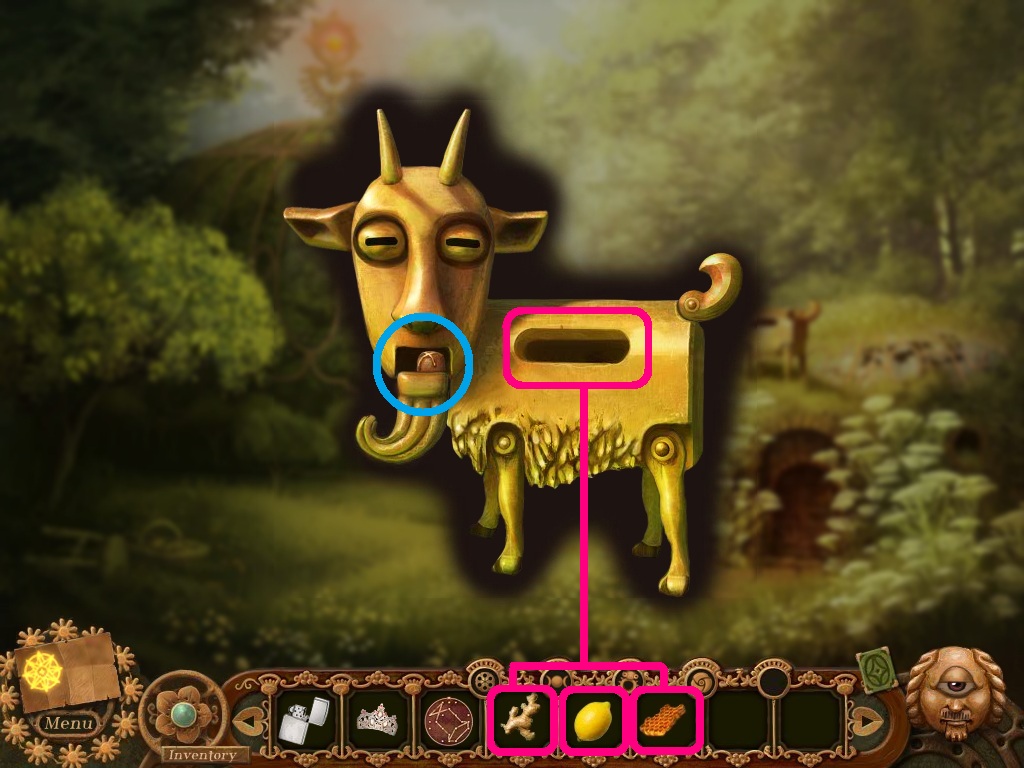
- Pick the ingredients: ginger, lemon, honeycomb (pink squares).
- Place them into the goat chocolatiers body slot.
- Collect the chocolate (blue circle).
- Go to the market square.
- Zoom into Cargan (yellow circle).
- Pick the chocolate (green square) give it to him.
- Go through the gate.
Comments will load when you reach this part of the walkthrough.