
Chapter Seven: Hello Alex
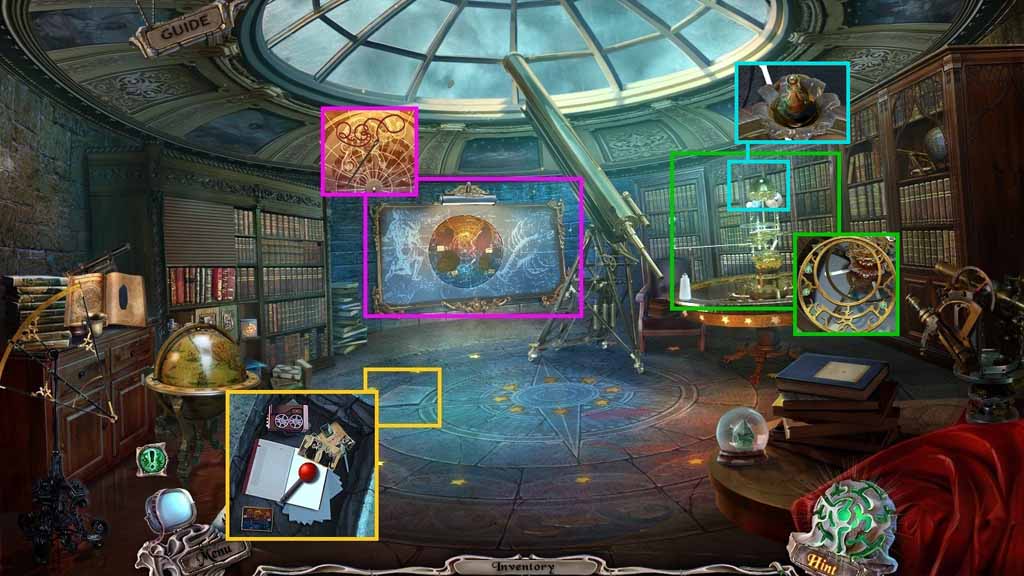
- Zoom into the wall.
- Select the string to use on the needle; collect the needle and thread.
- Click the stone then click the book.
- Zoom into the removed stone; collect the handle and examine the pictures.
- Zoom into the astrolabe.
- Select the trident to collect the astrolabe.
- Click the sphere and collect the 2nd chess piece.
- Move down once.
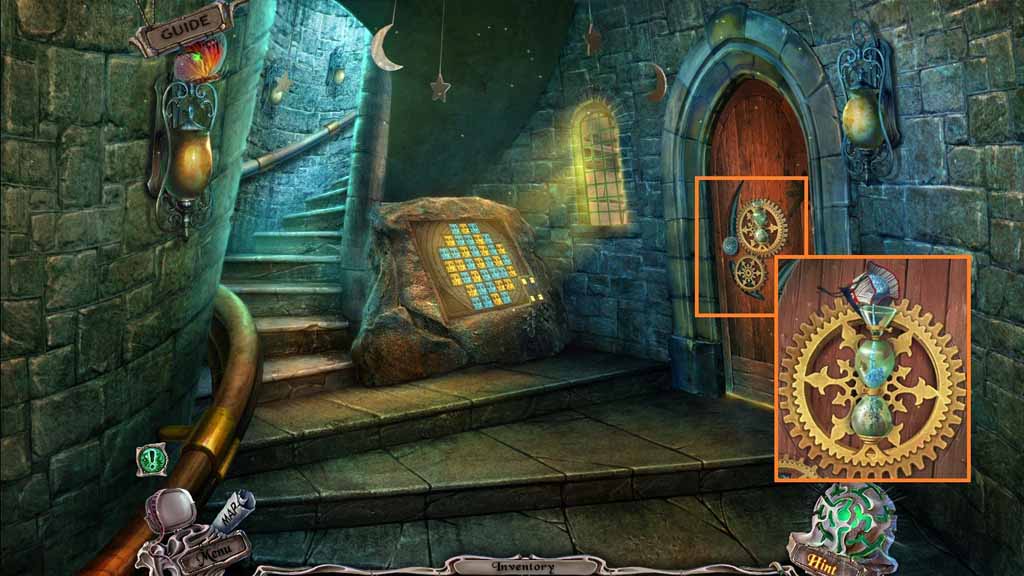
- Zoom into the door.
- Pour the sand into the glass.
- Enter the doorway.
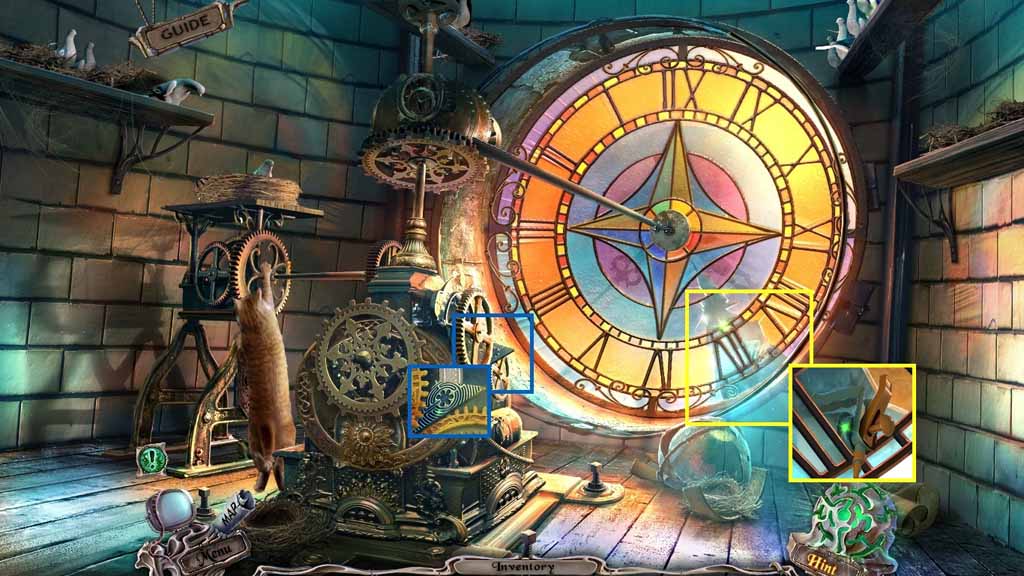
- Zoom into the gears and collect the 2 / 2 tiles.
- Zoom into the clock face; collect the spray bottle part.
- Move down once.
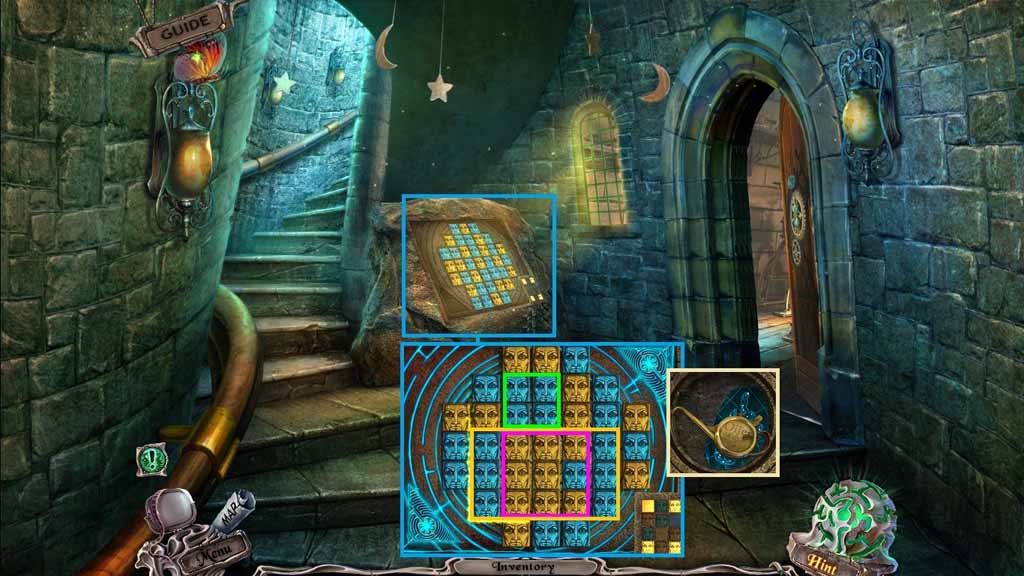
- Zoom into the stone and place the 2 tiles onto the board to trigger a puzzle.
- Solve the puzzle by flipping the all of the tiles by drawing a rectangle that includes four corners of the same color.
- Collect the oil and the Scorpio symbol.
- Move upstairs.
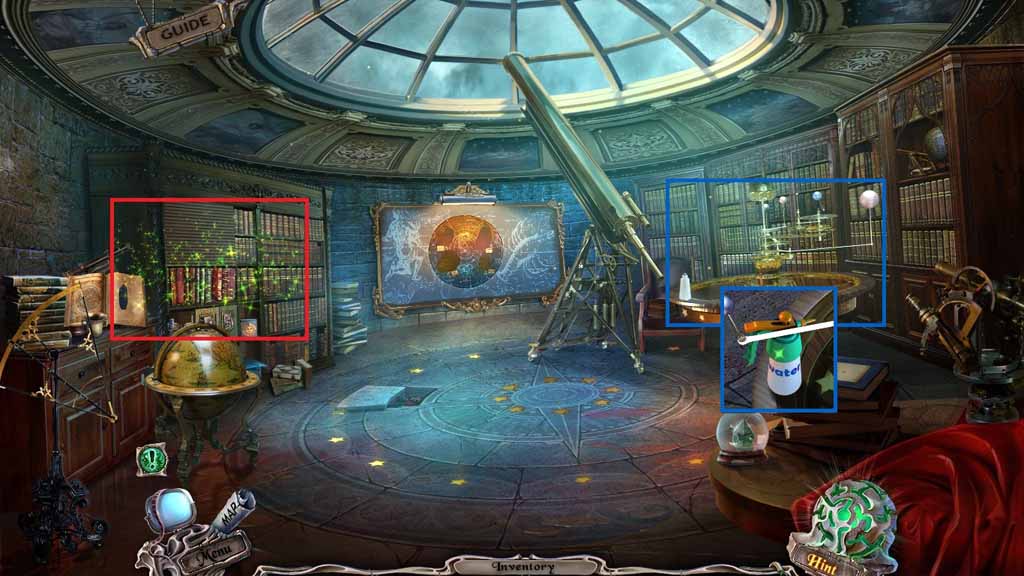
- Zoom into the astrolabe.
- Attach the spray bottle part onto the bottle; collect the spray bottle.
- Click the shelf to trigger a hidden objects area.
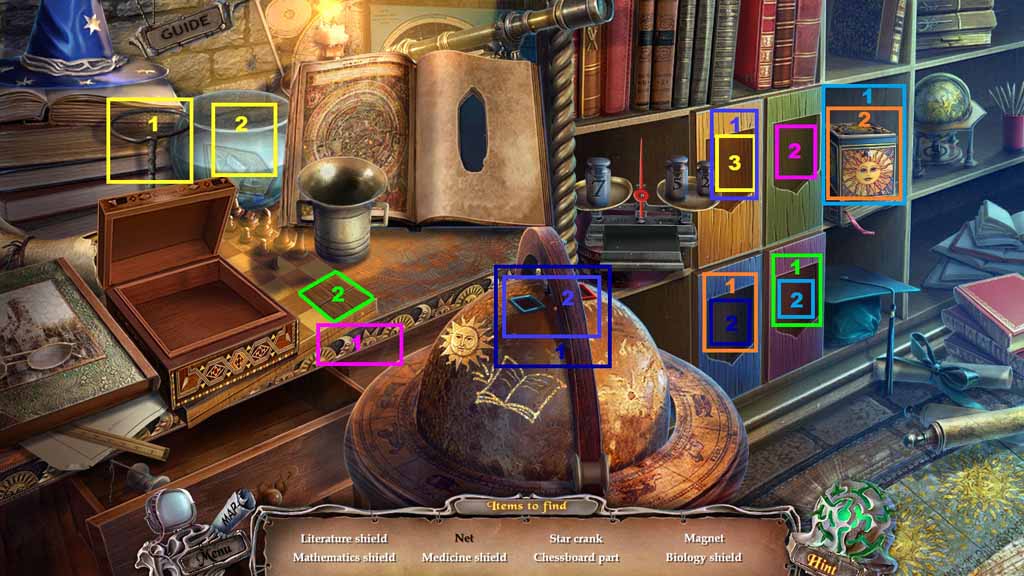
- Find the listed items.
- Select the net and dip it into the bowl to collect the literature shield; insert it into the drawer and reveal the magnet.
- Select the magnet and insert it into the globe to collect the mathematics shield.
- Insert the mathematics shield into the drawer to reveal the star crank.
- Select the star crank and attach it to the jack-in-the-box; collect the biology shield.
- Insert the biology shield into the drawer to collect the chess board piece.
- Select the chess board piece and attach it to the chess board to reveal the biology shield.
- Insert the biology shield into the drawer to reveal the knight.
- Collect the knight.
- Move to the Clock Tower.
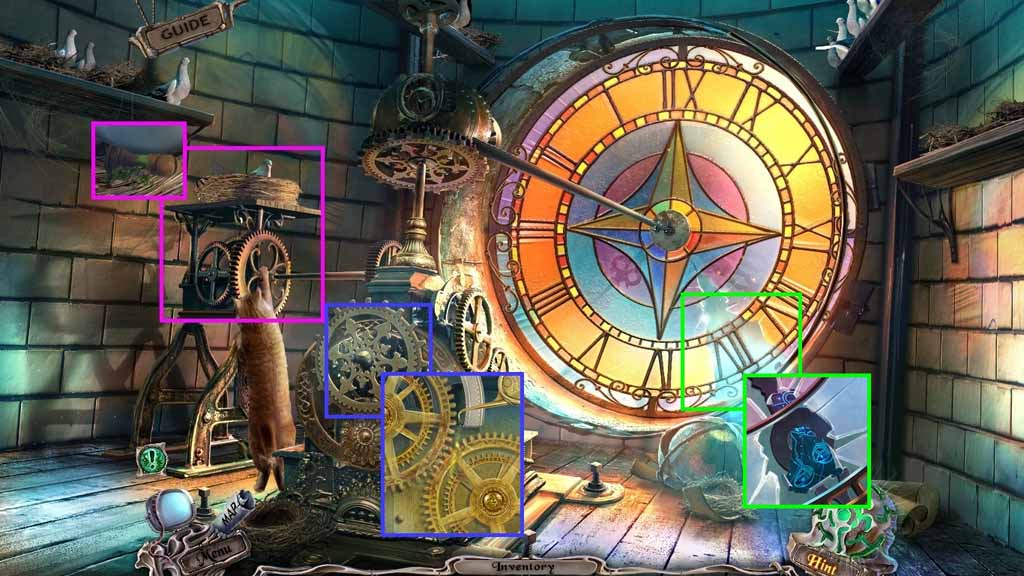
- Zoom into the cat.
- Select the spray bottle to use on him and collect the 3rd chess piece.
- Zoom into the gears and use the oil on them.
- Collect the Libra symbol.
- Move down 2 times.
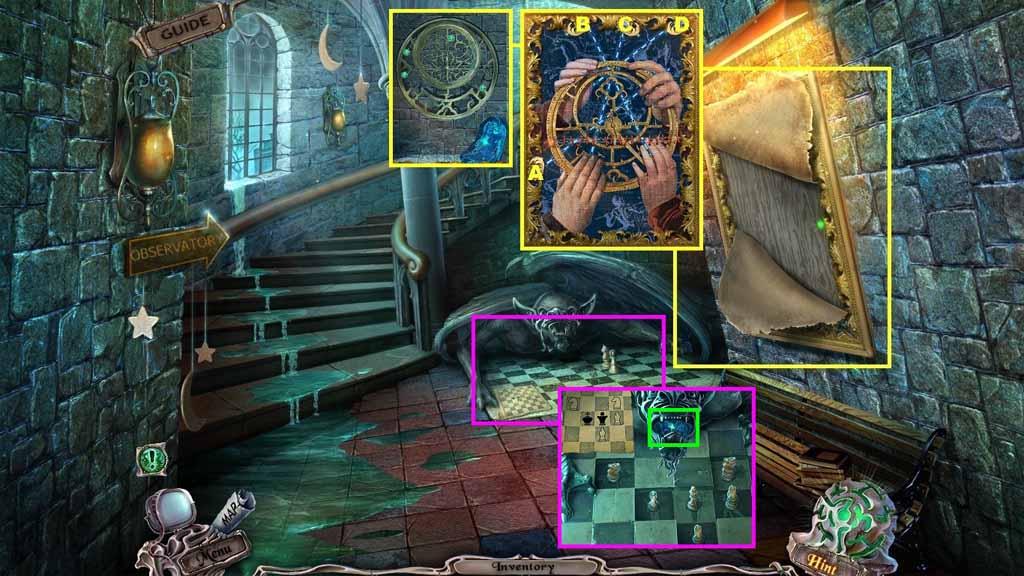
- Examine the frame.
- Select the needle and thread to repair the picture.
- Click the 4 tabs to clear the picture.
- Insert the astrolabe into space.
- Collect the astrolabe and the Virgo symbol.
- Zoom into the chess board.
- Place the 3 chess pieces and the knight down.
- Collect the Leo symbol.
- Move upstairs 2 times.
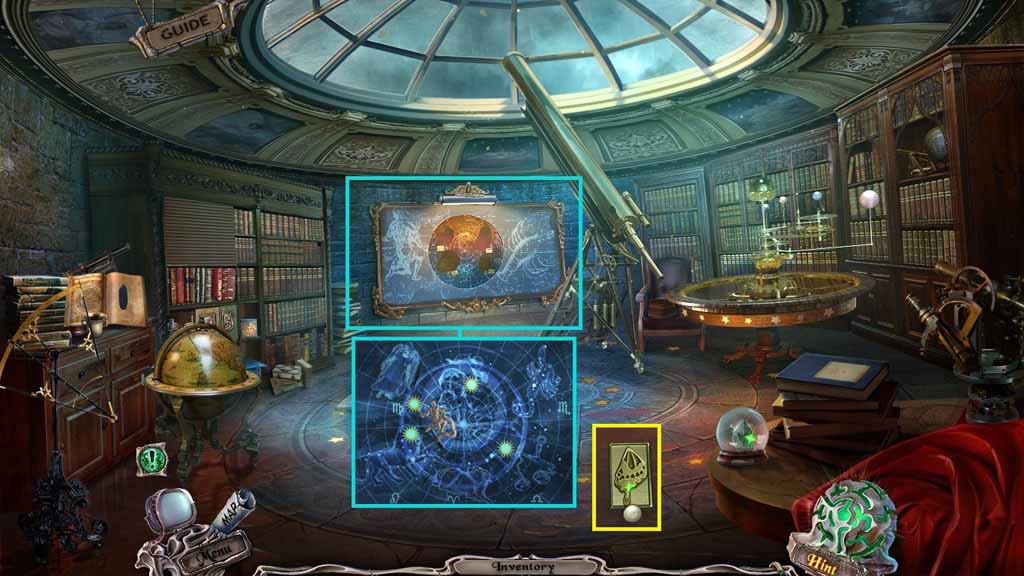
- Zoom into the wall.
- Insert the Scorpio, Libra, Virgo and Leo symbols.
- Insert the Astrolabe and the Aquarius; collect the star chart.
- Collect the 7 / 7 tiles.
- Move to the Square.
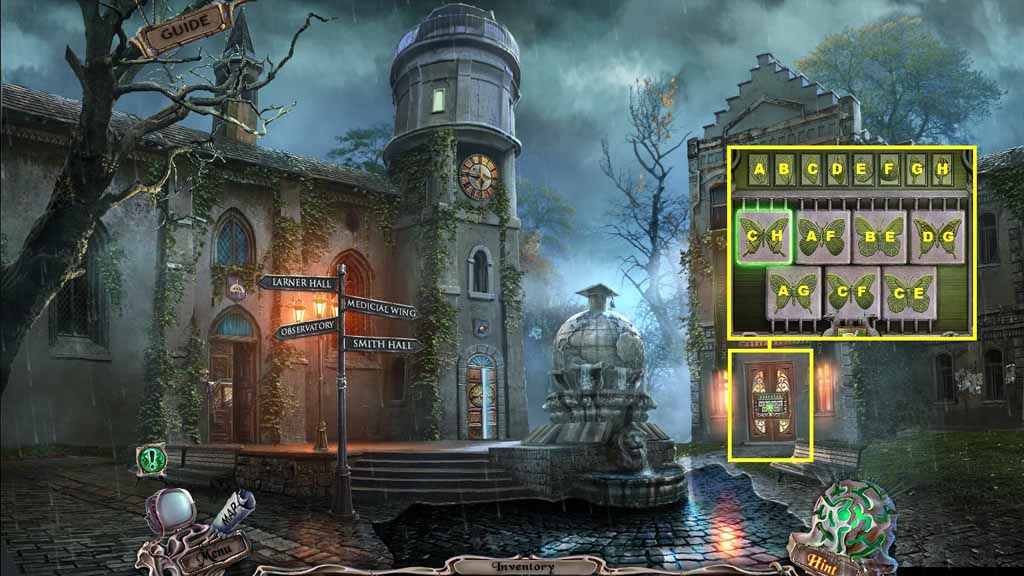
- Zoom into the door.
- Insert the 7 tiles to trigger a puzzle.
- Solve the puzzle by selecting the wings that create the butterflies.
- Enter the doorway.
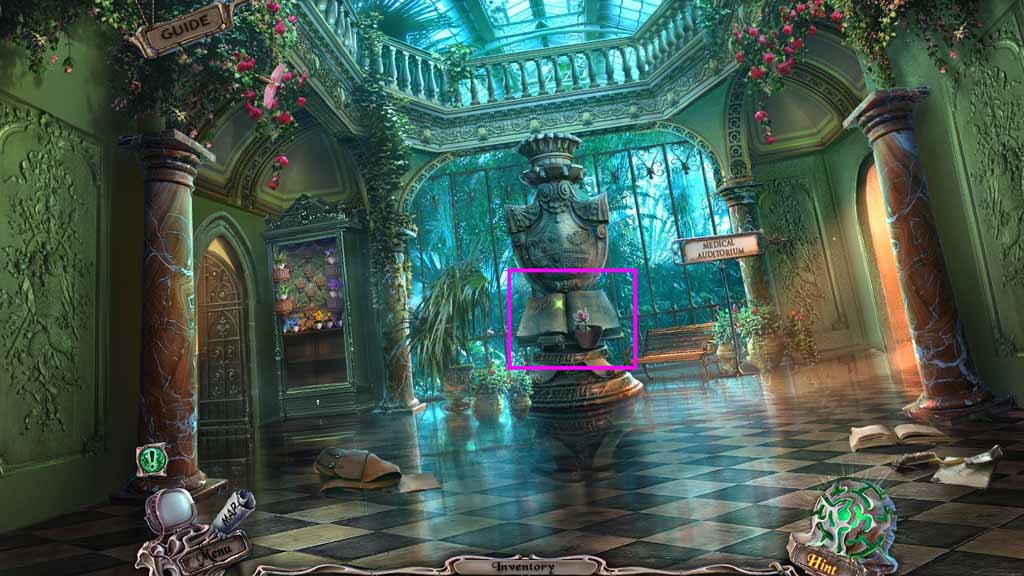
- Zoom into the book.
- Collect the stone book.
- Move to the left.
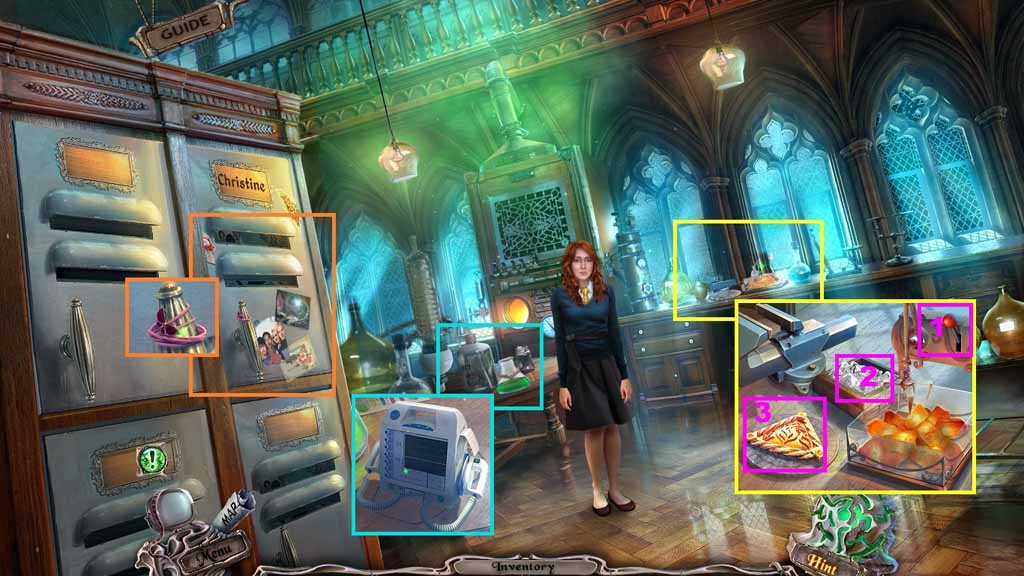
- Zoom into the locker; collect the scrunchy.
- Zoom into the counter.
- Attach the handle onto the crane and click it.
- Place the ice onto the tile; collect the ornate tile.
- Zoom into the table; collect the defibrillator.
- Move to the Labyrinth.
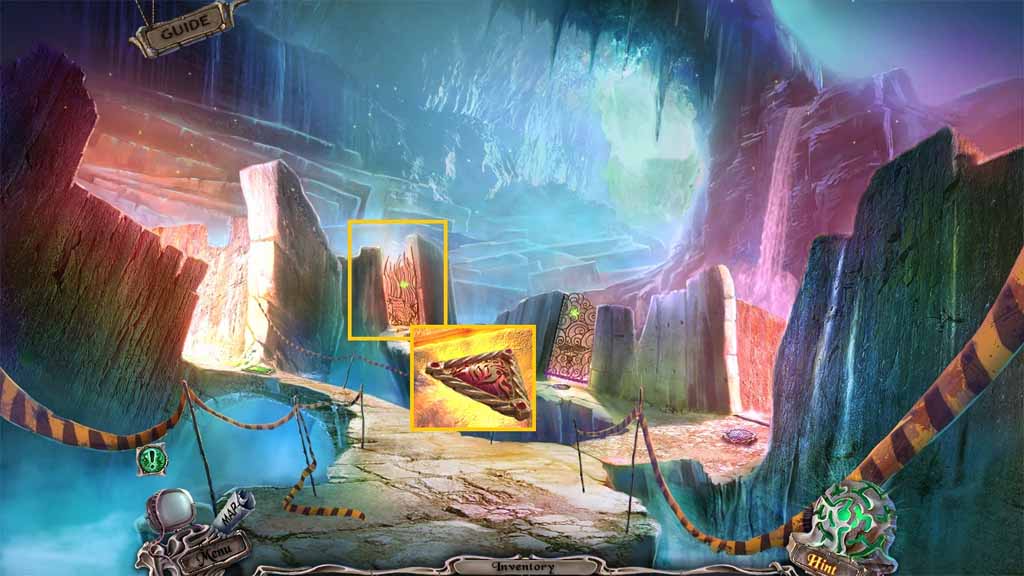
- Zoom into the gate on the left.
- Insert the ornate tile and enter the labyrinth.
- Move left and right 2 times.
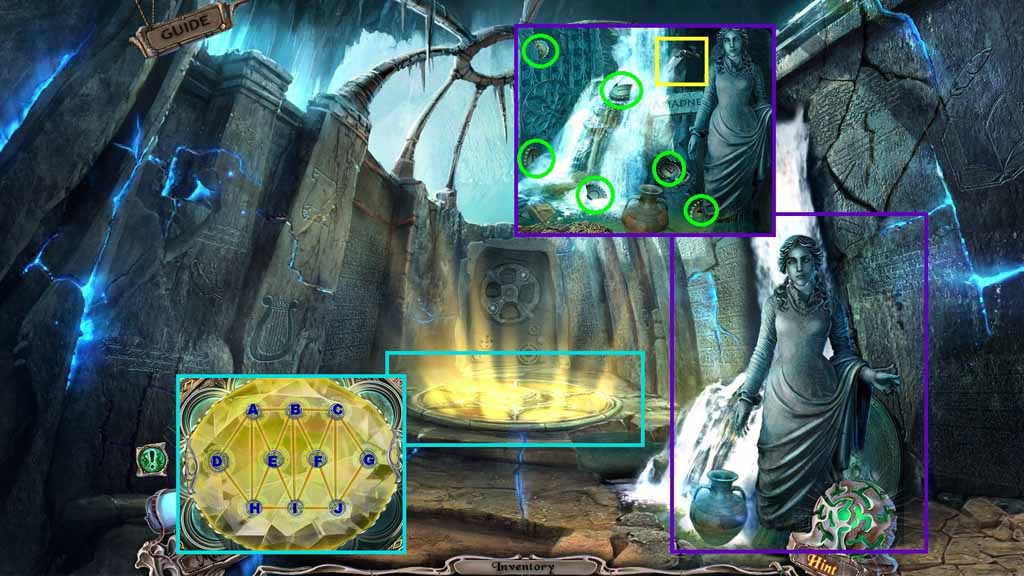
- Zoom into the statue.
- Collect the bent spade and the letters N – E – D – R – I – A.
- Place the diamond ring onto the crystal to trigger a puzzle.
- Solve the puzzle by cutting through all of the lines only once.
- Use the following sequence to solve the puzzle.
- I – C – D – A – C – E – A – B – E – I – B – F – I – J – F – C – J – G – C - B
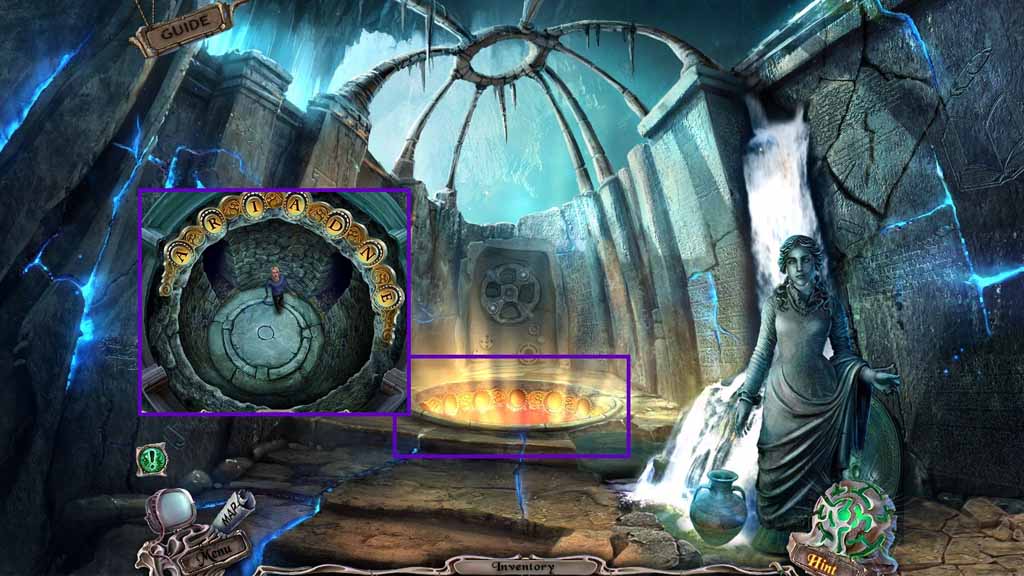
- Zoom into the well.
- Insert the letters from left to right as follows:
- A – R – I – D – N – E
- Collect the tile.
- Move to Smith Hall and go right.
Comments will load when you reach this part of the walkthrough.