

Chapter One: Welcome to the University
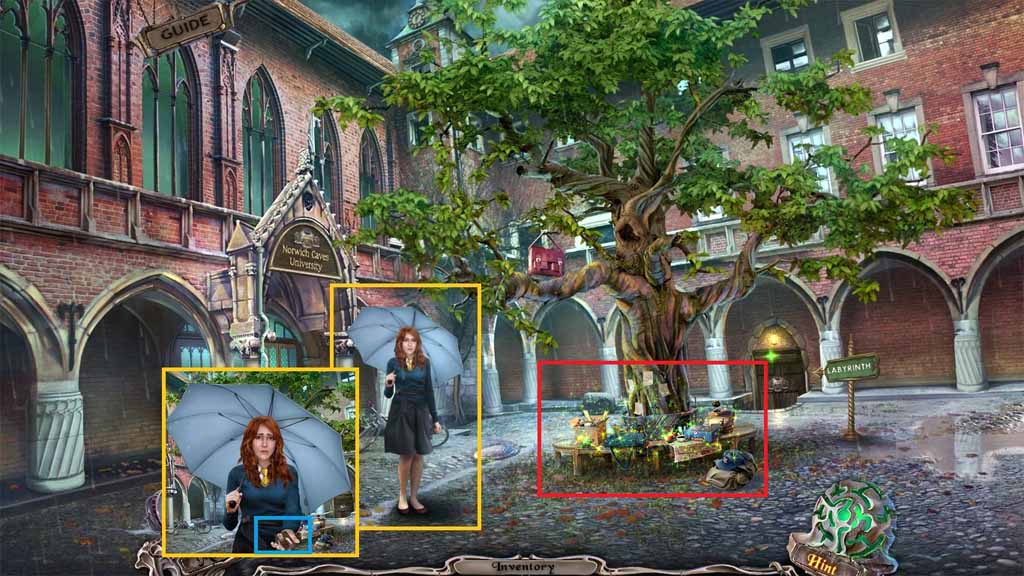
- Talk to Diana and collect the photo fragment.
- Click the bench to trigger a hidden objects area.
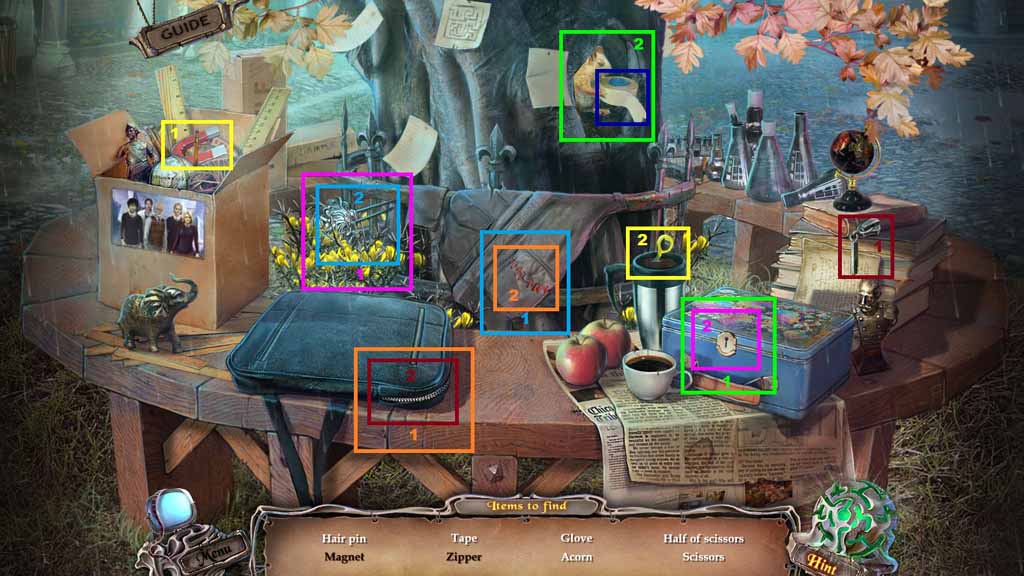
- Find the listed items.
- Collect the magnet and place it over the coffee mug to collect the half scissor.
- Collect the zipper and attach it to the bag; collect the half scissor.
- Place the 2 scissor halves together to collect the scissors.
- Select the scissors to cut the pocket seam; collect the glove.
- Select the glove and use it to remove the flowers to collect the hair pin.
- Select the hair pin and use it to open the lunchbox; collect the acorn.
- Select the acorn and give it to the squirrel; collect the tape.
- Collect the tape roll.
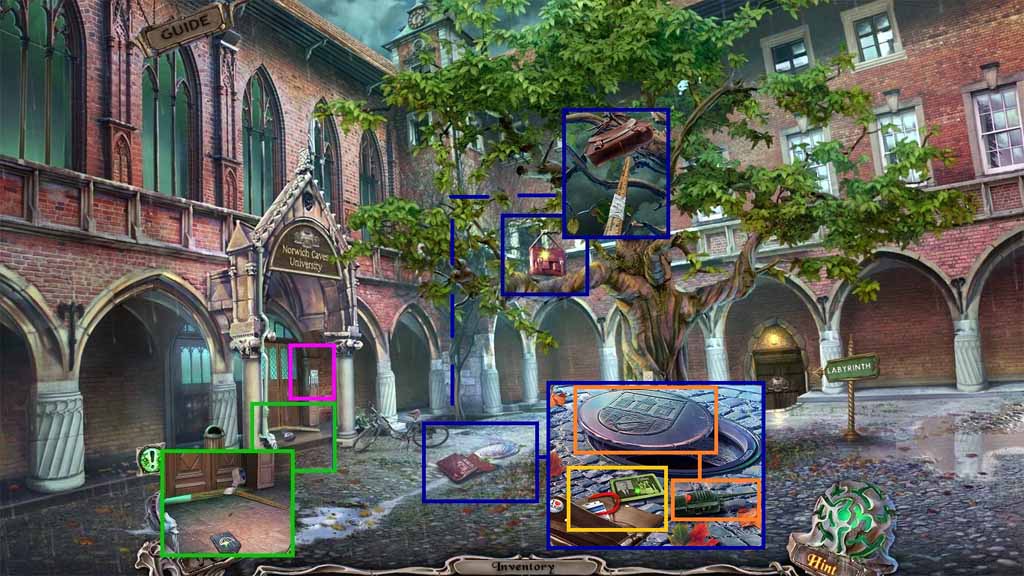
- Zoom into the University doorway.
- Select the tape roll to fix the yardstick.
- Collect the yardstick and the mathematics shield.
- Zoom into the tree.
- Select the yardstick to retrieve the bag.
- Zoom into the bag again; collect the Faber’s card and the ID card.
- Click the manhole cover and click the walkie-talkie.
- Zoom into the University doorway.
- Insert the ID card into the panel.
- Move into the building.
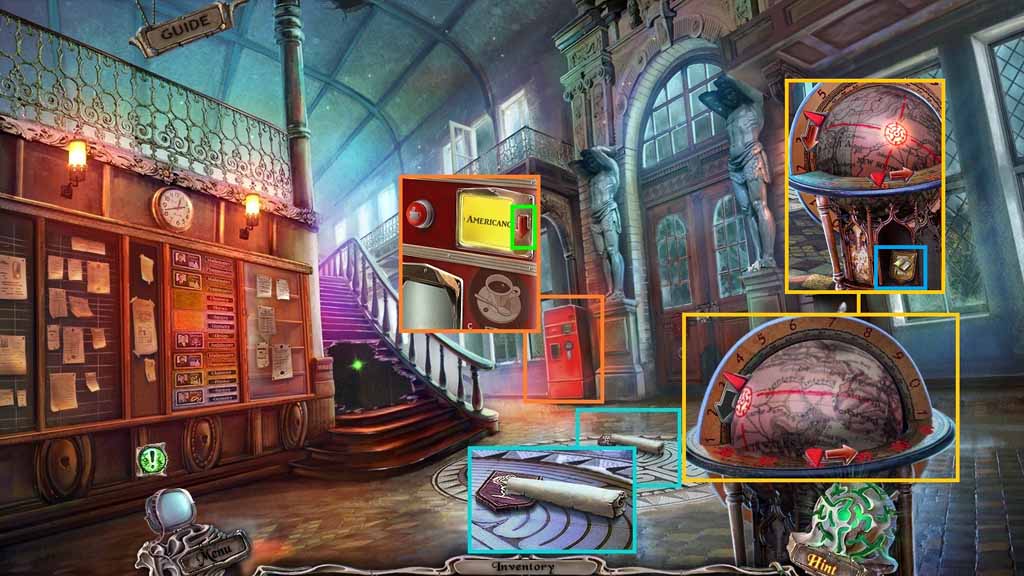
- Zoom into the floor.
- Collect the map and the medicine shield.
- Zoom into the drink machine; collect the down arrow button.
- Zoom into the globe and insert it into the empty slot.
- Click it 2 times then click the right arrow once.
- Click the glowing portion of the globe; collect the literature shield.
- Move down one time.
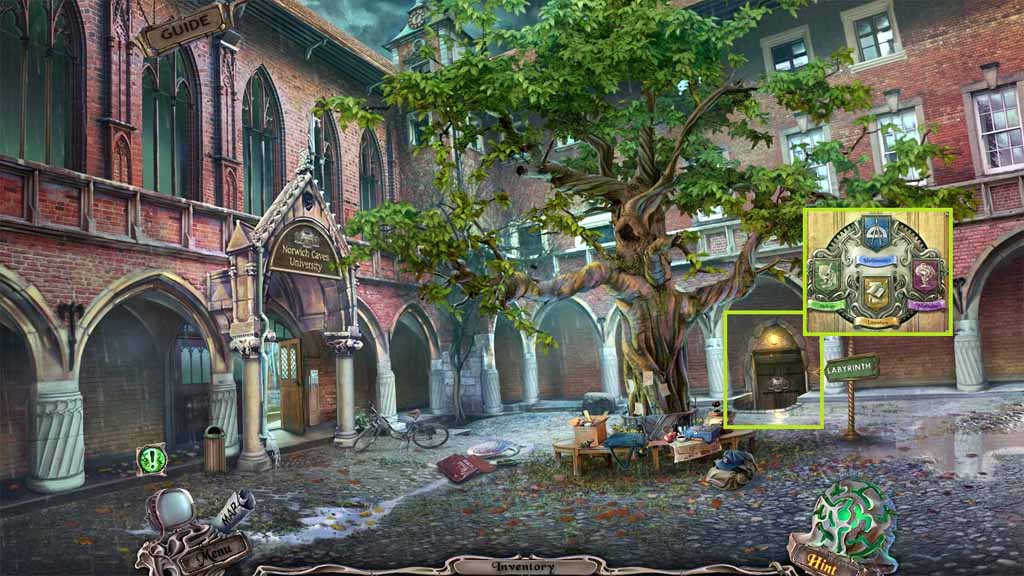
- Zoom into the cellar’s doorway.
- Insert the mathematics, literature and medicine shields into their slots.
- Move into the Cellar.
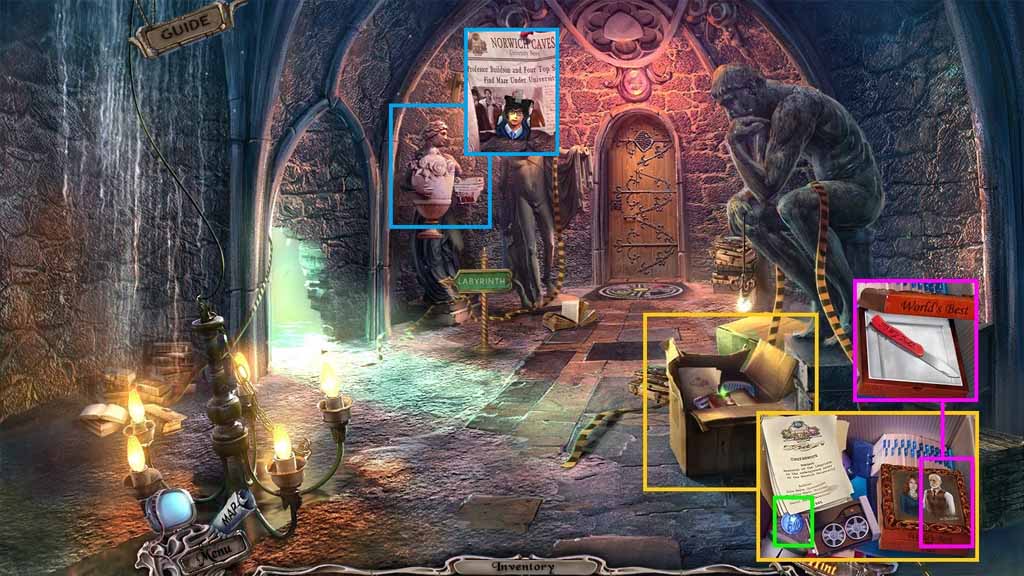
- Zoom into the box.
- Click the papers and collect the 1 / 3 face tokens.
- Put the photo fragment onto the box; collect the knife.
- Zoom into the bust; collect the 1 / 3 student photos.
- Move to the left.
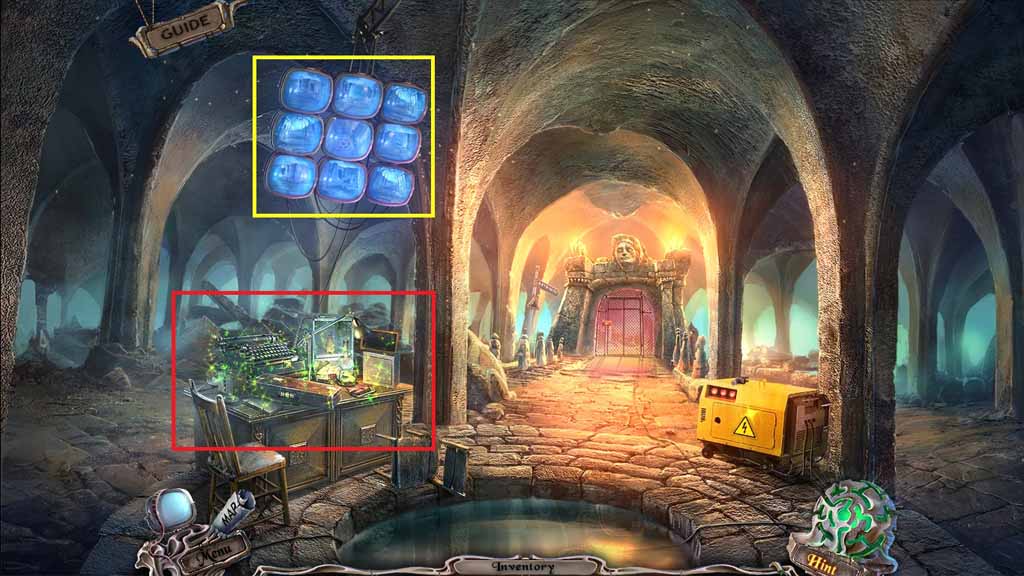
- Click the monitors 2 times.
- Click the desk to trigger a hidden objects area.
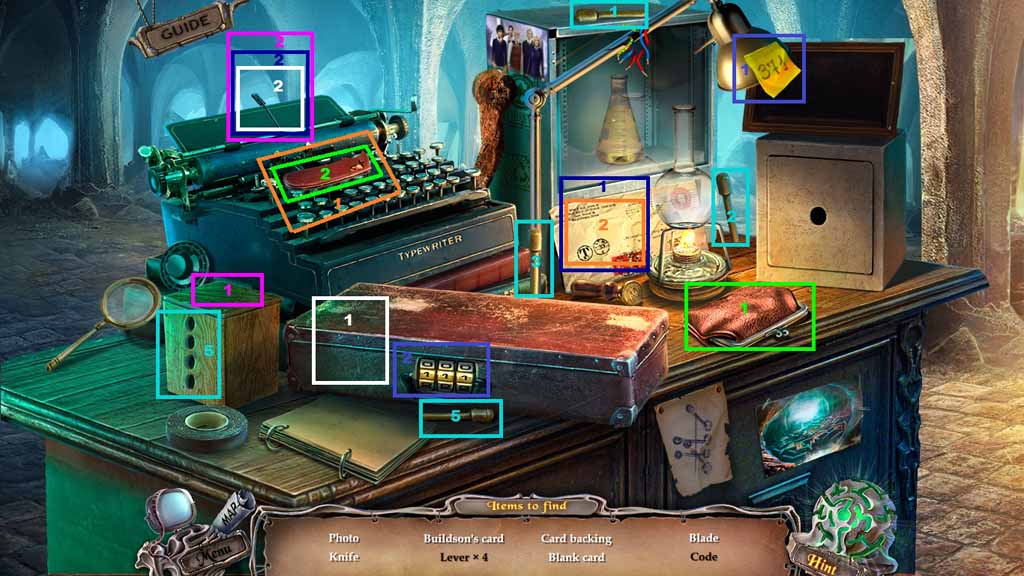
- Find the listed items.
- Collect the 4 levers and insert them into the box.
- Click the 2nd and 3rd levers down to uncover the card backing.
- Click the change purse and collect the blade.
- Select the blade and attach it to the handle; collect the knife.
- Select the knife and use it to open the envelope to uncover the photo.
- Select the code and place it onto the brief case lock; collect the blank card.
- Select the blank card and insert it into the typewriter.
- Select the photo and place it onto the blank card.
- Select the card backing and place it onto the blank card.
- Collect the Buildson’s Card.
- Move to Hudson Hall.
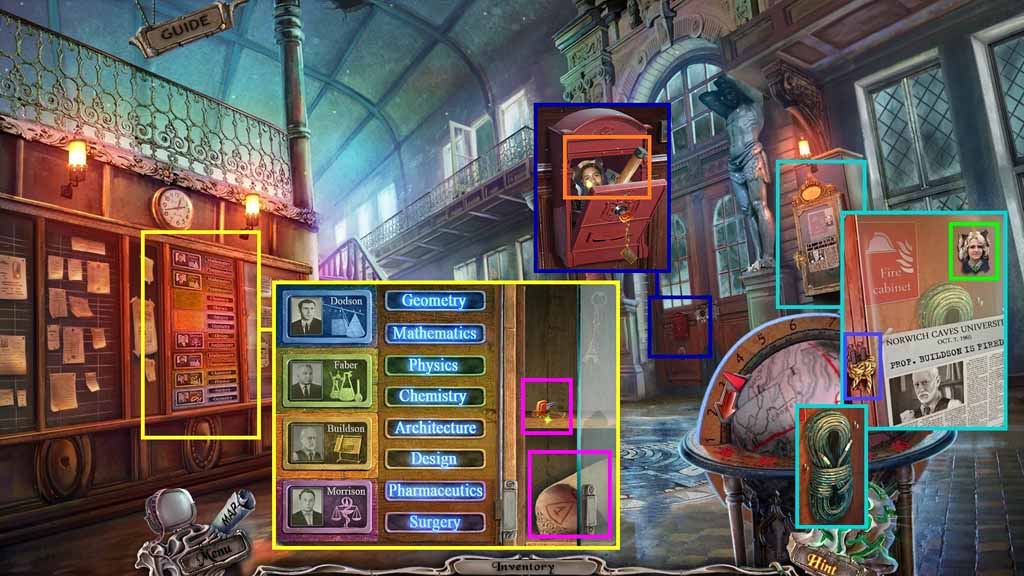
- Zoom into the fire cabinet.
- Collect the 2 / 3 student photos.
- Select the knife and use it to cut the rope on the handle.
- Click the handle and collect the rope inside.
- Zoom into the board.
- Put Faber’s and Buildson’s cards onto the board to trigger a puzzle.
- Solve the puzzle by aligning the classes and the professors correctly.
- Solve as shown.
- Collect the key and the paper.
- Zoom into the mailbox and insert the key then click it.
- Collect the 3 / 3 student photos and the handle.
- Move to the Basement.
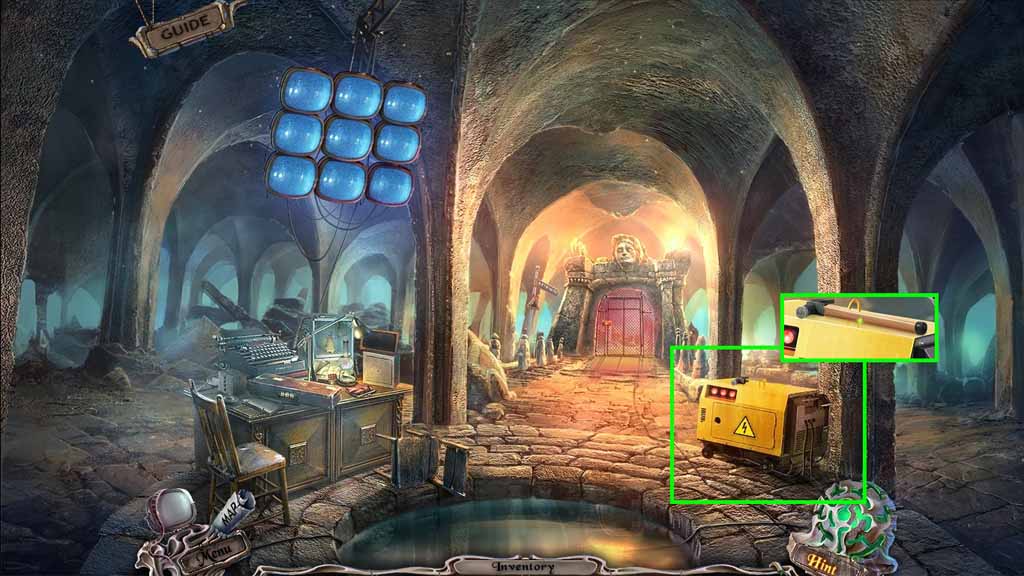
- Zoom into the generator.
- Attach the handle onto the hammer head; collect the hammer.
- Move down one time.
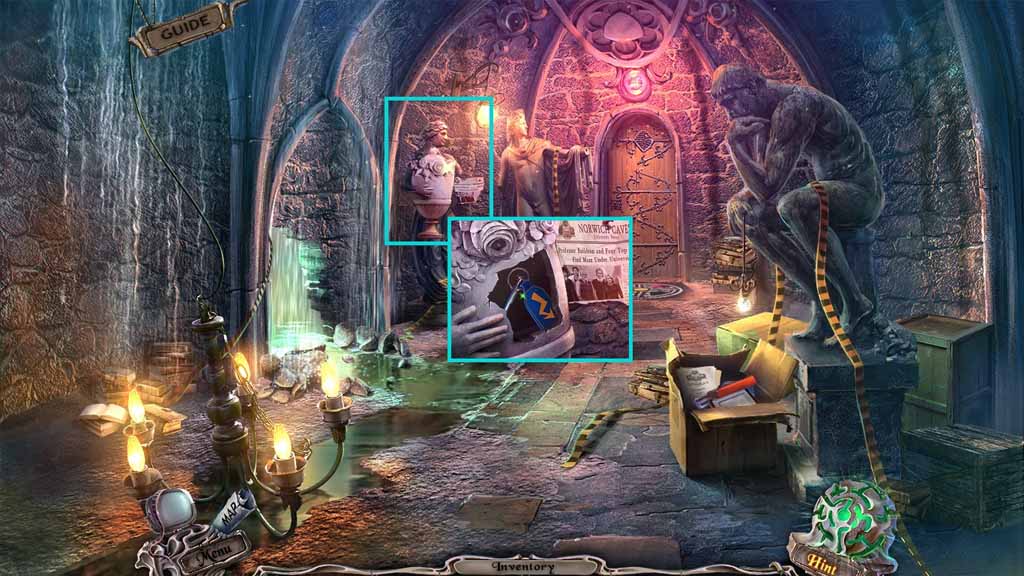
- Zoom into the bust.
- Select the hammer to smash the vase and collect the key.
- Move to the left.
- Click the desk to trigger a hidden objects area.
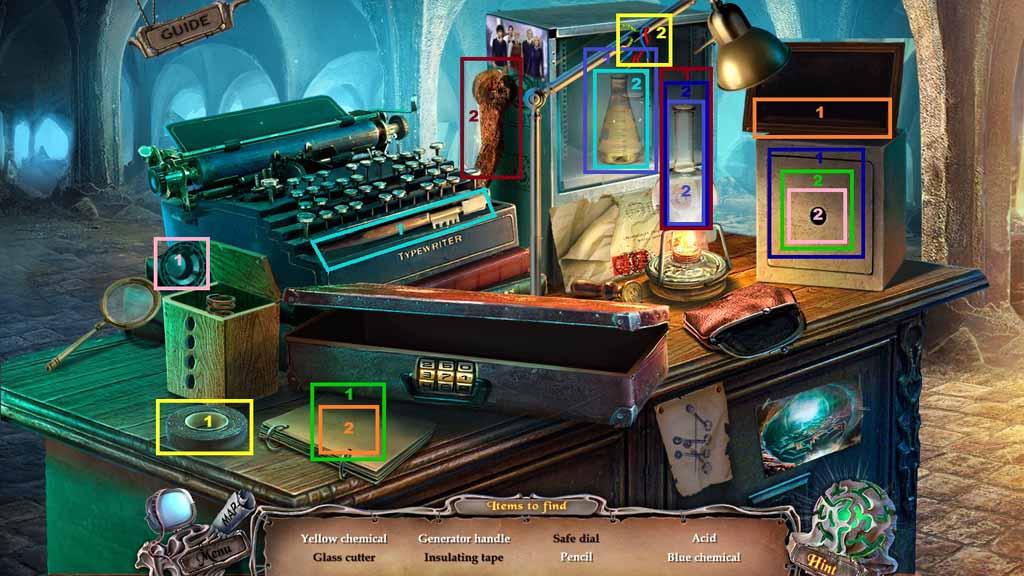
- Find the listed items.
- Select the glass cutter and use it to cut the glass; collect the yellow chemical.
- Pour the yellow chemical into the beaker.
- Select the insulating tape and use it to repair the wires and reveal the pencil.
- Select the pencil and place it onto the blank paper to reveal the code.
- Select the safe dial and attach it to the safe.
- Select the code and place it onto the safe to uncover the blue chemical.
- Select the blue chemical and pour it into the beaker and create acid.
- Select the acid and pour it onto the rust handle to uncover the generator handle.
- Collect the generator handle.
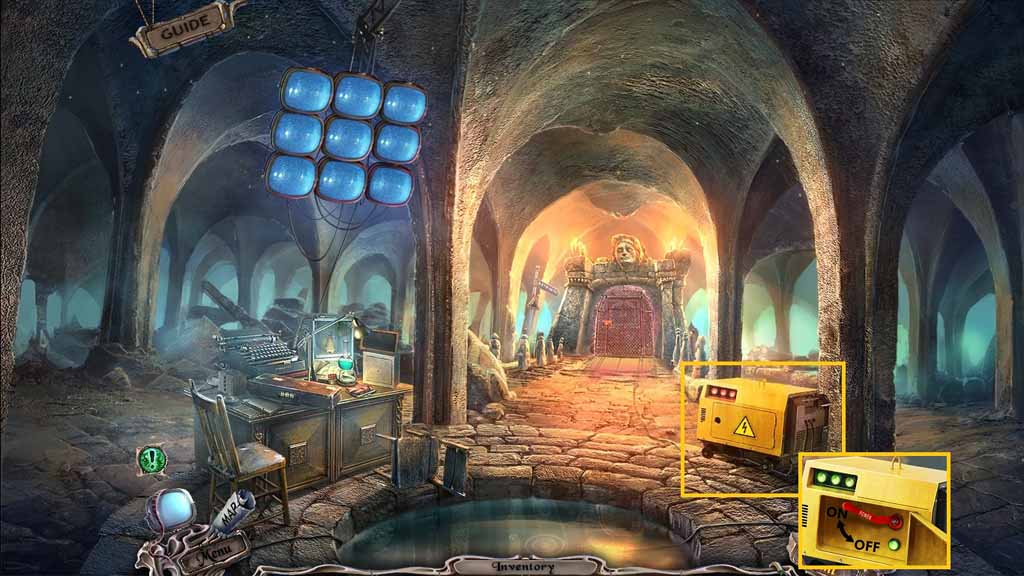
- Zoom into the generator.
- Select the key and insert it into the generator lock; click it once.
- Attach the generator handle and click it once.
- Move ahead into the Maze Entrance.
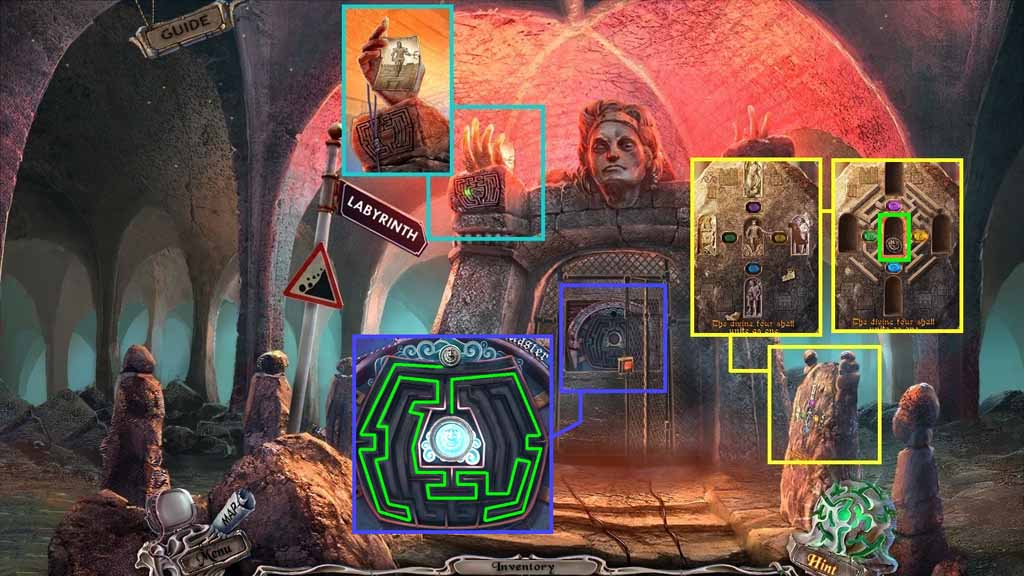
- Click the hand and attach the rope; collect the photo.
- Zoom into the stone to trigger a puzzle.
- Solve the puzzle by giving the founders the items that they are missing.
- Collect the tile.
- Zoom into the door and insert the tile to trigger a puzzle.
- Solve the puzzle by guiding the token to center of the maze.
- Move ahead.
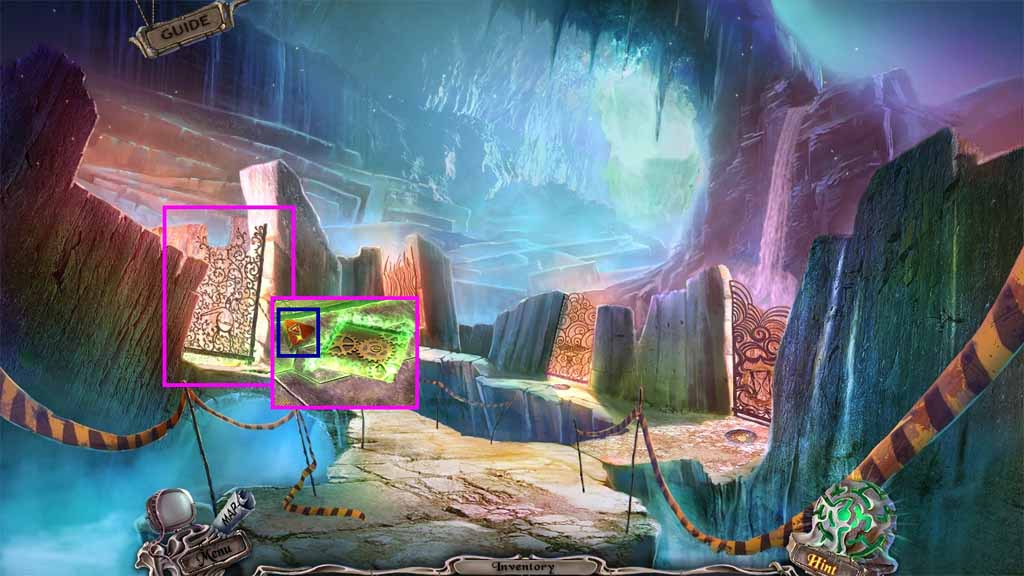
- Zoom into the gate.
- Collect the red stone.
- Move to the Cellar.
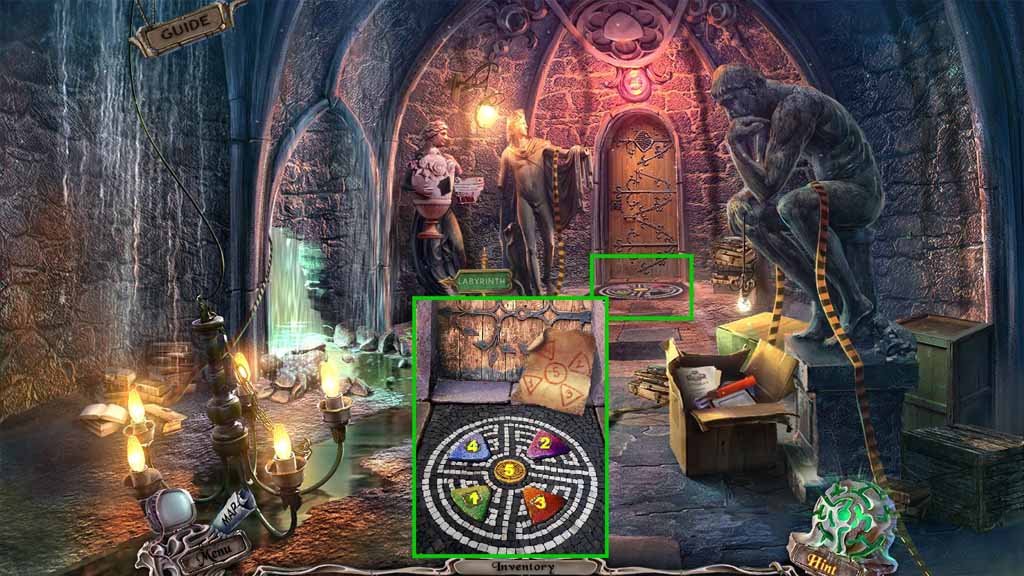
- Zoom into the floor tiles.
- Insert the red stone and click the stones in order 1-5.
- Move ahead.
Comments will load when you reach this part of the walkthrough.