

Chapter Five: The Records
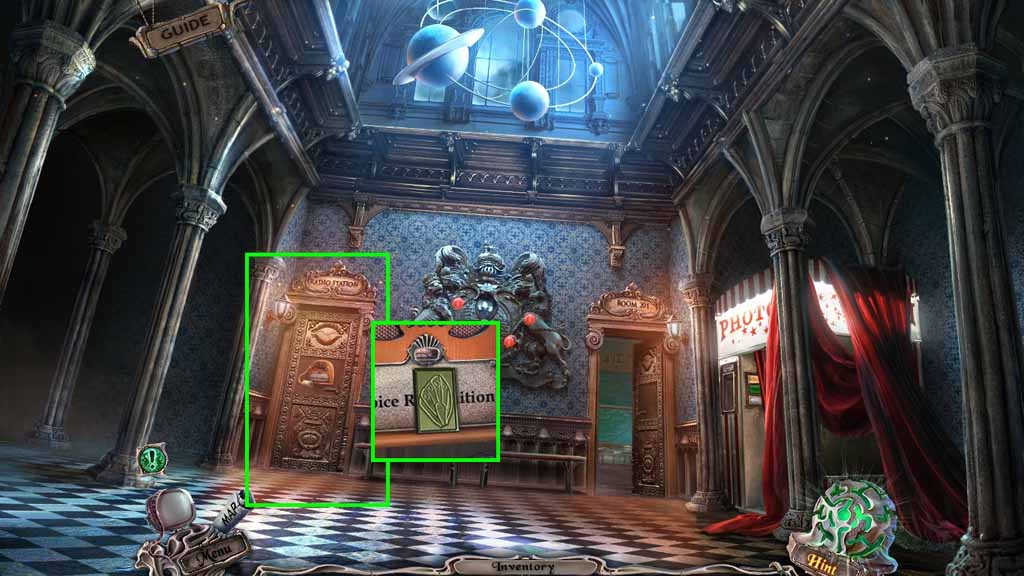
- Zoom into the door; collect the 3 / 7 tiles.
- Move ahead through the door on the right.
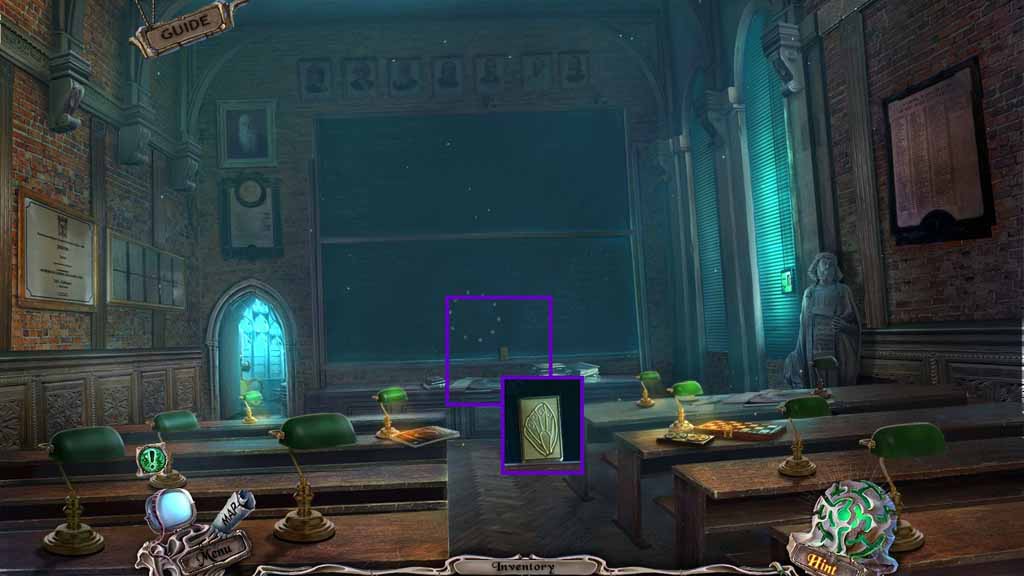
- Zoom into the chalkboard.
- Collect the 4 / 7 tiles.
- Move through the doorway on the left.
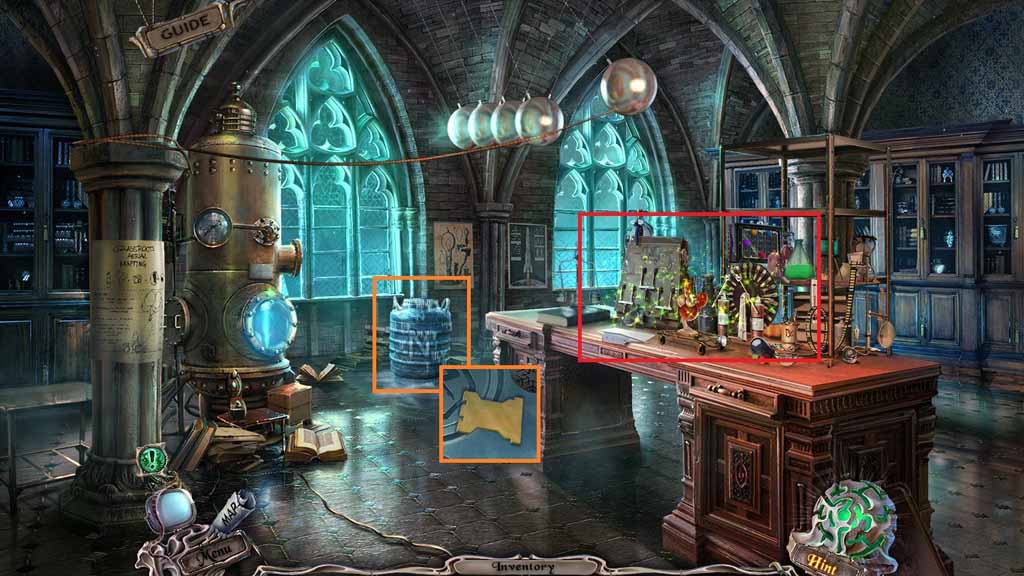
- Zoom into the canister; collect the key.
- Click the chemistry counter to trigger a hidden objects area.
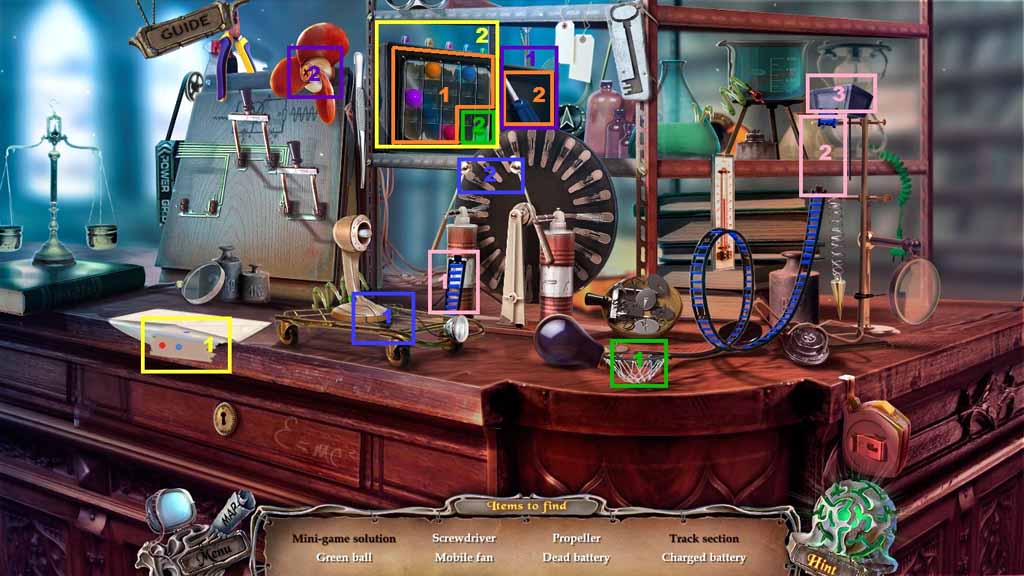
- Find the listed items.
- Select the mini-game solution and attach it to the mini-game.
- Select the track section and insert it into the missing track area; click the basket.
- Select the green ball and insert it into the mini-game; play the game.
- Solve the game by moving the purple ball down – orange ball down- pink ball up – blue ball down – green ball up to reveal the screwdriver.
- Select the screwdriver and use it to unscrew the propeller; attach the propeller onto the fan and click it.
- Select the dead battery and place it into the charger to create the charged battery.
- Collect the battery.
- Move down once.
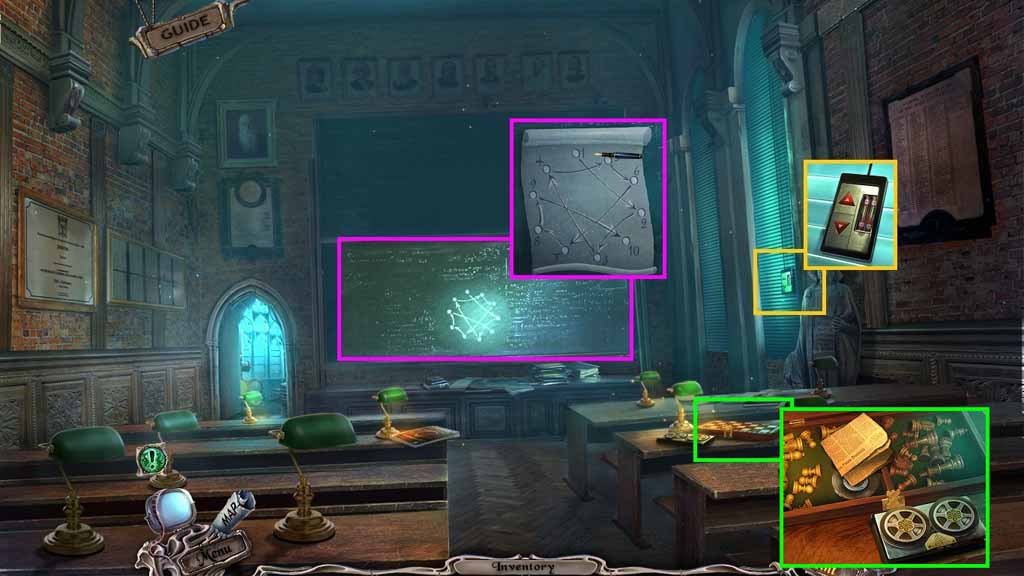
- Zoom into the blinds.
- Insert the battery into the control and click the up button.
- Place the tracing paper onto the chalkboard and use the pen to create the instructions.
- Zoom into the chessboard and place the key into it.
- Collect the chess game, audio tape and chess piece.
- Insert the audio tape into the recorder and collect it.
- Move down once.
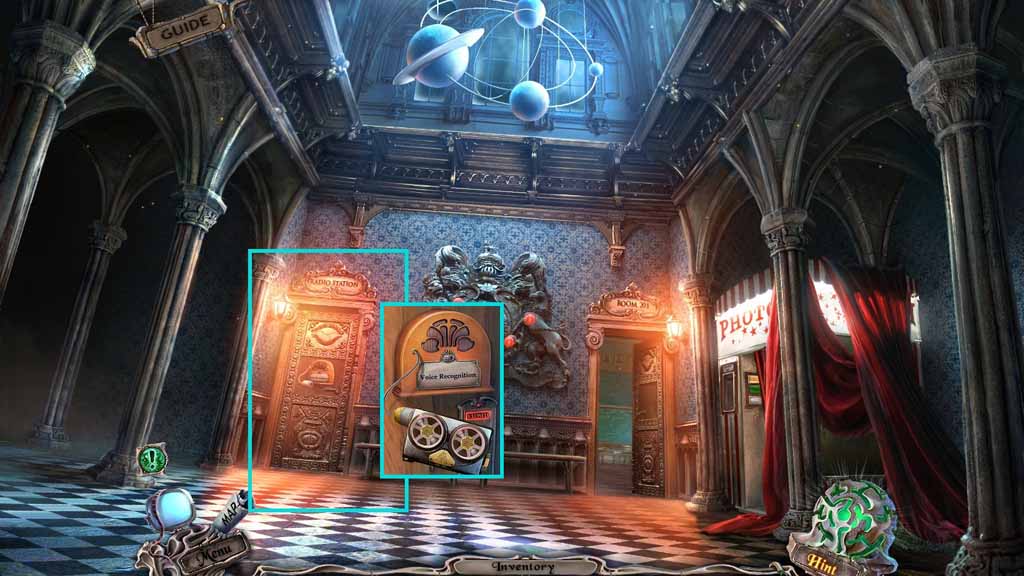
- Zoom into the door.
- Select the recorder to use on the door.
- Enter the doorway.
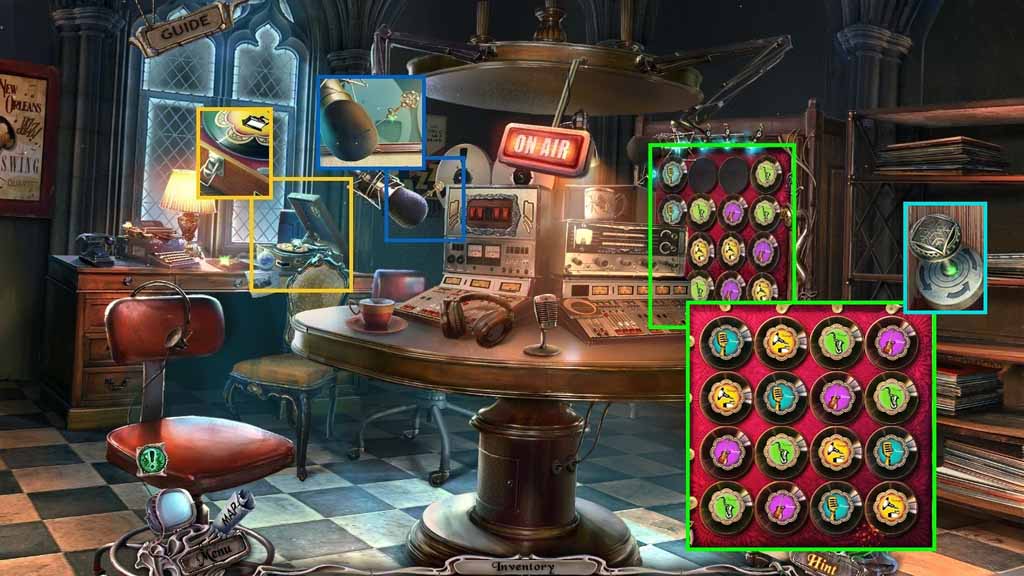
- Zoom into the record player; collect the 2nd record.
- Zoom into the microphone; collect the pin.
- Zoom into the wall and insert the 2 records to trigger a puzzle.
- Solve the puzzle by aligning the records so that there are no duplicates in any rows or columns.
- Collect the snowflake key.
- Move to the Physics Classroom.
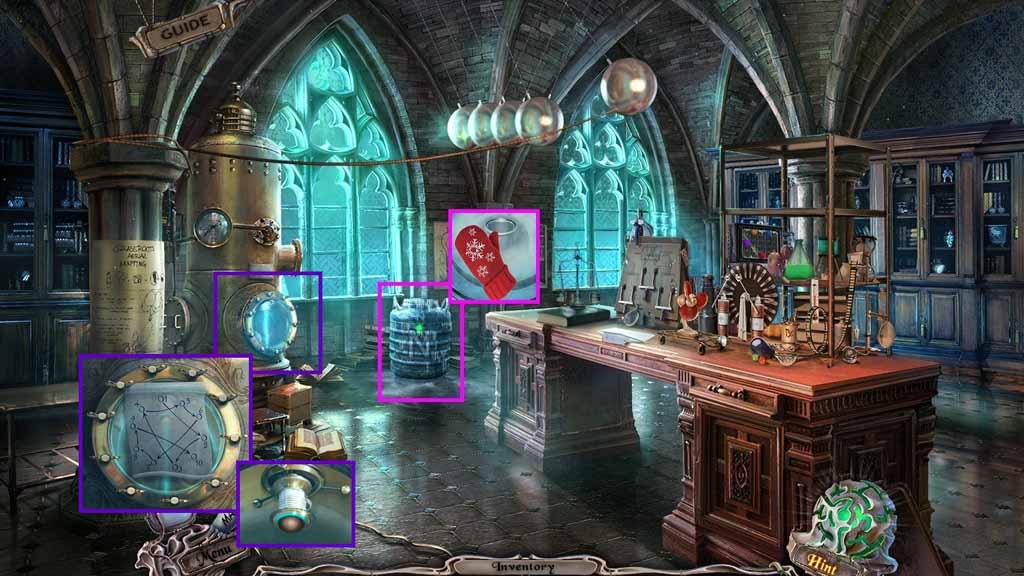
- Zoom into the tank and insert the snowflake key.
- Select the mitten to collect the bulb with nitrogen.
- Click the valve.
- Zoom into the portal.
- Attach the valve and click them in the order shown on the diagram; collect the laser.
- Move to Larner Hall.
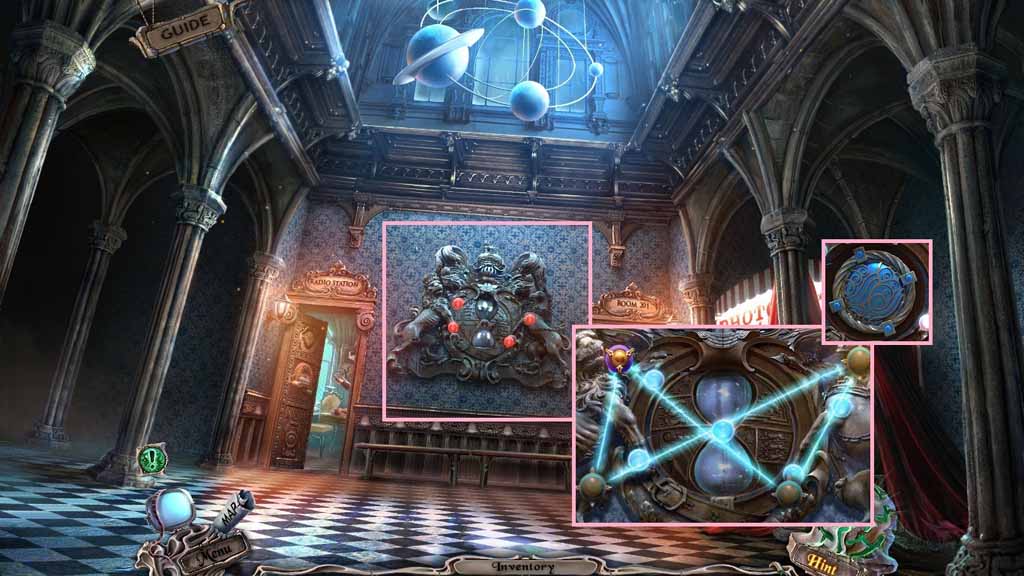
- Zoom into the coat of arms and insert the laser to trigger a puzzle.
- Solve the puzzle by guiding the laser through all of the sensors.
- Collect the ornate tile.
- Move to the Labyrinth.
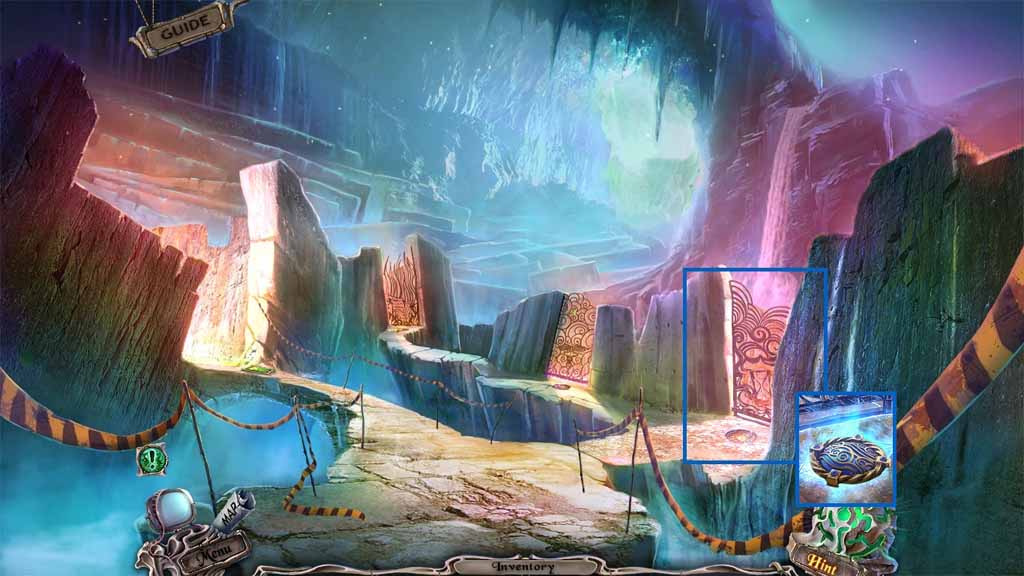
- Zoom into the gate on the right and insert the ornate tile.
- Enter the labyrinth.
- Move to the right and then go straight.
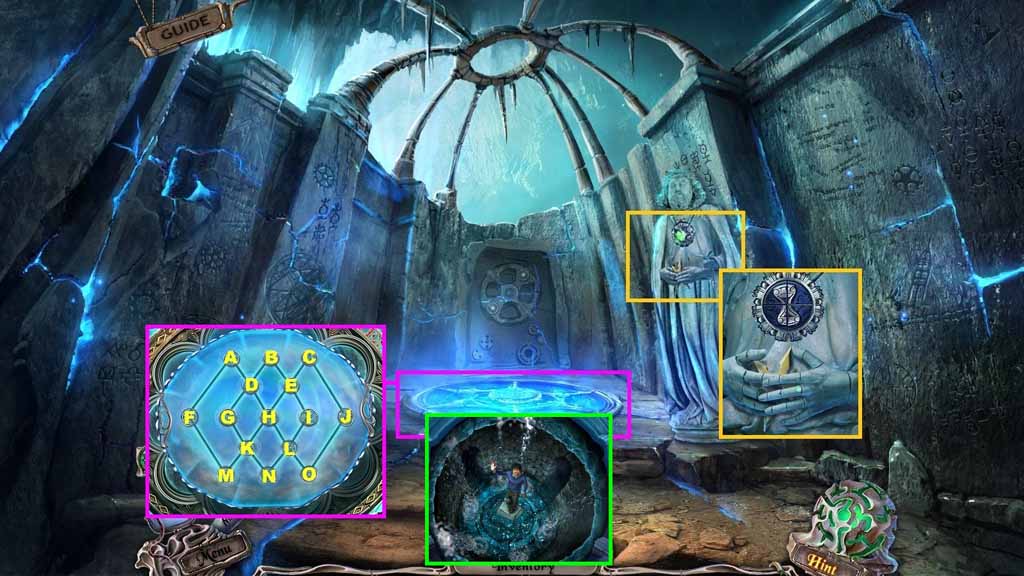
- Zoom into the statue.
- Click the medallion pieces to complete the image.
- Collect the throwing star.
- Zoom into the crystal and use the diamond ring to trigger a puzzle.
- Solve the puzzle by moving through all of the lines one time.
- Solve the puzzle using the following sequence.
- A – F – M – K – G – D – H – K – N – L – H – E – I – L – O – J – C – E – B – D – A
- Toss the bulb with nitrogen and the climbing pick to use in the well.
- Collect the Aquarius.
- Move to the Physics Classroom.
Comments will load when you reach this part of the walkthrough.