
Chapter 3: The Tower
The following contains screenshots and instructions on how to complete Chapter 3 from the CGG Royal Detective: Lord of Statues Walkthrough.
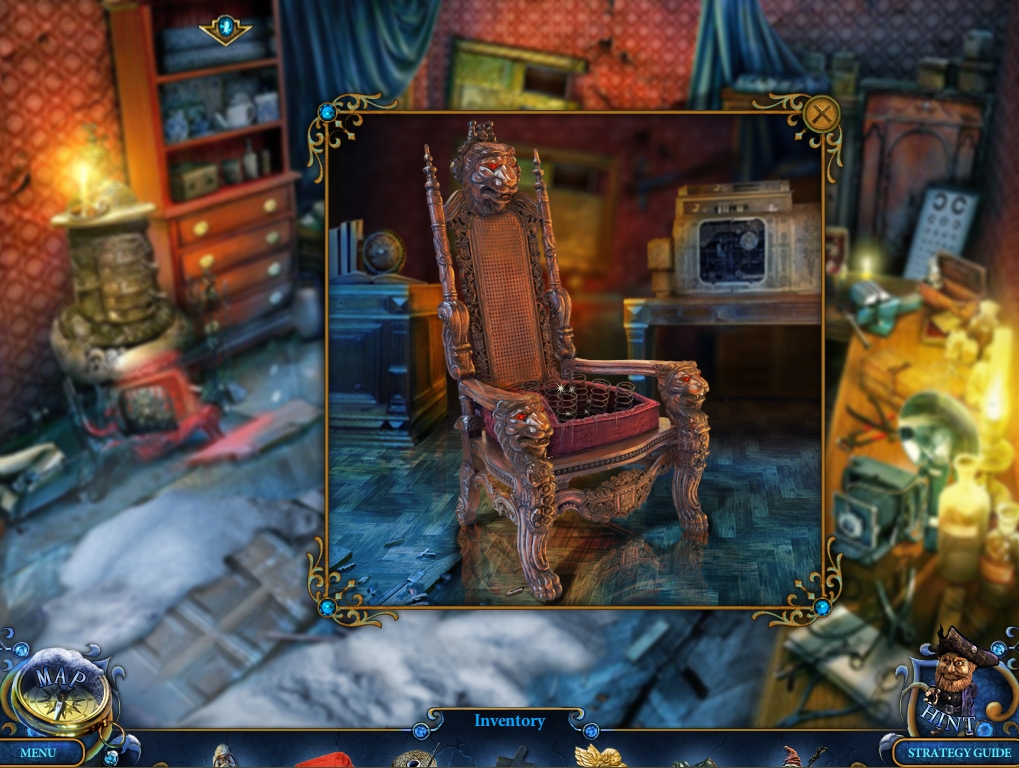
- Zoom into the chair.
- Use the RAG on the chair, then the NEEDLE AND THREAD.
- Take the repaired CHAIR.
- Return to the Dining Room.
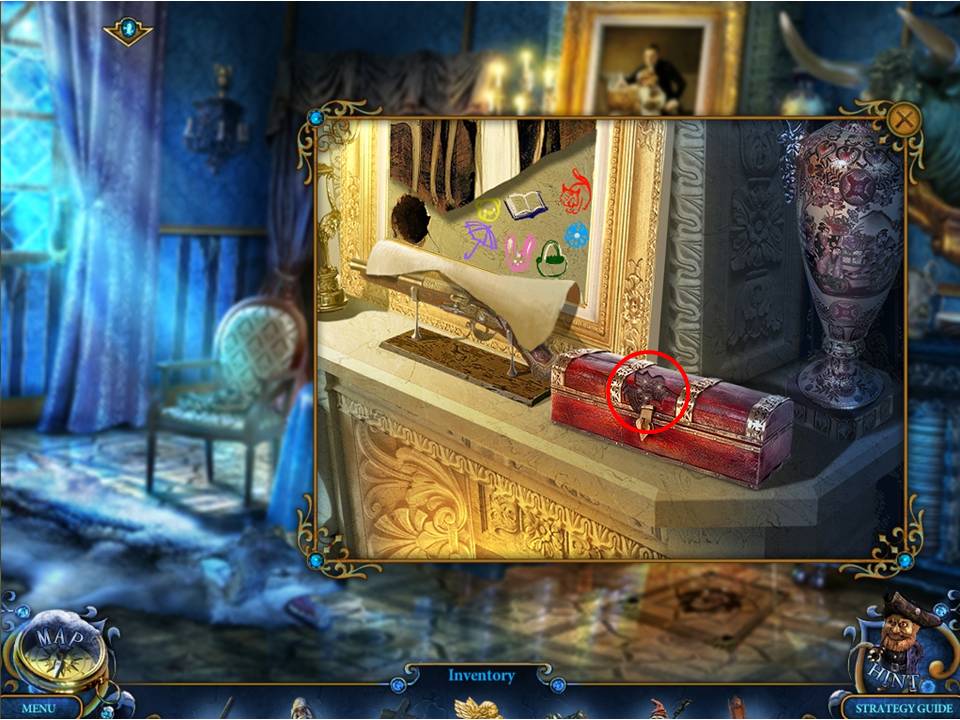
- Zoom into the box on the mantle.
- Place the GOLDEN ANGEL on the groove to open the box.
- Take the EMERALD.
- Place the CHAIR on the switch on the floor to the right of the table to reveal a Hidden Object Area to the left of the fireplace.
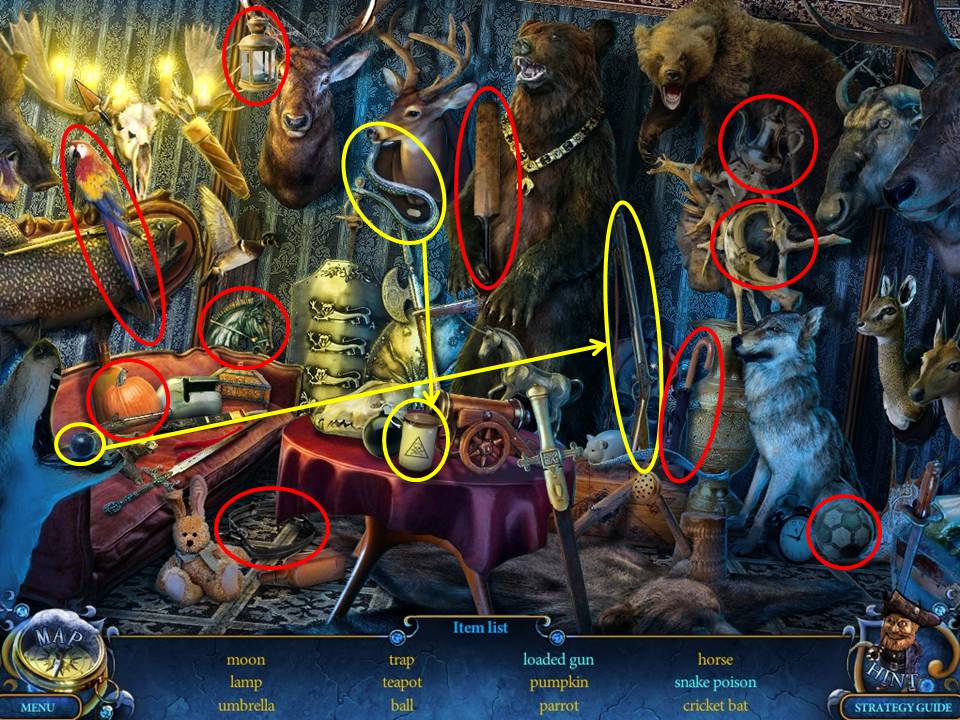
- Find the items listed.
- Take the HORSE HEAD.
- Return to the Mansion Hall.
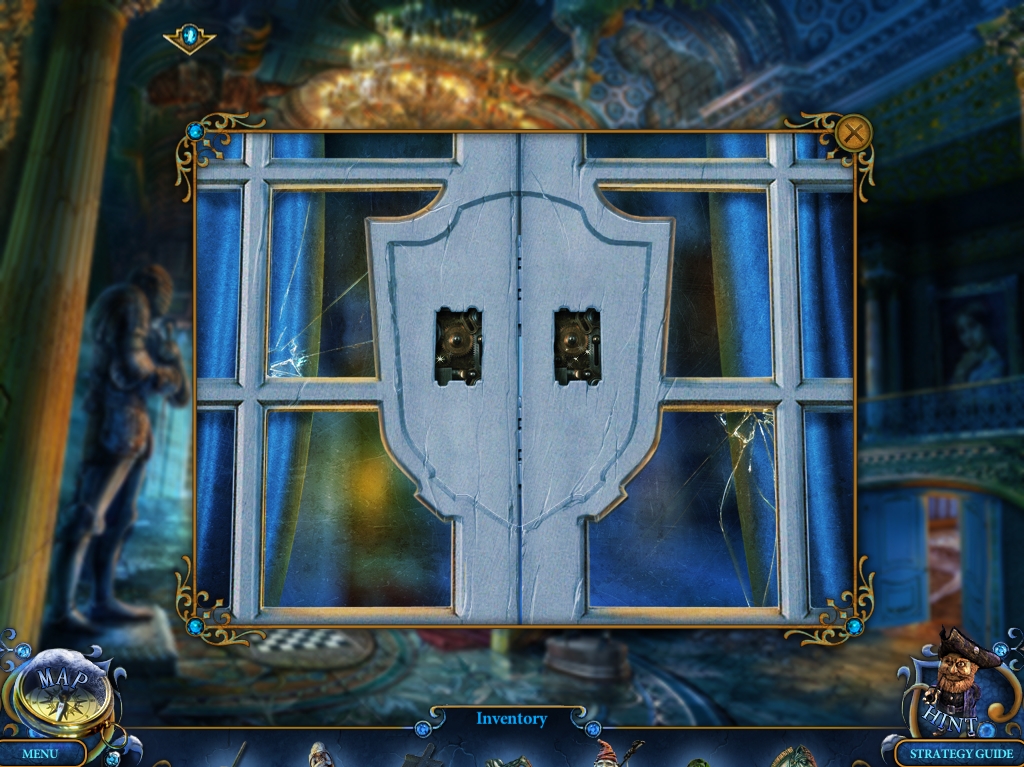
- Zoom into the white doors at the far end of the hall.
- Place the CREST PARTS (x2) on the groove in the door to open it.
- Enter Amadey's Workshop.
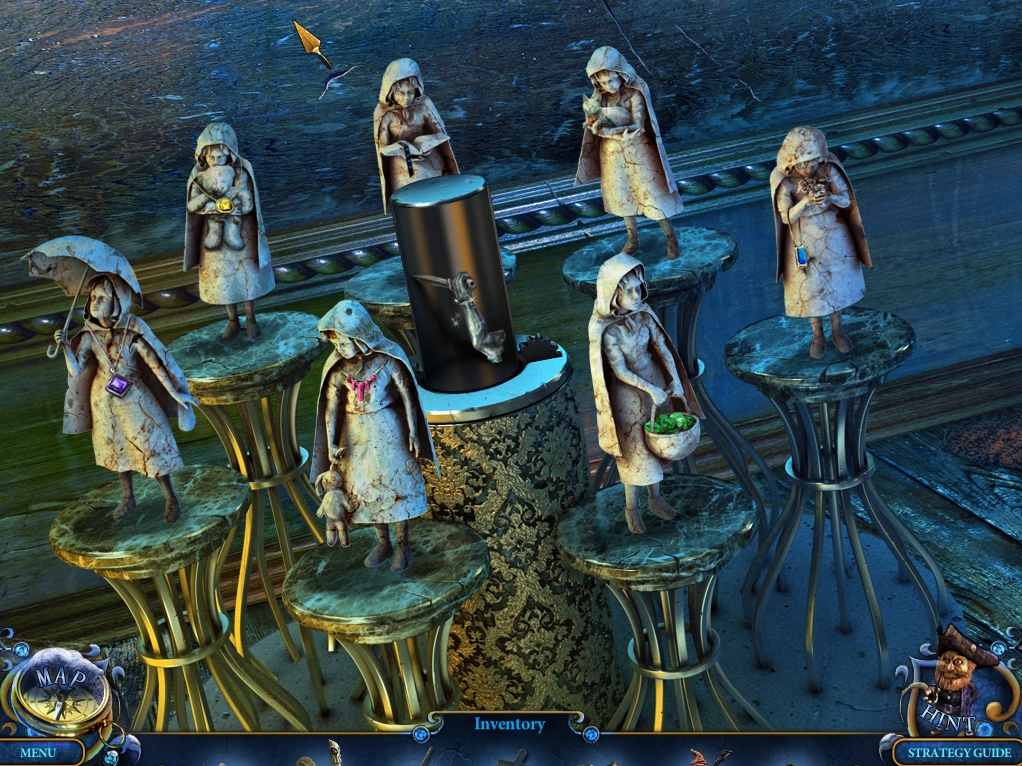
- Zoom into the small stands connected together on the floor straight ahead.
- Place the three PRINCESS FIGURES on the stands to initiate a puzzle.
- The object of the puzzle is to place each figure on the correct pedestal.
- Move figures by clicking two to swap them.
- See screenshot for solution.
- When finished, take the KNIGHT'S HAND.
- Return to the Mansion Entrance.
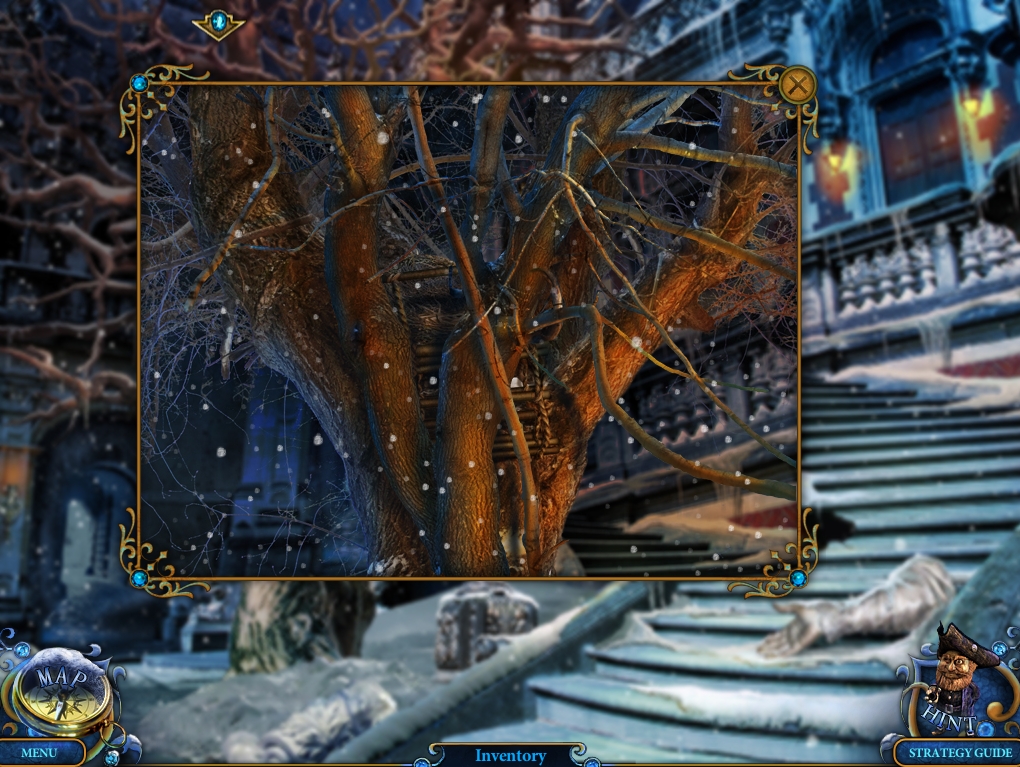
- Zoom into the tree on the left.
- Use the GNOME on the tree to trim it.
- Zoom into the tree again.
- Have the ROOSTER knock down the ladder.
- Take the GNOME back.
- Zoom within the tree to initiate a puzzle.
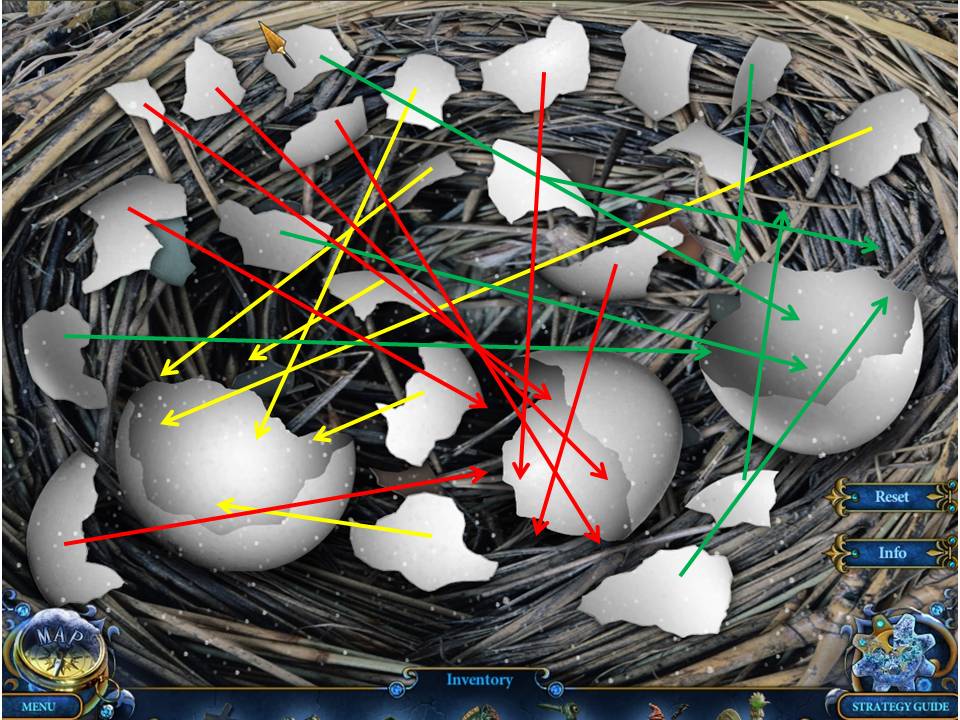
- The object of the puzzle is to reassemble the eggs.
- Click an egg piece, move it to the base, and click again to release.
- Not all pieces will be used.
- See screenshot for solution.
- When finished, take the FEATHER.
- Return to Amadey's Workshop.
- Zoom into the lock over the cabinet in the back corner.
- Use the HORSE HEAD, the KNIGHT'S HAND, the FEATHER, and the HORSE'S LEG on the lock figure to restore it.
- Look inside.
- Take the large GOLDEN ARROWS on the left.
- Return to the Square.
- Give the Archer the GOLDEN ARROWS.
- Return to the Tower Entrance and watch a cutscene.
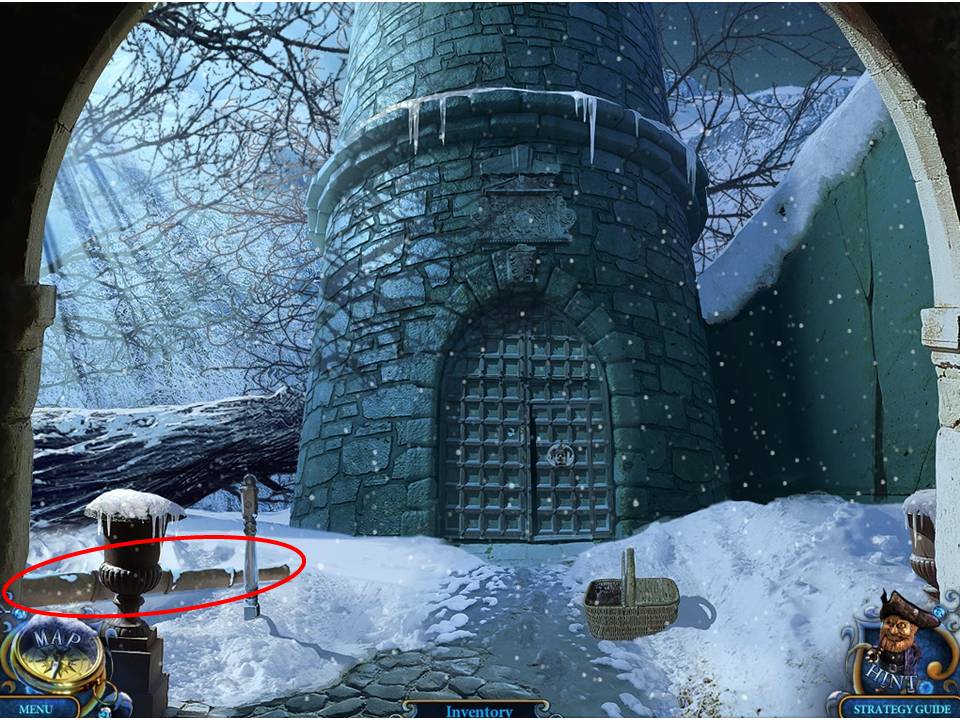
- Take the SPYGLASS dropped by the red-eyed statue.
- Zoom into the front doors of the Tower.
- Note the items you're missing.
- Take the SIGNALMAN.
- Return to Amadey's Workshop.
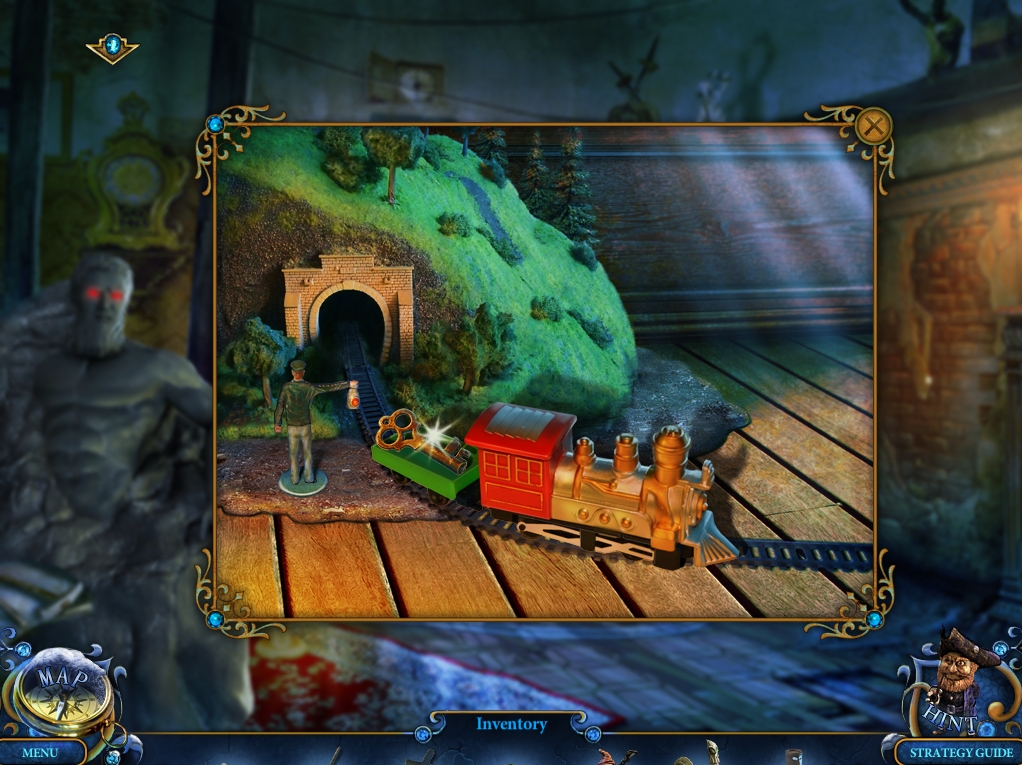
- Zoom into the small railroad model on the back wall.
- Place the SIGNALMAN on the small silver stand on the left.
- Take the KEY. Place the MINER on the exposed brick wall on the right.
- Give him the SPYGLASS to break down the wall.
- Play the Hidden Object Area that appears.
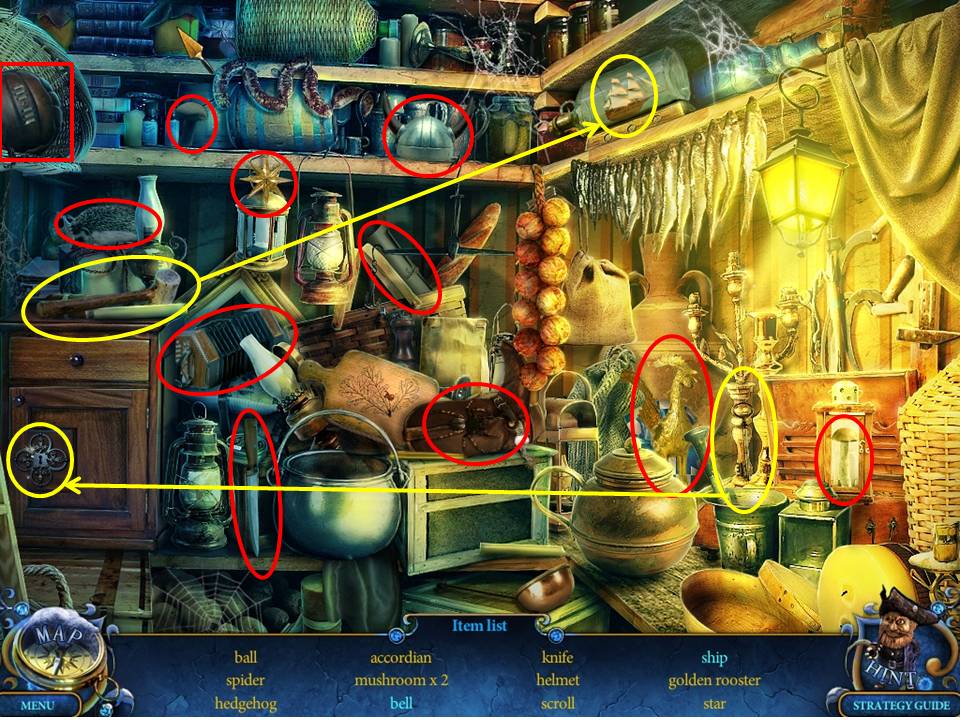
- Find the items listed.
- Receive the BELL.
- Return to the Maid's Room.
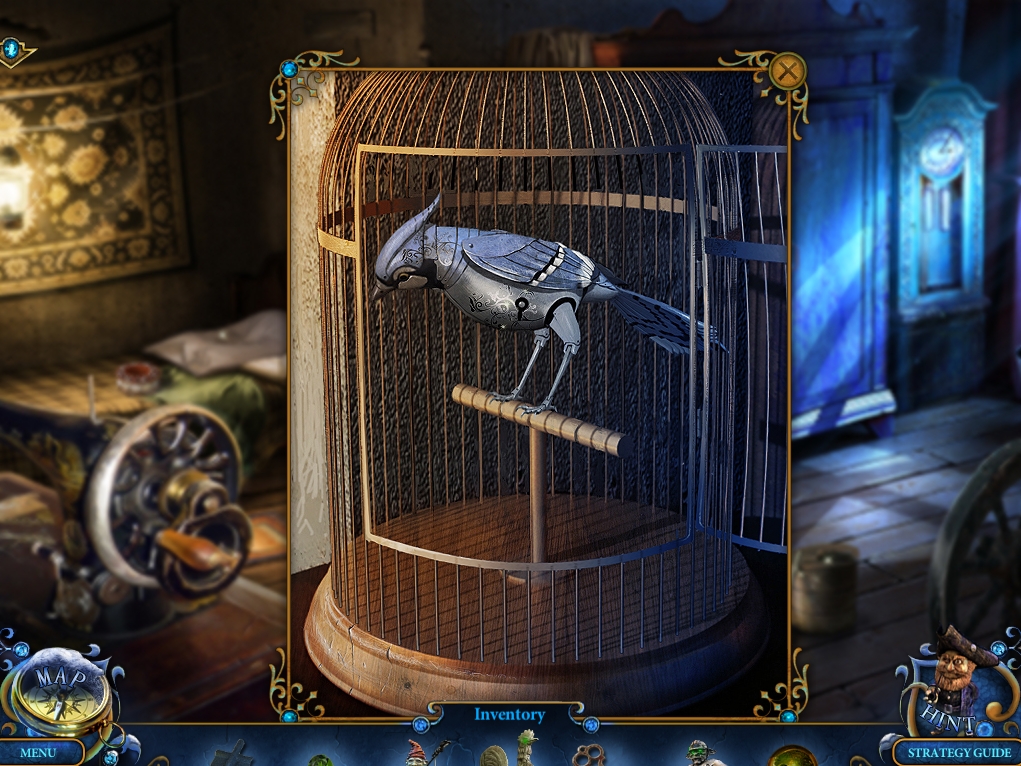
- Zoom into the birdcage.
- Use the KEY on the bird, then click on it to activate it.
- Take the BRONZE RING.
- Return to the Mansion Entrance.
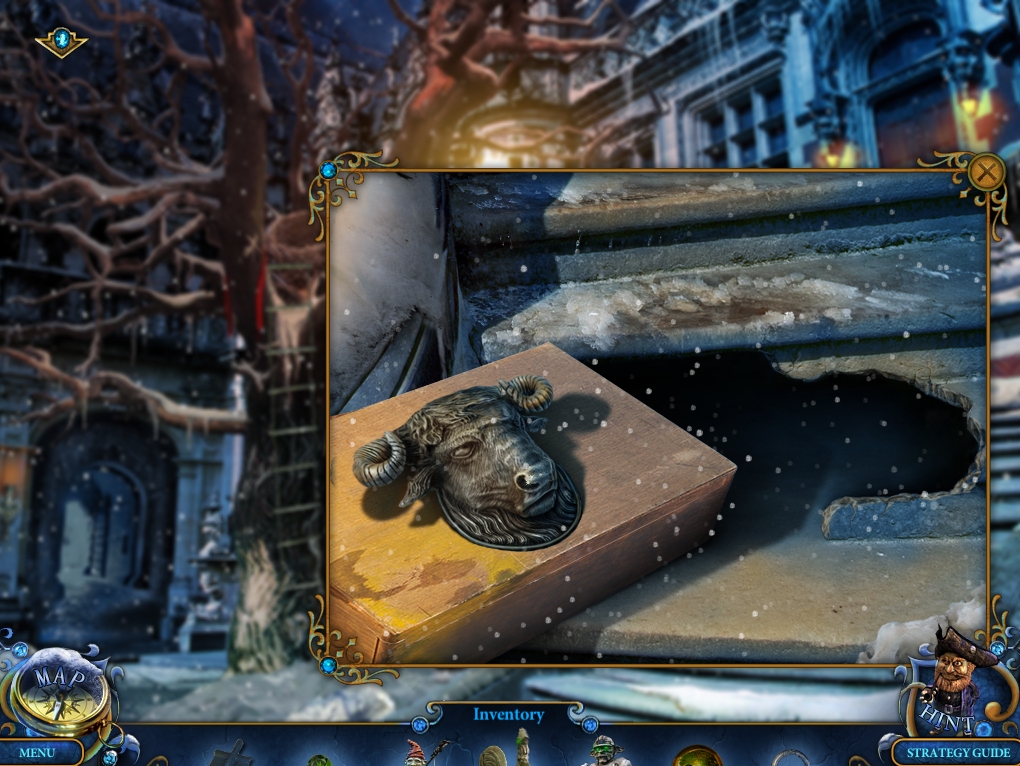
- Zoom into the box lying on the steps.
- Use the BRONZE RING on the ox face to open the box.
- Take the PAINT and the BELL (2).
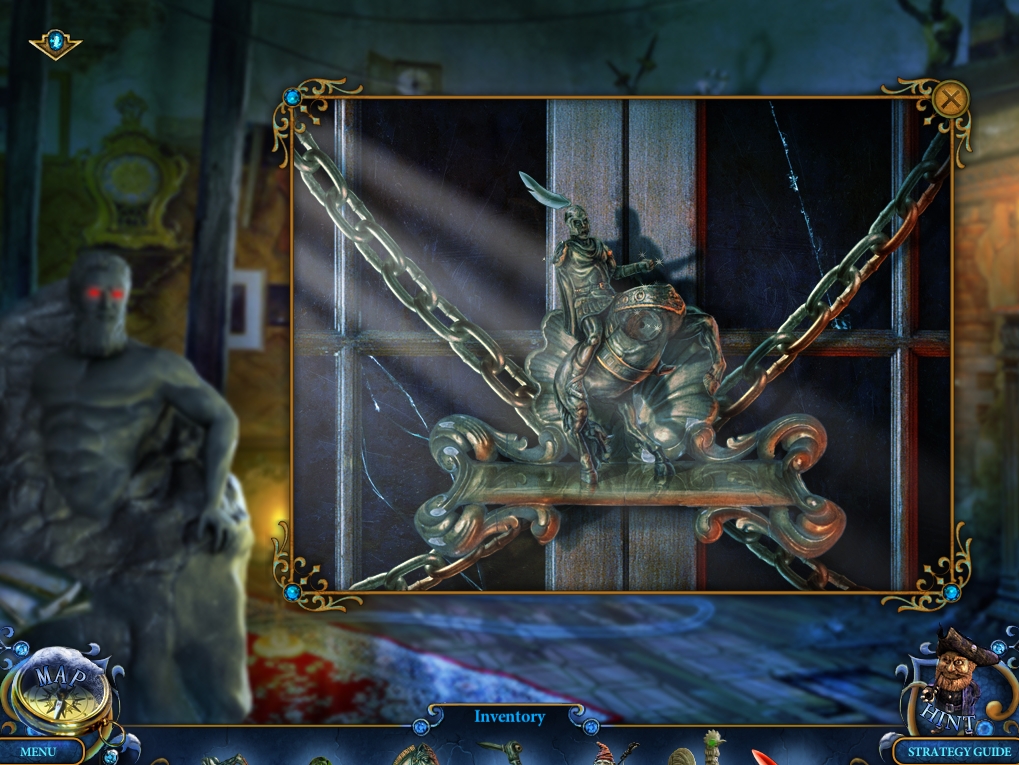
- Return to the Tower Entrance.

- Zoom into the front doors of the Tower.
- Place the BELLS (x2) on the stone jester to initiate a puzzle.
- The object of the puzzle is to “color correct” the jester.
- Click glass pieces to change their colors.
- See screenshot for solution.
- Go through the doors and click anywhere inside to watch the cutscene.
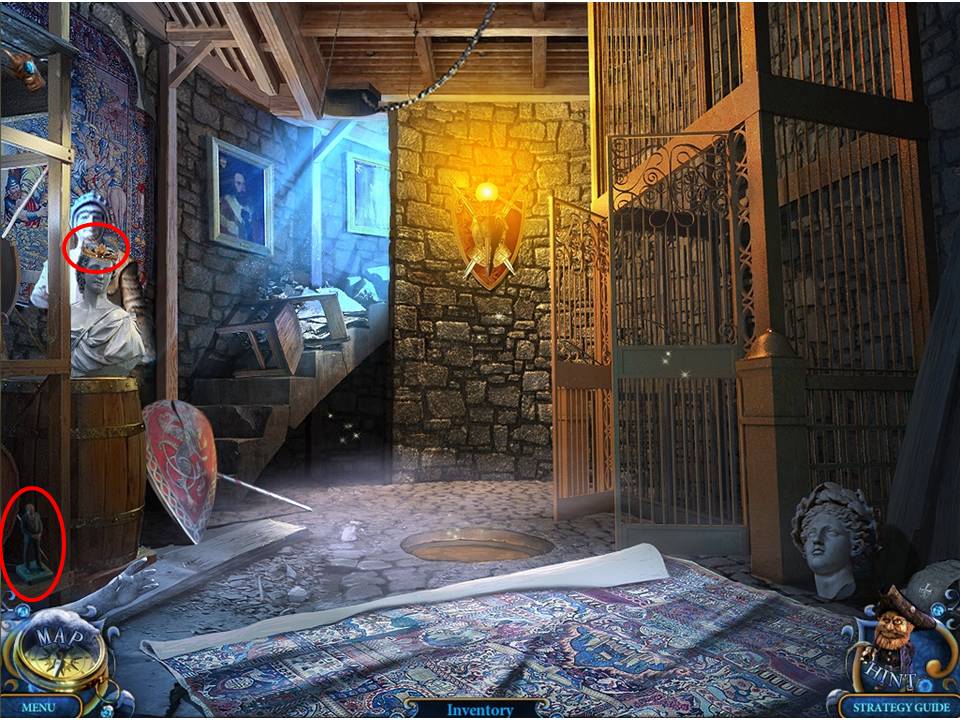
- Take Miniature 14/26.
- Zoom into the bust on the left.
- Take the RUBY from its crown.
- Return to the Mansion Hall.
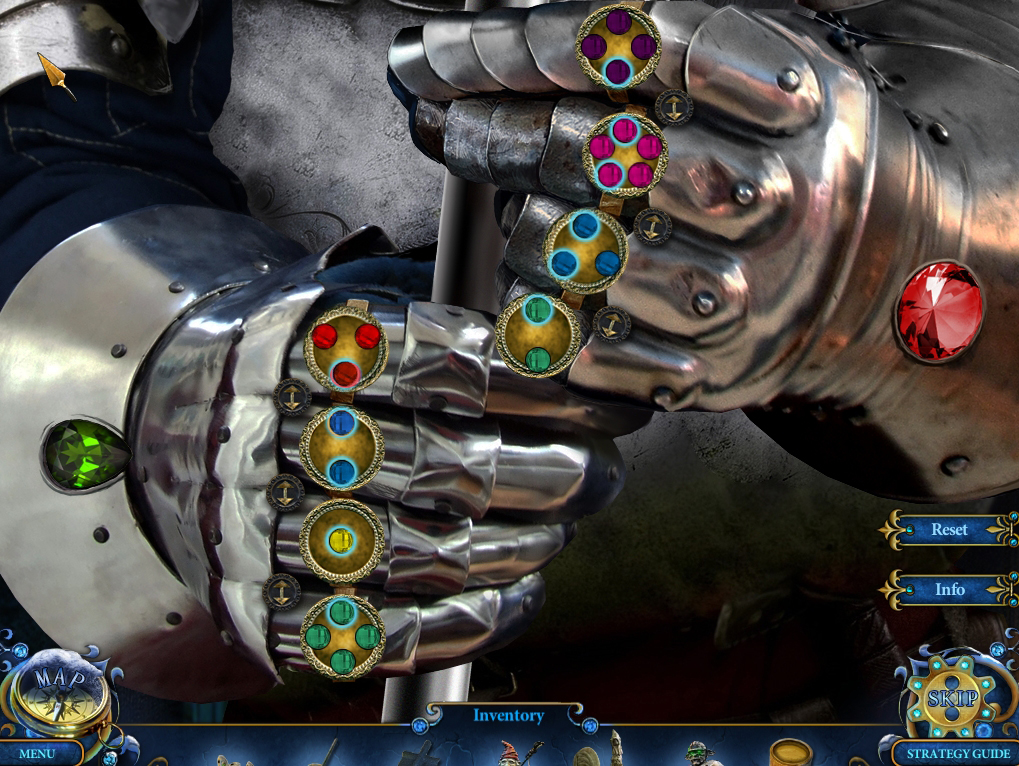
- Zoom into the suit of armor bordering the staircase.
- Place the RUBY and EMERALD on the slots in the gauntlets to trigger a puzzle.
- The object of the puzzle is to place the jewels on the correct rings.
- Click on the rings to rotate them.
- Click on the buttons to swap jewels.
- Note that there's a certain number of gems of each color.
- See screenshot for solution.
- When finished, receive the HALBERD.
- Return to the Tower Interior.

- Zoom into the spiked ball in the hole in the floor.
- Prop the ball out of the hole with the HALBERD.
- Play the Hidden Object Area.
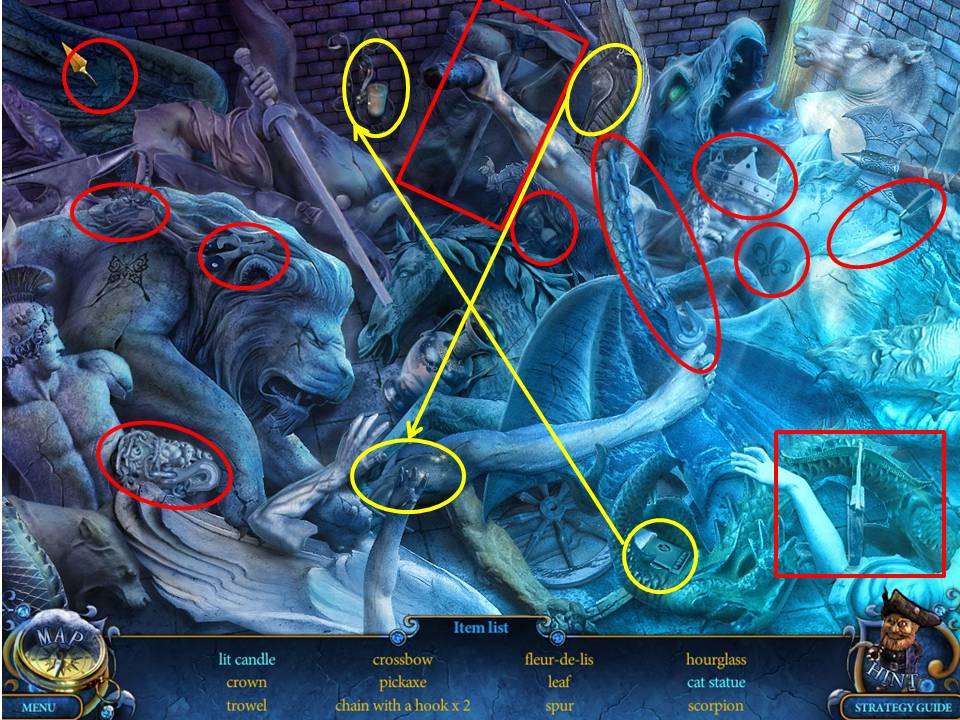
- Find the items listed.
- Receive the CANDLE.
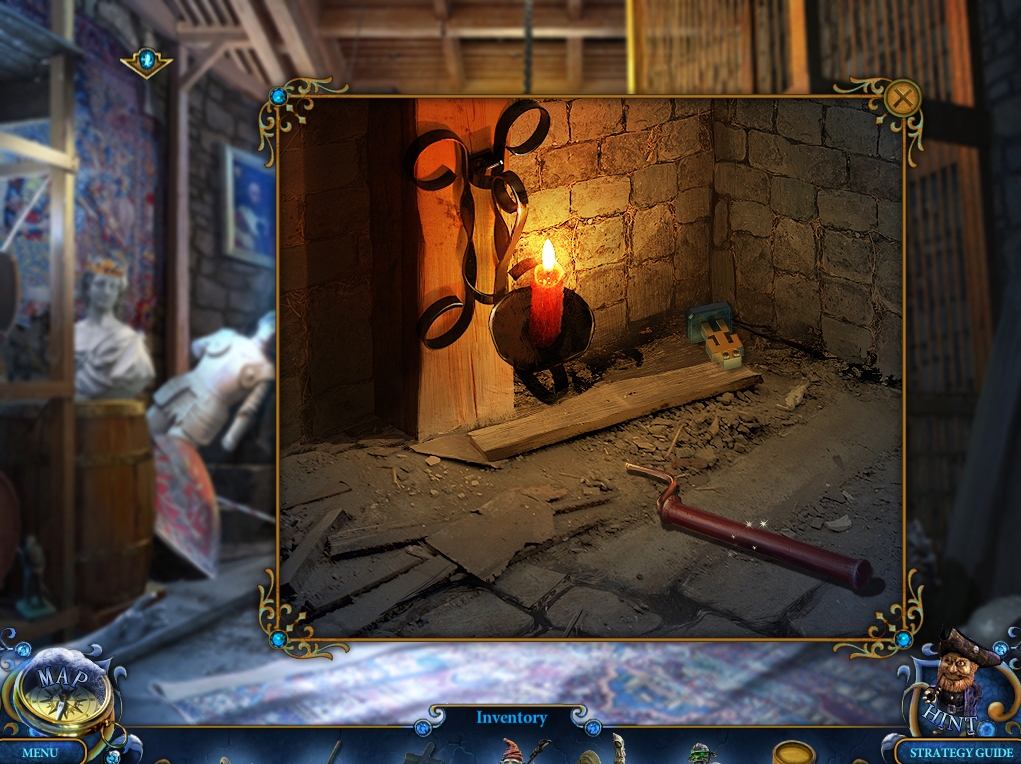
- Zoom into the area underneath the stairs.
- Light the area by putting the CANDLE on the peg on the wall.
- Take Miniature 15/26 and the CRANK HANDLE.
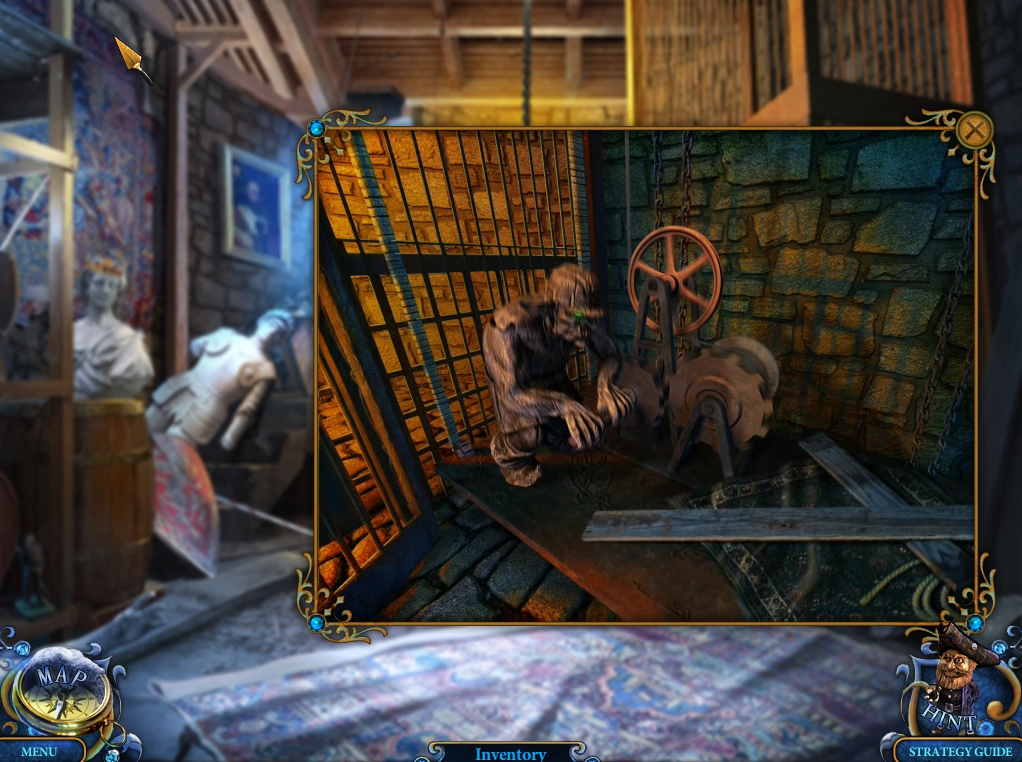
- Zoom into the gated area on the right.
- Use the CRANK HANDLE on the mechanism, then use the MINER to power it.
- The elevator is now activated and will take you to the Tower Chamber on the next level.
- Once there, click anywhere to watch a cutscene.
Congratulations! You've completed Chapter 3 from the Royal Detective: Lord of Statues Walkthrough!
Comments will load when you reach this part of the walkthrough.