Bonus Chapter
The following contains screenshots and instructions on how to complete the Bonus Chapter from the CGG Royal Detective: Lord of Statues Walkthrough.
- You will need to obtain Rupert again to enable hints.
- He’ll update you on what’s going on.
- You’ll automatically receive the MINER and the ROOSTER.
- Enter Princess' Secret Room and play the Hidden Object area over the desk on the left.
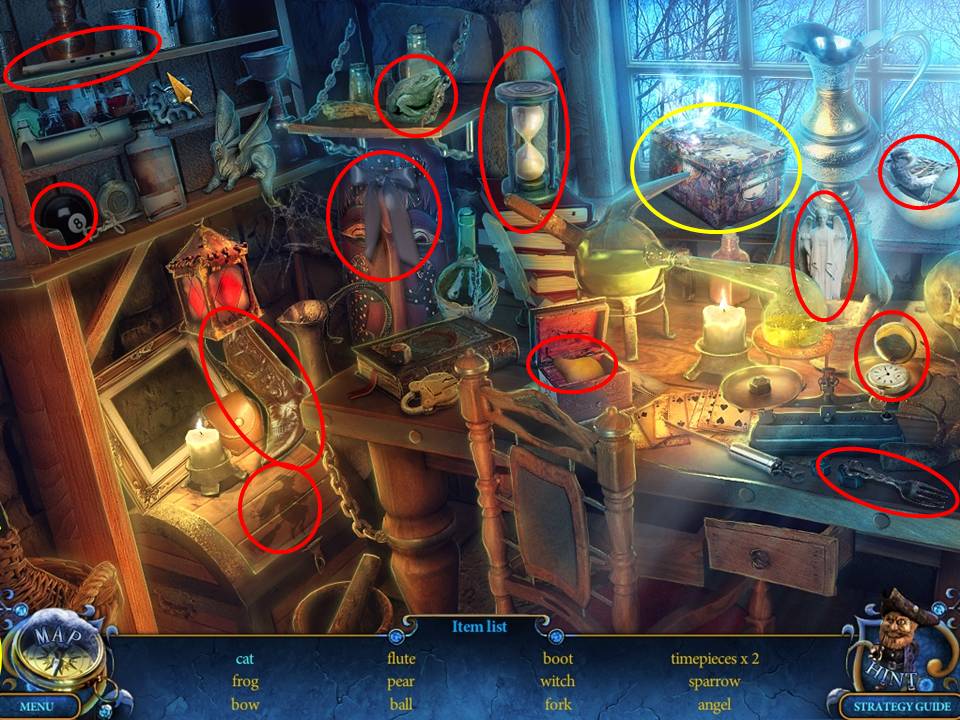
- Find the items listed.
- Receive FLUTE PART 1/2.
- Watch a cutscene.
- Zoom into the desk on the right.
- Take the COLORED ROCKS 1/3.
- Return to the Attic.
- Some of the ceiling beams come down.
- Proceed across the beam on the right and down into the Narrow Street below.
- Zoom into the window on the right. Open it.
- Take the COLORED ROCKS 2/3.
- Zoom out of the window.
- Use the MINER on the rubble blocking the path ahead to clear it.
- Move forward to the field.
- Click anywhere to watch a cutscene.
- Move toward the Ruins at the upper left.

- Zoom into the rock ruins on the upper left.
- Have your ROOSTER take the COLORED ROCKS 3/3.
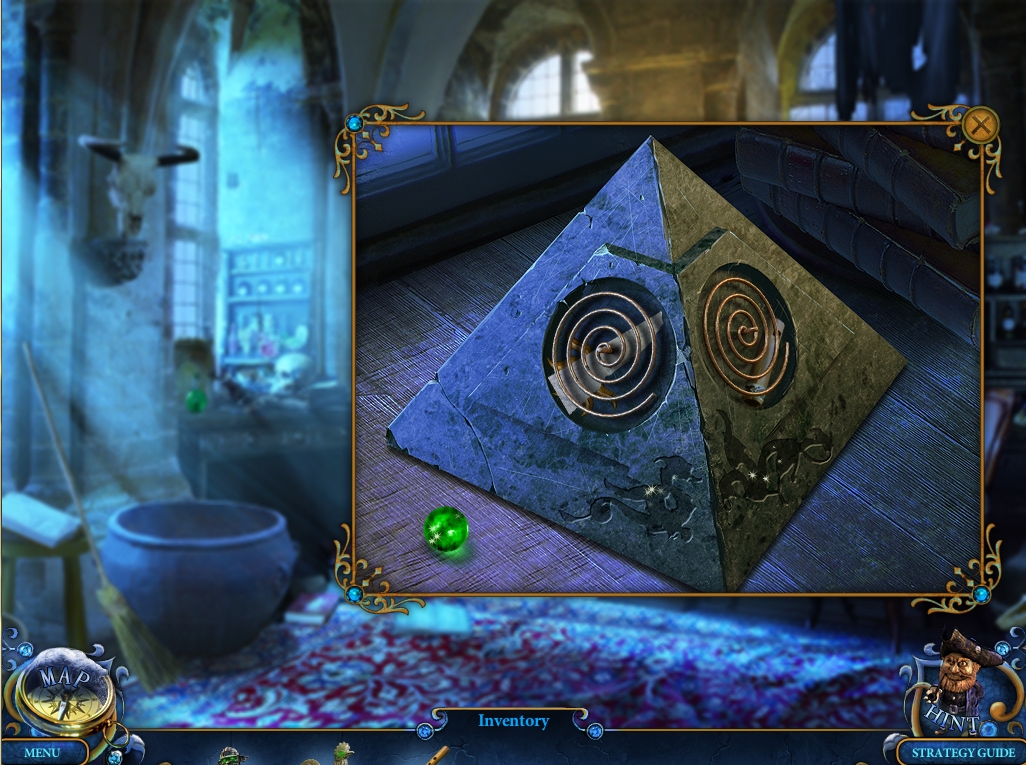
- Zoom into the the upright stone towards the left with the markings on the front.
- Use the COLORED ROCKS on the stone to trigger a puzzle.
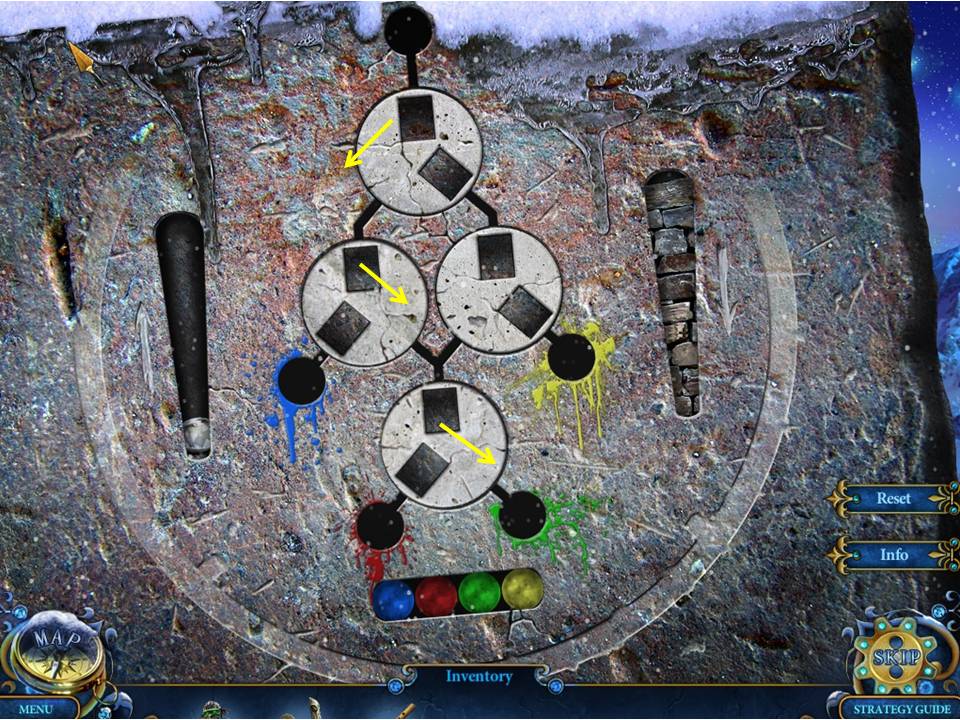
- Click on a rock to drop it into the chute.
- If the rock is the same color as the hole it eventually falls into, the diamond on the left will rise.
- Keep guessing correctly, and you’ll lift the diamond in the chute on the left all the way up to claim into inventory.
- A good strategy to use is to look at the way the chutes are positioned.
- The wheel turns the opposite way of where the chutes are located.
- If a wheel has chute slots positioned left and up, it will rotate right.
- Look at the example diagram and note the arrows, indicating which way the wheels will turn.
- If you follow the path, it becomes apparent that the green marble would be the one to insert into the hole at the top.
- When finished, receive the DIAMOND.
- Return to the Narrow Street.
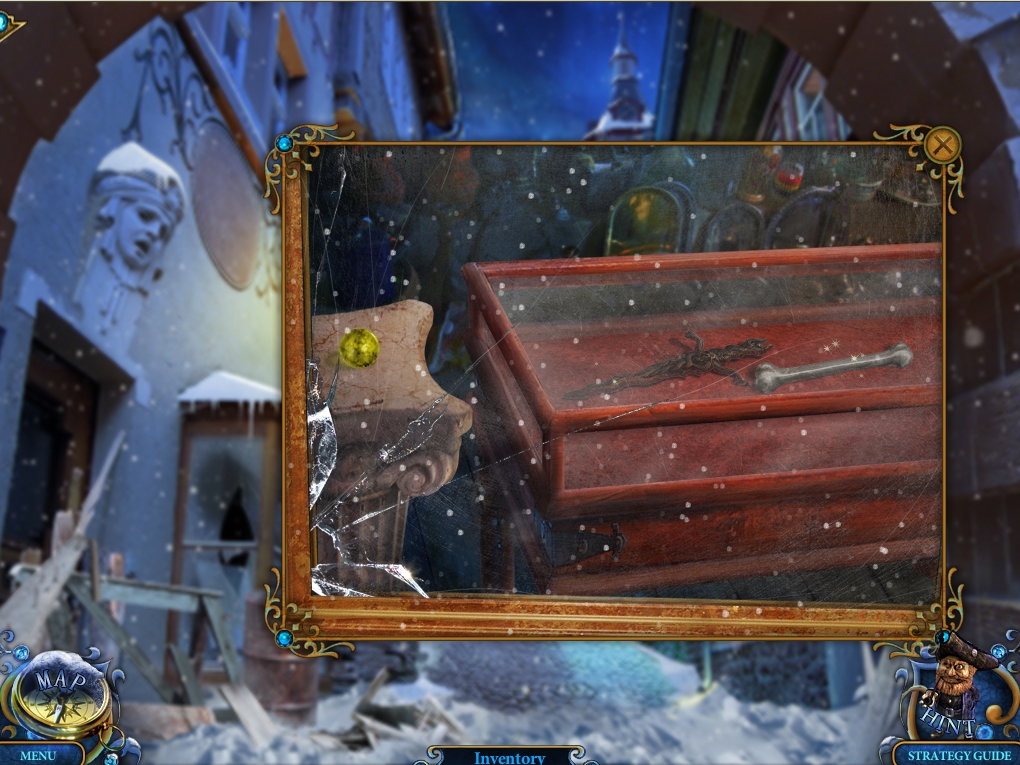
- Zoom into the window on the right again.
- Cut the glass case with the DIAMOND.
- Take the RUSTY DAGGER and the SILVER BONE.
- Return to the field.
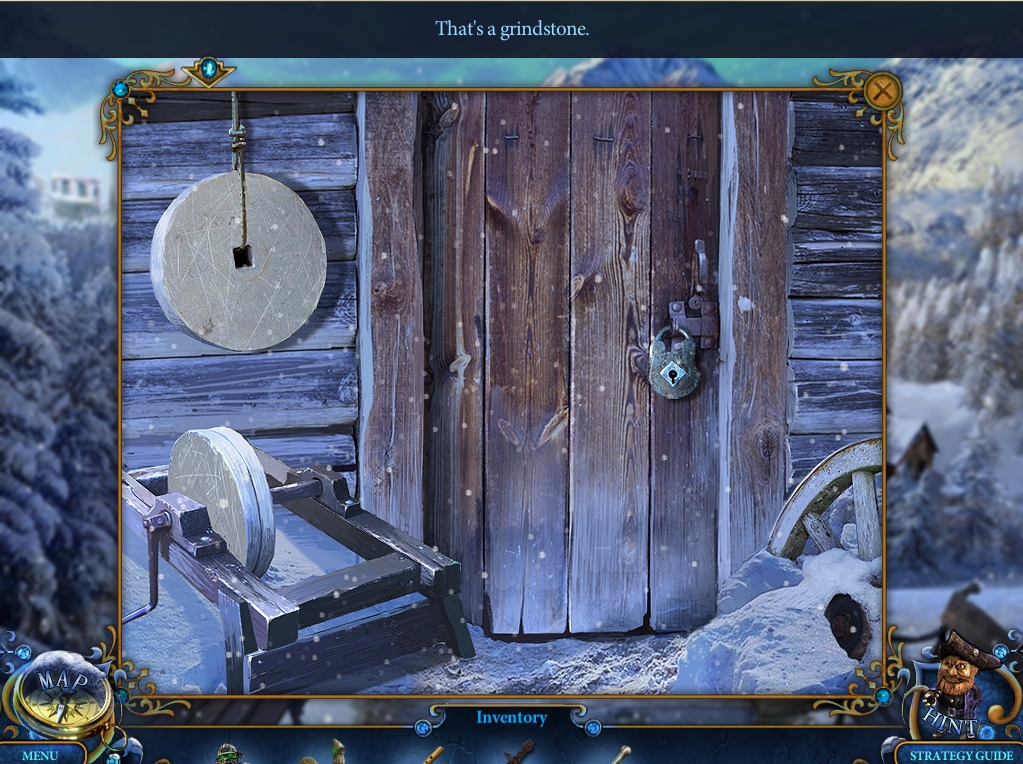
- Zoom into the windmill on the right.
- Sharpen the RUSTY DAGGER on the grinding wheel on the left.
- Take the SHARP DAGGER.
- Return to the Ruins.
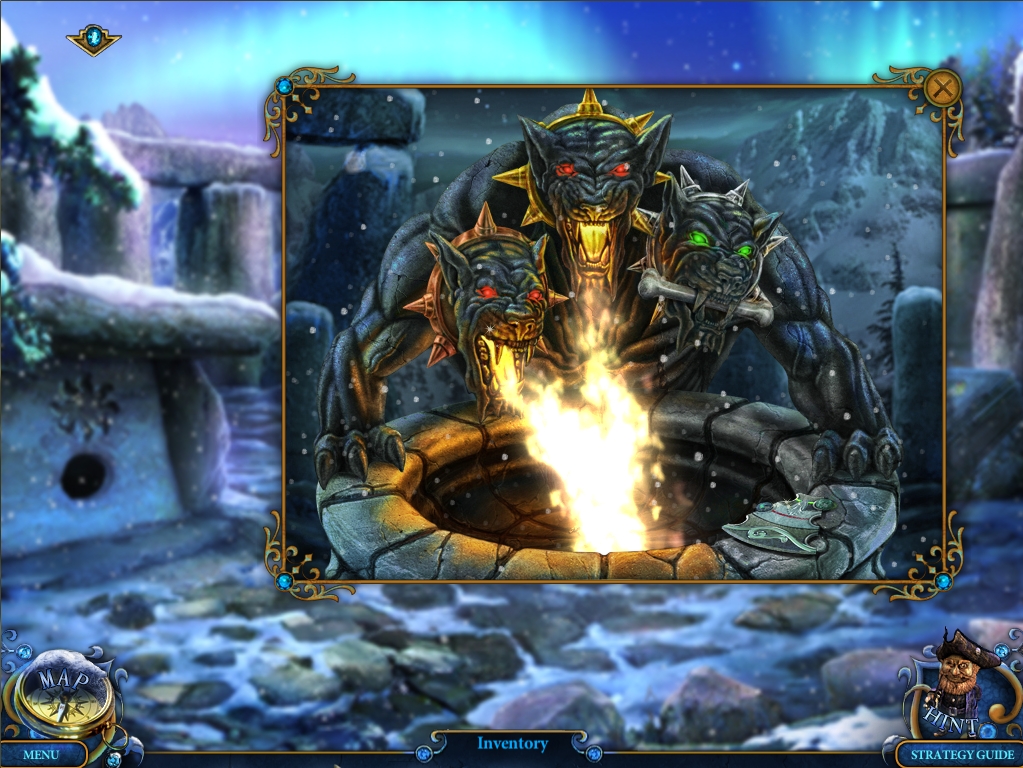
- Zoom into the fire-breathing statue ahead.
- Use the SILVER BONE on the head with the silver collar.
- Take the PART OF TITAN RING 1/2.
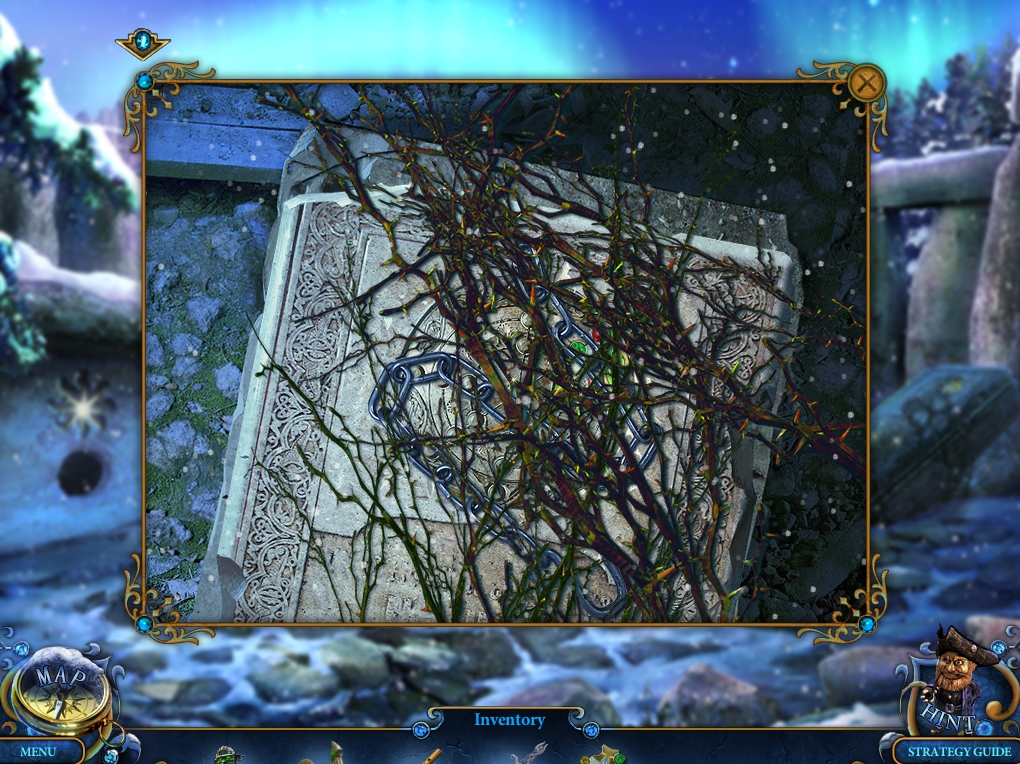
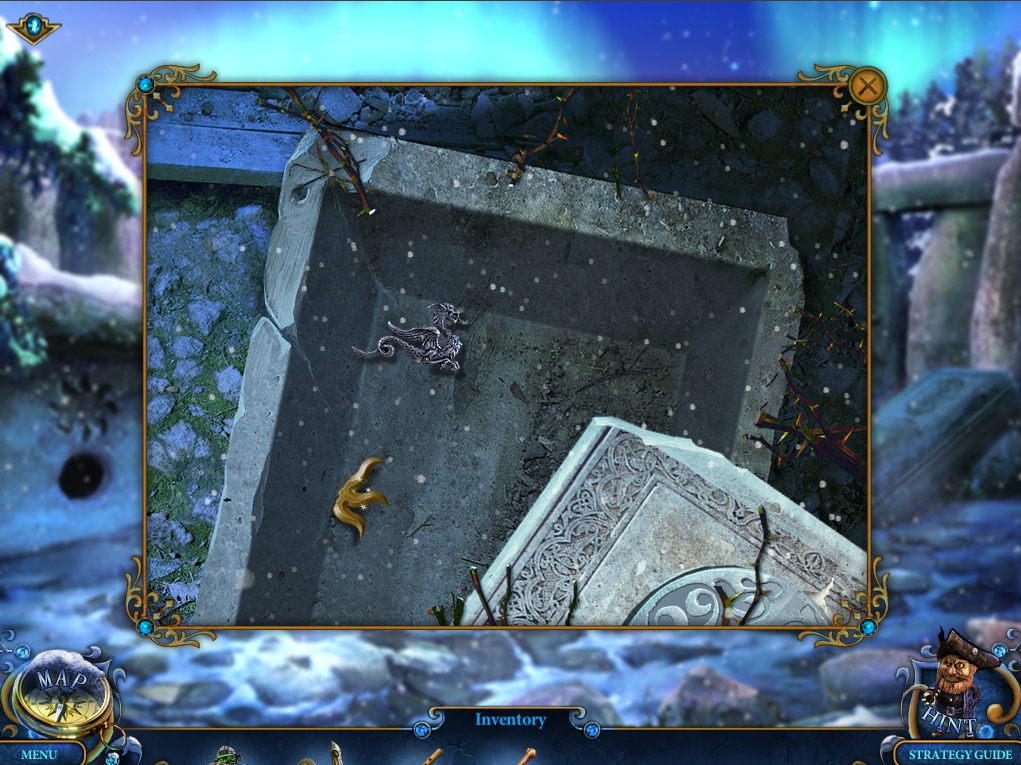
- Zoom into the stone coffin on the right.
- Remove the vines with the SHARP DAGGER.
- Take the CHAIN. Next, use the MINER on the coffin to take the PART OF TITAN RING 2/2.
- Go back to the Field.
- Zoom into the giant stone hand.
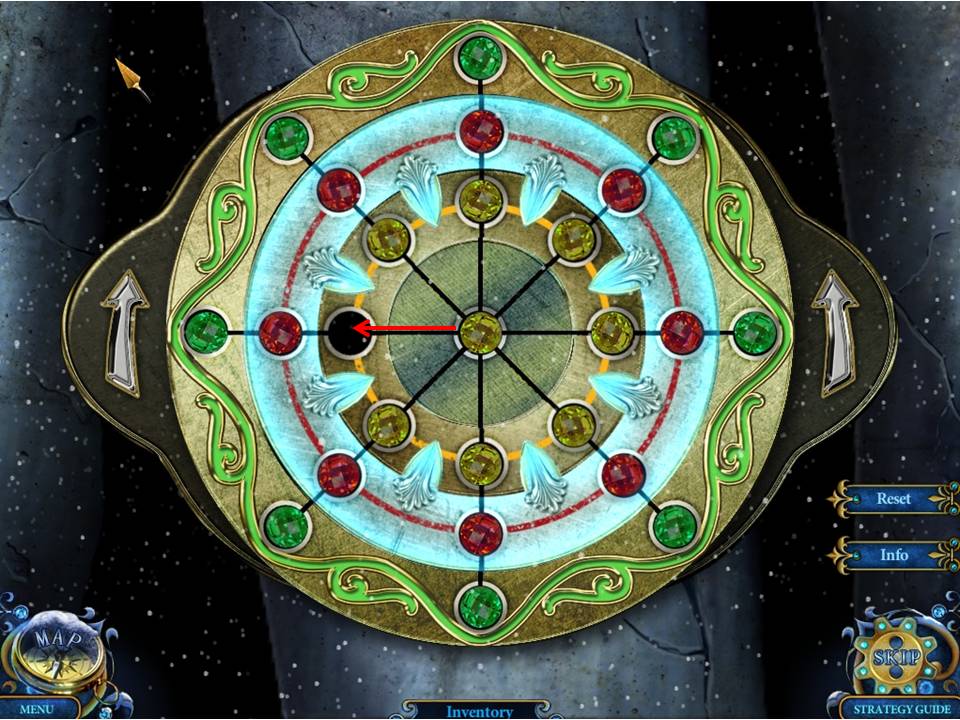
- Use the PART OF TITAN RING on the ring to initiate a puzzle.
- The object of the puzzle is to move all the colored diamonds onto their correspondingly colored rings.
- Click on a diamond to move it. It will move if there is an empty spot nearby.
- A good strategy is to move a yellow one into the center ring, then work on moving all the green ones into the green ring, followed by the red, followed by the yellow into their respective rings.
- See screenshot for solution, showing puzzle one move from completion.
- When finished, receive, the RING SEAL.
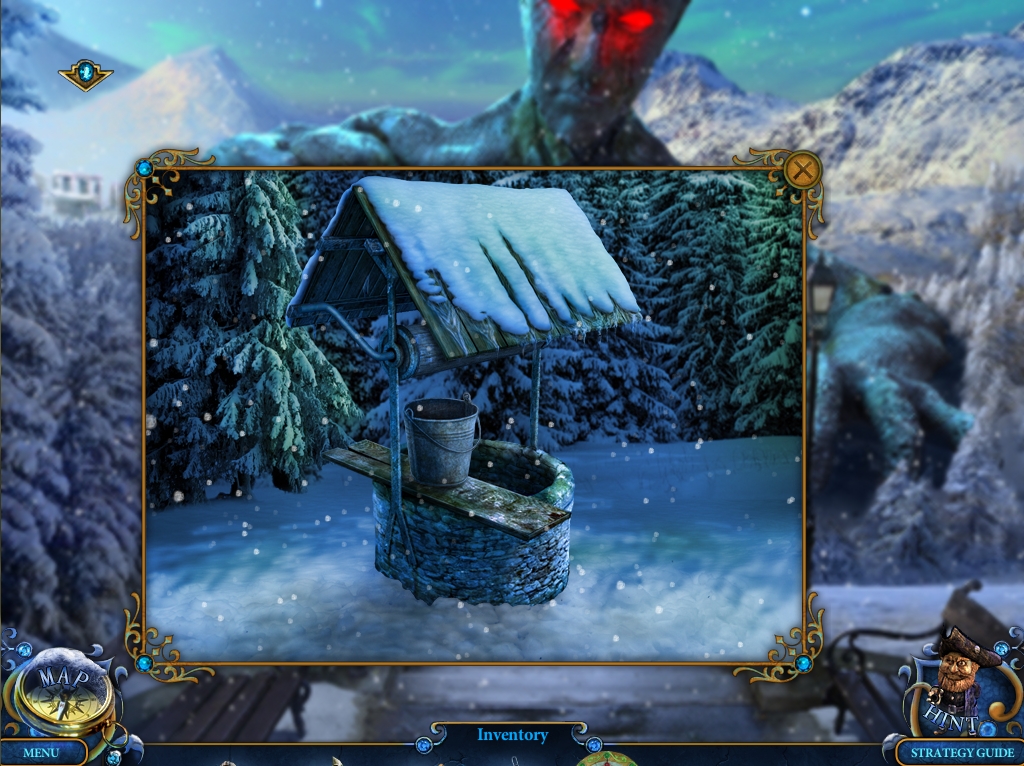
- Zoom into the well on the left.
- Use the CHAIN on the well to lower the bucket, then click on the lever to bring it back up.
- Take the BUCKET WITH WATER.
- Return to the Narrow Street.
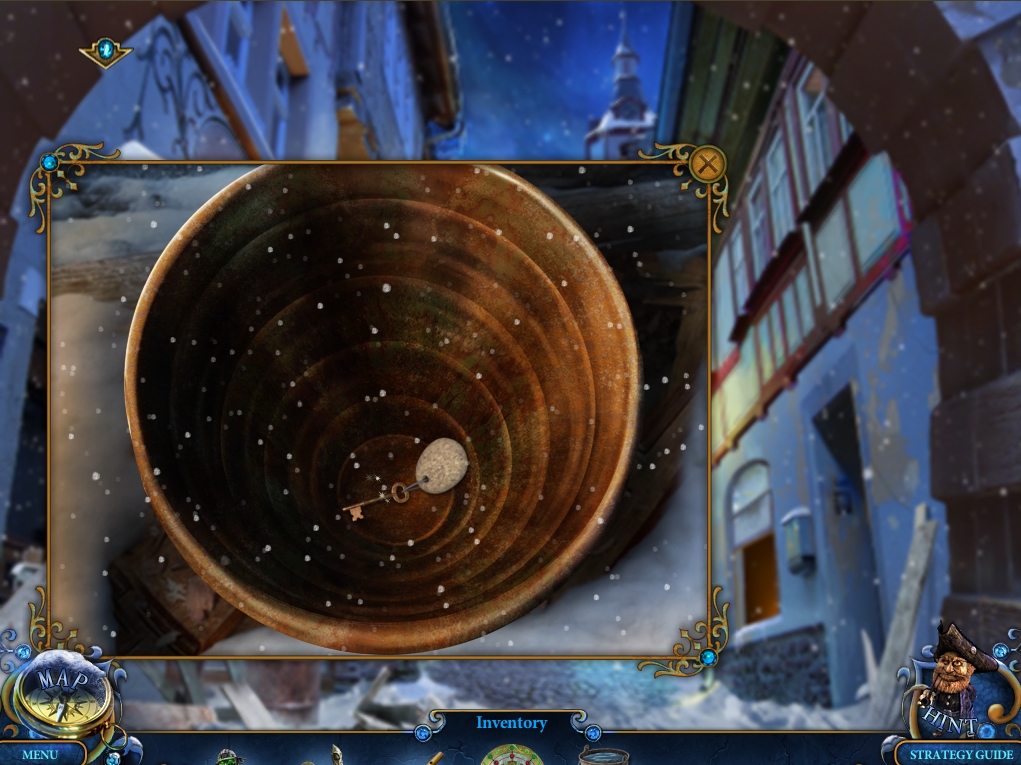
- Zoom into the metal barrel on the left.
- Pour the BUCKET WITH WATER inside the barrel.
- Take the RUSTY KEY.
- Return to the Field.
- Zoom into the windmill on the right.
- Open the door with the RUSTY KEY.
- Play the Hidden Object Area.
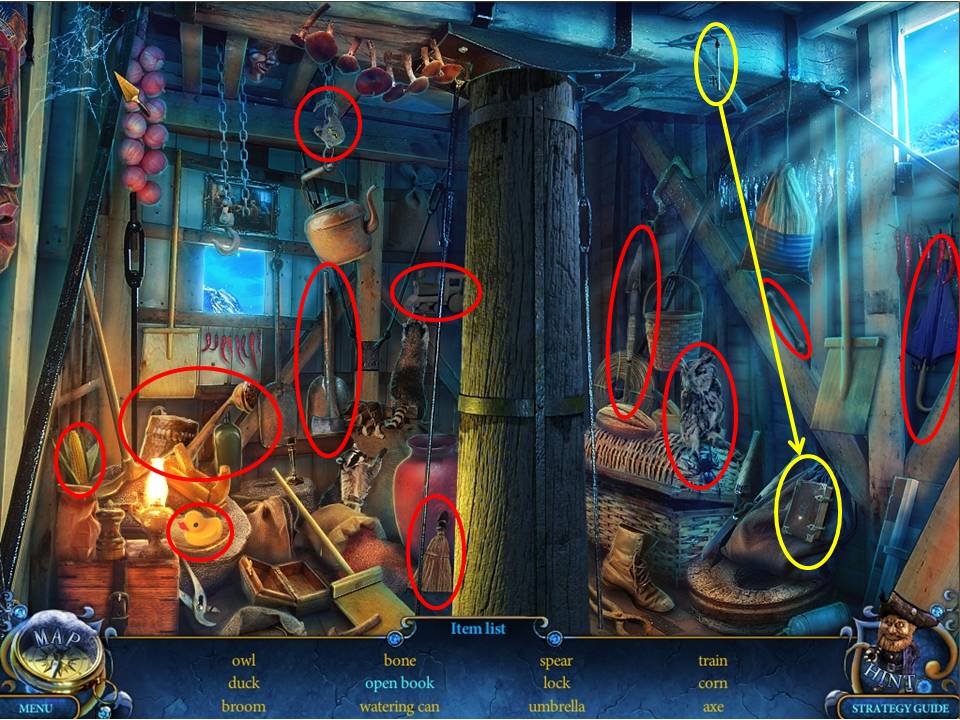
- Find the items listed.
- Receive the BRONZE BONE.
- Go to the Ruins via the space under the stone giant's arm.
- Zoom into the coffin on the right.
- Use the RING SEAL to open the coffin.
- Take the DRAGON and the STAR 1/2.
- Zoom into the fire-breathing statue again.
- Use the BRONZE BONE on the head with the bronze collar.
- Return to Princess' Secret Room.
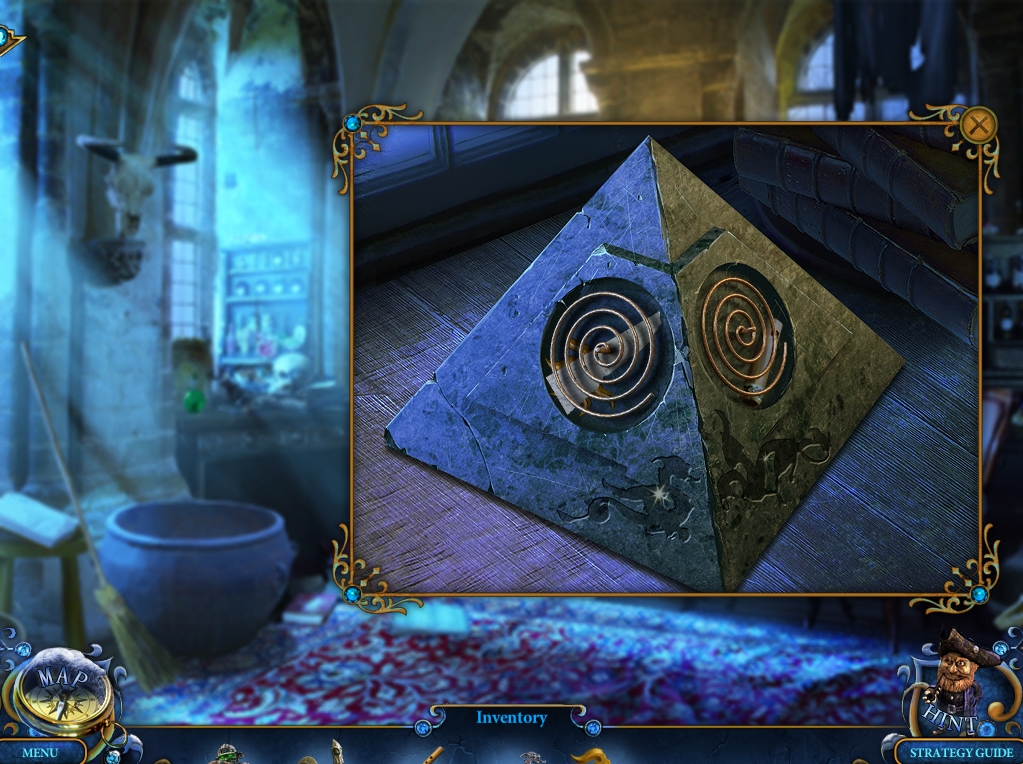
- Zoom into the desk on the right.
- Use the DRAGON on the indentation on the left side of the pyramid to open it.
- Take the PIECE OF PAPER and the STAR 2/2.
- Return to the Ruins.
- Zoom into the stone structure on the left.
- Use the STAR on the groove.
- Play the Hidden Object Area.

- Find the items listed.
- Receive the GOLDEN BONE.
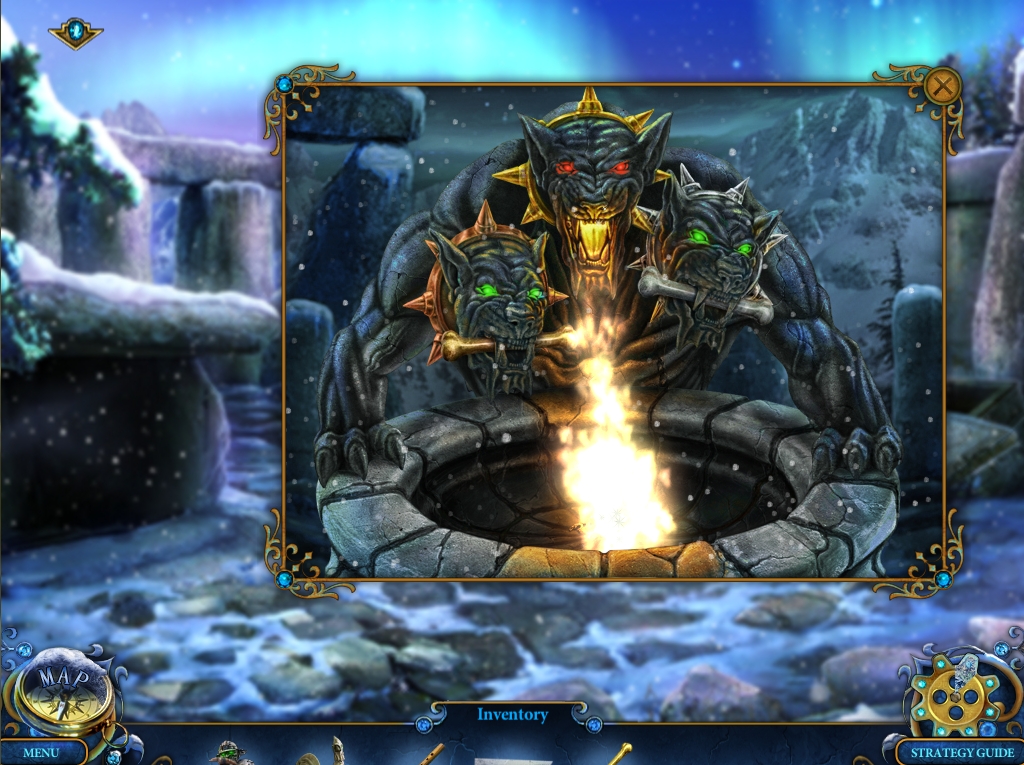
- Zoom into the fire-breathing statue again.
- Use the GOLDEN BONE on the head with the golden collar.
- Take the DRAGON.
- Return to Princess' Secret Room.
- Zoom into the desk on the right.
- Use the DRAGON on the remaining groove.
- Take FLUTE PART 2/2.
- Return to the Field and watch a cutscene.
- Use the FLUTE on the statue.
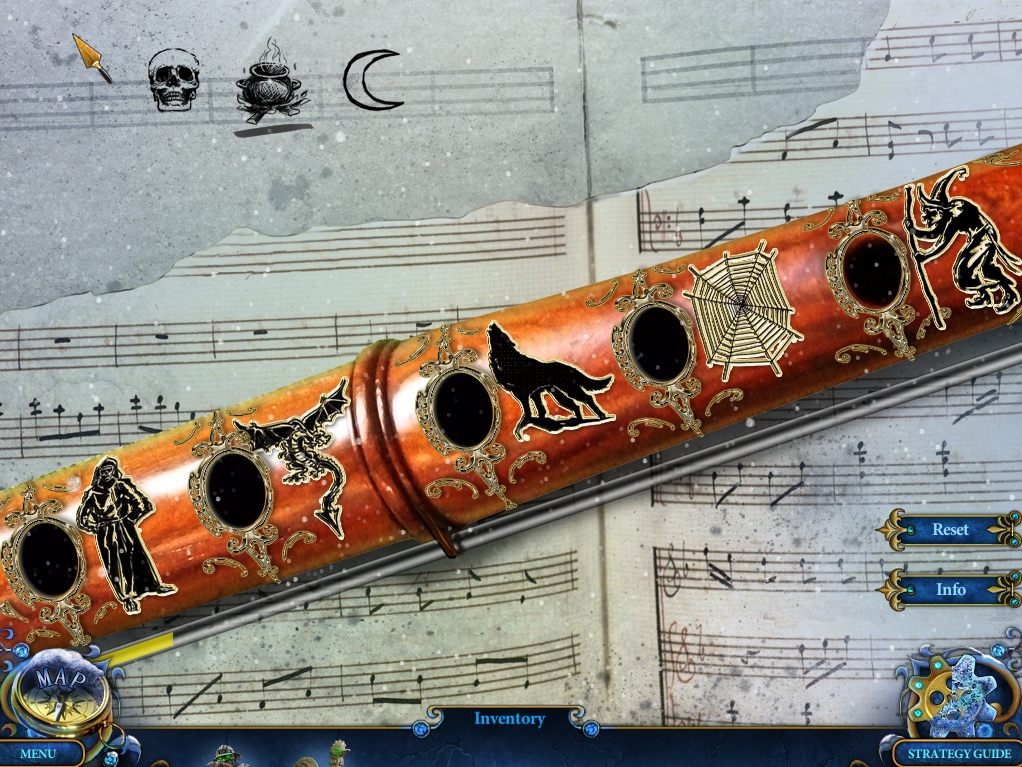
- Use the PIECE OF PAPER on the upper left corner to trigger a puzzle.
- Decipher the code to play the right melody.
- The pictures on the top left of the page are each associated with one of the flute holes.
- Click on the flute holes in the right order.
- The solution is as follows:
[NUMBERED]
[/NUMBERED]
- When finished, watch the final cutscene.
Congratulations! You have successfully completed the Bonus Chapter of Royal Detective: Lord of Statues Walkthrough!
Comments will load when you reach this part of the walkthrough.