
Chapter Seven: Enter the Reliquary
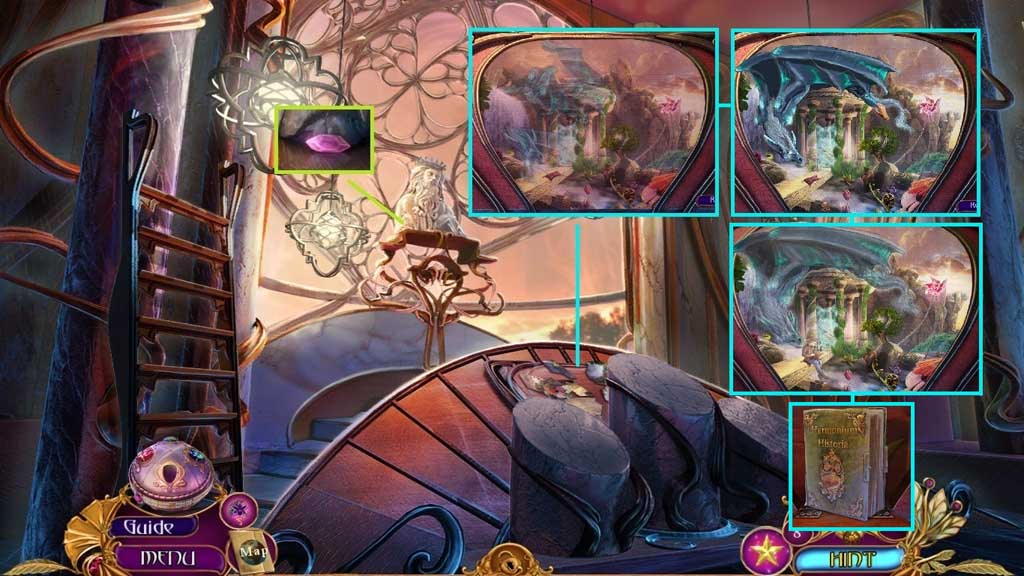
- Collect 2/ 3 jewel eyes.
- Zoom into the platform to trigger a mini game.
- Solve the game by arranging the pieces to complete the images.
- Collect the book, the Phoenix head and the shard fragments.
- Move down once and go right.
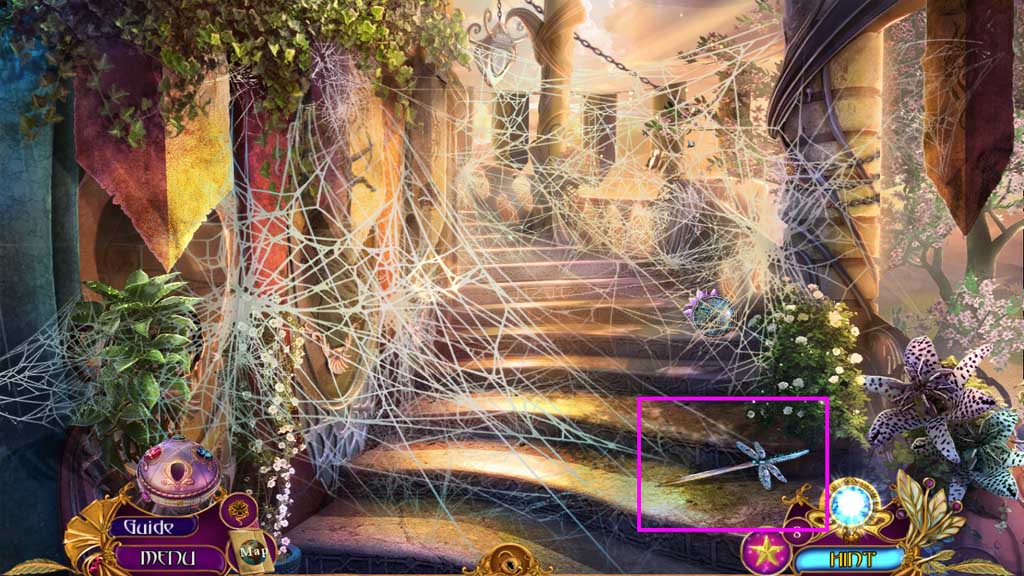
- Collect the dragonfly dagger.
- Move down once.
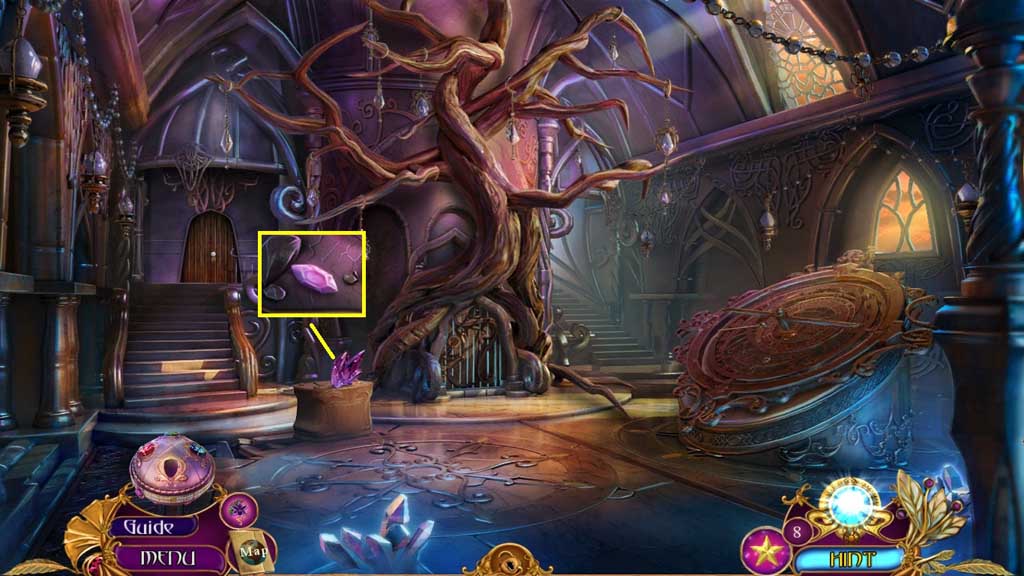
- Collect 3 /3 jewel eyes.
- Move down once.
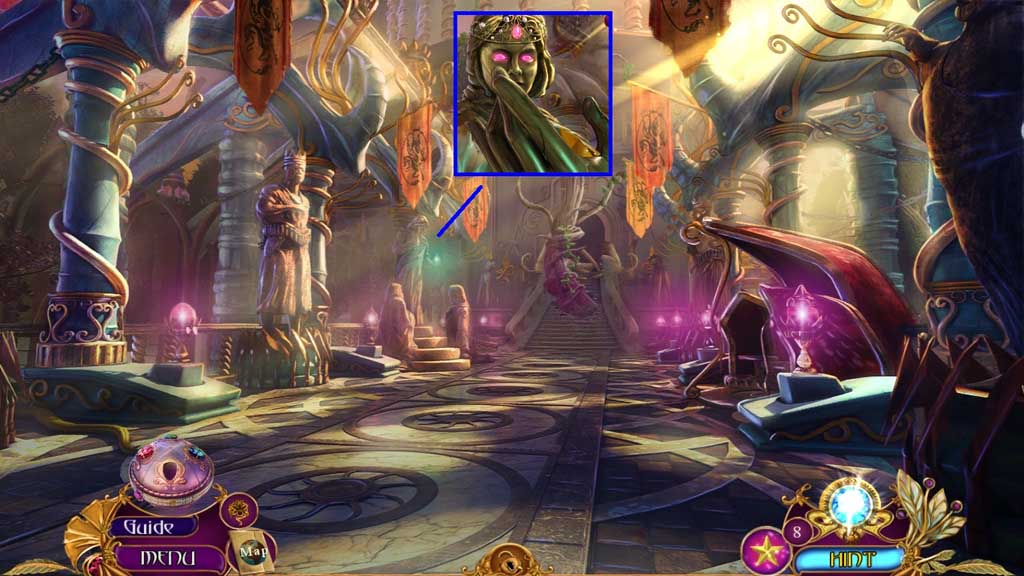
- Insert the 3 jewel eyes.
- Collect 2/5 shard fragments and 2/ 2 butterfly ornaments.
- Move ahead.
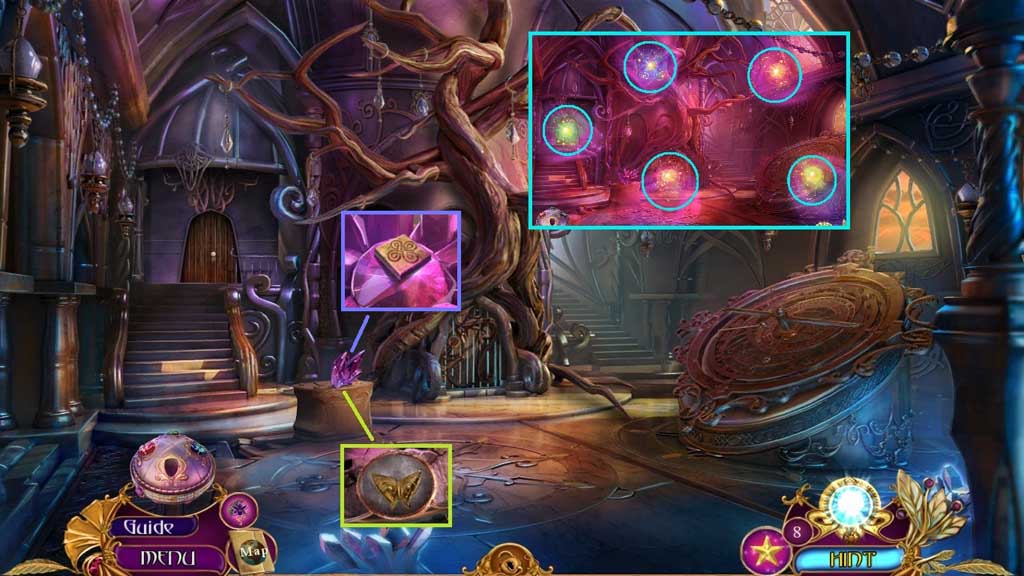
- Insert the 2 butterfly ornaments.
- Collect the 5 flower essences.
- Collect the square lock.
- Move left.
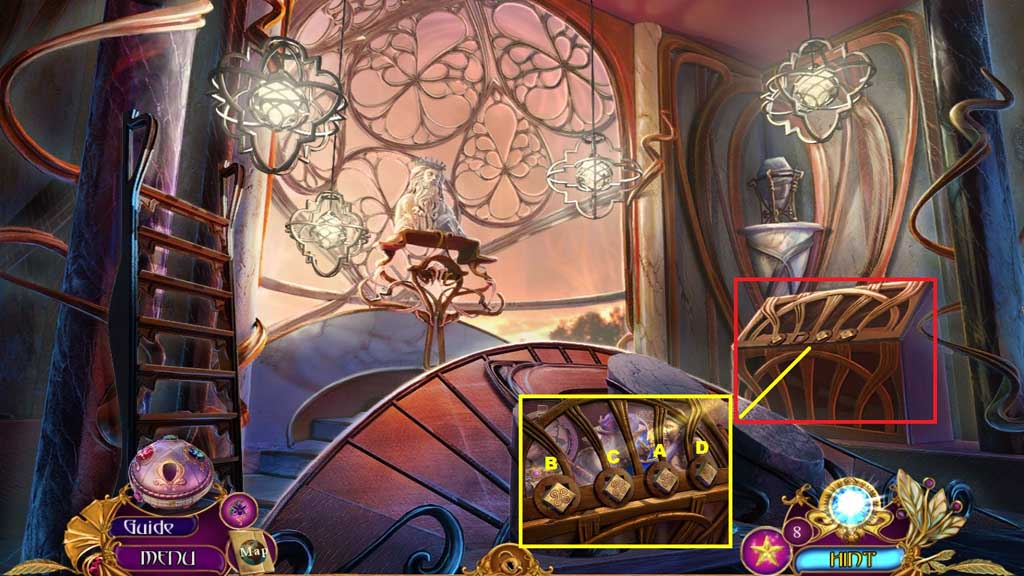
- Insert the square lock and click the squares in ABC order.
- Click the box open to trigger a hidden objects area.
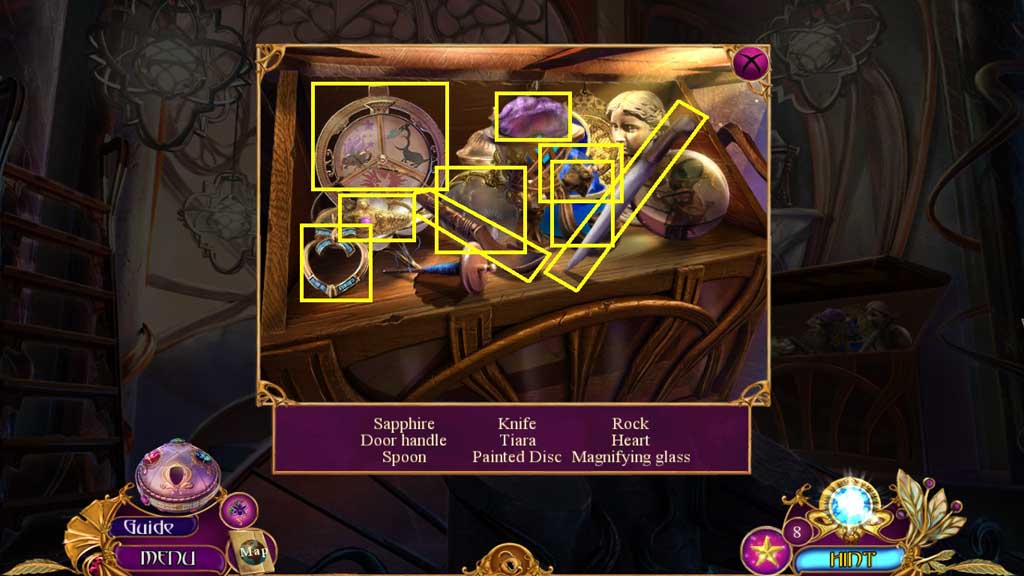
- Find the items.
- Collect the alidade.
- Move down once.
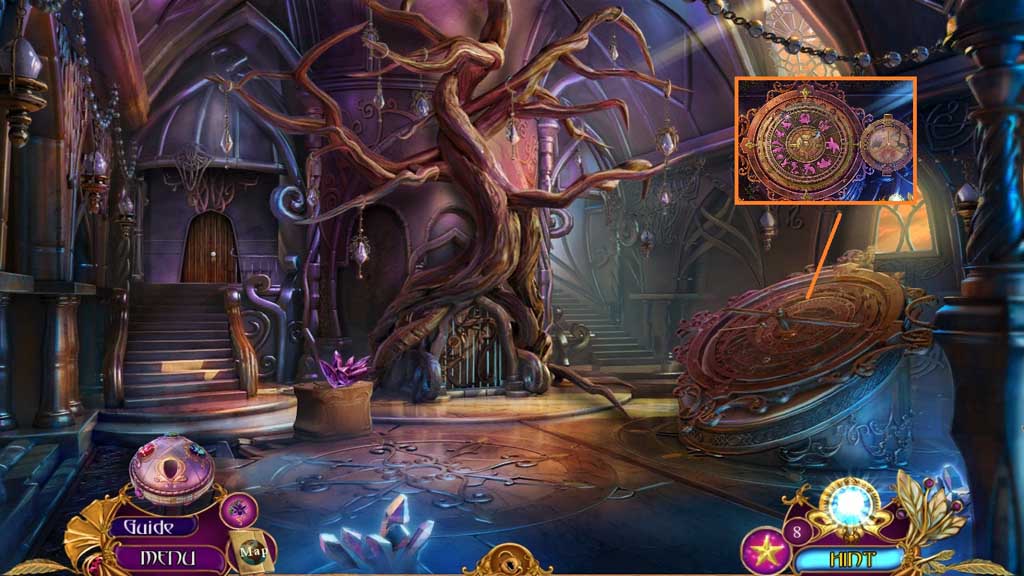
- Insert the alidade.
- Move down 2x’s.
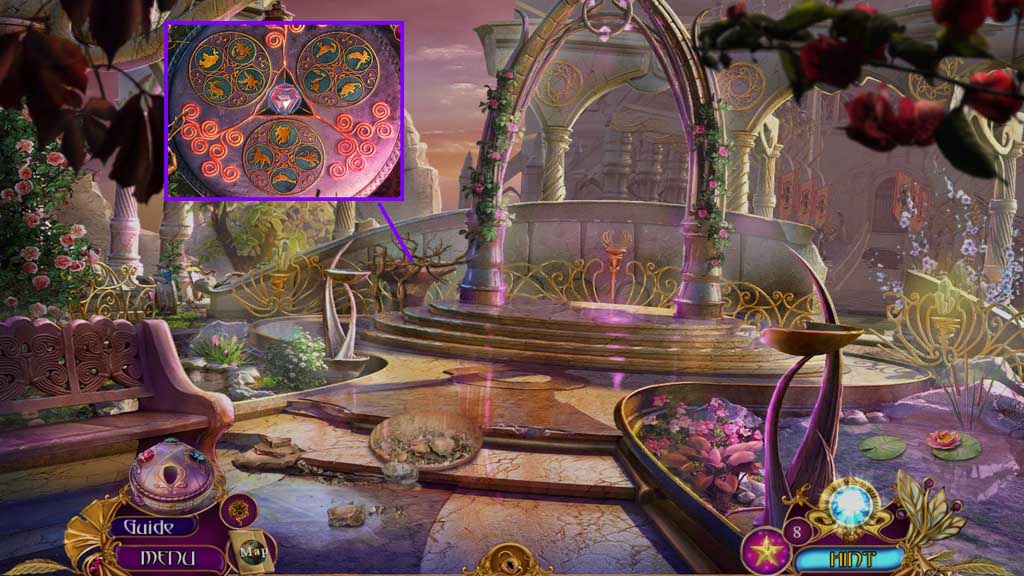
- Select the dragonfly dagger to remove the vines and insert the air crystal to trigger a mini game.
- Solve the game by aligning the discs correctly to charge the crystal.
- Collect the fire crystal.
- Move ahead 2x’s and go to the right.
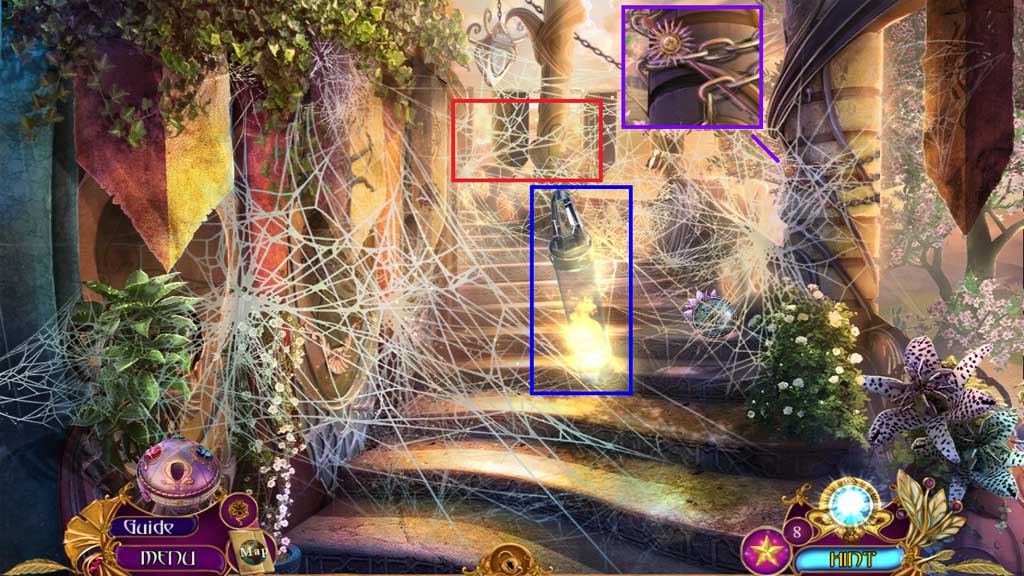
- Select the fire crystal to remove the cobwebs.
- Collect the sun.
- Click the hidden objects area.
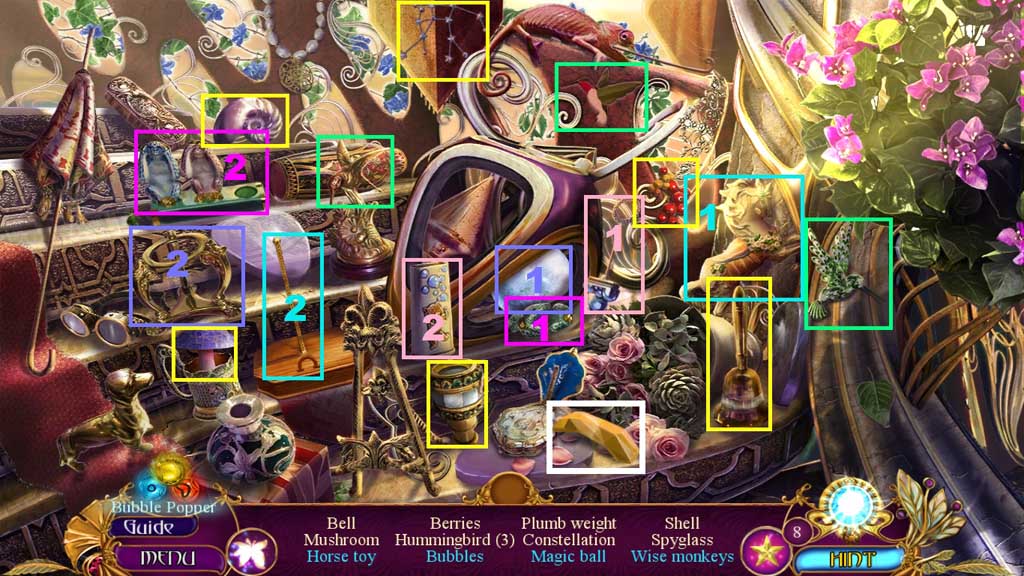
- Find the items.
- Select the horse and place it onto the base; collect the toy horse.
- Select the wand and insert it into the solution; collect the bubbles.
- Select the ball and place it onto the stand; collect the magic ball.
- Select the monkey and place it onto the base; collect the wise monkeys.
- Collect 3/5 shard fragments.
- Move ahead.
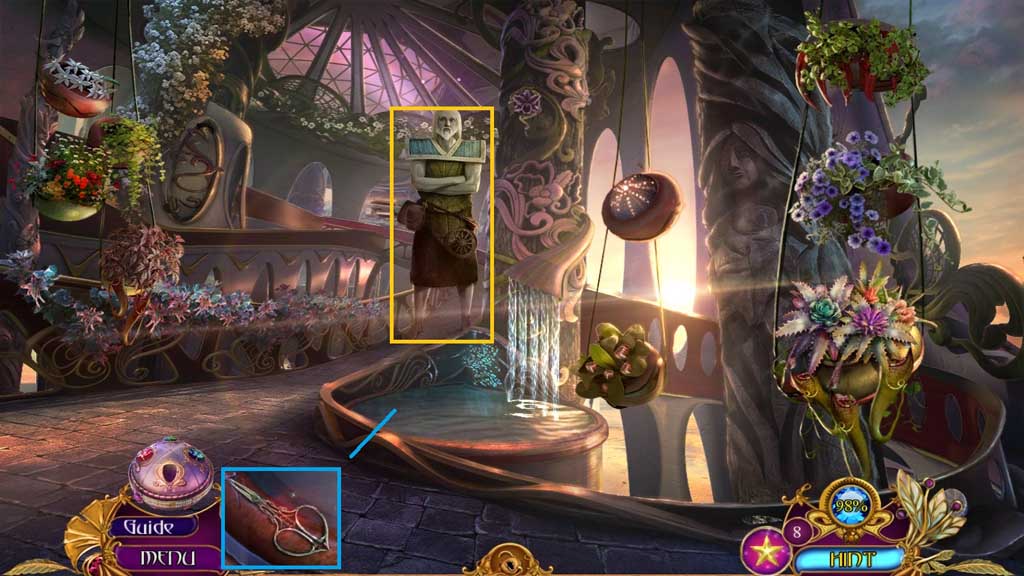
- Speak to the guardian.
- Collect the scissors.
- Move down once.
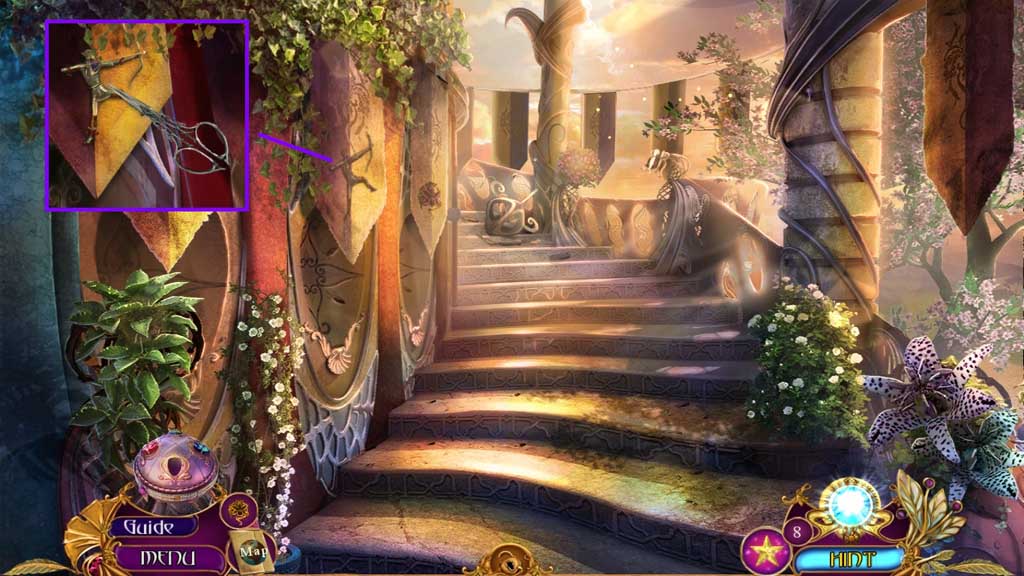
- Select the scissors to clip the threads.
- Collect the antehrian knight.
- Move ahead.
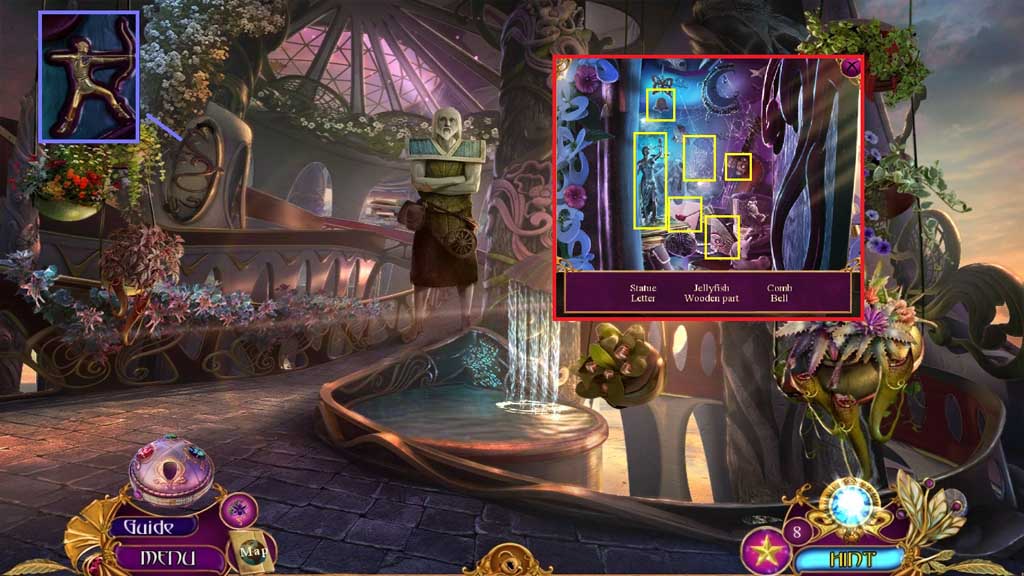
- Insert the antherian knight.
- Collect the 6 items; receive the wooden part.
- Move down 2x’s.
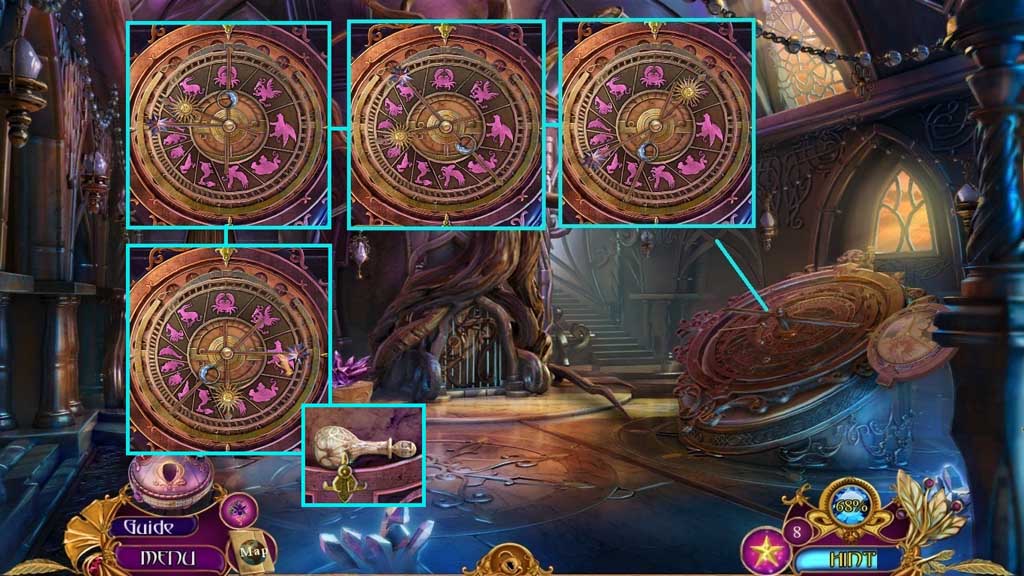
- Insert the sun to trigger a mini game.
- Solve the game by aligning the constellations to match the images on the right.
- Collect the fruit acid.
- Move to the right and go forward.
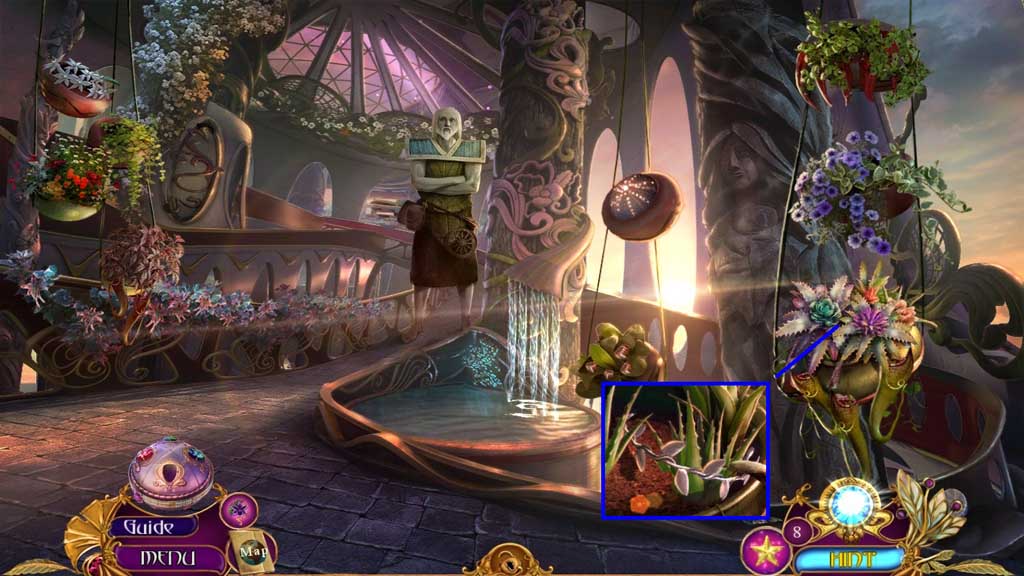
- Select the fruit acid to remove the cactus; collect the silver wreath.
- Move down 2x’s and move to the left.
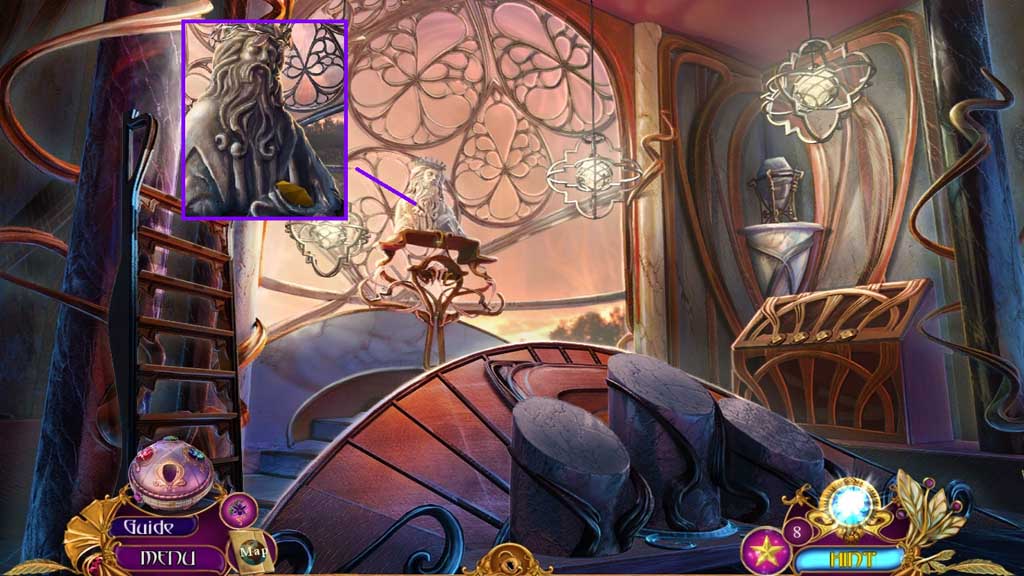
- Place the silver wreath; collect 4/5 shard fragments.
- Move down once.
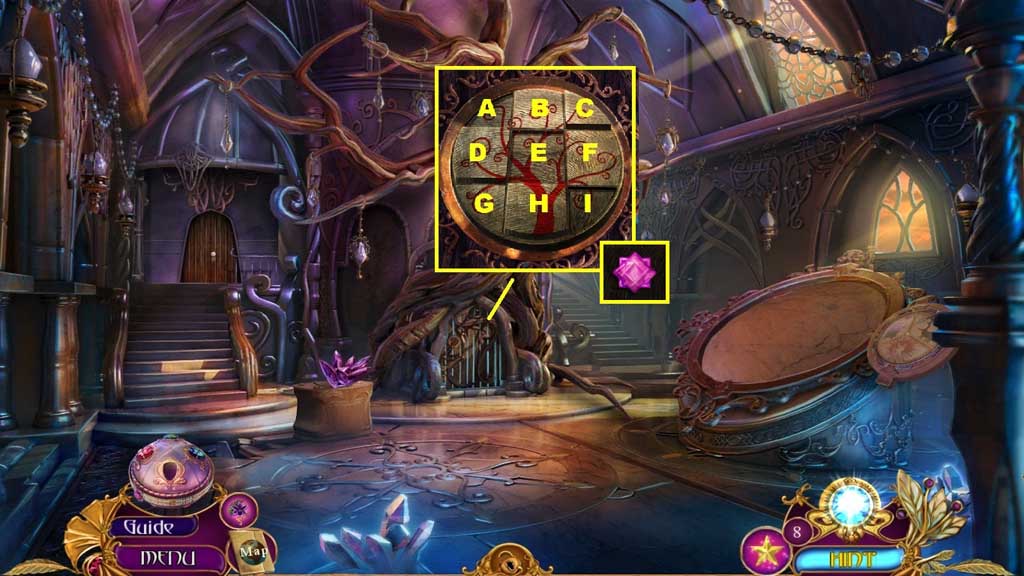
- Insert the wooden part to trigger a mini game.
- Solve the game by clicking the tiles until the image creates a continuous pattern.
- Use the following sequence to solve: E x 1 – H x 2 – F x 1 – D x 3 – G x 3 – A x 2 – C x 2 – B x 1 – I x 2
- Collect the freezing crystal.
- Move to the right and ahead once.
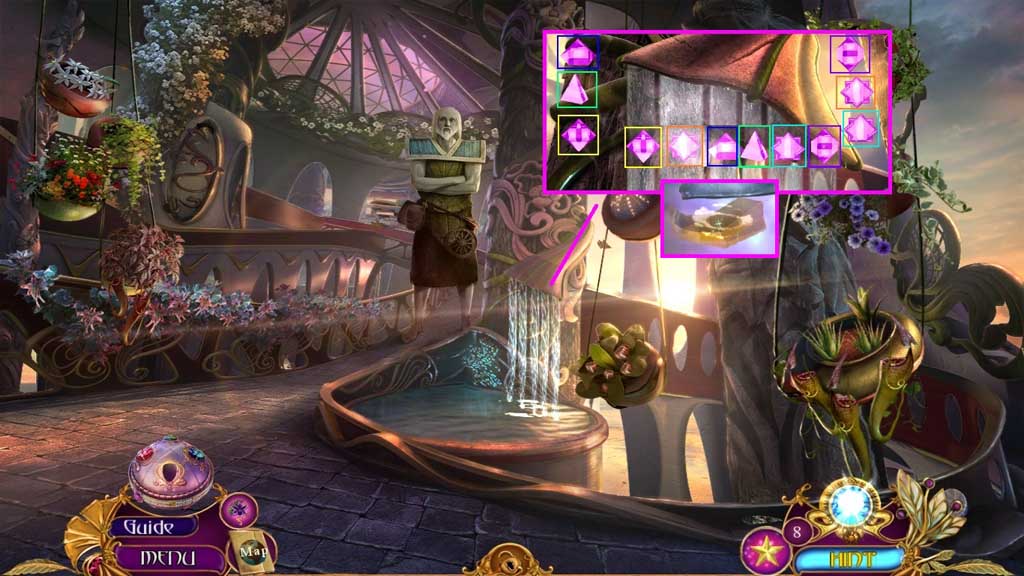
- Zoom into the waterfall.
- Insert the freezing crystal to trigger a mini game.
- Solve the game by arranging the shapes correctly to freeze the water flow.
- Collect 5 /5 shard fragments.
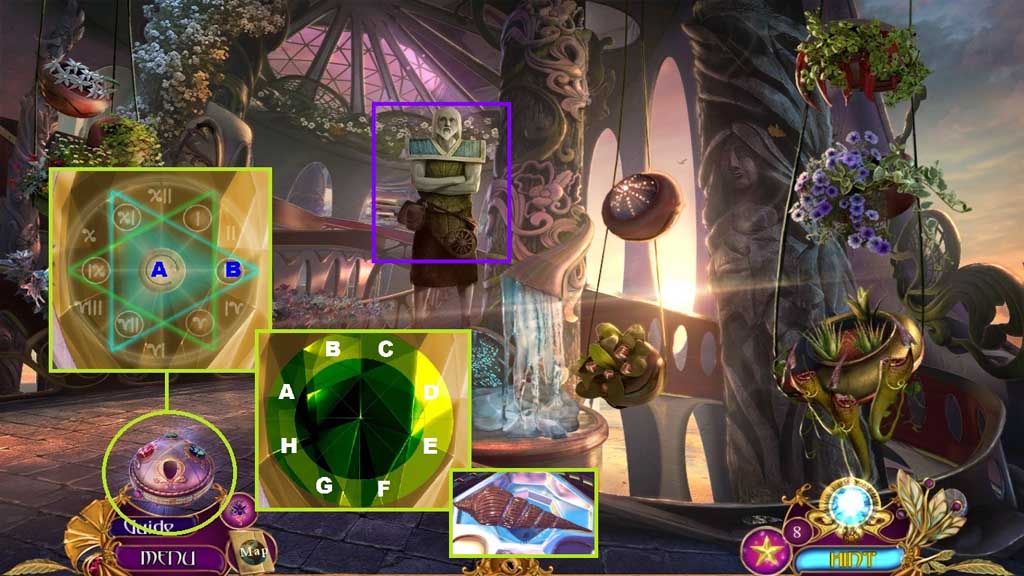
- Insert the 5 shard fragments into the orb to trigger a mini game.
- Solve the game by arranging the number in the correct order.
- Use the following sequence to solve: A x 5 – B x 1
- Another mini game will trigger.
- Solve the game by clicking the sections in the following sequence to solve: F – B – H – D – C – G – A – E
- Collect the shell and give it to the guard.
- Move ahead.
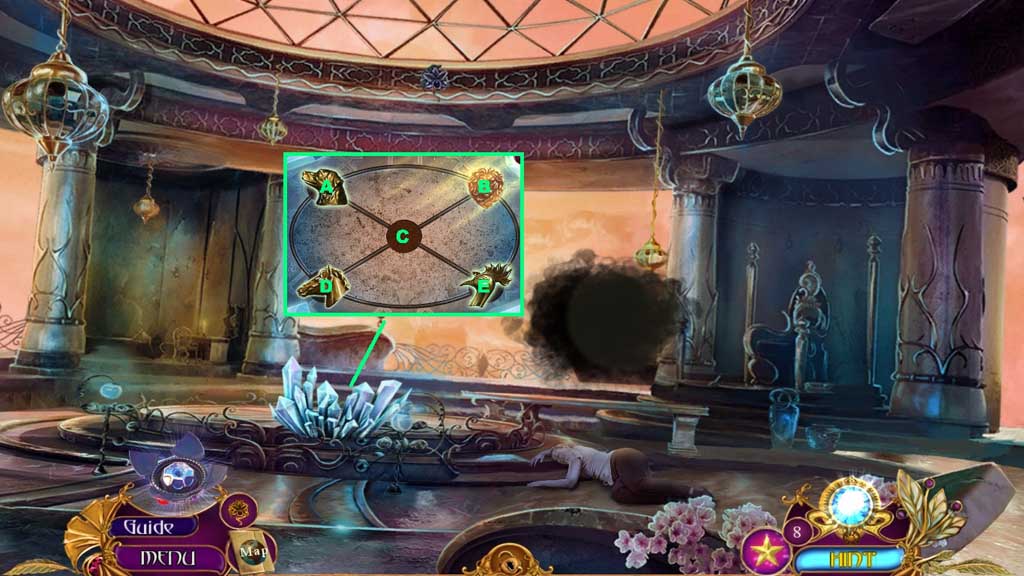
- Insert the Phoenix head to trigger a mini game.
- Solve the game by moving the animals to the correct slots.
- Use the following sequence to solve: E – B – A – C – D – E – B - C
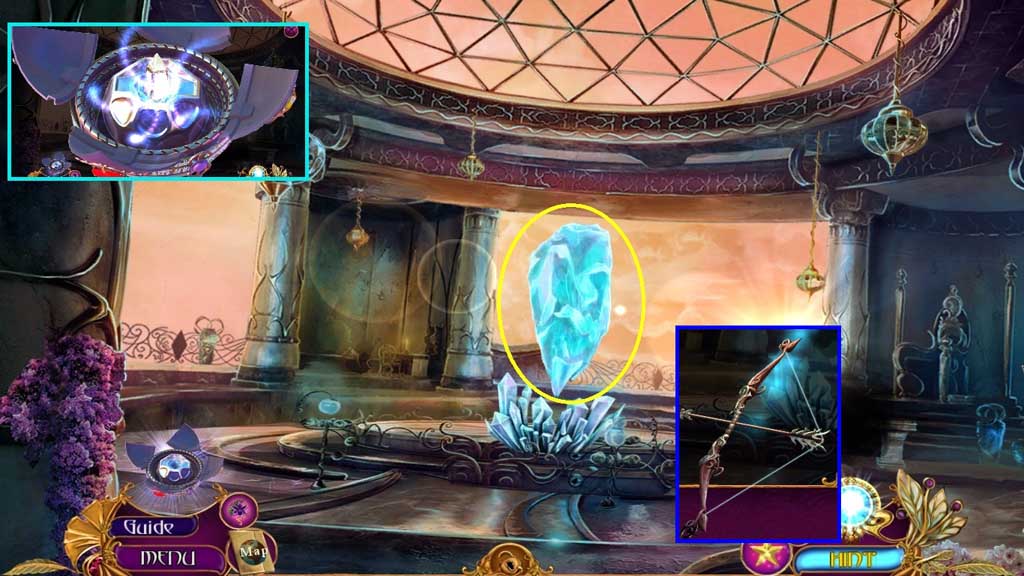
- Insert the white essence catcher into the orb; receive the orb with harmonium and use it on the large crystal to receive the charmed arrow.
- Insert the charmed arrow onto the bow; collect the bow with charmed arrow.
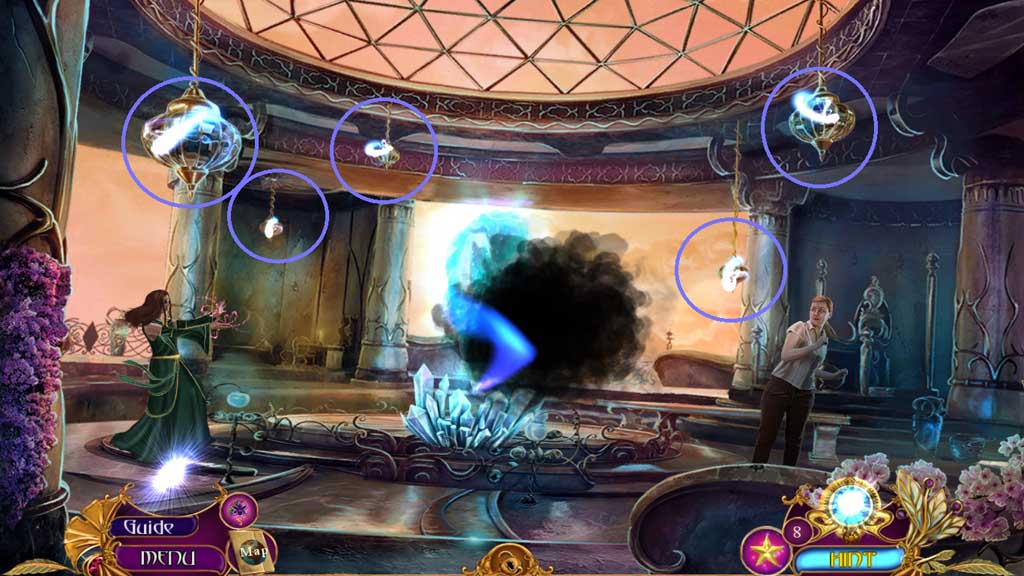
- Click the 5 lamps.
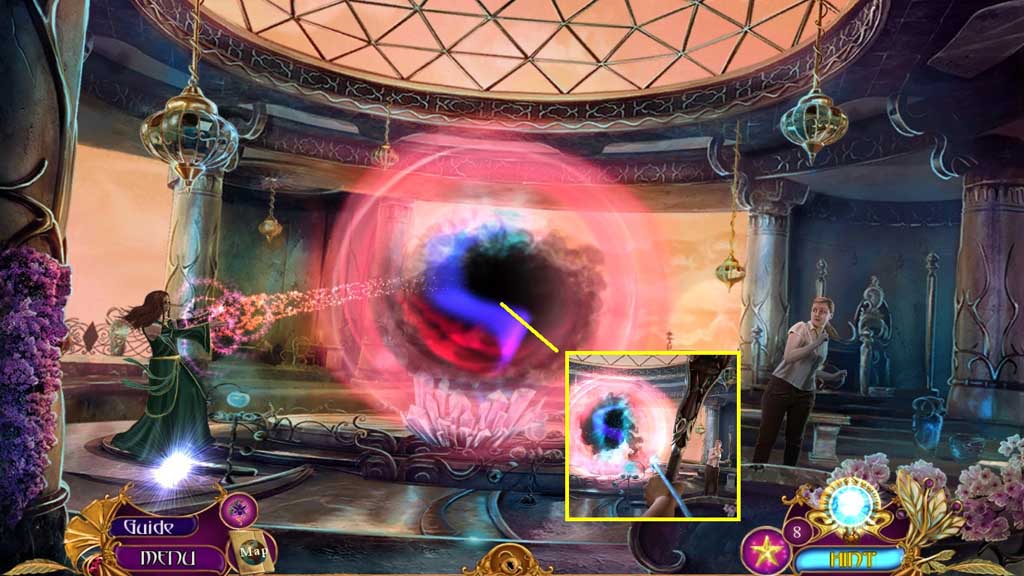
- Select the bow with charmed arrow and shoot it towards the sphere.
- Congratulations! You have successfully completed the main game of Amaranthine Voyage: The Shadow of Torment C. E.
Comments will load when you reach this part of the walkthrough.