
Chapter Three: The Palace Terrace
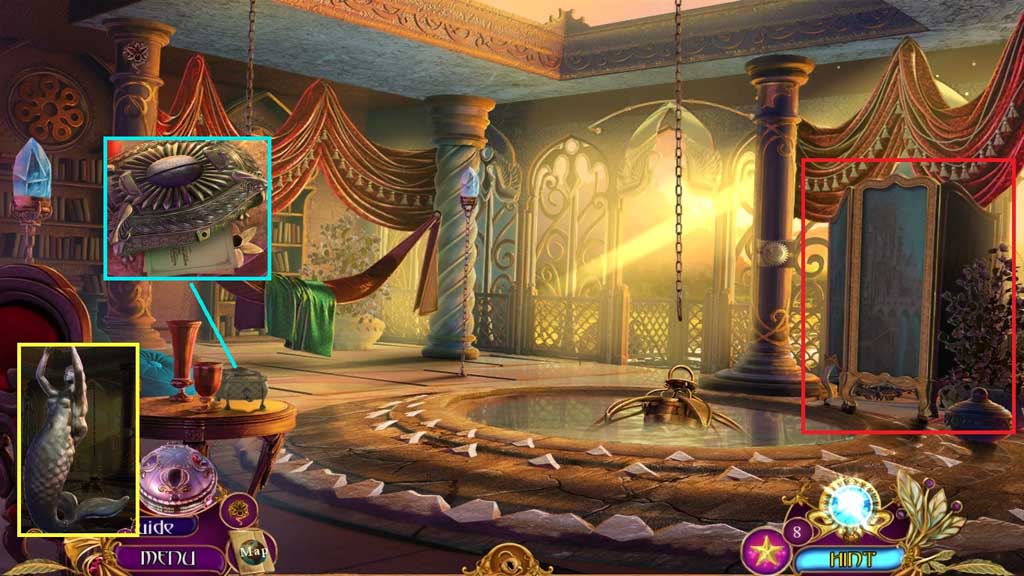
- Attach the tail hook onto the mermaid torso; collect the mermaid hook.
- Collect the notes and the stone daffodil.
- Click the room divider to trigger a hidden objects area.
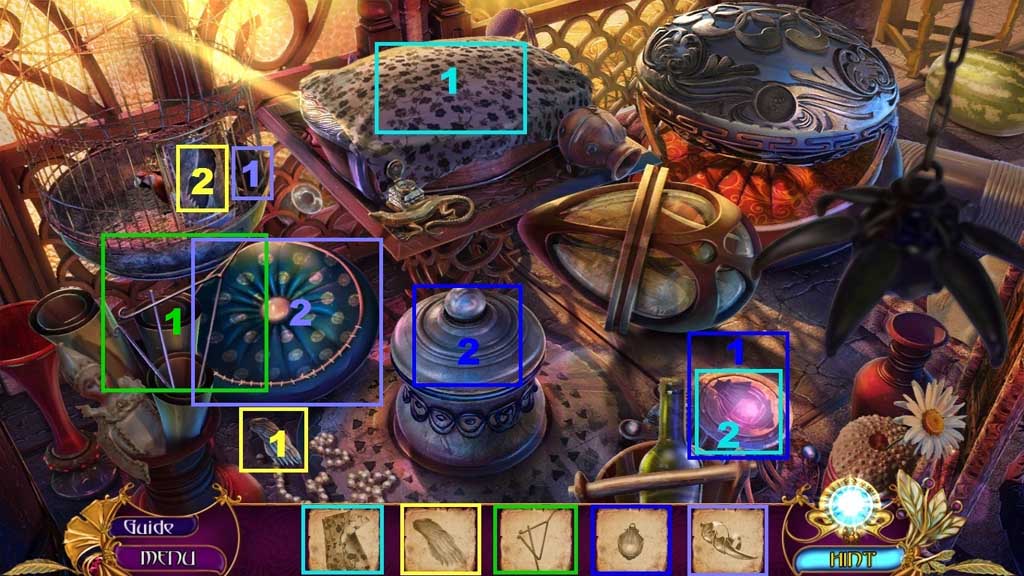
- Find the items.
- Insert the winged emblem; click aside the hay to collect the claw ring.
- Select the claw ring to slice open the pillow and trigger a mini game.
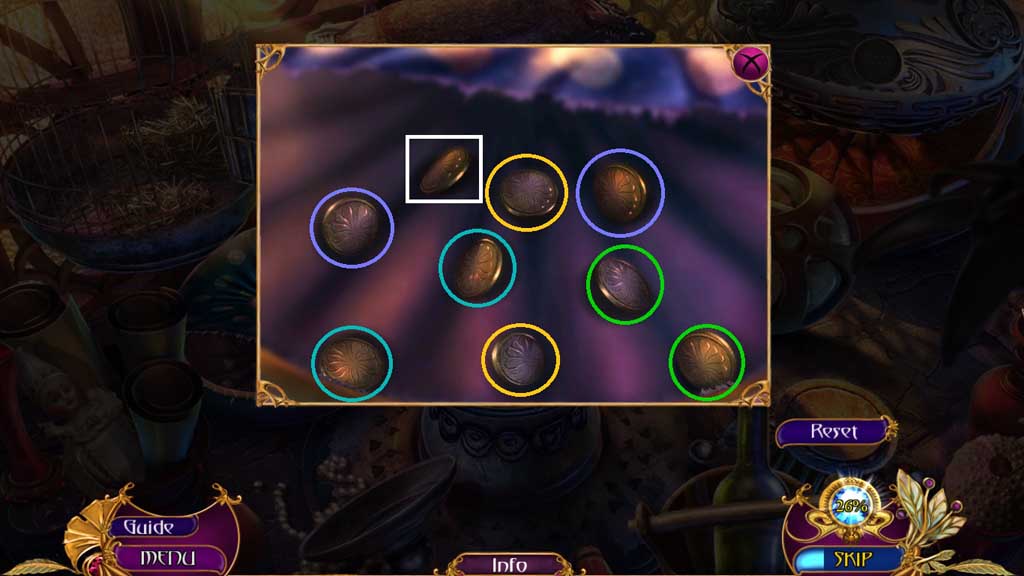
- Solve the game by finding the matching coins; collect the coin.
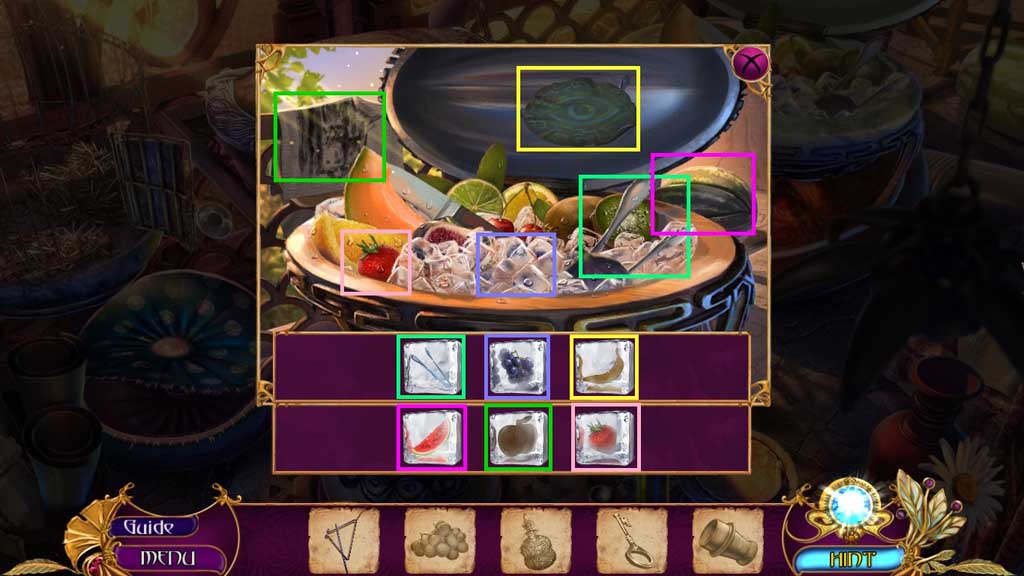
- Insert the coin into the trinket to trigger a mini hidden objects area.
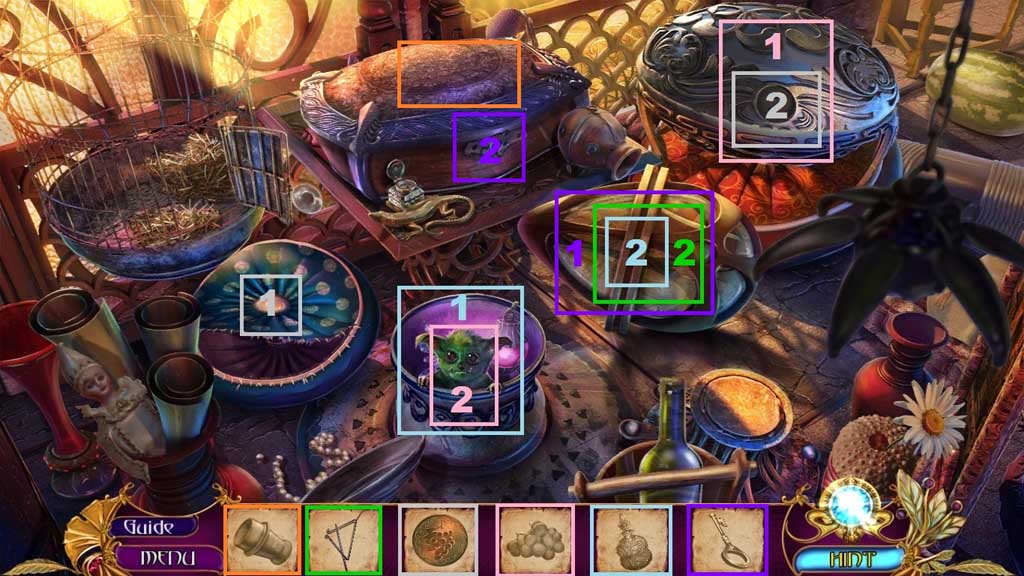
- Find the items; click the cloth to uncover the apple, click the eye to uncover the banana, click the ice to collect the grapes.
- Select the cloth to collect the lantern.
- Click the jar and insert the lantern; give the creature the grapes.
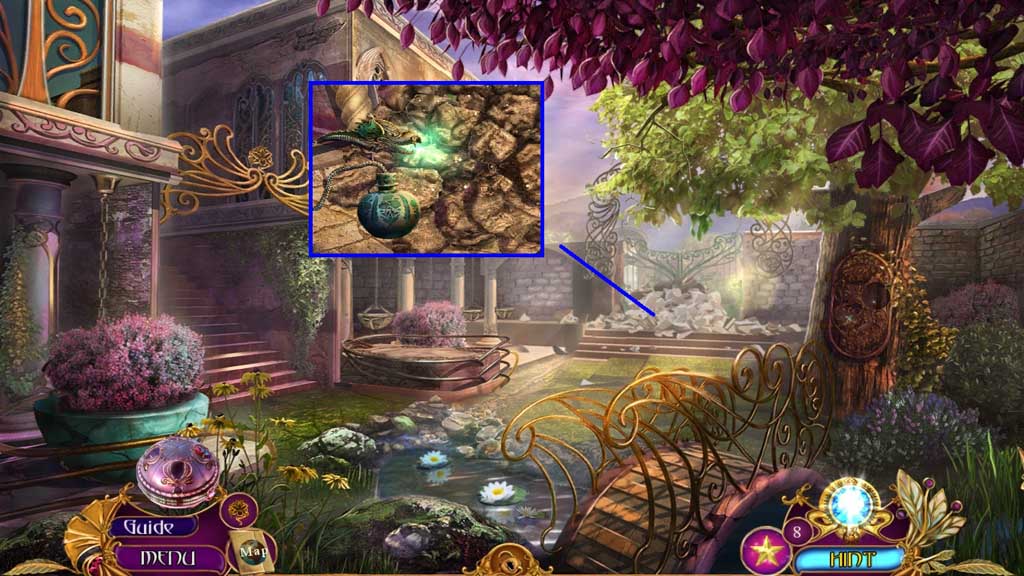
- Collect the freezing potion and use it on the strange egg shaped orb.
- Select the triangle to crack it open; move the shards aside and collect the key.
- Insert the key into the lock.
- Collect the eyepiece.
- Collect 1 /3 rune pebbles.
- Attach the mermaid hook.
- Click the lever to trigger a hidden objects area.

- Find the items.
- Collect 2 /3 rune pebbles.
- Move down 3x’s.
- Insert the stone daffodil; collect the wind up key and 3 /3 rune pebbles.
- Move to the Palace Garden.

- Insert the 3 rune pebbles to trigger a mini game.
- Solve the game by arranging the runes correctly.
- Click the compartment; collect the prince figurine.
- Move to the left.
- Place the prince and the princess figurines and insert the wind up key.
- Collect the levitation spray and 1 /3 emblem pieces.
- Move down once.
- Select the levitation spray to remove the rocks.
- Move ahead.
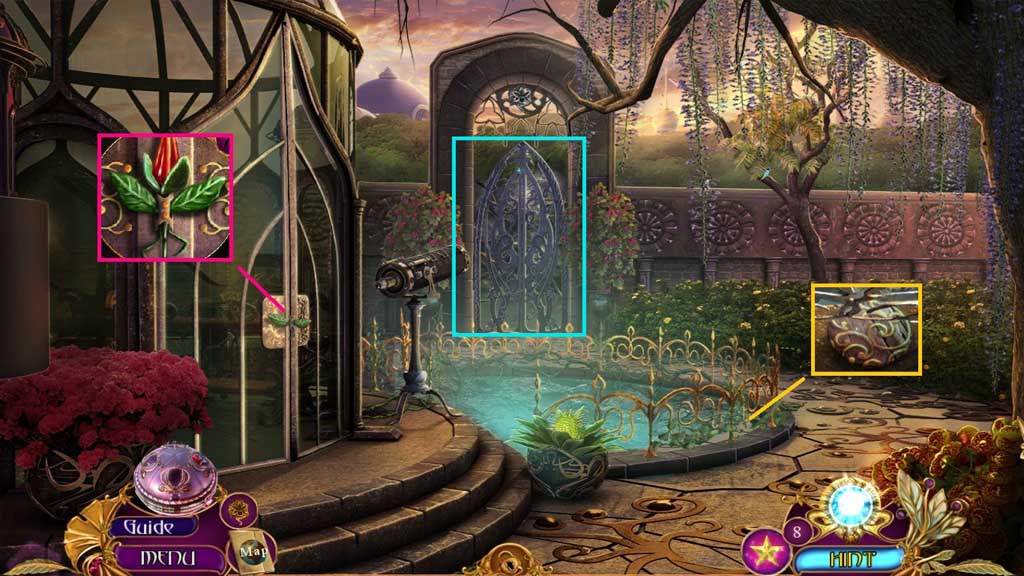
- Insert the porcelain tulip.
- Collect the patterned piece.
- Zoom into the gate.
- Collect 3/ 5 shard fragments.
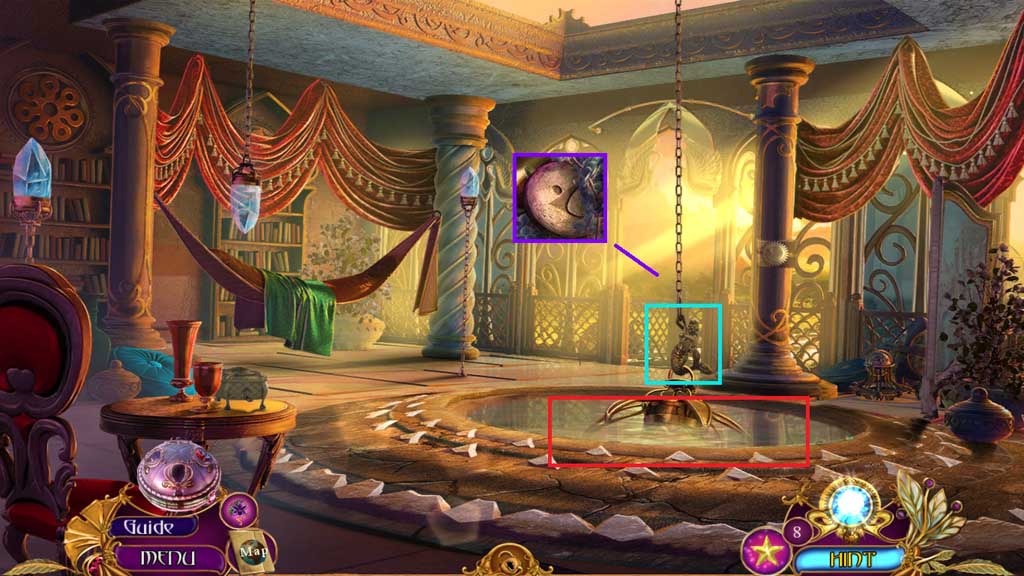
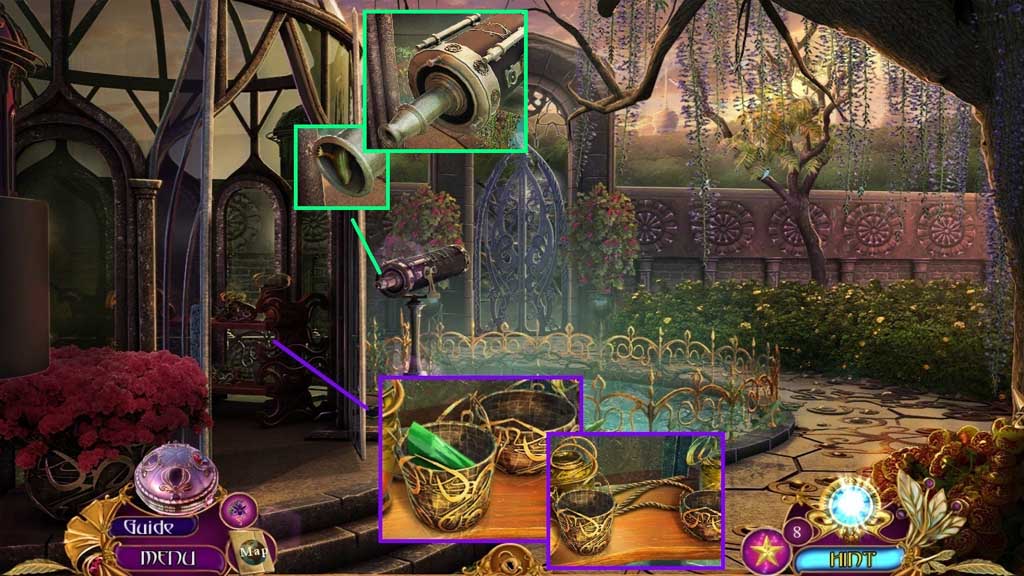
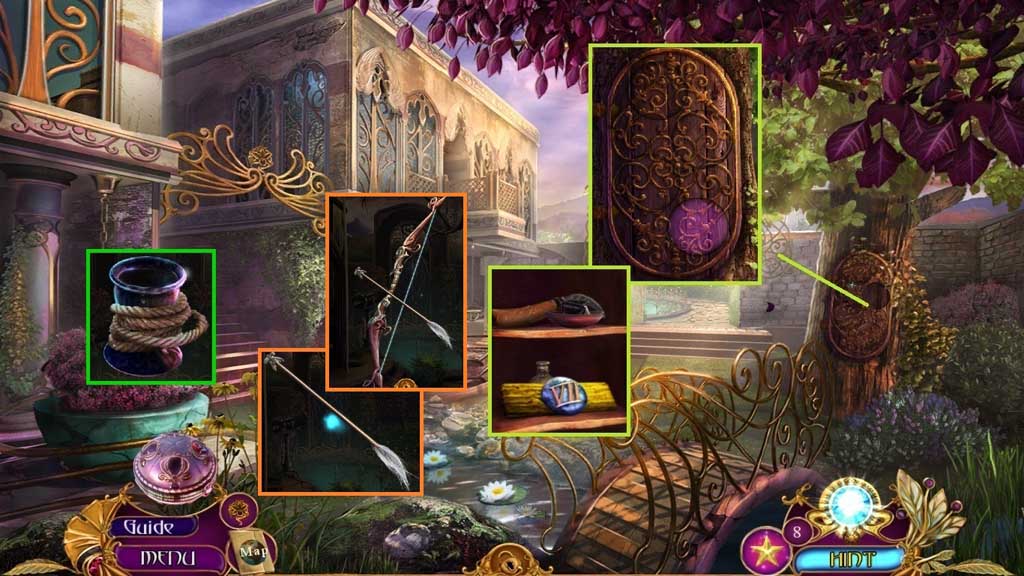
- Click the 2 bowls; collect the rope.
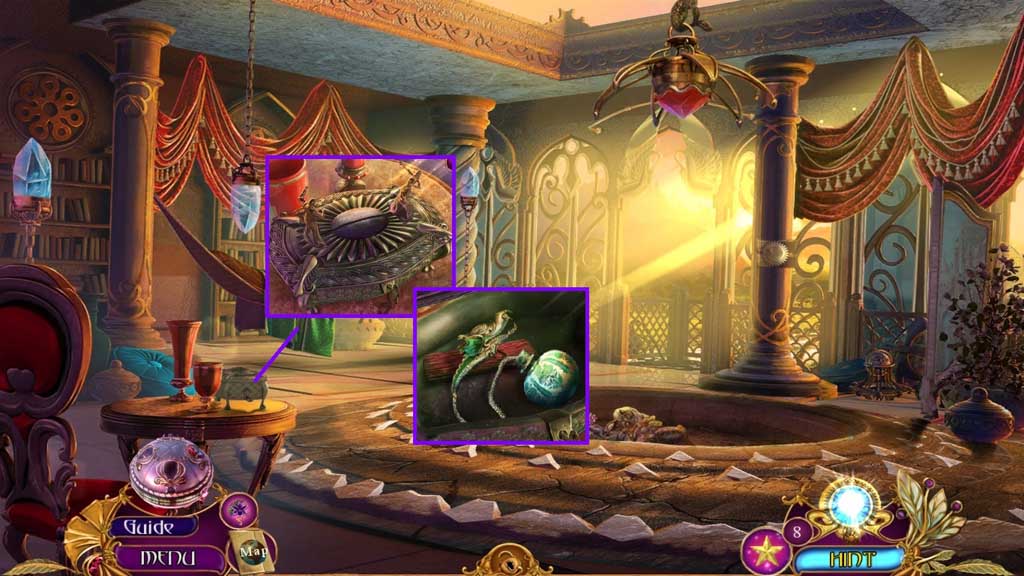
- Collect the porcelain gecko.
- Attach the eyepiece onto the telescope.
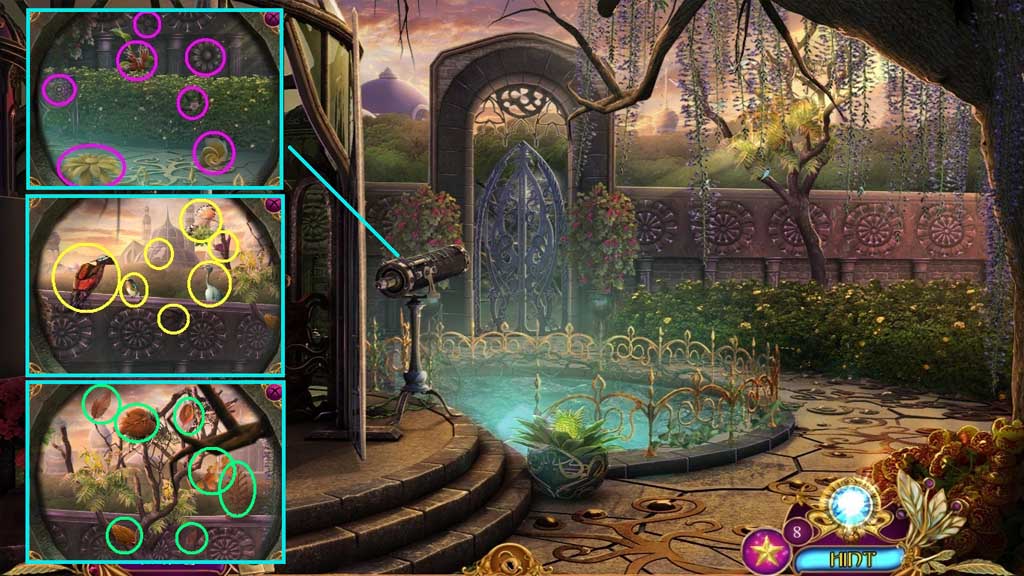
- Zoom into the telescope to trigger a mini game.
- Solve the game by finding the items.
- Move down 2x’s.
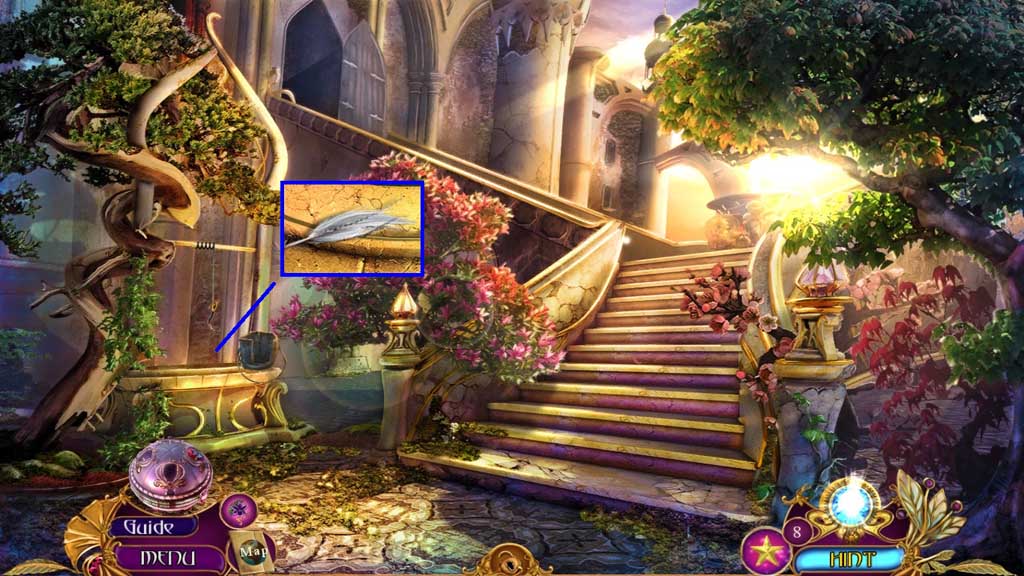
- Collect the white feather.
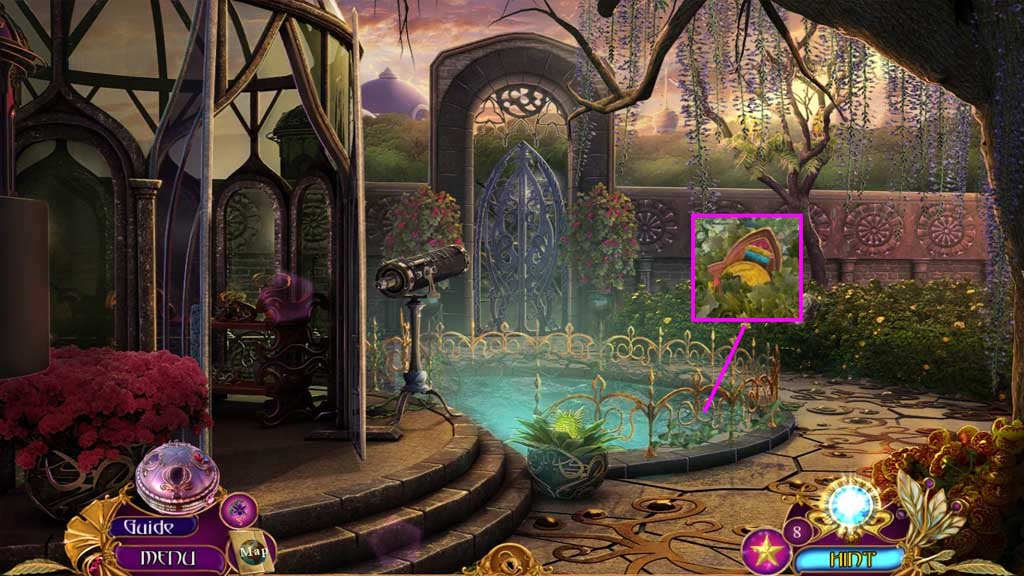
- Move to the Palace Garden.
- Insert the patterned piece to trigger a mini game.
- Solve the game by arranging the discs to complete the pattern.
- Collect 1 /2 golden numbers, 2 /3 emblem pieces and the pruning knife.
- Place the rope onto the vase; collect the vase with rope.
- Click the faulty arrow; use the pruning knife and the white feather on the faulty arrow; collect the twig arrow.
- Place the twig arrow into the bow; collect the bow with arrow.
- Move ahead.
![]()
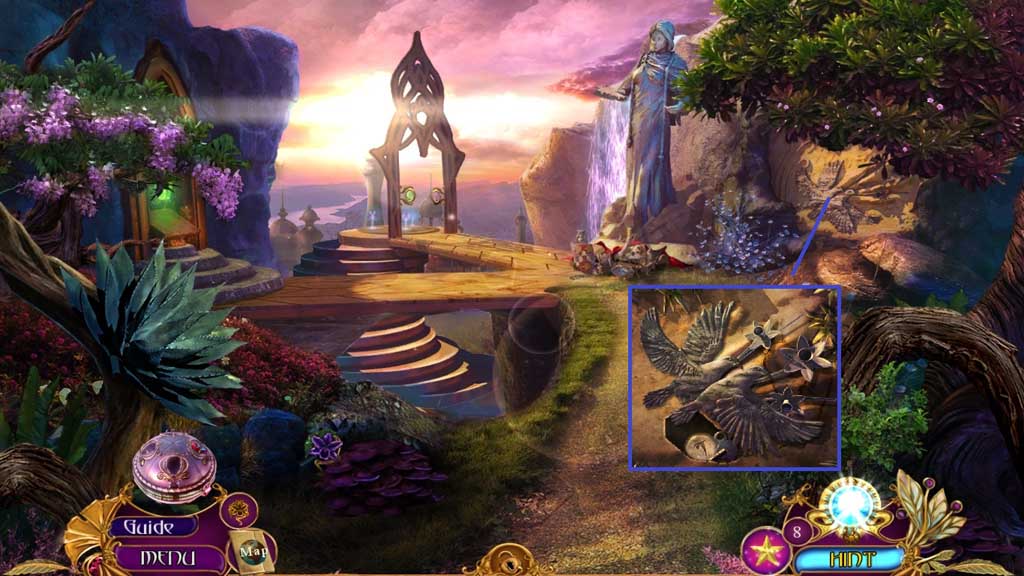
- Shoot the bow and arrow toward the nest.
- Collect 2 /2 golden numbers and 3 /3 emblem pieces.
- Move down 2x’s.

- Place the vase with rope into the well.
- Collect the growth potion.
- Move to the Palace Courtyard.
- Select the growth potion to grow the ferns.
- Collect the emblem.
- Move down once and go to the left.
- Zoom into the emblem.
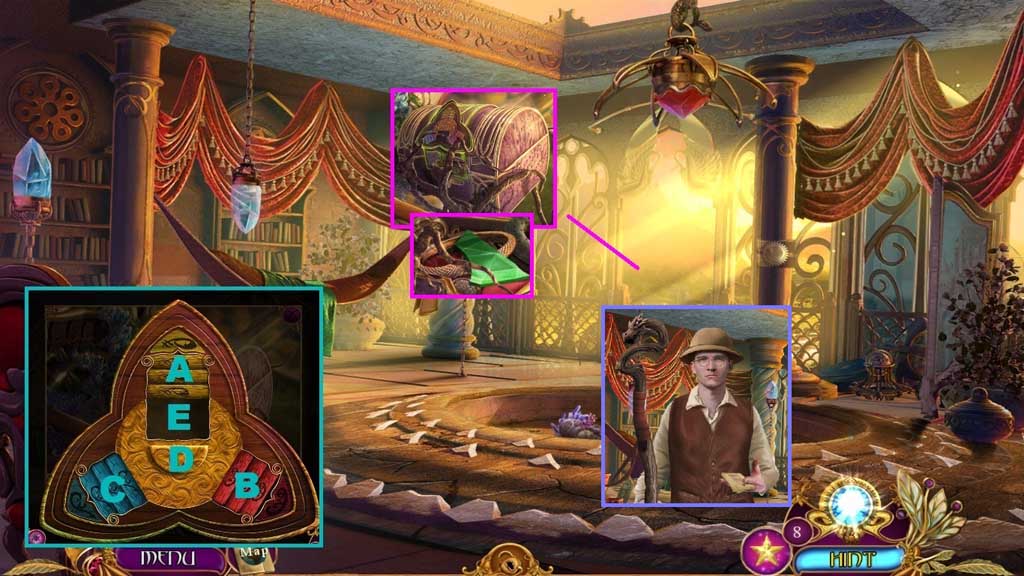
- Insert the 3 emblem pieces into the emblem to trigger a mini game.
- Solve the game by filling each compartment with the same color.
- Use the following sequence to solve: A x 2 – D – B – D x 2 - E – D – B – D x 2 – E – D x 2 – C – D x 2 – E – D x 2 – A – D – E – D – C – D – E – D x 2 – E – D x 2 – B – D – E – D x 2 – E
- Insert the chest emblem; collect 4 /5 shard fragments and the diamond bracelet.
- Collect the path instructions.
- Move down once and move ahead.
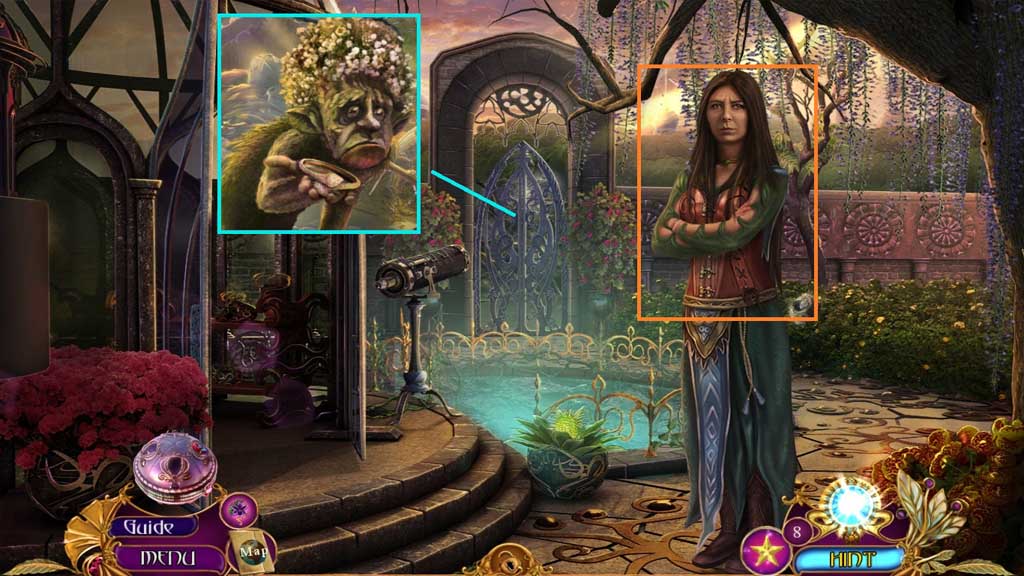
- Speak to the woman.
- Give the creature the diamond bracelet.
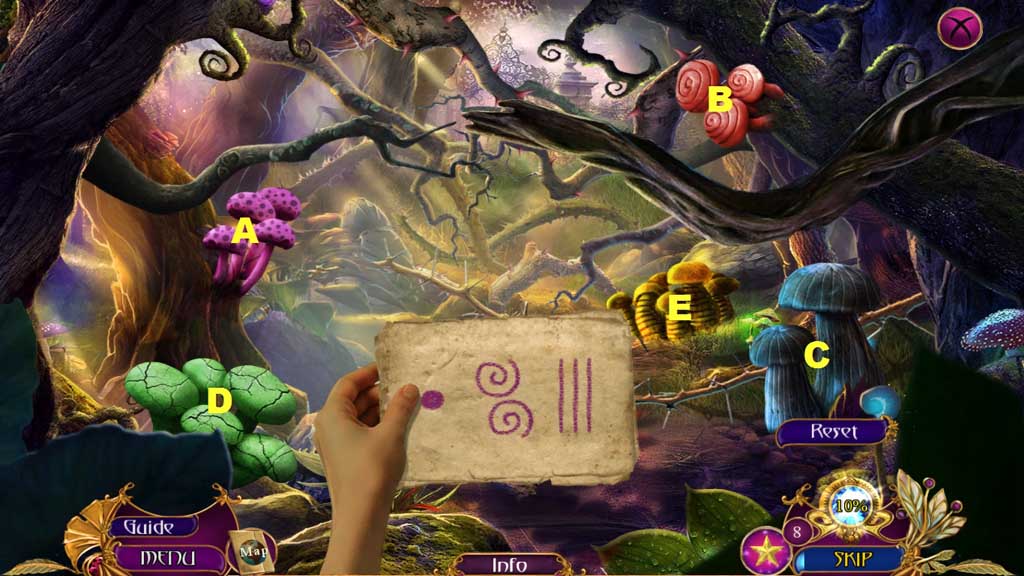
- Select the path instructions to trigger a mini game.
- Solve the game by clicking the mushrooms based on the icons shown on the instructions.
- Use the following sequence to solve: A –B – C – B –A – D – C – A – E – D – C – B
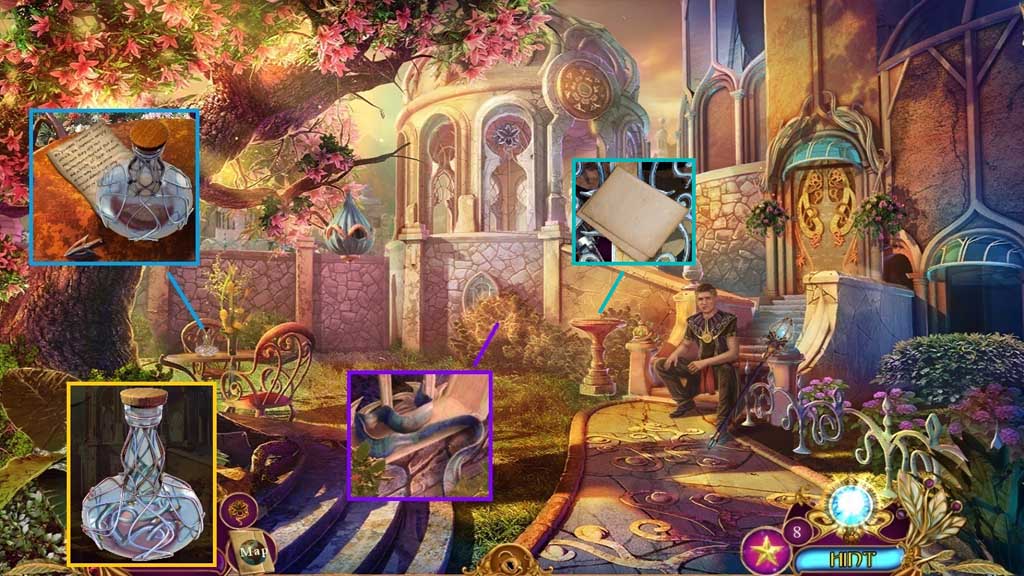
- Collect the note, the miniature arrow head and the bottle.
- Select the leather gloves to remove the bushes.
- Collect the curtain tie.
- Click the bottle open.
- Collect the note and 5/ 5 shard fragments.
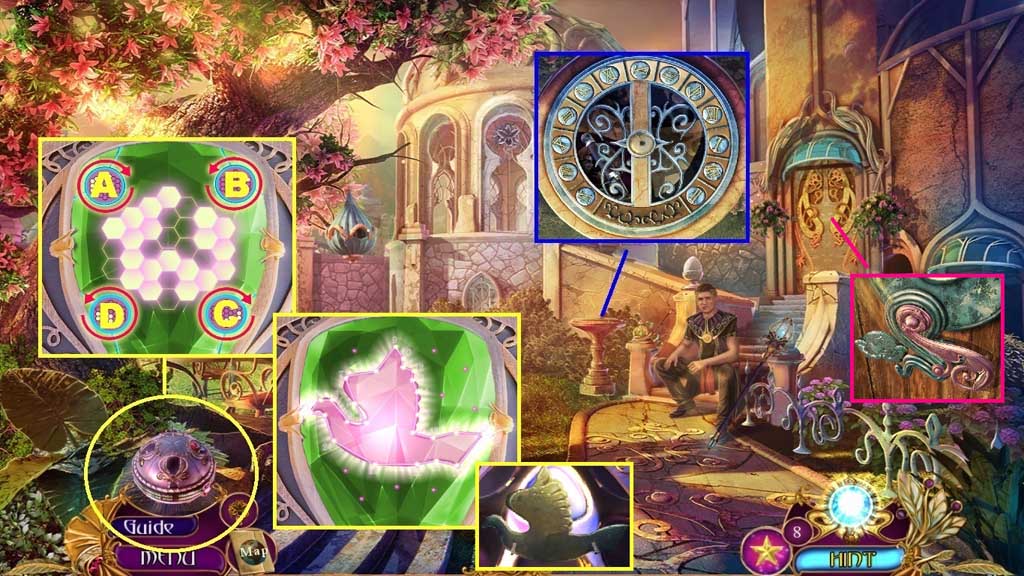
- Insert the 2 golden numbers.
- Insert the 5 shard fragments into the orb to trigger a mini game.
- Use the following sequence to solve the 1st part: A – C – C – C – D – D – B
- Then connect the dots to solve the 2nd part.
- Collect the turtledove shape; insert it into the door.
- Move to the right.
Comments will load when you reach this part of the walkthrough.