
Chapter Two: The Wayshrine
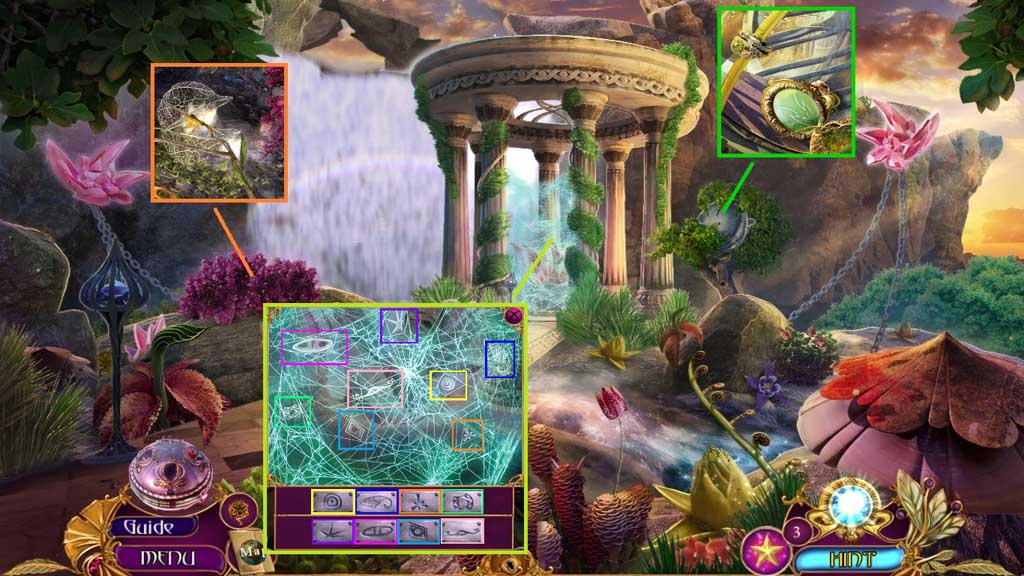
- Place the fruit husk into the bush.
- Select the twig with nectar to lead the fireflies into the husk; collect the trapped fireflies.
- Attach the ornate knob and click it once.
- Collect the lens and the bowl of fruits.
- Find the 8 symbols; collect the strong silk thread.
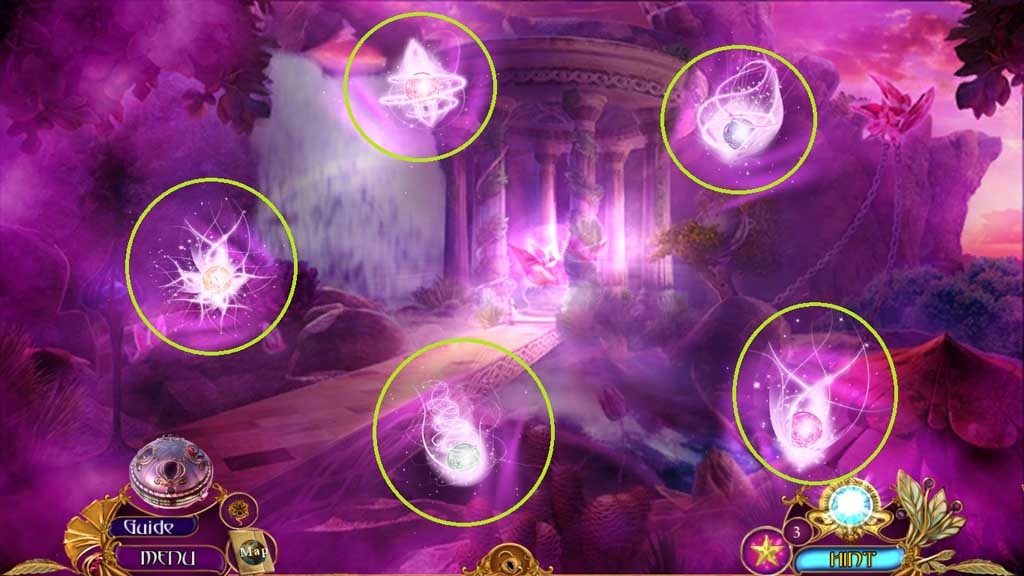
- Collect the flower essences.
- Move down once.
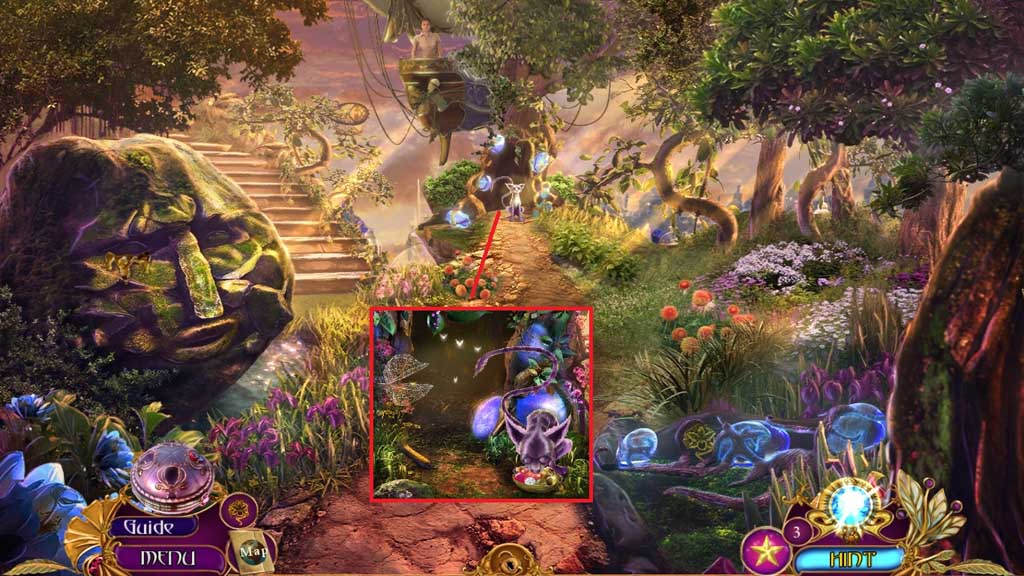
- Place down the bowl of fruits and the place trapped fireflies into the cave to trigger a hidden objects area.
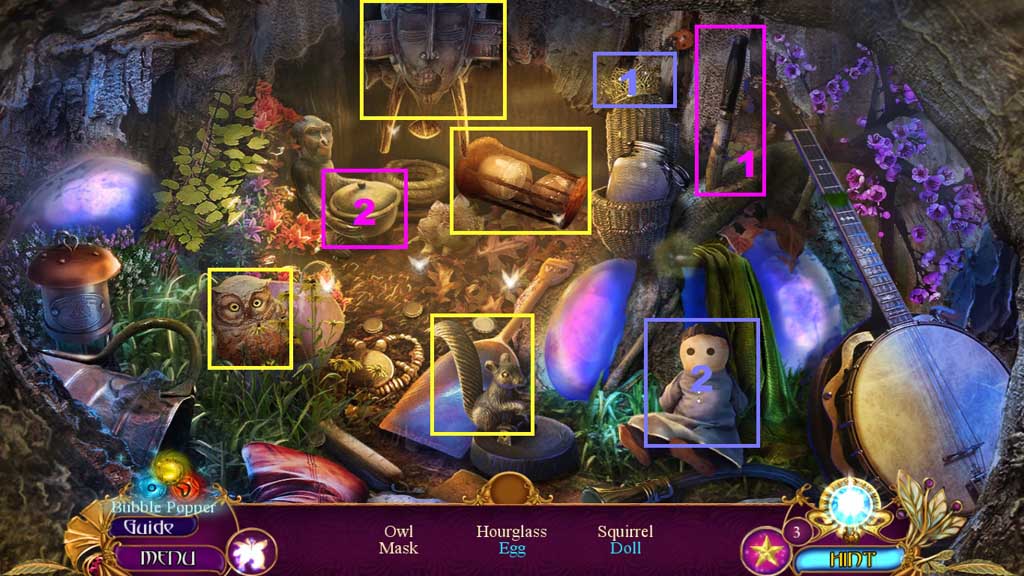
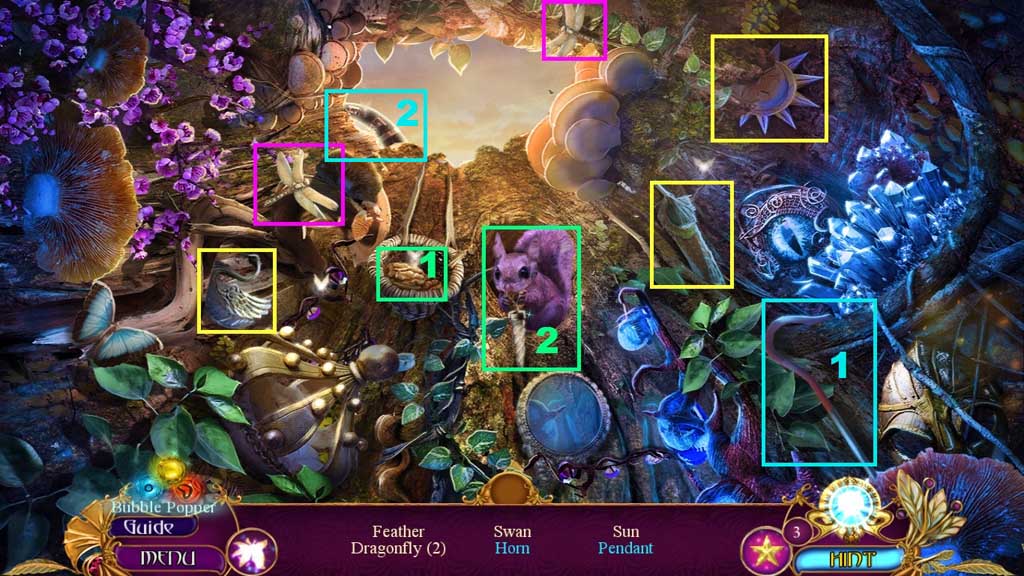
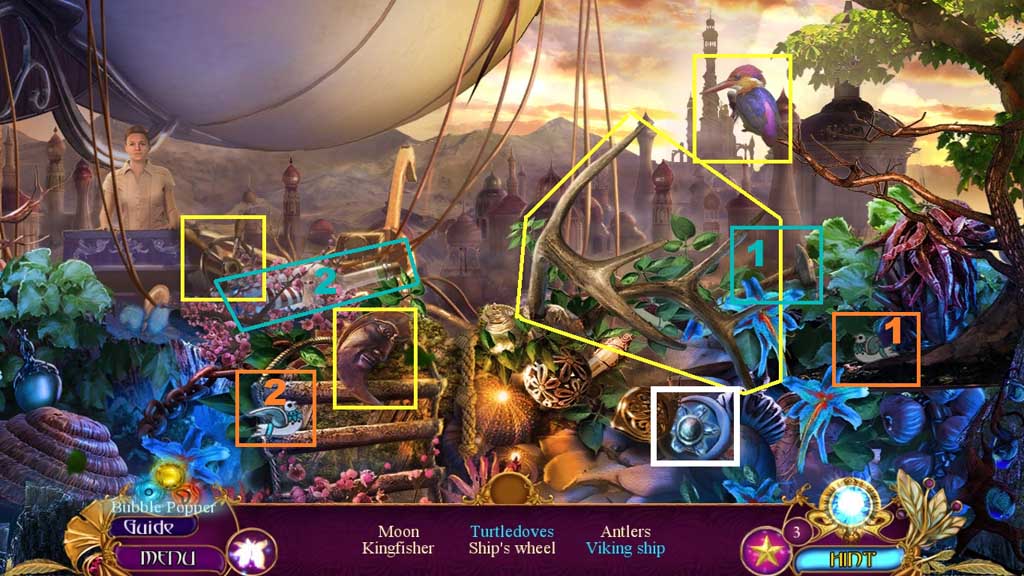
- Find the items.
- Select the dagger to pry the lid off of the pot; collect the egg.
- Select the tiara and place it onto the doll; collect the doll.
- Select the hook to collect the horn.
- Select the nut and give it to the squirrel; collect the pendant.
- Select the turtledove and place it along with the other; collect the turtledoves.
- Select the hammer to smash the bottle; collect the Viking ship.
- Collect the flower emblem.
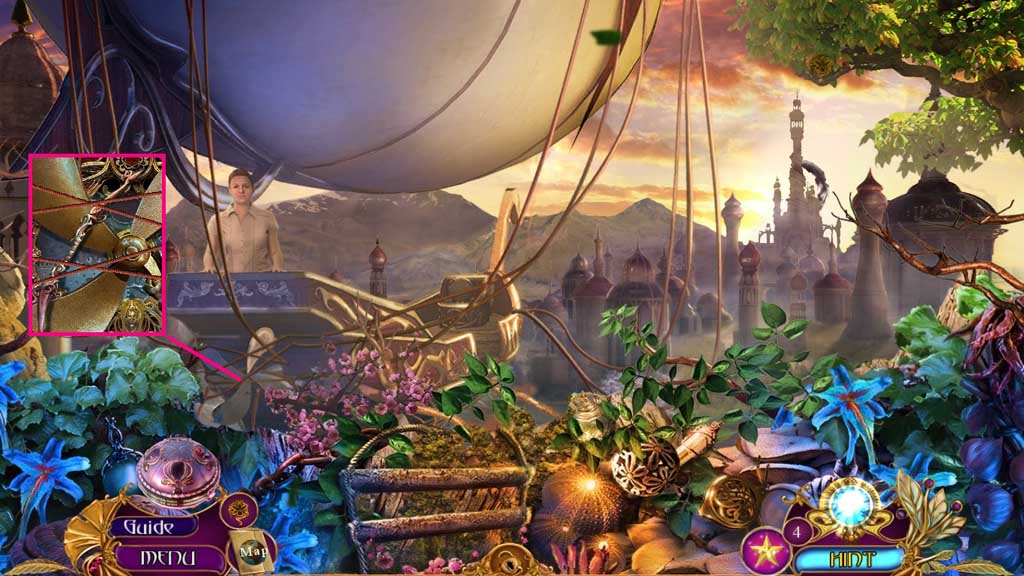
- Collect the bow.
- Move down once and go to the left.
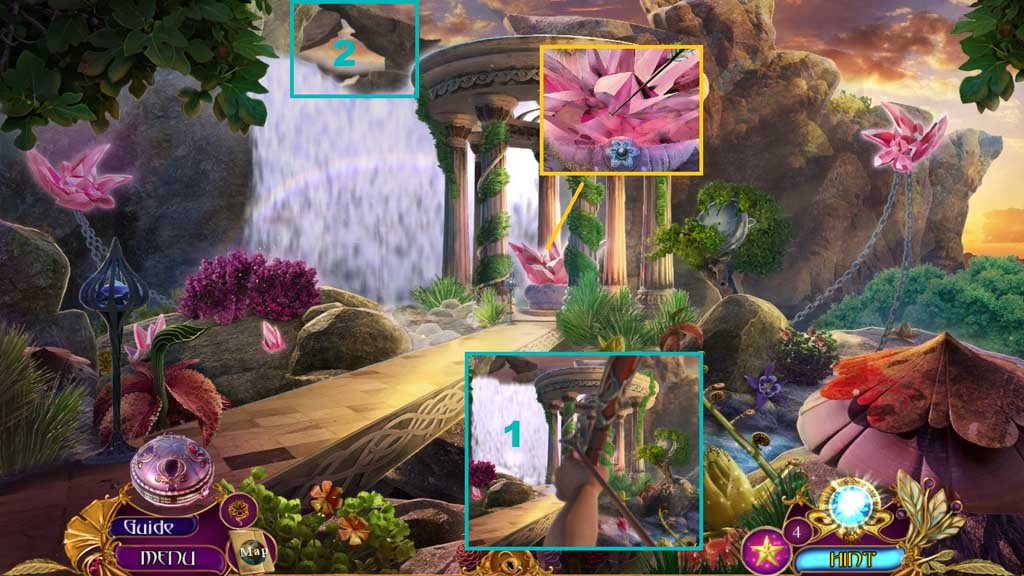
- Insert the flower emblem collect the explosive arrow.
- Select the strong silk thread and the explosive arrow to place onto the bow to create and collect the bow with the explosive arrow.
- Shoot the bow with explosive arrow towards the rocks; click the hidden objects area.
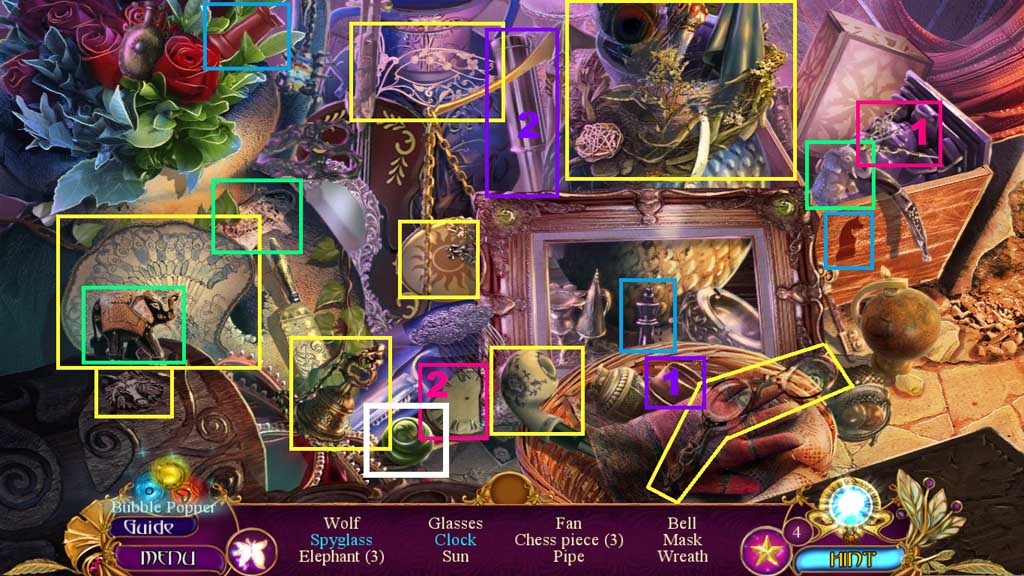
- Find the items.
- Select the eye piece and place it onto the spyglass; collect the spyglass.
- Select the clock hands and attach them onto the clock; collect the clock.
- Collect the glass eye.
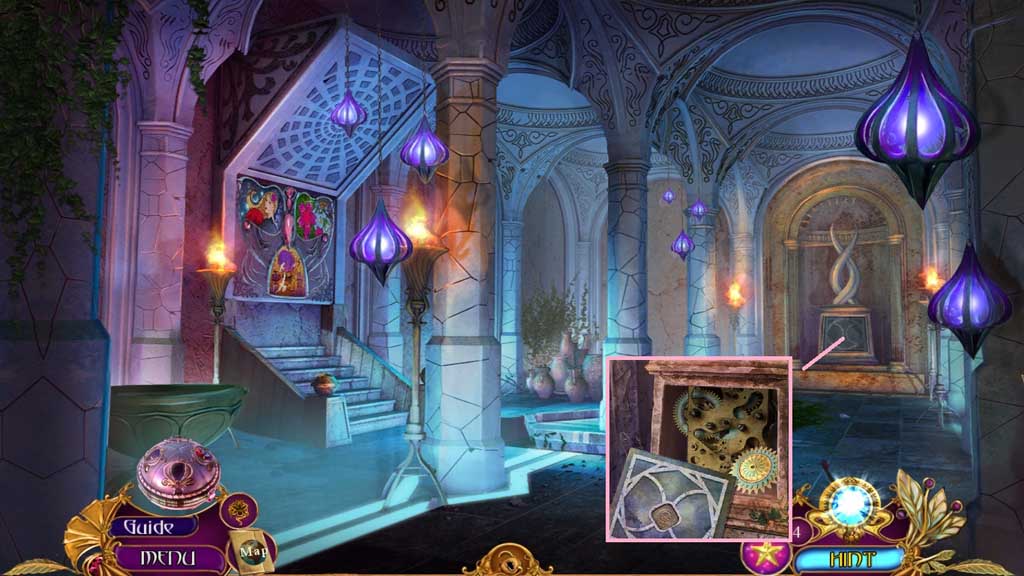
- Insert the square coin; collect the cog.
- Move to the Grove.
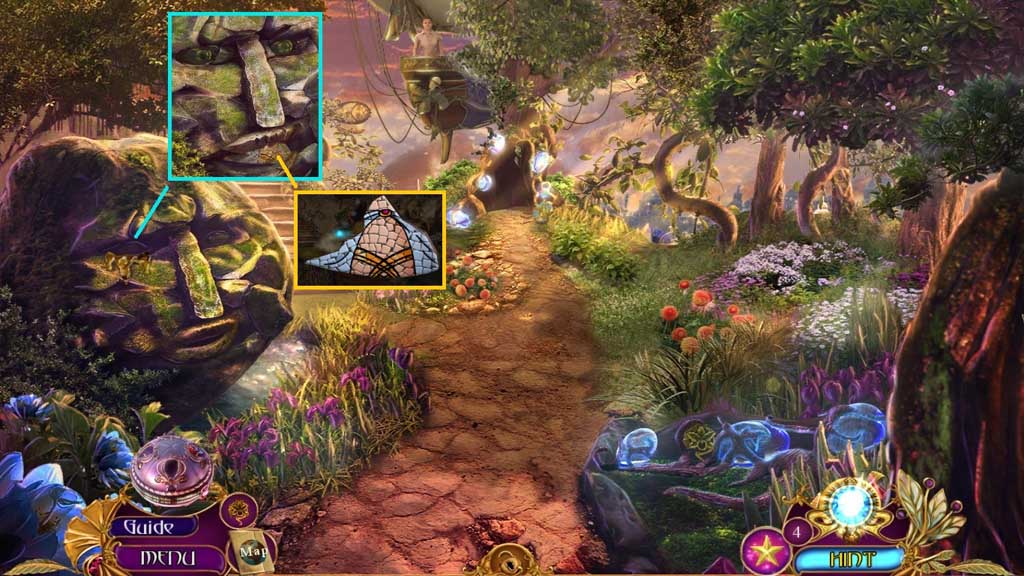
- Insert the glass eye; collect the dirty fragment.
- Use the cloth to clean the dirty fragment; collect the mosaic fragment.
- Move to the Undercroft.
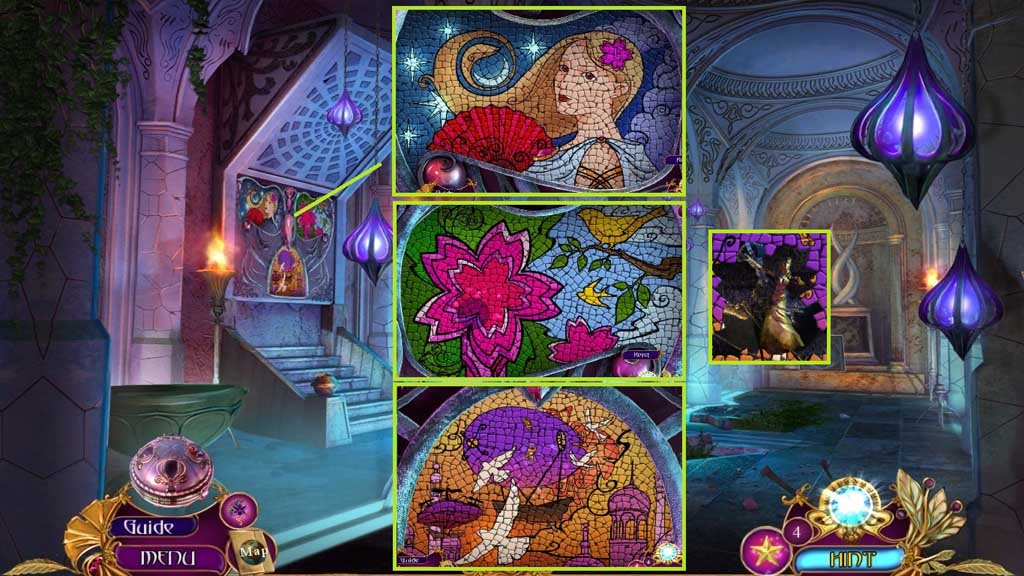
- Insert the mosaic fragment to trigger a mini game.
- Solve the game by adjusting the discs to align the images correctly.
- Collect the princess figurine and the ritual blade.
- Move to the Treetop.
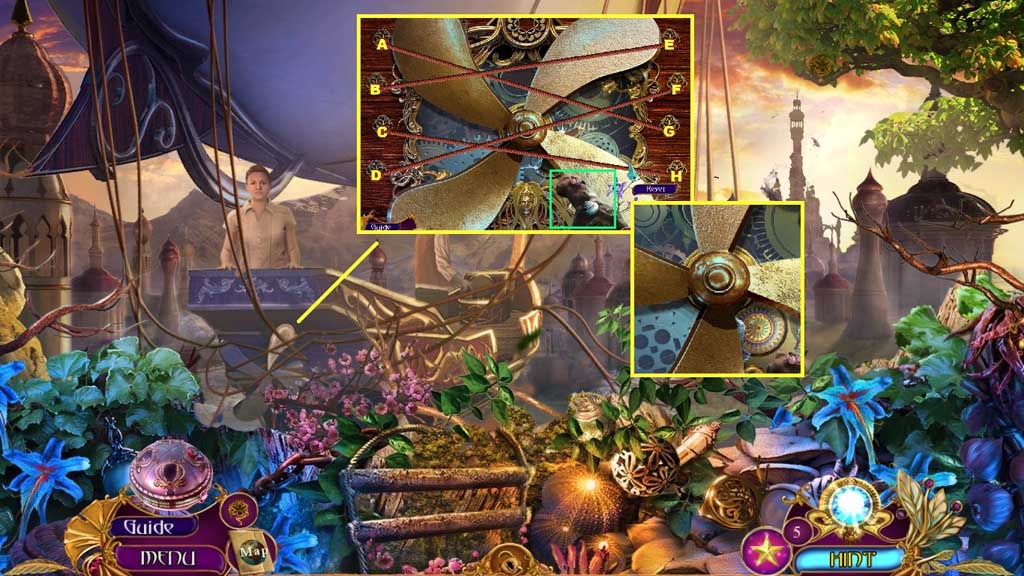
- Select the ritual blade to remove the branch and trigger a mini game.
- Solve the game by removing the ropes correctly from the propeller.
- Use the following sequence to solve: B – F – C – G – B
- Click the propeller and insert the cog.
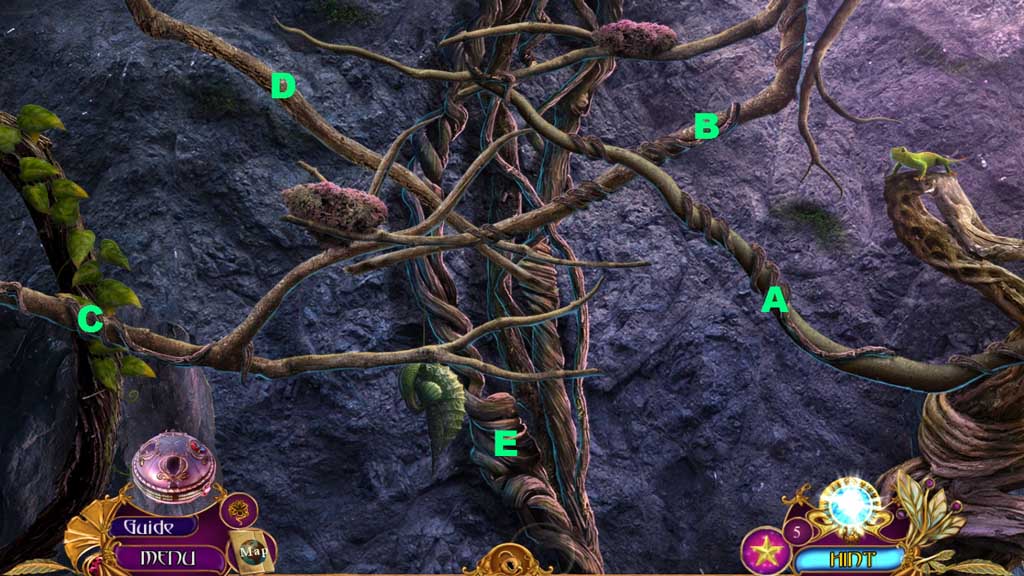
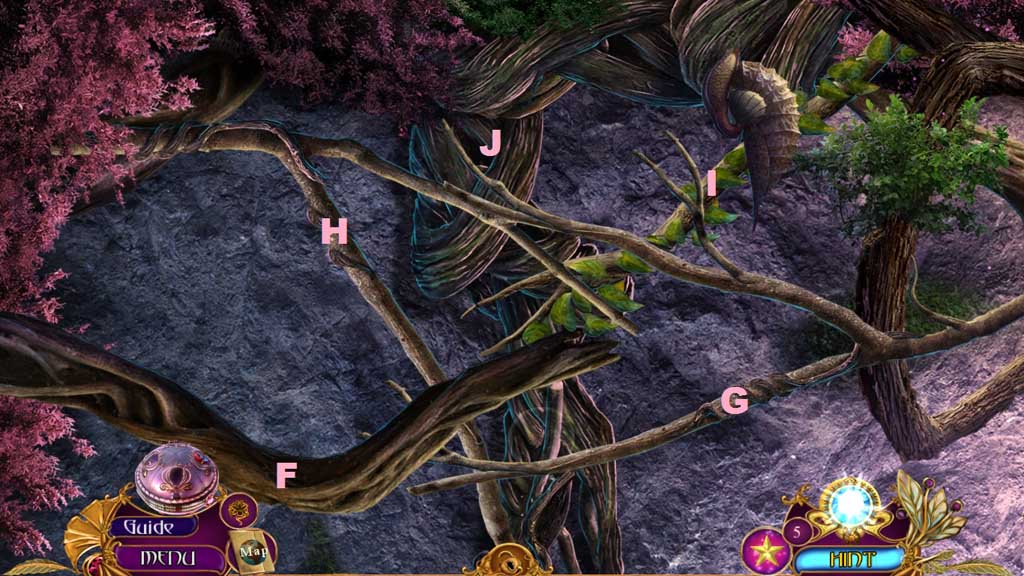
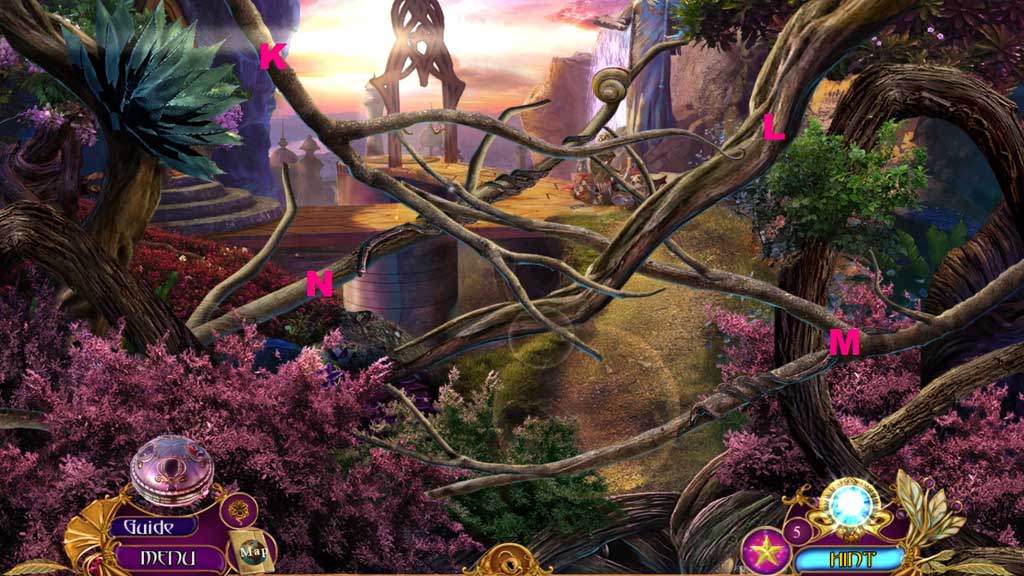
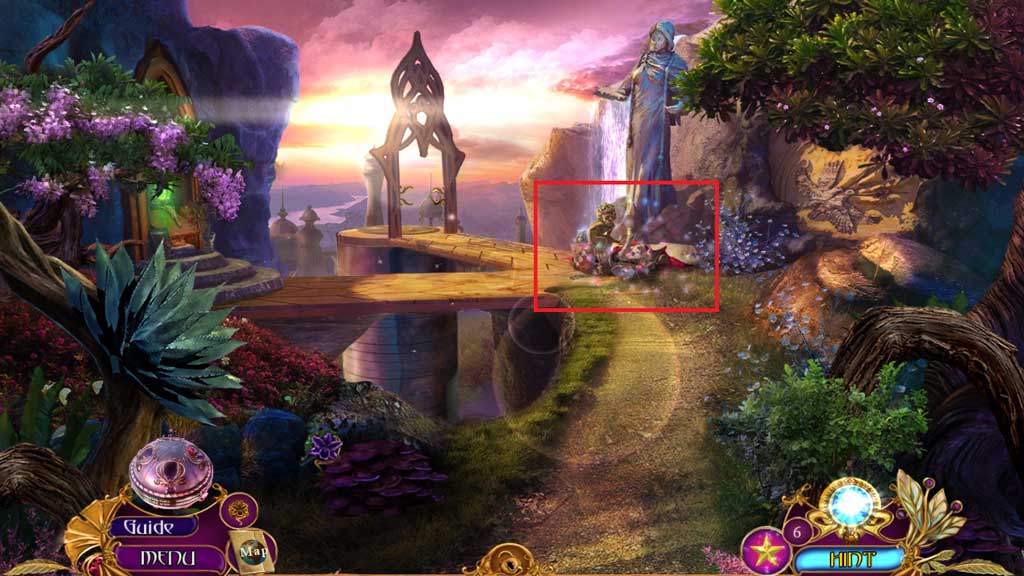
- Click the branches in the correct sequence to remove them.
- Speak to the creature.
- Click the hidden objects area.
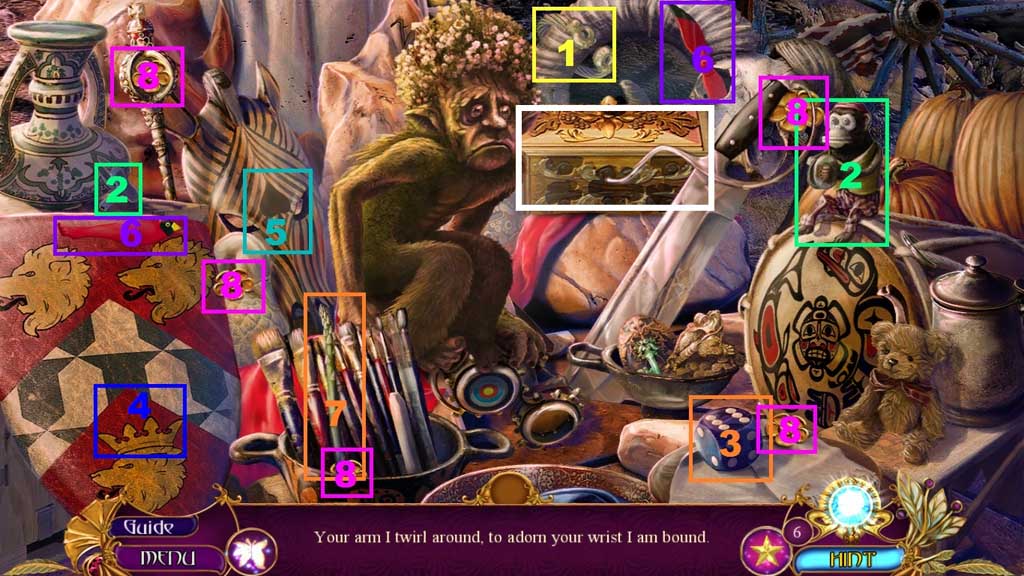
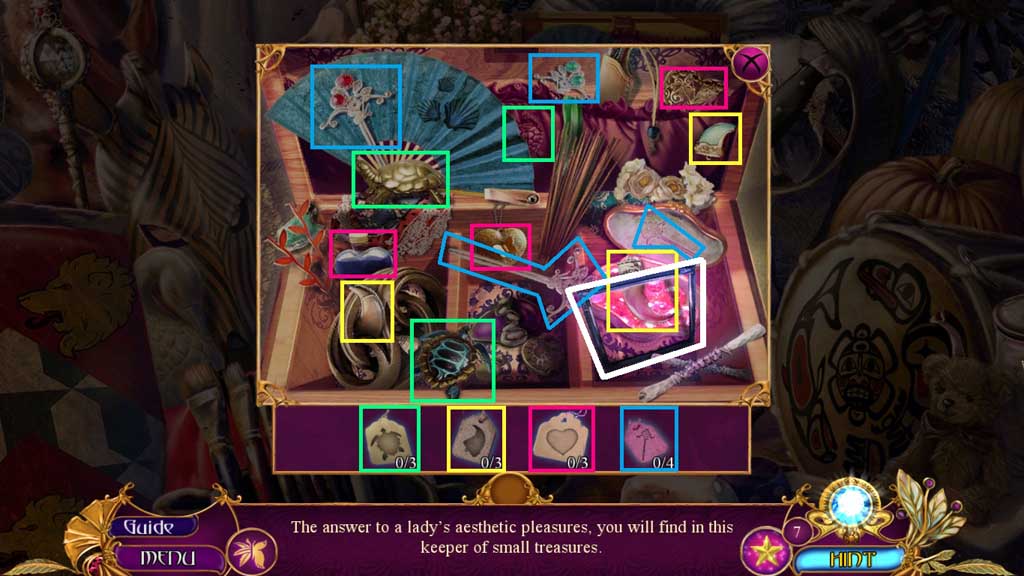
- Find the items based on the clues.
- Select the wind up key and insert it into the monkey.
- Select the winged propellers and place them onto the bird.
- Zoom into the box to trigger a mini hidden objects area.
- Collect the filter frame.
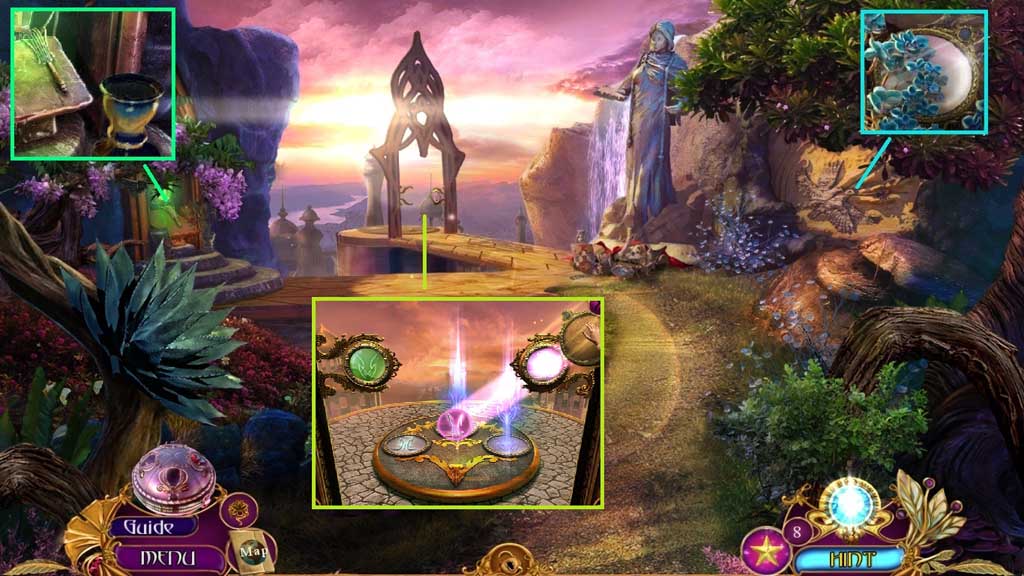
- Collect the mirror.
- Clear the flowers away; collect the vase.
- Collect the garden fork.
- Insert the lens and the mirror to trigger a mini game.
- Solve the game by moving the mirror around to stream the sunlight through the lenses to recreate the symbols shown.
- Move downstairs.
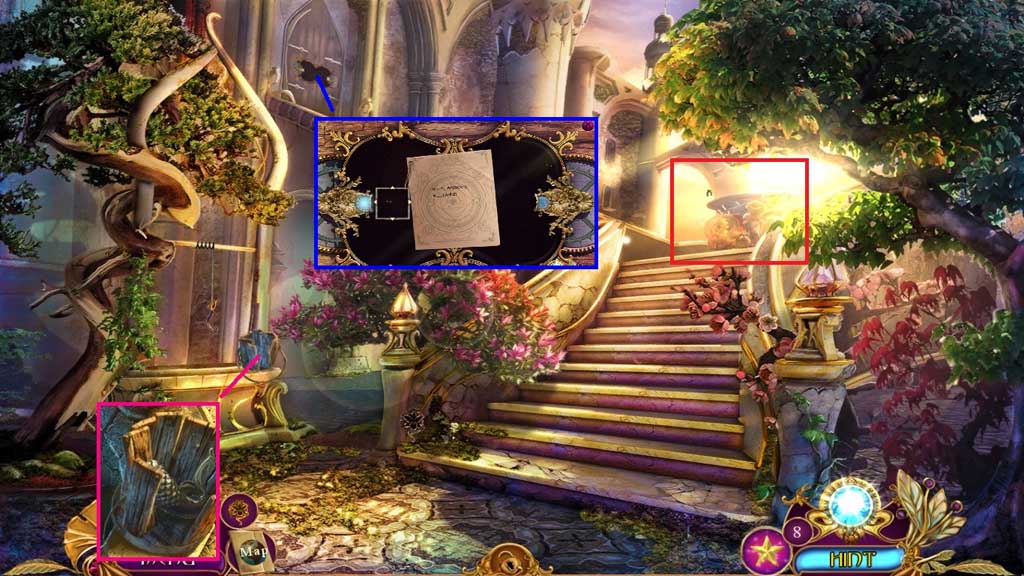
- Click the 3 boards; collect the tail hook.
- Read the note; insert the filter frame and click the note.
- Zoom into the bird bath to trigger a hidden objects area.
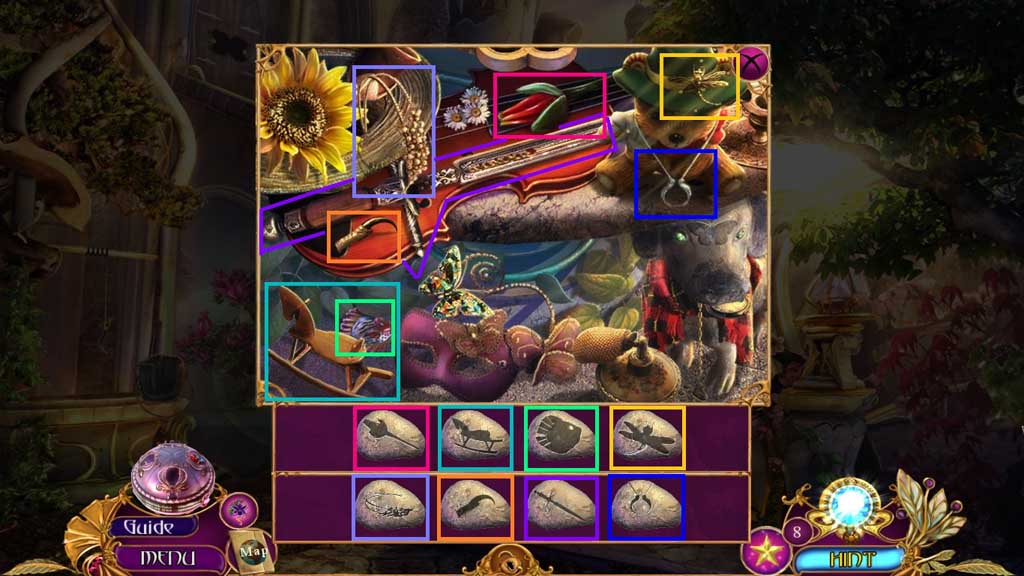
- Find the items.
- Collect the porcelain tulip.
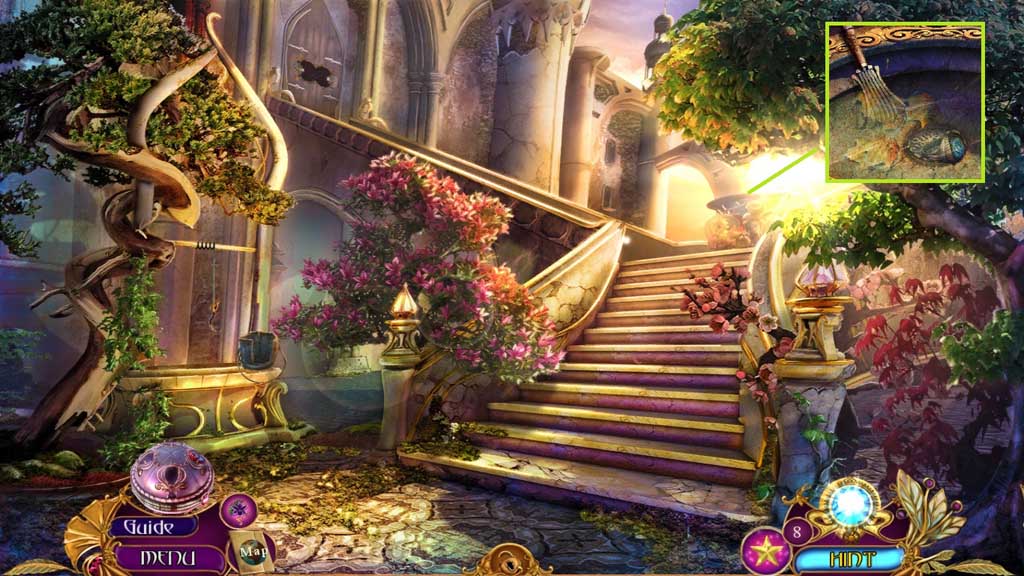
- Zoom into the bird bath.
- Select the garden fork to collect the signet ring.
- Move down once.
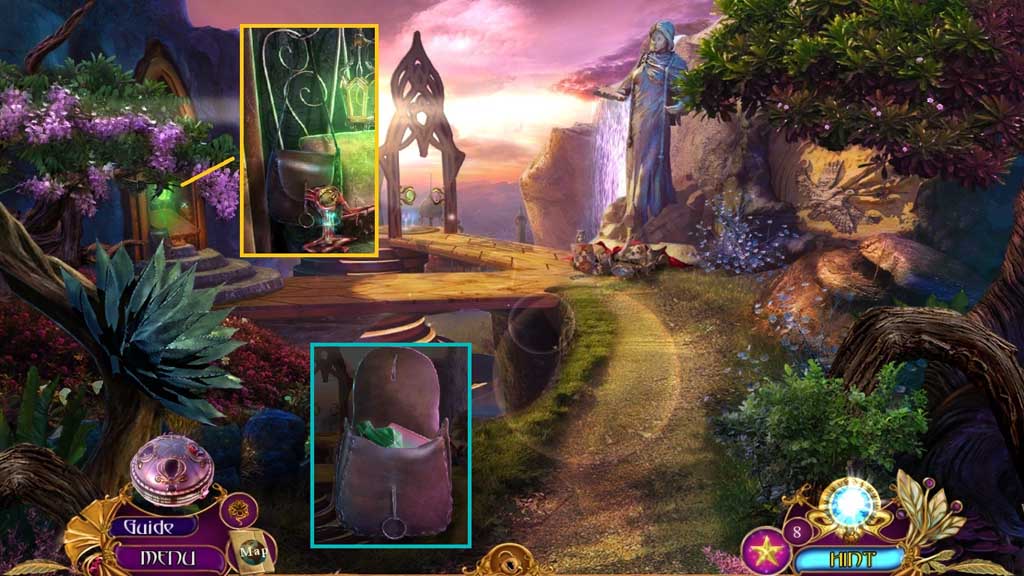
- Insert the signet ring; collect the leather bag.
- Click the leather bag open; collect 2 /5 shard fragments and the filter.
- Move downstairs.
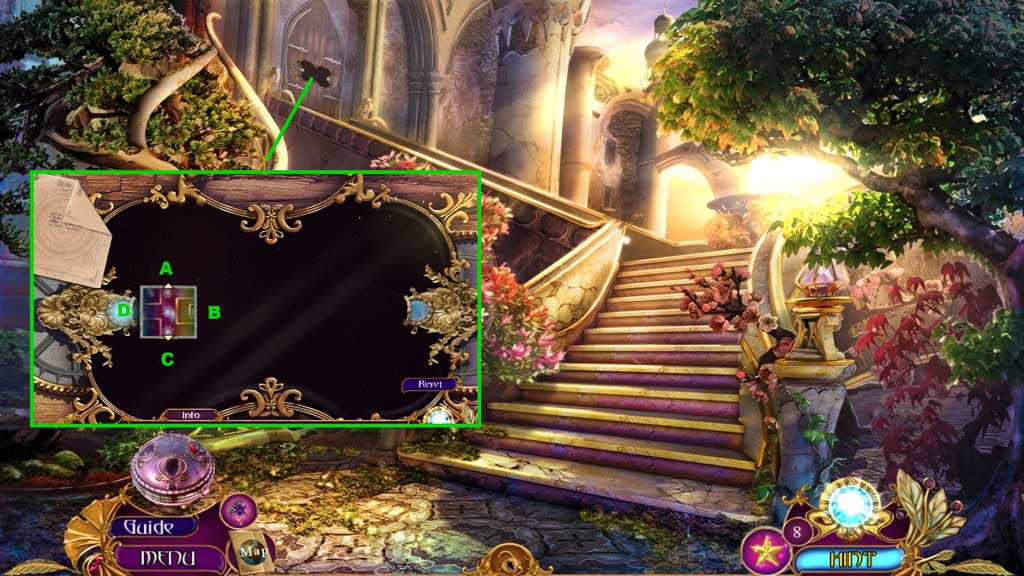
- Insert the filter to trigger a mini game.
- Solve the game by directing the light to reveal the maze and moving from one end to the other.
- Use the following sequence to solve: C – B – B – C – B – A – A – B – C – B
- Move into the Palace Garden.
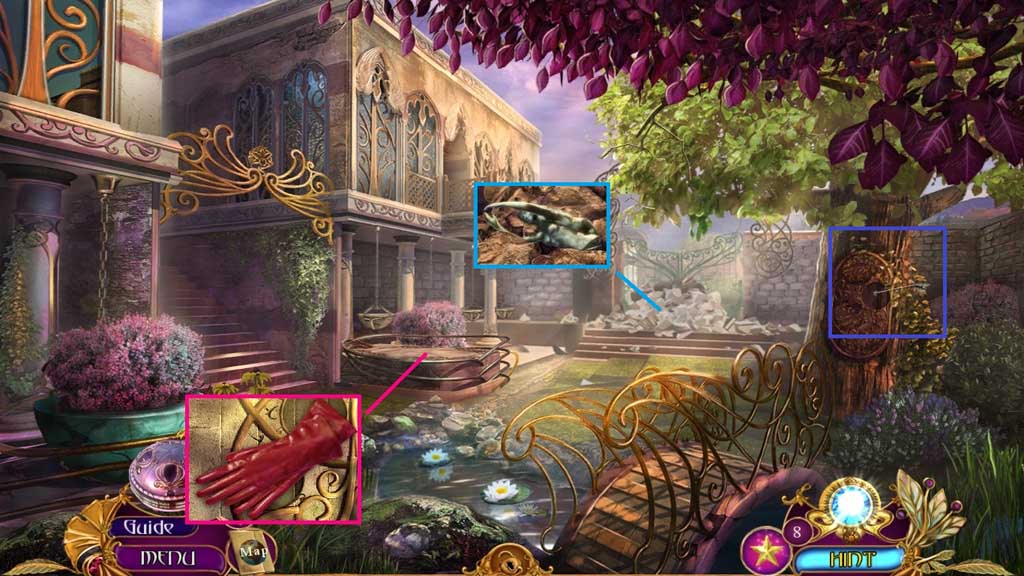
- Collect the leather gloves, the mermaid torso and the faulty arrow.
- Move to the left into the Palace Terrace.
Comments will load when you reach this part of the walkthrough.