

Chapter Six: Passage
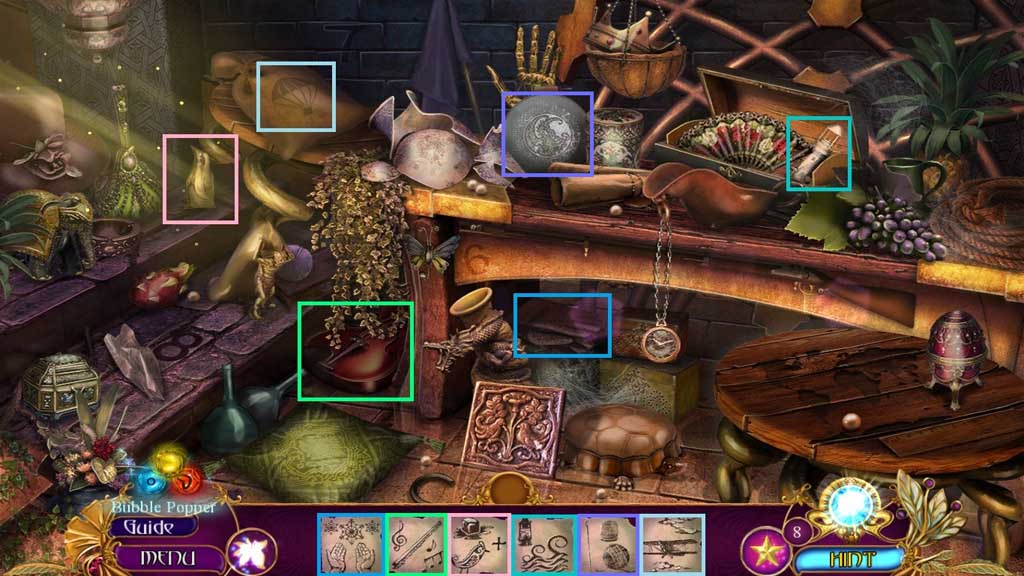
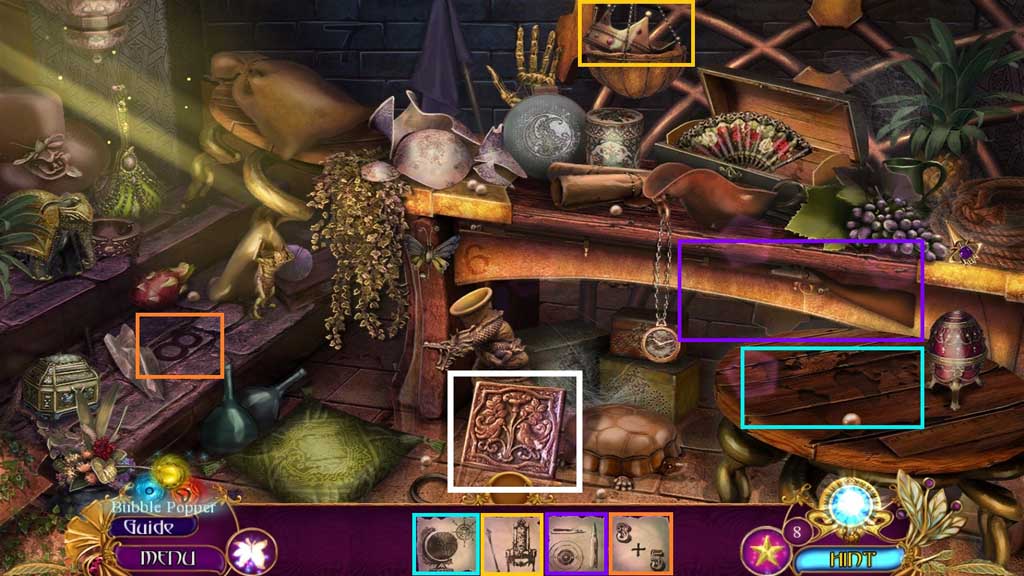
- Find the items.
- Collect the ceramic tiles.
- Move down once.
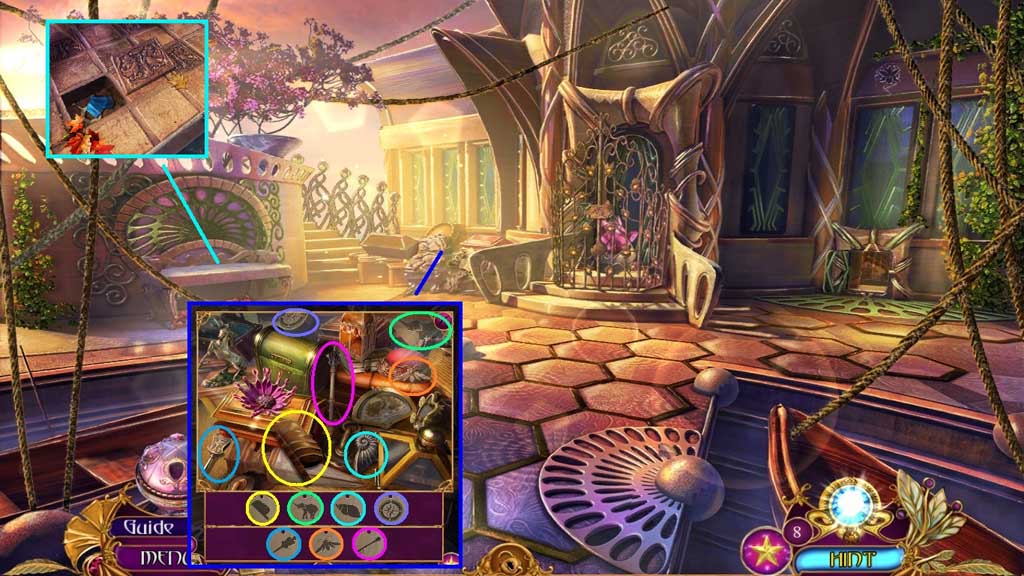
- Zoom into the pile of debris.
- Find the 7 items.
- Collect 2 /2 waterwheel paddles.
- Insert the ceramic tile; collect the hexagon turner and 4 /5 shard fragments.
- Move ahead.
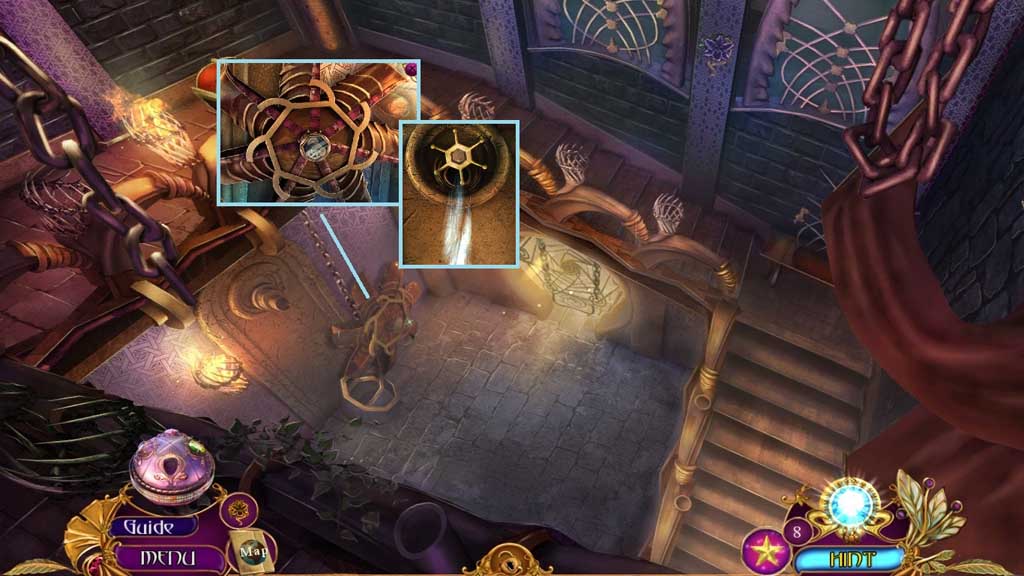
- Attach the 2 waterwheel paddles and the cogwheel mechanism.
- Use the hexagon turner.
- Move ahead.
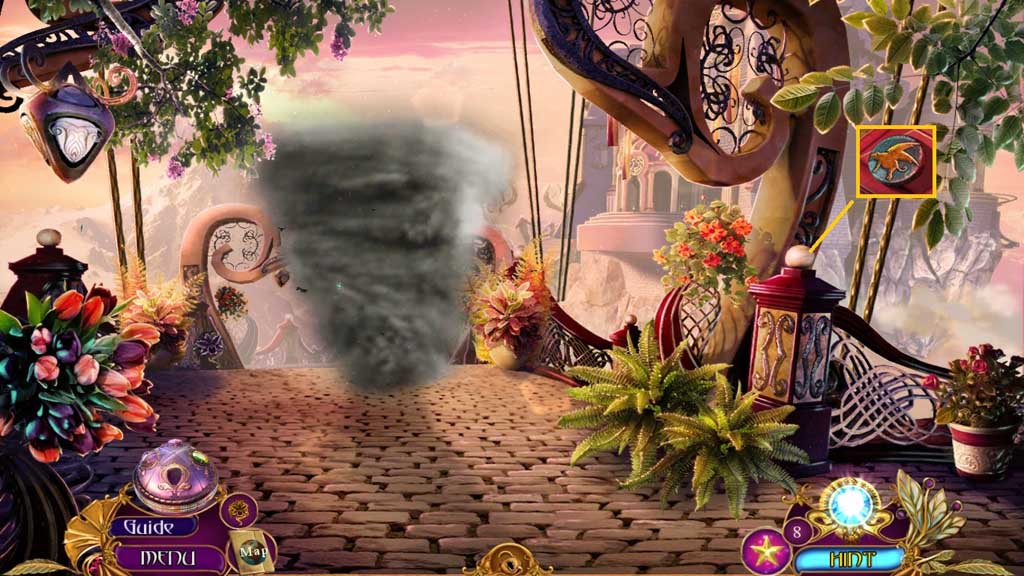
- Click the rock; collect 1 /2 elemental tokens.
- Move down once.
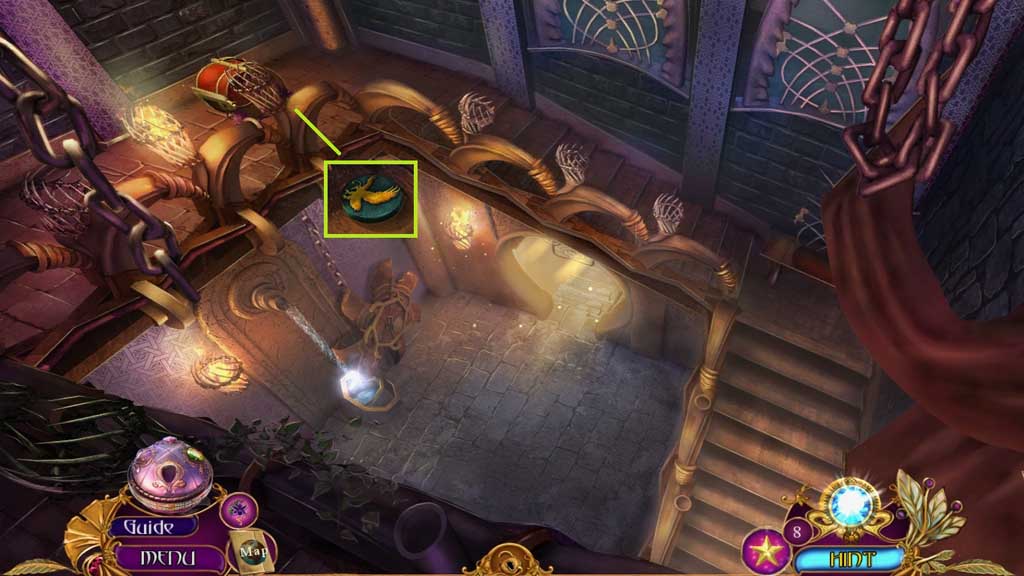
- Collect 2 /2 elemental tokens.
- Move down once.
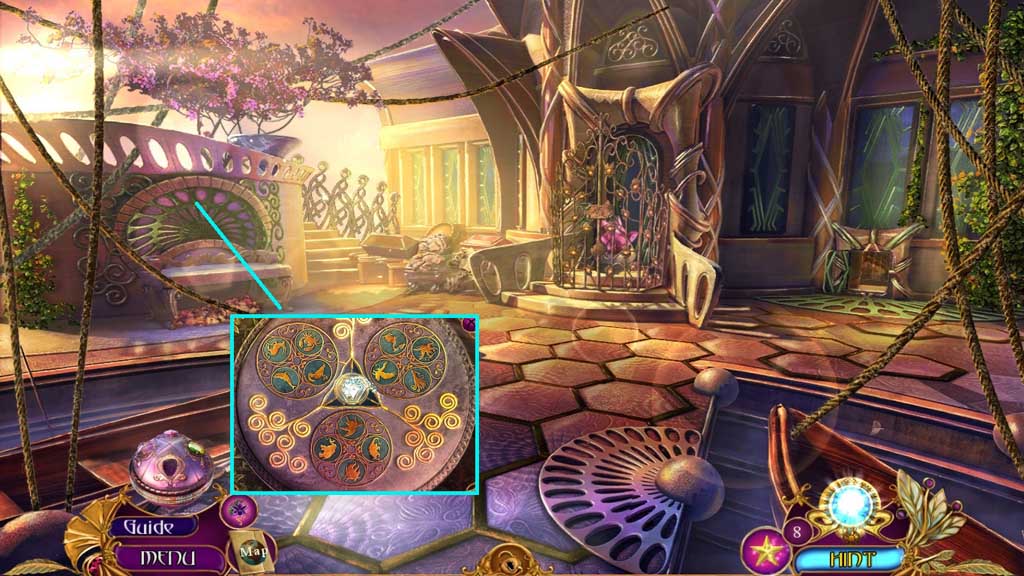
- Insert the 2 elemental tokens and the water crystal to trigger a mini game.
- Solve the game by aligning the disc to charge the crystal.
- Collect the air crystal.
- Move ahead 2x’s.
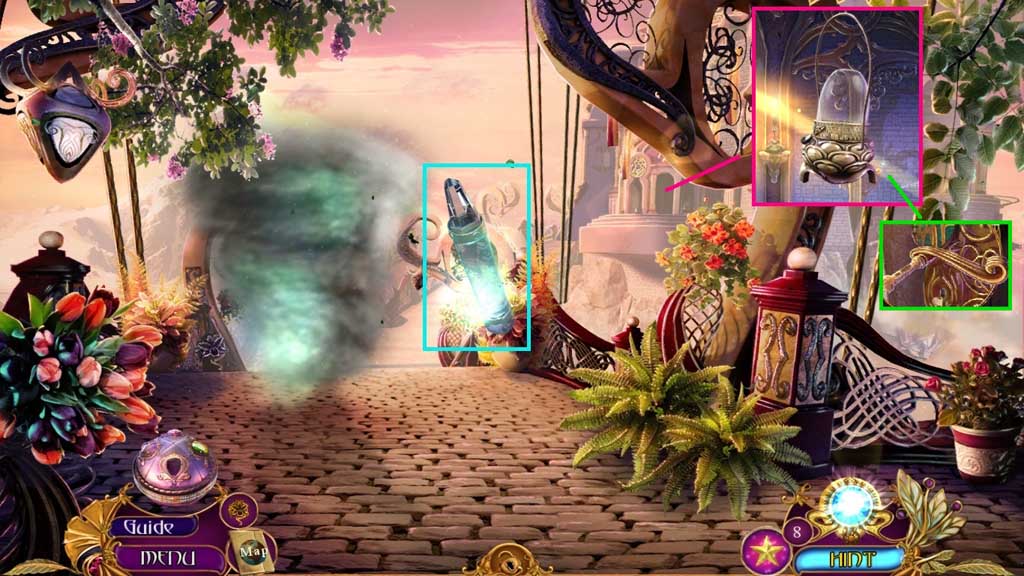
- Select the air crystal to remove the wind funnel.
- Collect the oil lamp and the tool box button.
- Move down once.
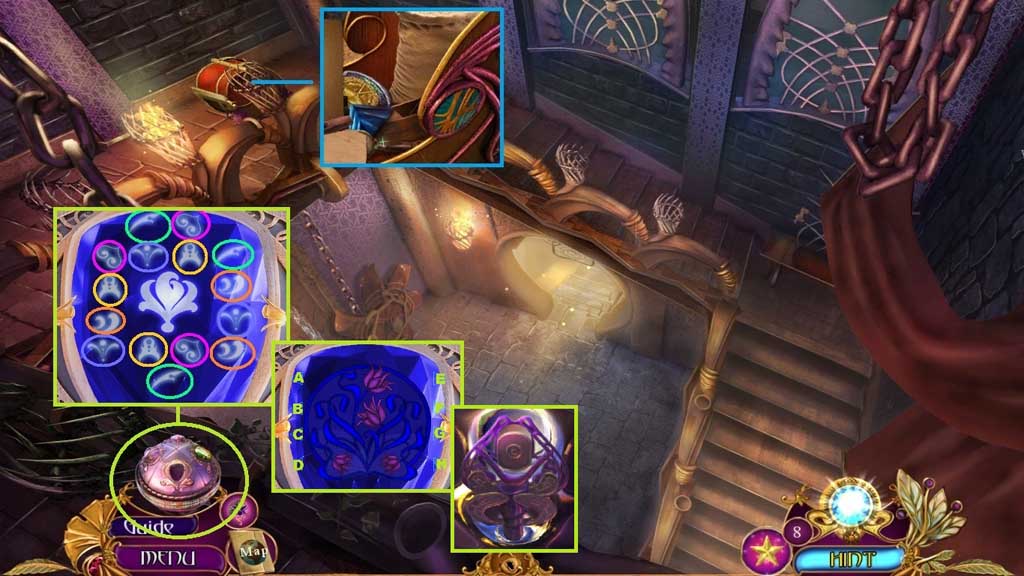
- Attach the toolbox button; collect 5/5 shard fragments and the guard medal parts.
- Insert the 5 shard fragments into the orb to trigger a mini game.
- Solve the game by collecting the matching groups of symbols.
- Another mini game will trigger.
- Solve the game by clicking the buttons to complete the image.
- Use the following sequence to solve: E – B – G - D
- Collect the stunner.
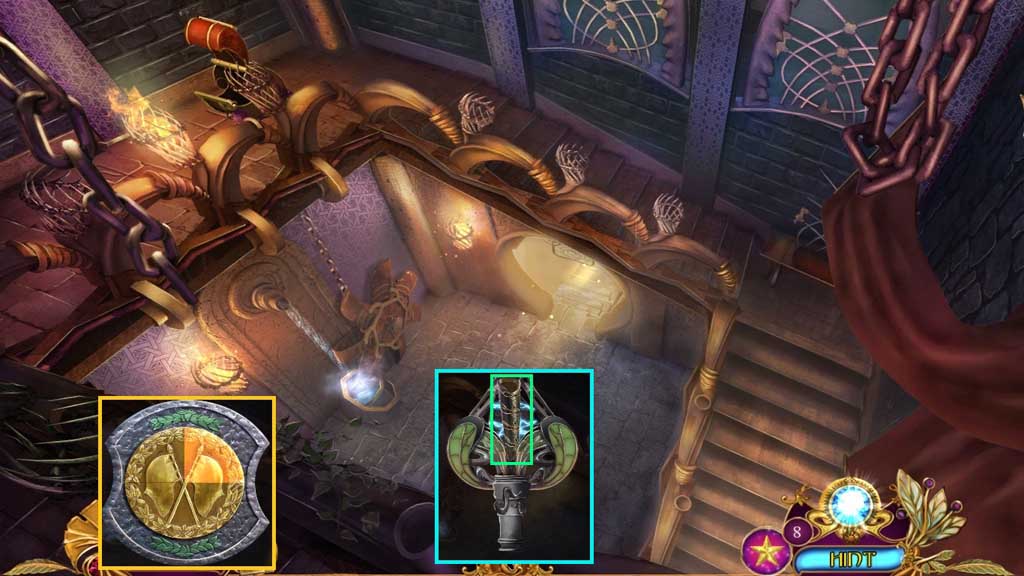
- Click the guard metal parts and arrange them correctly to create and collect the guard metal.
- Click the stunner 2x’s.
- Collect the summoning cylinder; receive the stunner.
- Move ahead.
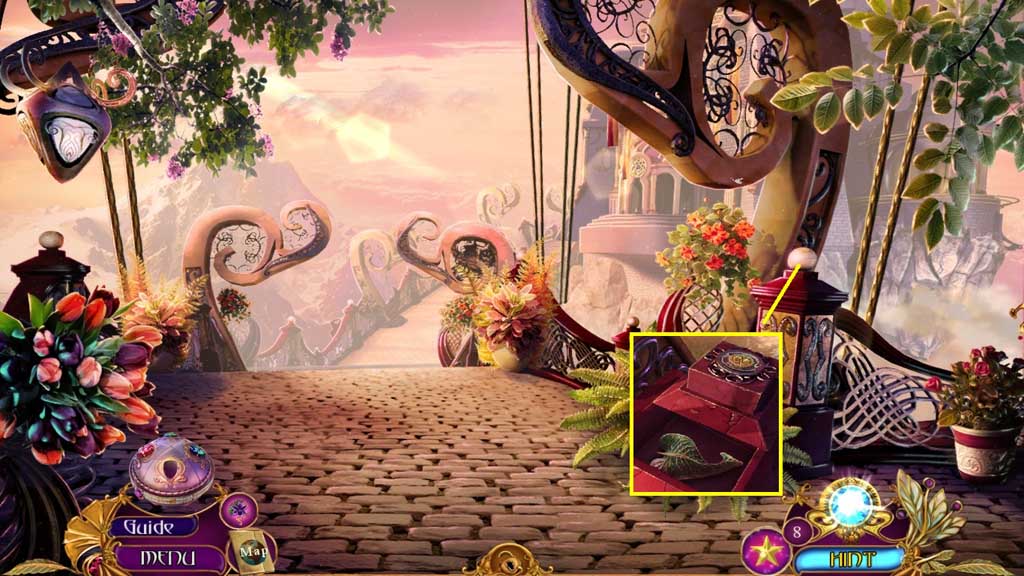
- Click the rock.
- Insert the guard medal; collect the iron leaf.
- Move down 2x’s.
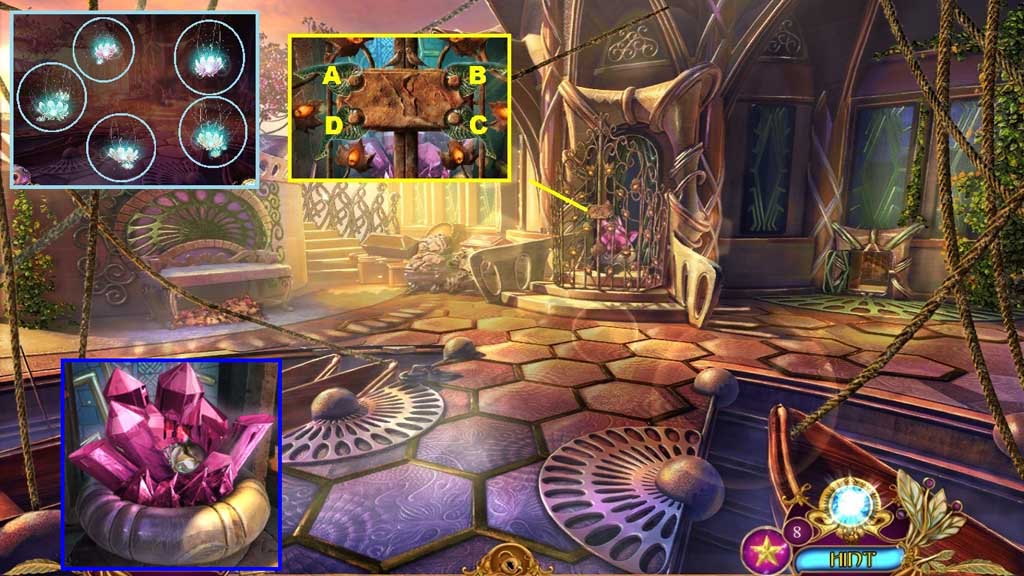
- Insert the iron leaf to trigger a mini game.
- Solve the game by clicking the leaves in the correct sequence to open the lock.
- Use the following sequence to solve: C – D - A
- Collect the 5 flower essences.
- Collect the tetrahedron and the mechanical handle spider.
- Move ahead 2x’s.
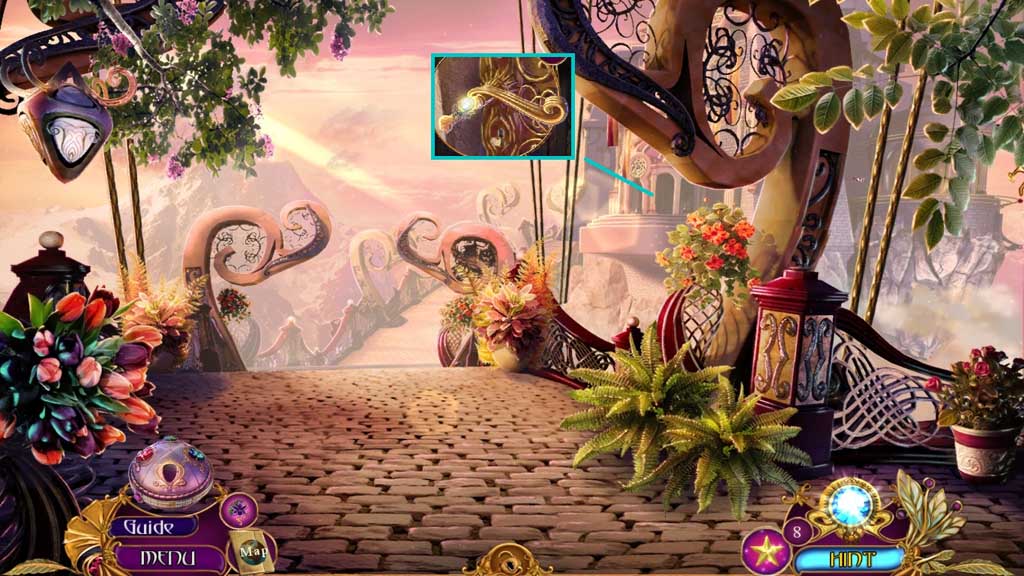
- Attach the mechanical handle spider.
- Move ahead.
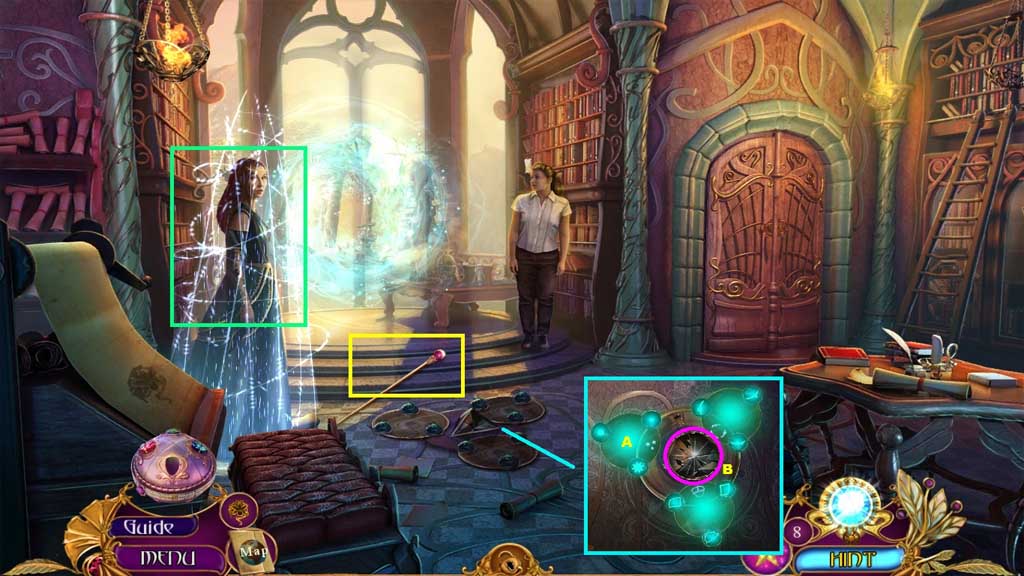
- Select the stunner to stun the woman.
- Collect Amelia’s stunner and use it to trigger a mini game.
- Solve the game by aligning the icons correctly.
- Use the following solution to solve: B – A – B
- Receive the cracked essence catcher.
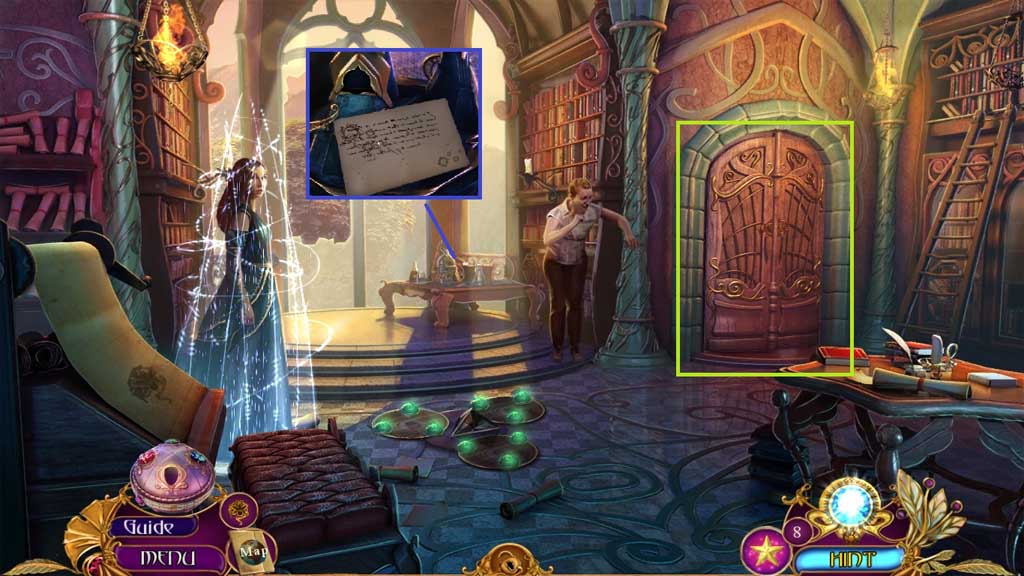
- Collect the note.
- Click the compartment; insert the tetrahedron and the summoning cylinder.
- Click the door open and move ahead.
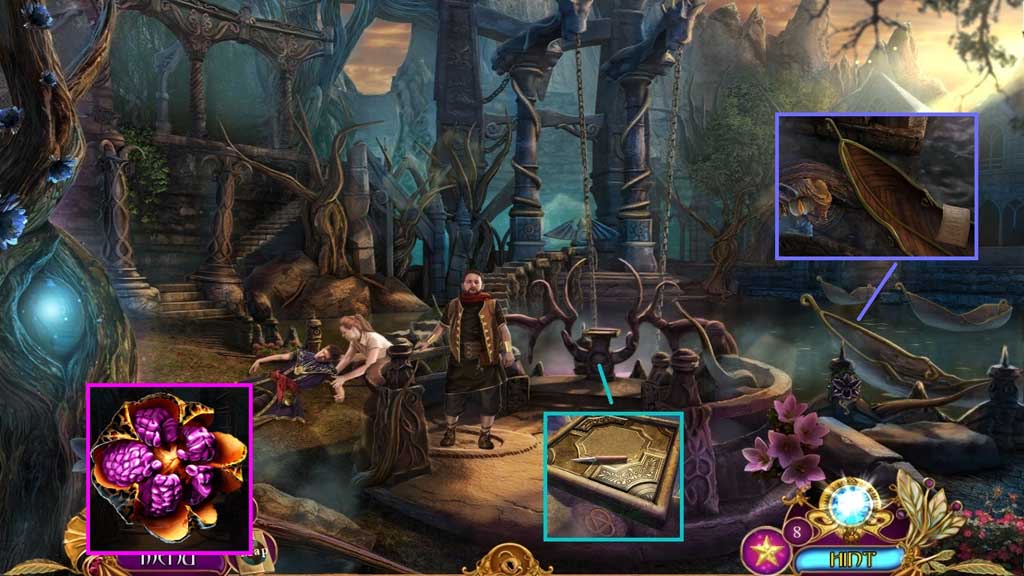
- Insert the badge of knowledge; collect the dibber.
- Collect the note and the pod.
- Click the pod open; collect the twist tree seed.
- Move ahead 2x’s and click the hidden objects area.
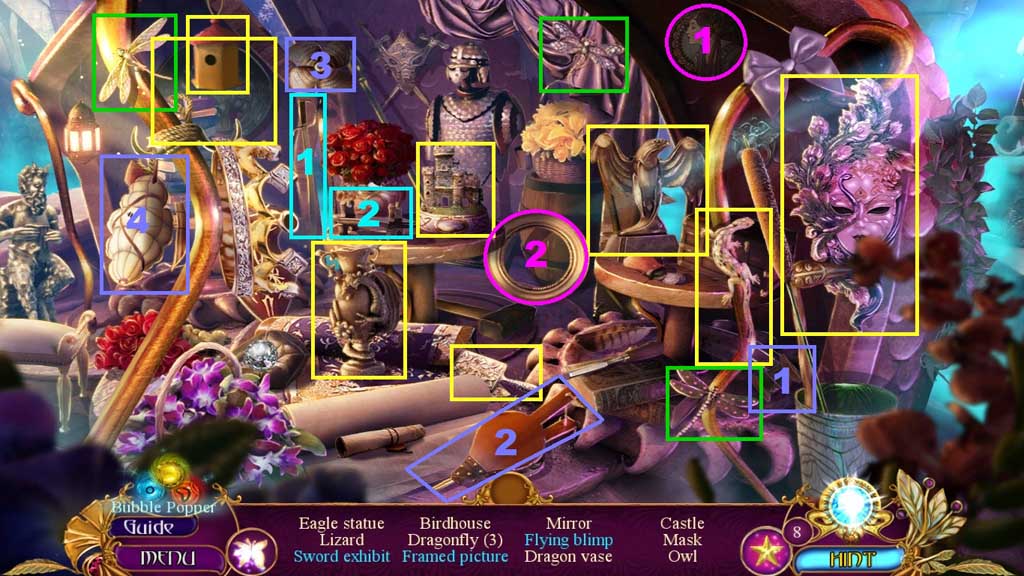
- Find the items.
- Select the sword and place it onto the stand; collect the sword exhibit.
- Select the picture and insert it into the frame; collect the framed picture.
- Select the needle and thread to mend the hole in the blimp, and then take the bellows to inflate it, attach the propellers; collect the flying blimp.
- Collect the cattail.
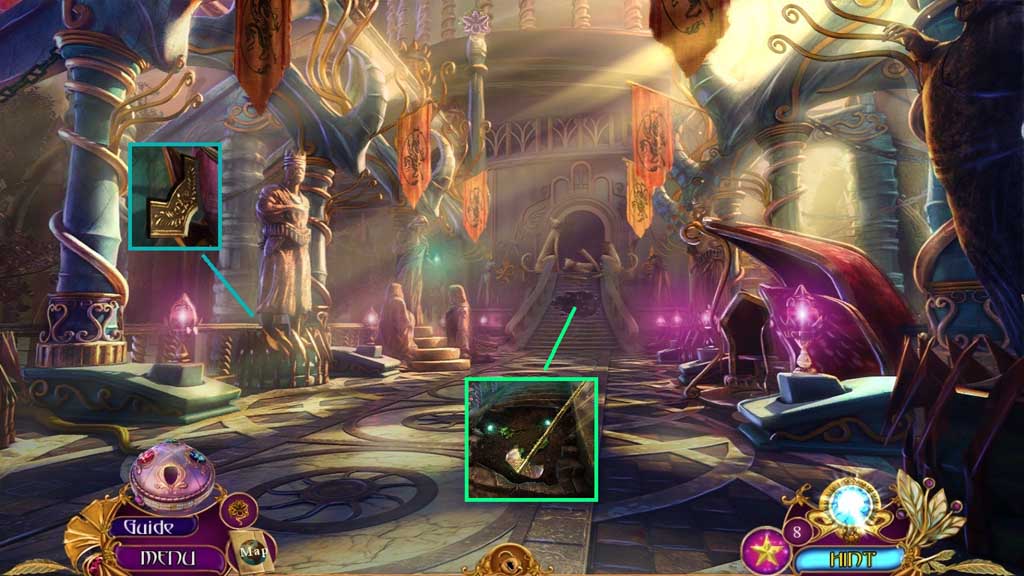
- Collect 1 /2 pedestal parts and the ornate axe.
- Select the dibber to loosen the soil and plant the twist tree seed.
- Move down once.
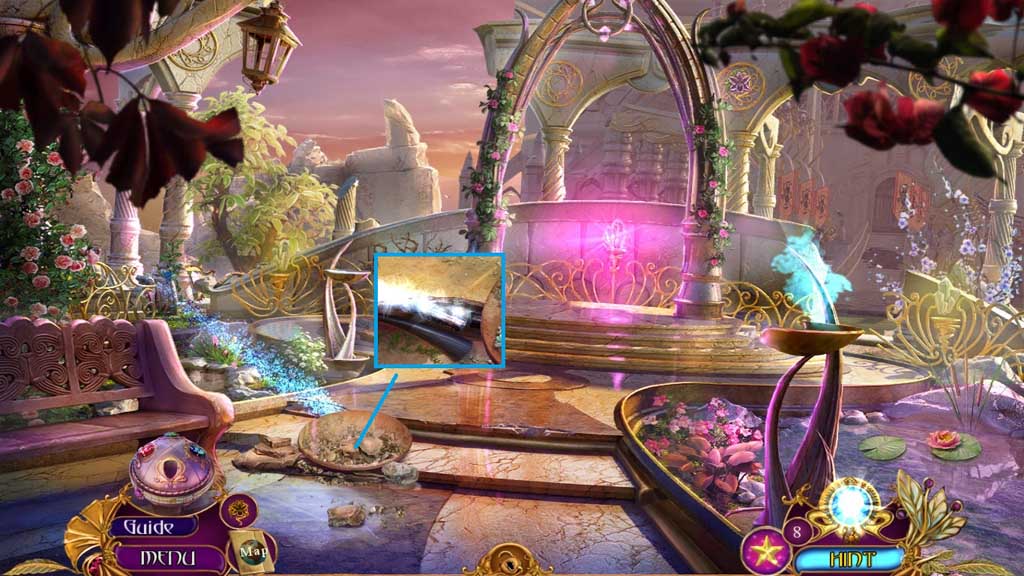
- Select the ornate axe to move the rubble covered lid; collect the horn.
- Move down once.
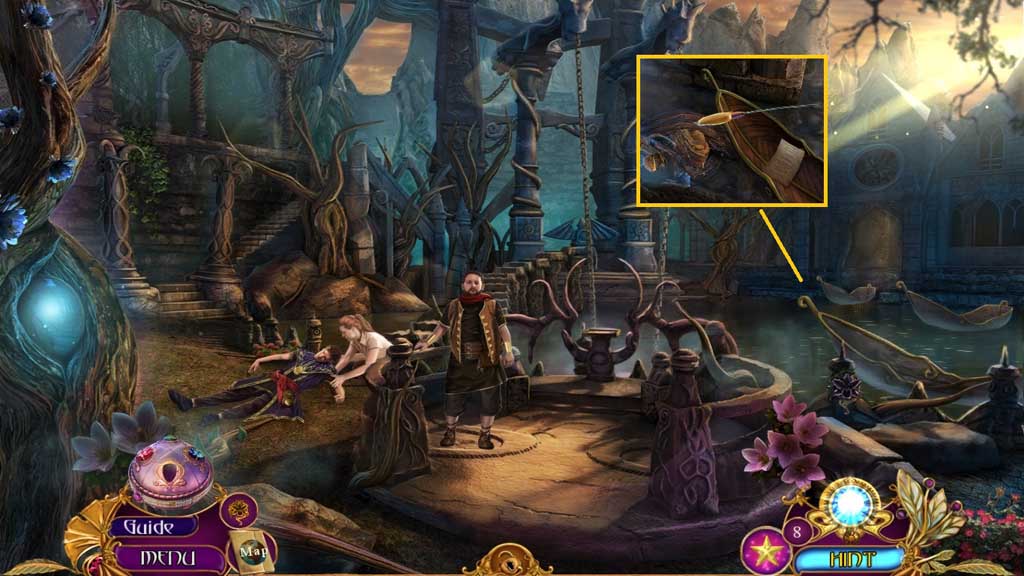
- Select the cattail to collect the honey and create the honey covered cattail.
- Move ahead 2x’s.
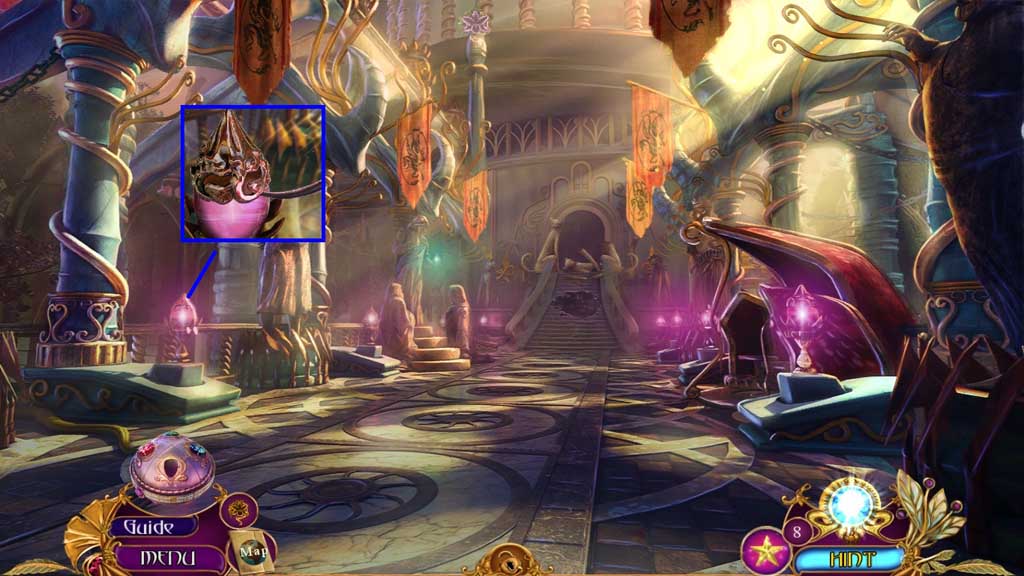
- Select the horn to loosen and collect the silver lid.
- Move down once.
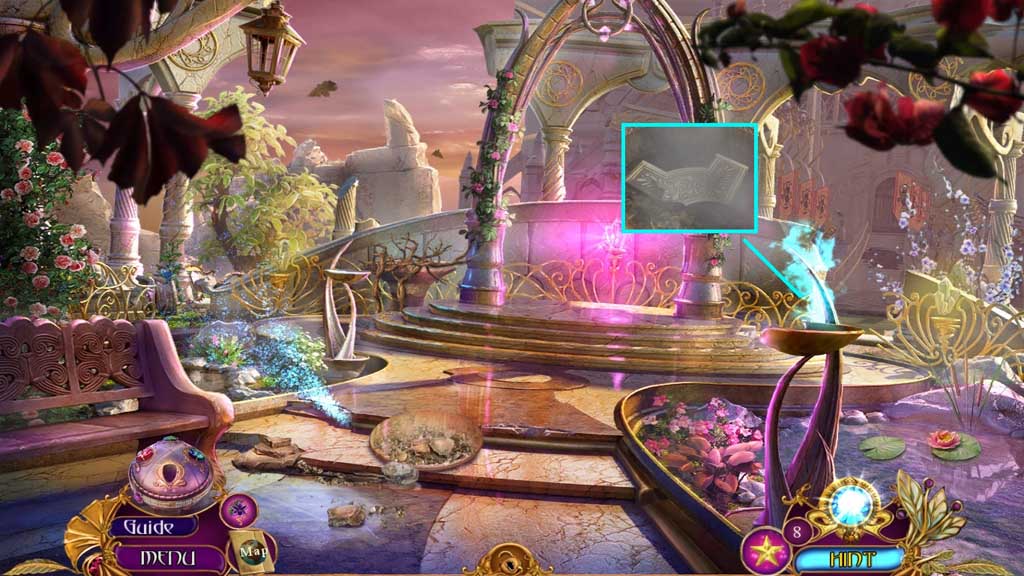
- Place the silver lid; collect 2 /2 pedestal parts.
- Move down once.
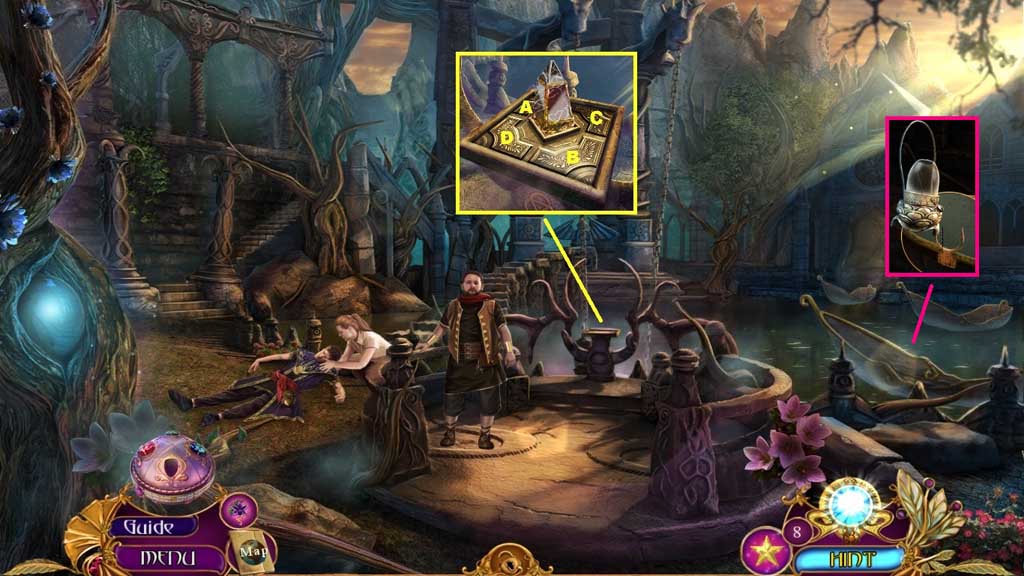
- Attach the 2 pedestal parts and the cracked essence.
- Click the parts in ABC order.
- Select the oil lamp to lubricate and collect the oarlock.
- Move ahead.
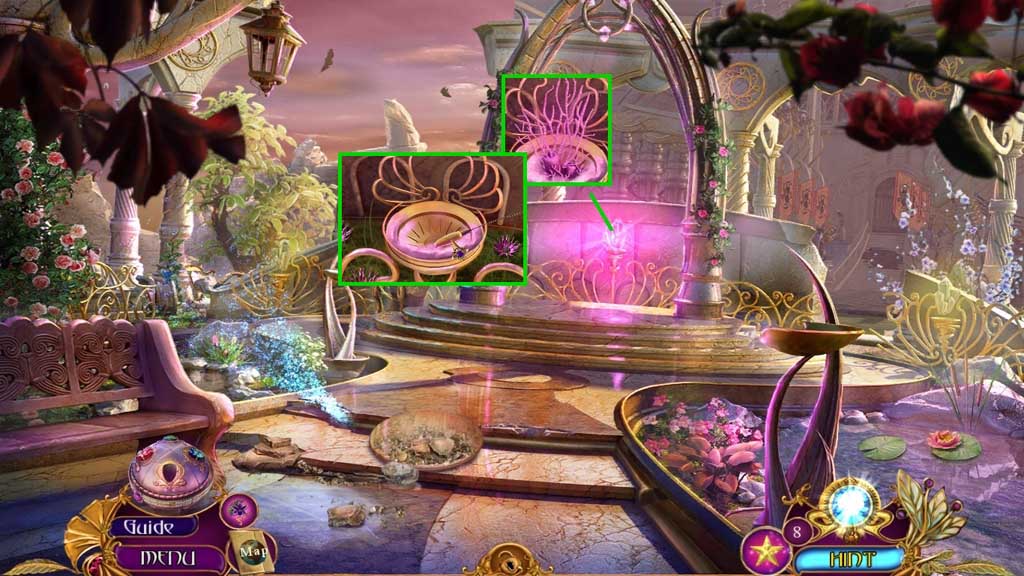
- Select the oarlock to shatter the crystal; collect the harmocoral.
- Select the honey covered cattail to collect the dust and receive the harmodust covered cattail.
- Move ahead.
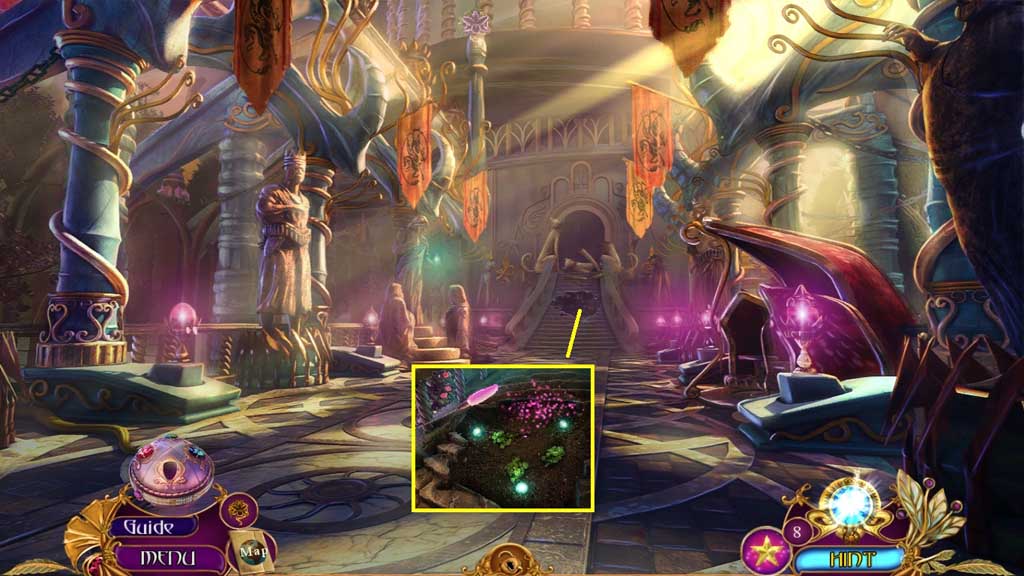
- Select the harmodust covered cattail to dust the seedlings.
- Move ahead.
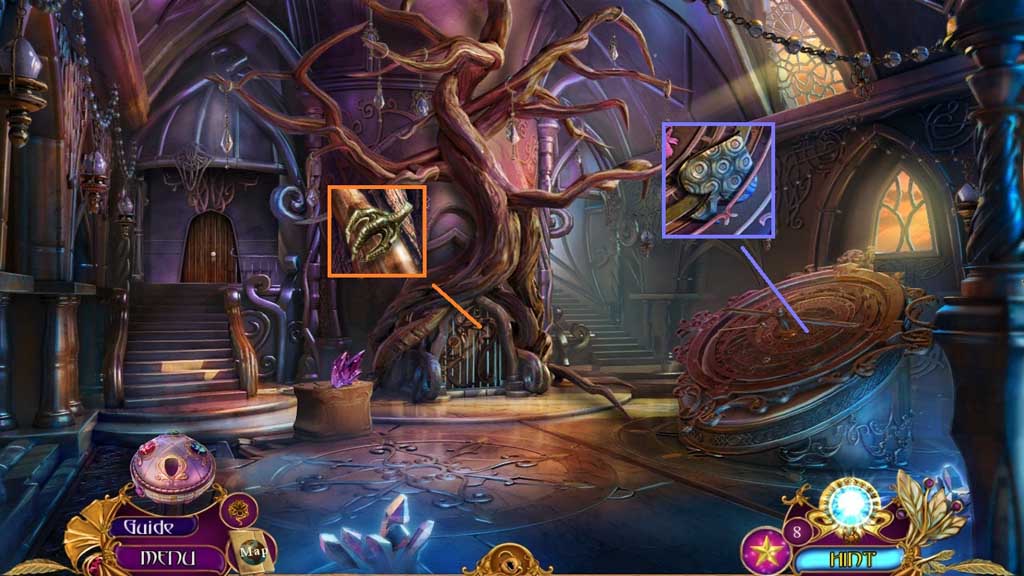
- Collect the golden claw and the spade signet.
- Move down 2x’s.
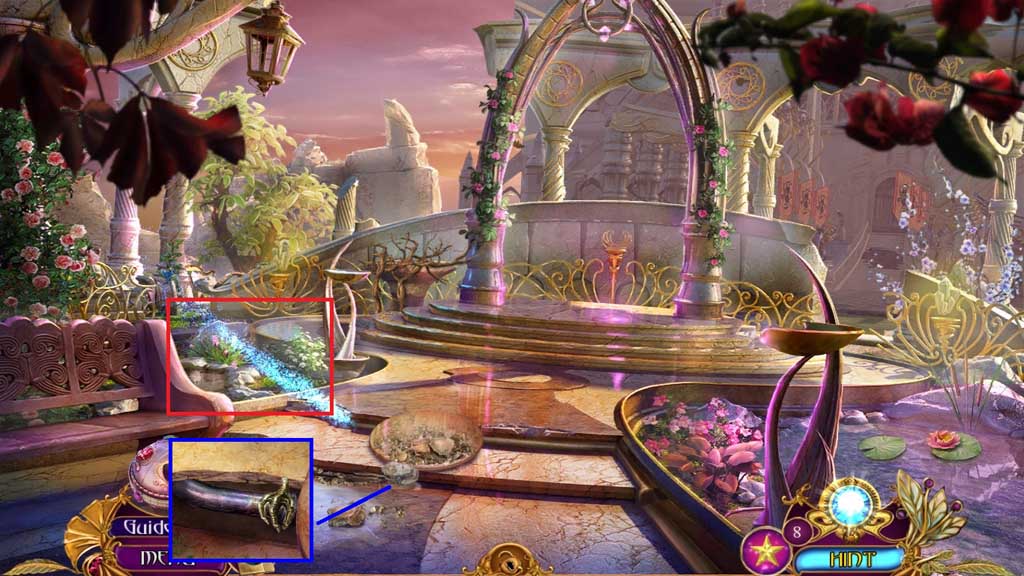
- Select the golden claw to clamp the break in the pipe and to trigger a hidden objects area.
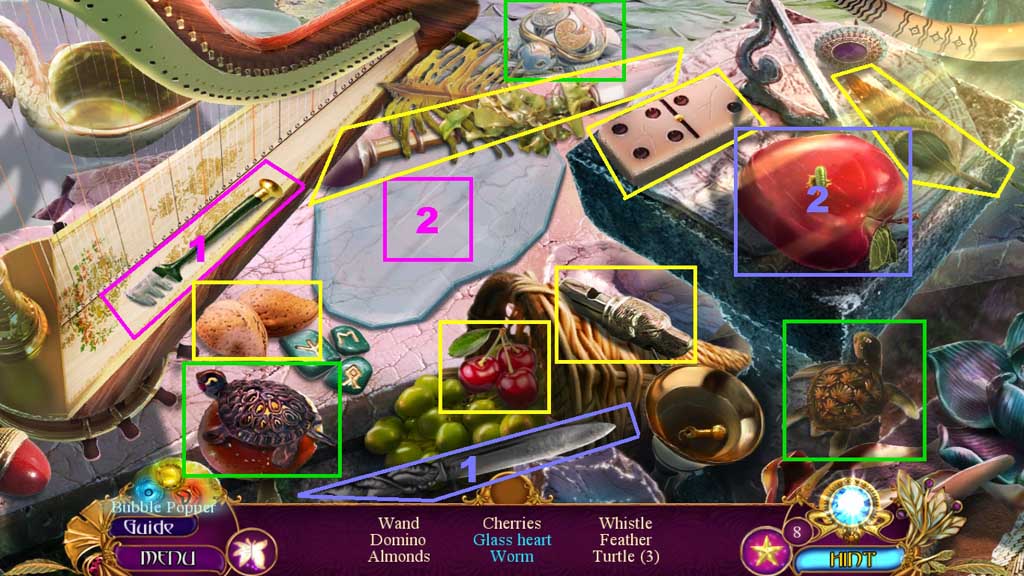
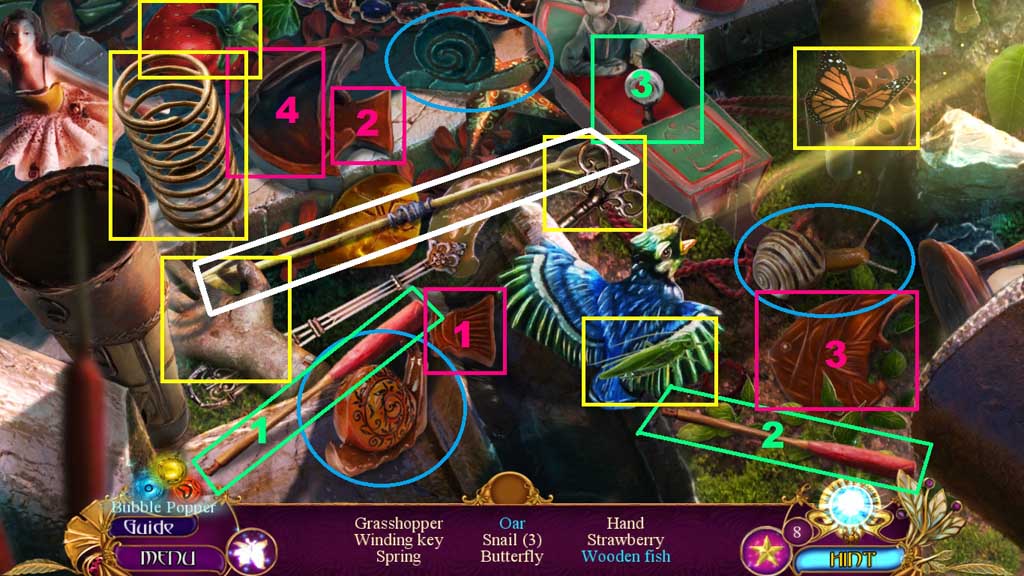
- Find the items.
- Select the knife to slice the apple; collect the worm.
- Select the glass cutter to cut and collect the glass heart.
- Select the oars and place them into the boat; collect the oar.
- Select the fish parts and connect them; collect the wooden fish.
- Collect the plain arrow.
- Move down once.
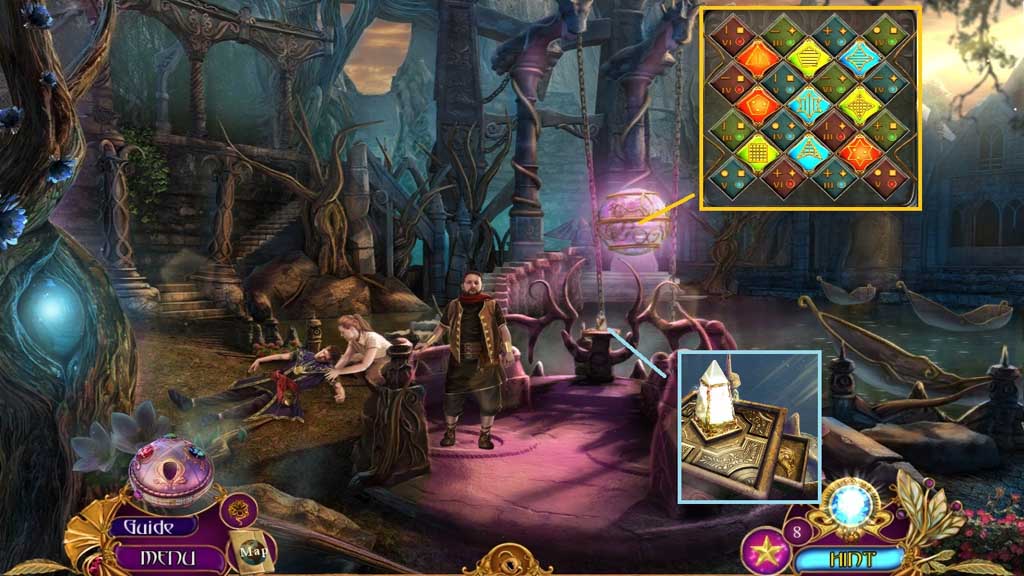
- Insert the spade signet to trigger a mini game.
- Solve the game by aligning the tiles by surrounding them by the correct elements.
- Collect the white essence catcher and 1 /2 butterfly ornaments.
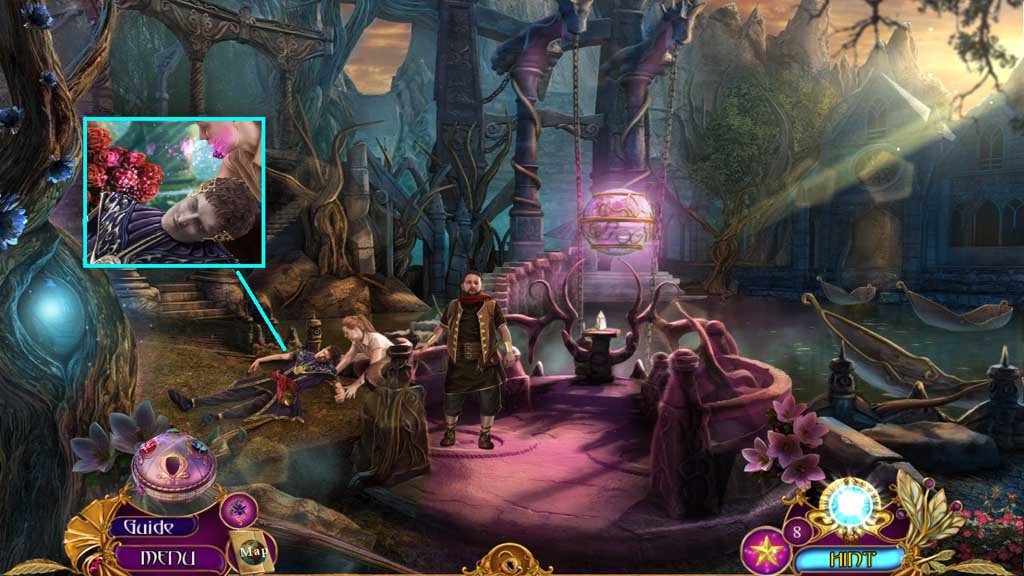
- Select the harmocoral to revive the man; receive 1 /3 jewel eyes.
- Move ahead 3x’s.
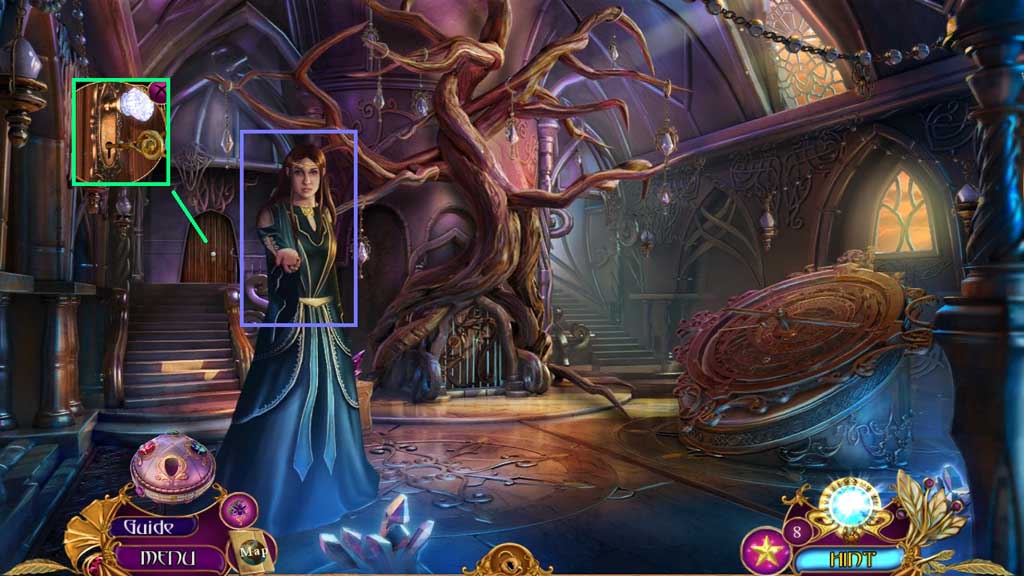
- Give the woman the plain arrow; receive the reliquary key.
- Insert the reliquary key.
- Move to the left.
Comments will load when you reach this part of the walkthrough.