
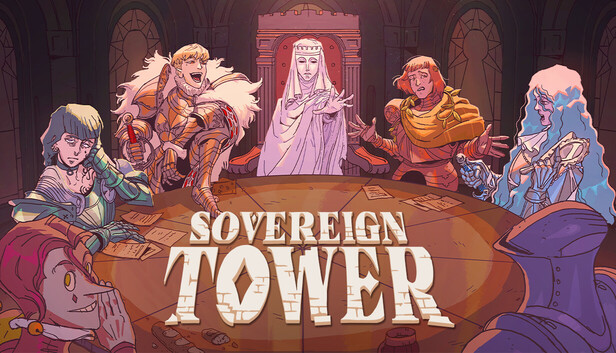
Act One Cycle-by-Cycle Walkthrough and Dragon Knight Deadline
You know the scene: the Dragon Knight is due at the door, the treasury finally looks respectable, and your best knight is still two cycles away chasing something with feathers. Sovereign Tower calls this royal planning. We call it a rewind checkpoint. This route clears the four-cycle ultimatum and reaches the Cycle 8 confrontation without flattening every role-playing choice.
This is a scoped Act One route, not a timeline that saves every knight, reward, and strange goose-related opportunity. It follows Rally the People and prepares the Silgur ambush. Other reigns remain valid, but their faction totals, recruits, and confrontation parties will differ.
How Time and Deadlines Work
A cycle is the game’s main unit of time. Holding Audience moves the day into its court phase, but the cycle ends at the Round Table when you choose Next Cycle or Finish. That step advances active assignments, reduces deadlines, and resolves work that has reached its end. Before pressing it, check every knight’s return time. Multi-cycle work can leave a vital seat empty when the Dragon Knight arrives.
- Morning: Check the current objective, treasury, faction Satisfaction, returning knights, armor, and deadlines.
- Audience: Answer petitions with the ultimatum totals in mind. Satisfaction is your standing with the People, Merchants, Nobles, or Scholars.
- Afternoon: Investigate traits, repair armor, serve meals, move equipment, and visit the Map Room.
- Round Table: Assign deadline quests first, story quests second, and optional work last.
- End of cycle: Record each party, result, faction change, and newly revealed trait. That tiny timeline note becomes priceless after a rewind.
Cycle 4 Ultimatum Requirements
Spoilers — Act One, Dragon Knight timeline: The Dragon Knight presents the ultimatum during Cycle 4 and gives you four cycles to prepare.
| Ultimatum plan | Faction check | Treasury and alliance check |
|---|---|---|
| Rally the People — route used below | Merchants 8; People 14 | At least 300 gold; 1 allied country |
| Muster Noble Allies | Merchants 10; Nobles 8 | At least 400 gold; 1 allied country |
| Use Mystic Forces | Scholars 12; People 10 | At least 300 gold; 1 allied country |
Treat the required gold as a floor. If a weapon, repair, meal, or generous petition would push you below it, wait unless the purchase is needed to secure a larger reward before the check. Shiny steel is less impressive when the accountant uses it to pin an eviction notice to the throne.
Cycles 1–8 Route
| Cycle opening and objective | Morning and Audience | Assignment and end-of-cycle check |
|---|---|---|
| Cycle 1: Your working roster begins with Angelica. Learn the court loop and recover Carina’s hammer. | Recruit Angelica and accept Hammer Lost, Yet Again. Praise her cat afterward to reveal Animal Lover. | Assign Angelica to the hammer quest. The quest asks for one knight, lasts one cycle, and has a 0–2 damage band. Angelica succeeds on this route and earns 30 gold, but repair any damage next morning. |
| Cycle 2: Build the roster and unlock your recovery tools. | Visit the Crypts to meet the Demon and unlock rewinding, which returns you to an earlier cycle while keeping learned information and some ruler progress. Recruit Goberto, accept The Clean Keeper Goose, and unlock the Forge. | Repair Angelica and send her to The Clean Keeper Goose. Her named outcome gives People +1 and 25 gold with no damage. Do not send Goberto to The Bloody Magpie: his special outcome kills him regardless of statistics or equipment. Use another knight or rewind if the tree has already claimed him. |
| Cycle 3: You have two proven knights, the Forge, and the opening Groveshire quest. Start the standard chain needed for Silgur. | Accept Guilhelm’s Face the Horde request and recruit Gwendan. Repairing the Grest road costs 90 gold and gives Merchants +2 and People +1. | Unlock the Intendancy, then investigate a knight with Alwena. Goberto can succeed on Face the Horde with the Silver Sword, but the weapon only raises his Magic from 0 to 2 while the quest asks for Magic 3, Agility 2, and Strength 3. His hunt bonuses can carry the result, but repair his armor first and expect damage. |
| Cycle 4: The Dragon Knight arrives. Choose an ultimatum and start its four-cycle clock. | Choose Rally the People. Letting the Kutnar Nomads stay helps the People while costing Noble favor. Choose River Research from Guilhelm’s follow-up. For Roland’s lighthouse petition, take the pragmatic response for the stronger People reward. | Assign Gwendan to River Research first. It has a two-cycle deadline, needs one knight for one cycle, and asks for Agility 3 and Wits 3. Success gives 40 gold and the Hunter Axe. The Haunted Lighthouse asks for two knights for two cycles with Strength 3, Agility 2, and Wits 3. Start it only if two other knights are free; do not build the plan around Gwendan occupying both assignments. |
| Cycle 5: Aim for Merchants 8, People 11, and at least 300 gold after quest results. | Accept Kill the Beast, recruit Ursula, and keep the Nomads if People 14 remains your target. The Kitchen now lets you serve meals that improve affinity and add a small quest-score bonus. | For the standard Kill the Beast result, send two knights and cover Strength 6, Agility 2, and Wits 1. Gwendan and Ursula can win with Strength gear: use the Hunter Axe and buy the 105-gold Claymore only if the later rewards restore or preserve the 300-gold floor. Do not send Angelica if you want Silgur; her named result follows the werewolf branch instead. The standard win gives People +2, Nobles +2, Merchants +2, and 120 gold. |
| Cycle 6: Secure Guilhelm’s alliance and finish the People target without breaking the treasury floor. | Guilhelm’s follow-up supplies the alliance and Wolf Skin. Daisy can trade 30 gold for People +1 if you will still hold 300. The Pirates Threat is a random emergency, so its exact timing can differ between timelines. | If The Pirates Threat appears, answer it immediately. It has a one-cycle deadline, needs two knights for one cycle, and asks for Strength 6, Agility 3, and Wits 3. Gwendan and Goberto can win; success gives People +2 and 80 gold, while failure destroys Grest. Angelica can take the one-cycle Knight of the Fountain, and Ursula can take the one-cycle Oracular Cheese. If the pirate emergency does not appear, seek the missing People points through another petition or short quest. |
| Cycle 7: Complete the ultimatum during Audience, recruit Silgur, and preserve your confrontation party. | Confirm Merchants 8, People 14, 300 gold, and Guilhelm’s alliance before holding Audience. Recruit Silgur from the standard Groveshire result. | Keep Silgur and two suitable partners available for the safest ambush setup. Ask the Nobles and Bucolic Diplomacy each last one cycle. Beaconsbury’s Hunt and The Silver Feathers each last two cycles, so do not commit a needed confrontation knight unless the objective tracker clearly shows that knight returning in time. Repair the intended party before pressing Finish. |
| Cycle 8: The Dragon Knight returns. The confrontation is now the main objective. | Move your best Agility and Wits equipment onto the chosen party. Favorite meals add affinity and a small quest-score bonus: Silgur likes Galette-Saucisse or Crêpe; Angelica likes Préfou or Crêpe; Gwendan likes Crêpe or Croque-Monsieur. Hold Audience, hear the available plans, and choose the branch you prepared. | Assign the confrontation before optional work. Each branch has a one-cycle deadline and duration. Confirm the full party size, repaired armor, and quest-card targets before pressing Finish. A victory closes Act One. Arron joins after the standard or Silgur victory, but the Tarcus route prevents his recruitment. |
Dragon Knight Confrontation Branches
Spoilers — Act One, Dragon Knight and Silgur/Tarcus timelines: These routes create different later histories. Preserve a rewind checkpoint before the Cycle 8 Audience if you want to inspect another branch. The listed statistics are quest-card targets, and party scoring uses the whole group; weak partners can drag down a strong knight.
| Branch | Party and quest-card requirements | Result and tradeoff |
|---|---|---|
| Dragon Knight Ambush | Silgur route; 3 knights total; Strength 4, Agility 8, Wits 8; damage 1–4 | Success defeats the Dragon Knight and awards a Dragon Heart. Silgur begins with Agility 8 and Wits 8, but his Poacher trait applies a penalty to Dragon quests. Equip his two partners for Agility and Wits so they do not pull down the party score. |
| Facing the Dragon Knight | 4 knights; Strength 8, Agility 8, Magic 7, Wits 4; damage 2–4 | This is the standard head-on victory and has no listed item reward. Use it when Silgur is absent or four strong, repaired knights give better coverage. Winning allows Arron to join after Act One. |
| Trap the Dragon Knight | Tarcus route; 2 knights total; Strength 4, Agility 4, Wits 9; damage 2–3 | Success kills the Dragon Knight and records the Tarcus outcome. Tarcus kidnaps Arron as part of the plan, so Arron becomes unavailable for recruitment. This route needs the smallest party, but it carries the sharpest story cost. |
When the Recommended Knight Is Missing
If Silgur or another needed knight is still committed on Cycle 8, do not launch an undersized ambush. Ask for a delay if that dialogue appears, then read the updated objective tracker instead of assuming you received a full extra cycle. If no safe delay exists, rewind to Cycle 7 before the Round Table and cancel the assignments that caused the clash. Keep Silgur plus two partners home, or prepare four knights for Facing the Dragon Knight.
If you missed a faction or treasury check, rewind to Cycle 4 or 5 and change one concrete choice: keep the Nomads, take the pragmatic lighthouse response, preserve the standard Kill the Beast rewards, pay Daisy only when affordable, or stop buying gear below the treasury floor. If a quest party is merely weak, the Hunting Bow adds Agility +1 and Wits +1; meals add a small score bonus, and repaired armor improves the party’s odds of surviving a poor result.
A rewind preserves useful foreknowledge, but it does not carry every ally, artifact, quest result, or relationship out of the discarded future. Random emergencies and changed earlier choices can also reshape a later cycle. That is the fun of Sovereign Tower: failed reigns become intelligence, and yesterday’s royal catastrophe becomes tomorrow’s suspiciously well-prepared master plan.
Comments will load when you reach this part of the walkthrough.