

Chapter Six: The Watch Tower
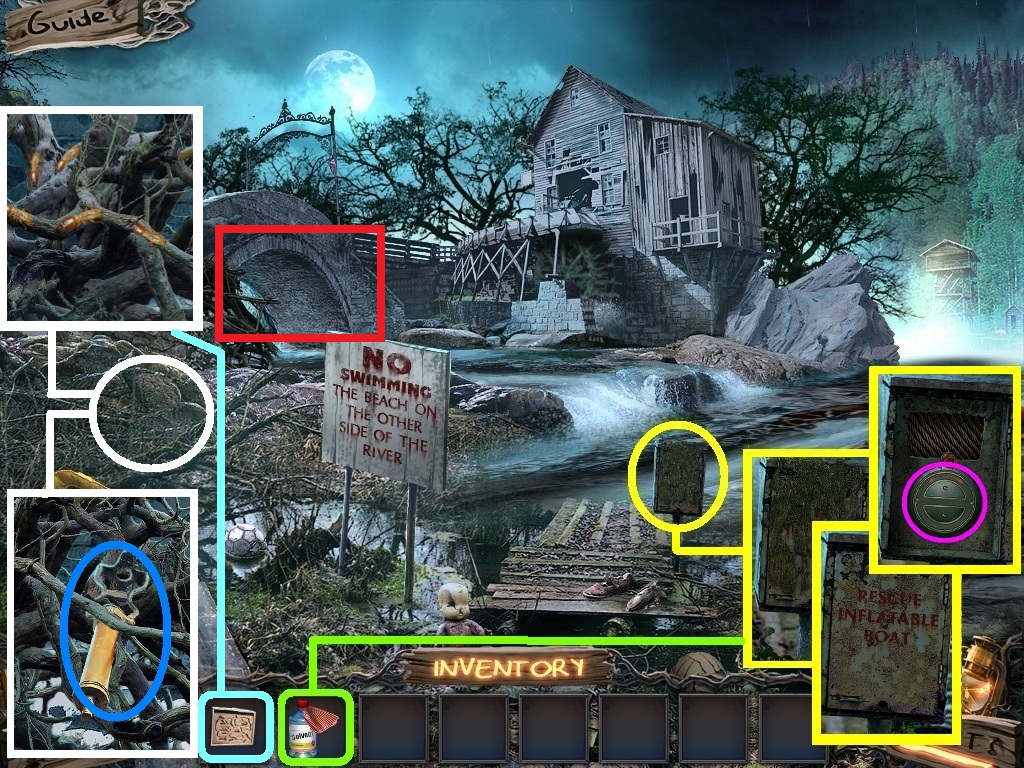
- Zoom into the control panel (yellow circle).
- Pick the solvent (green square); use it on the panel.
- Click the panel door.
- Click the winch (pink circle).
- Zoom into the branches (white circle); collect the broken pump (blue circle).
- Use the termites (aqua square) on the branches.
- Zoom under the bridge (red rectangle) to access a hidden objects area.
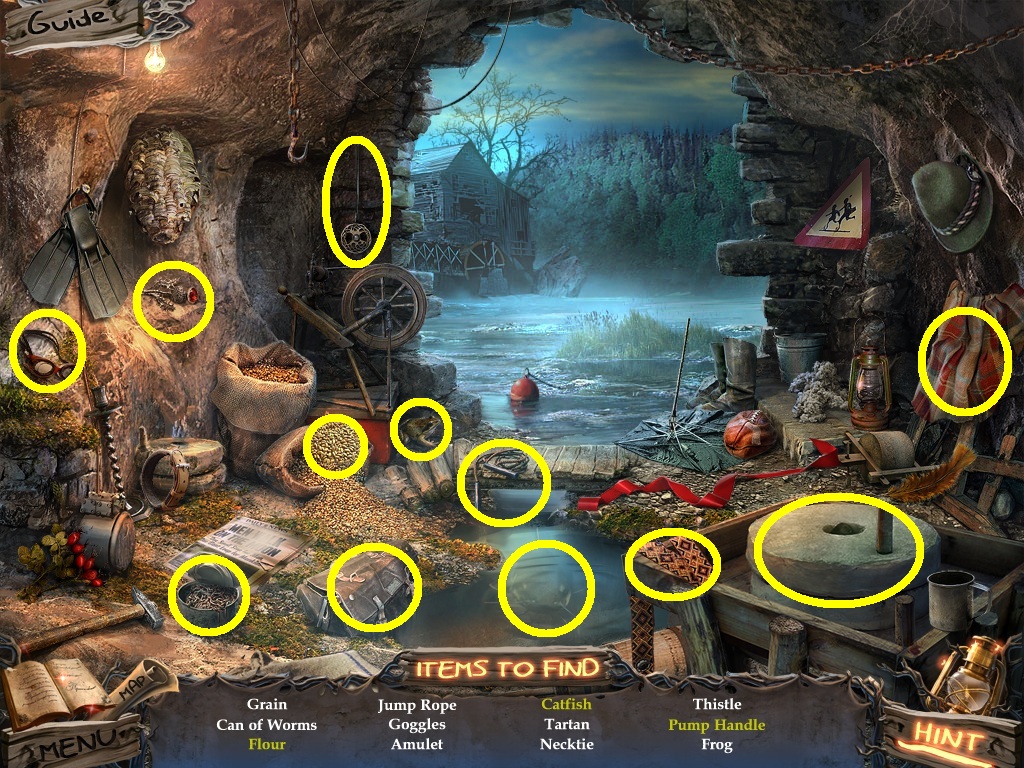
- Find the listed items (yellow circles).
- Collect the handle.
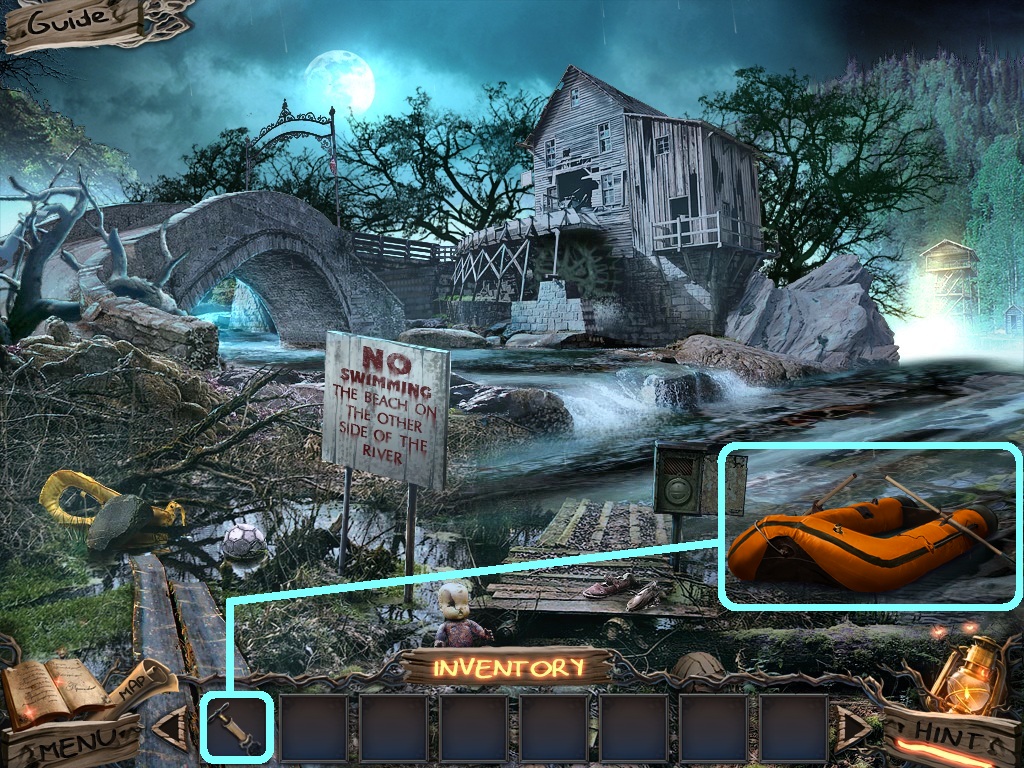
- Pick the air pump (aqua square); use it on the boat.
- Go to the dock.
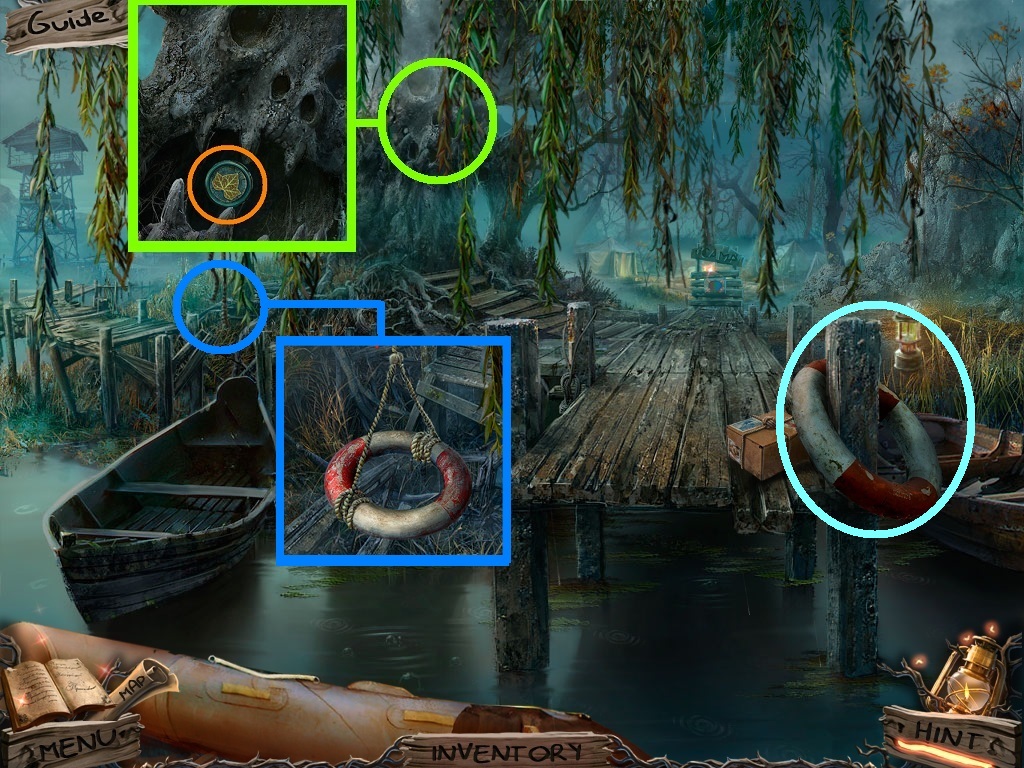
- Zoom into the tree (green circle).
- Click the trunk.
- Collect the leaf button (orange circle).
- Collect the life buoy (aqua circle).
- Zoom into the rope (blue circle); use the life buoy to tie onto the rope.
- Click the life buoy to go across.
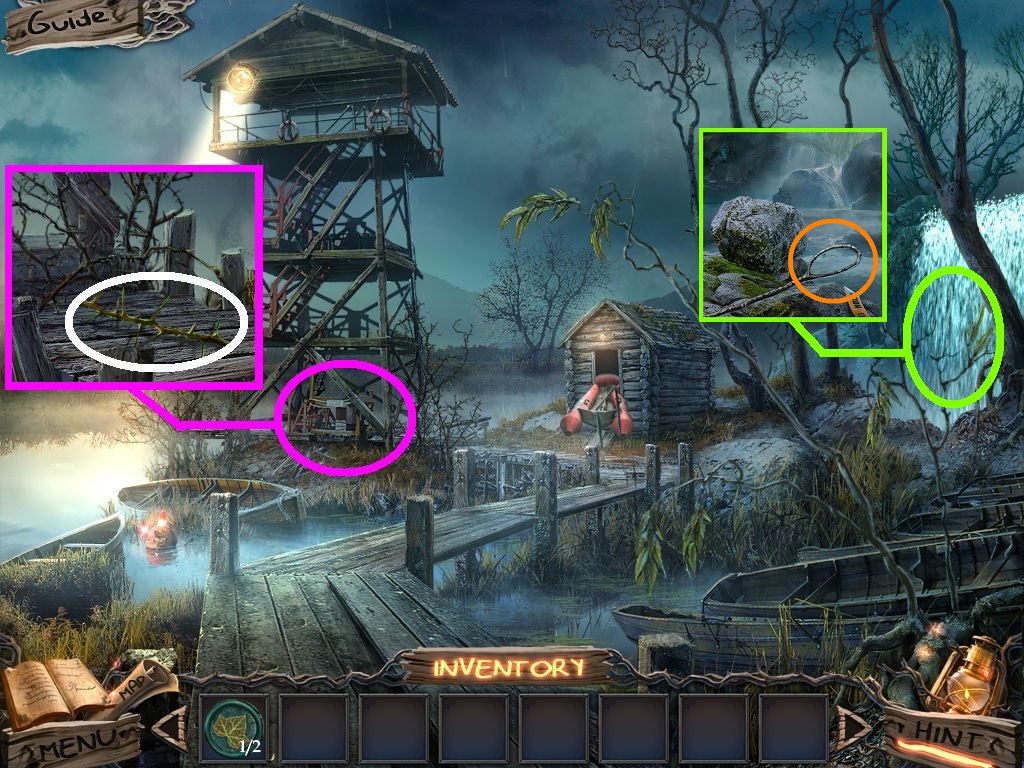
- Zoom into the tower (pink circle); collect the thorn (white circle).
- Zoom into the waterfall (green circle); collect the net piece (orange circle).
- Go to the dock.
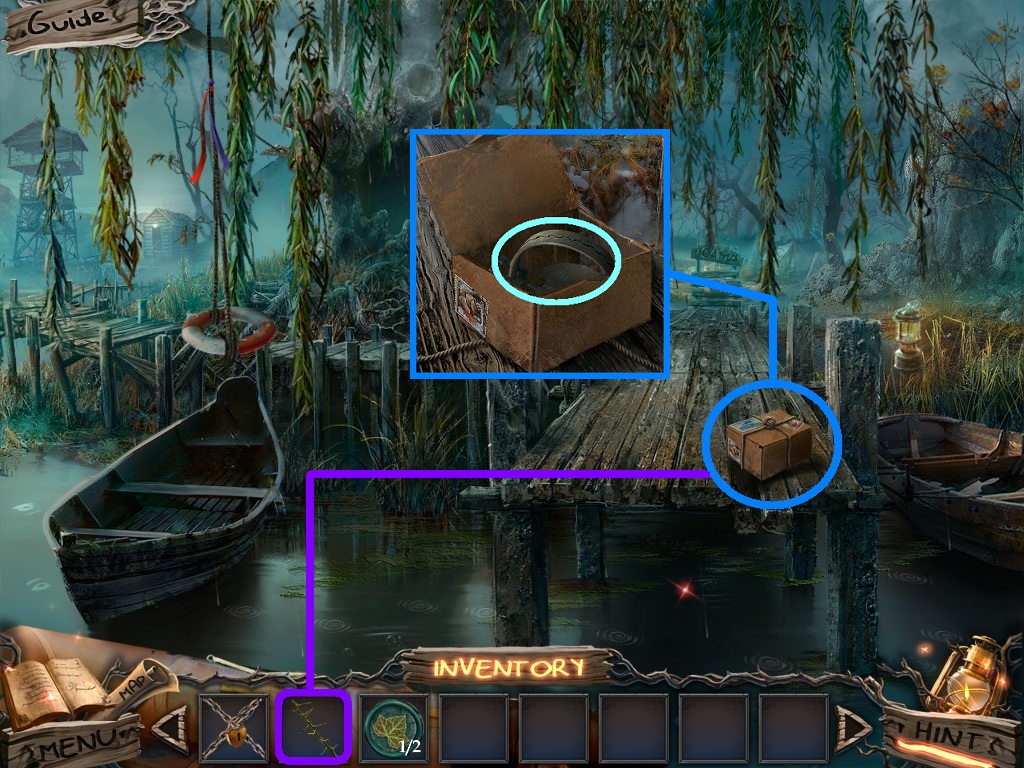
- Zoom into the package (blue circle); pick the thorn (purple square) and use it to open the package.
- Collect the animal trap (aqua circle).
- Go to the watch tower.
- Zoom into the boat (green circle).
- Use the animal trap (pink square) on it.
- Click the shed (red rectangle) to access the hidden objects area.
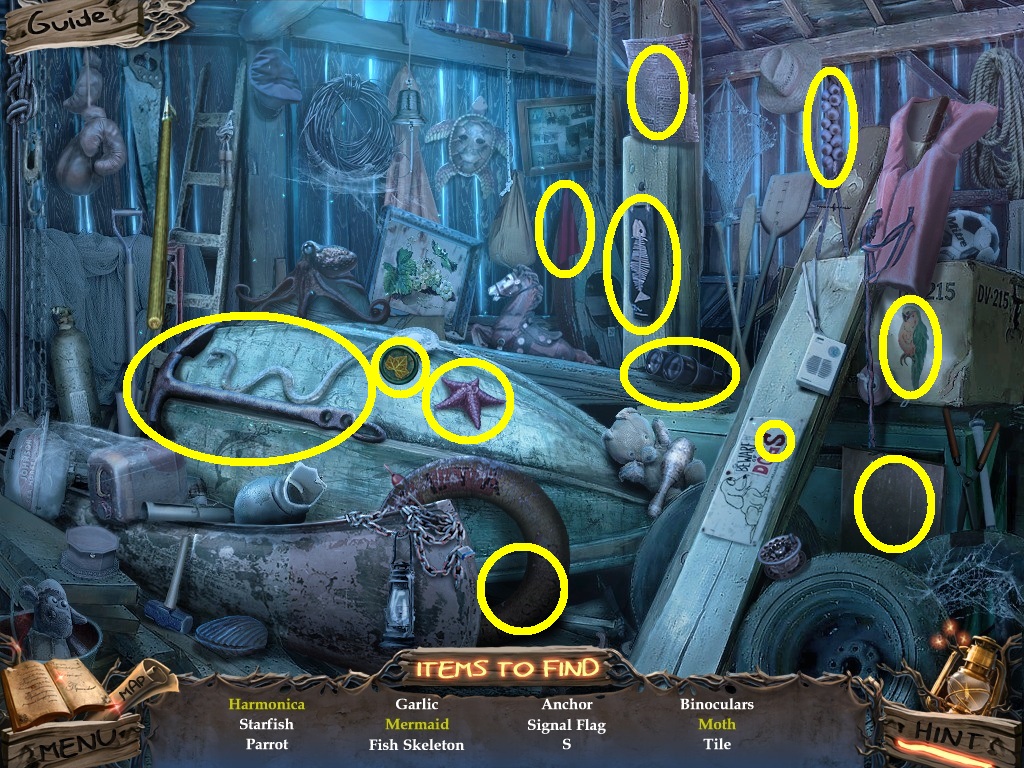
- Find the listed items (yellow circles).
- Collect the leaf button
- Go outside.
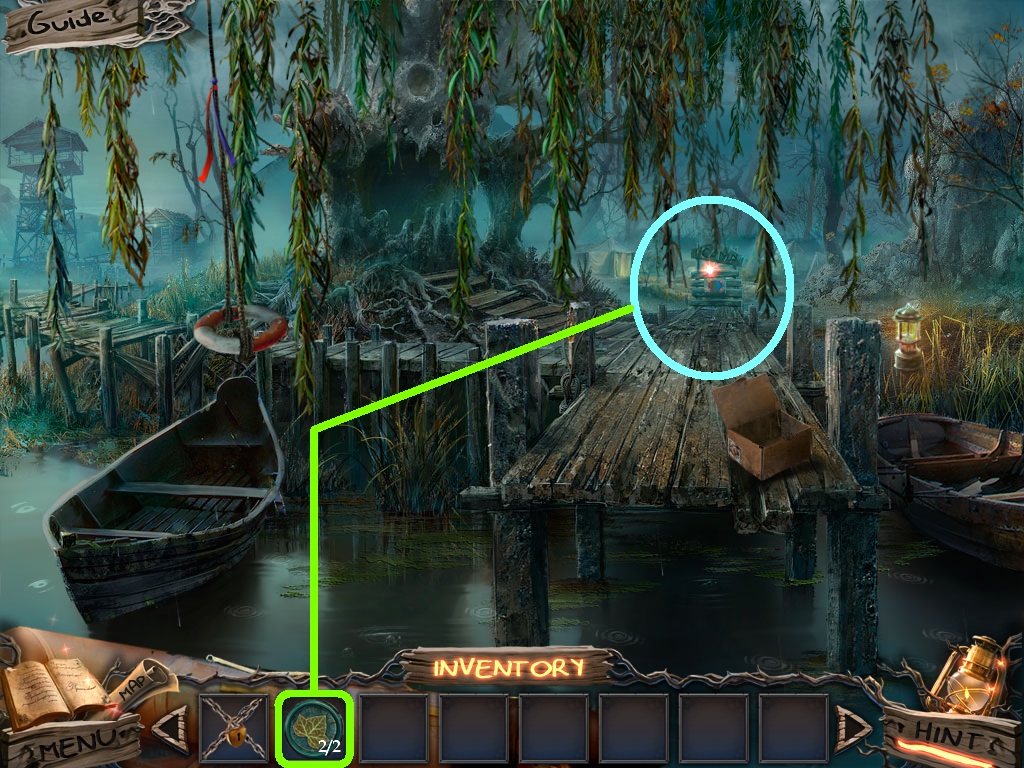
- Zoom into the wharf (aqua circle).
- Pick the leaf buttons (green squares) and place them into the gate slots; a puzzle will trigger.
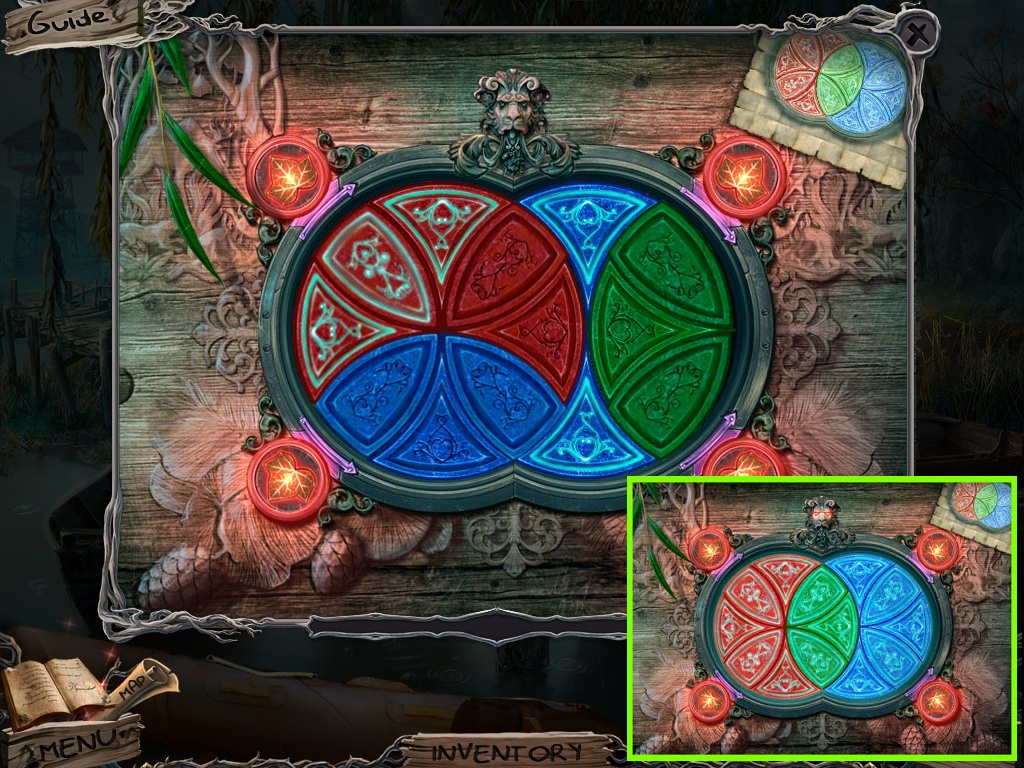
- Move the discs around to copy the pattern in the corner.
- Go to the campgrounds.
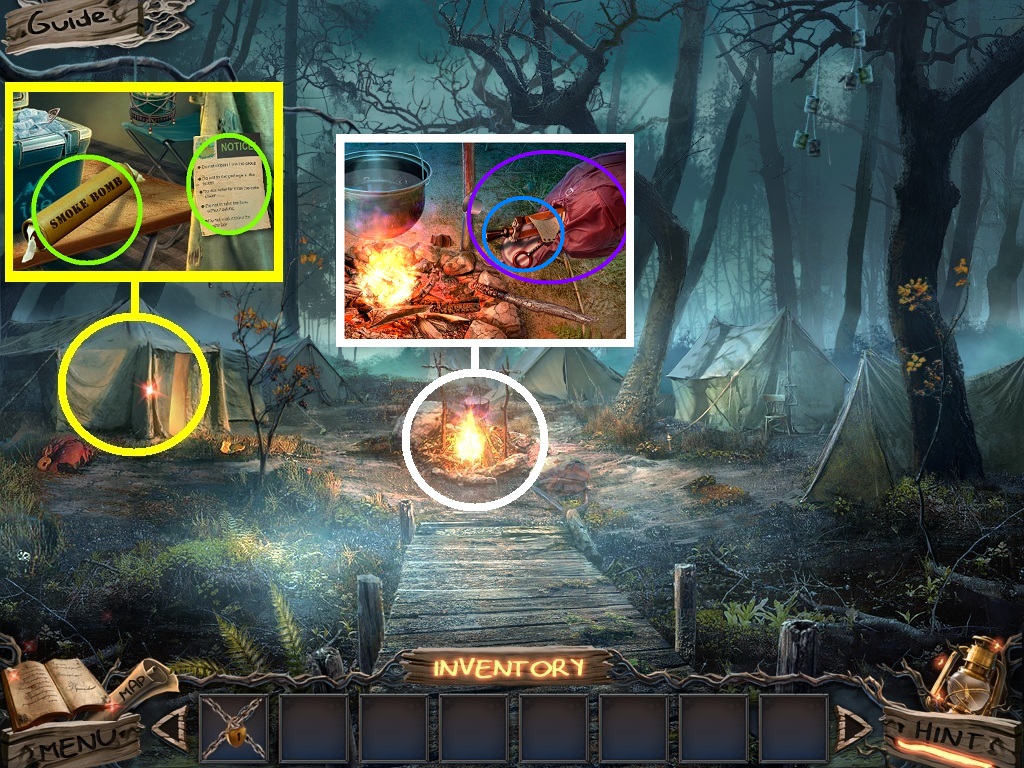
- Zoom into the tent (yellow circle) and collect the smoke bomb and the note (green circles).
- Zoom into the fire (white circle).
- Click the backpack (purple circle).
- Collect the note, the lever and the trigger ring (blue circle).
- Go to bridge mill.
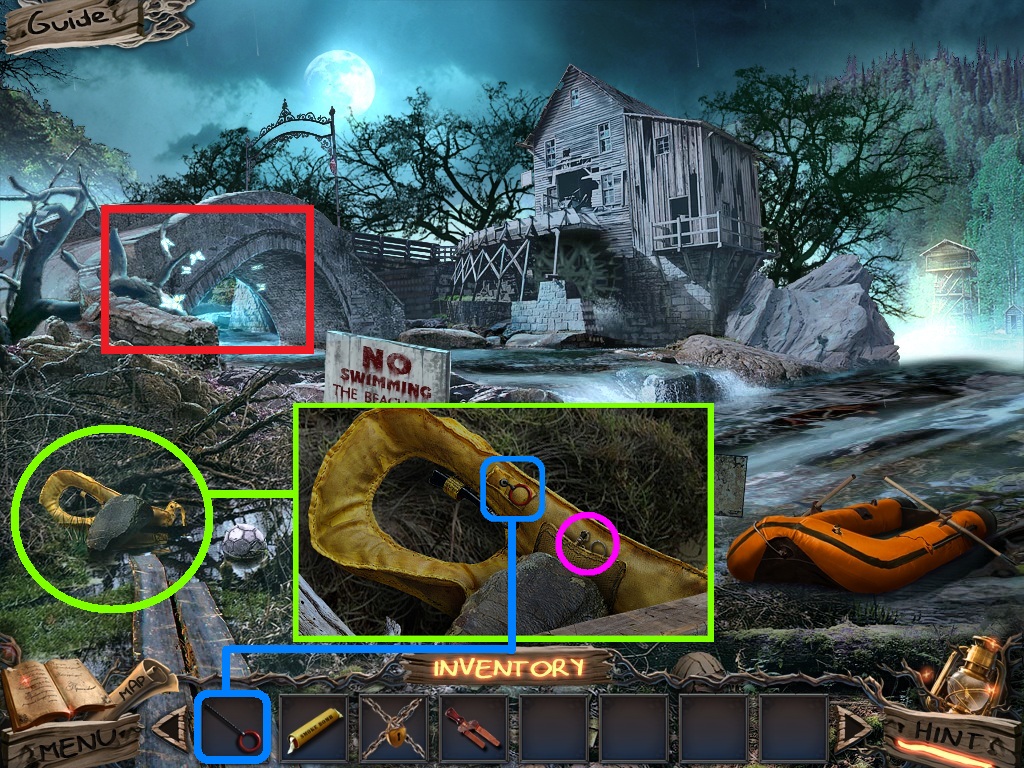
- Zoom into the life jacket (green circle).
- Pick the trigger ring (blue square); place it onto the life jacket.
- Click the trigger ring and collect the buoy ring (pink circle).
- Zoom under the bridge (red rectangle) to trigger a hidden objects area.
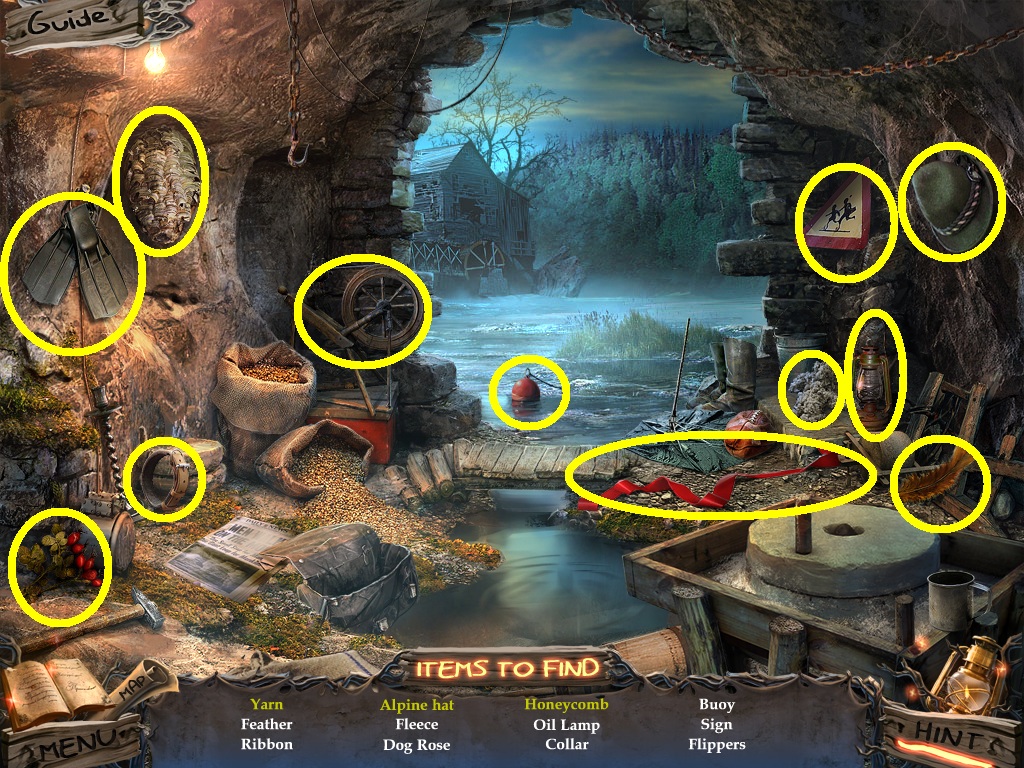
- Find the listed items (yellow circles).
- Collect the lantern.
- Go to the campground.
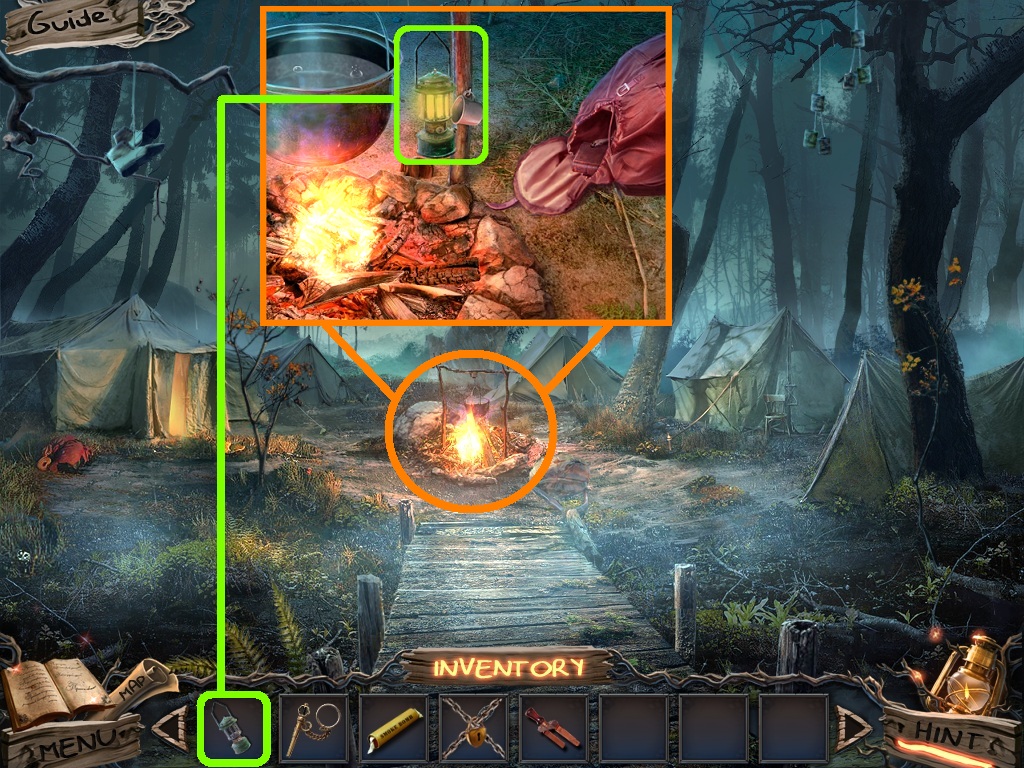
- Zoom into the fire (orange circle).
- Pick the lantern (green square) on the stick use it on the fire.
- Collect a lit lantern.
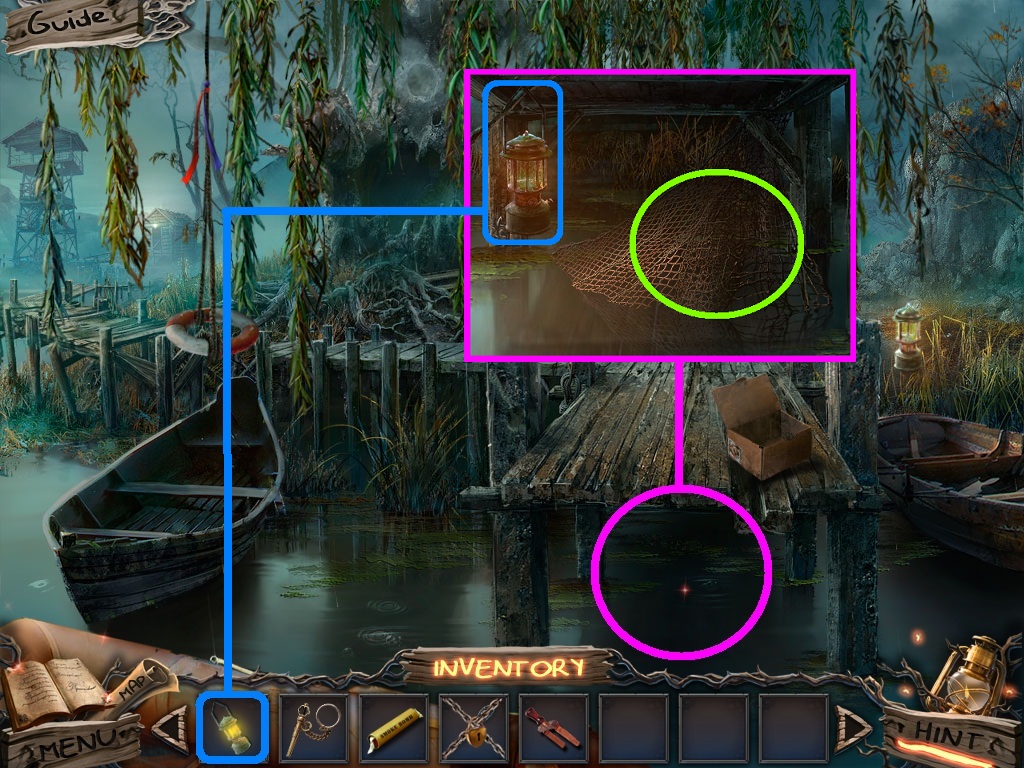
- Zoom under the pier (pink circle); place the lit lantern (blue square) under it.
- Collect the netting (green circle).
- Go to the watch tower.
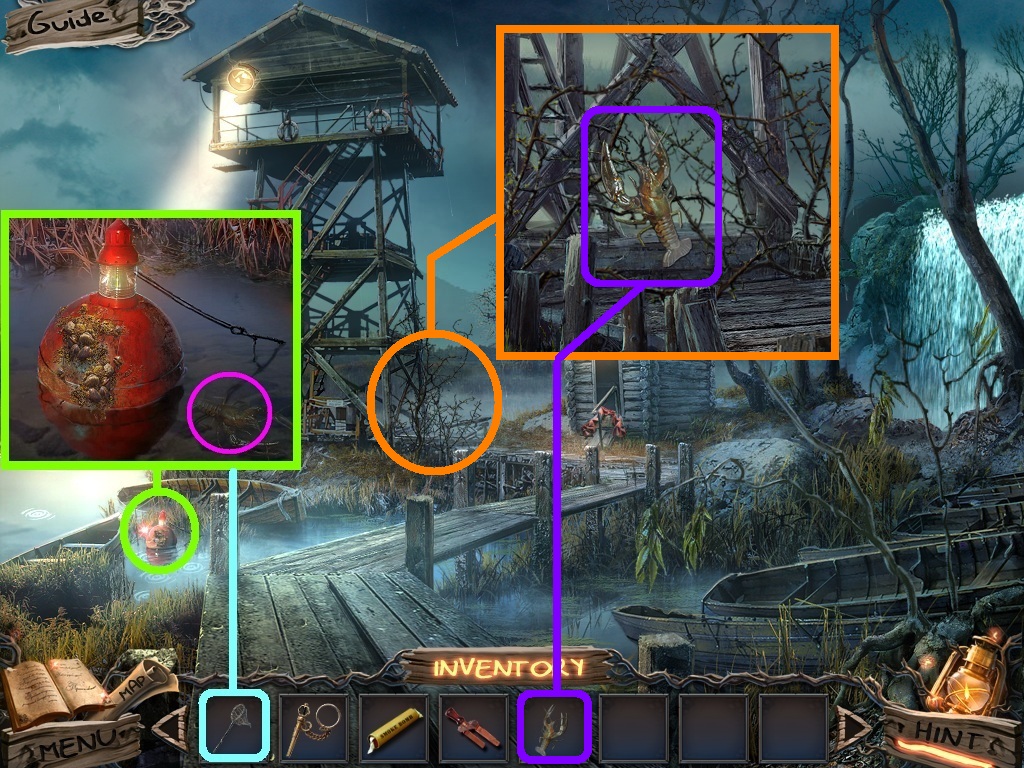
- Zoom into the buoy (green circle).
- Pick the net (aqua square); use it to collect the lobster (pink circle).
- Zoom into the tower (orange circle); pick the lobster (purple square); use it on the thorns.
- Go to the viewing platform.
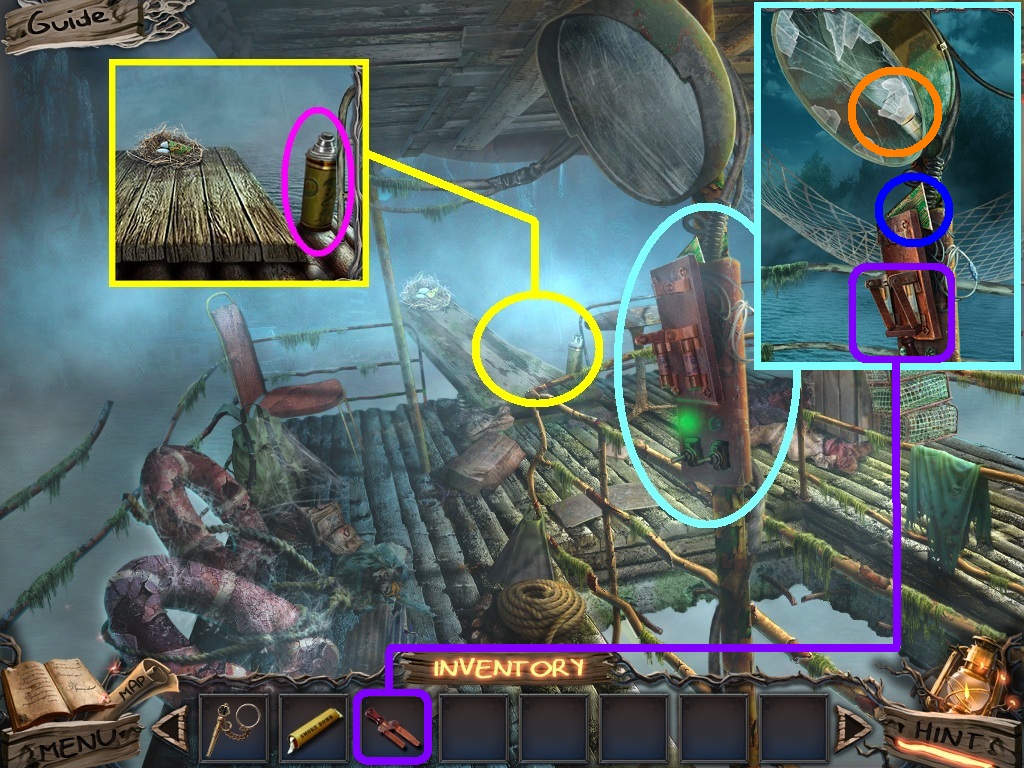
- Zoom into the plank (yellow circle).
- Collect the insulated flask (pink circle).
- Zoom into the spotlight controls (aqua circle) and collect the picture part (blue circle).
- Pick the lever (purple square); place it on the bracket and click.
- Collect the broken bulb (orange circle).
- Go to the campground.
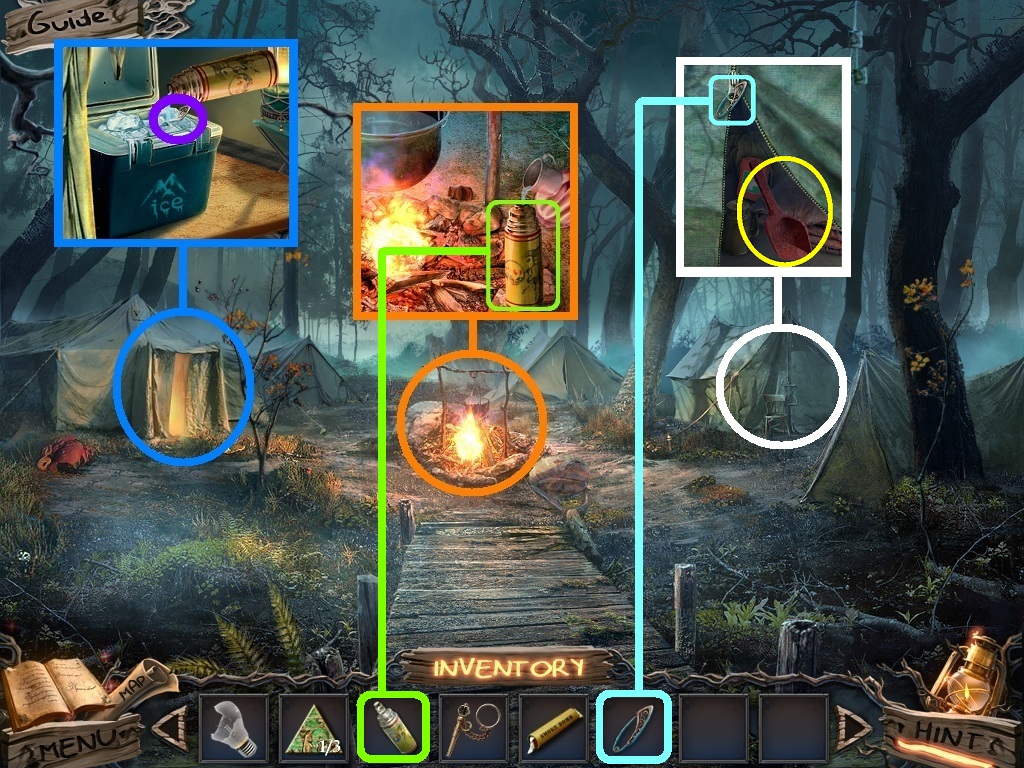
- Zoom into the fire (orange circle).
- Use the insulated flask (green square) to collect hot water.
- Zoom into the tent (blue circle); pour the hot water on the ice.
- Collect the pin (purple circle).
- Zoom into the other tent (white circle); click the zipper.
- Use the pin (aqua square) on the zipper.
- Collect the scraper (yellow circle).
- Go to the watch tower.
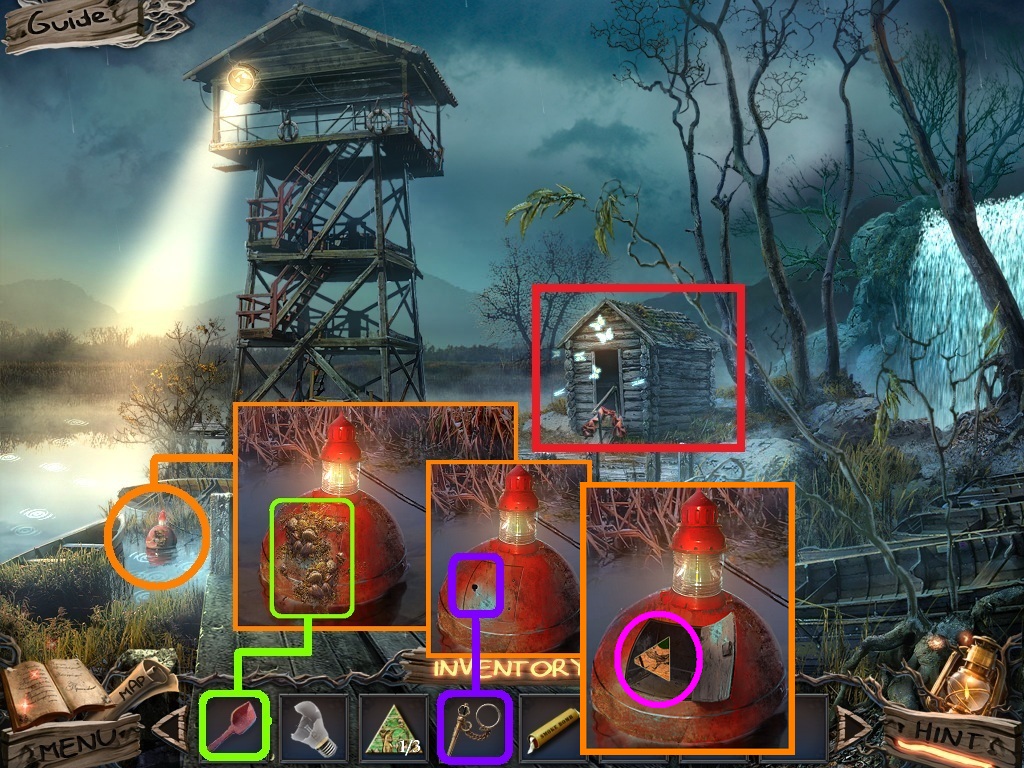
- Zoom into the buoy (orange circle).
- Use the scraper (green square) on the shells (click 3 times).
- Use the buoy key (purple square) on the lock.
- Click the door; collect the picture part (pink circle).
- Zoom into the shed (red rectangle) to access the hidden object area.
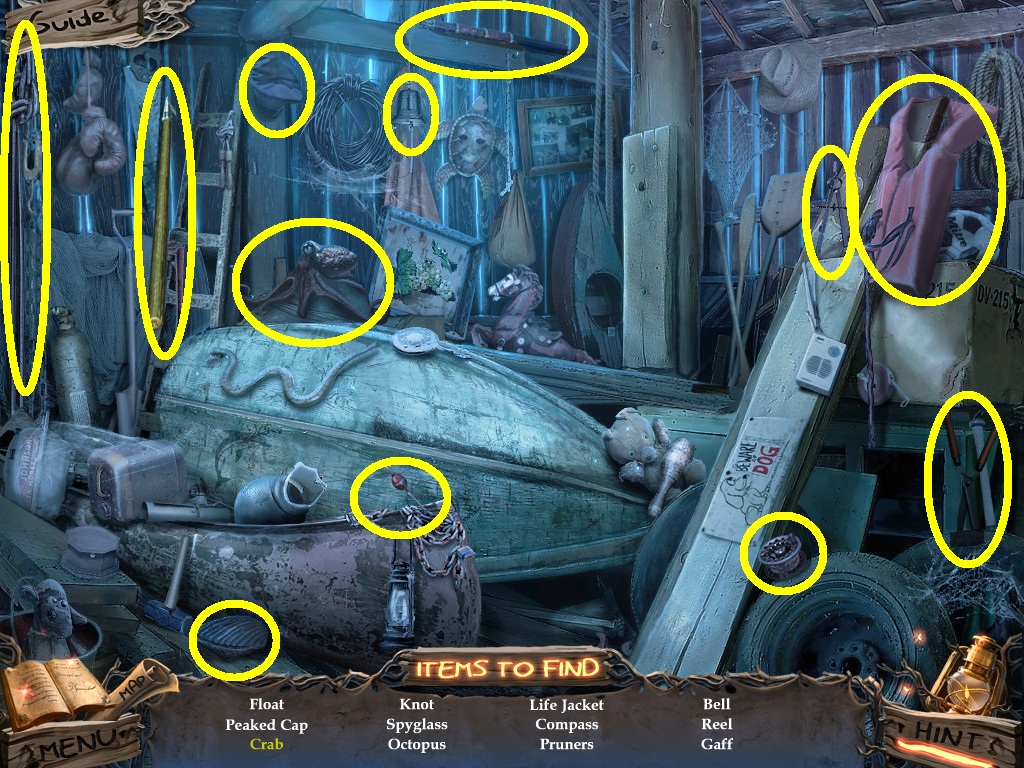
- Find the listed items (yellow circles).
- Collect the hook.
- Go to the viewing platform.
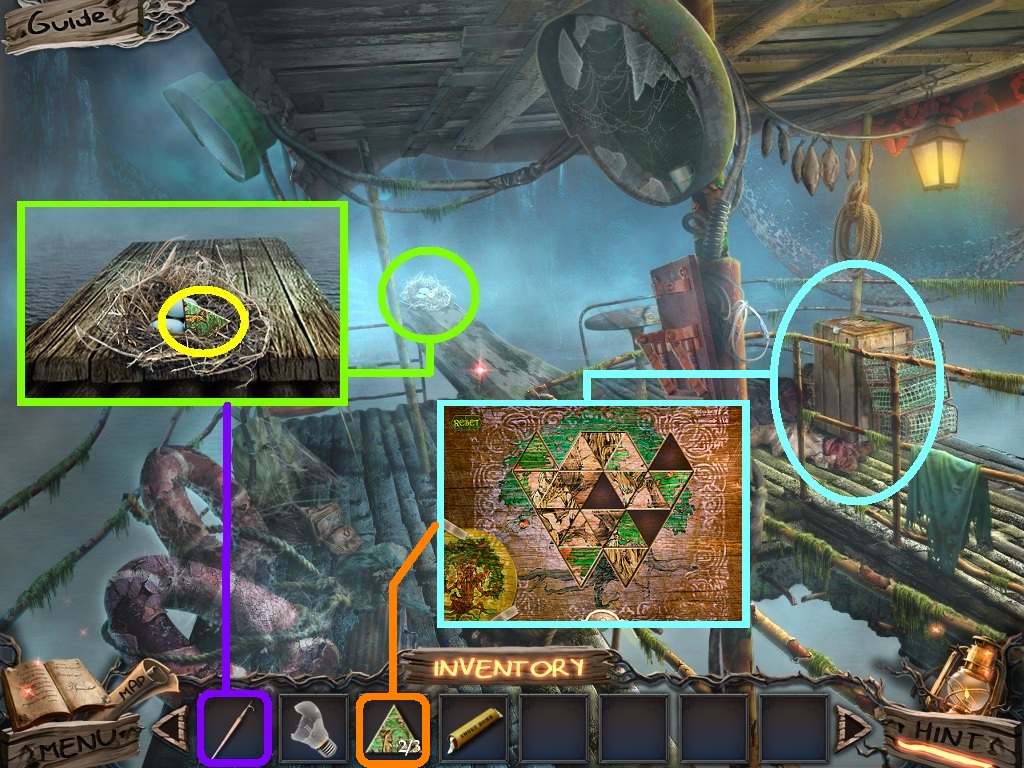
- Zoom into the nest (green circle).
- Use the hook (purple square) on the nest.
- Collect the picture piece (yellow circle).
- Zoom into the chest (aqua circle).
- Place the picture pieces (orange square) onto it to trigger a puzzle.
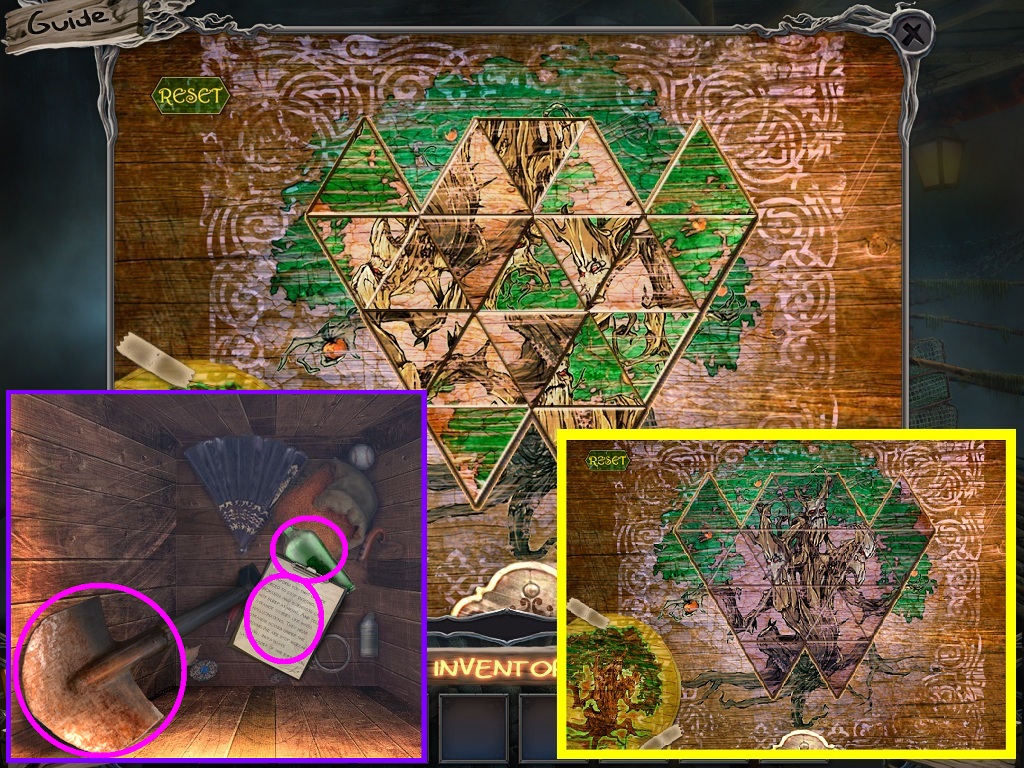
- Solve as shown above (yellow square).
- Collect the note, the shovel and the empty bottle (pink circles).
- Go to the exterior of the watch tower.
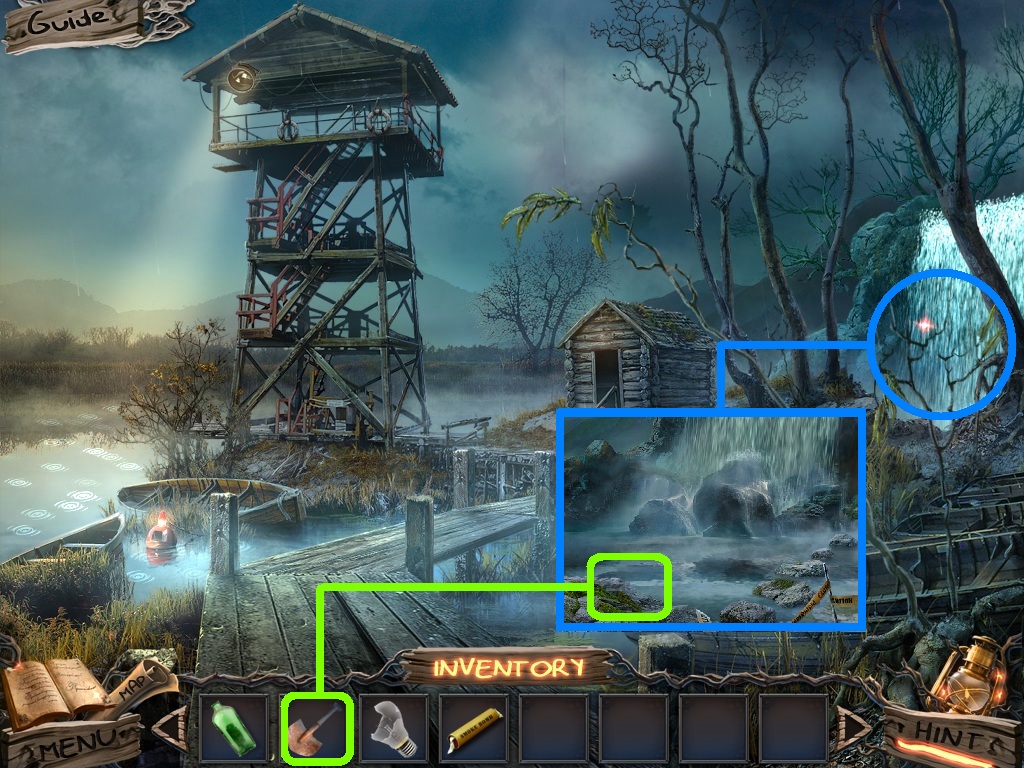
- Zoom into the waterfall (blue circle); use the shovel (green square) on the rock.
- Go behind the waterfall.
- Collect the apple piece.
Comments will load when you reach this part of the walkthrough.