Chapter Two: Nurse's Station
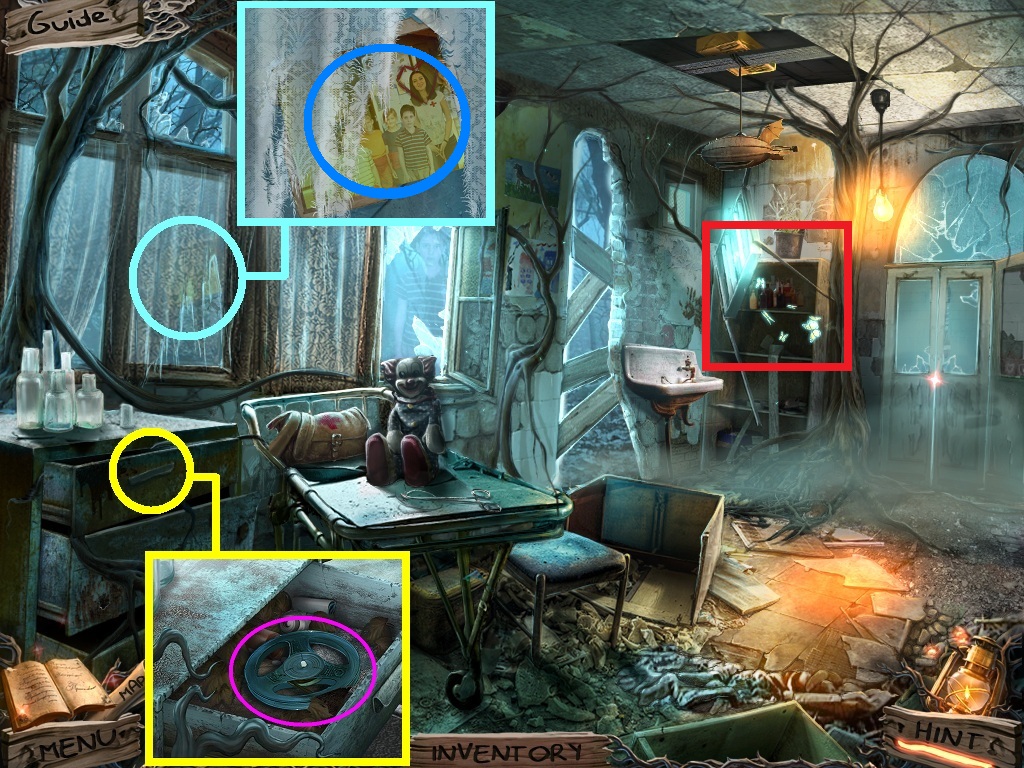
- Zoom into the top drawer (yellow circle).
- Collect the tape reel (pink circle).
- Zoom into the window (aqua circle).
- Collect the photo (blue circle).
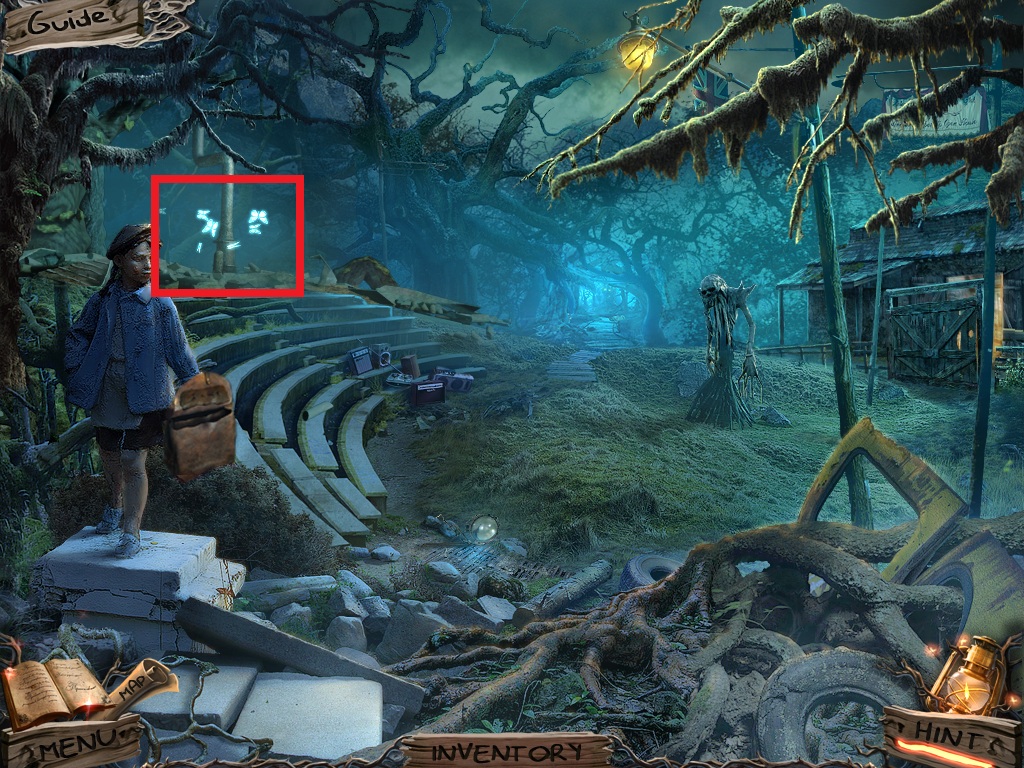
- Zoom into the shelves to access the hidden objects area (red rectangle).
- Find the listed items (yellow circles).
- Collect the bandage.
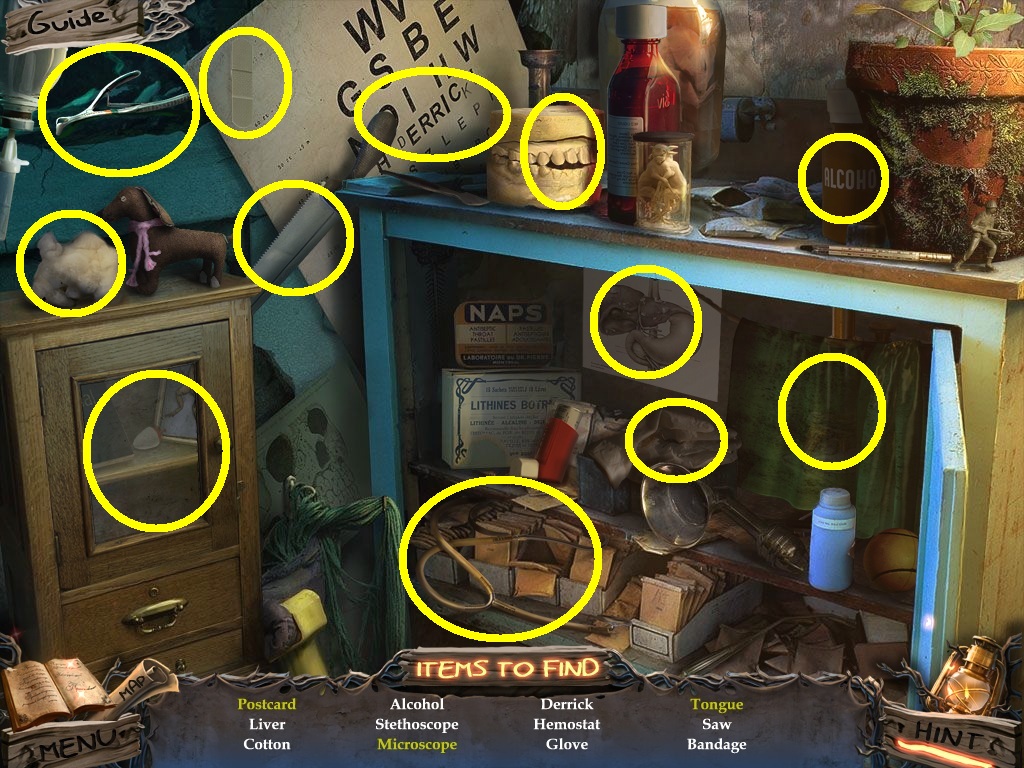
- Go to the fire pit.
- Zoom into the tape deck (blue circle).
- Pick the tape reels (yellow square) and place them on the spindles.
- Click the play button (green circle).
- Collect the tile with the symbols (pink circle).
- Go to the mess hall.
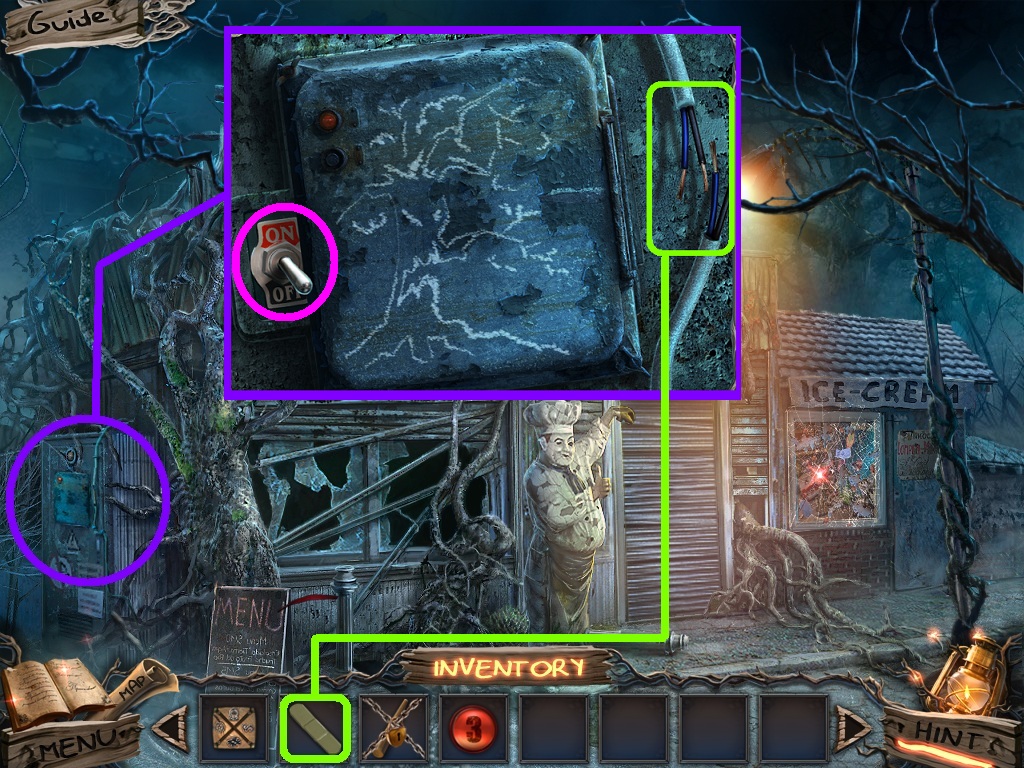
- Zoom into the electrical panel (purple circle).
- Pick the bandage (green square) and place them on the wires.
- Click the electrical panel (pink circle); a puzzle will trigger.
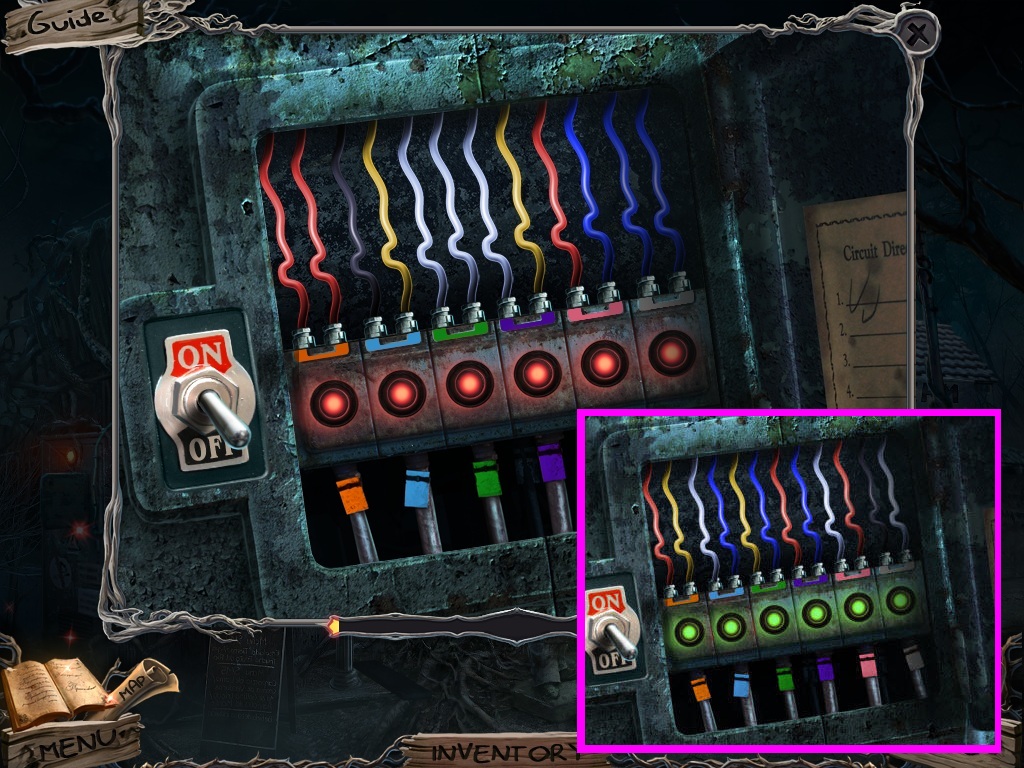
- Move the colored wires so that the 2 wire color combinations create the color of the connector.
- Solve as shown above (pink square).
- Go into the mess hall.
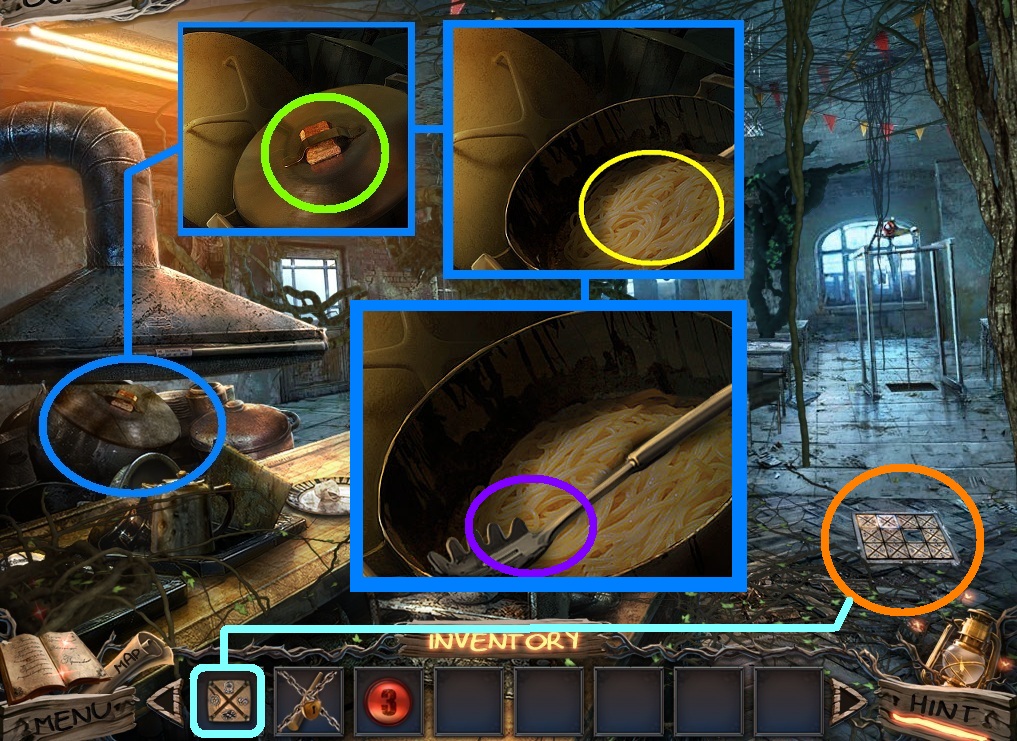
- Zoom into the pots (blue circle).
- Click the lid (green circle).
- Click the pasta (yellow circle).
- Collect the pasta ladle (purple circle).
- Zoom into the hatch (orange circle).
- Pick the tile with the symbols (aqua square); place it on to the hatch to trigger a puzzle.
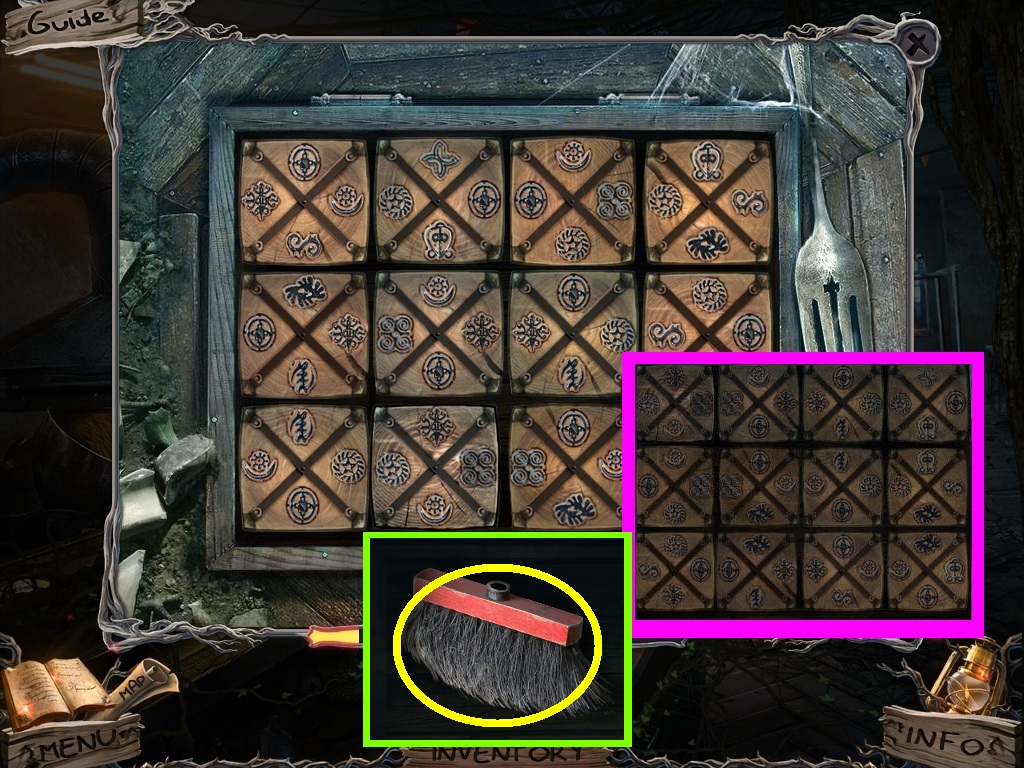
- Move the tiles so that the symbols match.
- Solve as shown above (pink square).
- Collect the broom head (yellow circle).
- Go to the mess hall exterior.

- Zoom into the window (yellow circle).
- Pick the broom (green square); use it on the cobwebs.
- Zoom into the window and access the hidden objects area (red rectangle).

- Find the listed items (yellow circles).
- Collect the plunger.
- Go to the mess hall.

- Zoom into the sink (blue circle).
- Pick the plunger (green square); use it on the sink.
- Collect the toy propeller (pink circle).
- Go to the fire pit.
- Zoom into the collapsed house area to access a hidden object area (red rectangle).
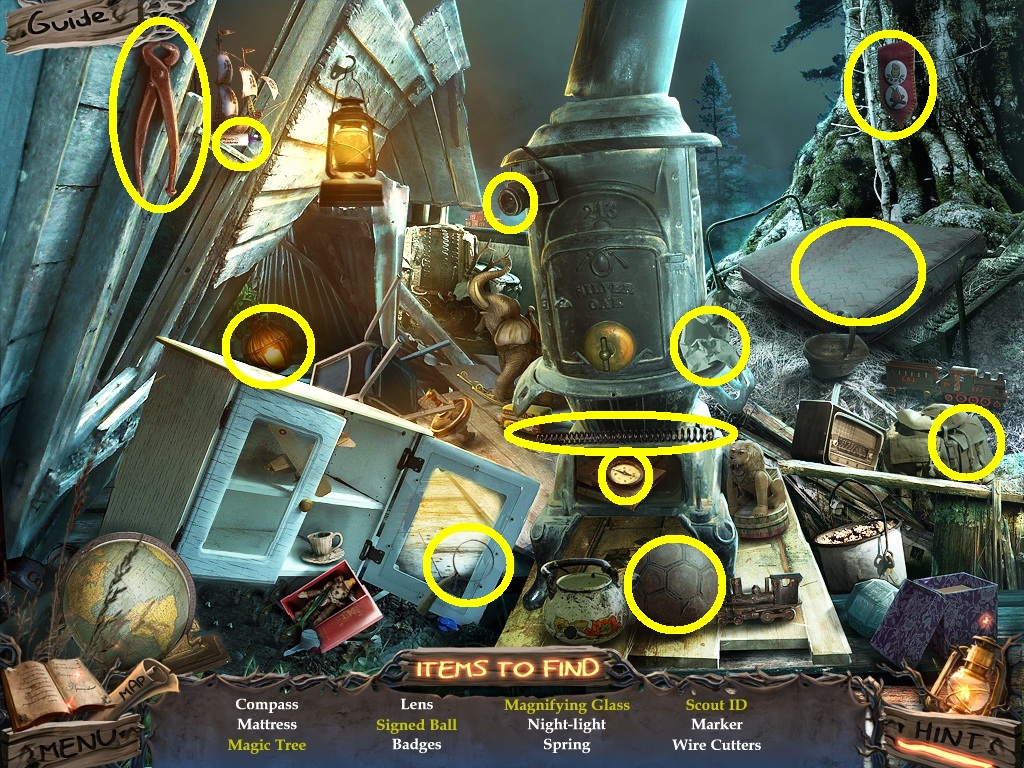
- Find the listed items (yellow circles).
- Collect the wire cutters.
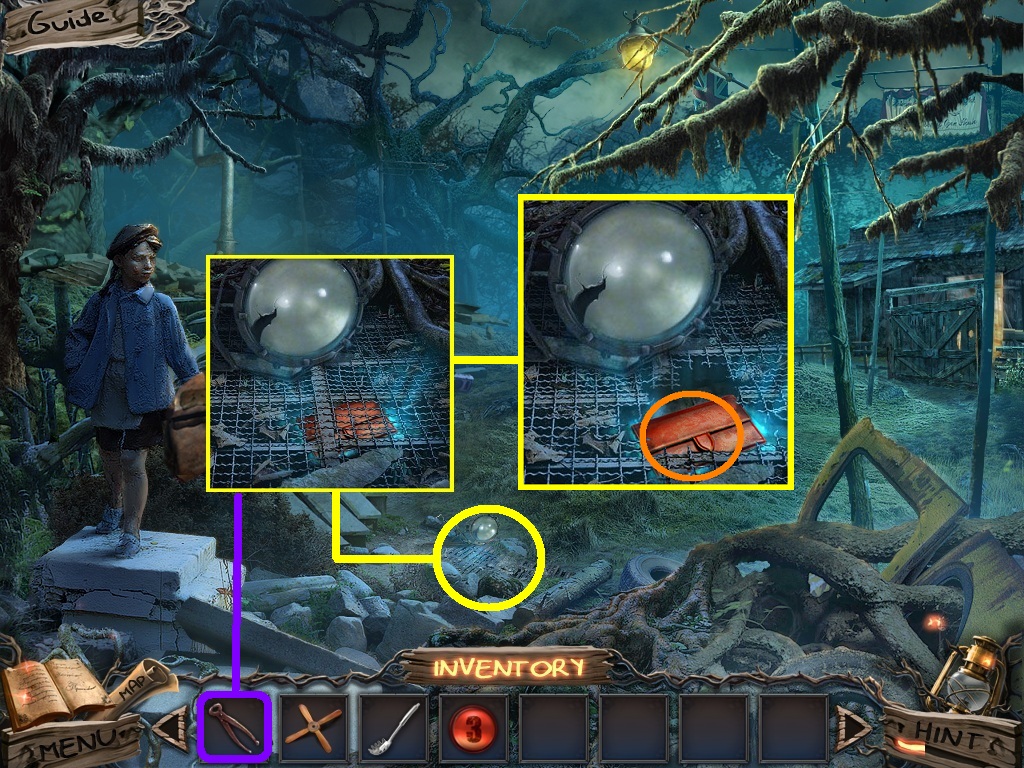
- Zoom into the grate (yellow circle).
- Pick the wire cutters (purple square) use them to cut the bars.
- Collect the code (orange circle).
- Go to the director’s office.
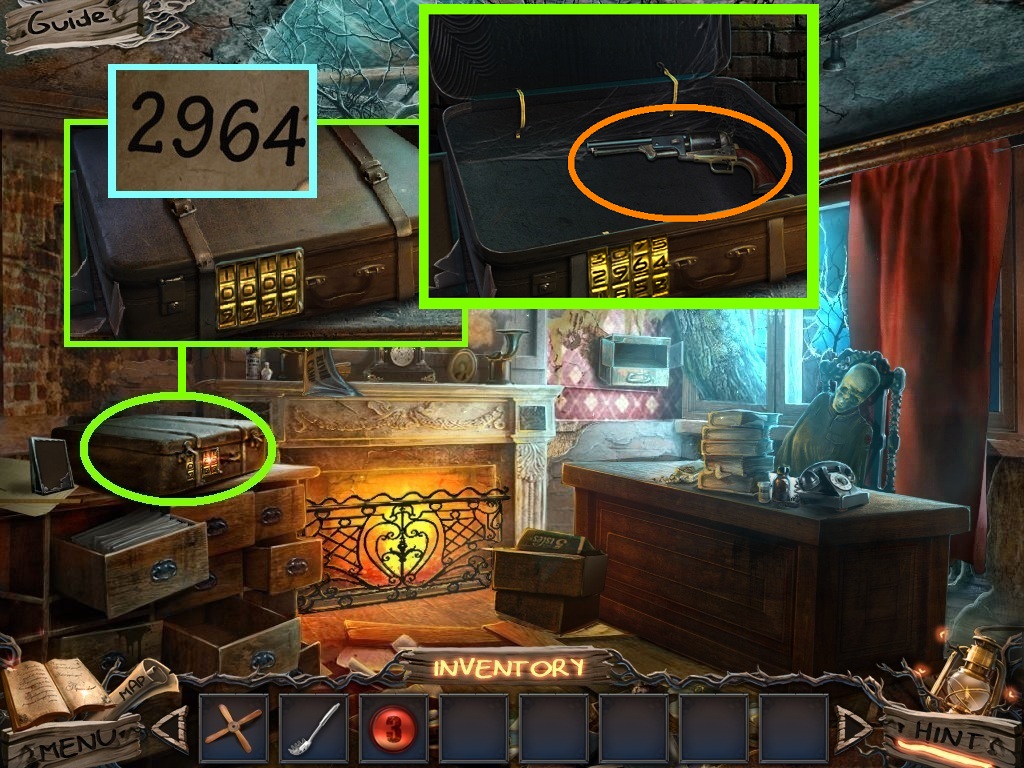
- Zoom into the suitcase (green circle).
- Use the code {2964} from the grate to unlock the lock.
- Click the suitcase; collect the revolver (orange circle).
- Go into the nurse’s office.
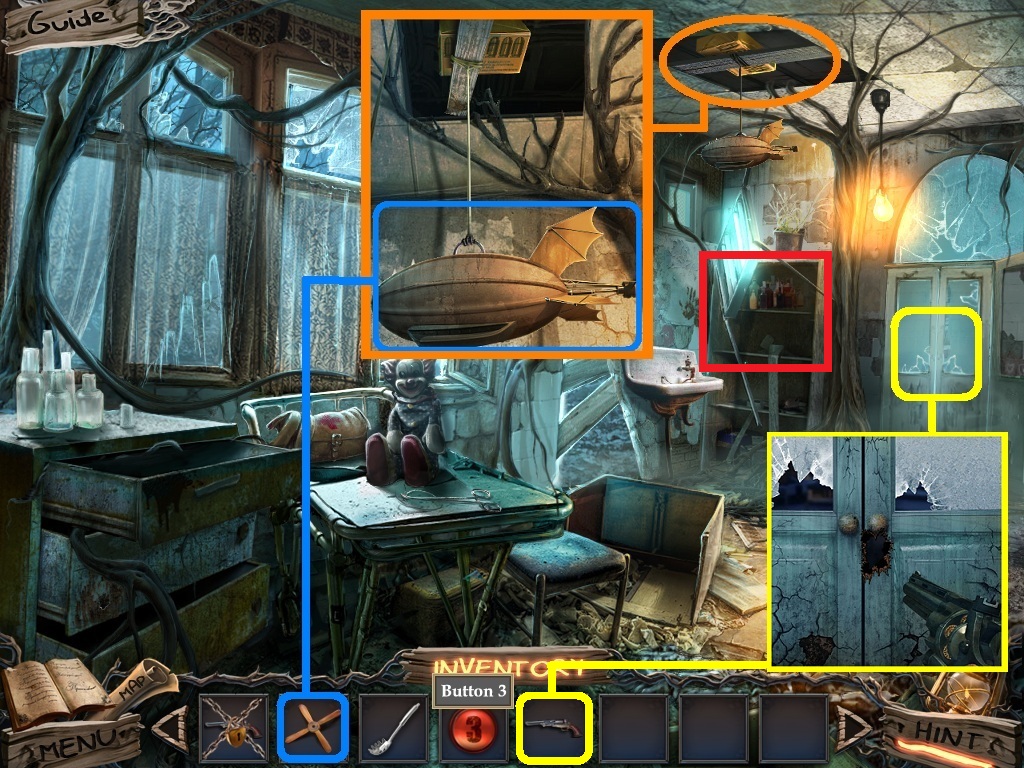
- Zoom into the hole in the ceiling (orange circle).
- Place the toy propeller (blue square) onto the blimp.
- Click the blimp.
- Collect the bullets.
- Zoom into the door and use the loaded revolver on it (yellow square).
- Zoom into the shelves to access the hidden objects area (red rectangle).
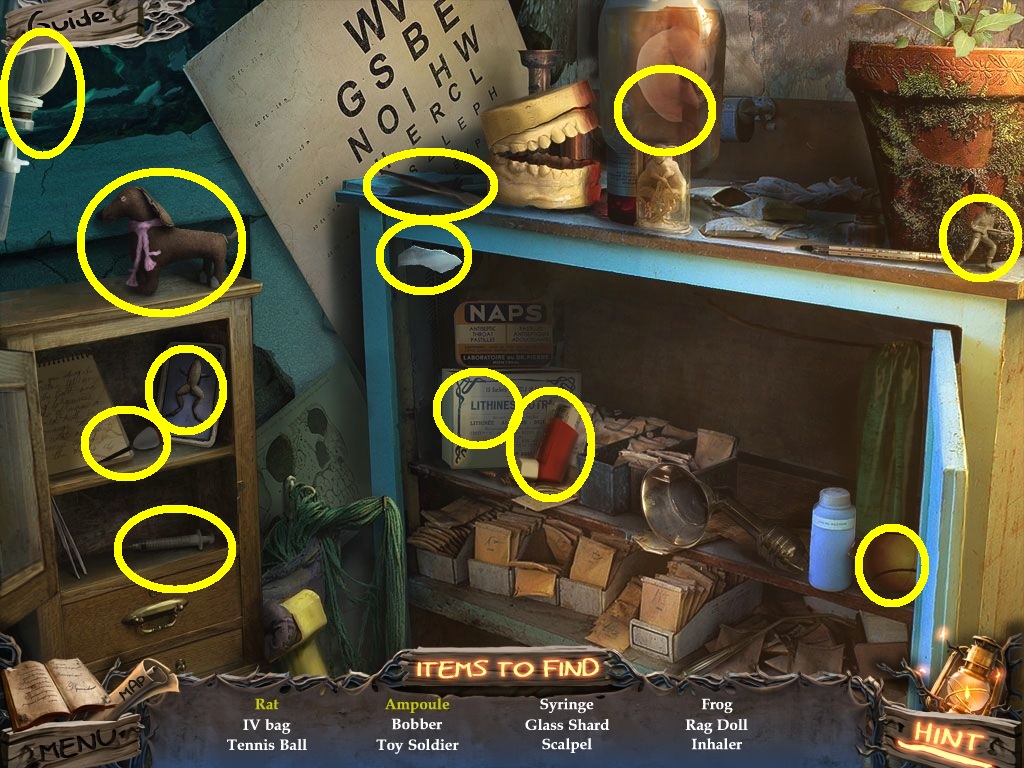
- Find the listed items (yellow circles).
- Collect the glass shard.
- Go into the doorway; to the infirmary.
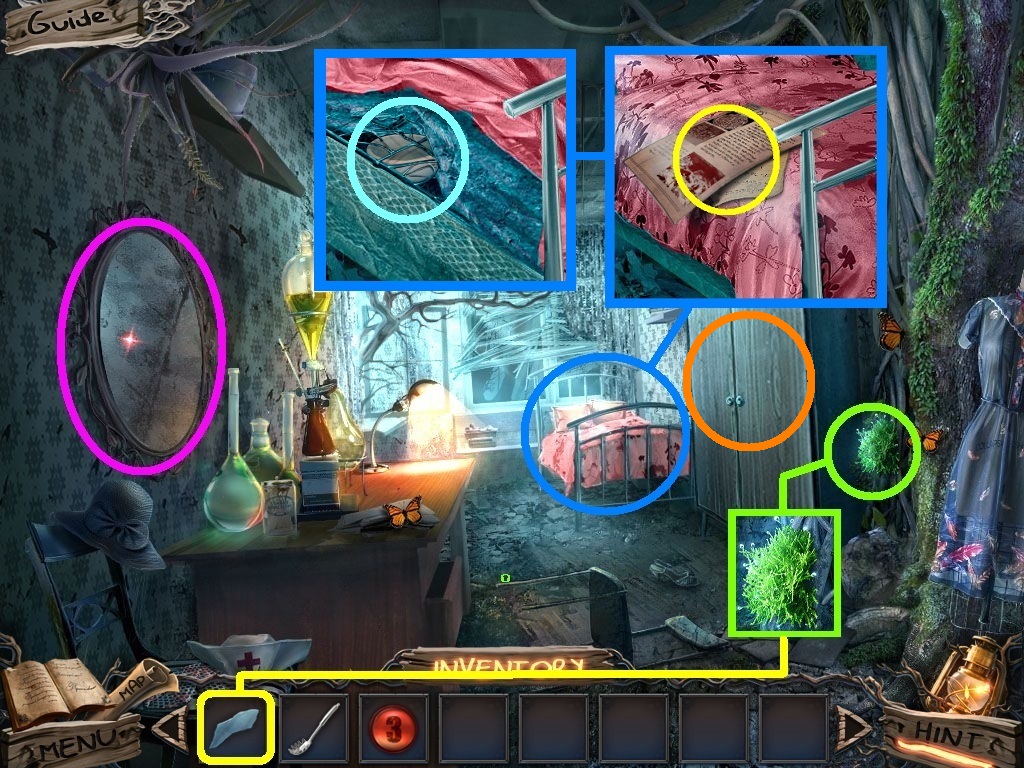
- Click the mirror (pink circle).
- Zoom into the moss (green circle); pick the glass shard (yellow square) to remove the moss.
- Zoom into the bed (blue circle).
- Collect the note (yellow circle).
- Click the sheets; collect the mortar (aqua circle).
- Zoom into the cabinet (orange circle).
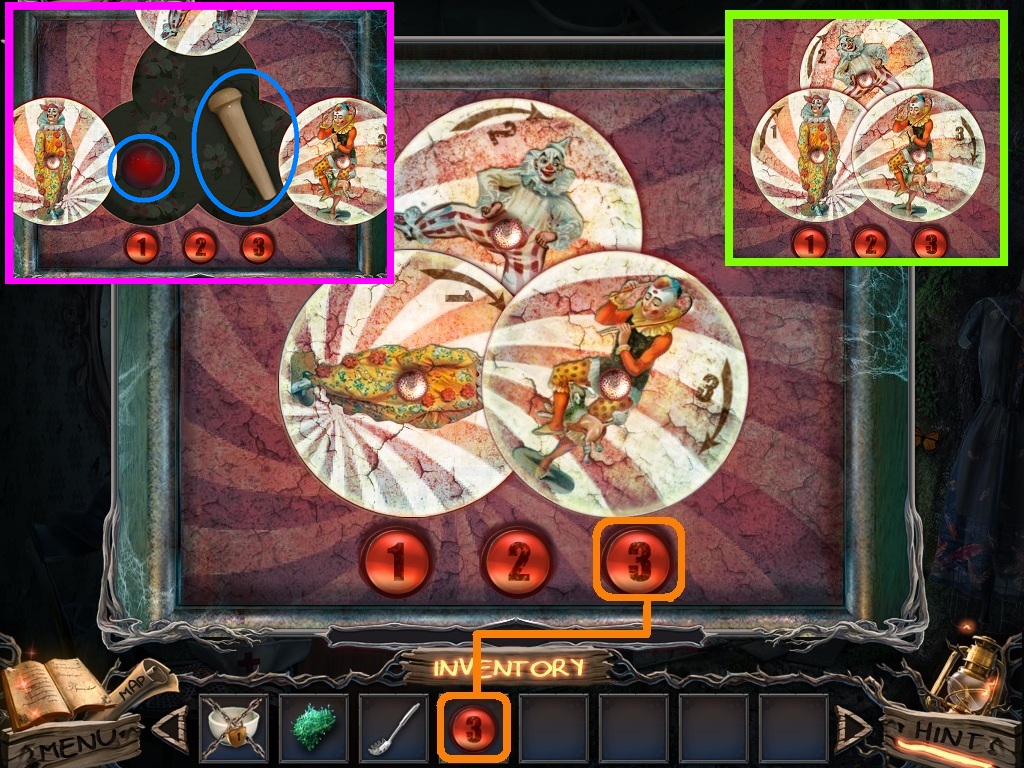
- Pick the “3” button (orange square) and place it into the slot to trigger a puzzle.
- Move the disks around to complete the puzzle.
- Solve as shown above (green square).
- Collect the red nose and pestle (blue circles).
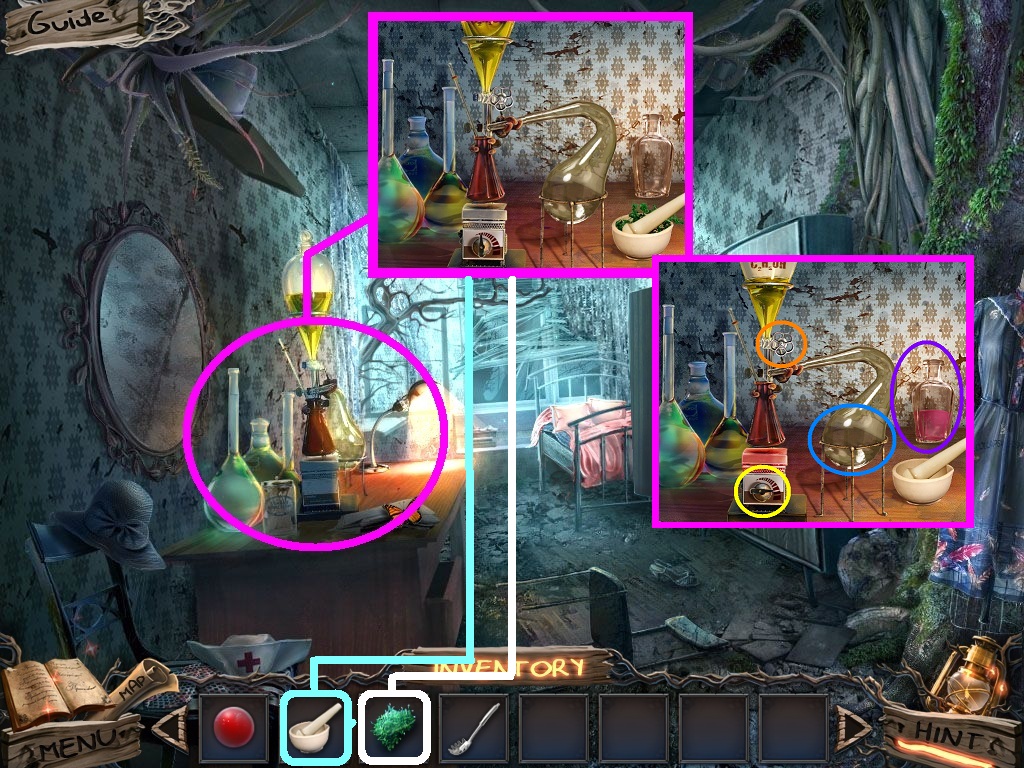
- Zoom into the dresser top (pink circle).
- Pick the mortar with pestle (aqua square) and put it next to the lab equipment.
- Pick the moss (white square) and place it into the mortar and pestle.
- Click the mortar and pestle and click the ground moss.
- Click the dial (yellow circle).
- Click the valve (orange circle).
- Click the beaker (blue circle).
- Collect the tree-fighting elixir (purple circle).
- Go to the nurse’s station.
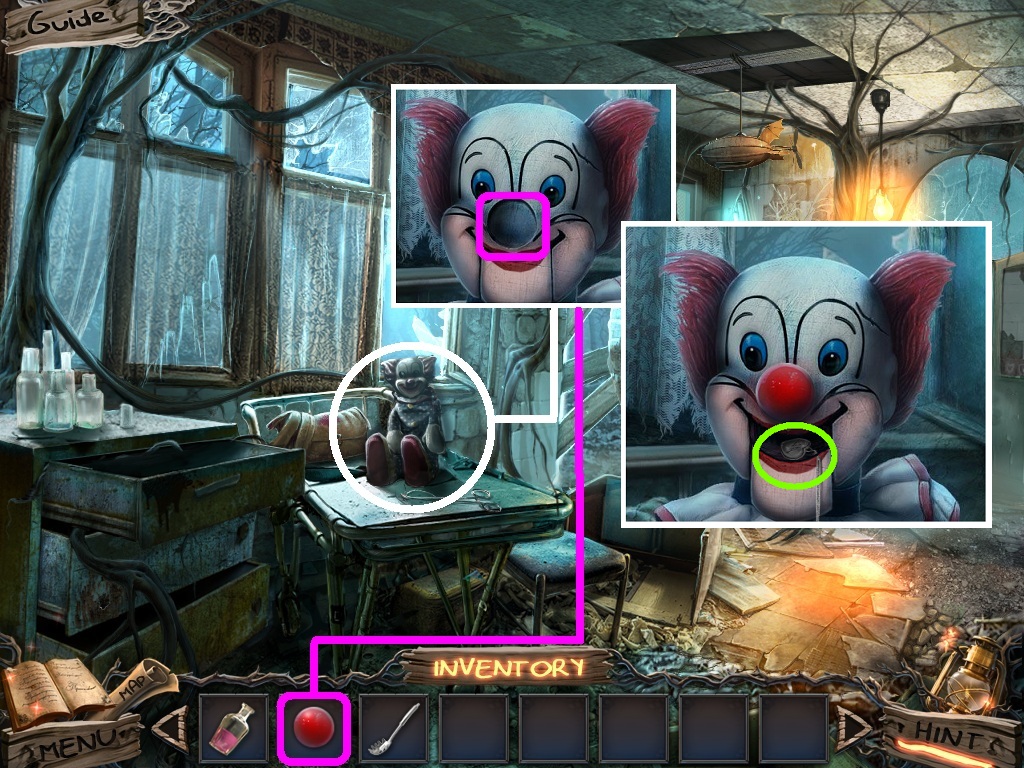
- Zoom into the clown (white circle).
- Pick the red nose (pink square) and place it on his face.
- Collect the silver pendant (green circle).
- Go to the forest boardwalk.
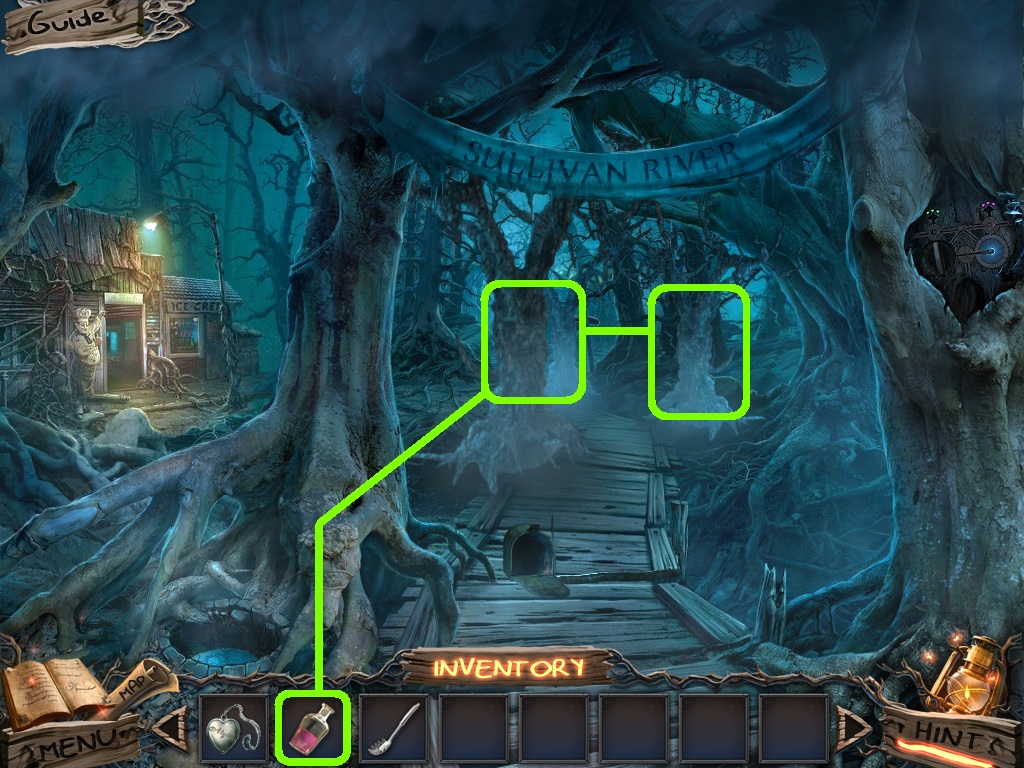
- Pick the tree fighting elixir (green square); use it on the trees.
- Go into the tree houses.
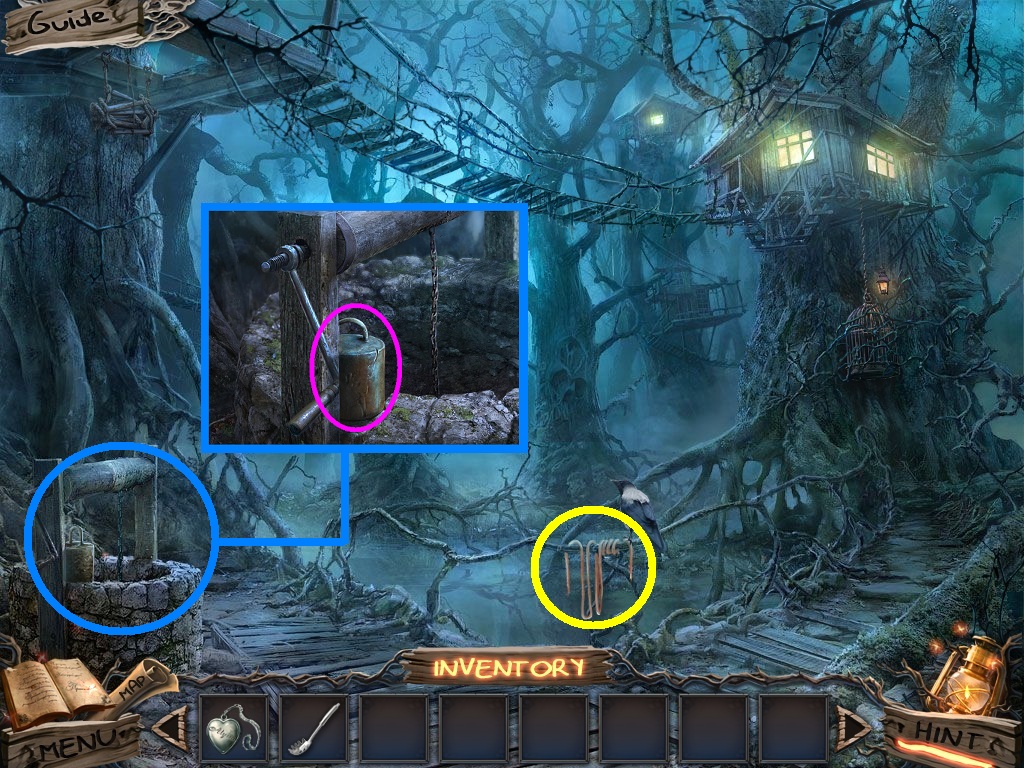
- Zoom into the well (blue circle).
- Collect the weight (pink circle).
- Collect the rope (yellow circle).
- Go to the mess hall.
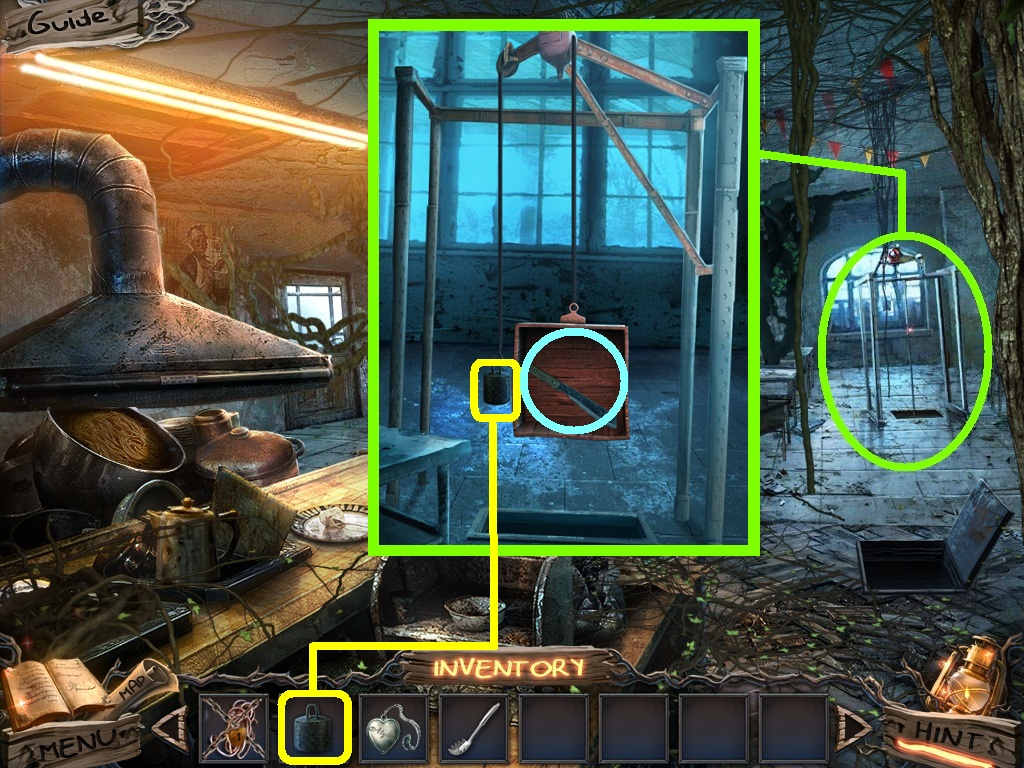
- Zoom into the pulley (green circle).
- Pick the weight (yellow square) place it onto the hook.
- Collect the machete (aqua circle).
- Go back to the exterior of the mess hall.
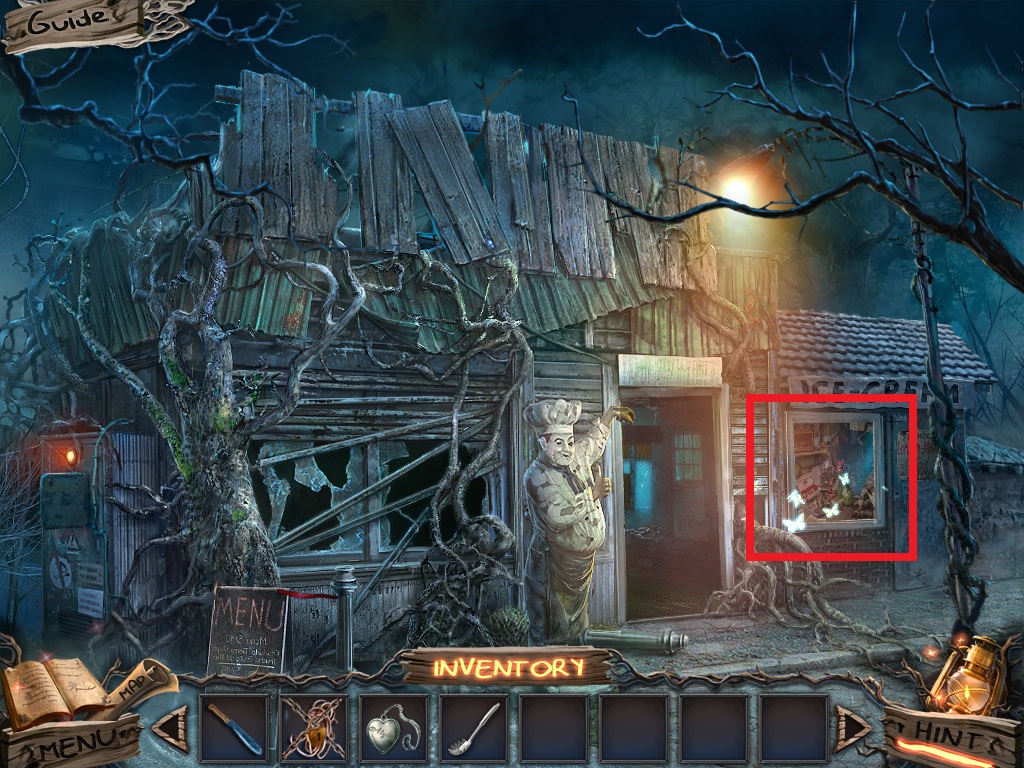
- Zoom into the window to access the hidden object area (red rectangle).
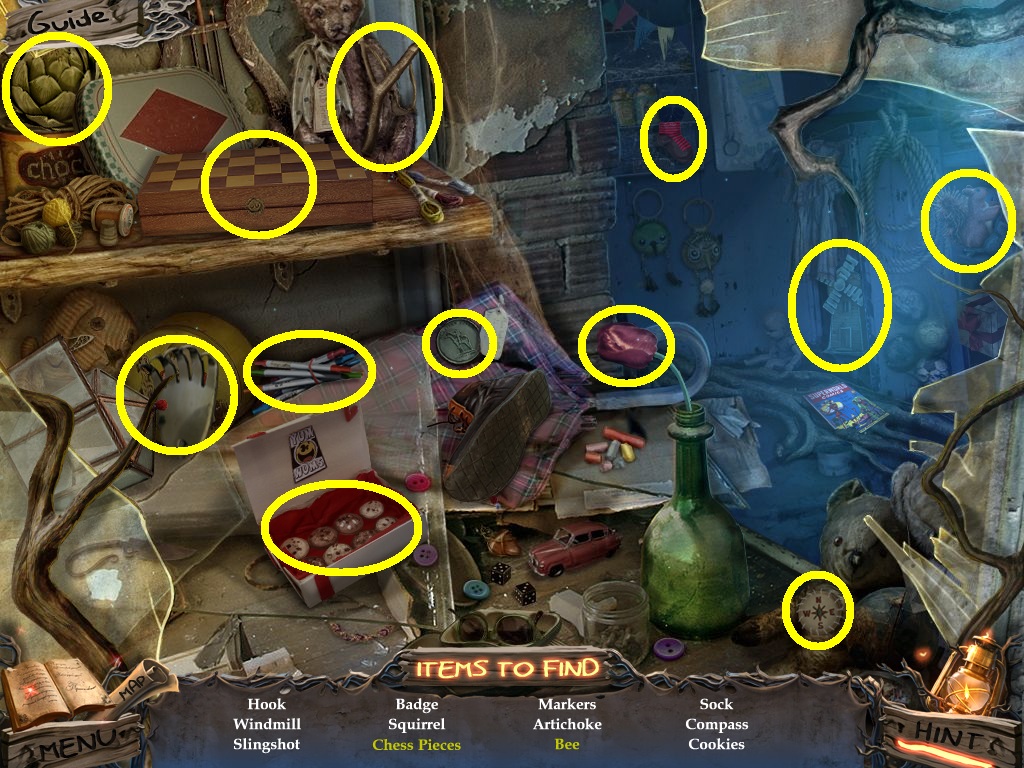
- Find the listed items (yellow circles).
- Collect the hook.
- Go to the tree house.
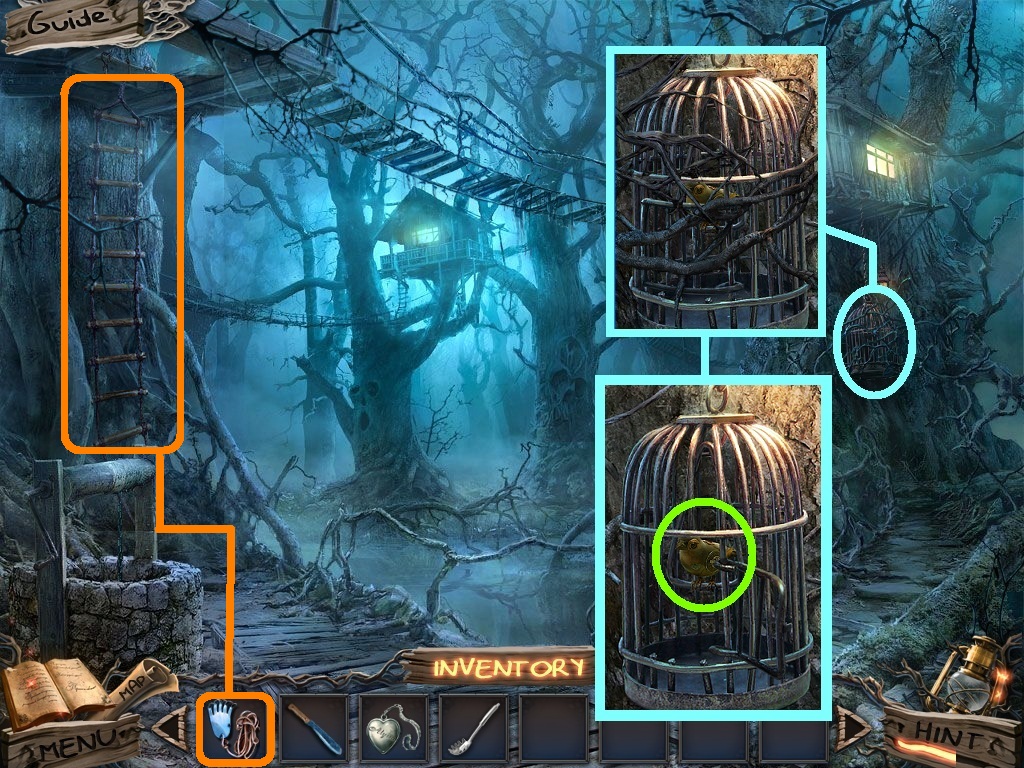
- Zoom into the cage (blue circle).
- Pick the machete (green square) and use it on the lock.
- Click the cage door and collect the mechanical bird (green circle).
- Pick the climbing tool (orange circle) and use it on the ladder.
- Go into the tree house.
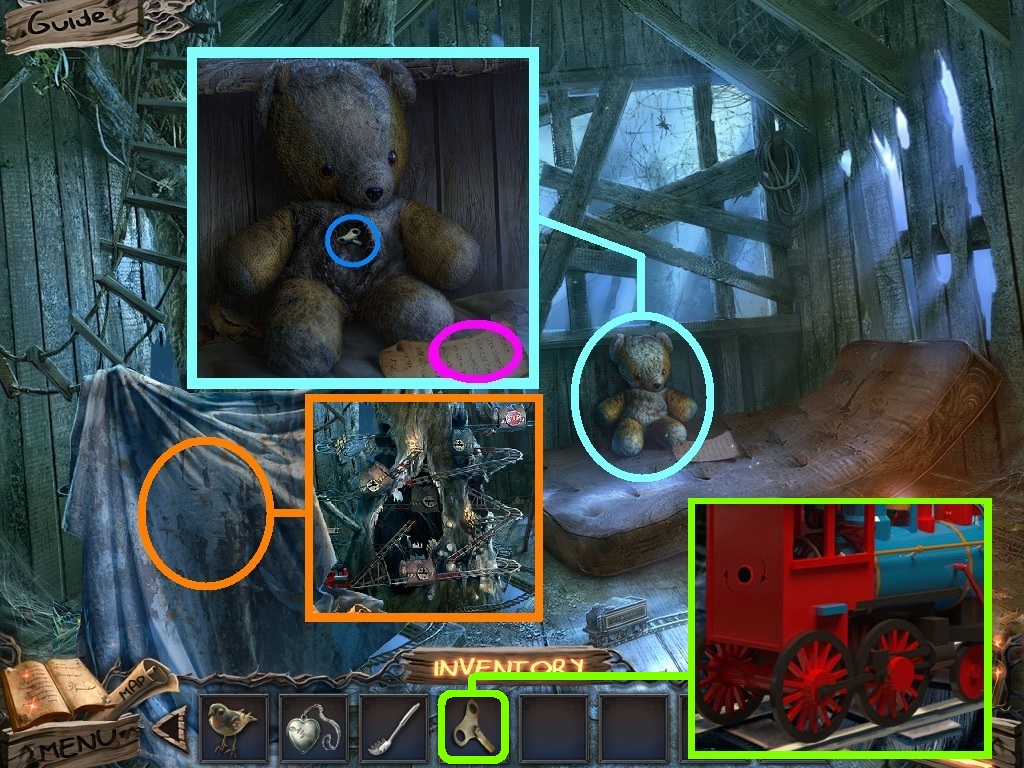
- Zoom into the teddy bear (aqua circle).
- Collect the note (pink circle).
- Click the stitching three times; collect the wind up key (blue circle).
- Click the cloth (orange circle).
- Pick the wind up key (green square); place it into the train to trigger a puzzle.
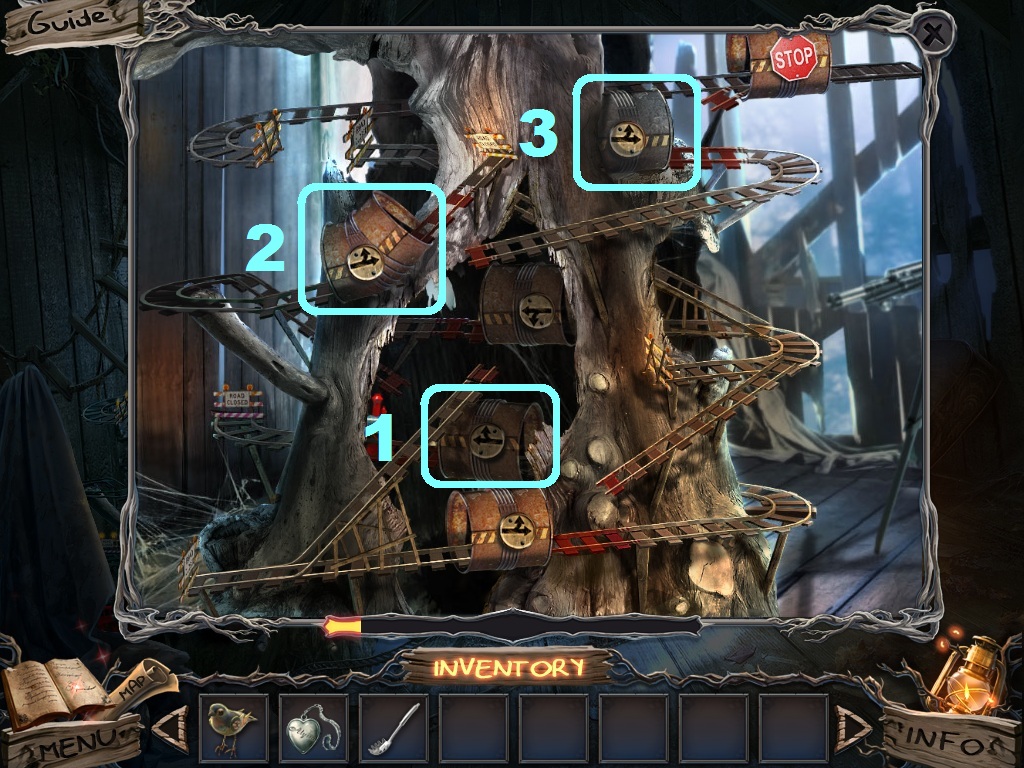
- Move the tracks as follows to solve the puzzle:
- Raise track 1.
- Lower track 2.
- Raise track 3.
- Collect the nut.
- Go back to the tree house scene.
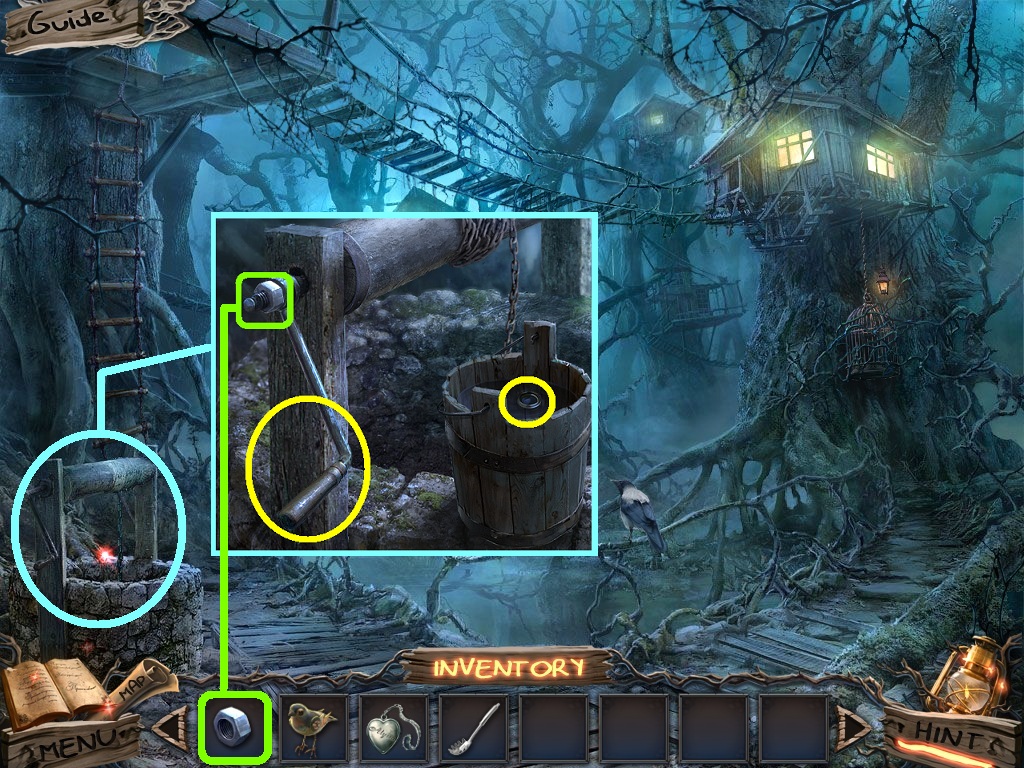
- Zoom into the well (aqua circle).
- Pick the nut (green square) and place it on the handle.
- Click the handle and collect the lens (yellow circles).
- Go into the tree house.
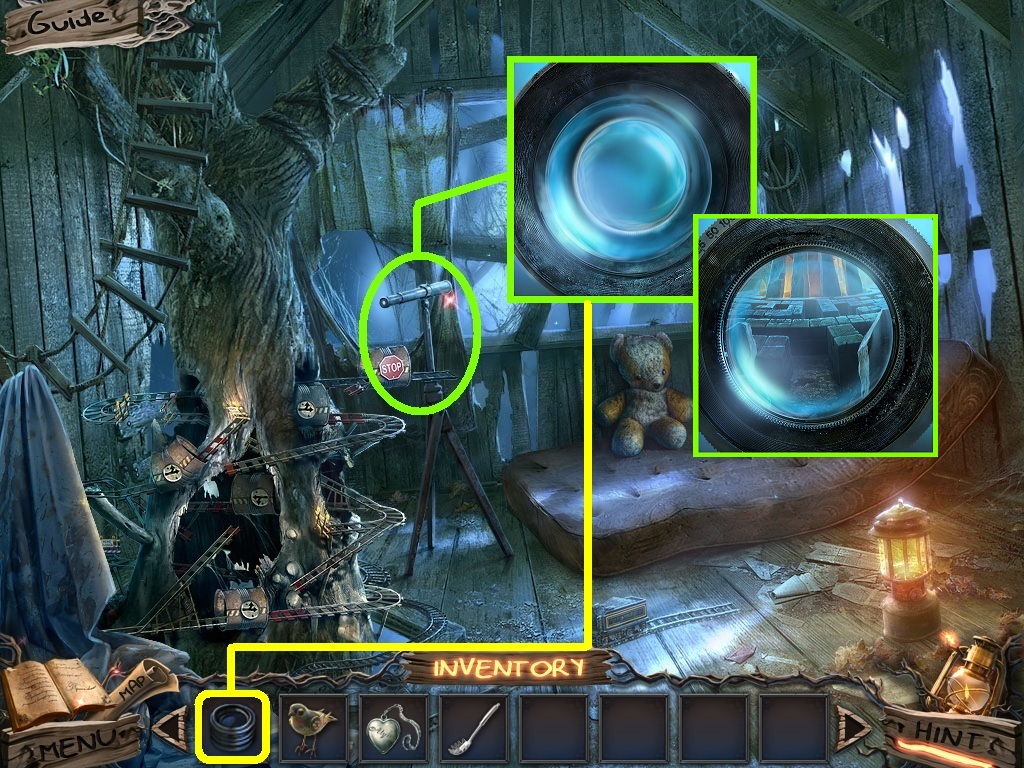
- Zoom into the telescope (green circle).
- Pick the lens (yellow square) and place it onto the telescope.
- Click the lens.
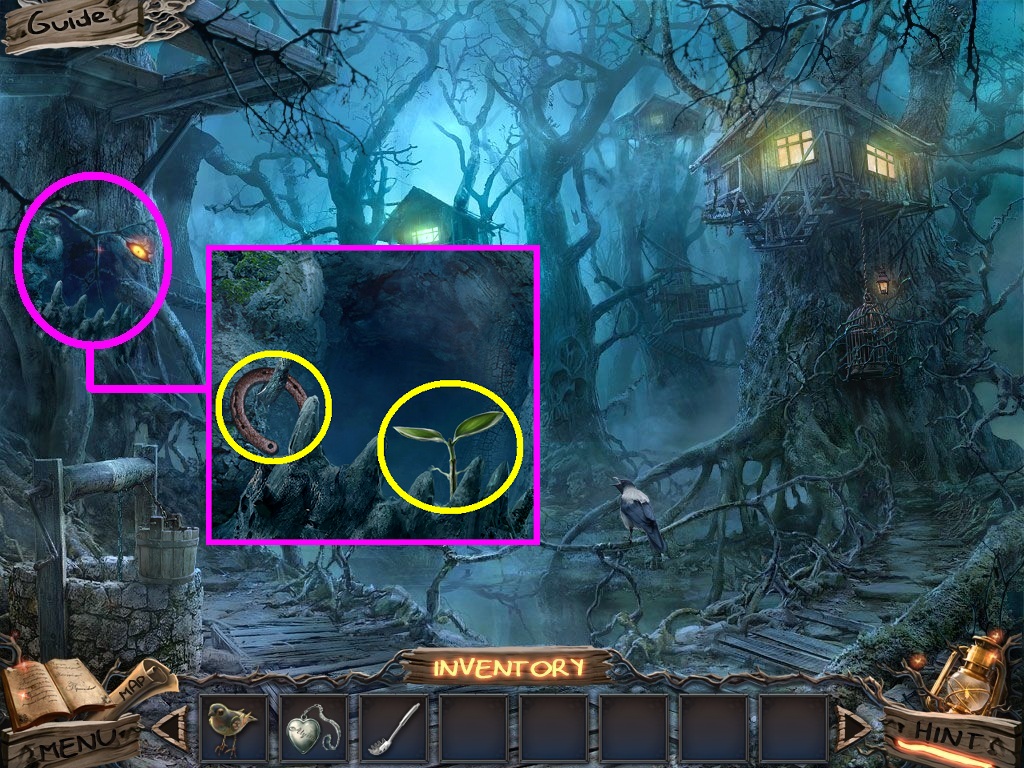
- Zoom into the hole in the tree (pink circle).
- Collect the horseshoe and the dryad (yellow circles).
- Go to the fire pit and turn right into the stable.
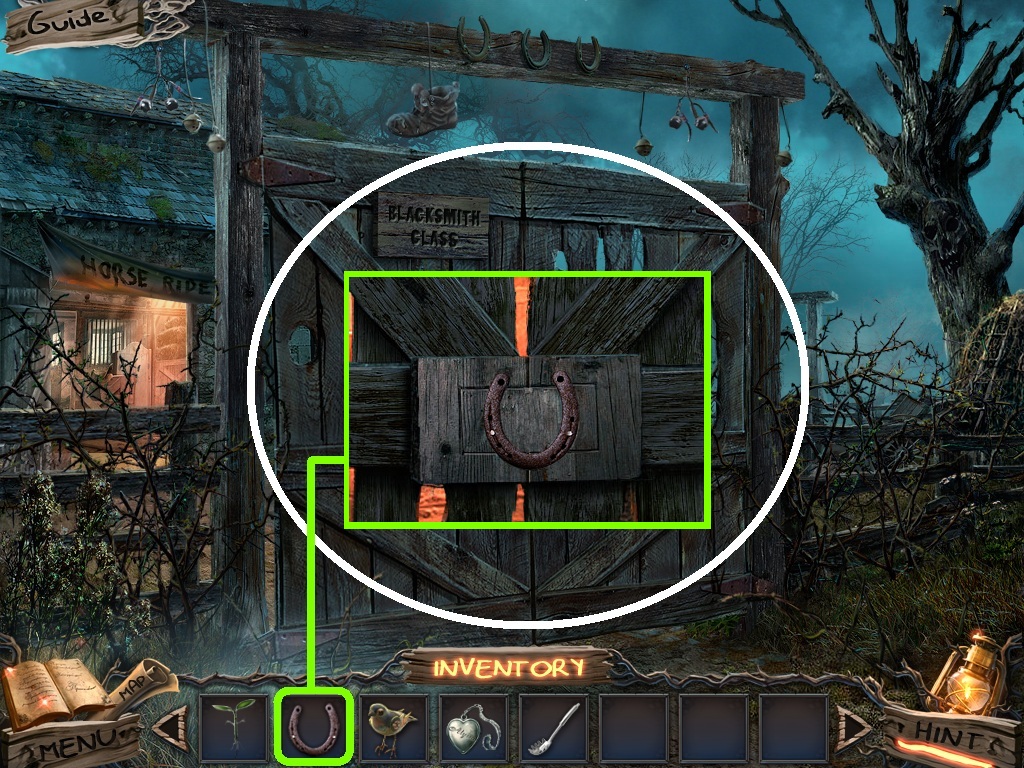
- Zoom into the gate (white circle).
- Pick the horseshoe (green square); place it into the slot.
- Click the horseshoe to open the gate.
- Go inside the gate.
Comments will load when you reach this part of the walkthrough.