Chapter One: The River
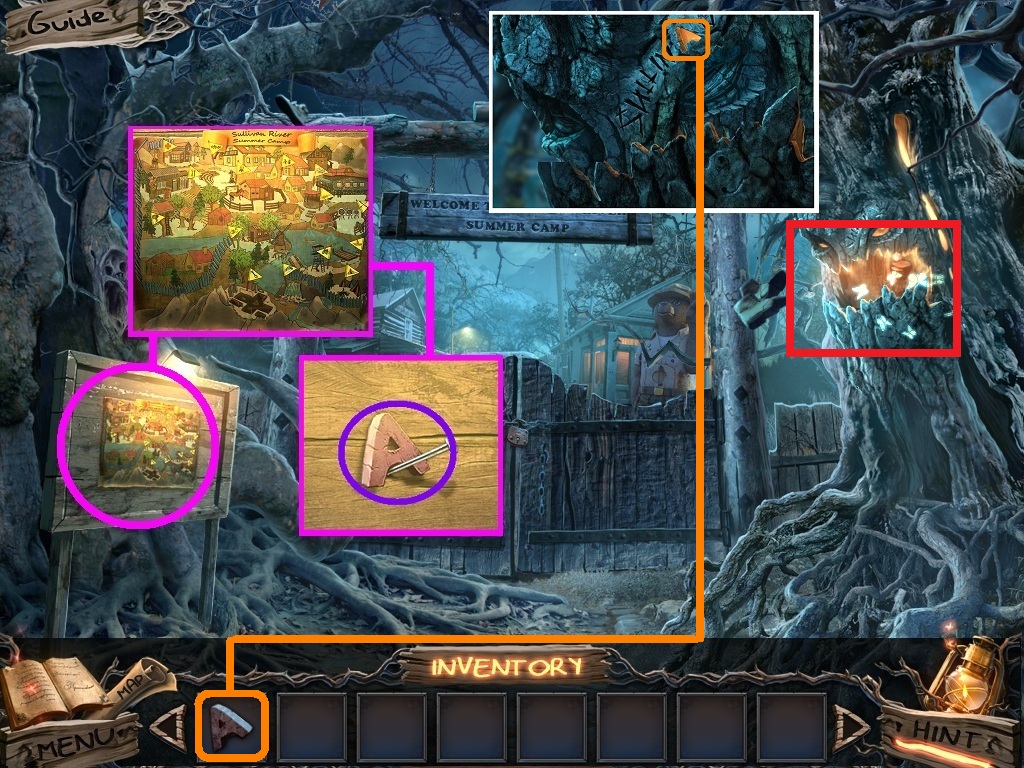
- Zoom into the bulletin board (pink circle).
- Collect the map (pink square).
- Collect the wooden letter “A” (purple circle).
- Pick the wooden letter “A” (orange square); place it onto the tree (white square).
- Zoom into the hole in the tree to find a hidden objects area (red rectangle).
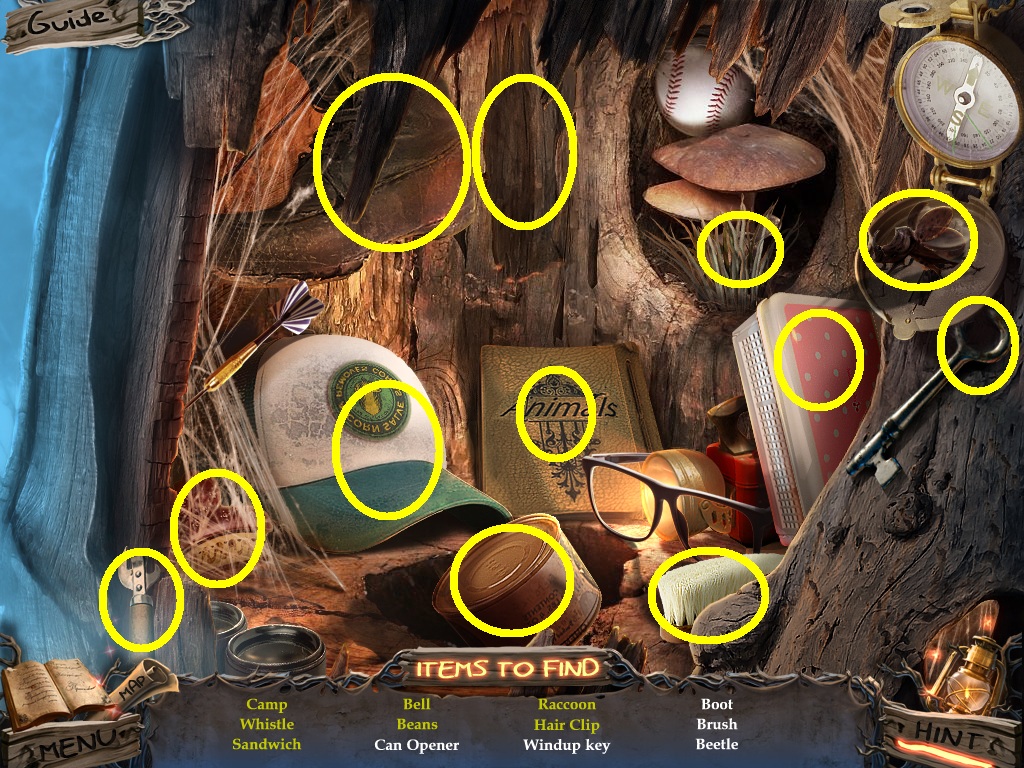
- Find the listed items (yellow circles).
- Collect the gate key.
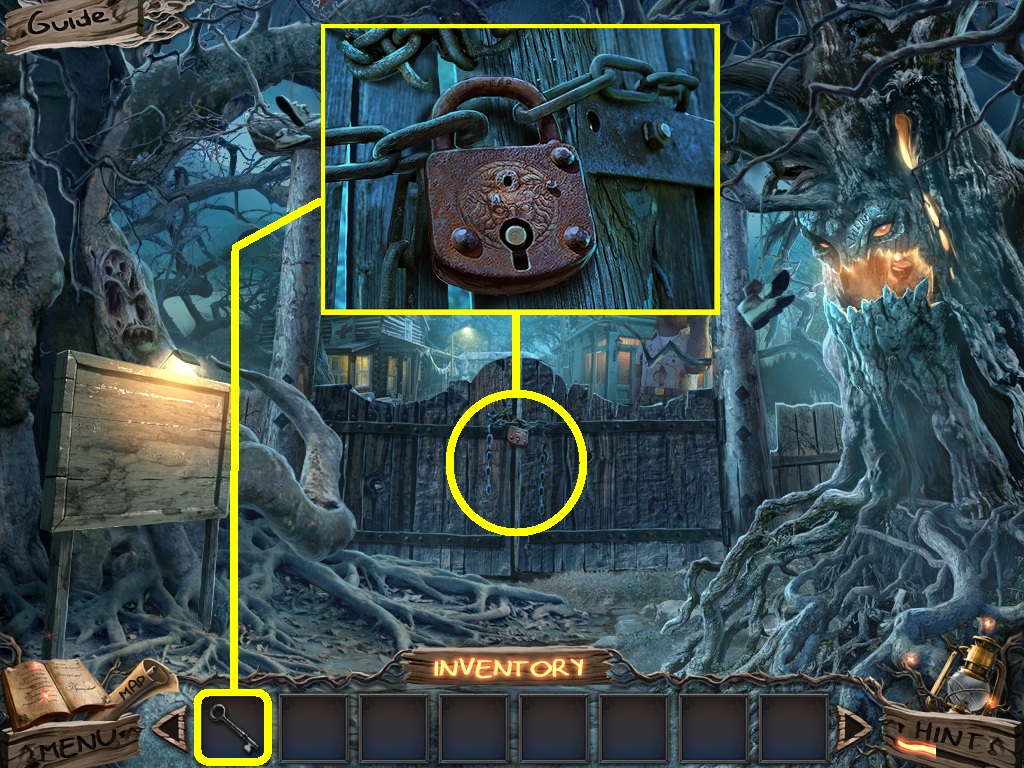
- Zoom into the gate (yellow circle).
- Pick the gate key (yellow square); use it to unlock the gate.
- Go inside.
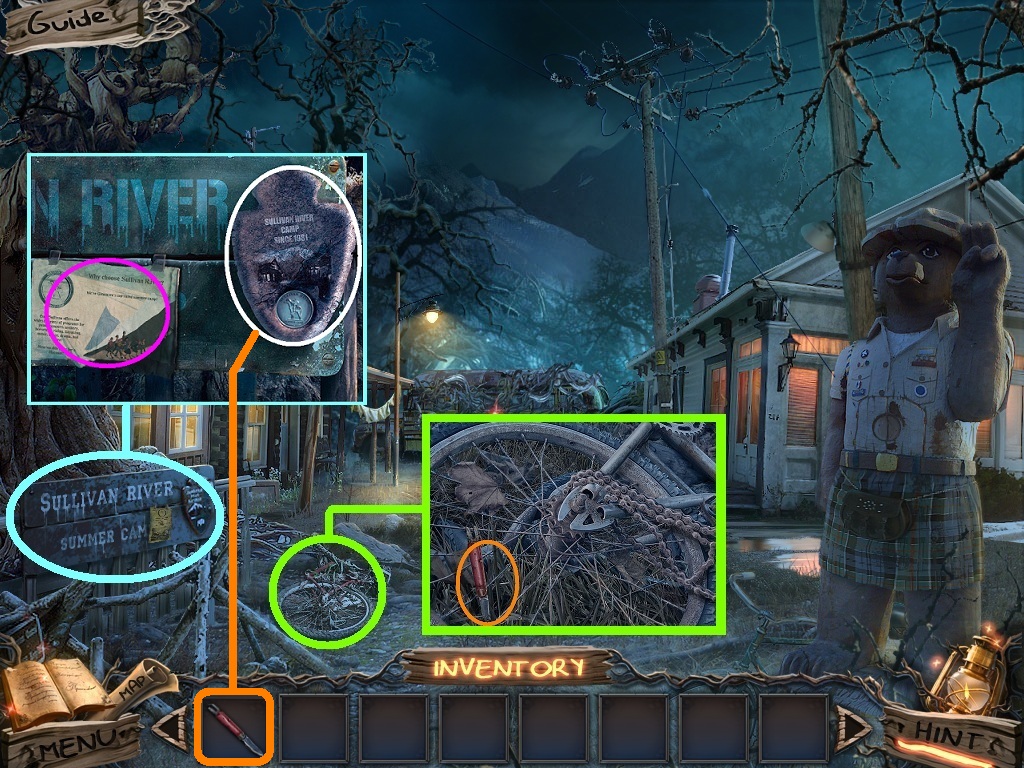
- Zoom into the bike (green circle).
- Collect the pocket knife (orange circle).
- Zoom into the sign (aqua circle).
- Collect the note (pink circle).
- Use the pocket knife to collect the wooden badge (white circle).
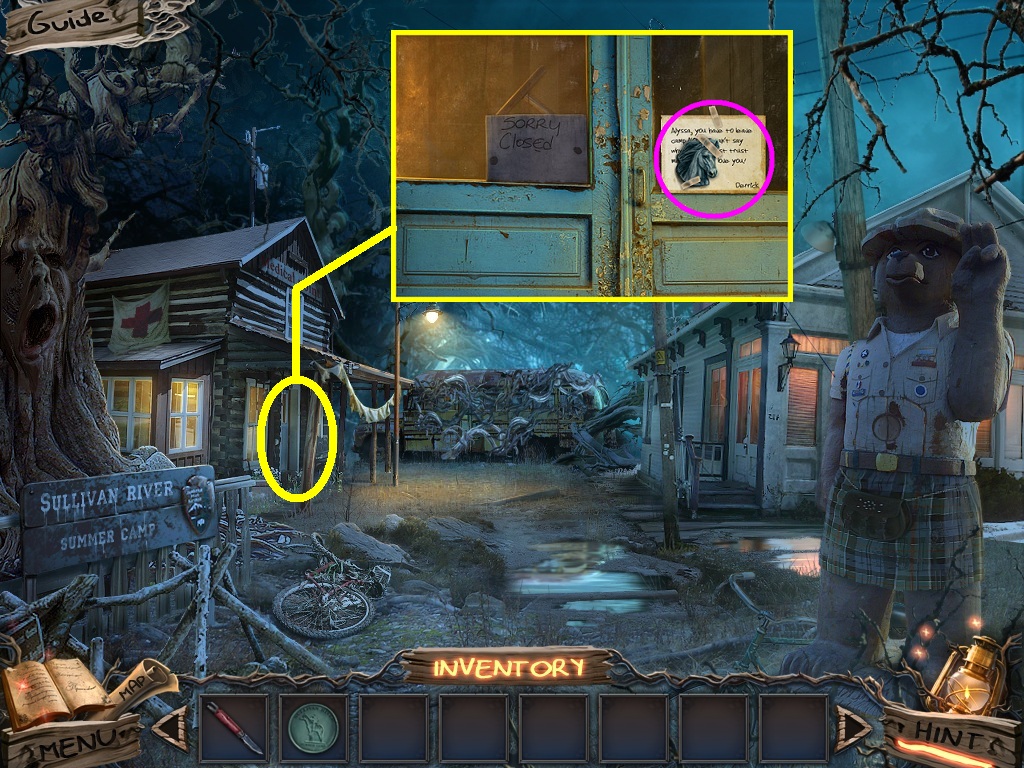
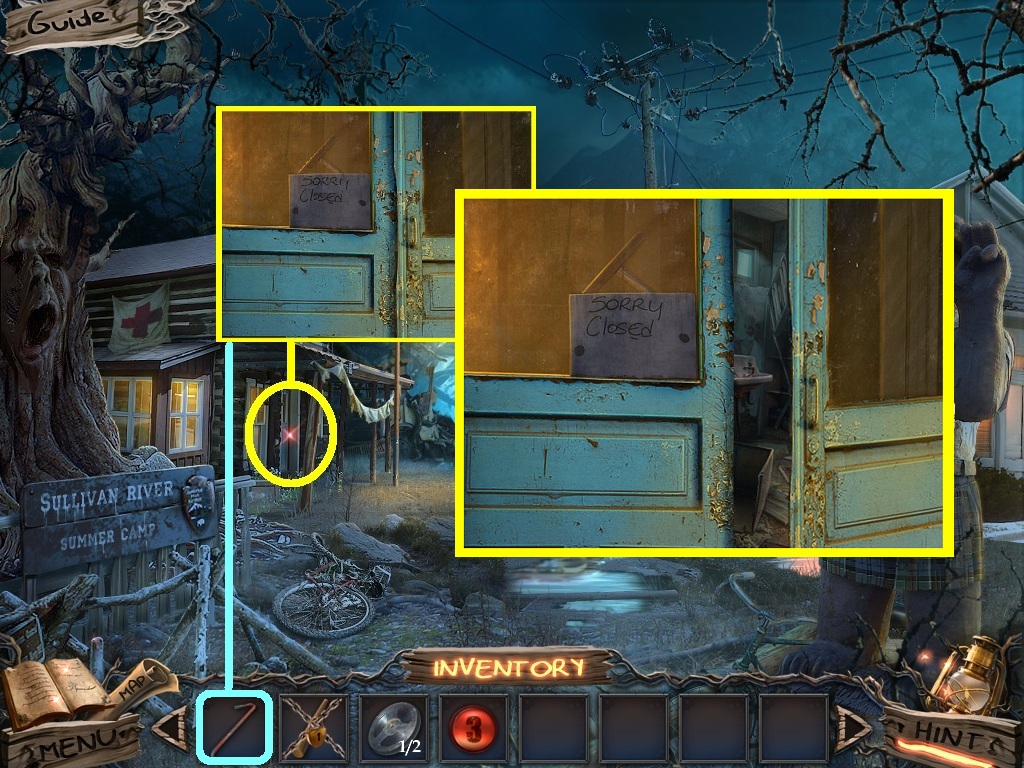
- Zoom into the nurse’s office door (yellow circle).
- Collect the horse emblem and the note (pink circle).
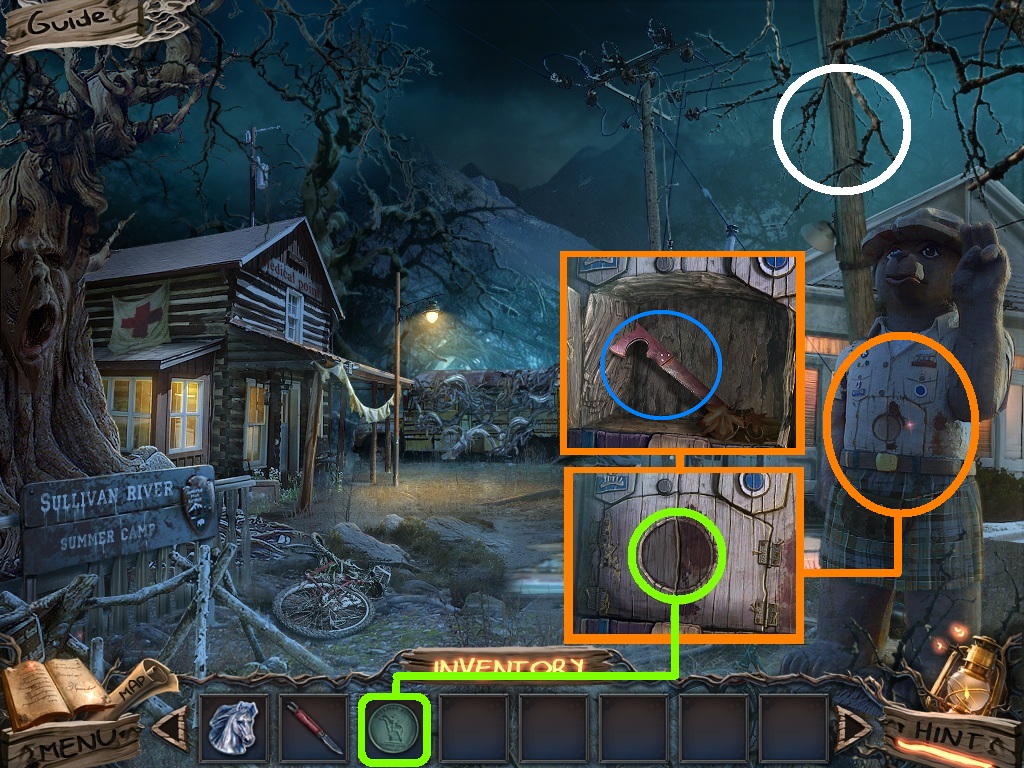
- Zoom into the bear (orange circle).
- Pick the wooden badge (green square); place it in the slot (green circle).
- Collect the hacksaw (blue circle).
- Click the pole (white circle).
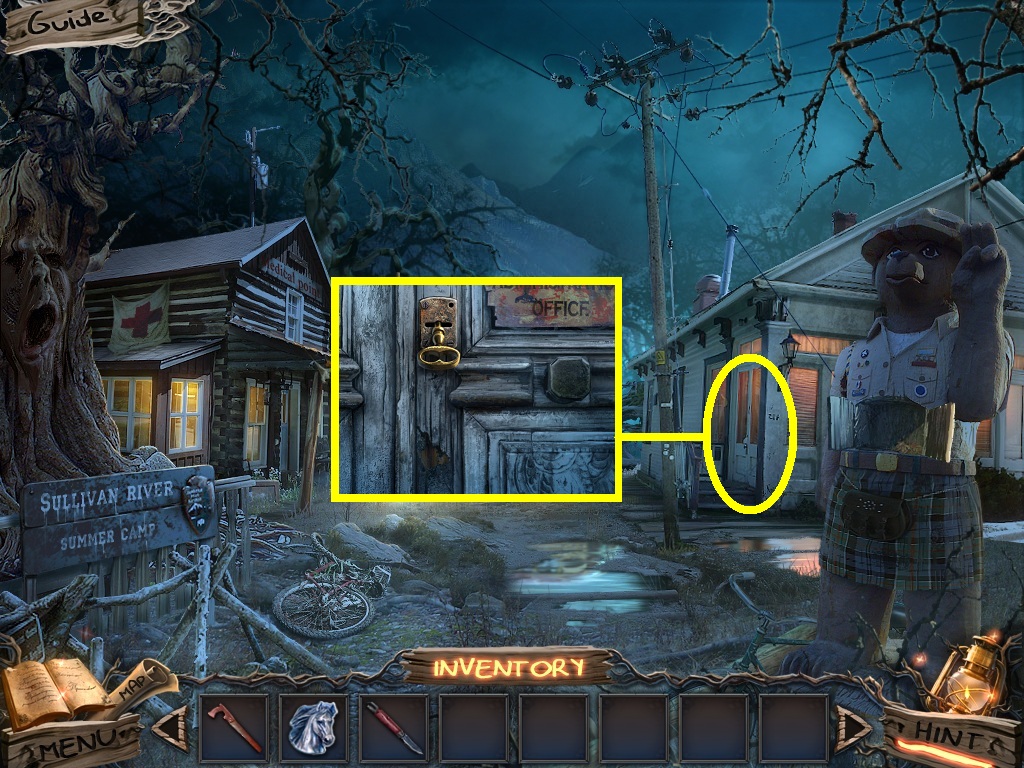
- Zoom into the office door (yellow circle); click the key.
- Go into the office.
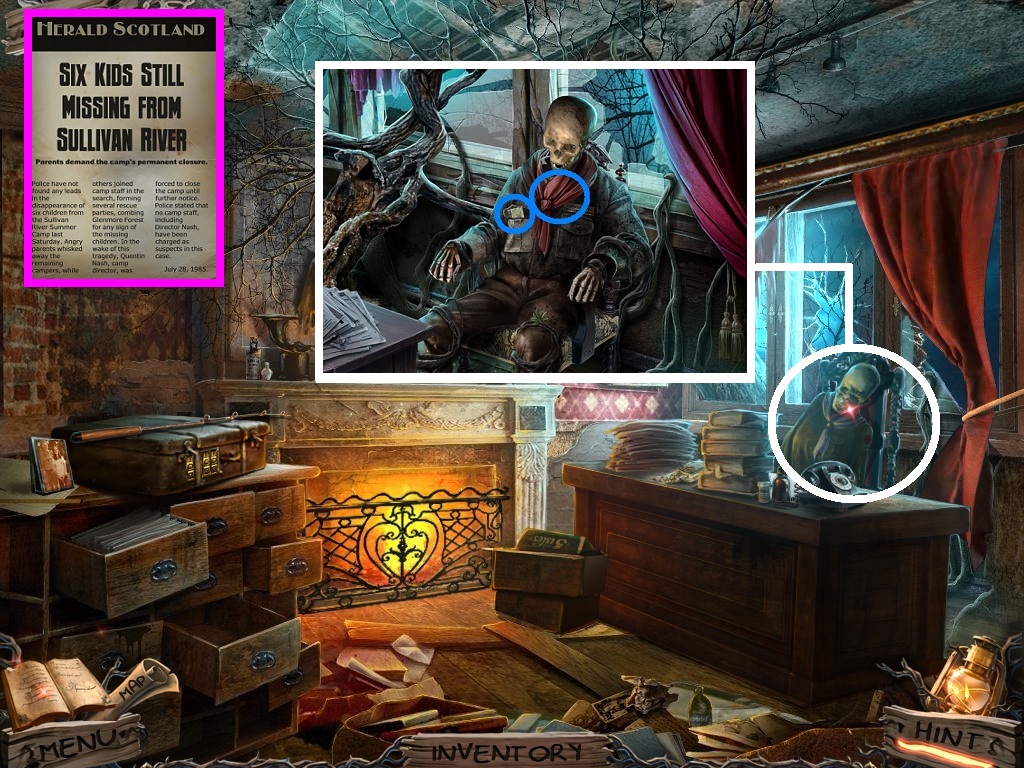
- Zoom into the skeleton (white circle).
- Collect the scarf and the note (blue circles).
- Collect the note (pink square).
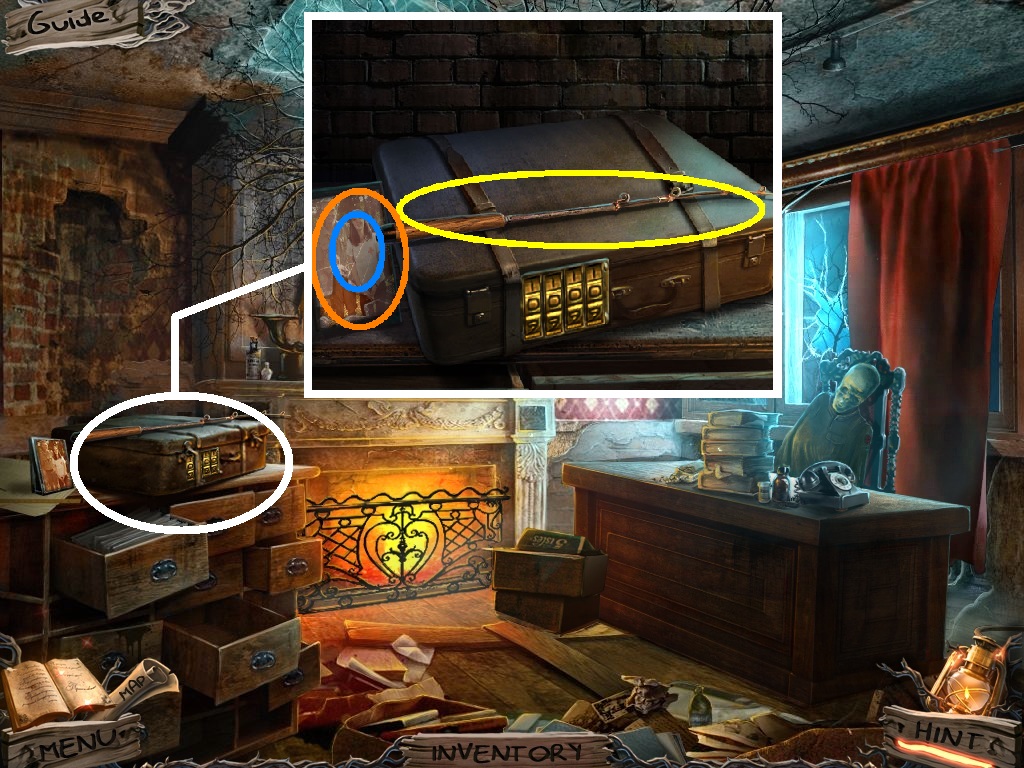
- Zoom into the suitcase (white circle).
- Collect the fishing pole (yellow circle).
- Zoom into the glass in the frame (orange circle).
- Collect the picture (blue circle).

- Zoom into the safe (green circle).
- Pick the hacksaw (yellow square) to cut the chain.
- Click the safe and collect the blowtorch and the note (pink circles).
- Go outside.
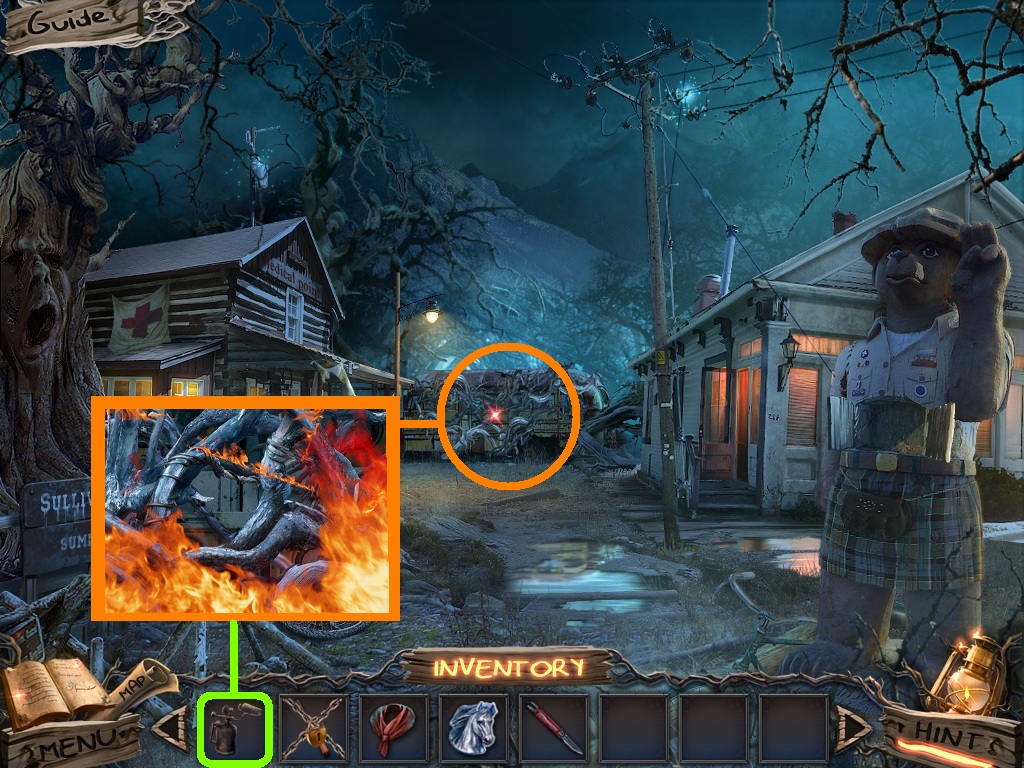
- Zoom into the brambles (orange circle).
- Pick the blowtorch (green square); use it on the brambles.
- Go forward.
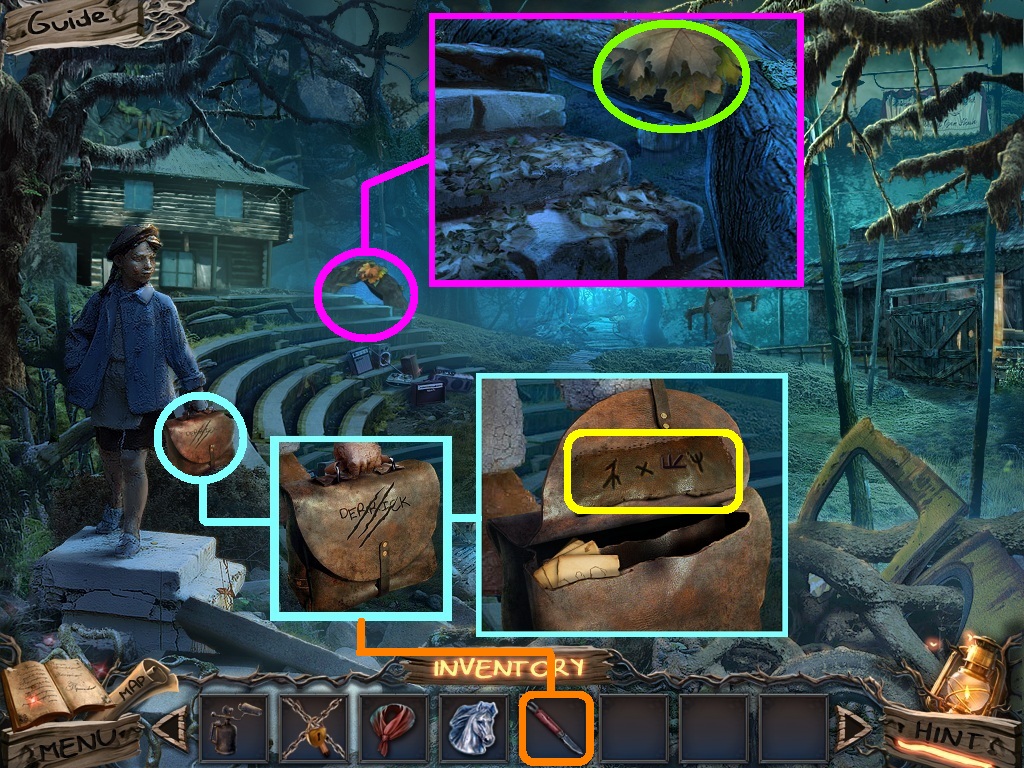
- Zoom into the bag (aqua circle).
- Pick the pocket knife (orange square); use it on the buckle.
- Collect the code (yellow rectangle).
- Zoom into the root (pink circle).
- Collect the dry leaves (green circle).
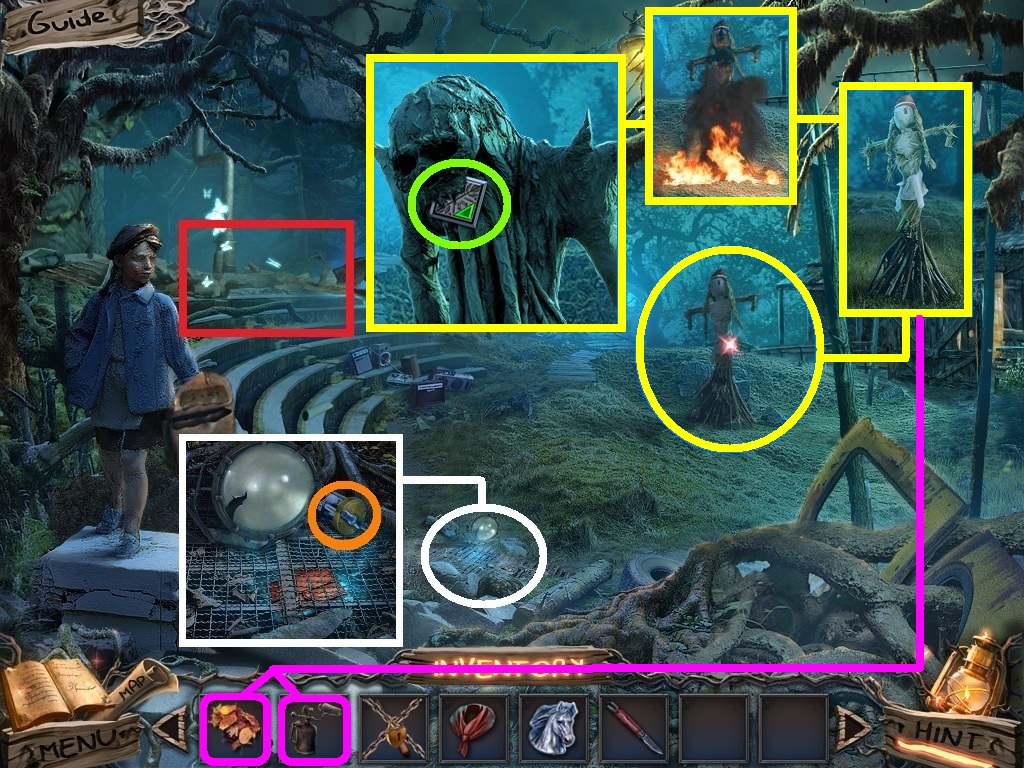
- Zoom into the grate (white circle).
- Collect the reel (orange circle).
- Zoom into the effigy (yellow circle).
- Pick the dry leaves and the blow torch (pink squares); use them on the base.
- Zoom into the burnt effigy; collect the green tile (green circle).
- Zoom into the collapsed house (red rectangle) to access a hidden objects area.
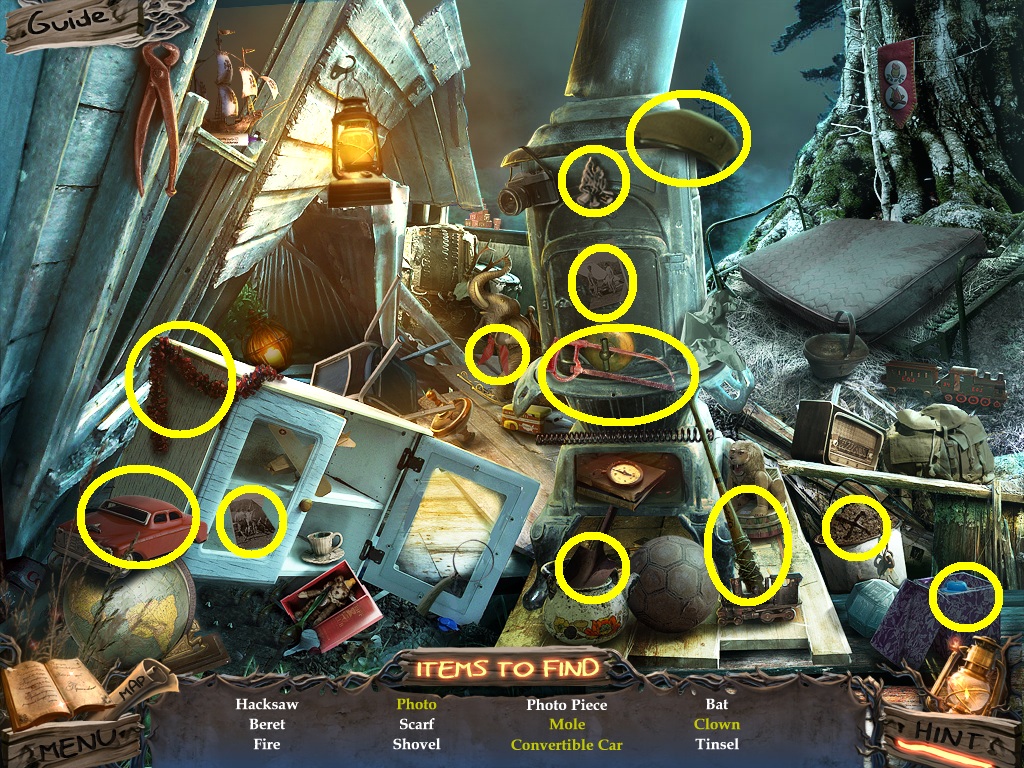
- Find the listed items (yellow circles).
- Collect the fire emblem.
- Go to the forest boardwalk.
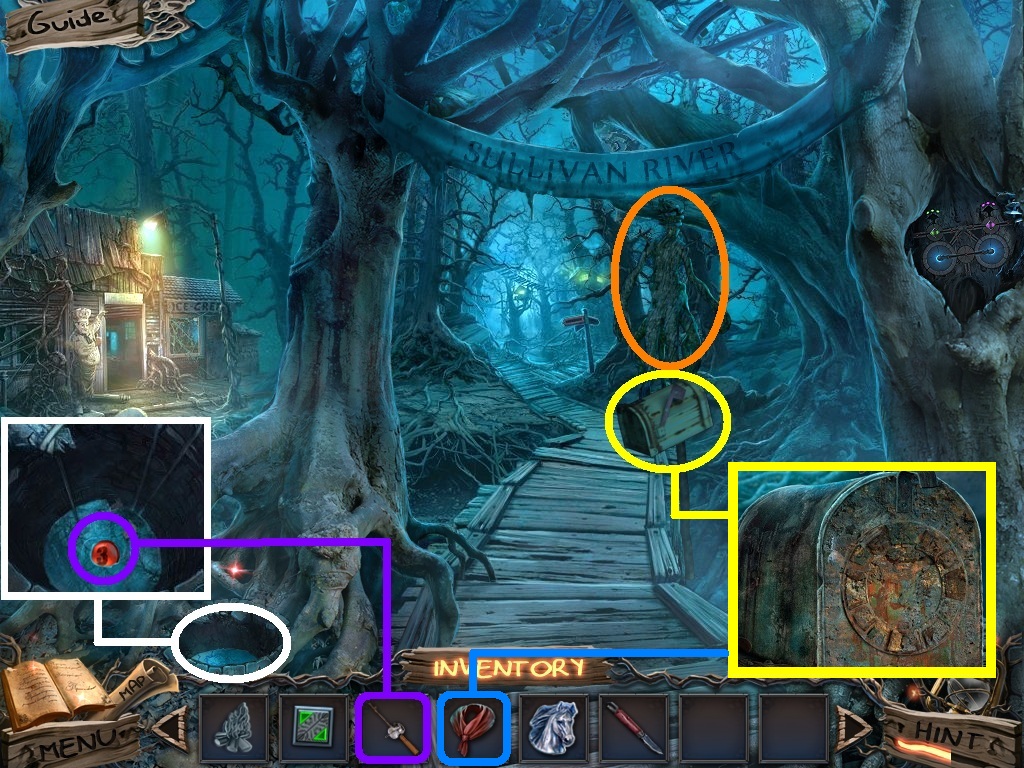
- Zoom into the tree roots (white circle).
- Pick the fishing rod (purple square) and use it to collect the button “3.”
- Click the walking tree (orange circle).
- Click the mailbox (yellow circle).
- Zoom into the mailbox; pick the scarf (blue square) and wipe the mailbox.
- A puzzle will trigger.
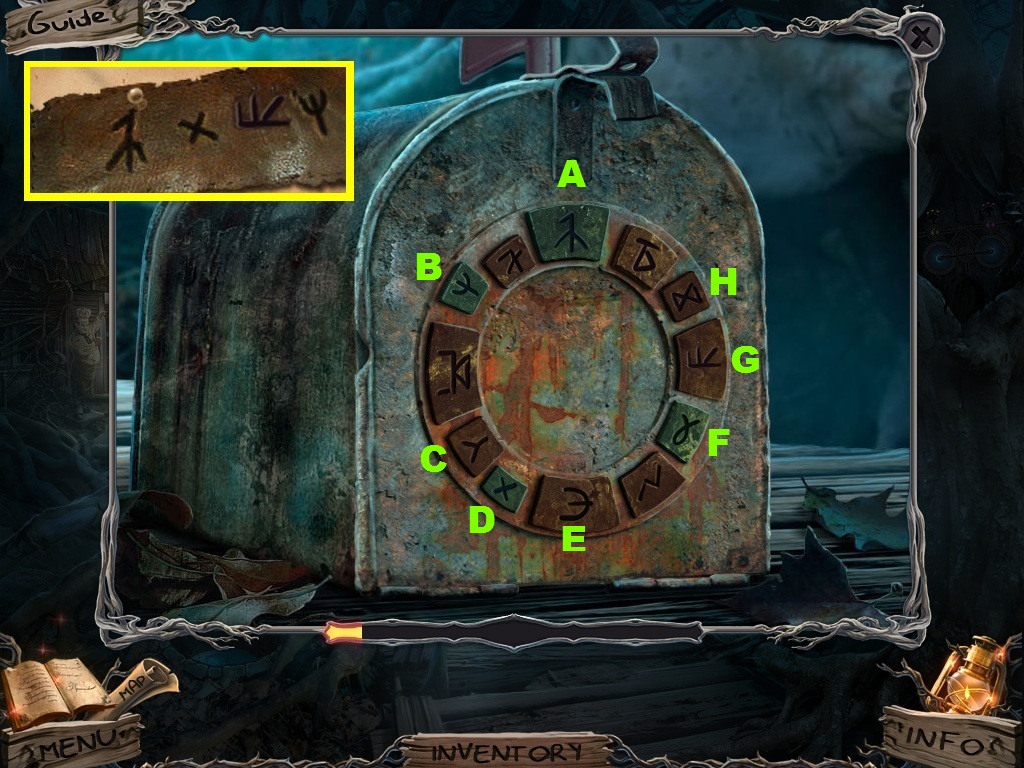
- Pick the suitcase code (pink square).
- Click the runes as shown above starting A-H.
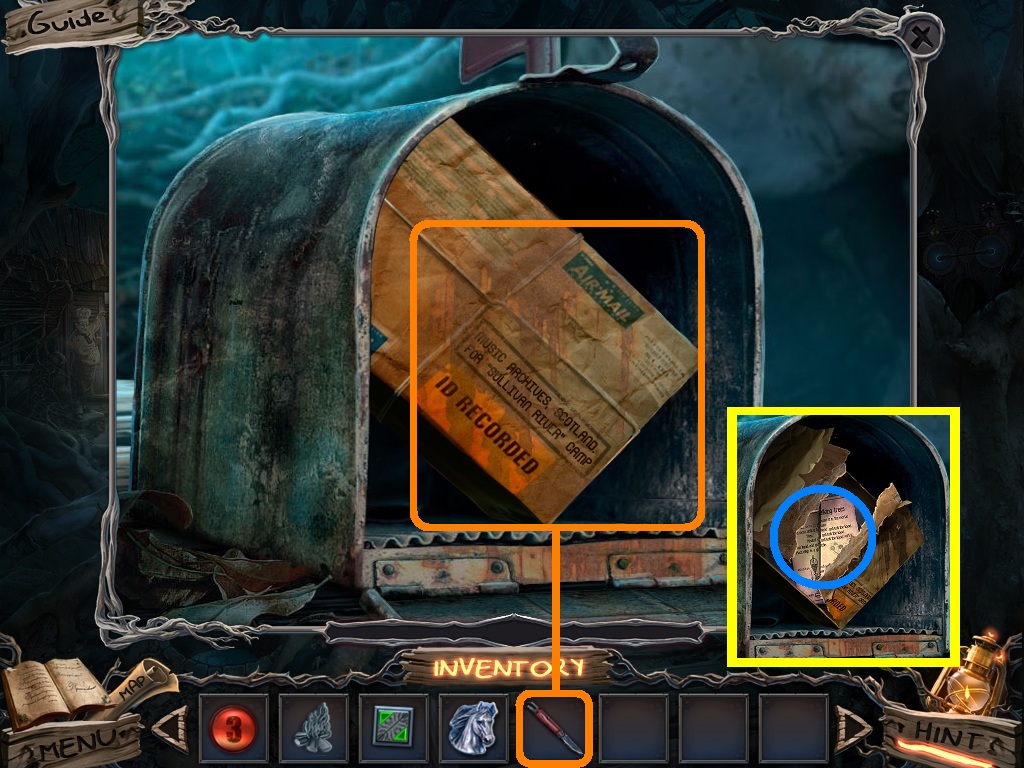
- Pick the pocket knife (orange square); use it on the package.
- Collect the note, the tape reel piece (blue circle).
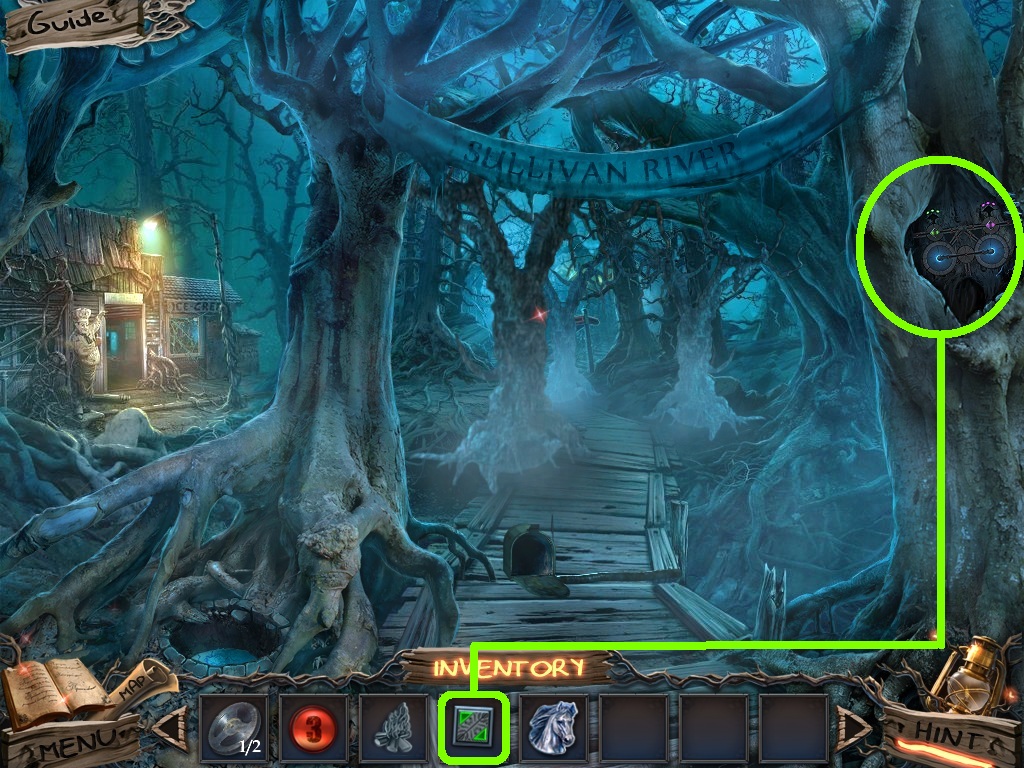
- Zoom into the tree (green circle).
- Pick the green tile (green square); use it on the disk to trigger a puzzle.
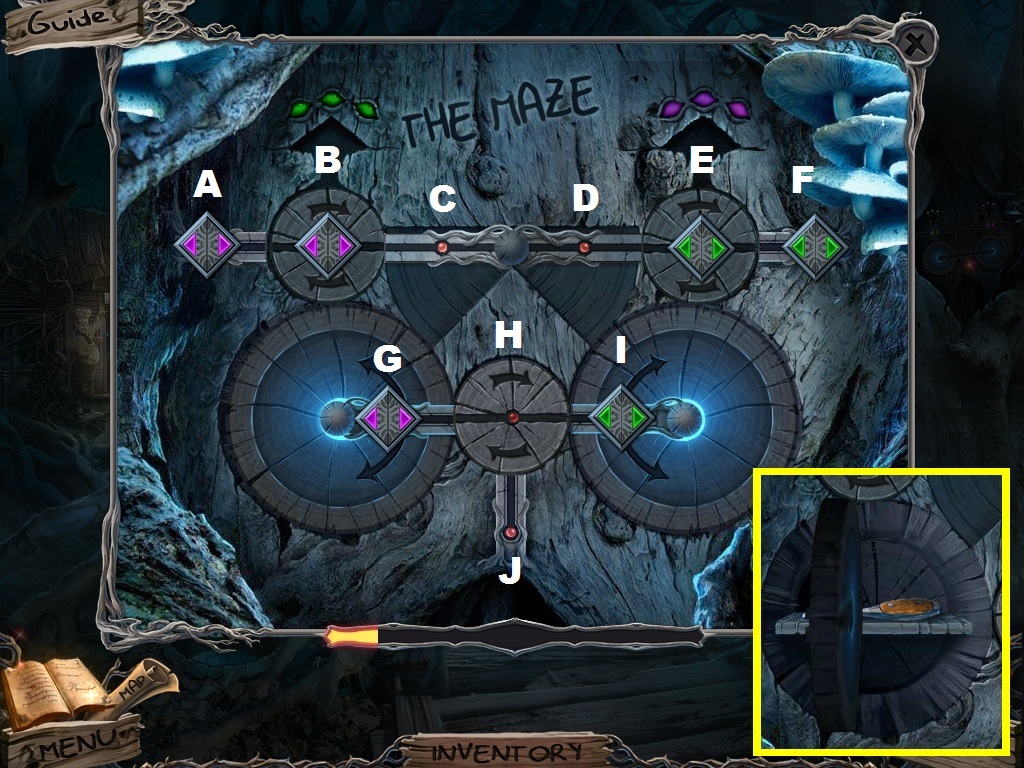
- Move the tiles to the color matched slots.
- Swirl “H” left and go down.
- Swirl “H” and “G” 2x’s right.
- Swirl “I.”
- Roll “D.”
- Move “I” to “D.”
- Move “B” right.
- Roll “C” right.
- Swirl “G.”
- Move “C” and “G.”
- Swirl “G.”
- Swirl “I.”
- Move “G” right 2x’s.
- Swirl “H.”
- Move “J” up.
- Swirl “H.”
- Move “J” up.
- Swirl “H.”
- Move “H” left.
- Swirl “G.”
- Move “G” to “C.”
- Roll “C.”
- Move “C” left.
- Swirl “B.”
- Move “B” up and into the slot.
- Move “I” left.
- Swirl “H.”
- Move “H” down.
- Swirl “H.”
- Swirl “I.”
- Move “D” to “I.”
- Swirl “I.”
- Roll “C.”
- Swirl “G.”
- Move “I” left 2x’s.
- Swirl “G.”
- Move “G” to “C.”
- Roll “D.”
- Move “E” left.
- Roll “D.”
- Swirl “I.”
- Move “D” to “I.”
- Swirl “I.”
- Swirl “G.”
- Move “I” left 2x’s.
- Swirl “H.”
- Move “J” up.
- Swirl “H.”
- Move “H” right.
- Swirl “I.”
- Move “I” to “D.”
- Roll “D.”
- Move “D” right.
- Swirl “E.”
- Move “E” up to the slot.
- Move “G” right.
- Swirl “H.”
- Move “H” down.
- Swirl “H.”
- Swirl “G.”
- Move “G” right.
- Swirl “H.”
- Swirl “G.”
- Move “C” to “G.”
- Swirl “G.”
- Swirl “I.”
- Move “G” right 2x’s.
- Roll “D.”
- Move “I” to “D.”
- Roll “D.”
- Swirl “E.”
- Move “E” up into the slot.
- Swirl “E.”
- Move “F” left 2x’s.
- Roll “D.”
- Move “D” to “I.”
- Swirl “I.”
- Move “I” left 2x’s.
- Swirl “G.”
- Move “G” to “C.”
- Roll “C.”
- Roll “B.”
- Move “C” left.
- Swirl “B.”
- Move “B” up into the slot.
- Swirl “B.”
- Move “A” right 2x’s.
- Roll “C.”
- Move “C” to “G.”
- Swirl “G.”
- Move “G” right 2x’s.
- Swirl “I.”
- Move “I” to “D.”
- Roll “D.”
- Move “D” right.
- Swirl “E.”
- Move “E” up into the slot.
- Swirl “H.”
- Move “H” left.
- Swirl “G.”
- Move “G” to “C.”
- Roll “C.”
- Move “C” left.
- Rotate “B.”
- Move “B” up into the slot.
- Collect the screwdriver.
- Go to the mess hall.
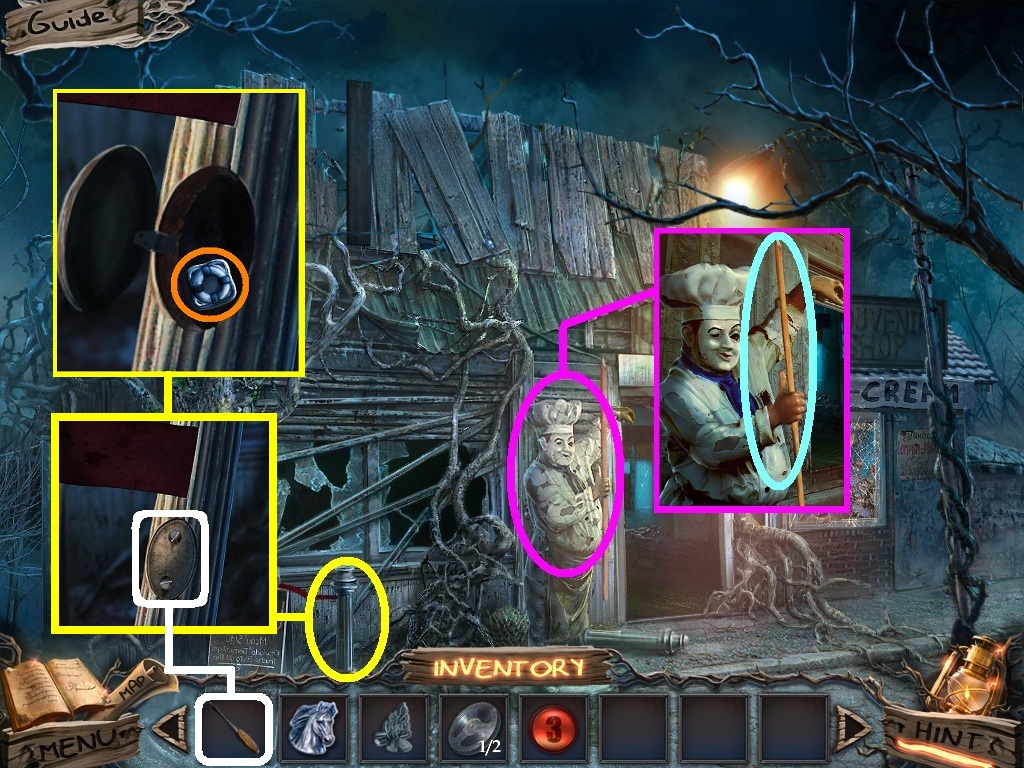
- Zoom into the pedestal (yellow circle).
- Pick the screwdriver (white square) and use it on the screws.
- Click the compartment.
- Collect the life preserver emblem (orange circle).
- Zoom into the statue (pink circle).
- Collect the wooden stick (aqua circle).
- Go into the director’s office.
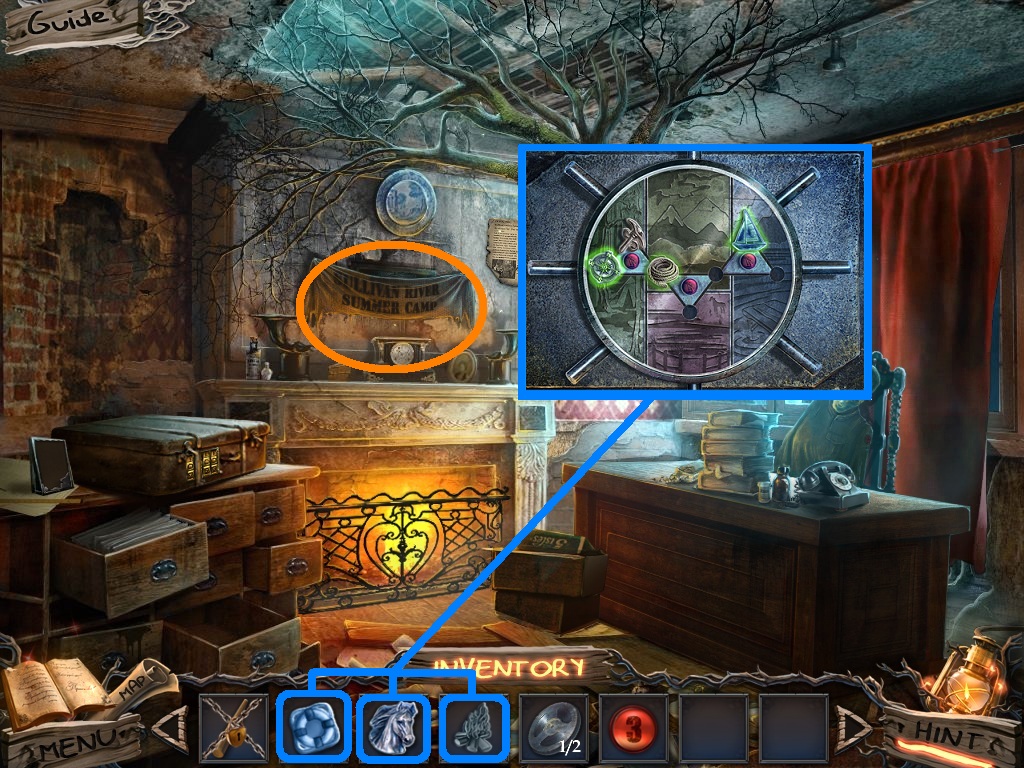
- Click the banner (orange circle).
- Zoom into the safe under the banner.
- Pick the horse emblem, life preserver emblem and the fire emblem (blue squares); place them onto the door to trigger a puzzle.
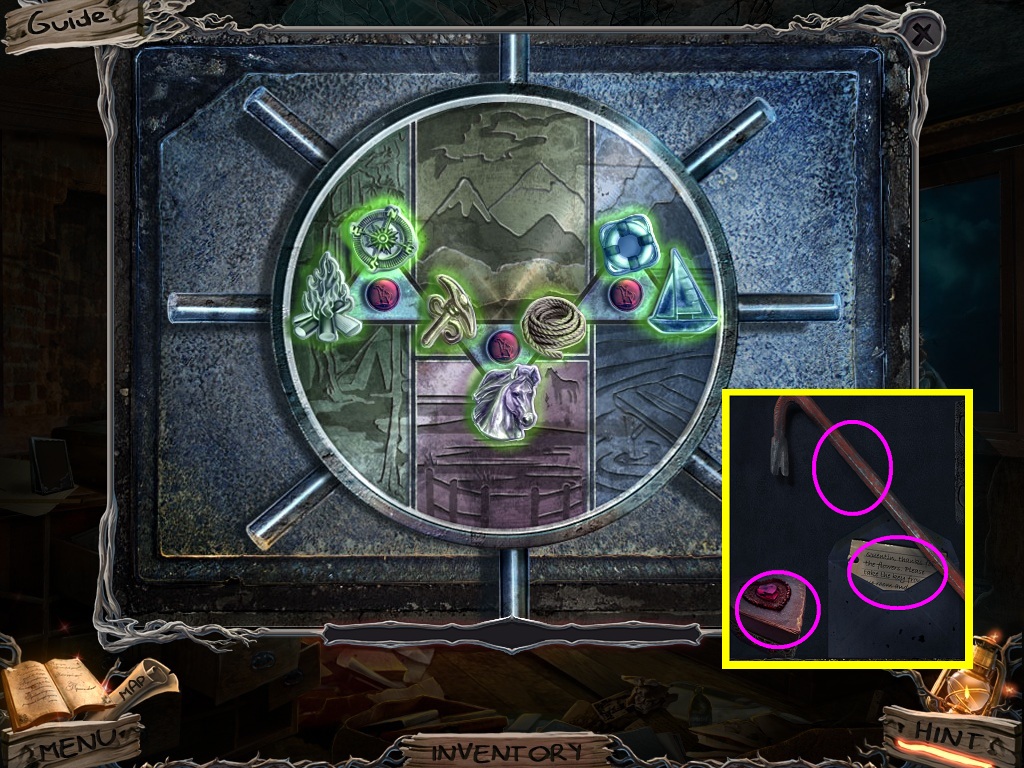
- Place the tiles with their matching background.
- The layout and solution is randomized.
- Solve as shown above.
- Click the box and collect the trinket, the crowbar and the note (pink circles).
- Go back to the courtyard.
- Zoom into the door (yellow square).
- Pick the crowbar (aqua square); use it on the middle of the door.
- Go into the nurse’s office.
Comments will load when you reach this part of the walkthrough.