
Chapter Five: Enter the Classrooms
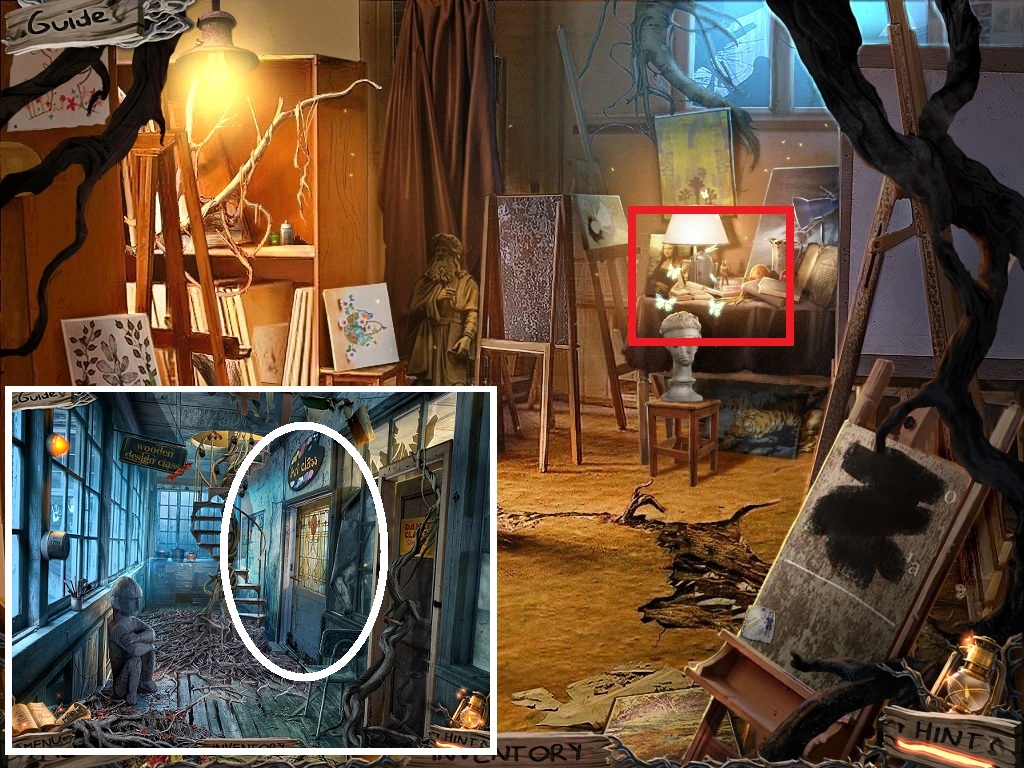
- Click the classroom door (white circle); go in.
- Zoom into the table to access a hidden objects area (red rectangle).
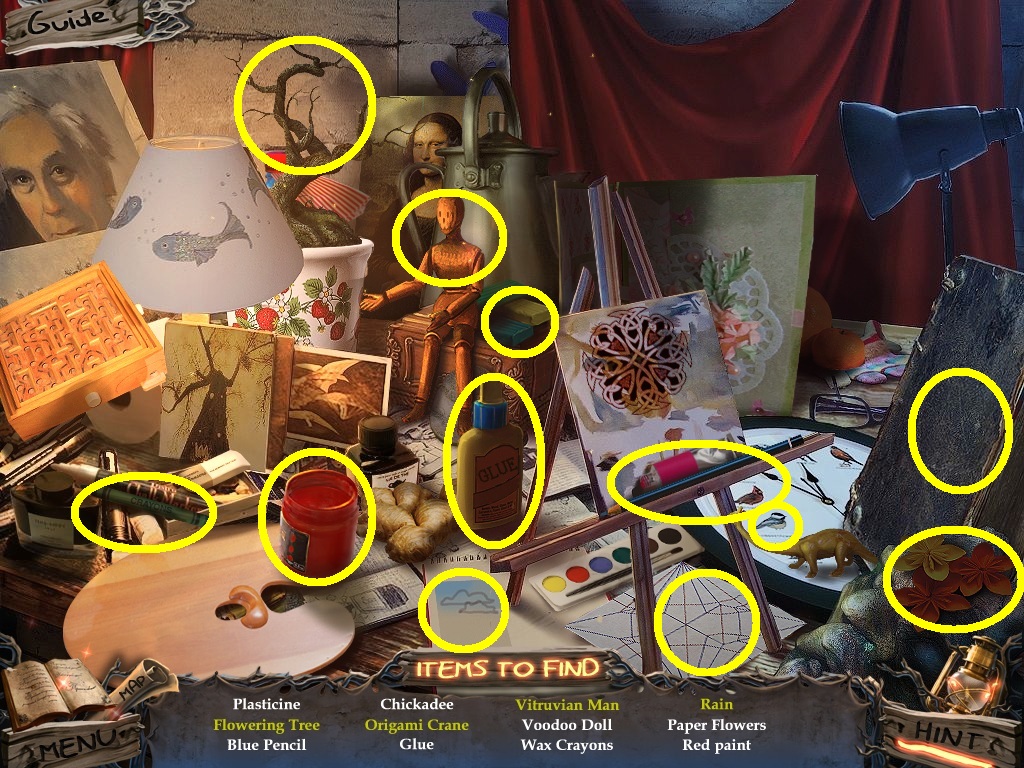
- Find the listed items (yellow circles).
- Collect the red paint.
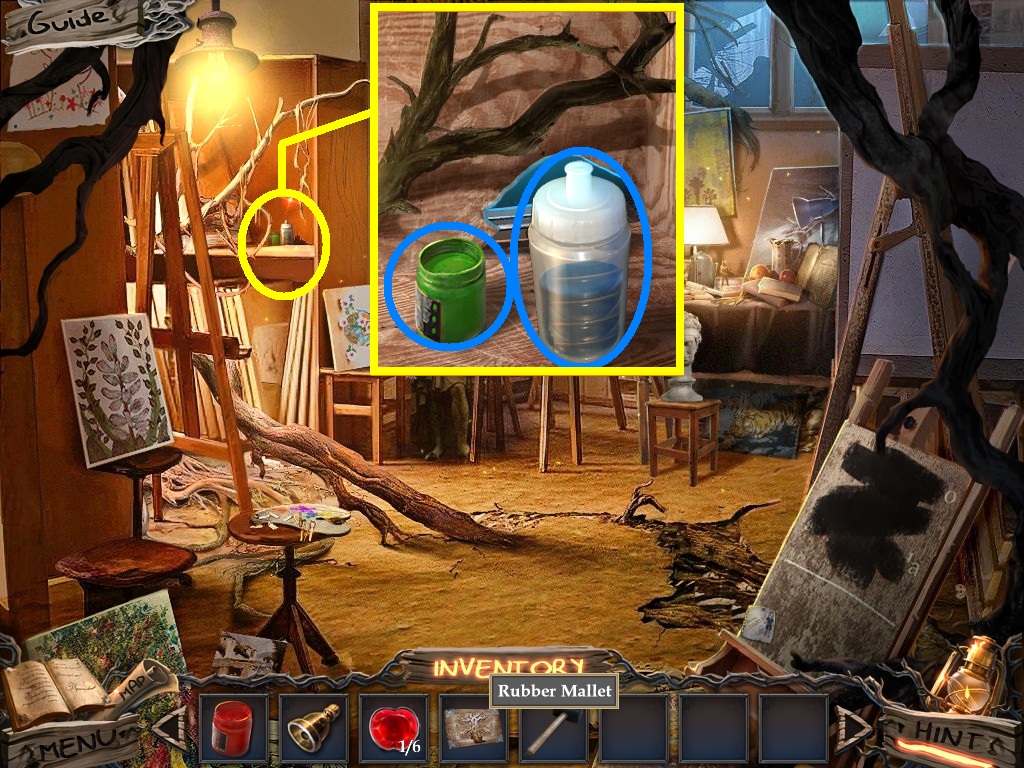
- Zoom into the shelf (yellow circle).
- Collect the water and the green paint (blue circles).
- Go to the art house.
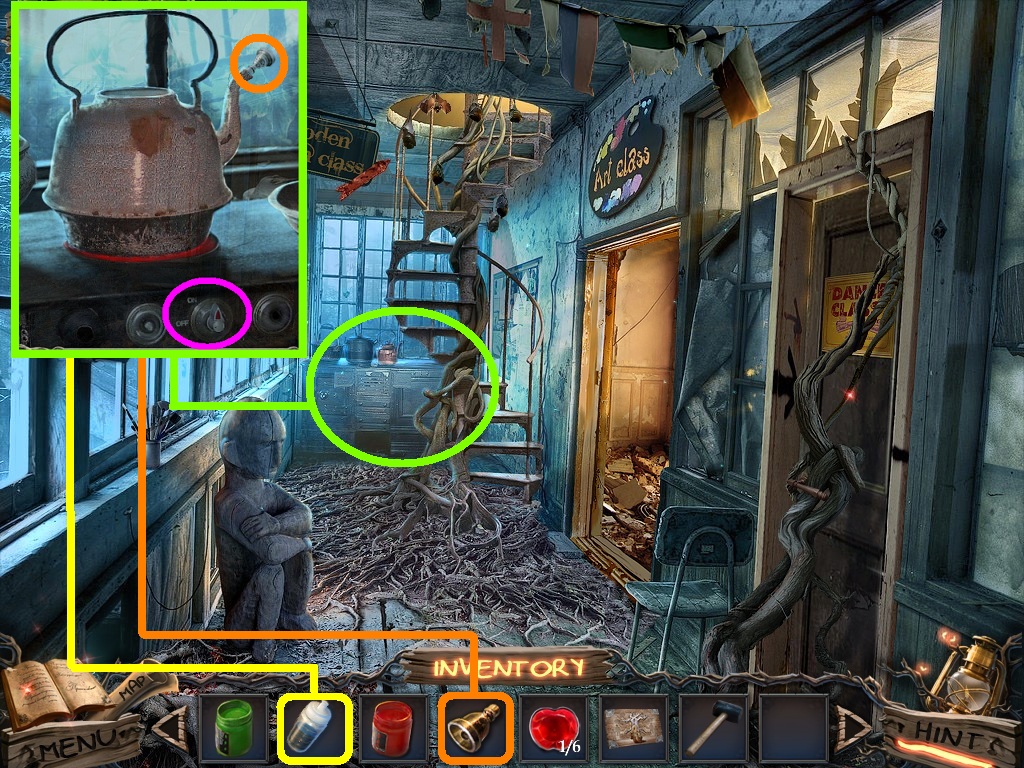
- Zoom into the stove (green circle).
- Pick the water (yellow square); pour it into the kettle.
- Click the burner (pink circle).
- Pick the mouthpiece (orange square); place it onto the spout.
- Go up the stairs and into the woodworking class.
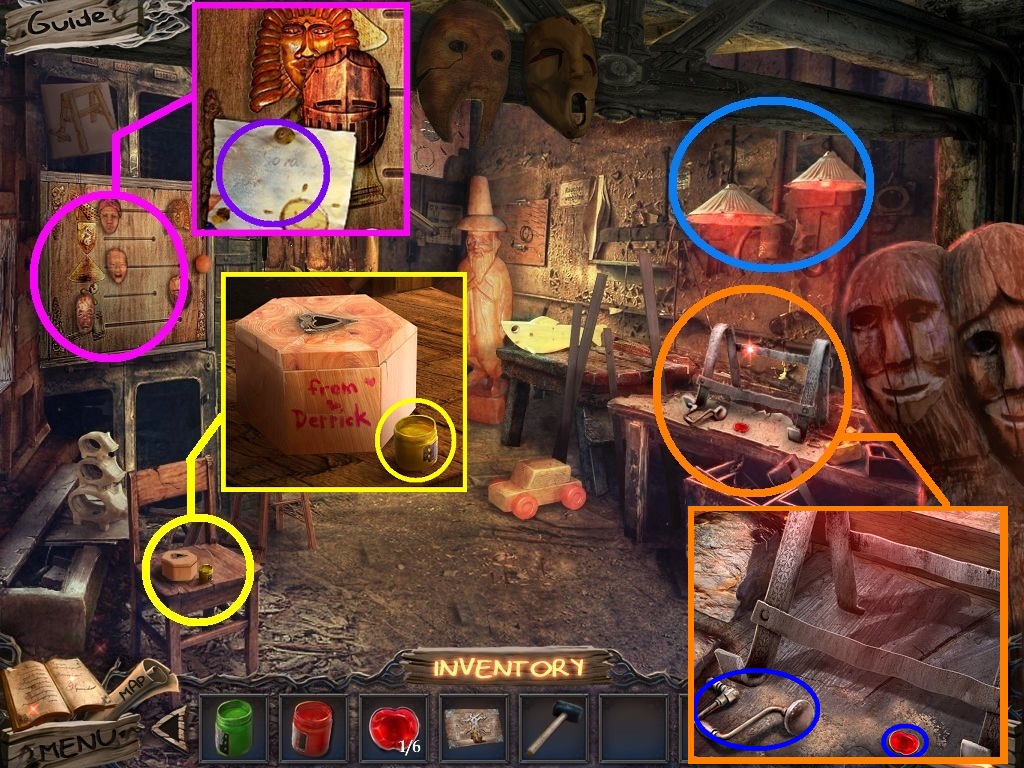
- Click the lamp (blue circle).
- Zoom into the chair (yellow circle); collect the yellow paint.
- Zoom into the workbench (orange circle).
- Collect the drill piece and apple piece (green circles).
- Zoom into the board (pink circle) and collect the note.
- Go to the art class.
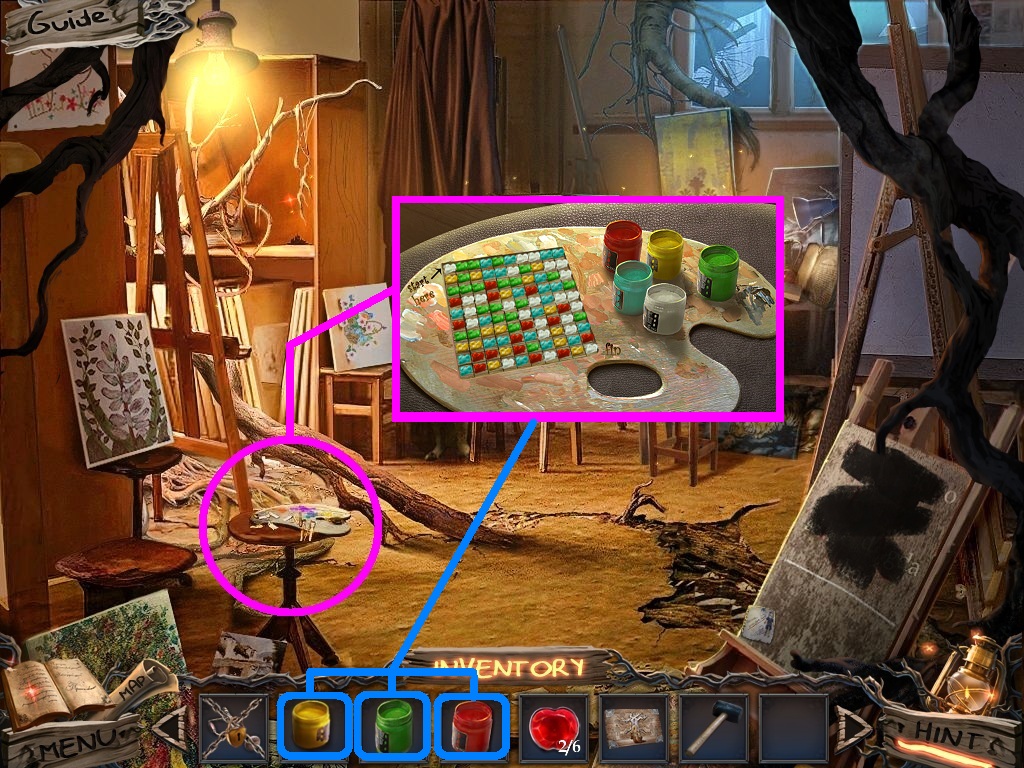
- Zoom into the table (pink circle).
- Pick the green paint, the yellow and red paint (blue squares) and place them onto the table.
- A puzzle will trigger.
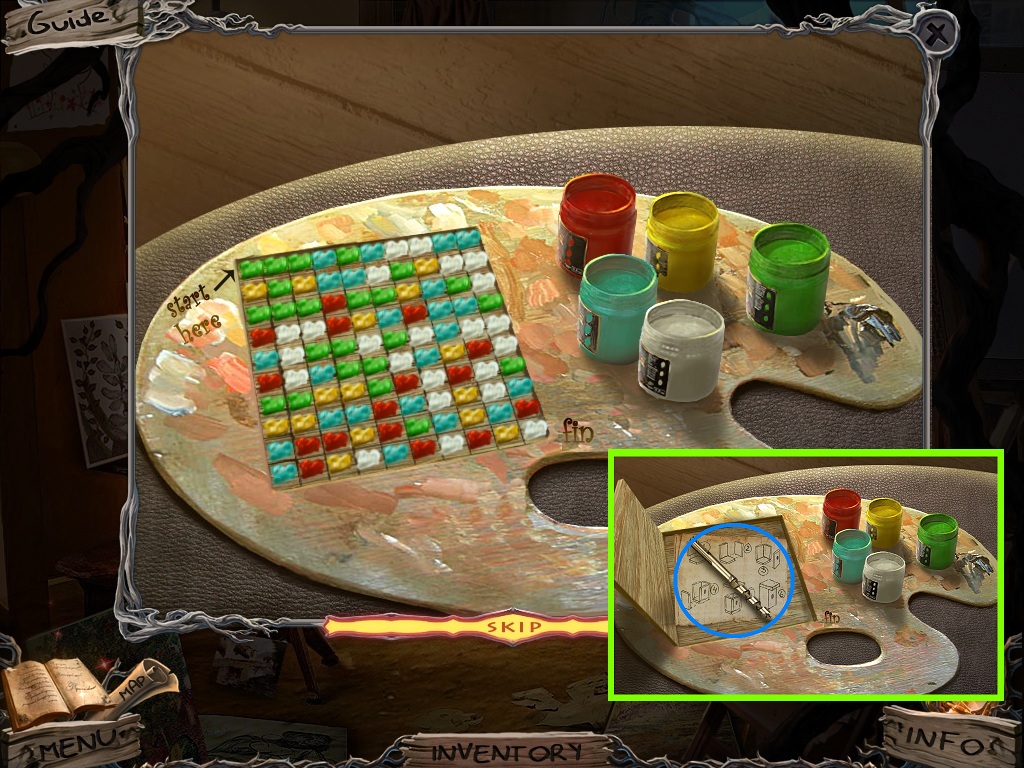
- The arrangement of the puzzle will be random.
- Notice the color in the upper left corner.
- Select a paint color of the connecting colors to change all tiles to the selected color.
- The goal is to get all tiles to be one color.
- Complete 2 boards.
- Collect the drill bit and the blueprint (blue circle).
- Go to the woodworking class.
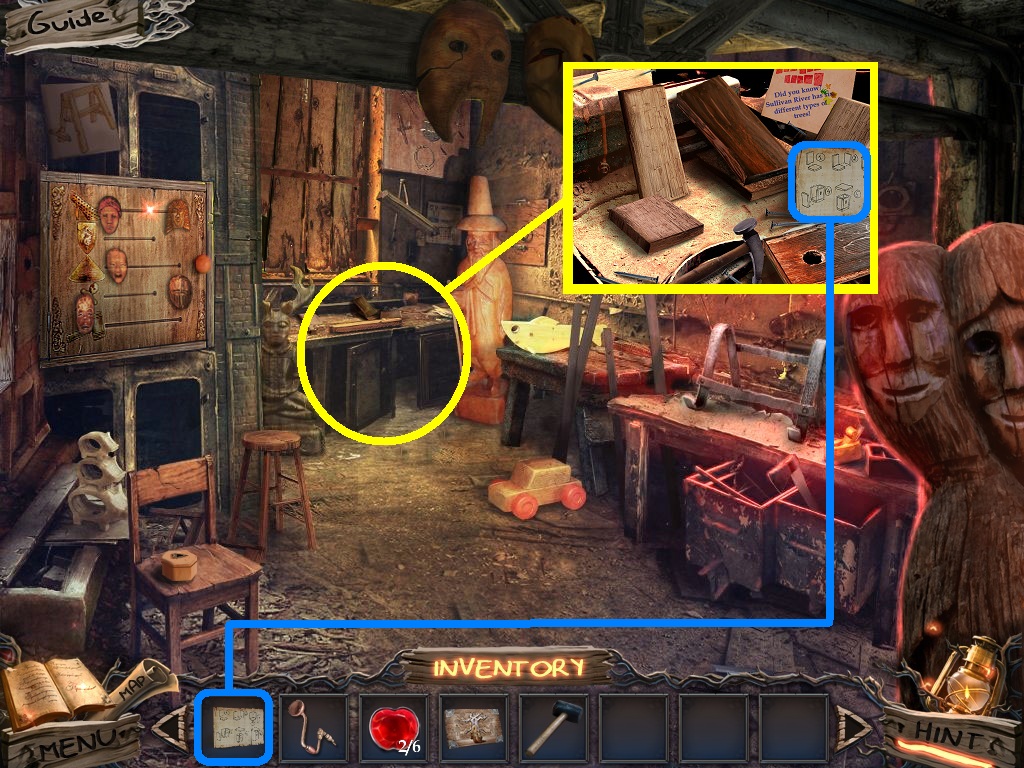
- Zoom into the workbench (yellow circle).
- Pick the blueprint (blue square) place it next to the wood to trigger a puzzle.
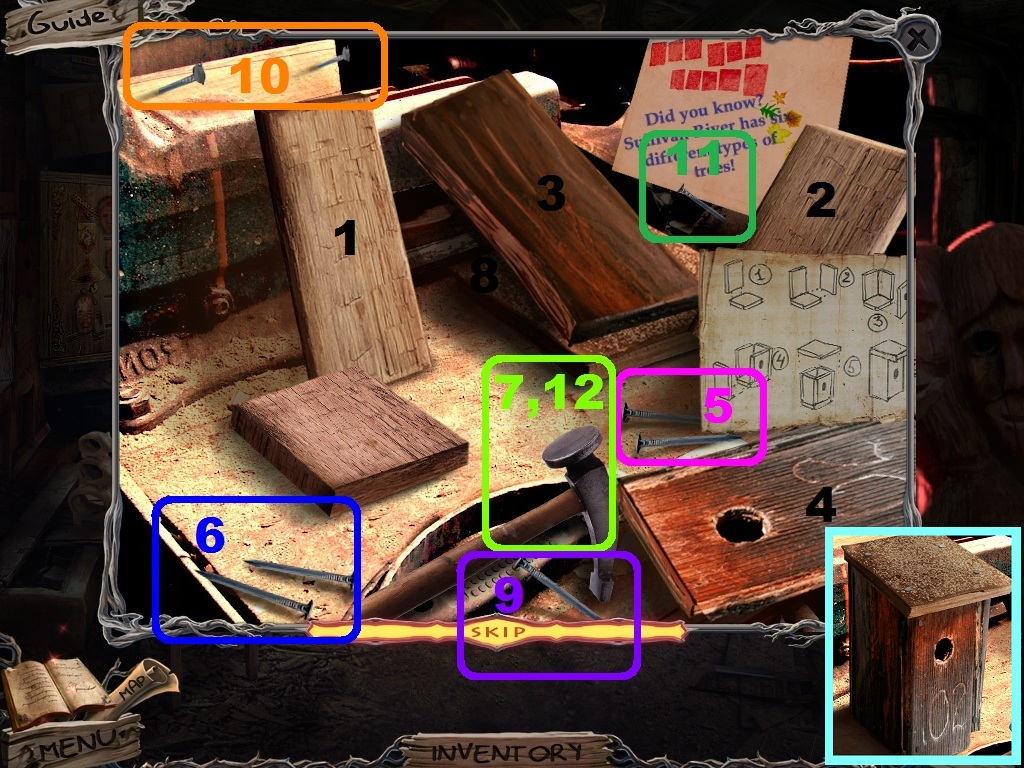
- Click the pieces in the pattern shown above.
- Collect the nesting box.
- Go to the stage.
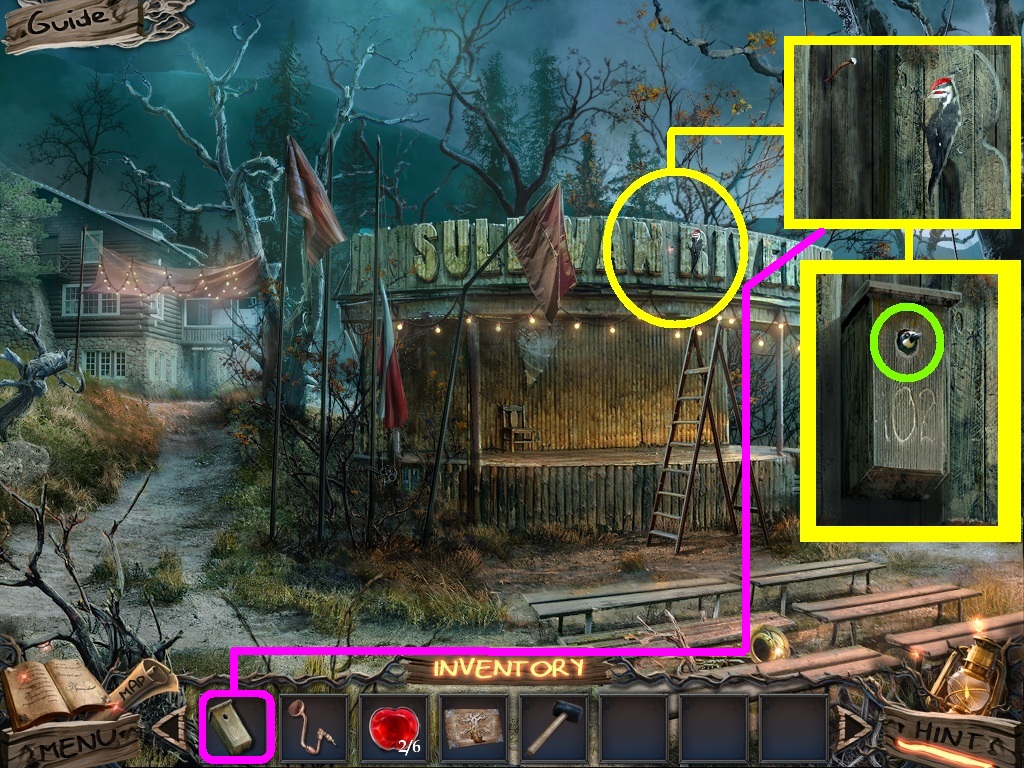
- Zoom into the sign (yellow circle).
- Pick the nesting box (pink square) and place it onto the nail.
- Collect the woodpecker (green circle).
- Go to the art house.
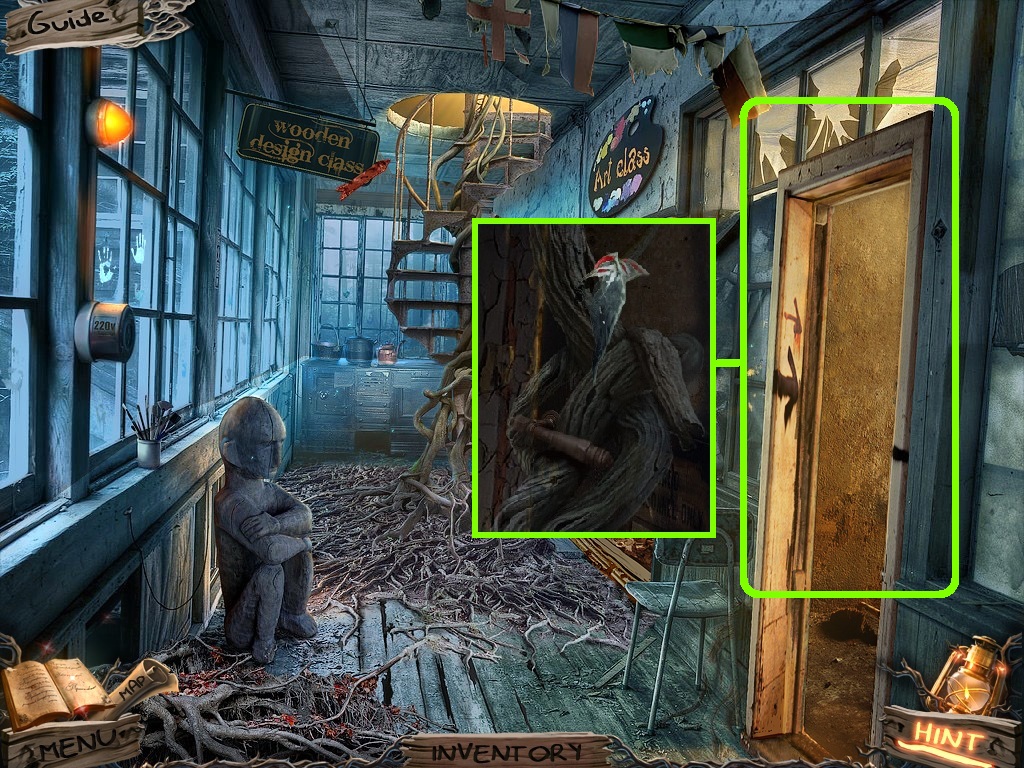
- Zoom into the door (green square).
- Pick the woodpecker place it onto the branch.
- Go into the dance class.
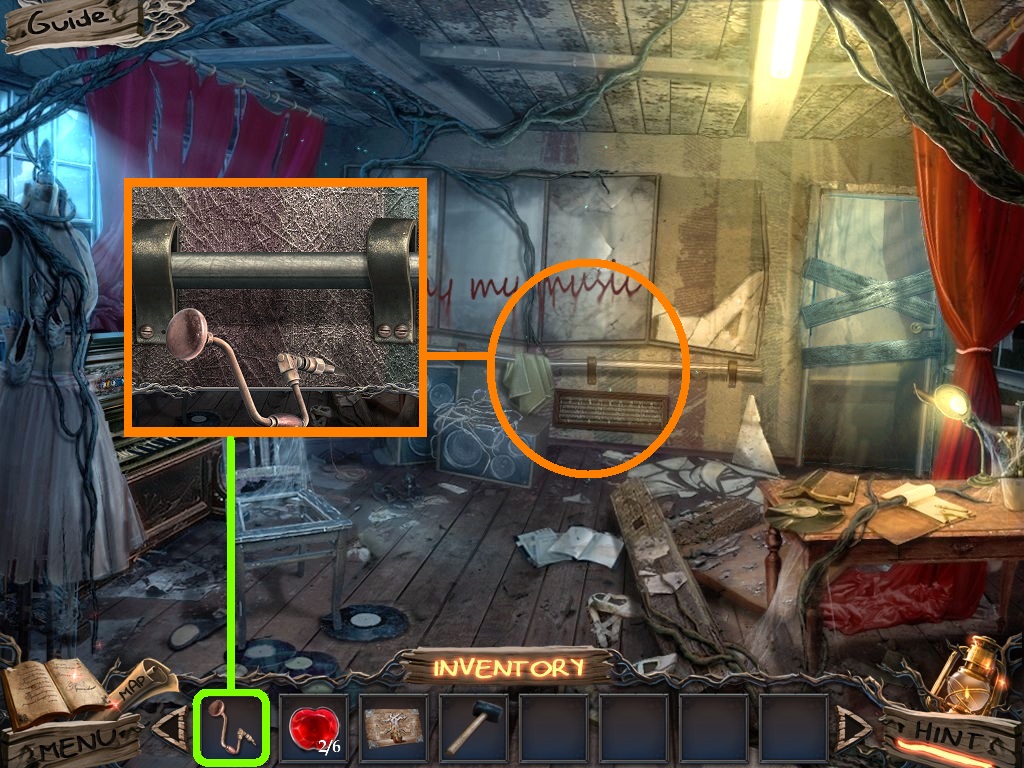
- Zoom into the railing (orange circle).
- Pick the drill (green square) and use it on the screws.
- Collect the handrail.
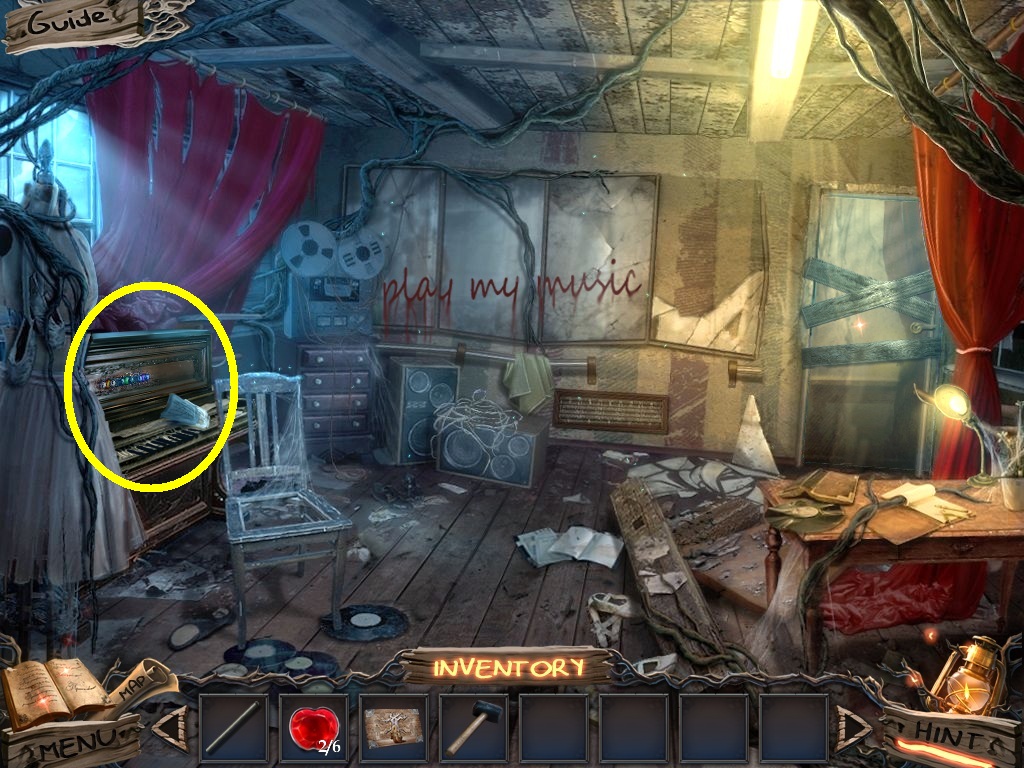
- Zoom into the piano (yellow circle) to trigger a puzzle.
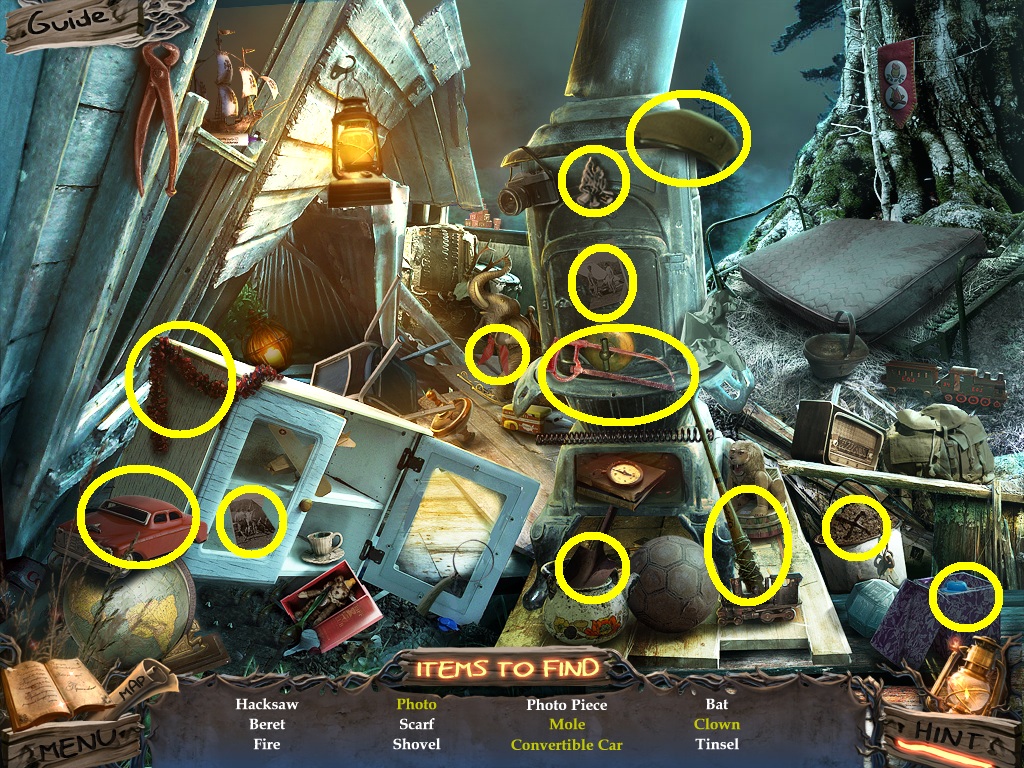
- Move the ballerinas to their color matched center.
- Follow this pattern to solve: 1 – 3 – 2 – 1 – 4 – 6 -3- 4 - 3 -2.
- Collect the tomahawk.
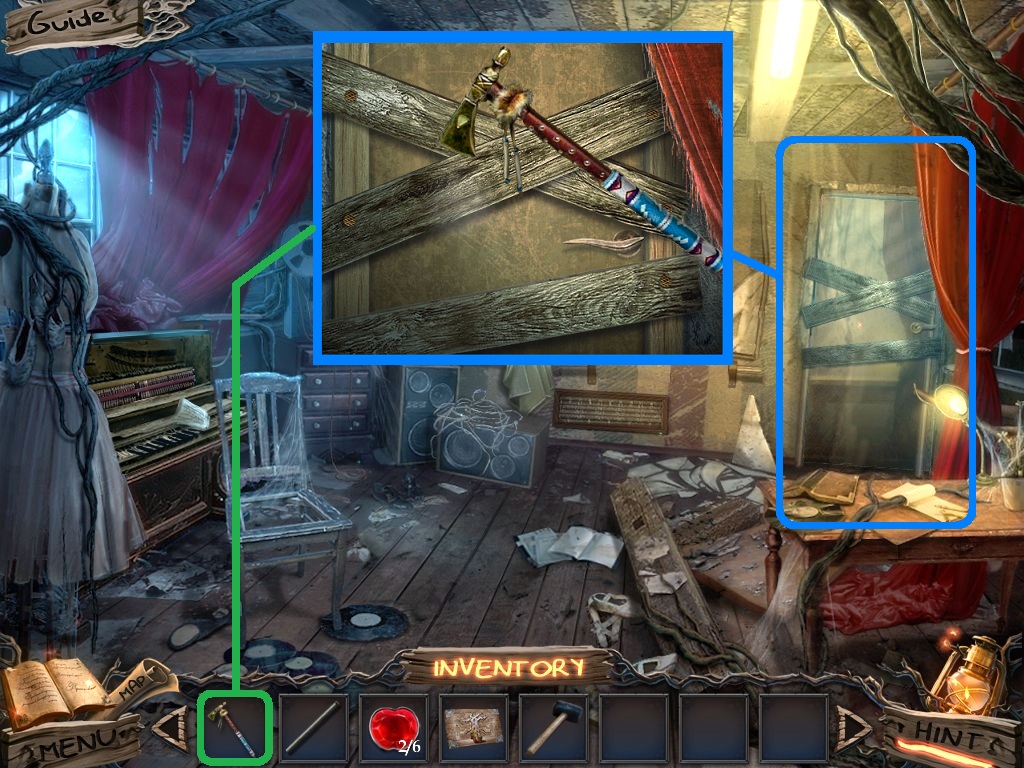
- Zoom into the door (blue square).
- Pick the tomahawk (green square) use it on the boards.
- Go into the orchestra class.
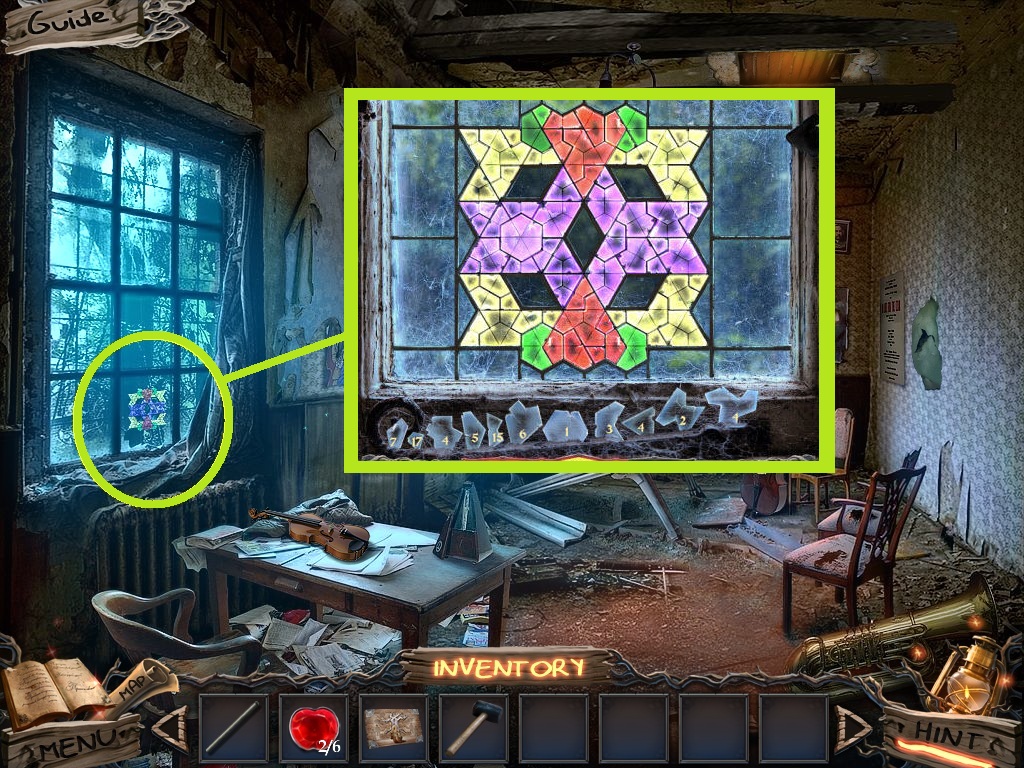
- Zoom into the stained glass (yellow circle); a puzzle will trigger.
- Arrange the stained glass as shown above.
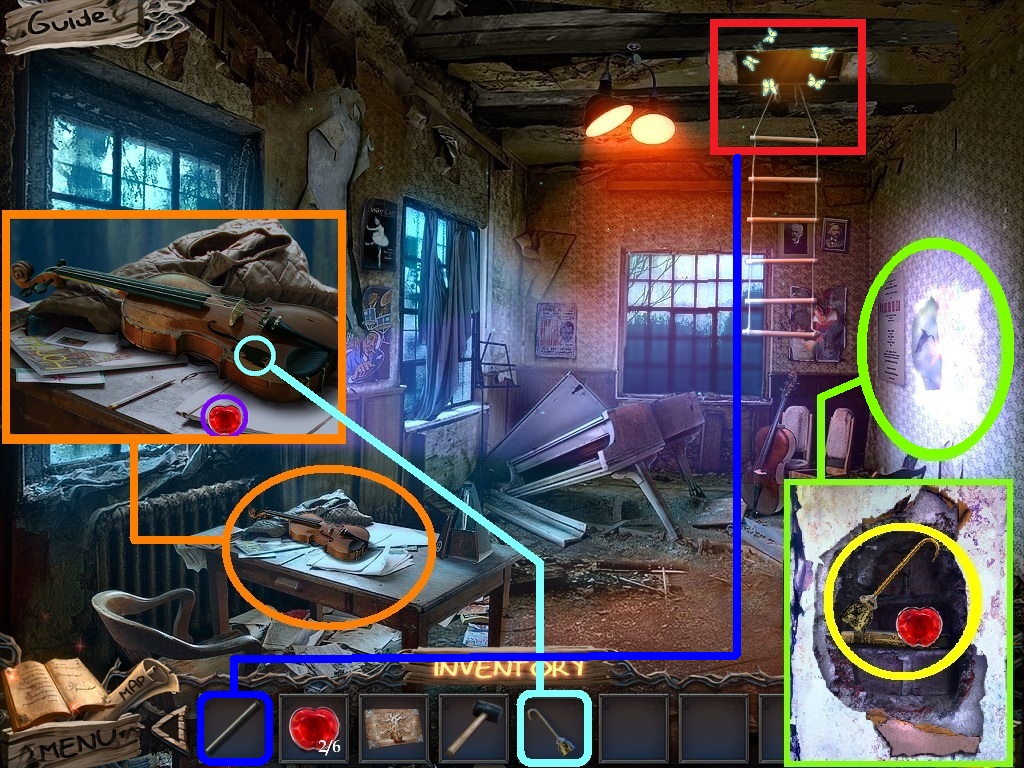
- Zoom into the wall (green circle).
- Pick the rubber mallet (blue square) and use it on the hole.
- Collect the hook the apple and the book (yellow circles).
- Zoom into the table (orange circle).
- Pick the hook (aqua circle) use it on the violin hole.
- Collect the heart key.
- Collect the apple (purple circle).
- Zoom into the hatch (red rectangle); pick the handrail (dark blue square) use it on the hatch.
- Click it to open and access a hidden object area.
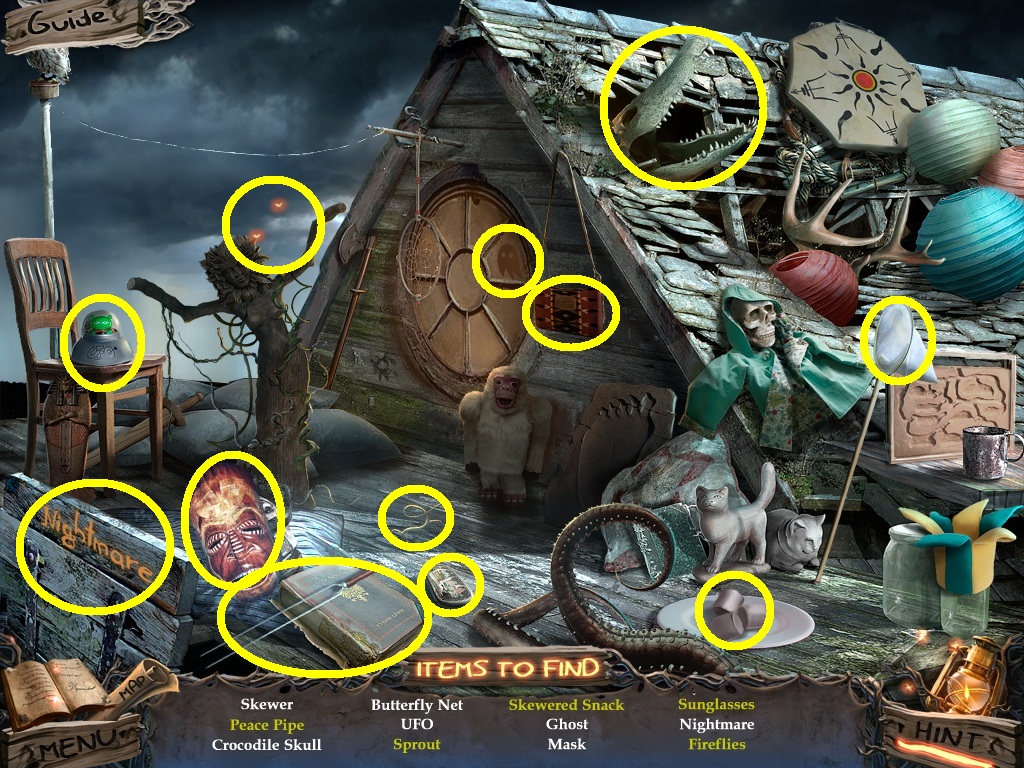
- Find the listed items (yellow circles).
- Collect the mask.
- Go into the art class.
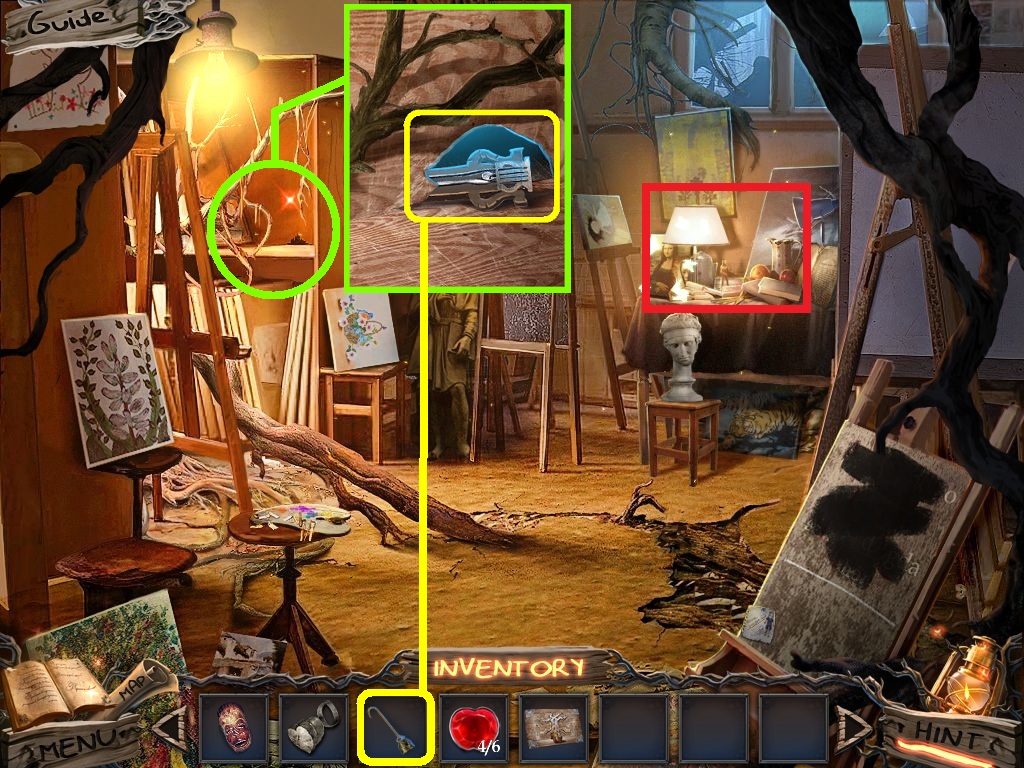
- Zoom into the shelf (green circle).
- Pick the hook (yellow square); use it to collect the piano brace.
- Zoom into the table (red rectangle) to access a hidden object area.
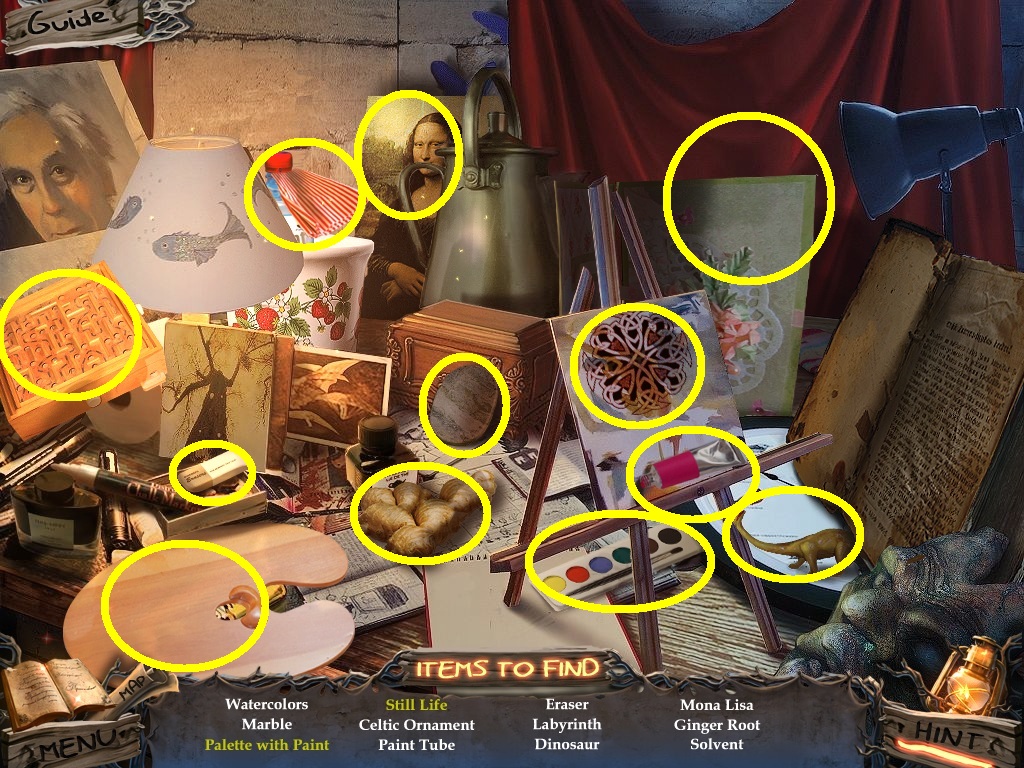
- Find all the listed items (yellow circles).
- Collect a solvent.
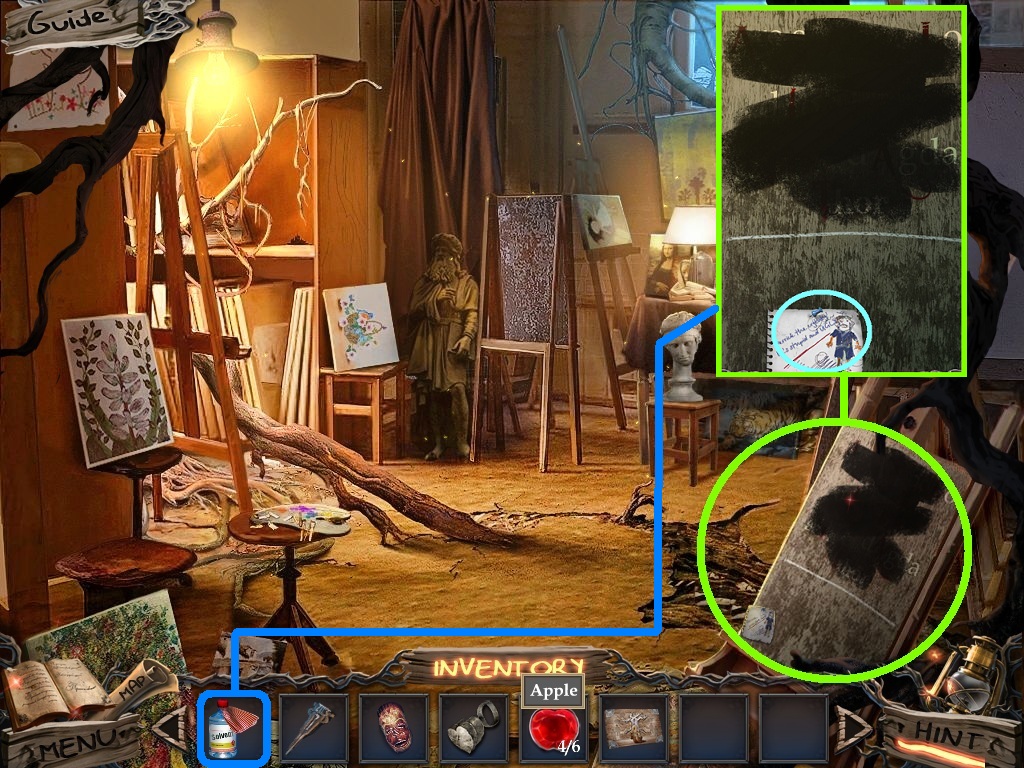
- Zoom into the easel (green circle).
- Collect the note.
- Pick the solvent (blue square) use it on the black paint (click 3 times) to trigger a puzzle.
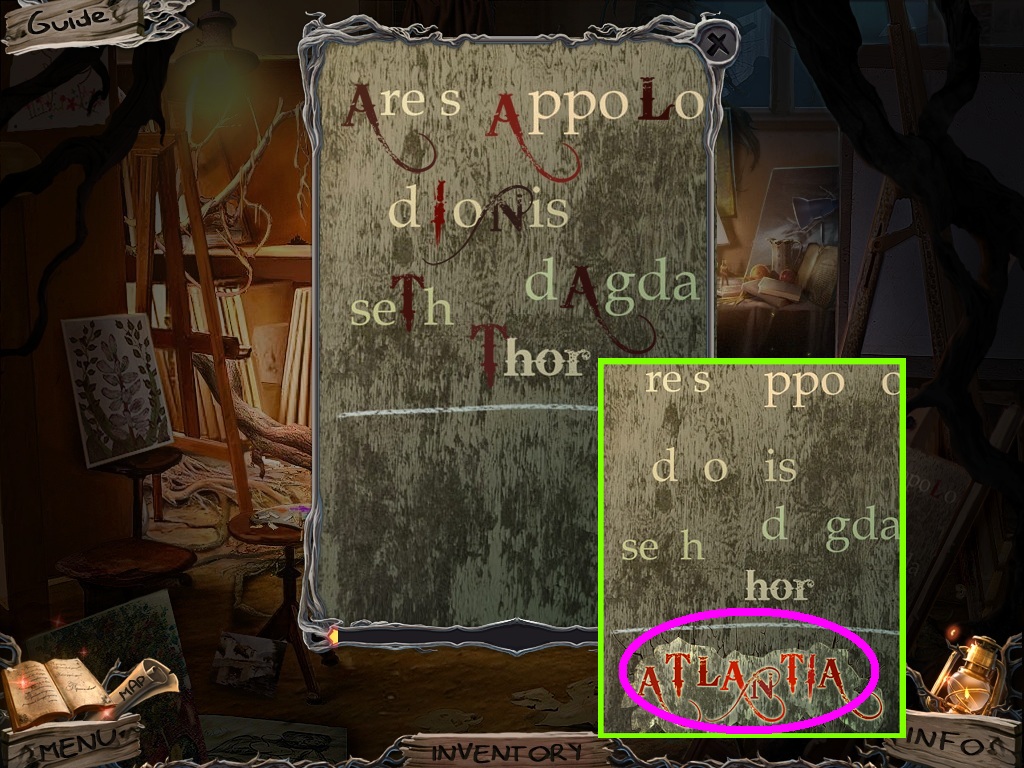
- Click the ancient letters first.
- Move the letters to spell: ATLANTIA.
- Collect the dryad name (pink circle).
- Go to the woodworking class.
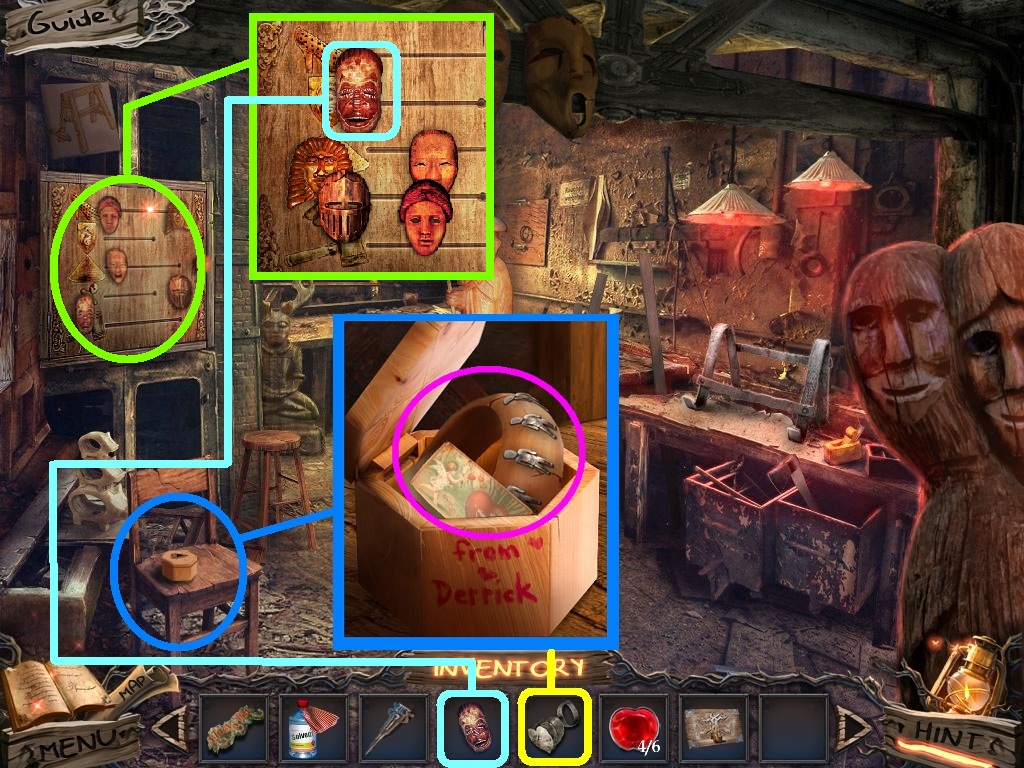
- Zoom into the chair (blue circle).
- Pick the heart key (yellow square); use it on the box lock.
- Collect the note and the bracelet (pink circles).
- Zoom into the compartment door (green circle).
- Pick the mask (aqua square); place it on the door to trigger a puzzle.
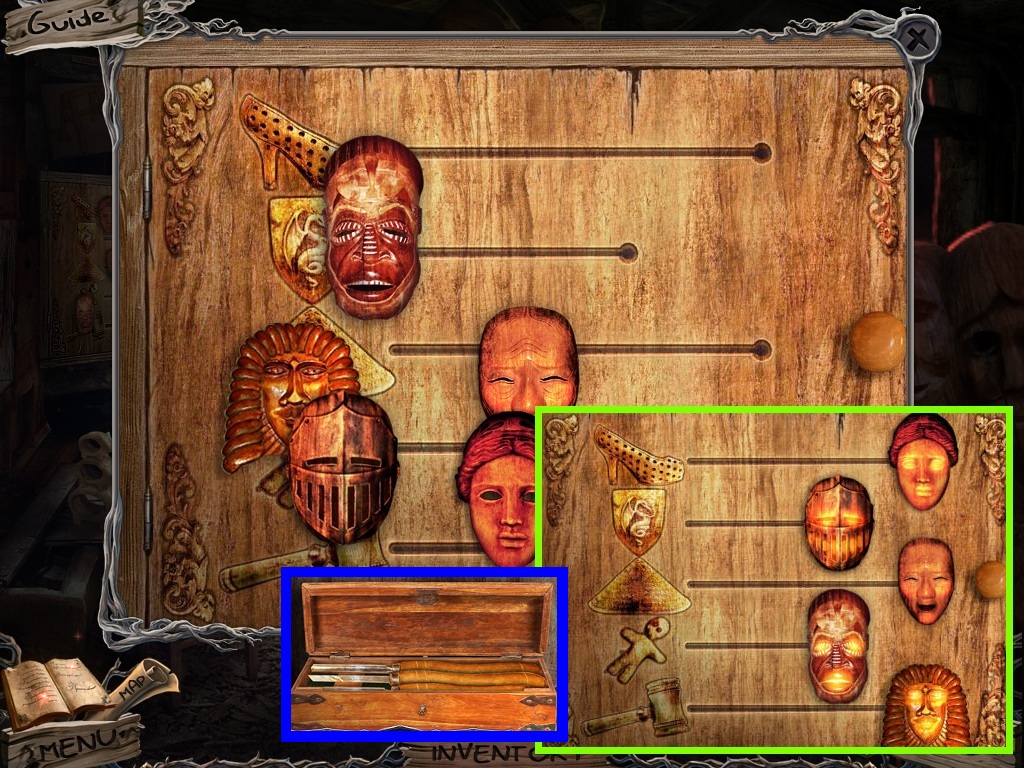
- Move the masks in line with their matching items.
- Solve as shown above.
- Collect the tools.
- Go into the dance class and proceed to the orchestra class.
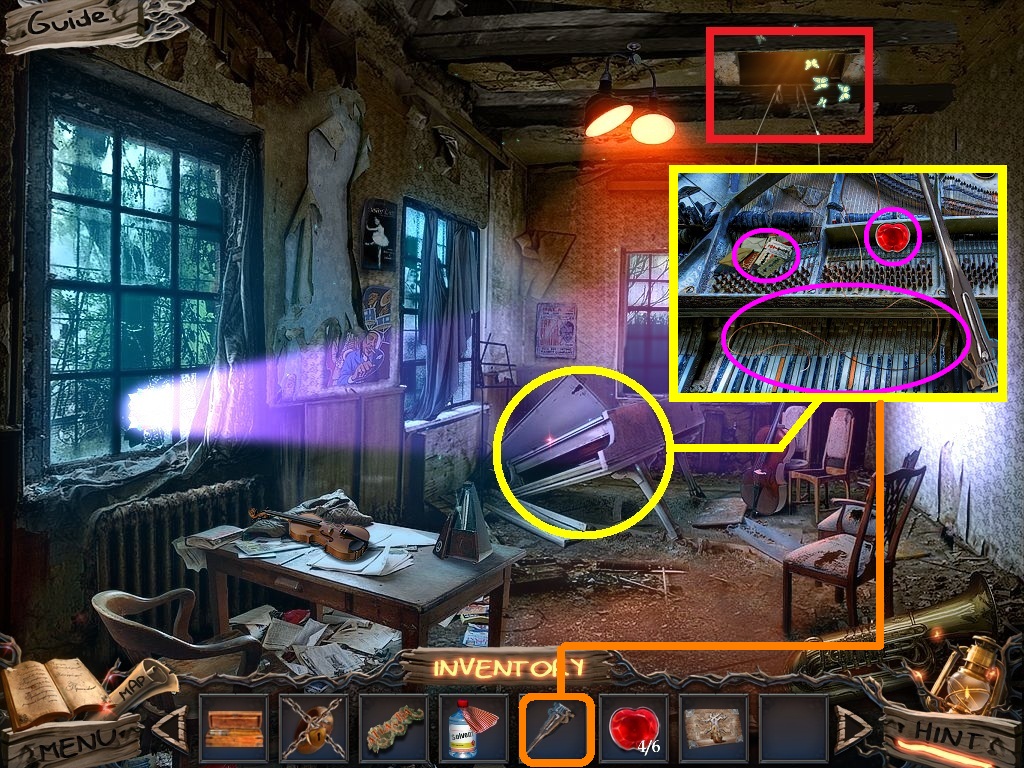
- Zoom into the piano (yellow circle).
- Pick the piano brace (orange square) place it onto the piano lid.
- Collect the piano string, the apple and the razor blade (pink circles).
- Go into the hatch (red rectangle) to access the hidden object area.
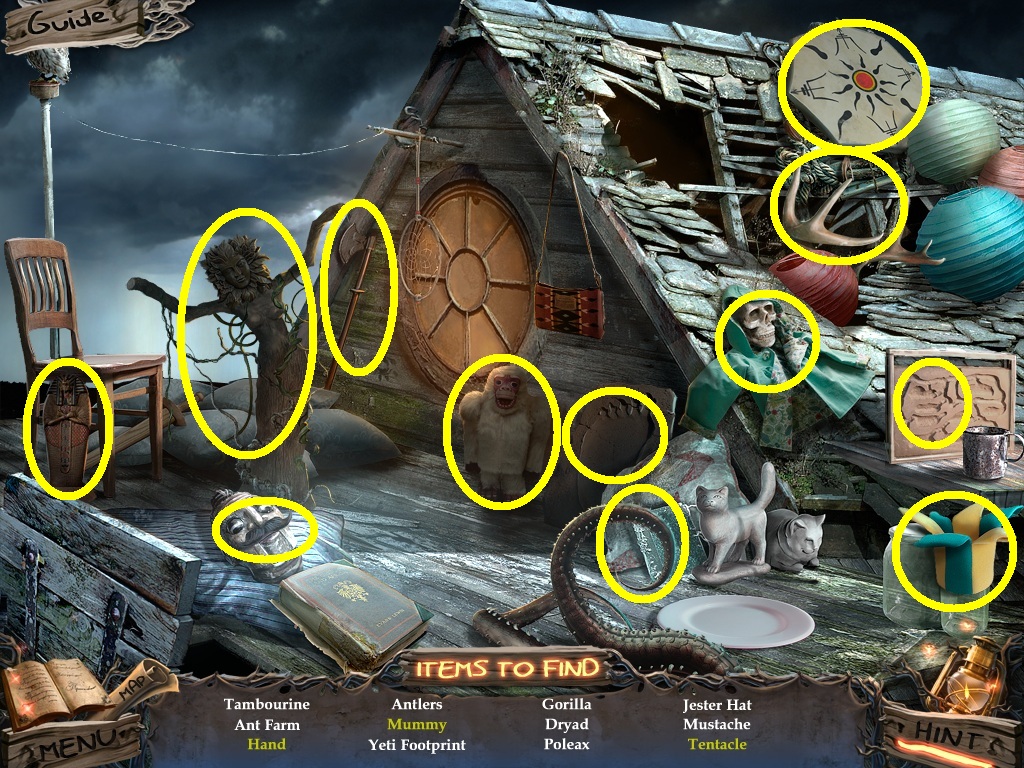
- Find the listed items (yellow circles).
- Collect the ant farm (purple circle).
- Go to the dance class.
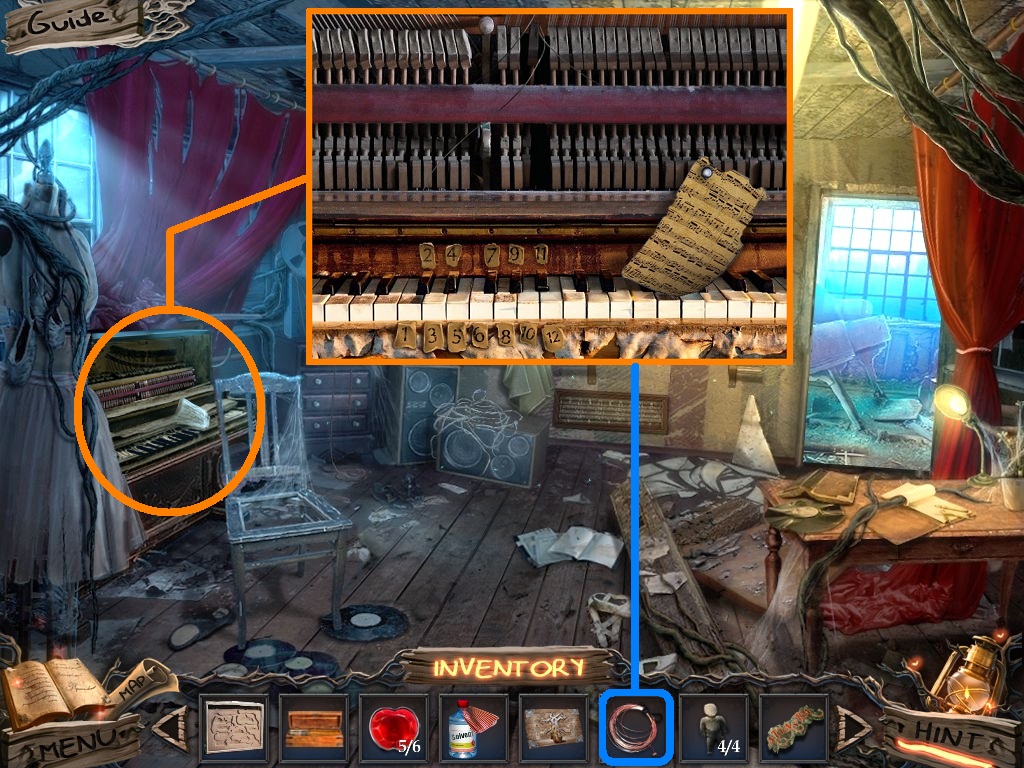
- Zoom into the piano (orange circle).
- Pick the piano string (blue square) place it on the piano.
- Click the keys as follows: 10 – 1 – 5 – 1 – 3.
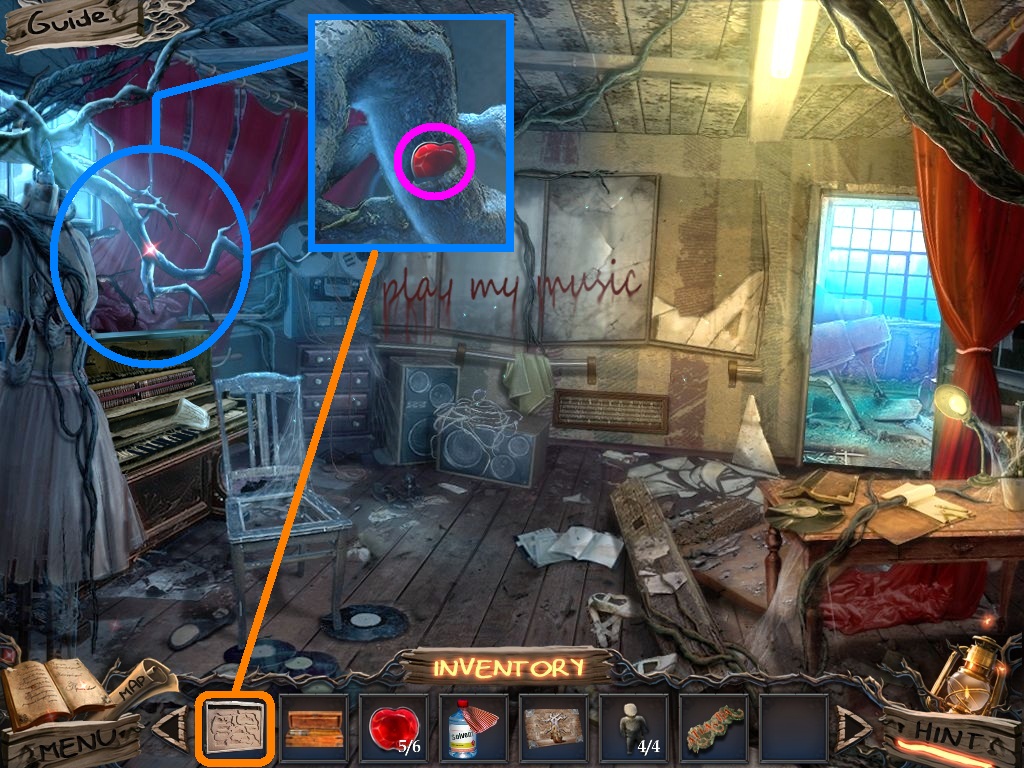
- Zoom into the branch (blue circle).
- Pick the ant farm (orange square); use it on the termites.
- Collect the termites.
- Collect the apple (pink circle).
- Go to the woodworking class.
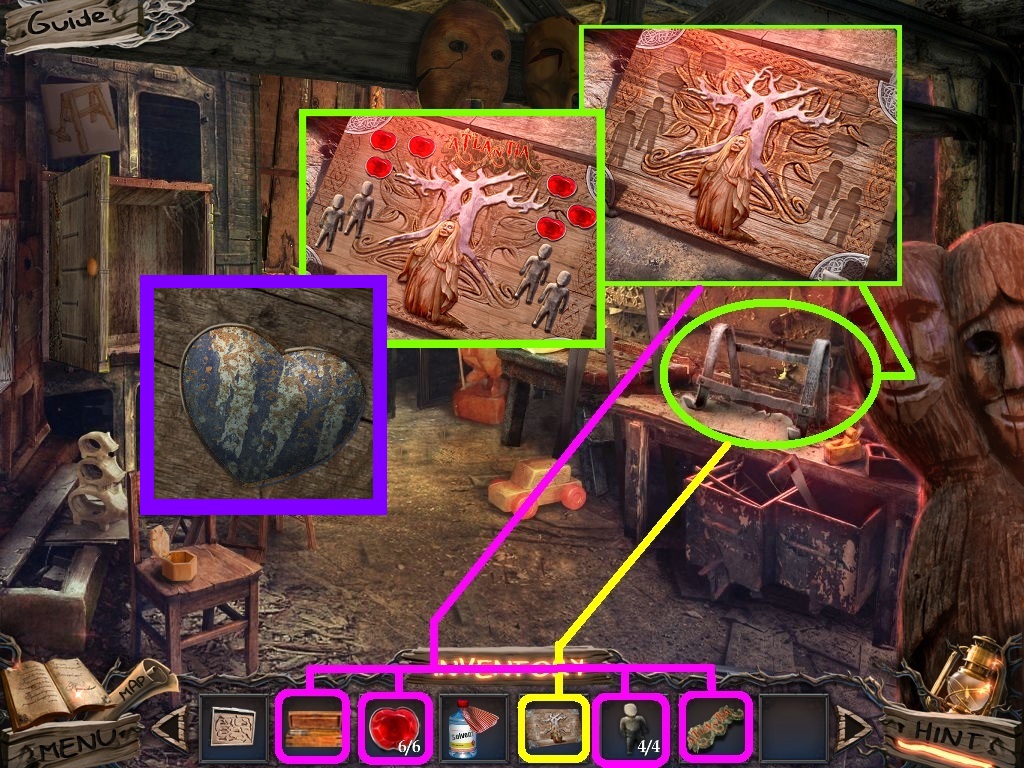
- Zoom into the easel (green circle).
- Pick the picture (yellow square) and place it onto the easel.
- Pick the tools, 6 apples, 4 figurines, and the dryad name (pink squares) use them on the picture.
- Collect the heart (purple square).
- Go to the apple orchard.
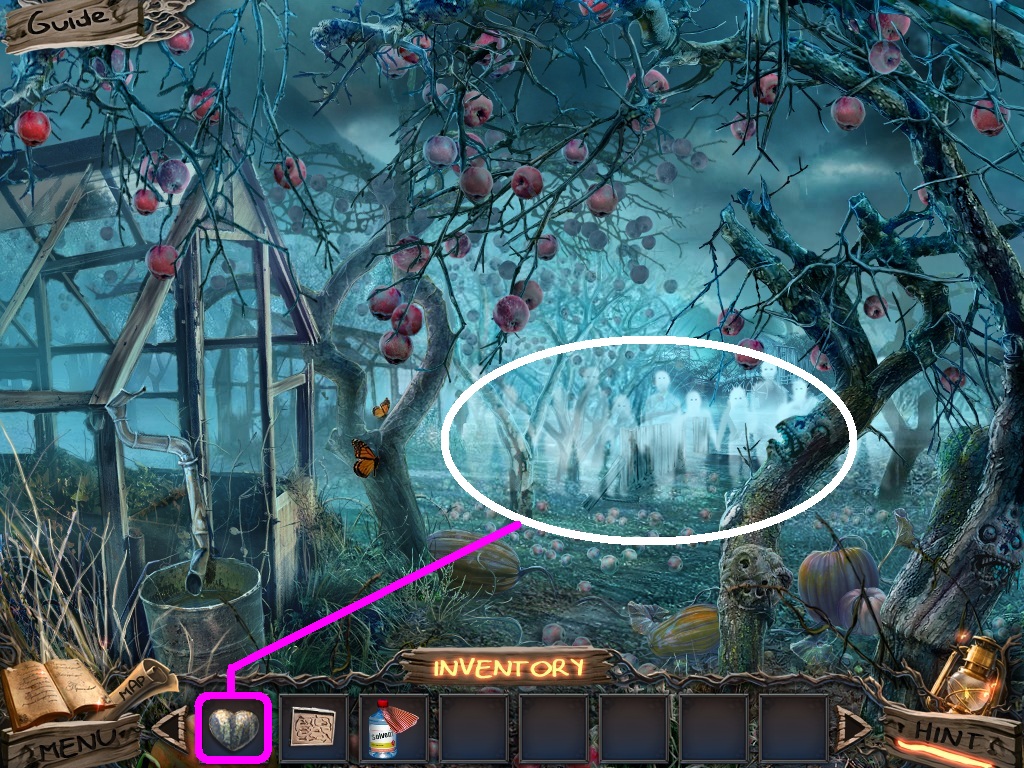
- Zoom into the ghost children (white circle).
- Give the heart (pink square) to them.
- Go to the bridge to the mill.
Comments will load when you reach this part of the walkthrough.