

Chapter Three: The Horse Stable
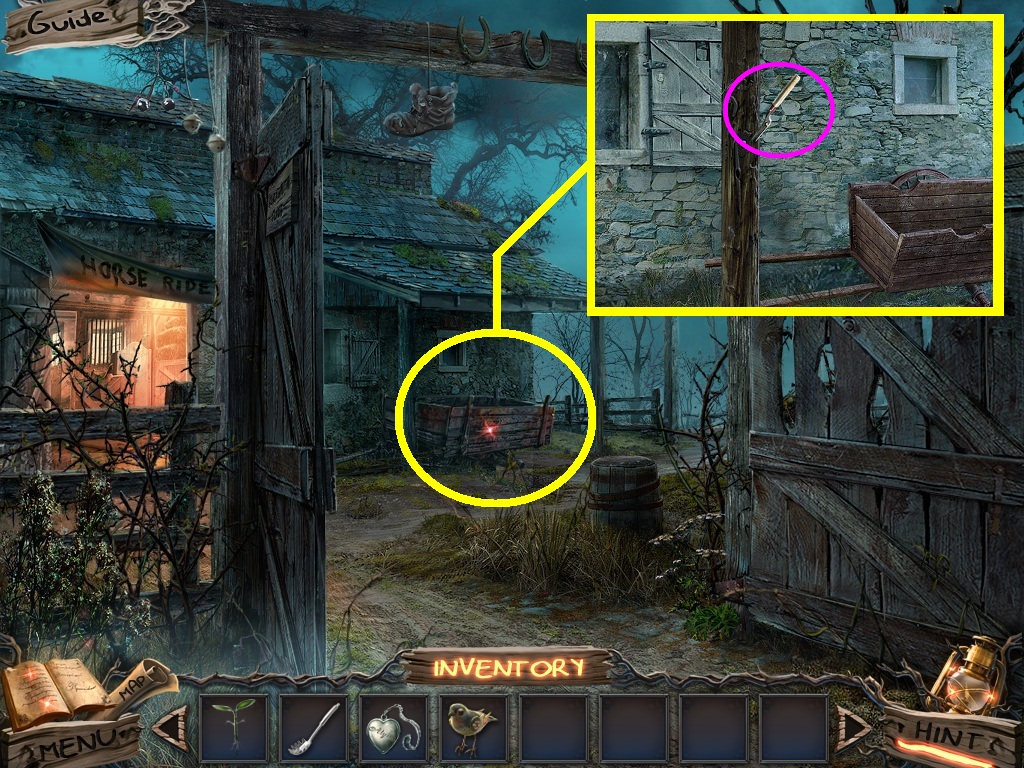
- Zoom into the cart (yellow circle).
- Collect the half of shears (pink circle).
- Go into the stables.
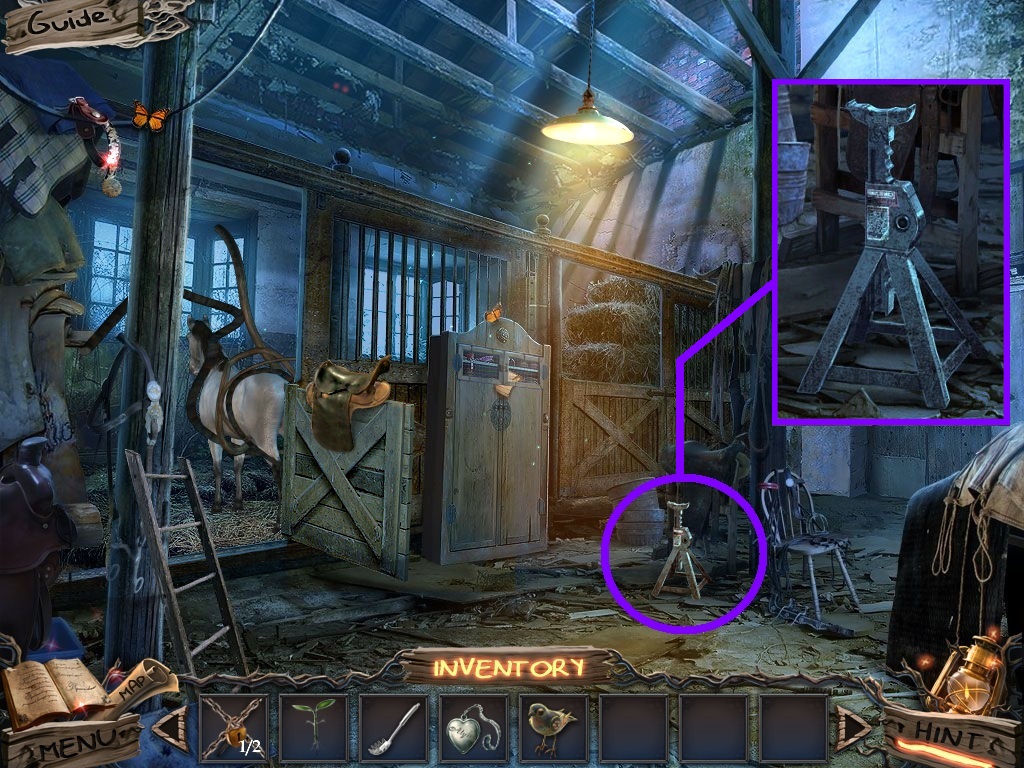
- Zoom into the broken jack (purple circle); collect it.
- Go to the horse trail.
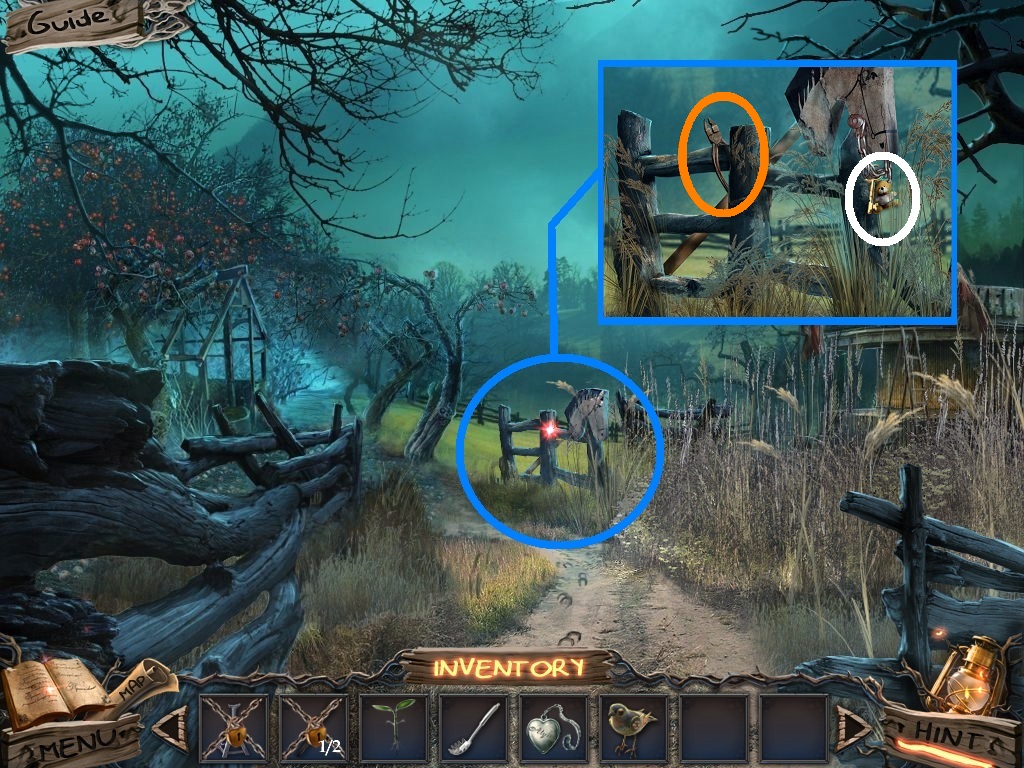
- Zoom into the hobby horse (blue circle).
- Collect the pliers (orange circle).
- Use them on the keys (white circle).
- Go to the apple orchard.
- Click the path.
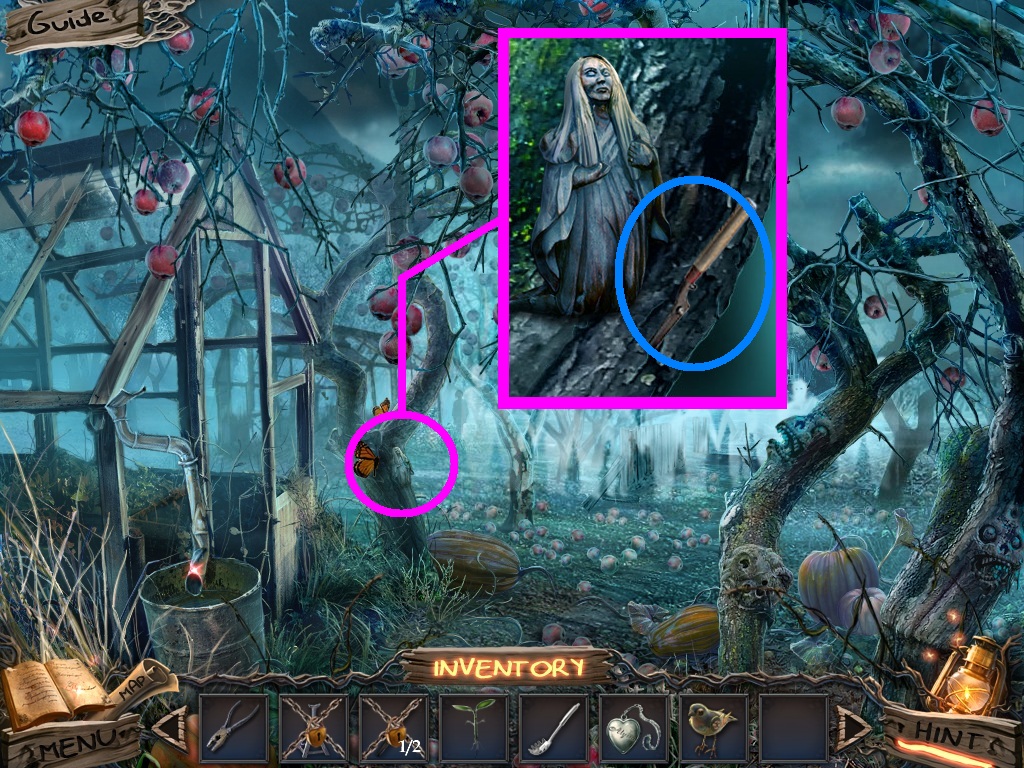
- Zoom into the tree (pink circle).
- Collect the half shear (blue circle).
- Go back to the exterior of the stables; go inside.
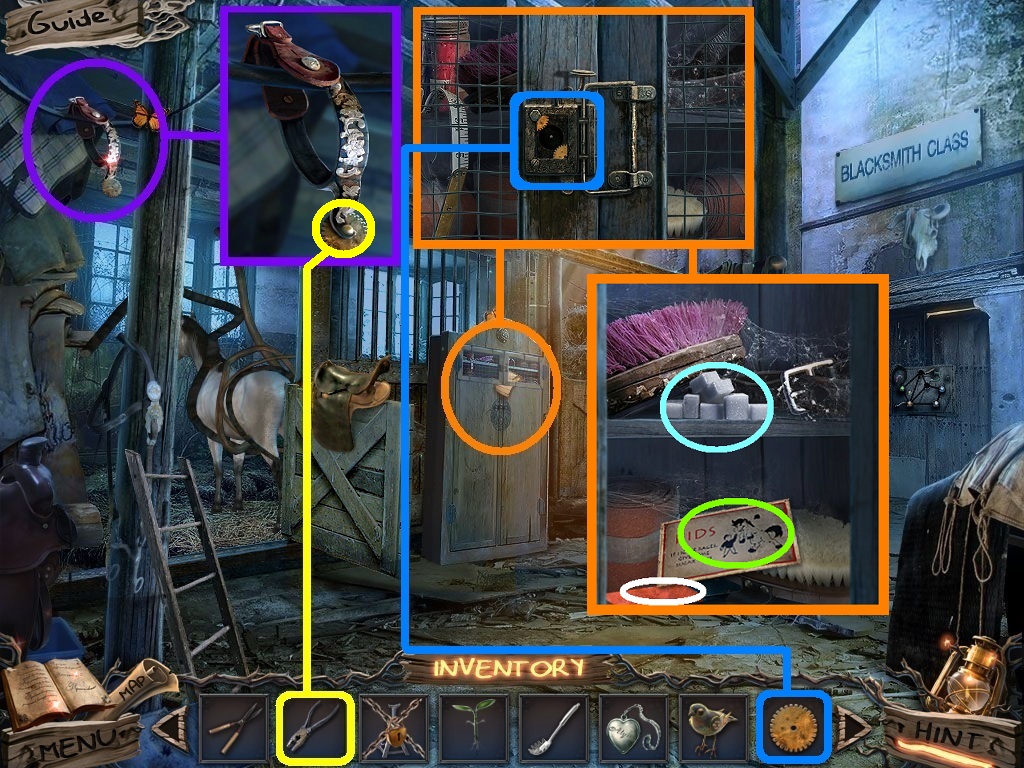
- Zoom into the spur (purple circle).
- Pick the pliers (yellow square); use it on the spur wheel.
- Collect the gear (yellow circle).
- Zoom into the cabinet (orange circle).
- Pick the gear (blue square); use it on the lock.
- Click the handle and then click the door.
- Collect the note (green circle); collect the sugar cube (aqua circle) and the magnet (white circle).
- Go to the apple orchard.
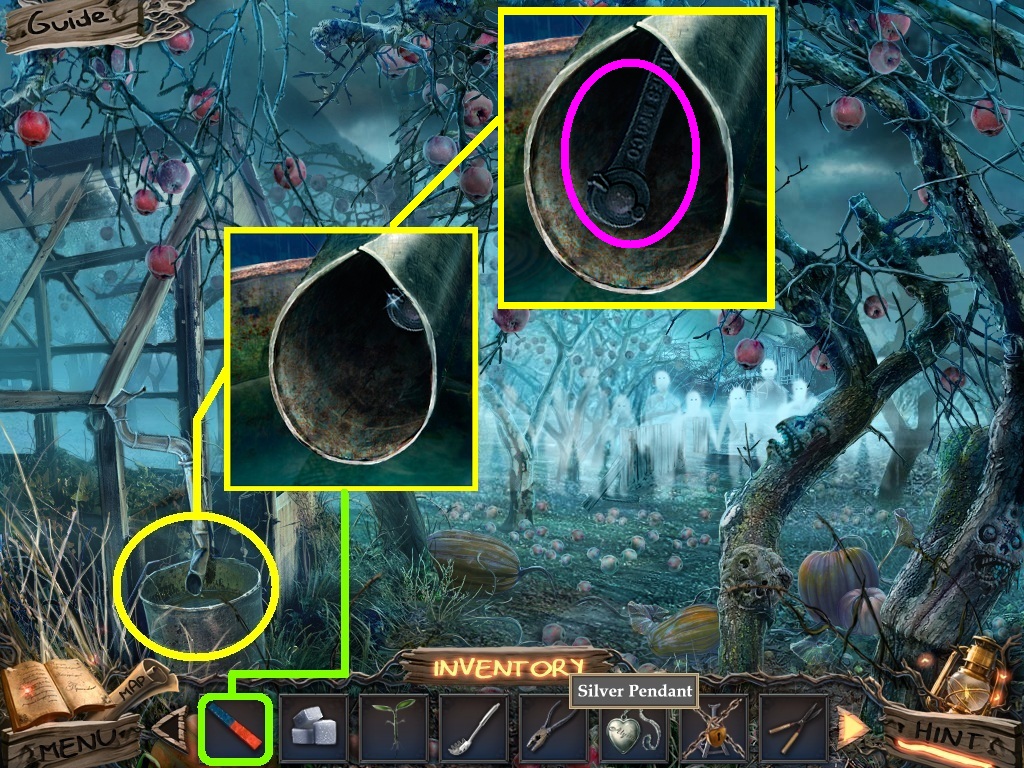
- Zoom into the downspout (yellow circle) and click it.
- Pick the magnet (green square) use it in the spout.
- Collect the crank (pink circle).
- Go to the stable gate.
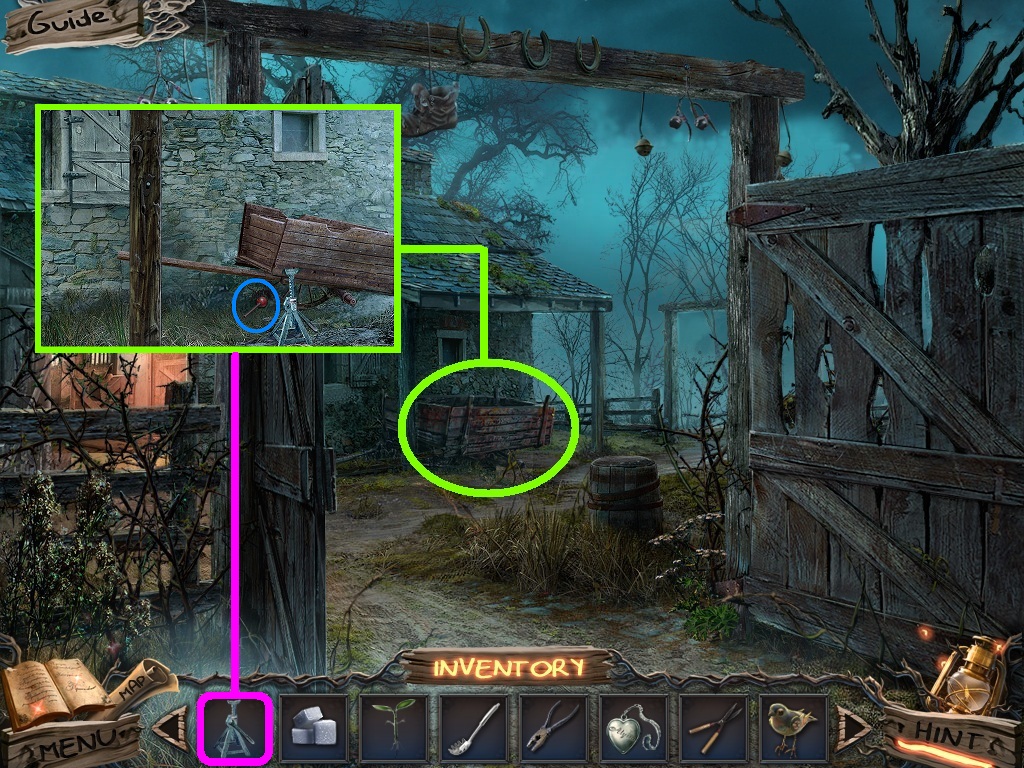
- Zoom into the cart (green circle).
- Pick the jack (pink square) use it on the cart.
- Collect the red lever (blue circle).
- Go into the stable gate.
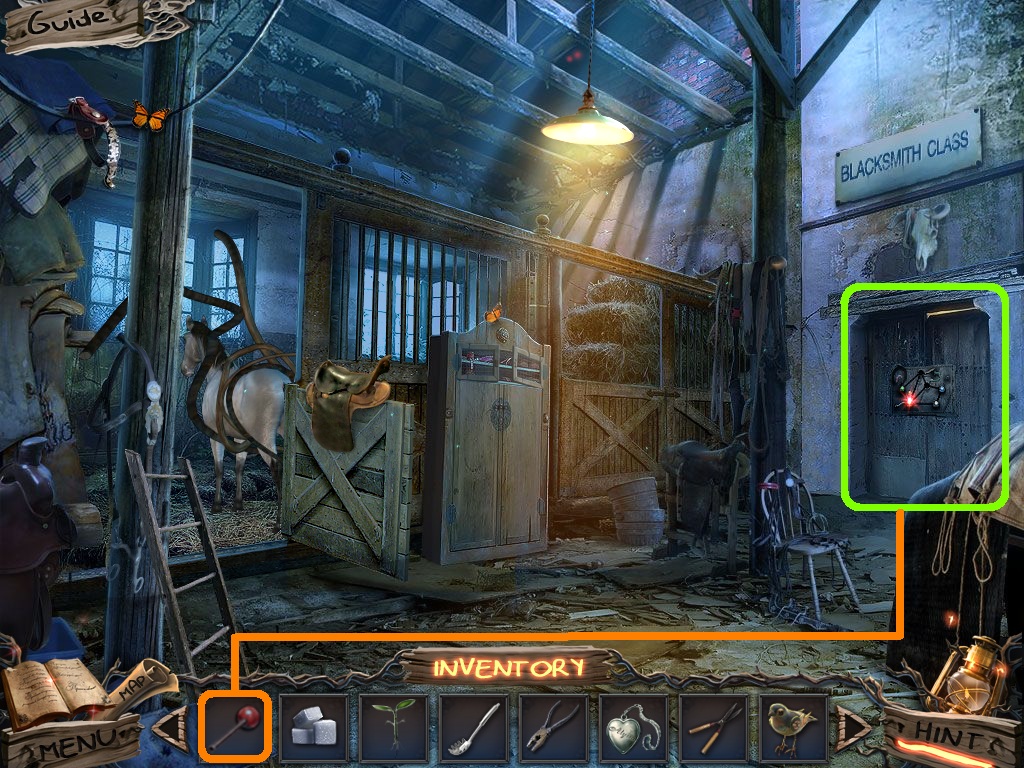
- Zoom into the door (green square).
- Pick the red lever (orange square) place it on the door.
- A puzzle will trigger.
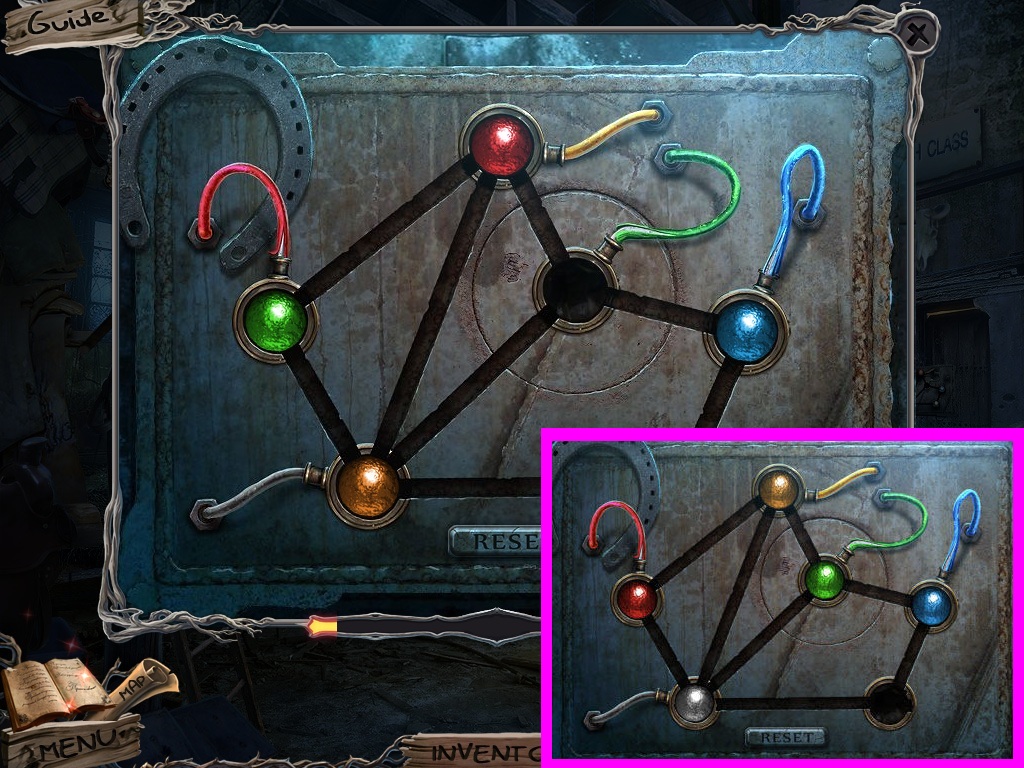
- Move the colored circles to the color matched wires.
- Solve as follows: yellow ball – green ball – red ball – yellow ball – green ball – white ball.
- Solve as shown above.
- Go to the blacksmith class.
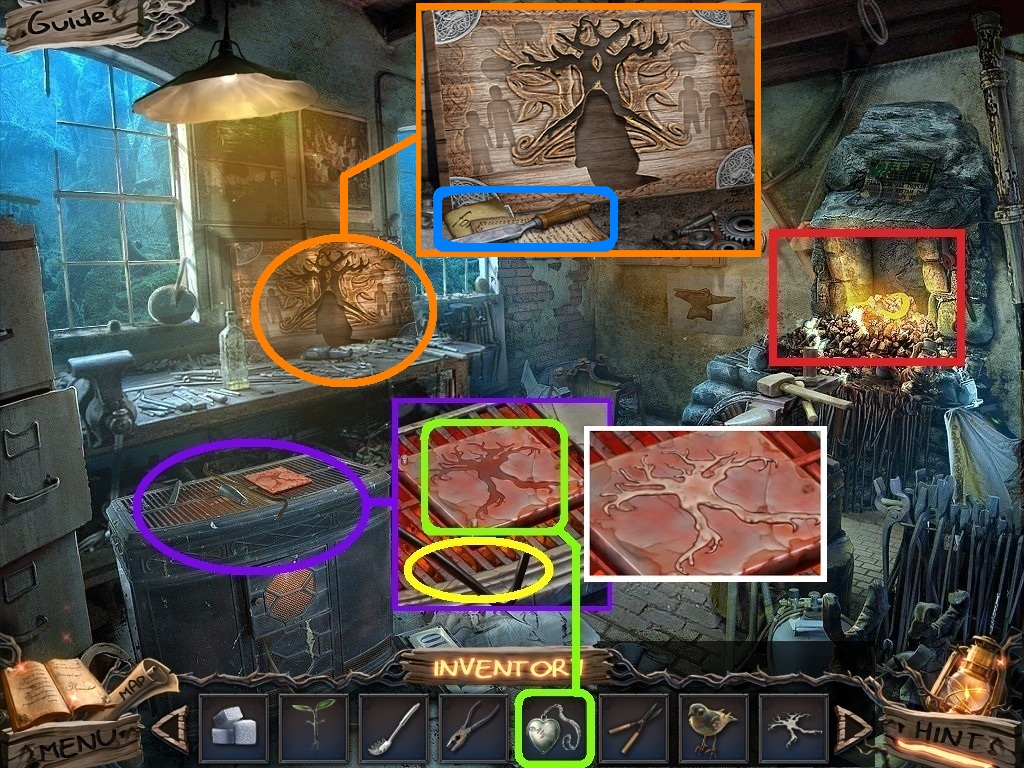
- Zoom into the furnace (purple circle).
- Pick the silver pendant (green square) place it onto the plate.
- Click the crowbar (yellow circle).
- Collect the silver tree (white square).
- Zoom into the workbench (orange circle).
- Collect the chisel and the 2 notes (blue square).
- Zoom into the fireplace to access a hidden object area (red rectangle).
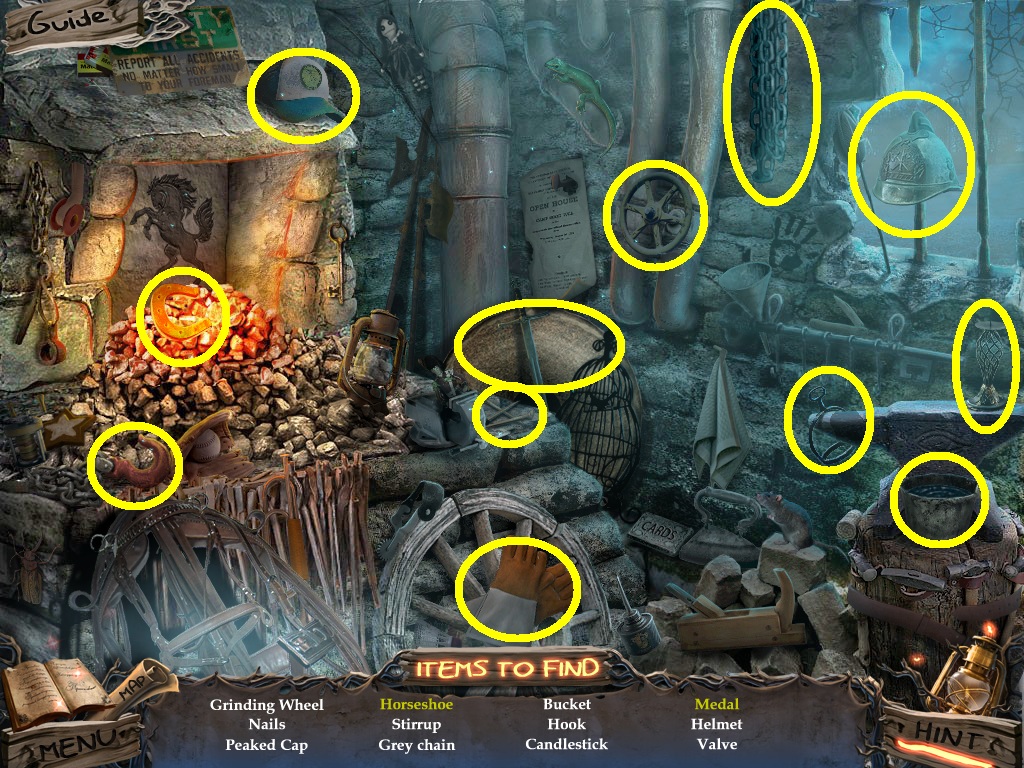
- Find the listed items (yellow circles).
- Collect the grinding wheel.
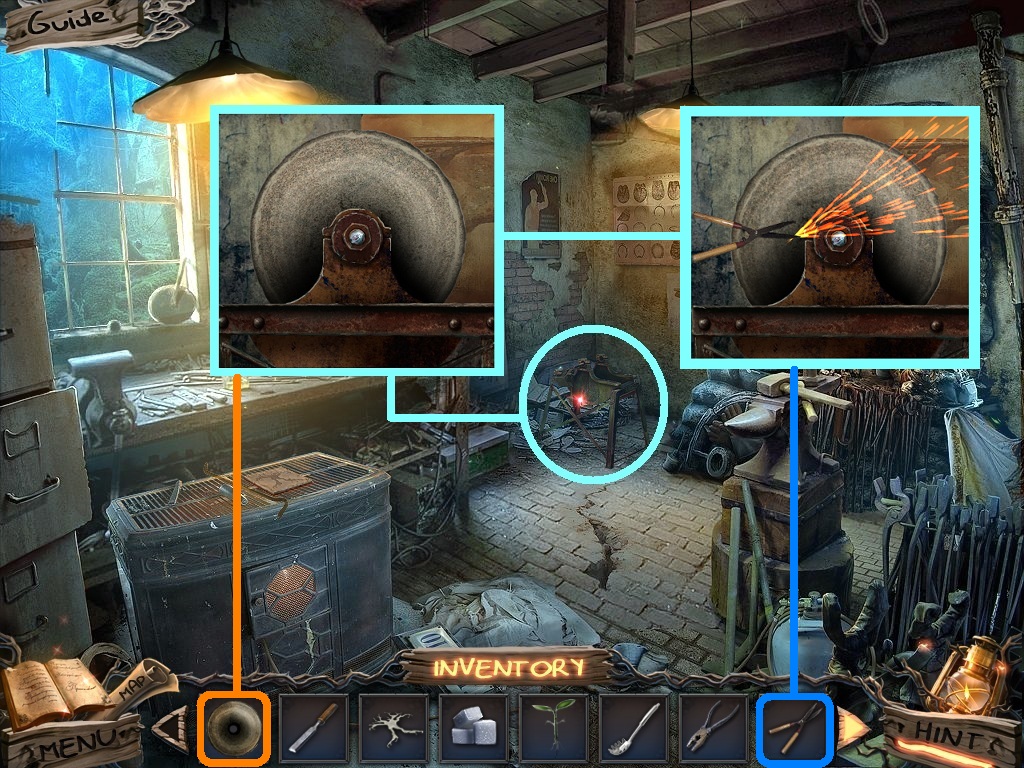
- Zoom into the grinder (aqua circle).
- Pick the grinding wheel (orange square) place it onto the grinder.
- Click the wheel; use the dull shears (blue square) on it.
- Go back to the horse stables.
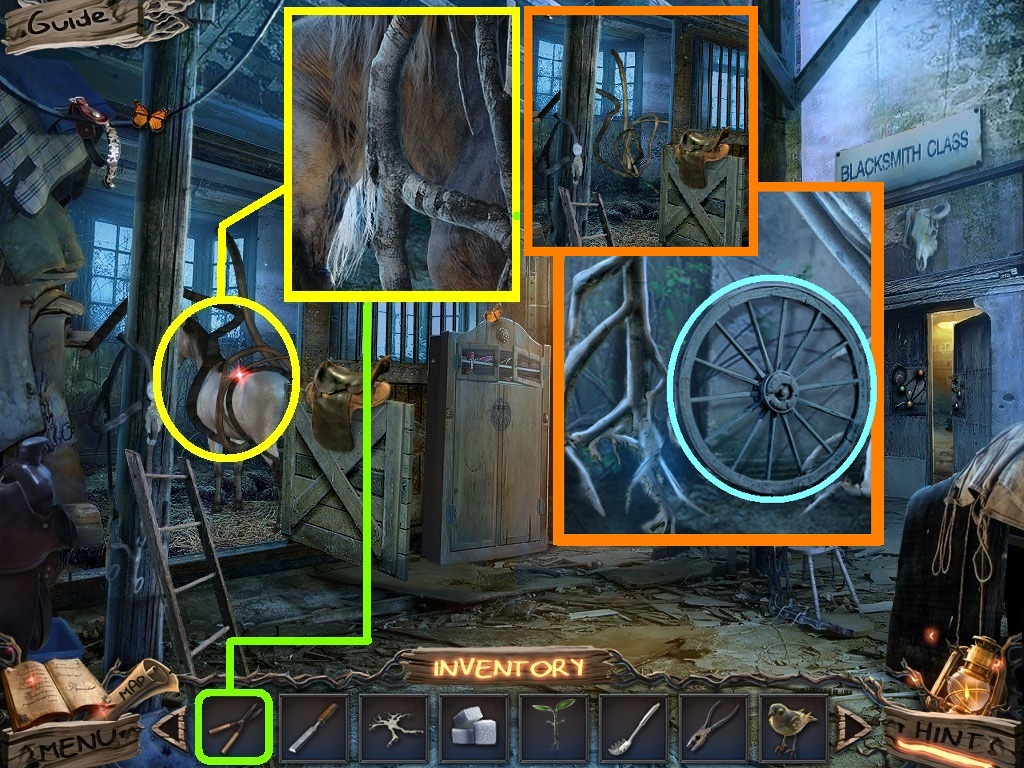
- Zoom into the horse (yellow circle).
- Pick the shears (green square); use it on the branches.
- Zoom into the empty stall (orange square).
- Collect the wheel (aqua circle).
- Go to the apple orchard.
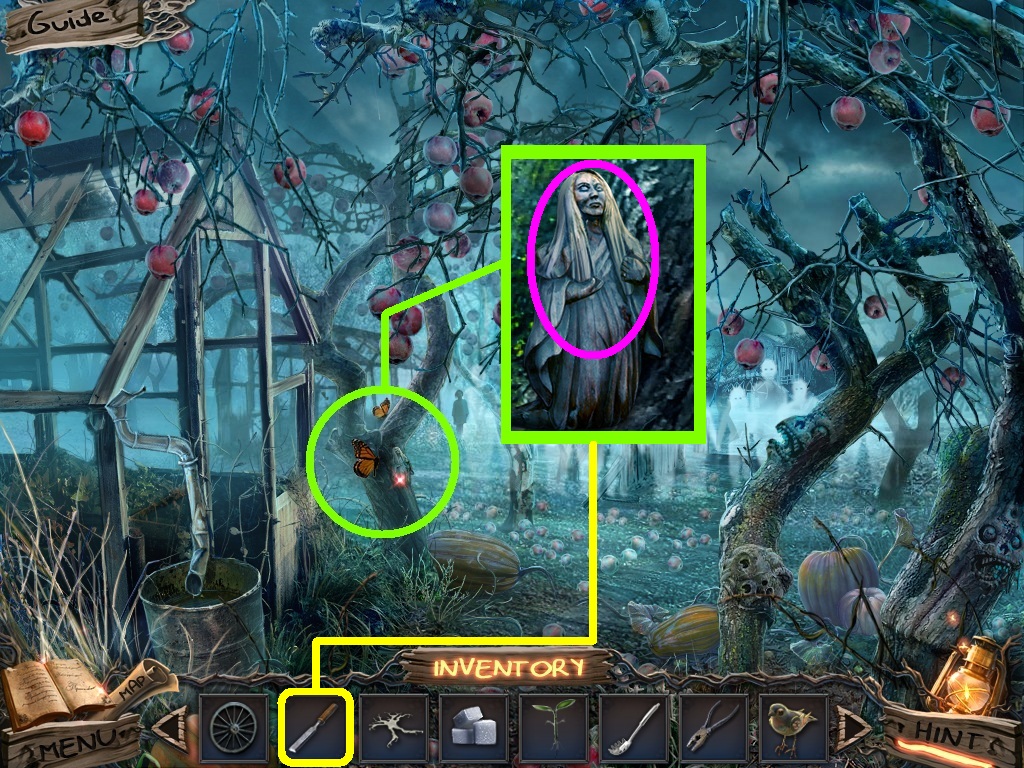
- Zoom into the tree (green circle).
- Pick the chisel (yellow square) use it on the tree.
- Collect the wooden figure (pink circle).
- Go to the blacksmith class.
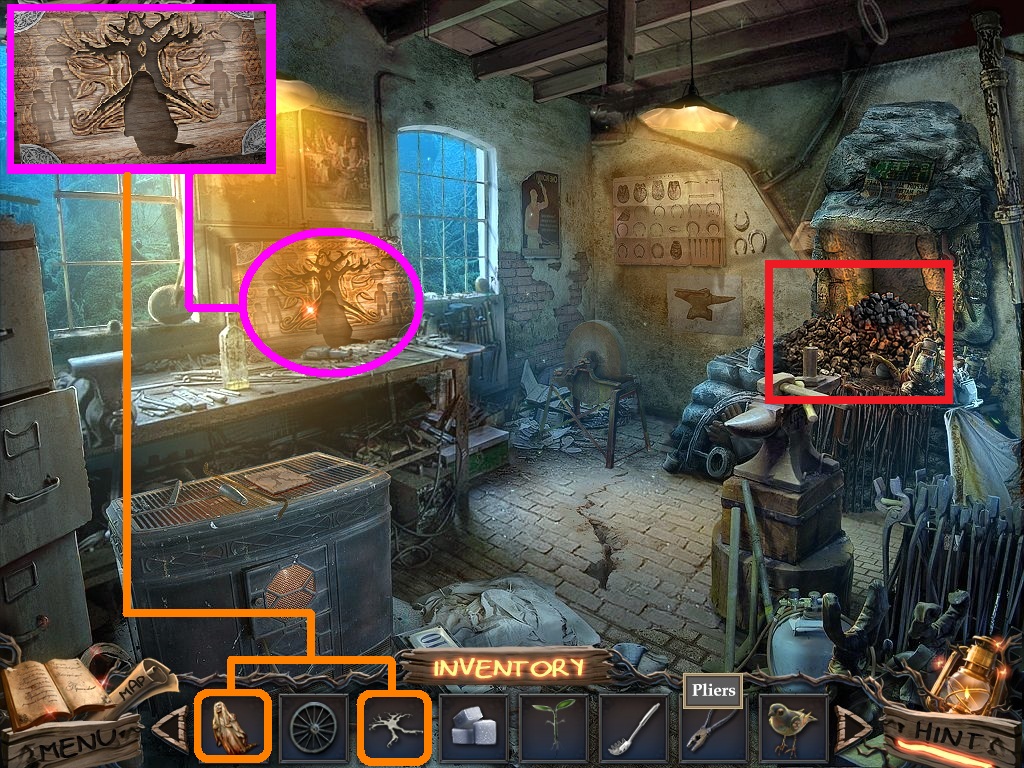
- Zoom into the workbench (pink circle).
- Pick the wooden figure and the silver tree (orange squares); place them onto the picture.
- Collect the picture.
- Zoom into the fireplace to access a hidden objects area (red rectangle).
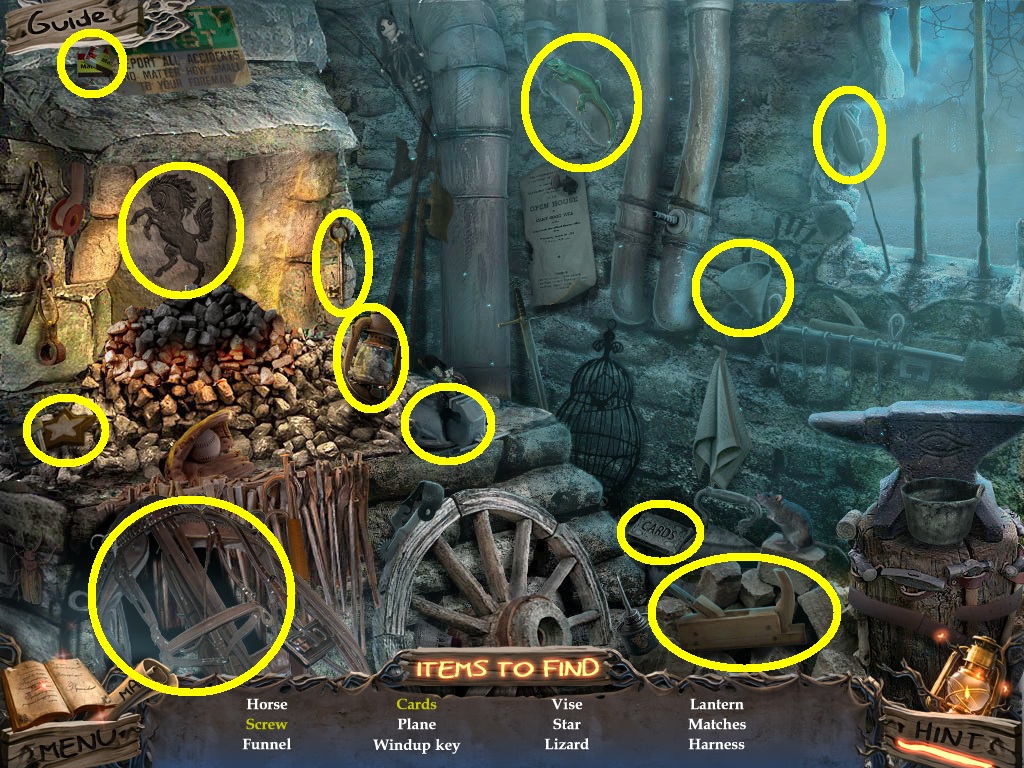
- Find the listed items (yellow circles).
- Collect the harness.
- Go to the stable gate.
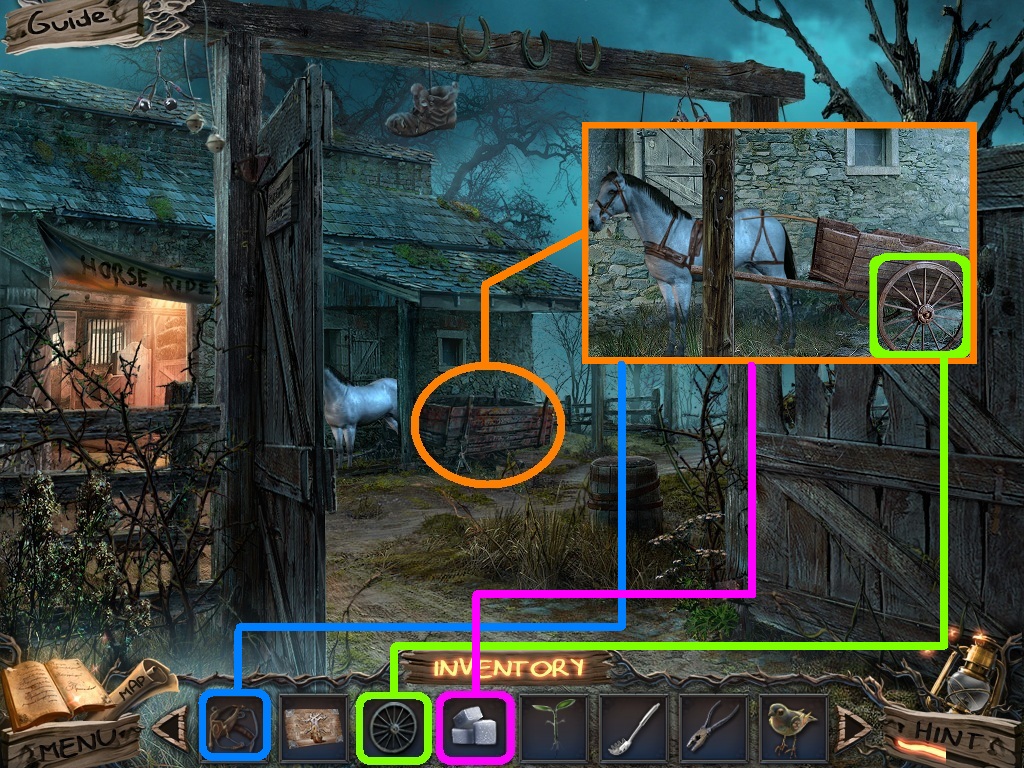
- Zoom into the cart (orange circle).
- Pick the wheel (green square) place it onto the cart.
- Pick the sugar cube (pink square) give it to the horse.
- Pick the harness (blue square); put it onto the horse.
- Click the horse.
Comments will load when you reach this part of the walkthrough.