

Chapter 4: The Viceroy
The following contains screenshots and instructions on how to complete Chapter 4 from the CGG Fabled Legends The Dark Piper Walkthrough.
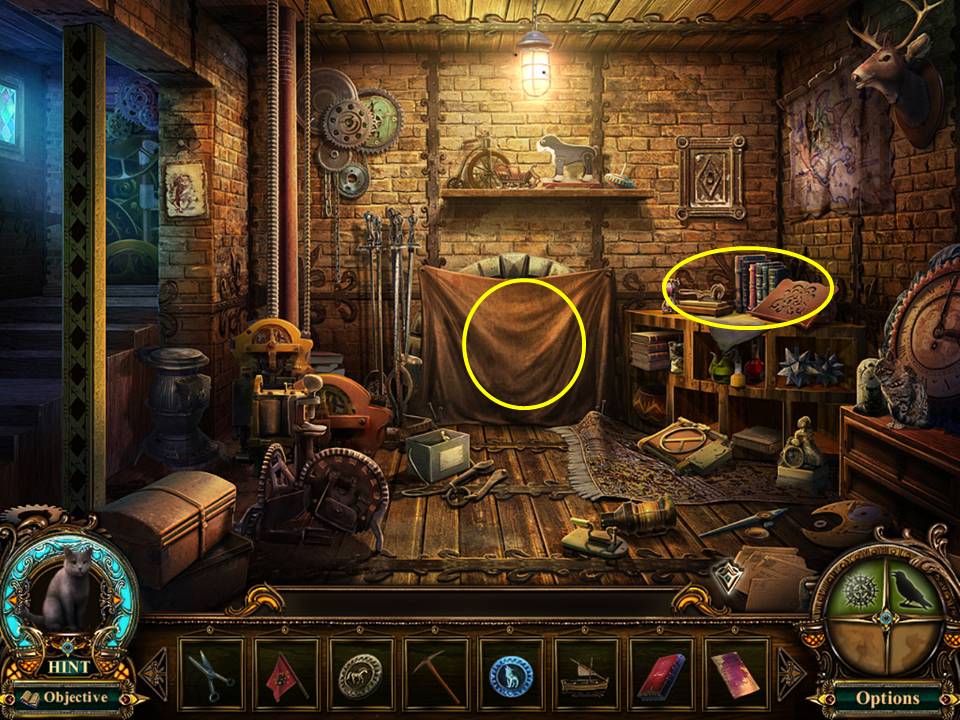
- Cut the hanging cloth with the SCISSORS.
- Take the BOTTLE OF SOUR MILK.
- Zoom into the corner table and place the ENCRYPTED RECEIPT on the surface.
- Use the DECODER on the receipt.
- Place the ADDRESS BOOK on the stand.
- Open it and take the MORGUE CODE.
- Click down four times to return to the town entrance.
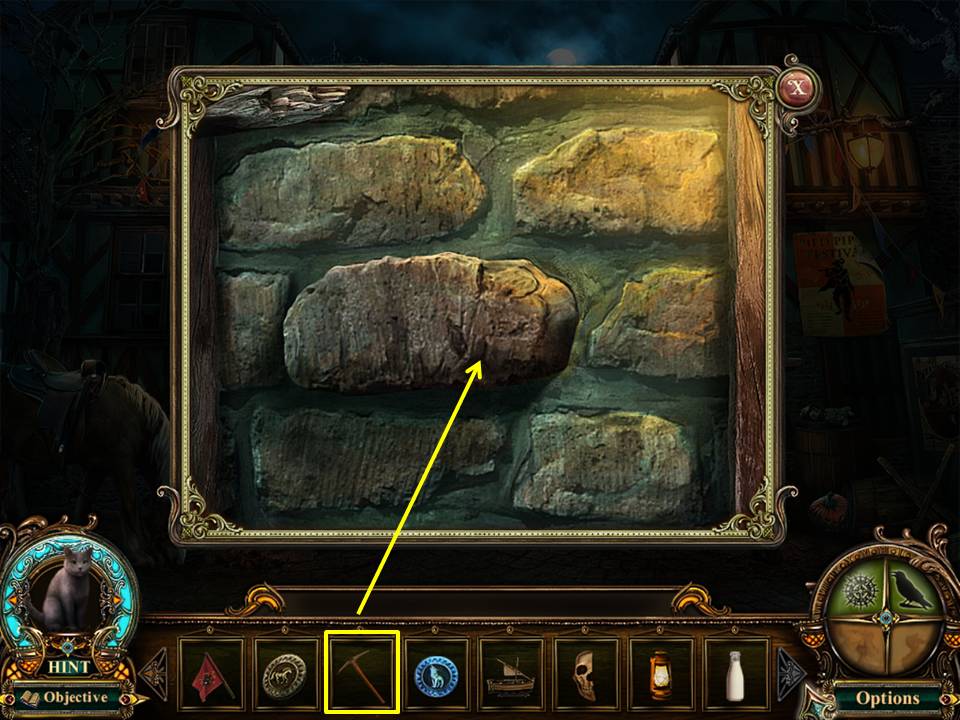
- Zoom into the wall.
- Use the RUSTY PICKAX on the loose brick.
- Take the SEA SERPENT PLATE.
- Proceed forward, left, forward, then enter the gate leading to the lake.
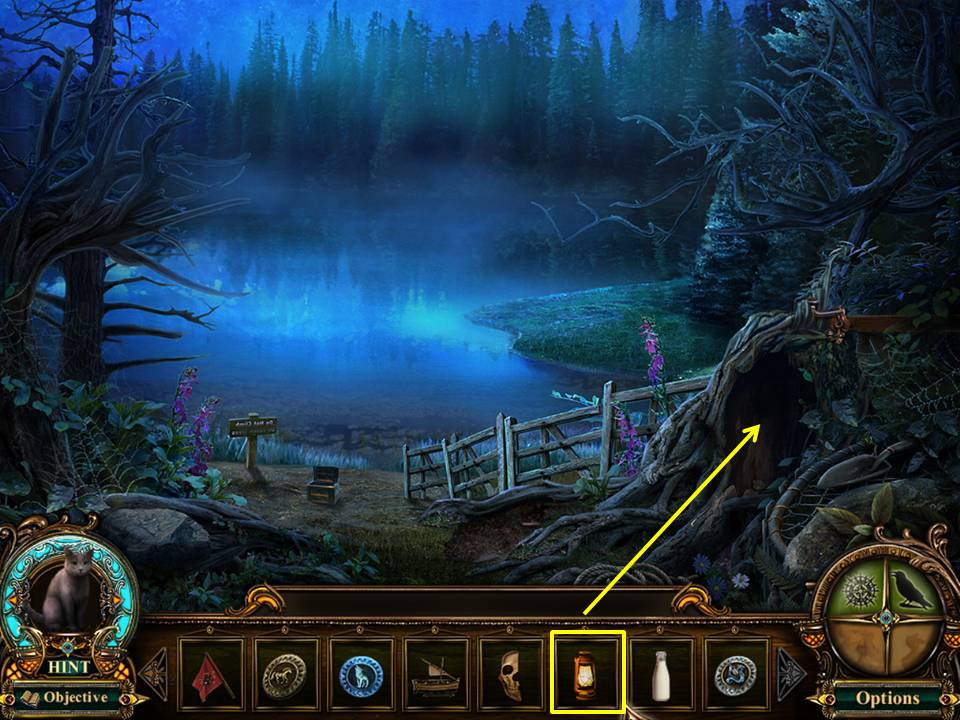
- Illuminate the hollow with the lamp.
- Play the Hidden Object Area by the hollow.
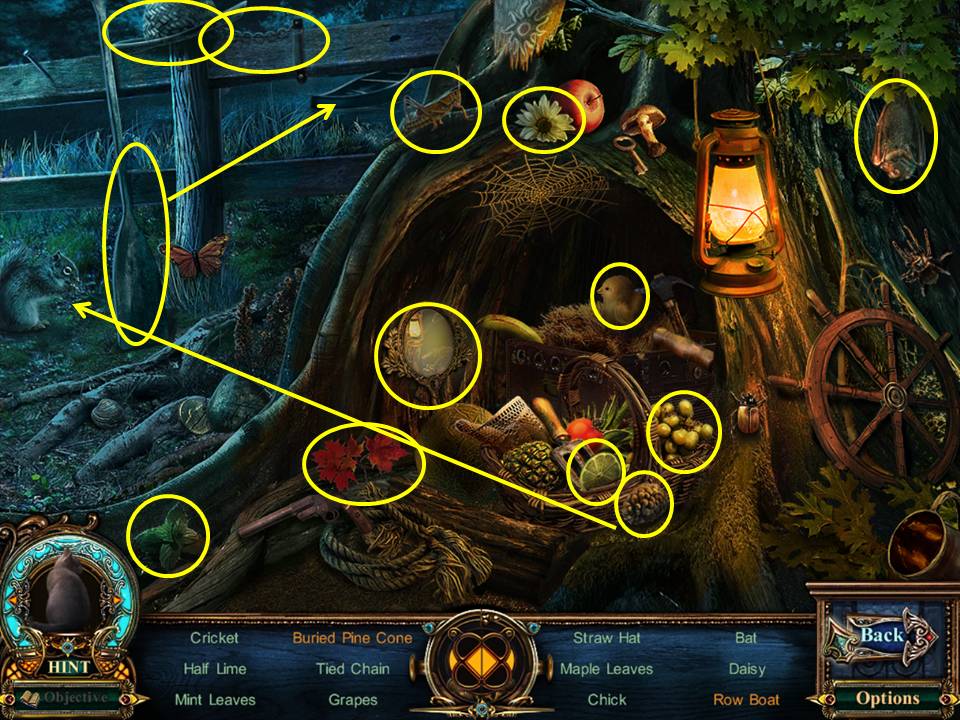
- Find the items listed.
- Place the oar in the boat to get the rowing boat.
- Give the squirrel the pine cone to get the buried pine cone.
- Receive the HAND MIRROR WITH MOON ENGRAVING.
- Click down and proceed left to the street.
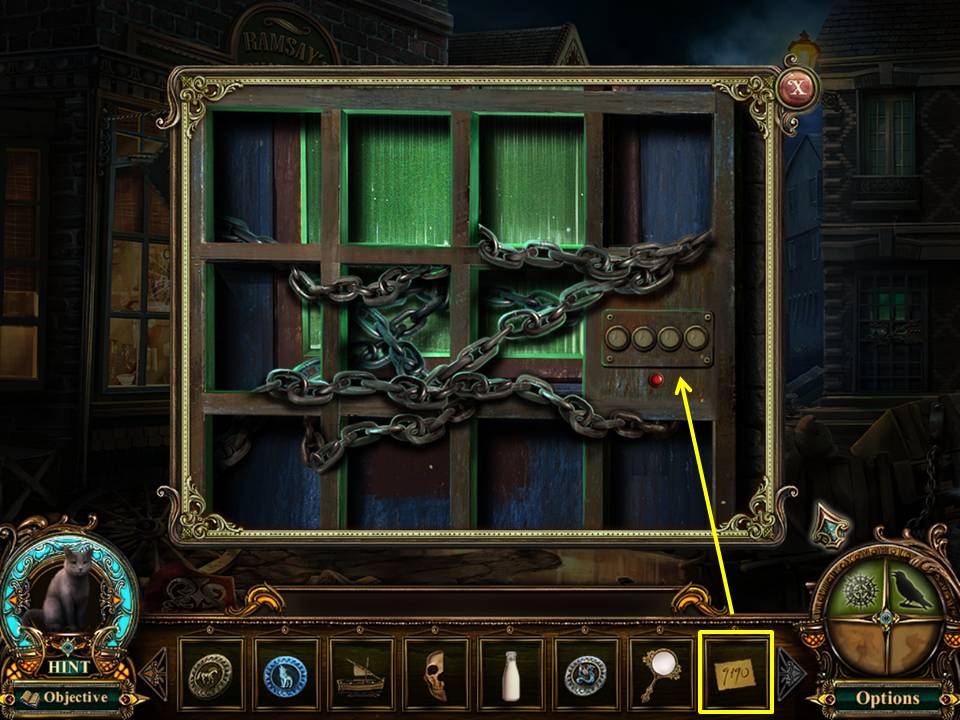
- Zoom into the morgue door.
- Use the MORGUE CODE on the lock.
- Enter the morgue.
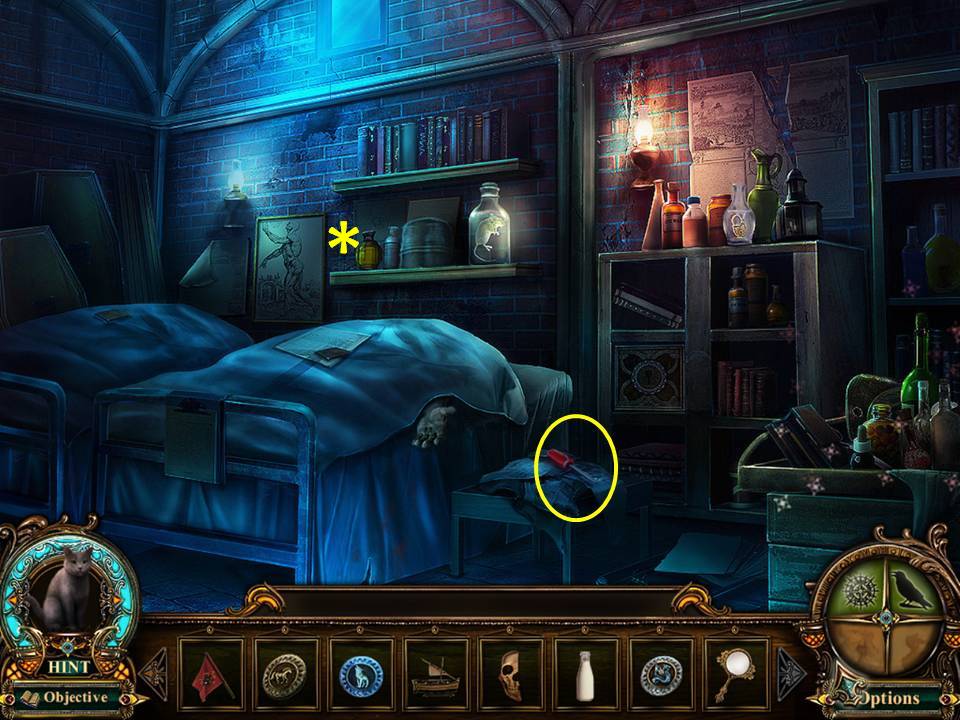
- Take the SCREWDRIVER.
- Play the Hidden Object Area by the cabinet on the right.
- FO: The bottles inside the Morgue.
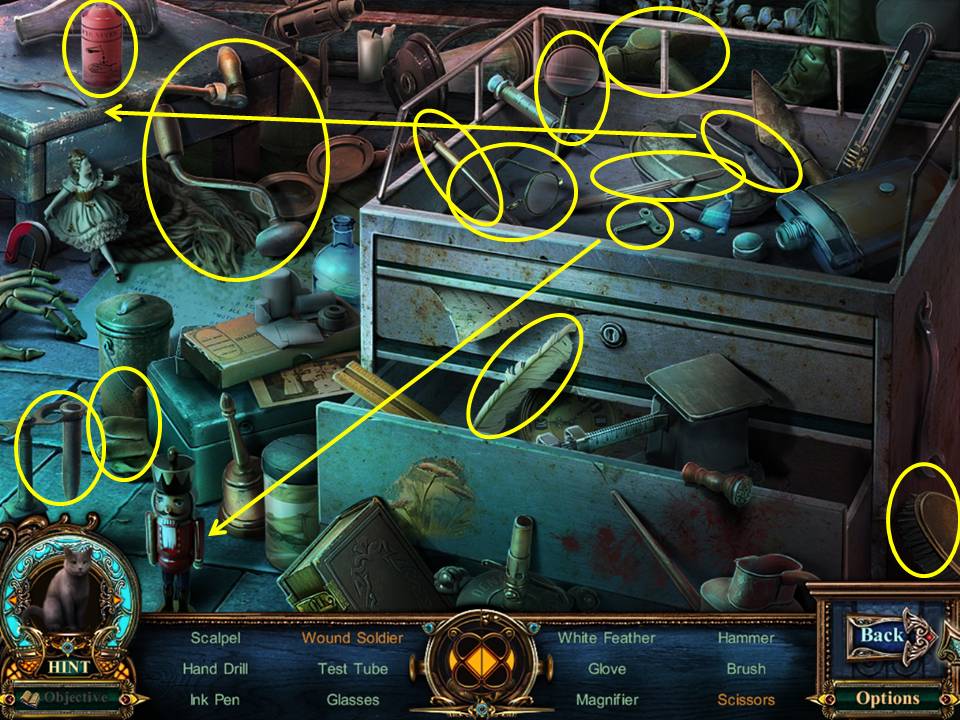
- Find the items listed.
- Use the key on the nutcracker to get the wound soldier.
- Match the two scissor halves to get the scissors.
- Receive the EMBALMING ACID.
- Click down twice.
- Proceed through the left gate.
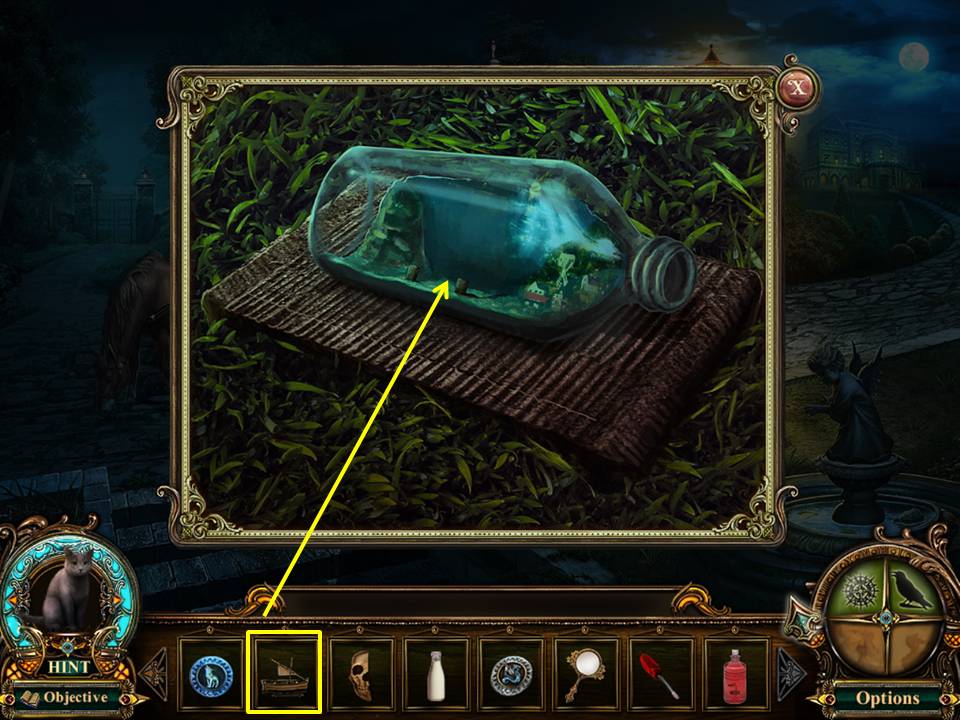
- Zoom into the bottle.
- Place the SMALL SHIP inside.
- Take the GOLEM PLATE.
- Head to the Mansion.
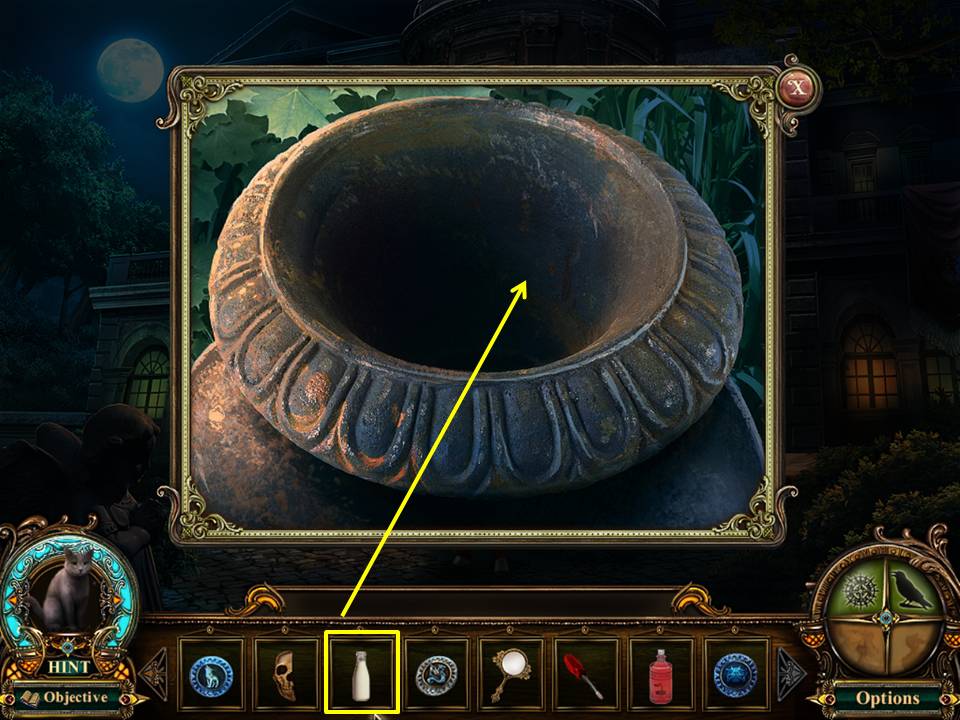
- Zoom into the pot.
- Pour the BOTTLE OF SOUR MILK inside.
- Take the EAGLE PLATE.
- Click down four times.
- Enter the manhole.
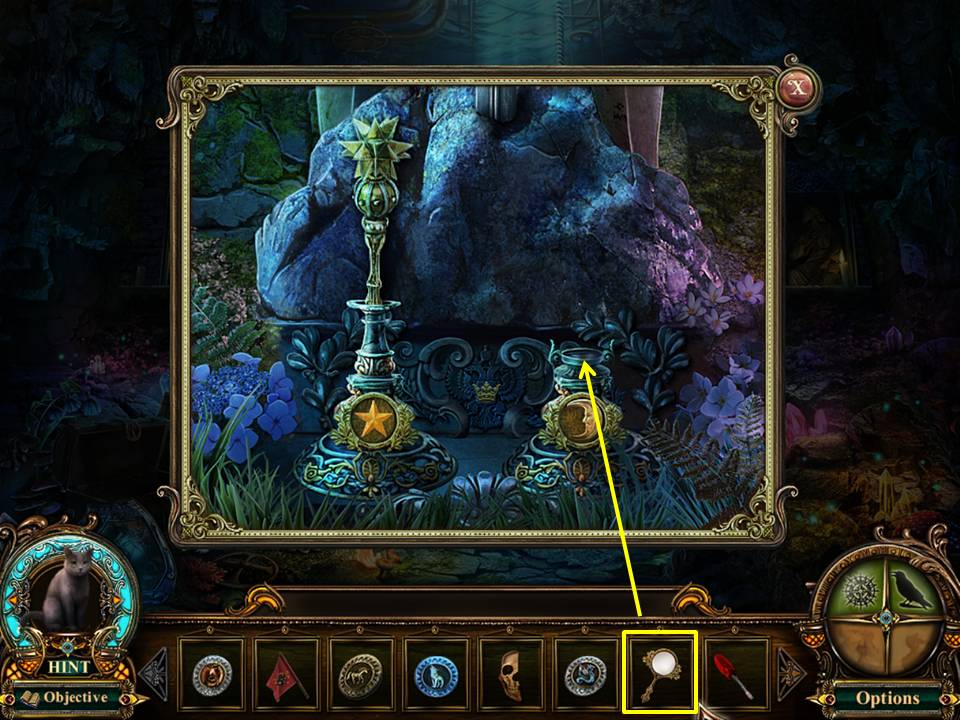
- Zoom into the base of the knight.
- Place the HAND MIRROR WITH MOON ENGRAVING on the right.
- Place the BRONZE SCEPTER on the left.
- Take the BLUE CRYSTAL #1.
- Proceed forward.
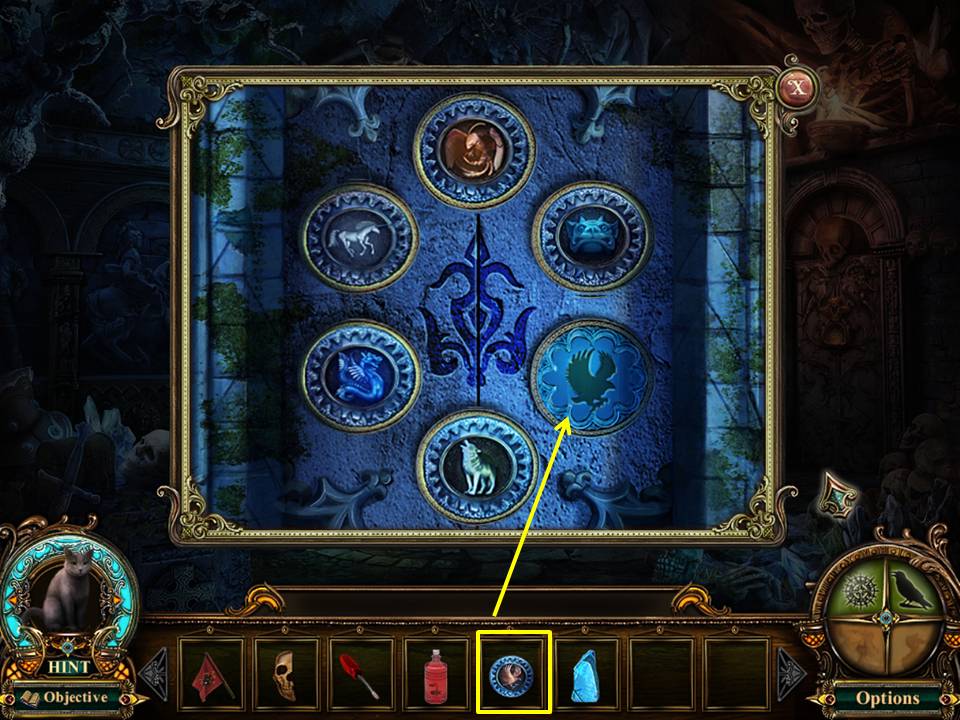
- Zoom into the left door.
- Place the EAGLE PLATE, SEA SERPENT PLATE, GOLEM PLATE, WOLF PLATE, UNICORN PLATE and PHOENIX PLATE into the appropriate circles.
- Go through the door to the vault entrance.
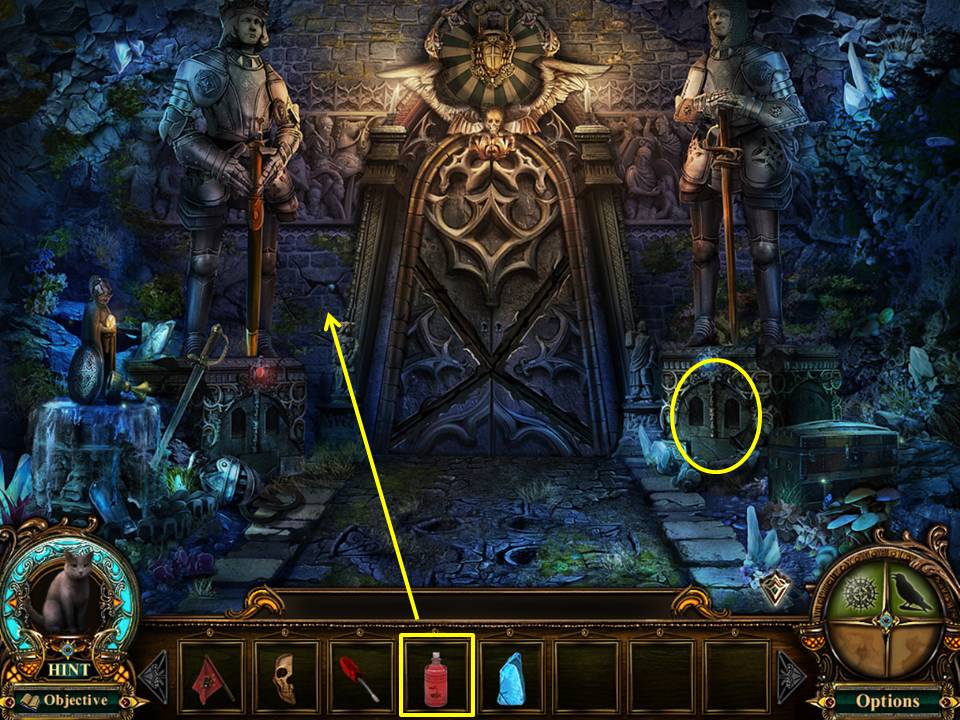
- Zoom into the wall and use the EMBALMING ACID on the mortar.
- Take BLUE CRYSTAL #2.
- Zoom into the base of the knight at right.
- Place the 2 BLUE CRYSTALS into the niches.
- A mini game will open.
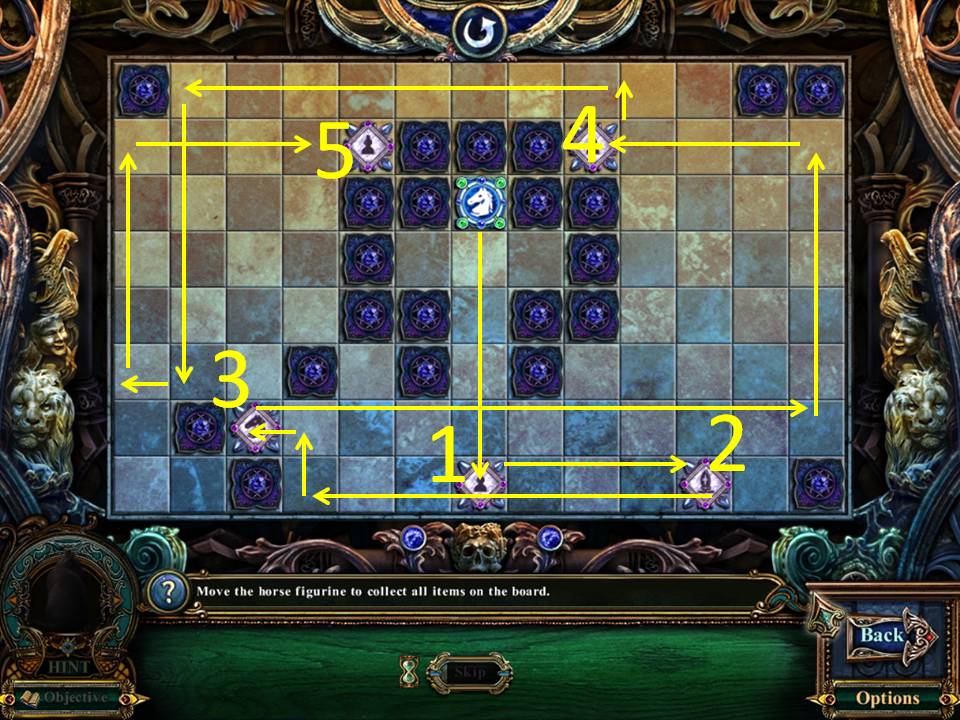
- The object of the game is to move the horse figurine to collect all the items on the board.
- When you select the horse, you will see all the possible directions it can move.
- When you proceed down one path, the horse will move until something stops it.
- Follow the path in numerical order to complete the game.
- When finished, take VAULT KEY #1.
- Click down twice.
- Go up through the manhole in the street.
- Proceed left, forward, then through the left gate.
- Proceed to the mansion.
- You will experience a cut-scene and then be returned to the vault entrance.
- Play the Hidden Object area by the rubble on the left.
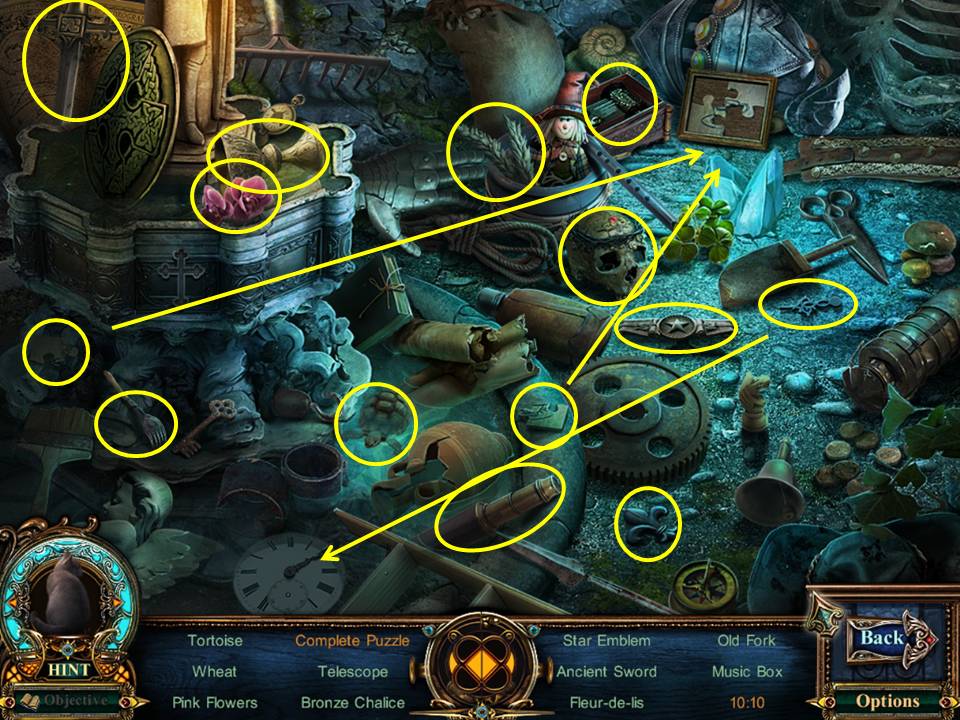
- Find the items listed.
- Place the two pieces in the frame to get the complete puzzle.
- Place the clock hand on the face to get the time 10:10.
- Receive the SKULL.
- Click down once.
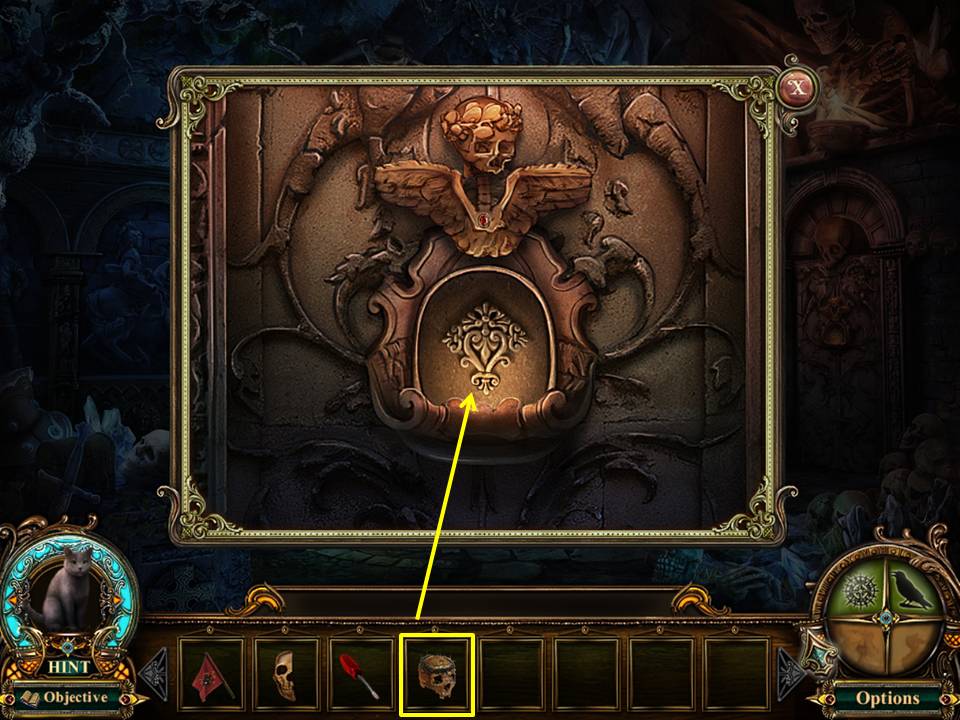
- Zoom into the door on the right.
- Place the SKULL into the basin.
- Proceed through the door.
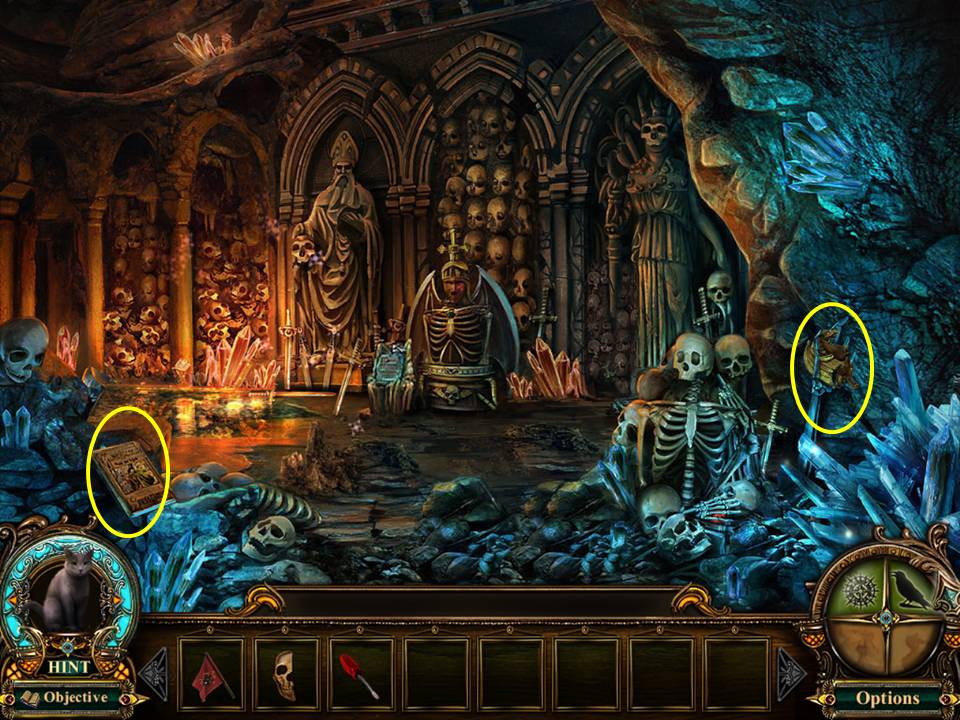
- Take the BOOK OF PIED PIPER.
- Take the WOODEN DRAGON.
- Play the Hidden Object Area on the left.
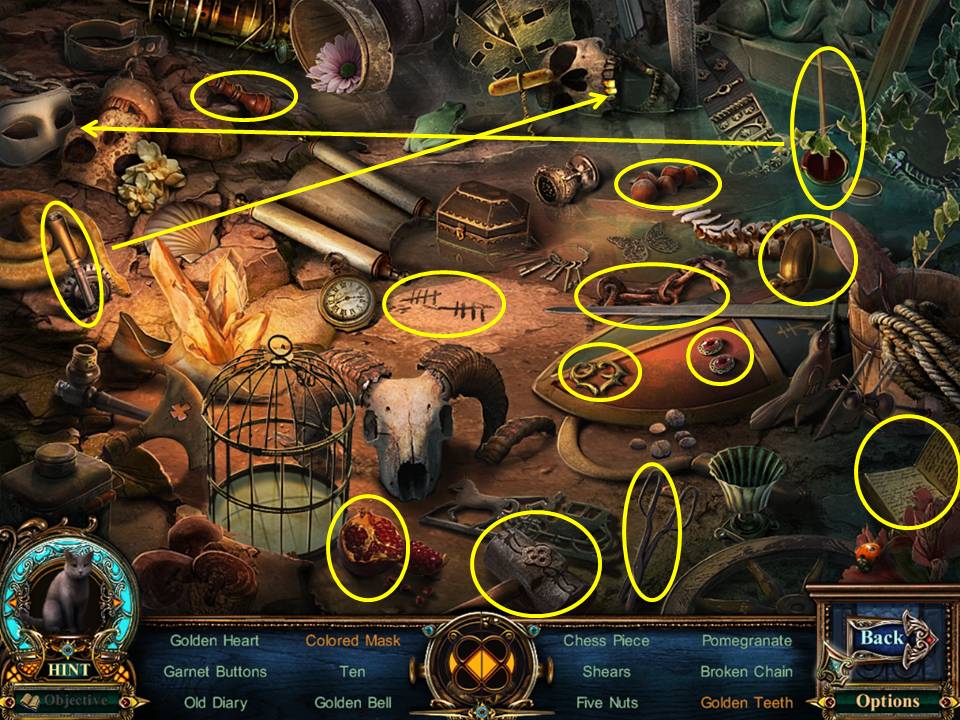
- Find the items listed.
- Paint the mask to get the colored mask.
- Chisel the skull to get the golden teeth.
- Receive the SLEDGEHAMMER.
- Click down twice.
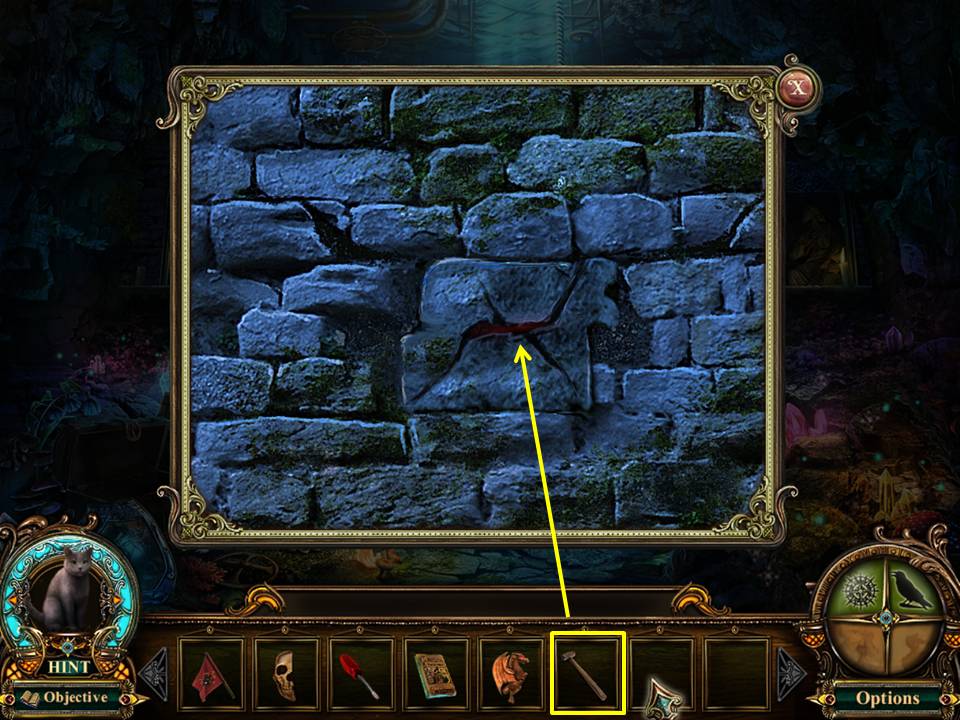
- Zoom into the wall.
- Use the SLEDGEHAMMER on the brick.
- Take RED CRYSTAL #1.
- Play the Hidden Object Area on the right.
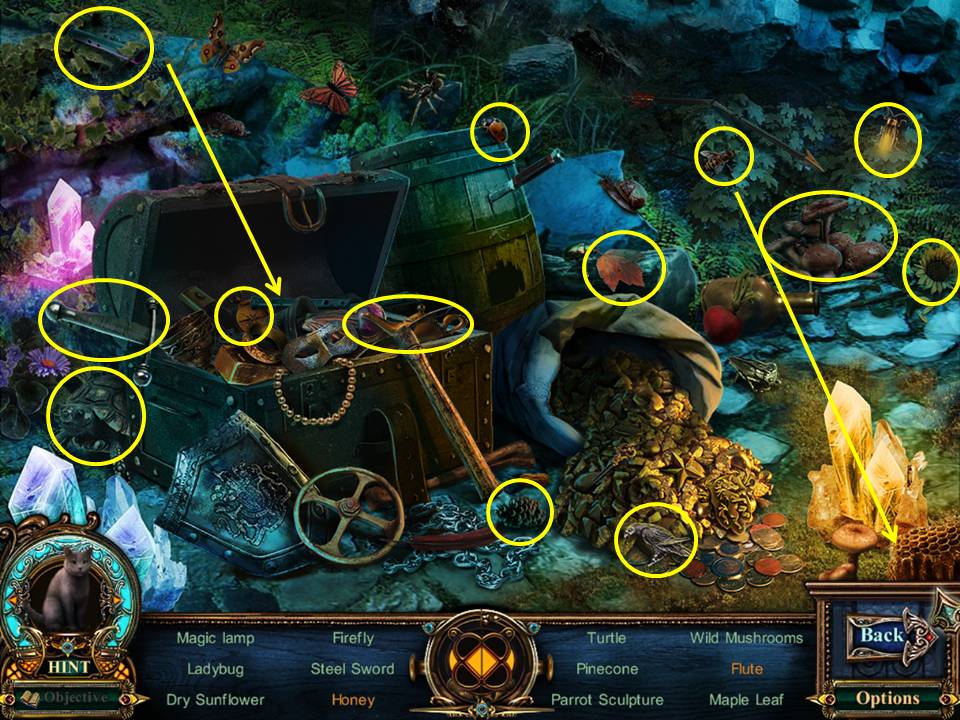
- Find the items listed.
- Place the bee on the honeycomb to get the honey.
- Assemble the pieces to get the flute.
- Receive the COMPASS.
- Go forward twice to the vault entrance.
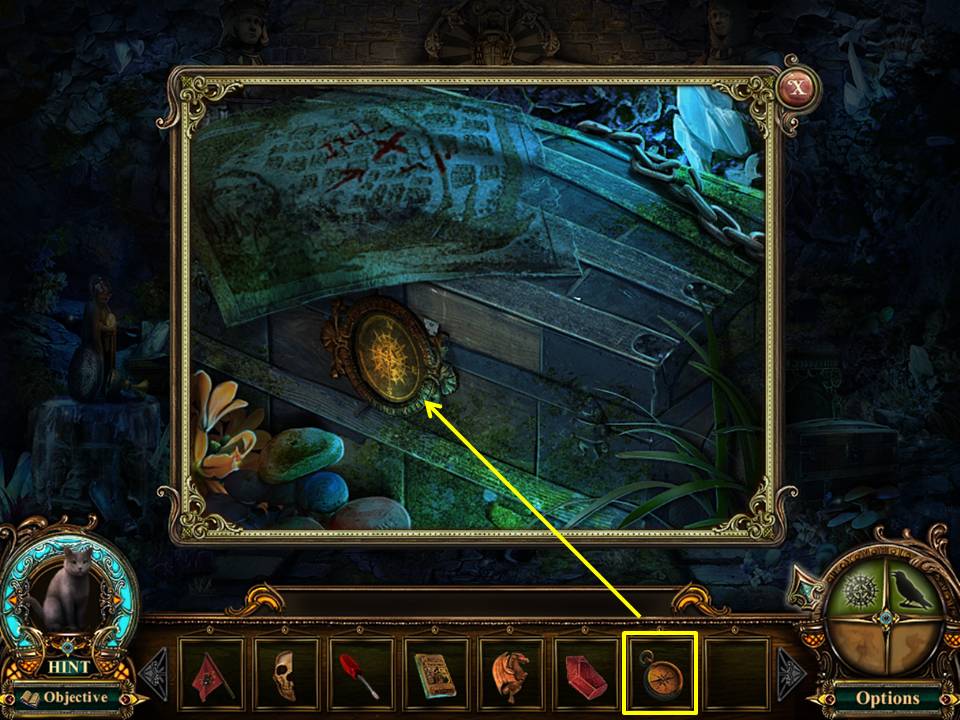
- Zoom into the chest.
- Place the COMPASS in the lock.
- Take the BONES from the chest.
- Click down and enter the door on the right.
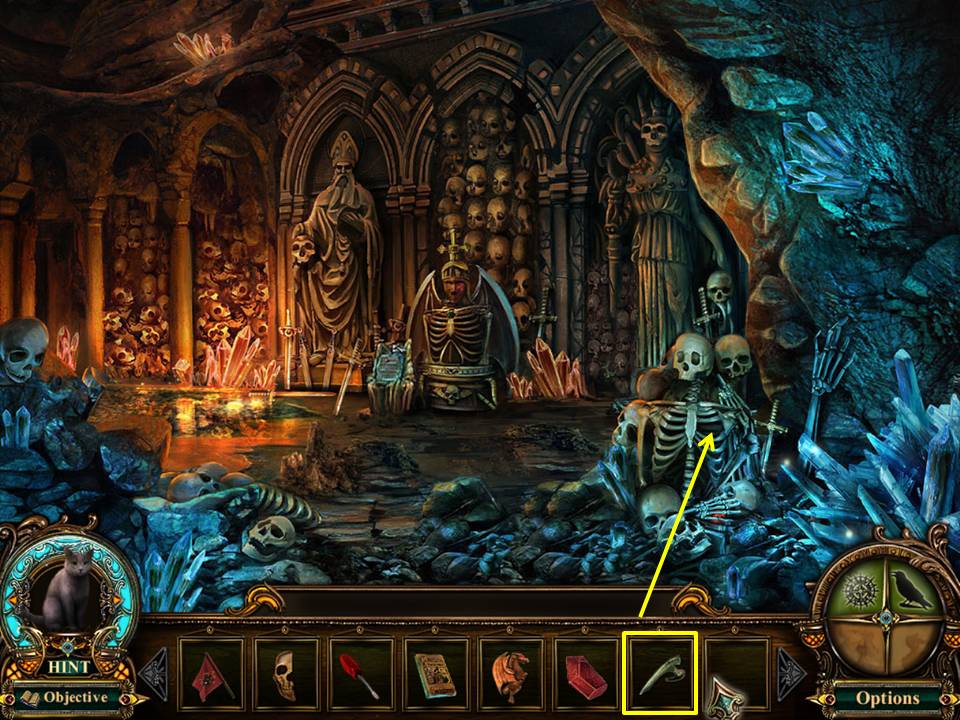
- Zoom into the statue for a new objective.
- Place the BONES on the skeleton.
- Take RED CRYSTAL #2. Click down.
- Proceed forward through the door on the left.
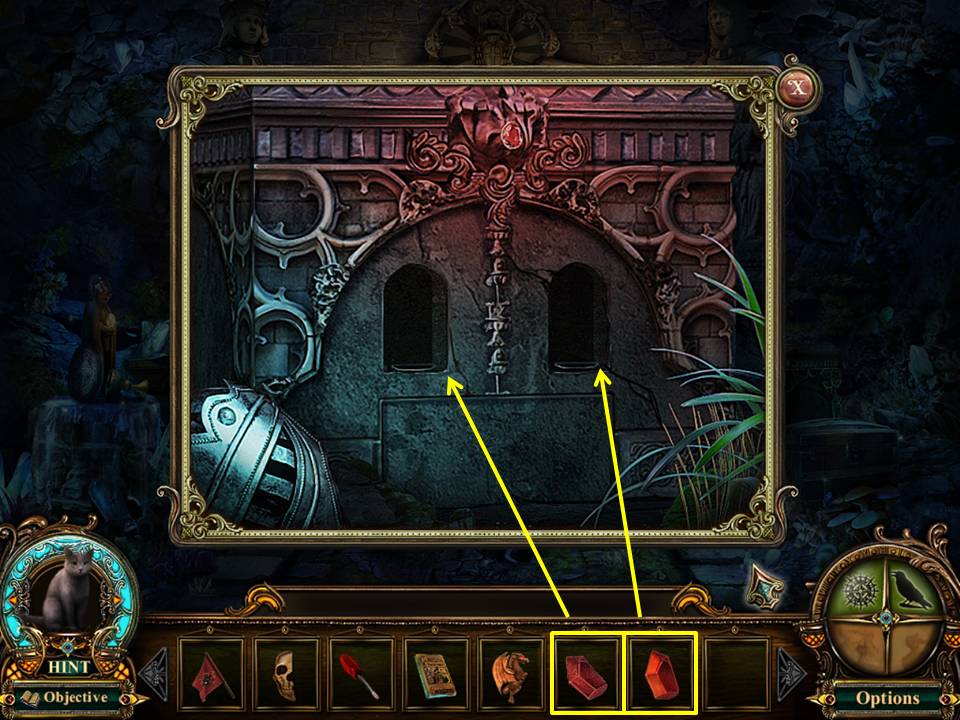
- Zoom into the base of the left statue.
- Place the 2 RED CRYSTALS into the niches.
- Click on the open area to play a mini-game.
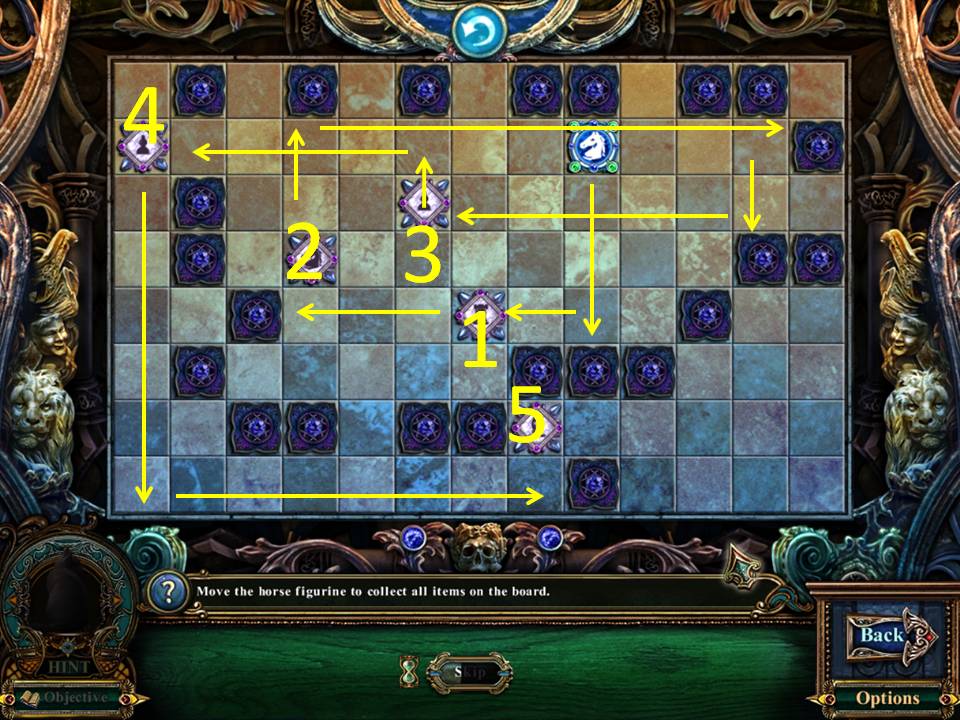
- The object of the game is to move the horse figurine to collect all the items on the board.
- When you select the horse, you will see all the possible directions it can move.
- When you proceed down one path, the horse will move until something stops it.
- Follow the path in numerical order to complete the game.
- When finished, take VAULT KEY #2.
Comments will load when you reach this part of the walkthrough.