
Chapter 2: The Piper’s Partner
The following contains screenshots and instructions on how to complete Chapter 2 from the CGG Fabled Legends The Dark Piper Walkthrough.
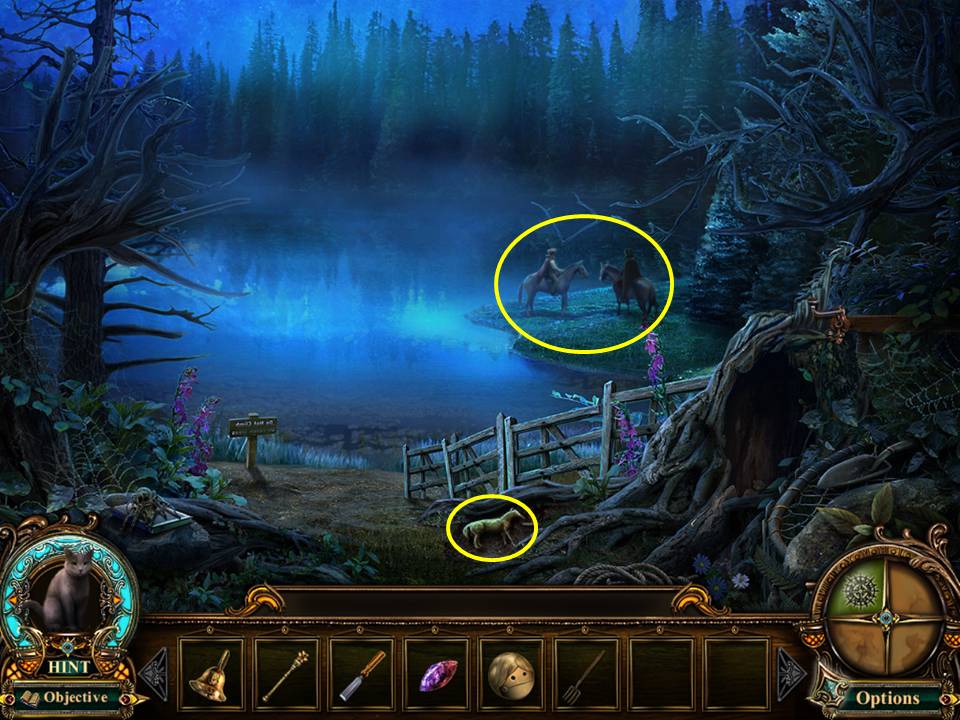
- Zoom into the figures on horseback.
- Take the HORSE FIGURINE lying on the bank.
- Click down three times.
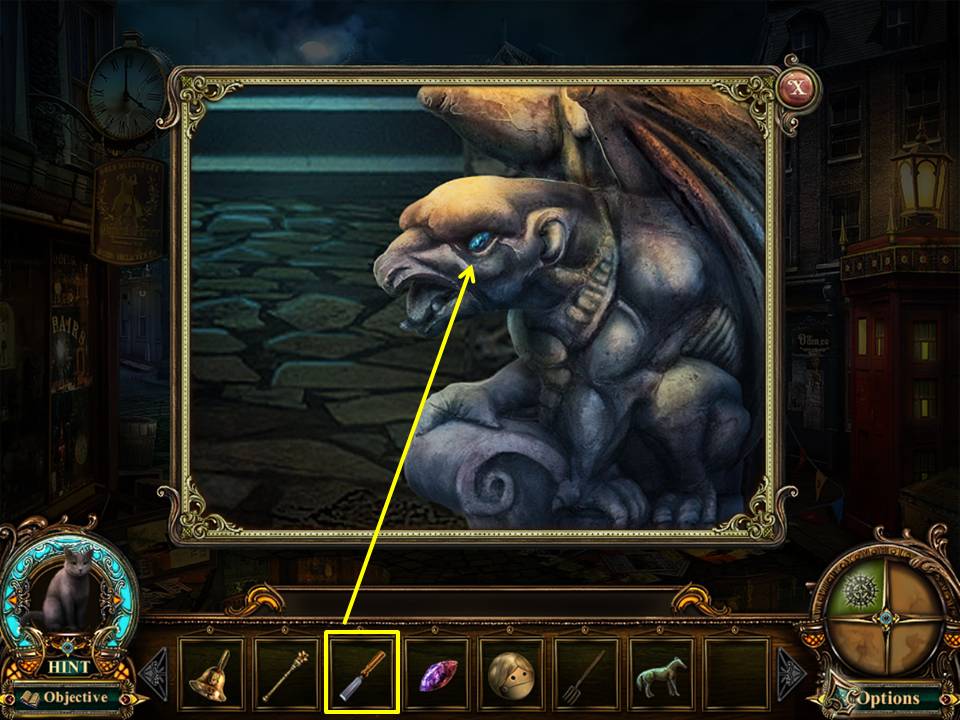
- Zoom into the gargoyle.
- CHISEL out its SAPPHIRE EYE.
- Move forward.
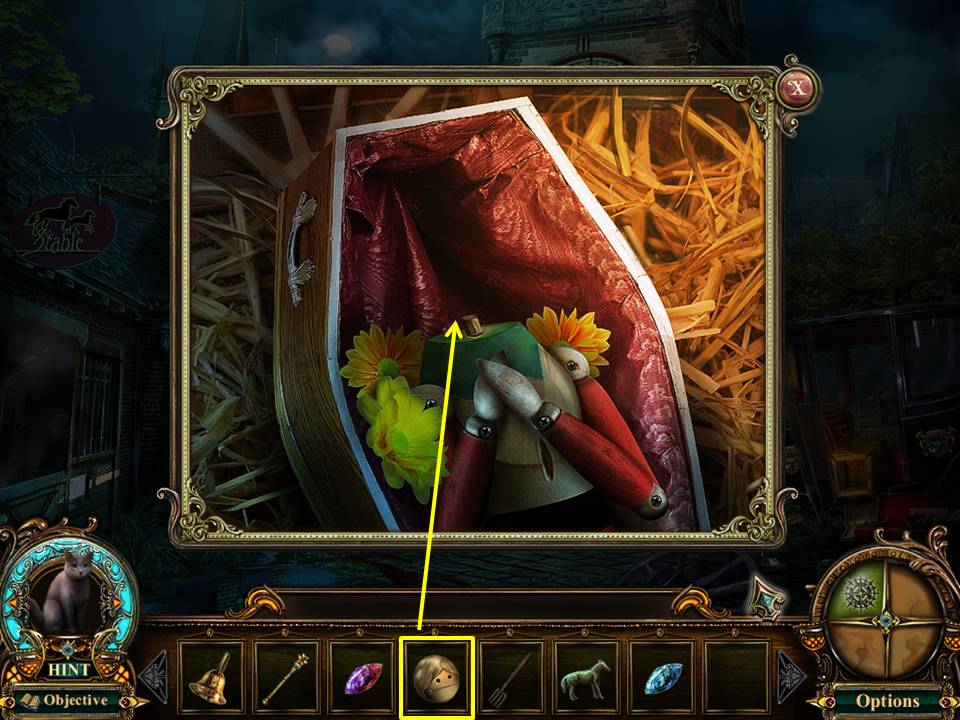
- Zoom into the doll.
- Place the WOODEN DOLL HEAD on the doll body.
- Take the SILVER COIN from the doll’s mouth.
- Enter the stables.
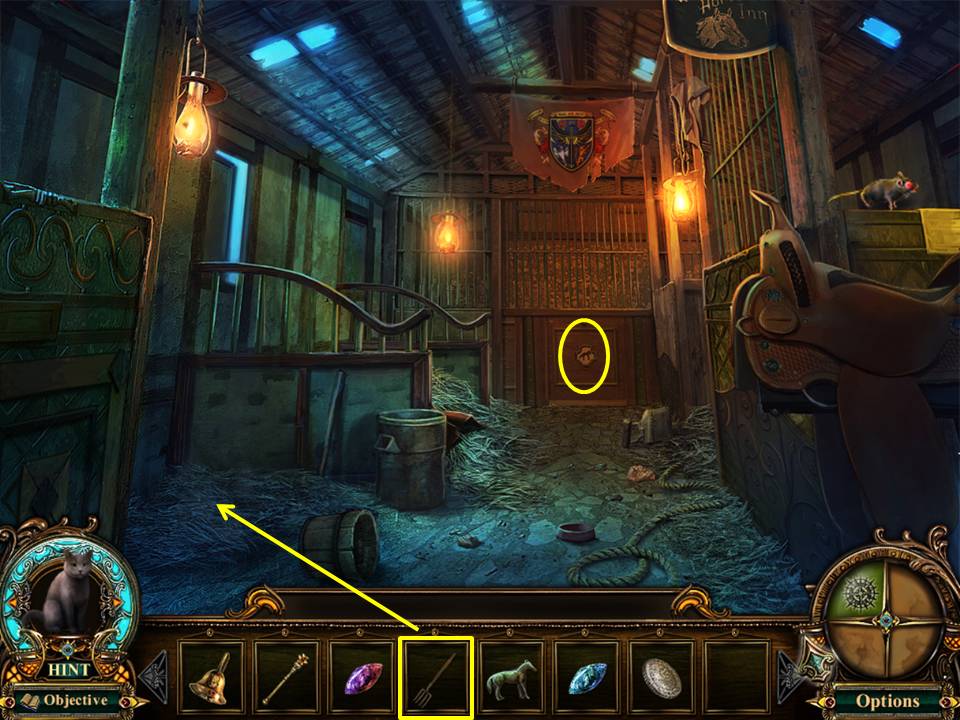
- Move hay from the trap door with the HAY FORK.
- Note the trap door needs a handle.
- Place the HORSE FIGURINE in the appropriate spot on the stall door.
- Play the Hidden Object Area by the stall door.
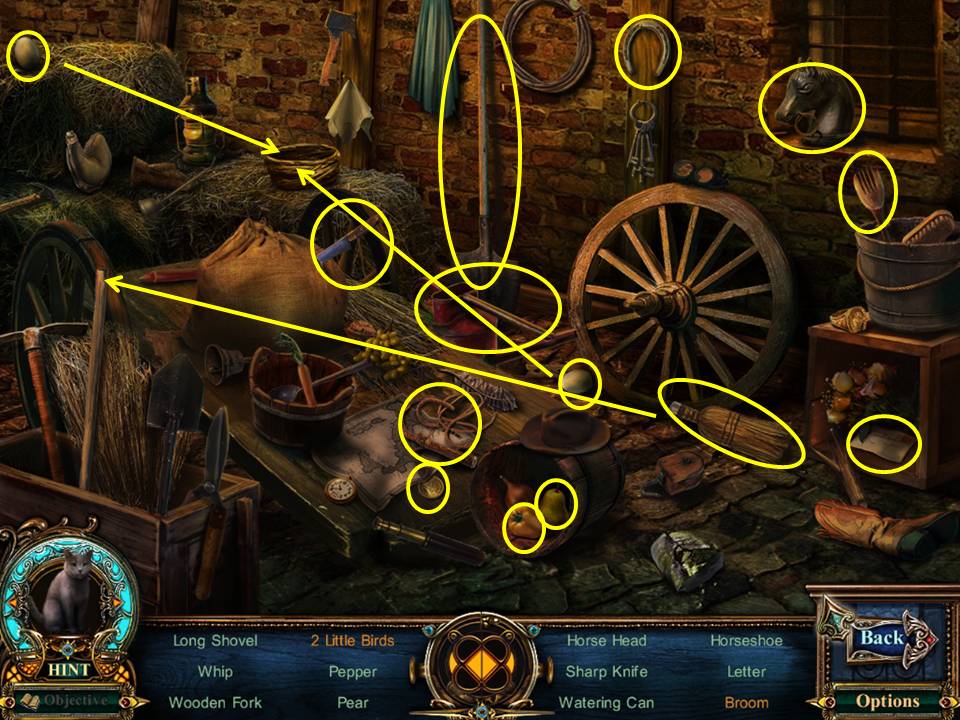
- Find the items listed.
- Place the broom bristles on the handle to get the broom.
- Place two eggs in the nest to get the 2 little birds.
- Receive the GOLD COIN. Click down twice.
- Proceed left, forward and then left again to arrive at the street.
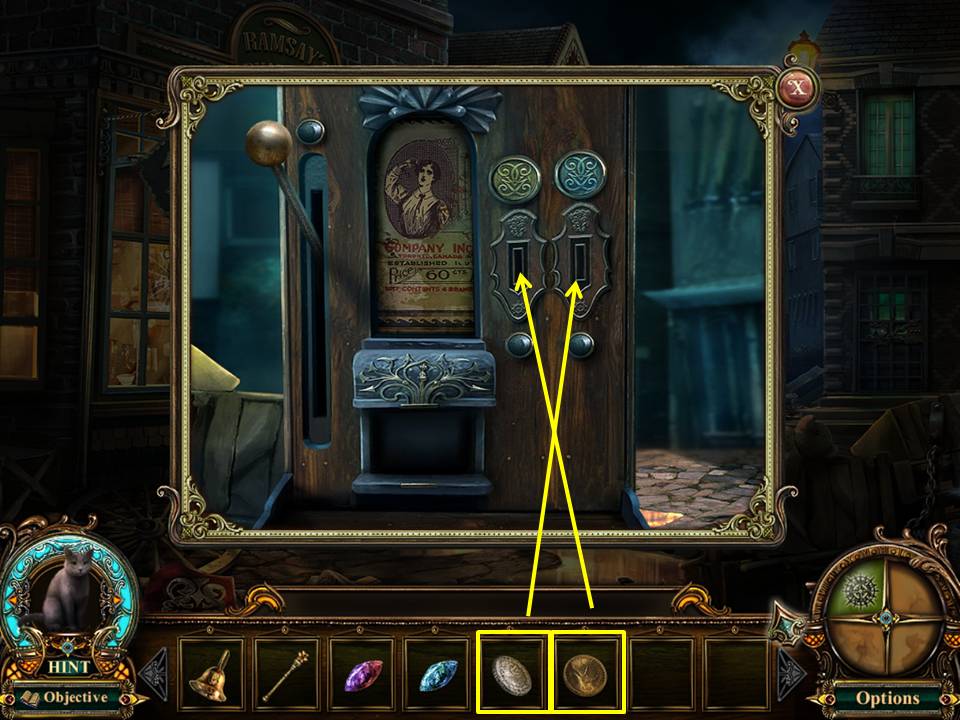
- Zoom into the vending machine.
- Insert the silver coin in the silver slot and the gold coin in the gold slot.
- Pull the lever. Take the TONIC WATER.
- Click down twice.
- Enter the window.
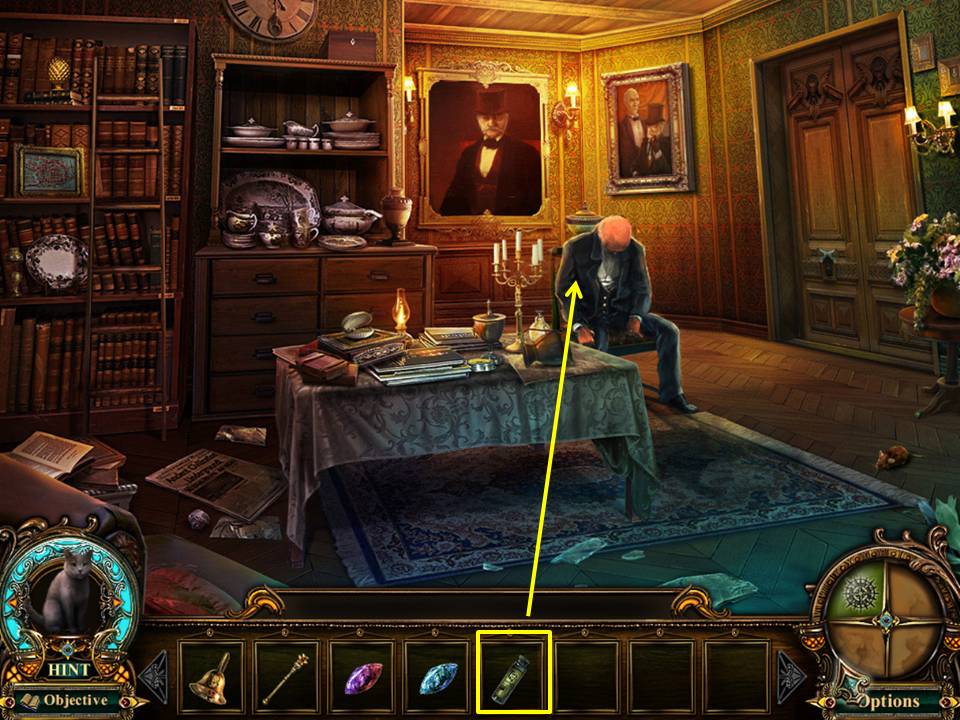
- Give the butler the TONIC WATER.
- He will give you a WHITE SWAN EMBLEM.
- Play the hidden object area by the china cabinet.
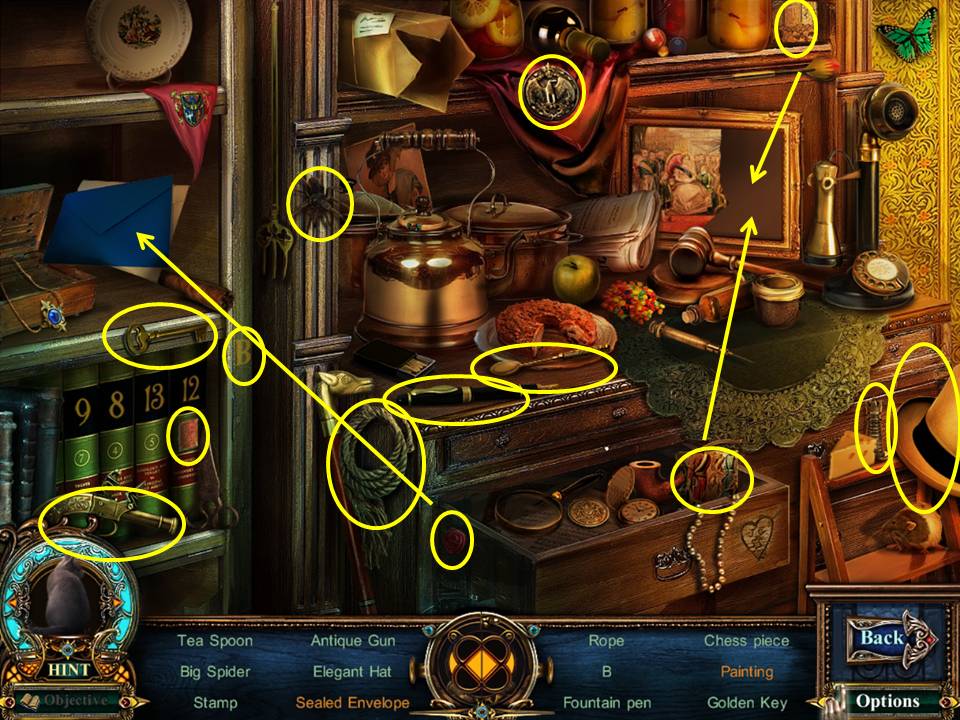
- Find all the items listed.
- Place the two painting halve in the frame to get the painting.
- Place the wax seal on the envelope to get the sealed envelope.
- Take the RAVEN DISK.
- Click down.
- Enter the newly opened door below the window.
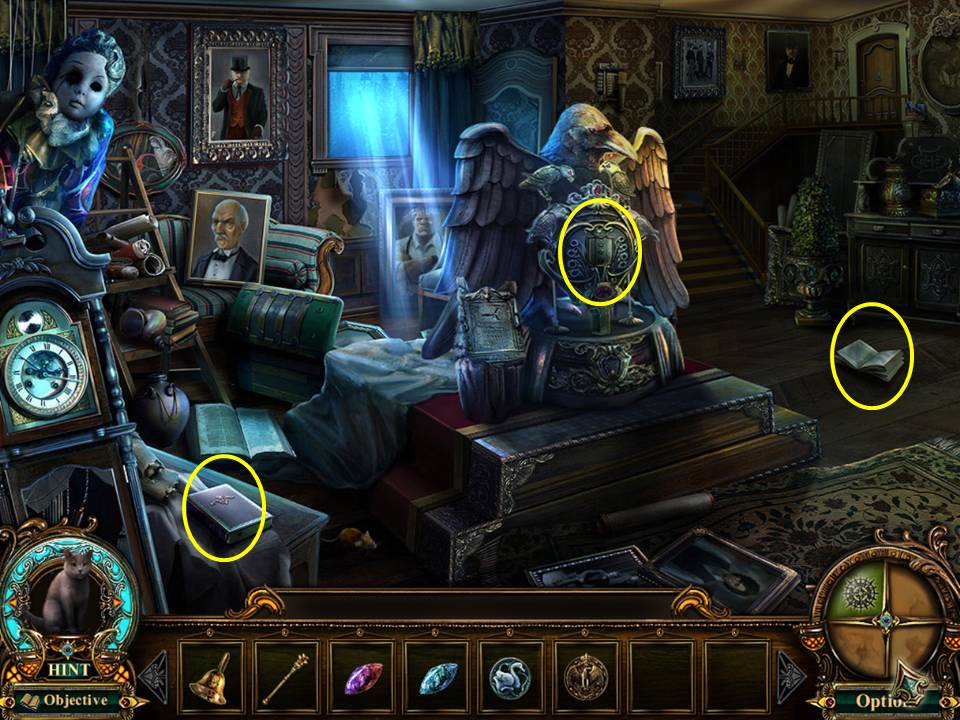
- Zoom into the book.
- Take the LONG HOOK.
- Note the raven statue.
- Open the book and take the SHINY BUTTON.
- Click down once and go to the gravesite.
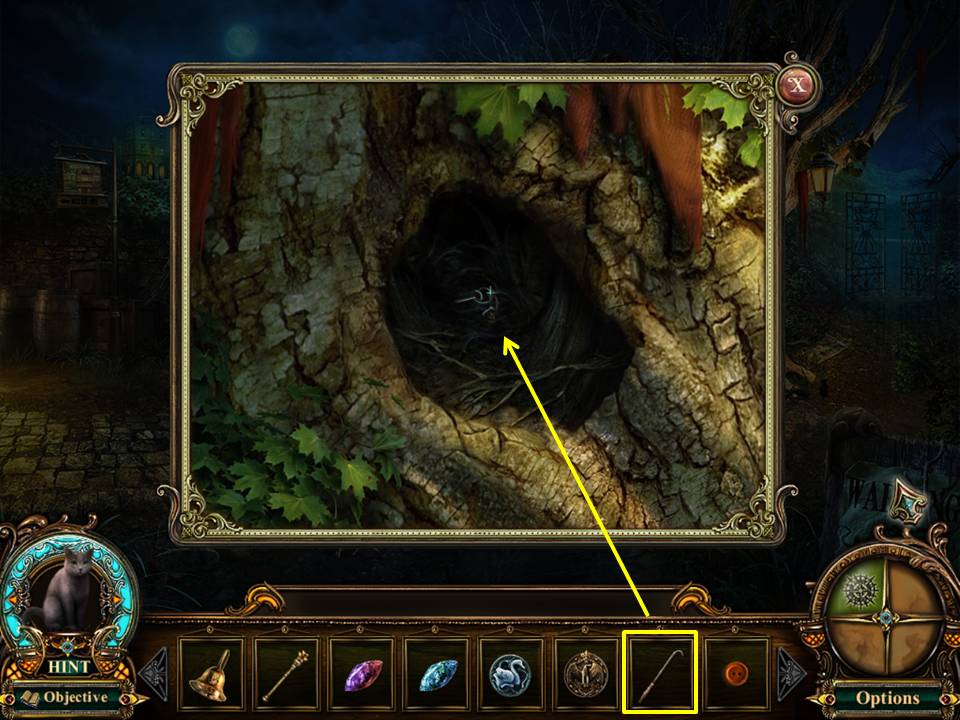
- Zoom into the tree hollow.
- Use the LONG HOOK to get the POLICE KEY.
- Click down twice.
- FO: The tombstone and the angel on the crypt at the Gravesite.
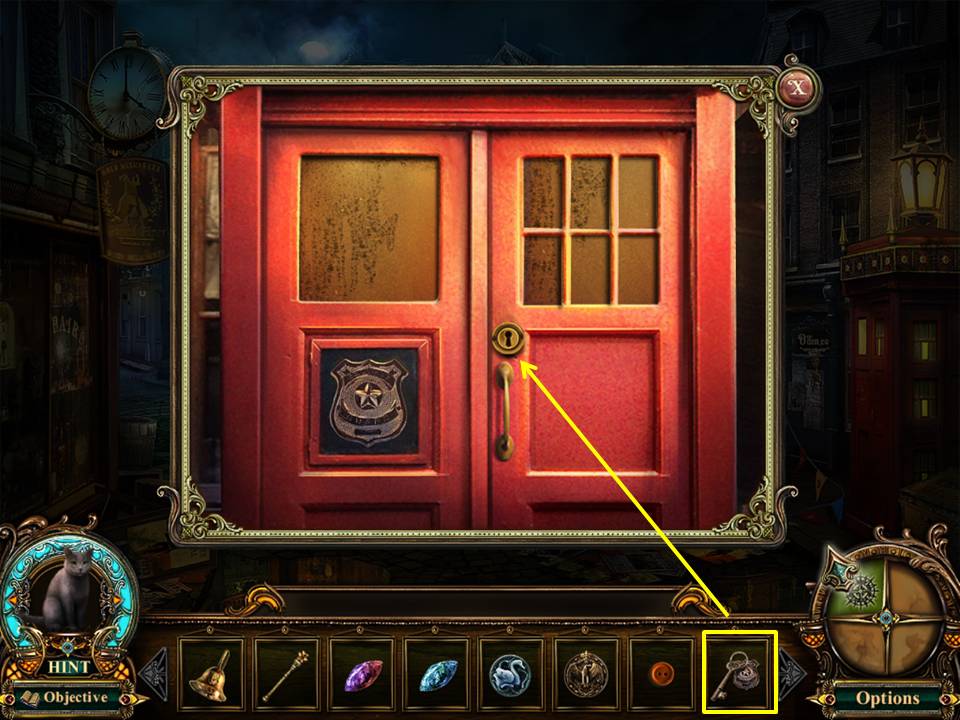
- Zoom into the police box.
- Open the lock with the POLICE KEY.
- Take the BULB. Proceed left and enter the door under the window.
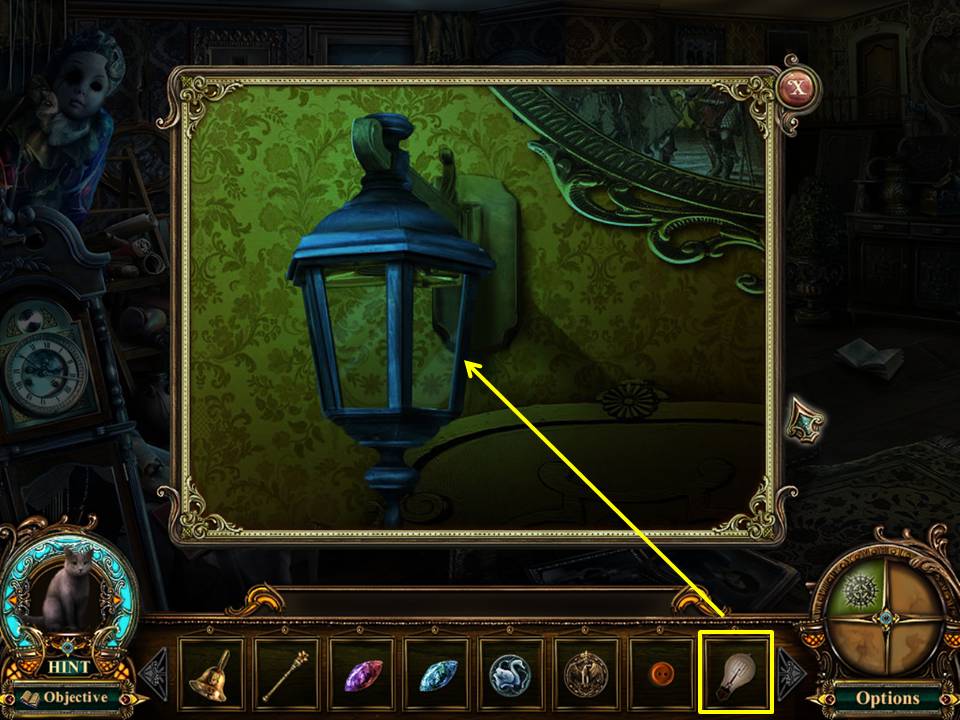
- Zoom into the wall sconce.
- Insert the BULB.
- Play the Hidden Object Scene by the cabinet.
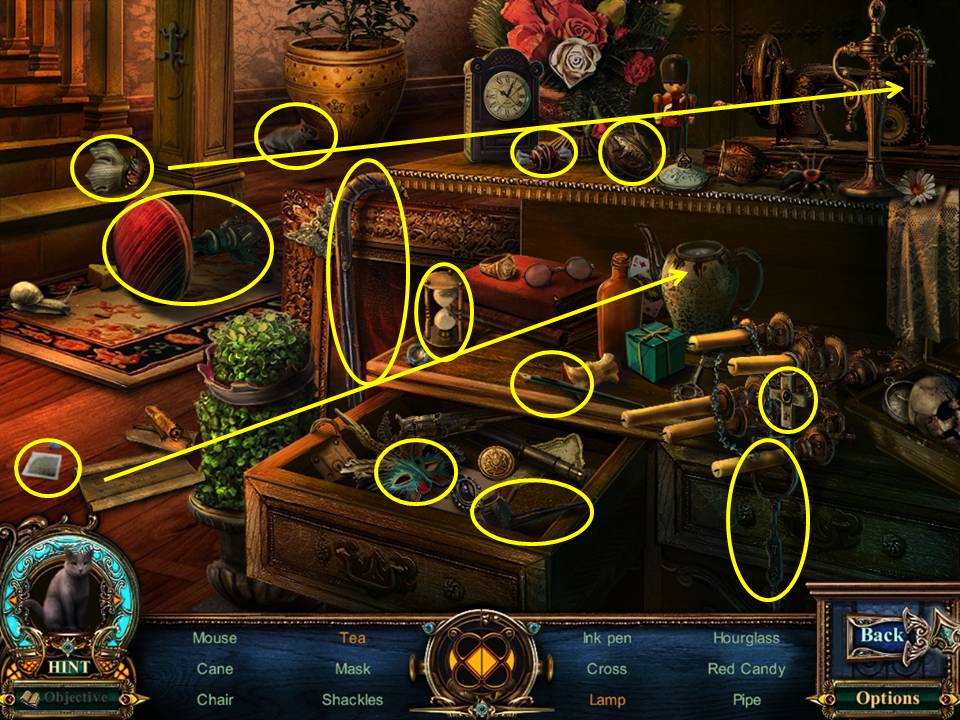
- Find the items listed.
- Place the teabag in the kettle to get the tea.
- Hang the fixture on the stand to get the lamp.
- Receive the RAT KNOB.
- Click down twice.
- Proceed forward.
- Enter the stables.
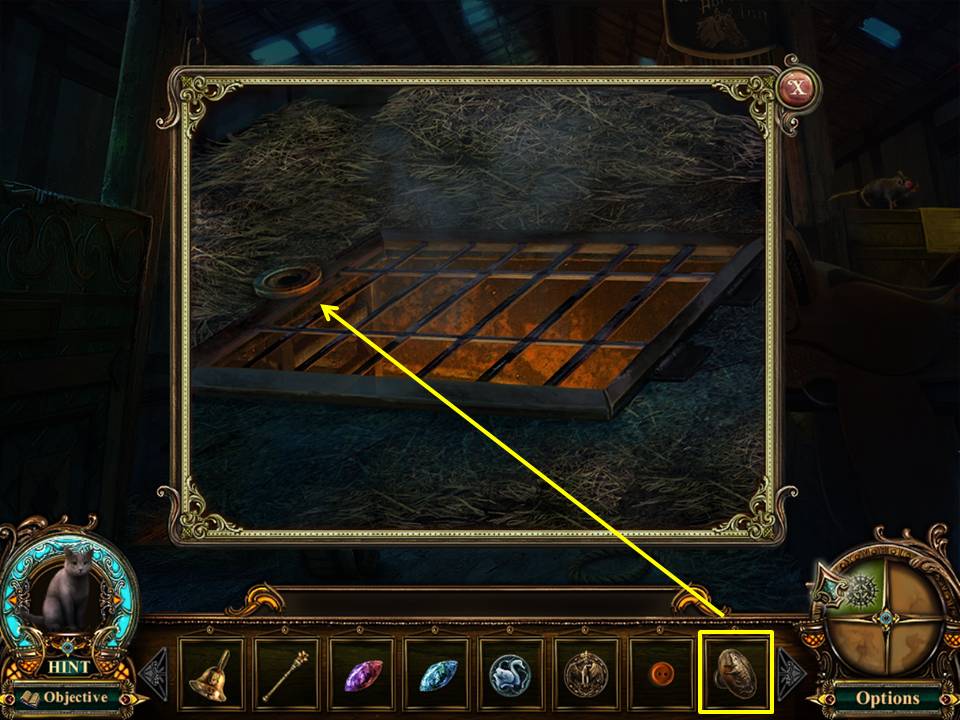
- Zoom into the trapdoor.
- Open it with the RAT KNOB.
- Go through the door into the sewer.
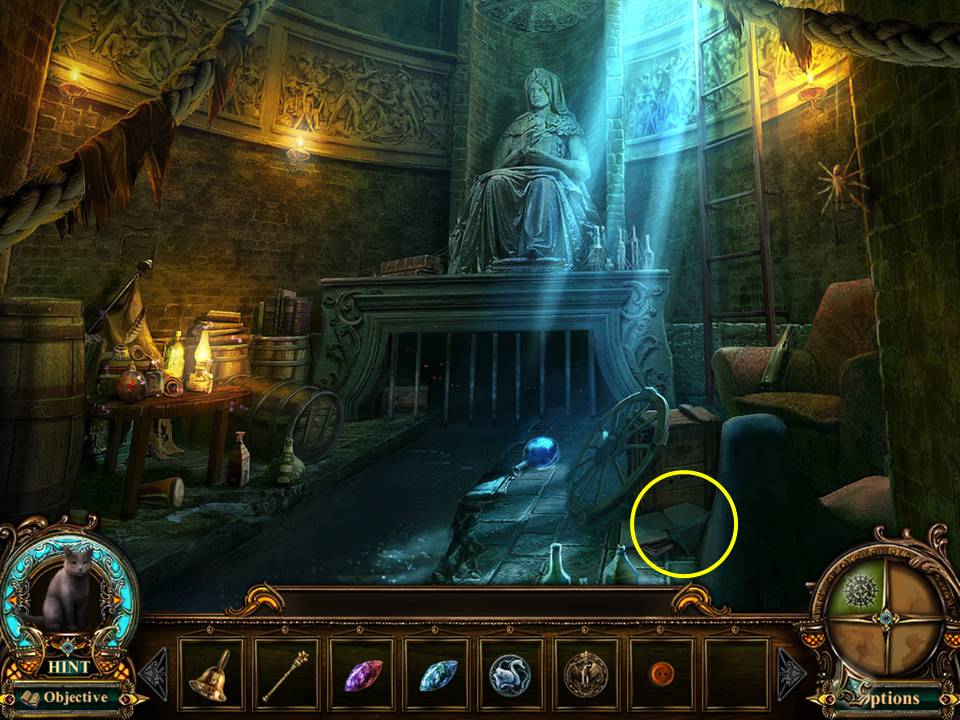
- Move the cloth.
- Take the PHOENIX PLATE.
- Note the ladder leading out of the sewer.
- Play the mini-game located at the table on the left.
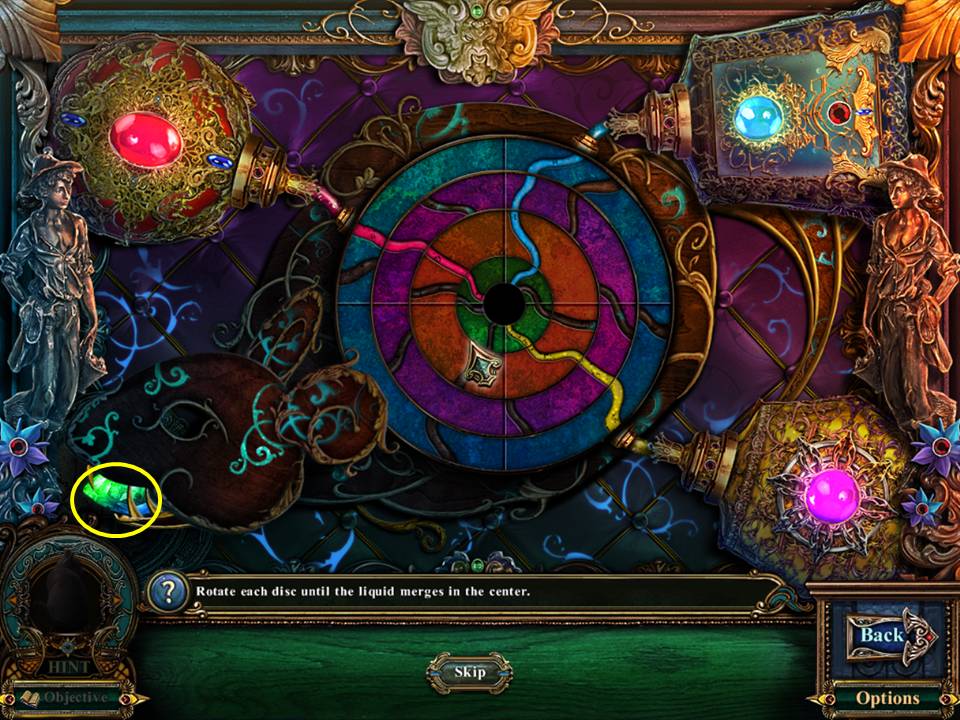
- The object of the game is to rotate each disc until the liquid merges in the center.
- See screenshot for solution.
- When finished, take the JADE EYE.
- Exit the sewer and click down three times.
- Play the Hidden Object Area by the barrels.
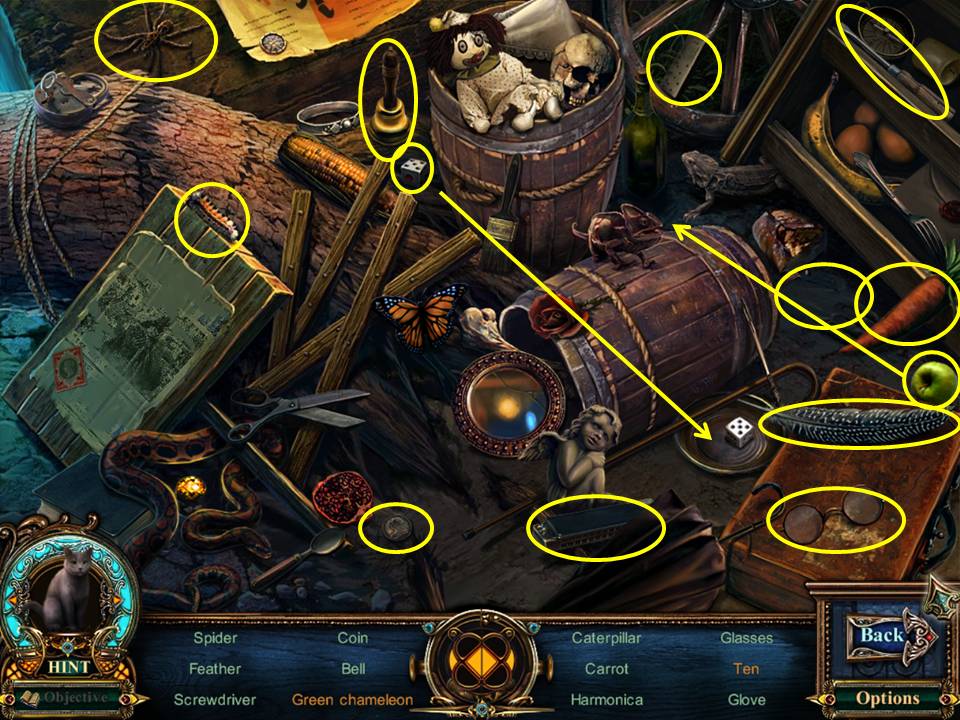
- Find the items listed.
- Place the chameleon on the apple to get the green chameleon.
- Move the two dice together to get ten. Receive the DECODER.
- Proceed forward, left, forward and left again to the street.
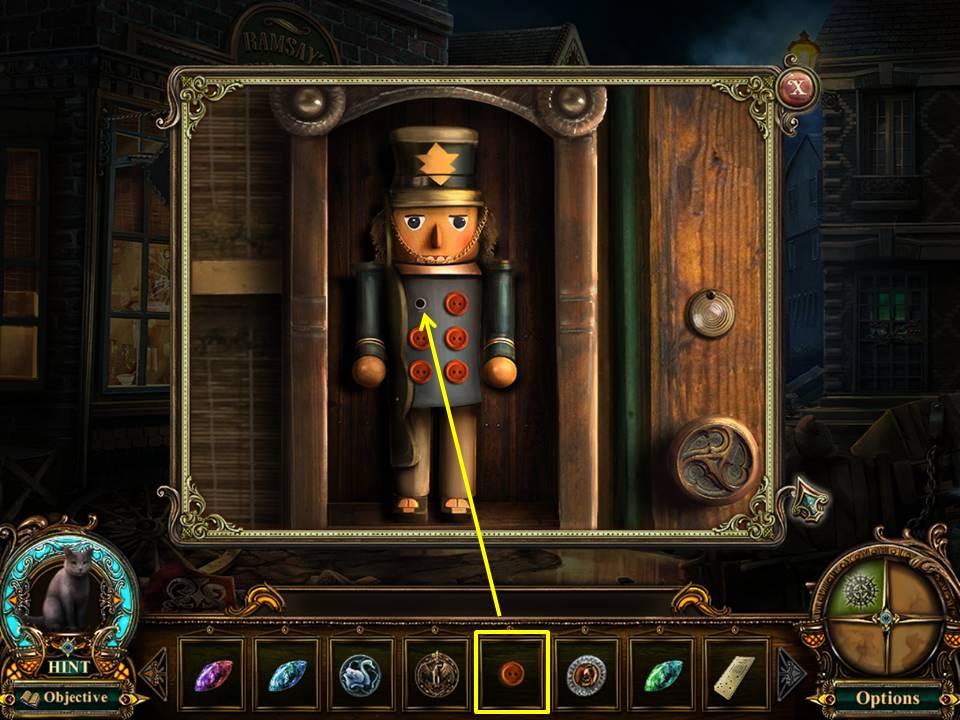
- Zoom into the toy shop door.
- Place the SHINY BUTTON on the toy soldier’s coat.
- Take the CRYSTAL EYE.
- Click down twice.
- Enter the door under the window.
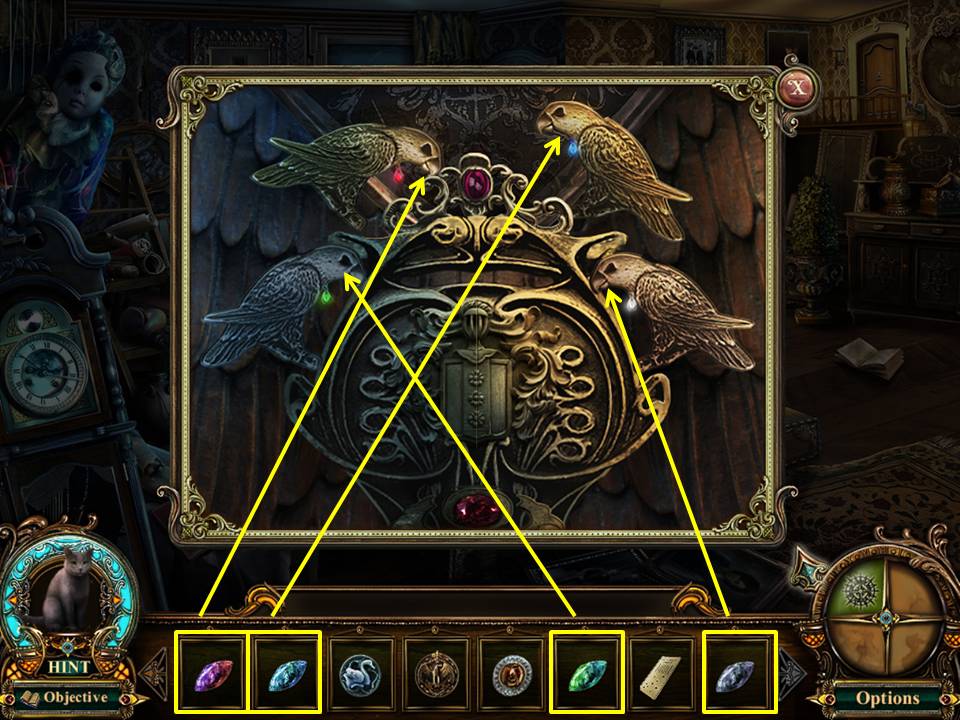
- Zoom into the raven statue.
- Place the CRYSTAL EYE, JADE EYE, RUBY EYE, and SAPPHIRE EYE into the eyes of the four birds with the corresponding color stone on their neck.
- Place the RAVEN DISC in the center of the birds.
- When finished, take the RAVENLORE WHISTLE.
- Click down.
- Proceed forward to the gravesite.
- Enter the gate leading to the lake.
- FO#3: The painting in the house Bottom.
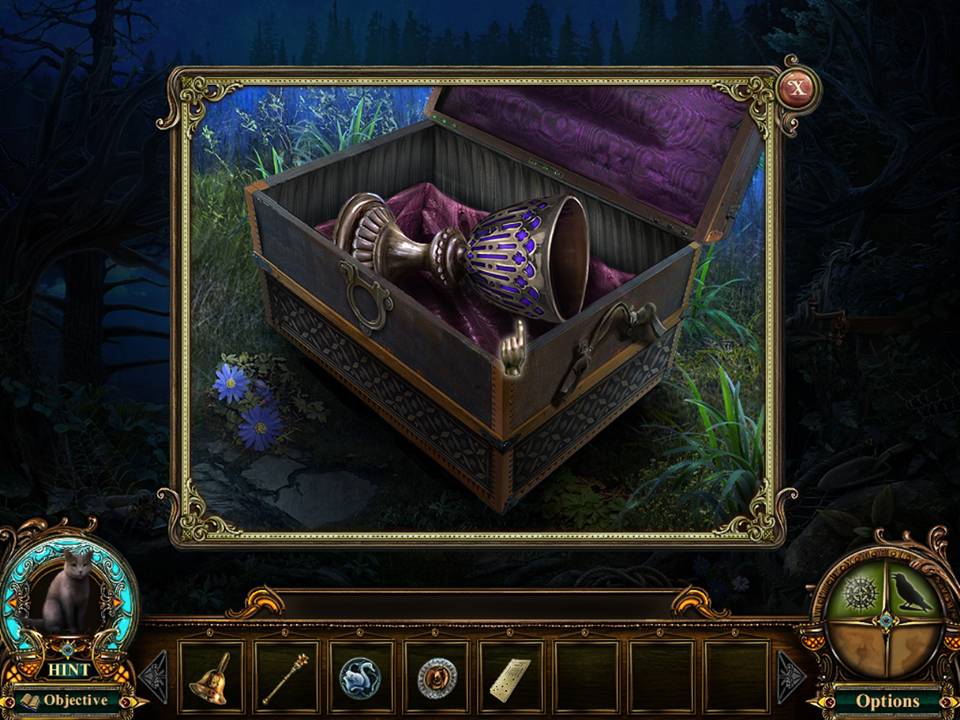
- Use the RAVENLORE WHISTLE to call the raven.
- He will bring the chest on the shore.
- Zoom into the chest.
- Open the lid and take the GOLD CHALICE.
- Click down three times.
Congratulations! You've completed Chapter 2 of our Fabled Legends The Dark Piper Walkthrough.
Comments will load when you reach this part of the walkthrough.