

Chapter Five: Aquez
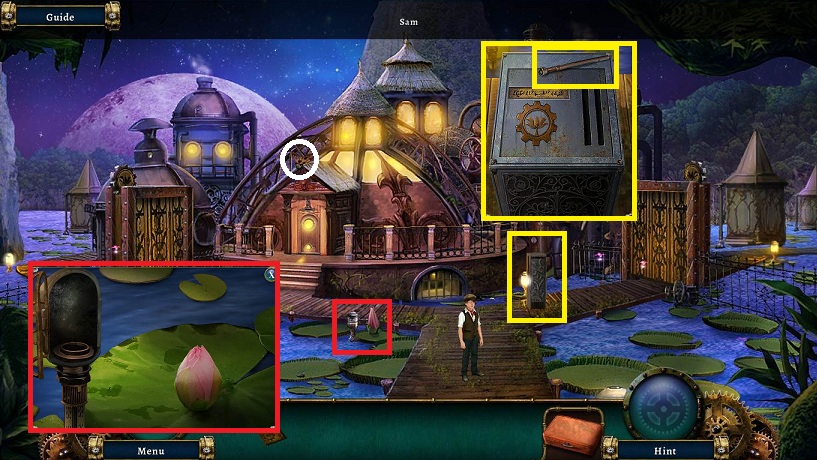
- Examine the pedastal
- Pick up the LADDER RUNG
- Note a lever is missing
- Examine the water lily
- Note the empty bulb cage
- Enter the open door
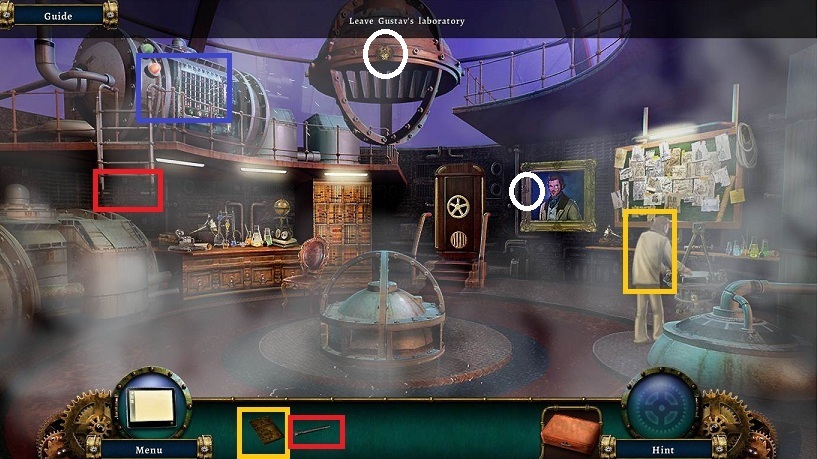
- Talk to Gustav
- Pick up collectible
- Examine the ladder
- Place the LADDER RUNG and click on the ladder to lower it
- Examine the machine
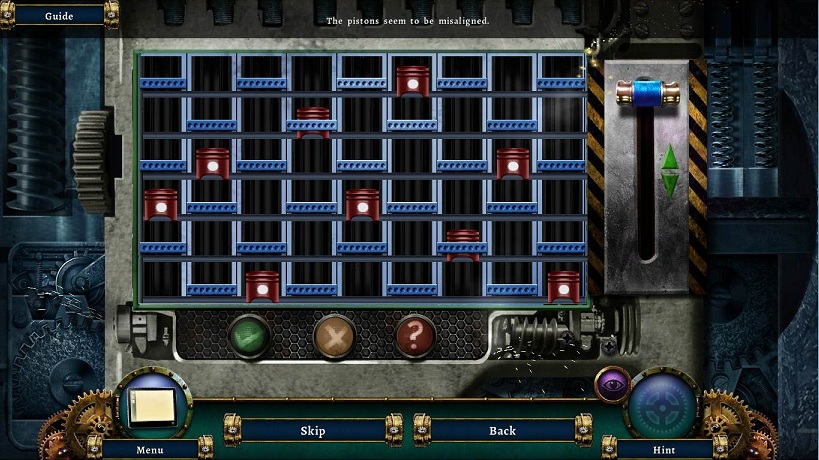
- The goal here is to get all the pistons into a position where all the lights are green
- One way to do this is to place all the pistons at the top
- Pull the blue bar down so you can see all of them
- Pull the lever
- Then move all the ones that did not light green down one and repeat
- Unfortunately they do not stay lit so you'll have to use your memory a little bit
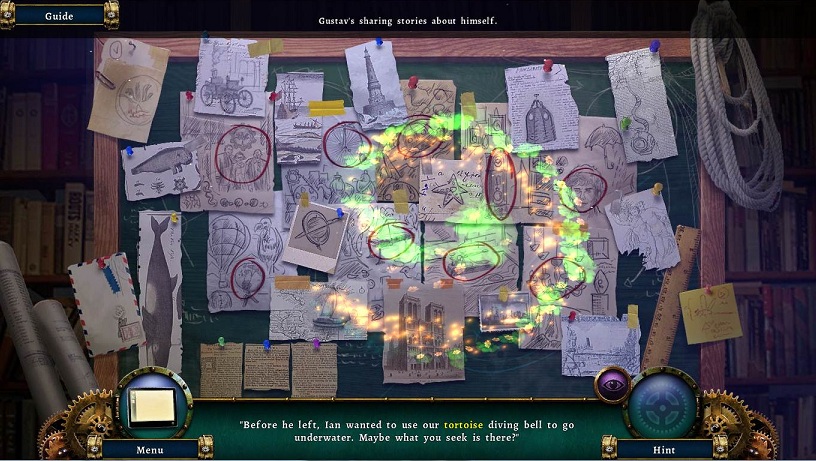
- Give Gustav the ROBOT PLATE
- Click on pictures that match with Gustav's story
- Receive the BLUE KEY CARD
- Examine Gustav's portrait
- Pick up Collectible
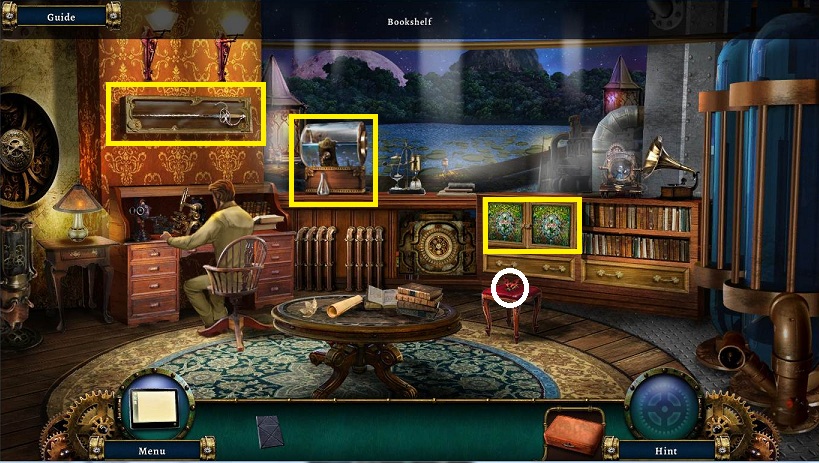
- Go through door
- Examine Gustav's study
- There is a sword that is locked onto the wall
- Pick up collectibe
- There is a container of solution missing a valve
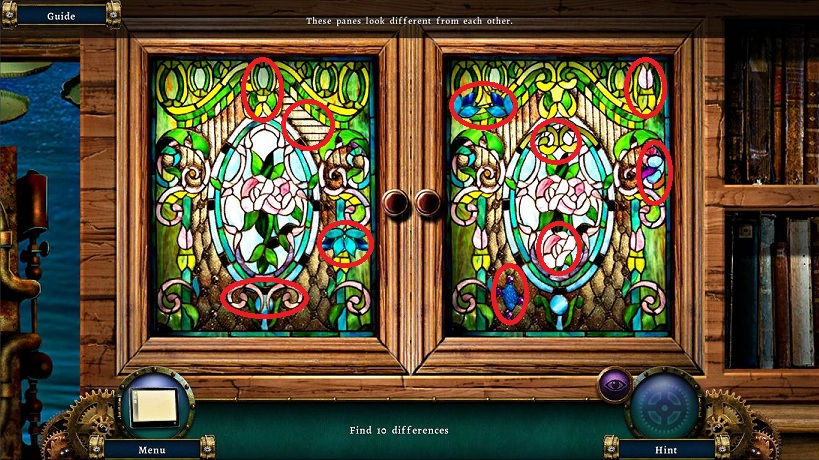
- Examine the cabinet and find 10 differences
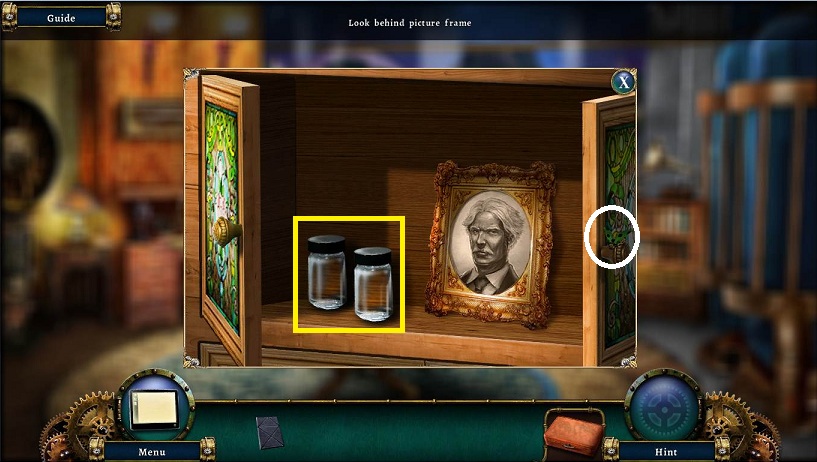
- Pick up 2 EMPTY BOTTLES
- Examine behind the picture frame
- Pick up collectible on the open door
- Return outside
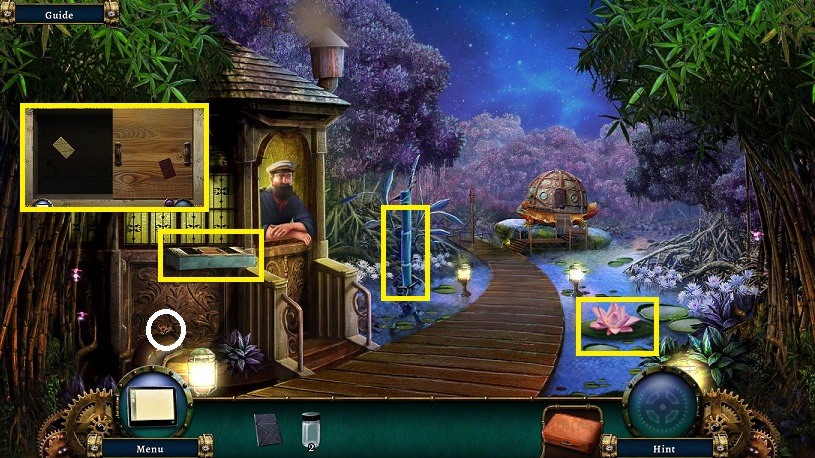
- Examine the right gate
- Use the BLUE KEY CARD
- Go through the gate to the dock
- Pick up collectible
- Talk to Harbormaster; the tortoise has lost her baby
- Examine the shelf to the left
- Match up the cards
- You need to slide the wood piece right and left to expose all the cards
- Some cards to be matched are hidden on both sides
- Pick up the last RED KEY CARD
- Examine the open flower; it has a light to make it bloom
- Use an EMPTY BOTTLE on the flower to pick up a pollen sample
- Examine the bamboo; you need something to cut it with.
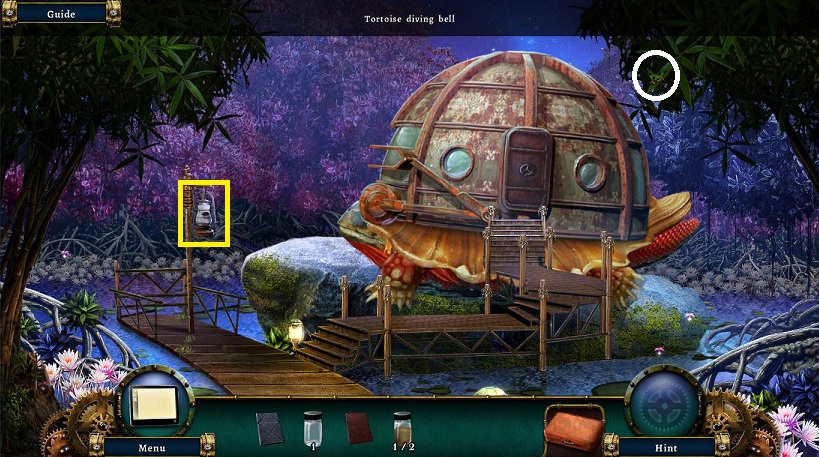
- Go forward to the tortoise diving bell
- Examine the lantern
- Pick up the PALETTE KNIFE
- Pick up collectible
- Return to start point and examine the left gate
- Use the RED CARD KEY and enter
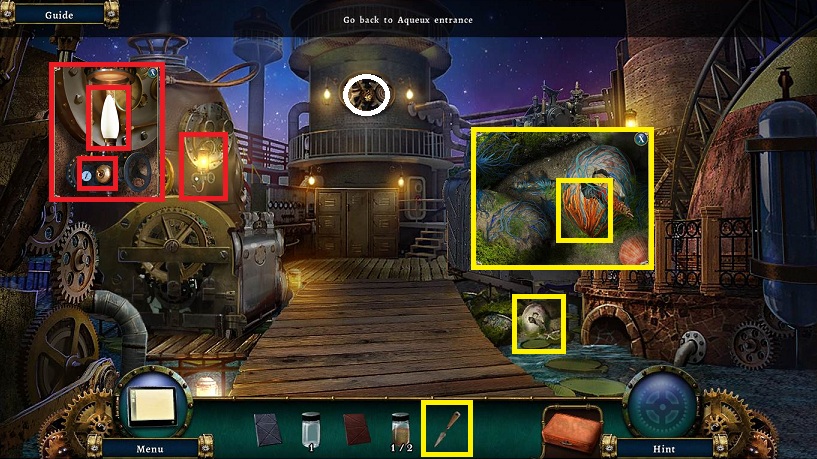
- Examine the machine to the left
- Flip the switch below the light
- Pick up the LIGHT BULB
- Examine the tool locker; it is locked
- Pick up collectible
- Examine the baby tortoise to the right
- The baby tortoise and LEVER are encrusted in moss
- Use the PALETTE KNIFE on the orange bit of moss
- Back up once
- Examine the flower
- Place the LIGHT BULB and click
- Use the EMPTY BOTTLE on the now open flower
- Enter the study
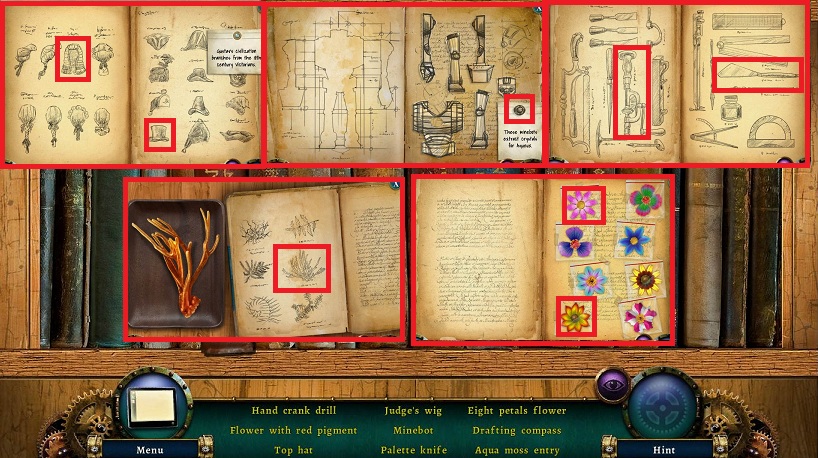
- Examine the bookshelf
- Place the MOSS SAMPLE on the mat to the left
- From left to right as you examine the books, five of them will pull out
- Clicking on the left most one, reveals a judge's wig and top hat
- Next book requires you to place the minibot pieces on the schematic to the left
- Note the circle piece on the note
- Next book exposes hand crank drill, drafting compass, and palette knife
- Next one reveals the aqua moss entry
- Last book reveals the 2 flowers
- Receive a receipe book
- Flip through the pages of the book
- Click on the plant picture
- Pick up the DISPLAY CASE KEY
-
Pick up collectible
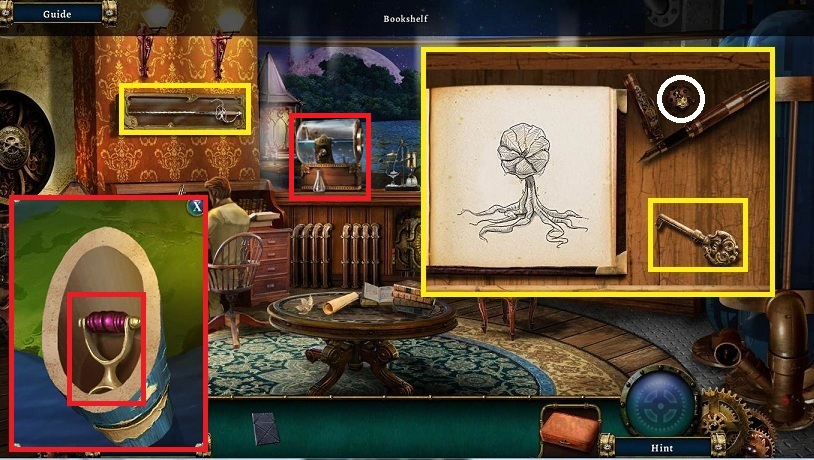
- Examine the sword
- Use the DISPLAY CASE KEY
- Pick up the SWORD
- Return outside
- Head right
- Examine the bamboo
- Use the SWORD
- Pick up the VALVE
- Return to the study
- Examine the solution
- Use the VALVE on the solution container
- Click on it
- Pick up the vial of solution and LOCKER KEY hidden behind it
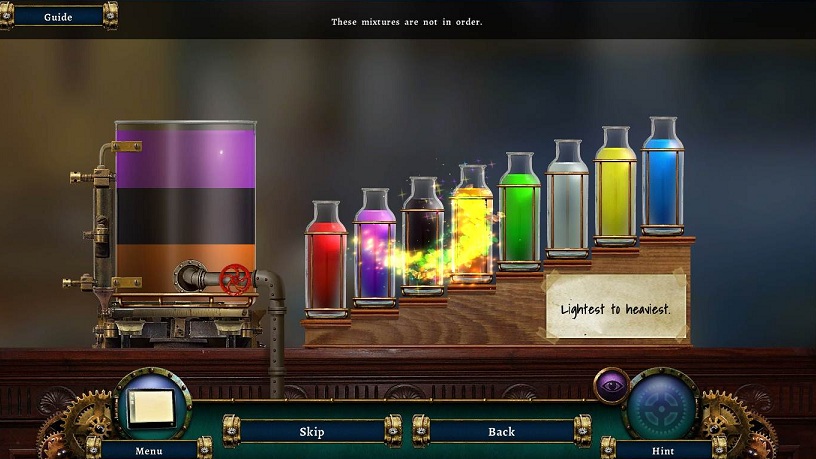
- Open the Botanist Kit
- Place the colored mixtures with the lightest on the left
- The container to the right will have the heaviest mixture drop to the bottom to help you sort
- After filling it with 3 colors, click on the red dial and it will empty
- Receive MOSS EATING ALGAE
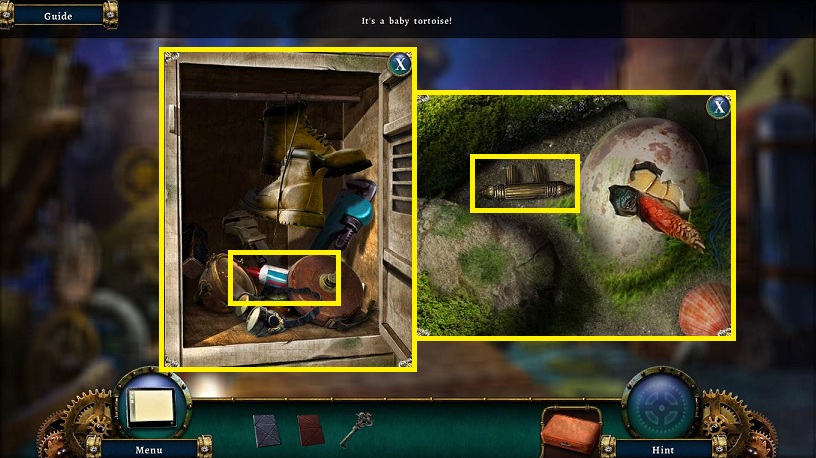
- Return outside and to the left
- Examine the baby tortoise
- Use the dropper to remove the moss
- Pick up the LEVER
- The baby tortoise will swim away
- Examine the locker
- Use the LOCKER KEY
- Move items so you can pick up the GREASE
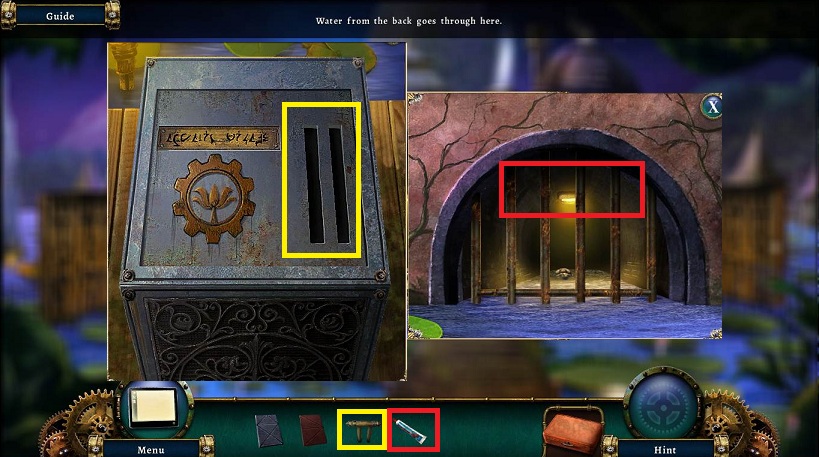
- Back up once
- Examine the pedastal
- Place the LEVER
- Examine the grate
- Use the GREASE on the grate
- Flip the LEVER now
- Pick up the BABY TORTOISE
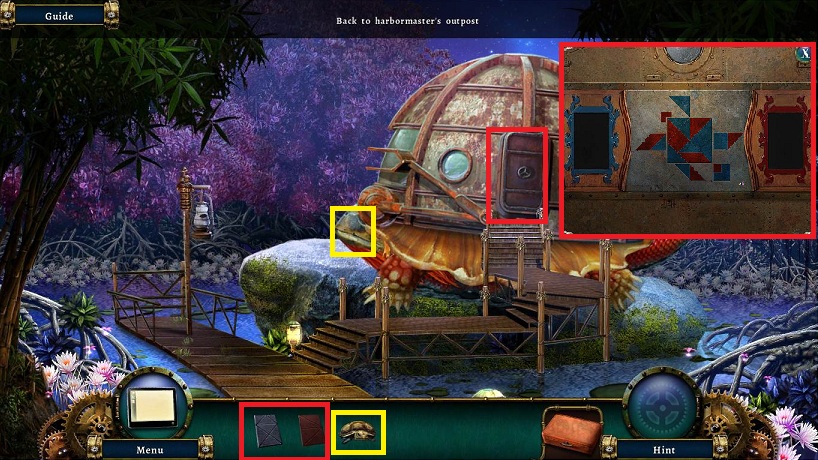
- Return to the right and the tortoise diving bell
- Place the BABY TORTOISE on the mama
- Examine the door
- Place the RED AND BLUE KEYS CARDS on the puzzle lock
- Place the shapes below onto the images above.
- No flipping is needed
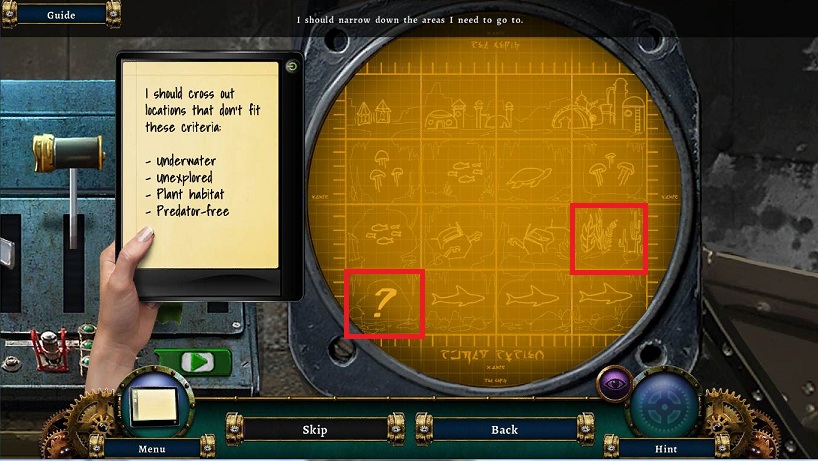
- Enter the diving bell
- Examine the Select Destination yellow circle
- Cross out every square but the one that fits the criteria
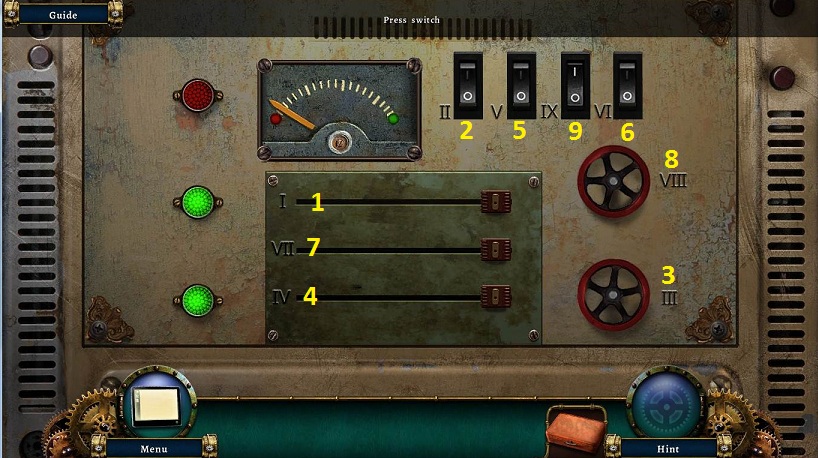
- Examine the center console
- Slide the slider, flip the switch, or turn the dial in numerical order
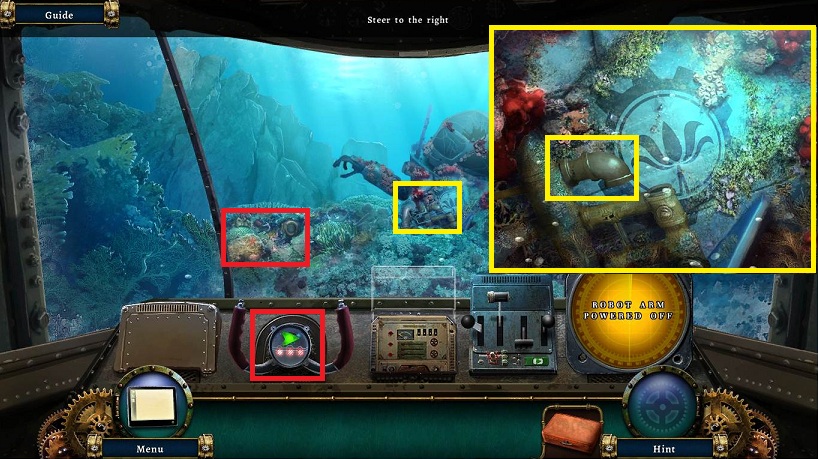
- Examine the wrecked machine
- Pick up the PIPE JOINT
- Examine the pile to the left of the machine
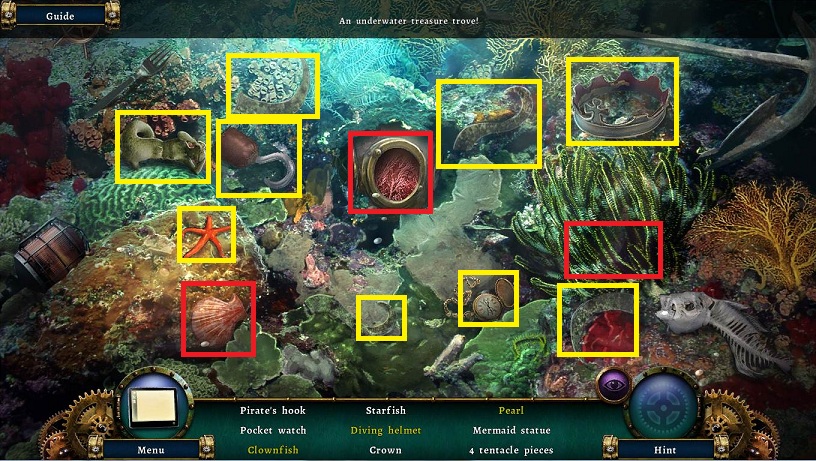
- Clownfish: Slide the kelp out of the way.
- Diving helmet: Click on the helmet and then the ducky. Pick up the face plate.
- Pearl: Slide the shell out of the way.
- Receive 4 TENTACLES
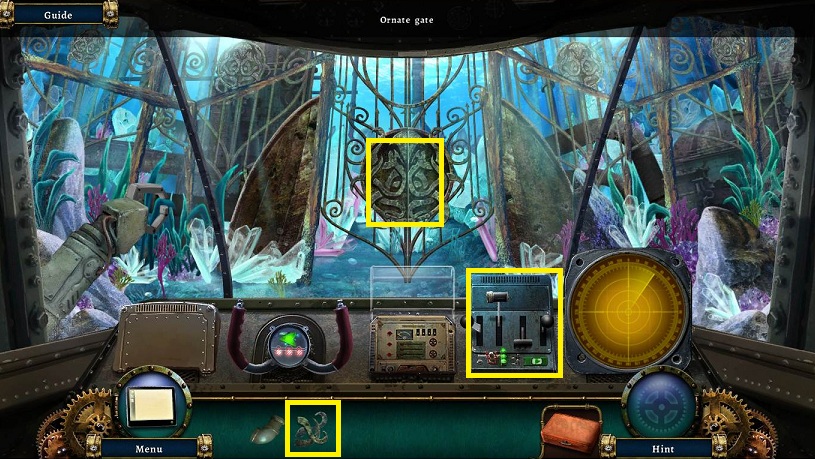
- Click on the green arrow on the steering device
- Examine the ornate gate.
- Place the TENTACLE PIECES
- Examine the crystal
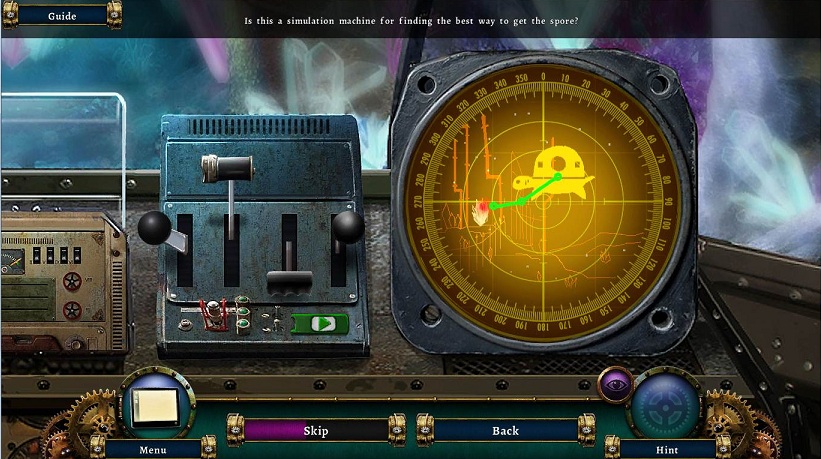
- Examine the robot arm controls
- Flip the levers and then the green arrow
- If the lines to the right turn red, then you flipped the proper switch
- The 2nd control is the first section
- The 4th controls the 2nd section
- The 3rd controls the 3rd section
- The 1st controls the 4th section
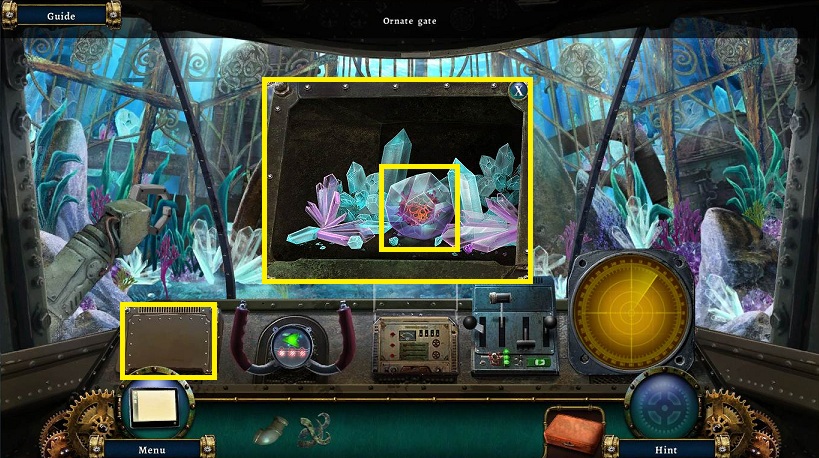
- Examine the compartment to the left
- Pick up the SPORE
- Watch cut scene
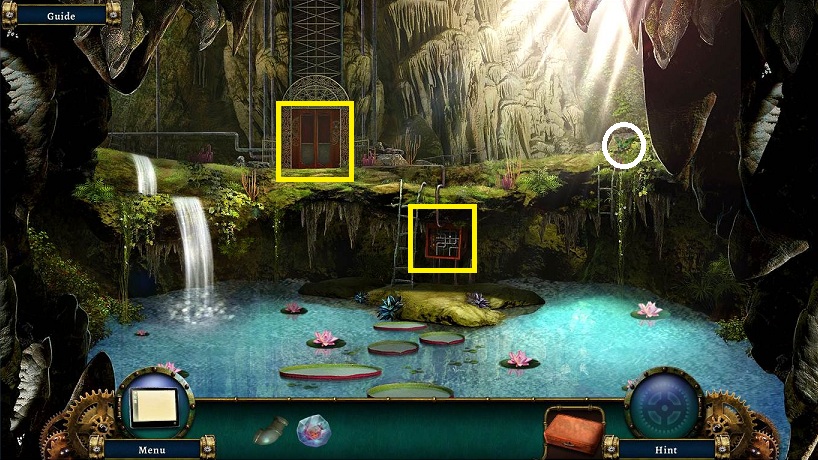
- Pick up collectible
- Examine the pipes directly ahead
-
Place the PIPE JOINT
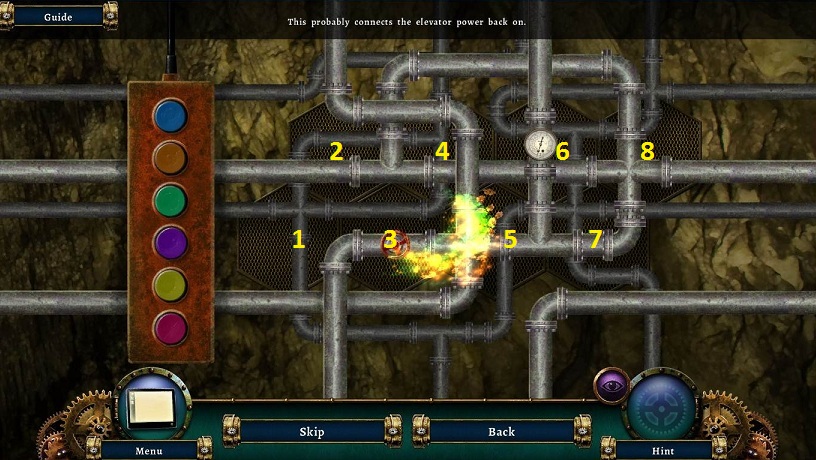
- The puzzle requires you to turn the hexagonal pieces until the pipes are all connected.
- Blue turns 5 and 6
- Orange turns 2
- Green turns 1, 6, and 8
- Purples turns 5
- Yellow turns 2, 3, and 7
- Red turns 1 & 4
- Press green until 8 is in place
- Press yellow until 7 is in place
- Press red until 4 is in place
- Press blue until 6 is in place
- If necessary press orange and purple to move 2 and 5
- Enter the elevator
- Watch cut scene to end chapter
Comments will load when you reach this part of the walkthrough.