

Chapter Four: Newstone Way
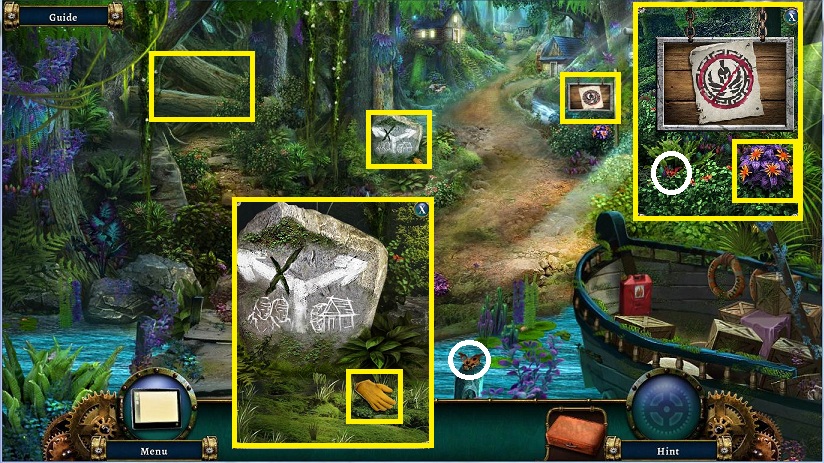
- Pick up collectible
- Note the way blocked with logs to the left
- Examine guide stone
- Pick up the LEATHER GLOVE
- Examine the sign
- Pick up collectible
- Pick up HERBS (1/4)
- Note the gas can on the boat
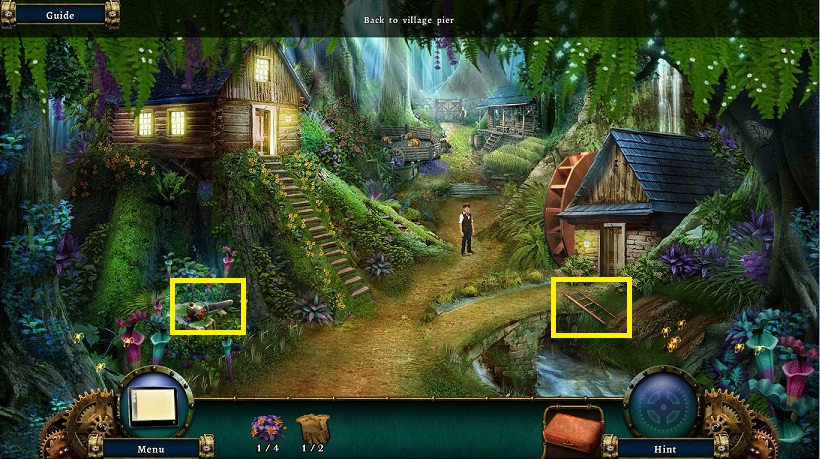
- Talk to Sam
- Pick up the LADDER
- Examine the chain saw
- Note you need FUEL and CHAIN
-
Head into hut on the left
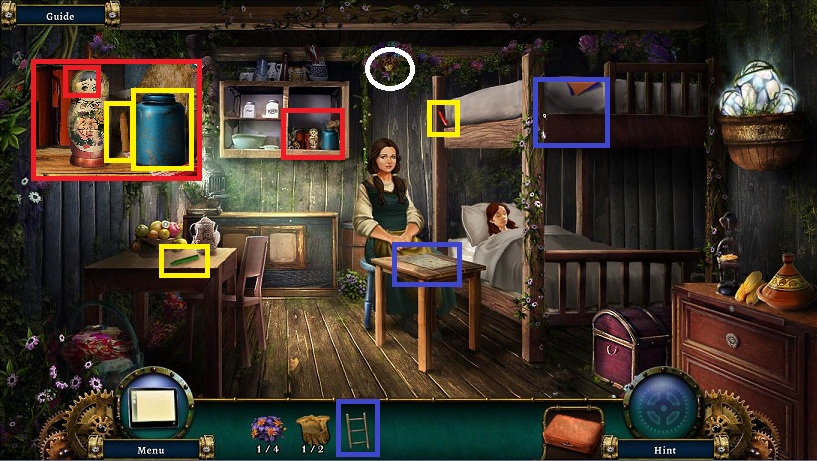
- Pick up collectible
- Speak with Margaret
- Pick up CRAYONS (1/4, 2/4)
- Place the LADDER
- Examine the top bunk
- Pick up CRAYON (3/4)
- Examine the shelf
- Pick up CRAYON (4/4)
- Pick up EMPTY JAR
- Place the CRAYONS on the table
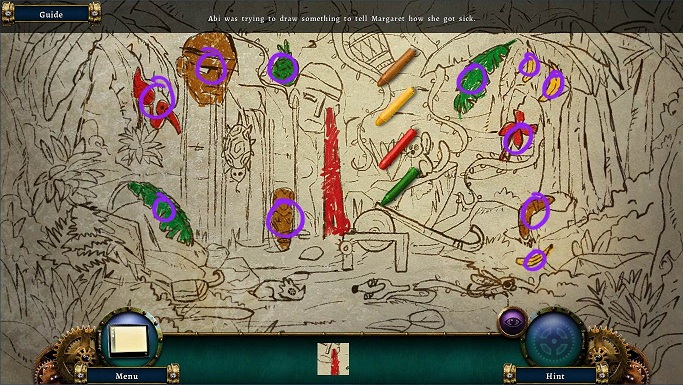
- Using the crayons, color in parts of the drawing to match the images at the bottom
- Just pick up the crayon and click on the item
- Then click on the item again
- Exit the hut.
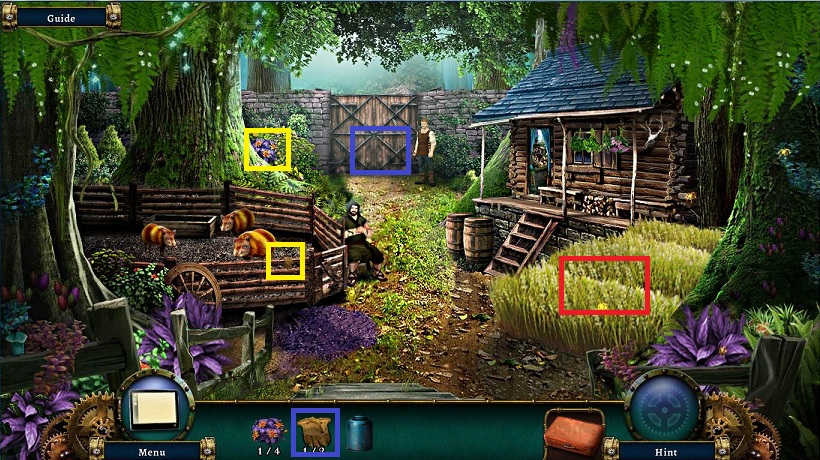
- Talk to Sam and go forward
- Examine the pig pen
- Pick up the LEATHER GLOVE (2/2)
- Pick up the HERBS (2/4)
- Examine the gate
- Use the LEATHER GLOVES to pick up the CHAIN
- Note the wheat and that there seems to be something in it.
- Enter the Healer's hut.
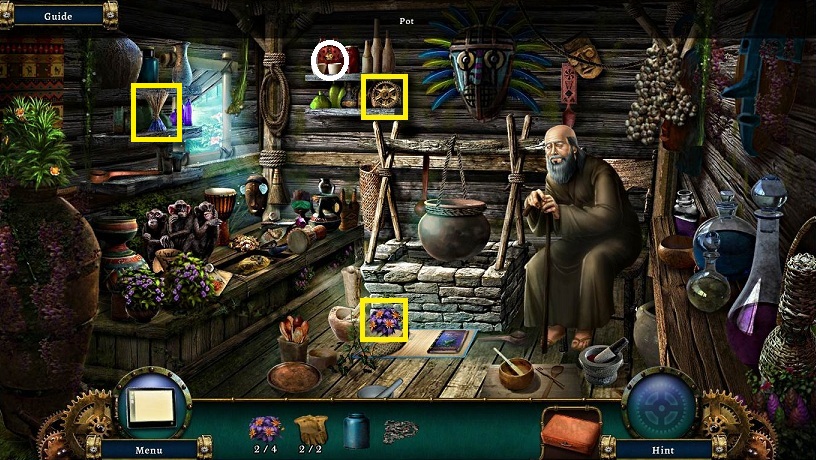
- Speak to Healer
-
Pick up collectible
Pick up INCENSE on the side shelf - Pick up GEAR (1/3) on the back shelf.
- Pick up HERBS (3/4)
- Examine the Healer's table
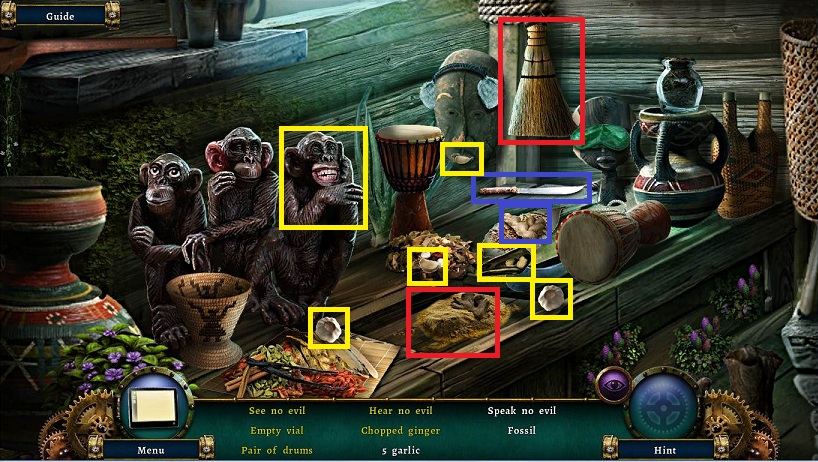
- 5th garlic: Use the broom on the dust.
-
Chopped ginger: Use the knife and the whole ginger
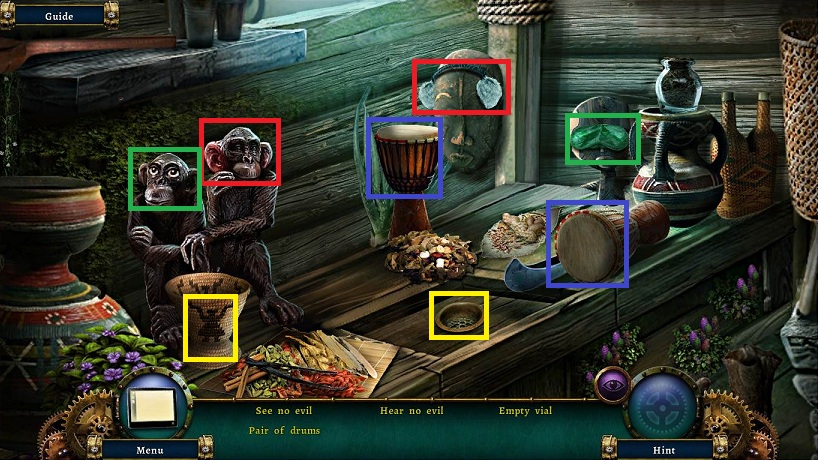
- See no evil: Place the eye shade on the center monkey
- Hear no evil: Place the ear muffs on the left monkey
- Empty vial: Click on the basket. Pick up the full vial and use it on the drain.
- Pair of drums: Place front drum with the back drum
- Receive EMPTY VIAL
- Exit the hut and return to the pier
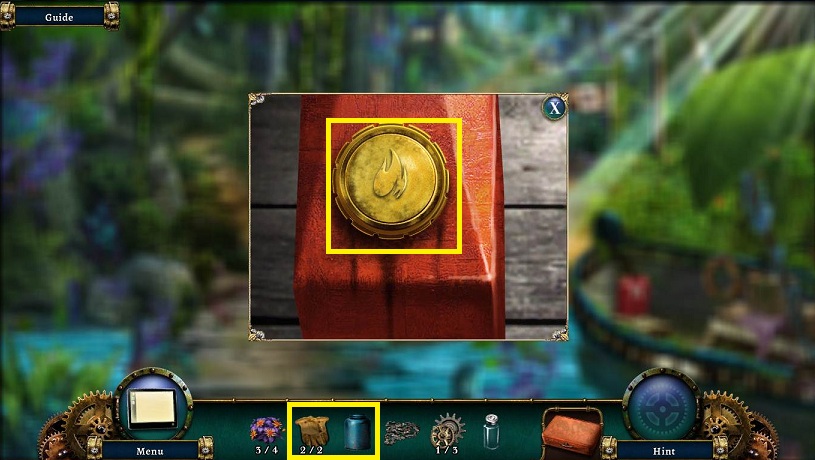
- Examine the boat
- Use the LEATHER GLOVES on the gas cap
- Use the EMPTY JAR on the fuel to get a CAN OF FUEL
- Return to village
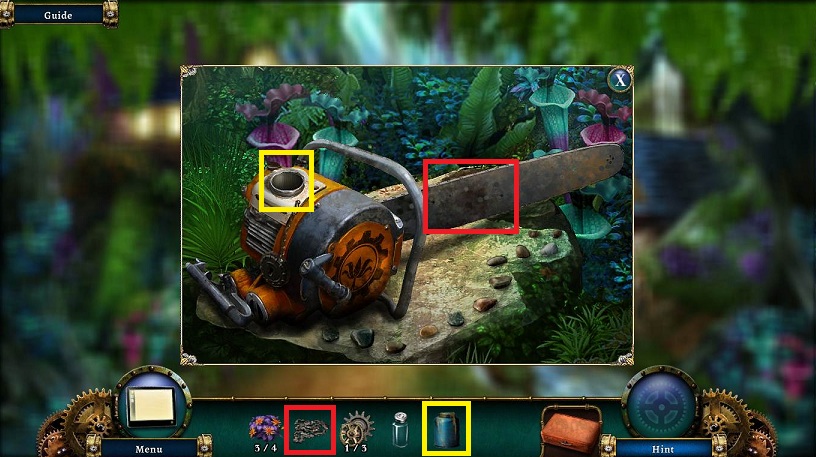
- Examine the Chain Sawm
- Remove the gas cap and place the CAN OF FUEL
- Place the CHAIN
- Pick up the CHAIN SAW
- Return to pier
- Use CHAIN SAW on the way blocked to the left
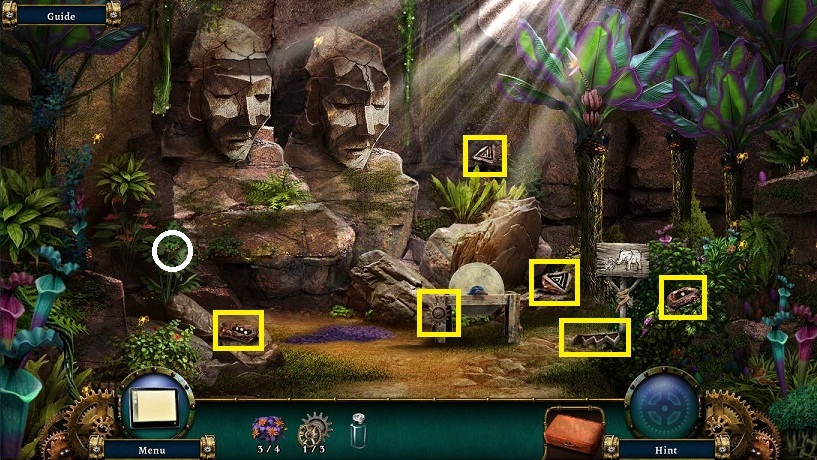
- Pick up collectible
- Note the sharpening stone
- Pick up GEAR (2/3)
- Pick up 5 ROCKS
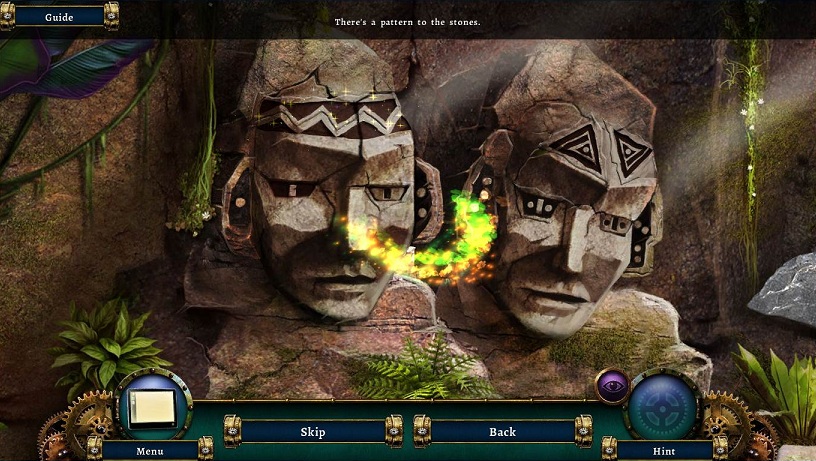
- Examine the golem fountain
- Place the 5 ROCKS by clicking and then dragging to the appropriate spot
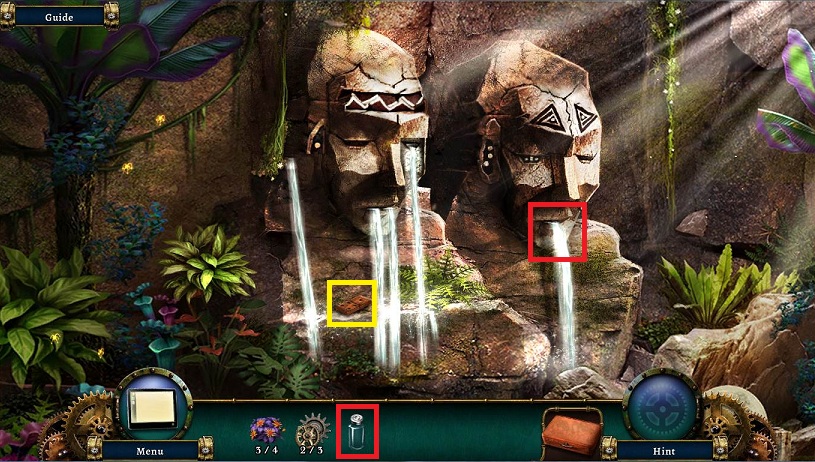
- Pick up DOMINO (1/3)
- Use EMPTY VIAL on the right
- The filled vial will go into the Botanist's Kit
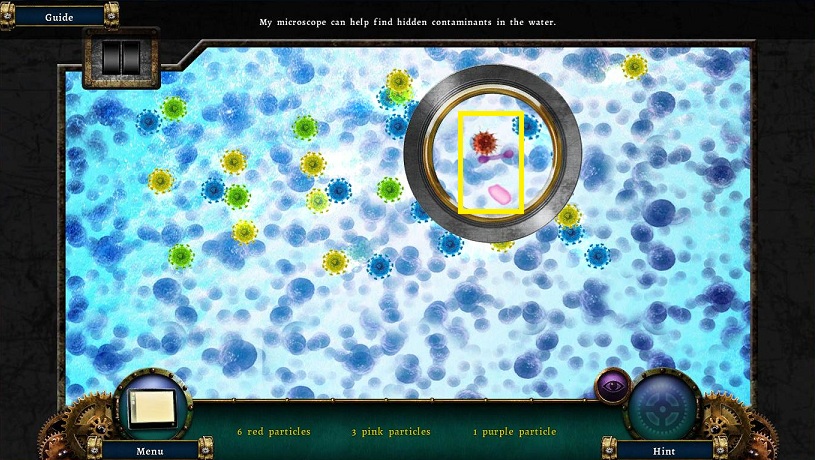
- Examine the Botanist's Kit
- Move the magnifier around to find the different particles
- Receive CONTAMINANTS
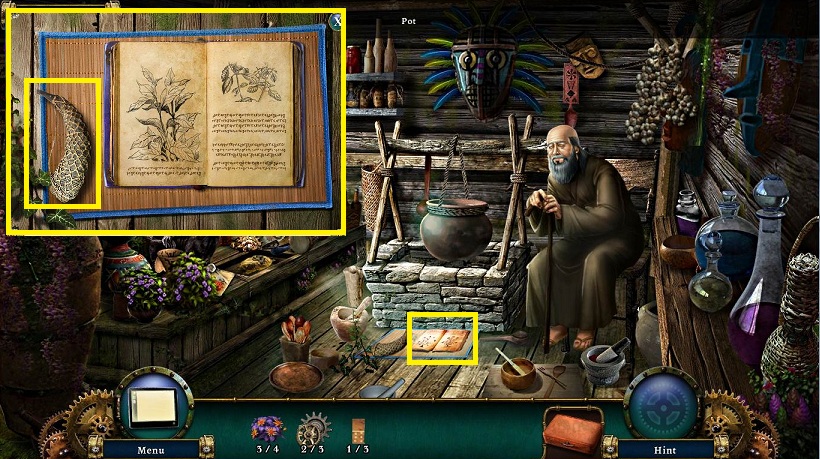
- Return to the Healer's hut.
- Give the HEALER the CONTAMINANTS
- Examine the book on the floor
- Pick up the HORN
- Flip through the pages.
- Return outside
- Use the HORN on the sleeping pig herder.
- He wants you to fix the watermill and gives you the WATERMILL KEY
- Go back once.
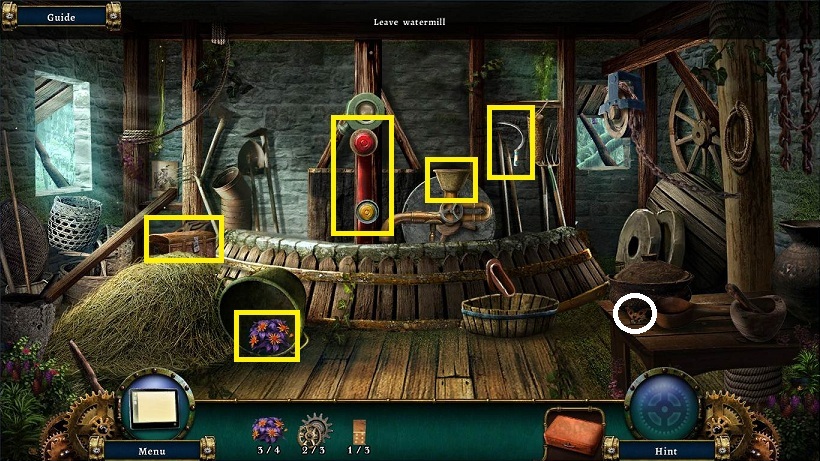
- Use the WATERMILL KEY on the door and enter
- Pick up collectible
- Pick up HERBS (4/4)
- Note the locked chest
- Note the mechanism missing gears.
- Note the input bucket for the wheat
- Pick up the BLUNT SICKLE
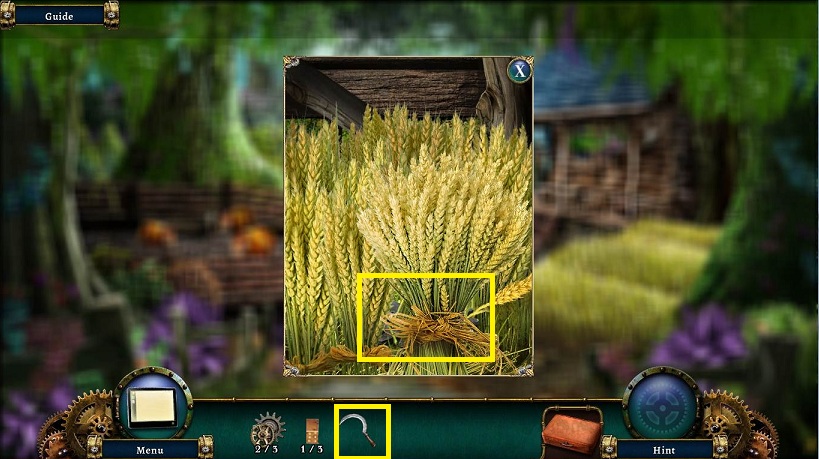
- Return to golem area and use the BLUNT SICKLE on the sharpening stone to get a SHARP SICKLE
- Return to outside the Healer's hut
- Examine the wheat
- Use the BLUNT SICKLE 4 times on the wheat
- Receive 4 WHEAT
- Pick up GEAR (3/3)
- Return to watermill
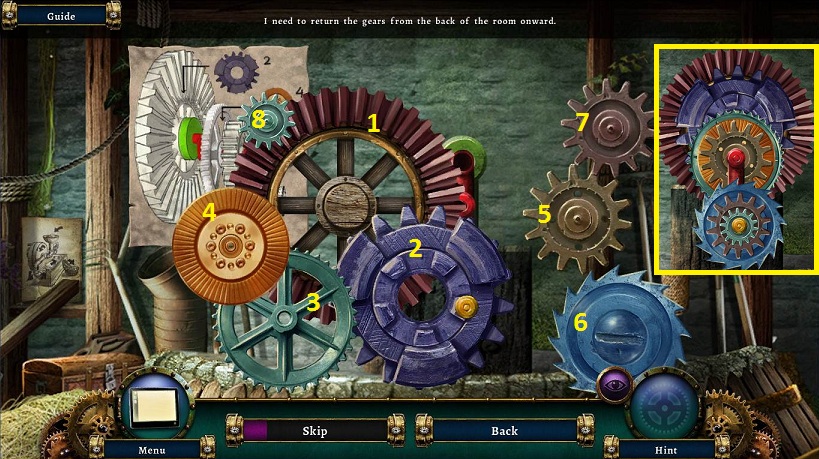
- Use the GEARS on the mechanism
- Place the gears in the order listed on the diagram.
- Note there are 3 spindles to place them on
- See solution above, numbered in order of placement.
- Place the 4 WHEAT in the input bucket and pick up GRAIN in the basket
- Return to pig pen.
- Place the GRAIN in the trough.
- Receive a PIG
- Return to the pier and use the PIG on the purple soil
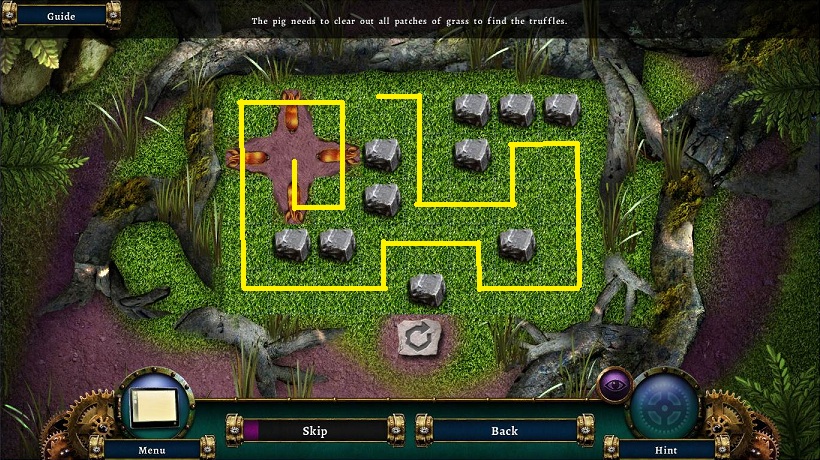
- You must click on the starting spot for the pig to clear the grass.
- You will then be given a choice of which pig to select to best complete the puzzle.
- The pig will stop whenever there is a choice of directions
- The solution above shows the path the pig needs to take.
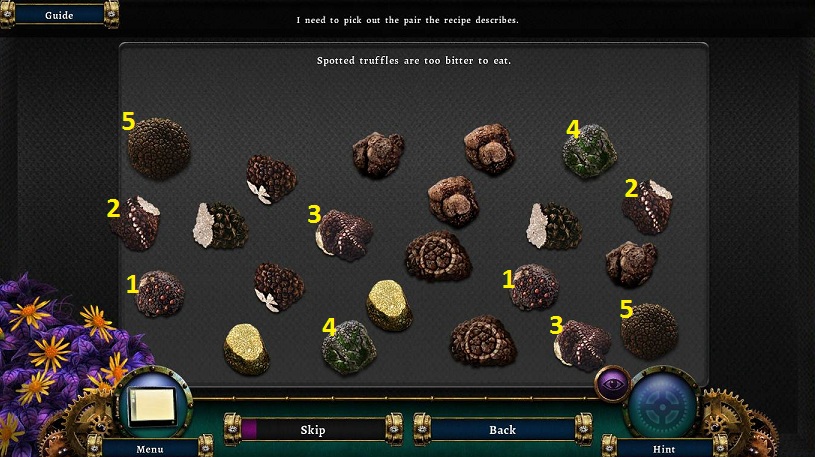
- Examine the Botanist's Kit
- Match the truffles according to the directions.
- Receive PURE TRUFFLES
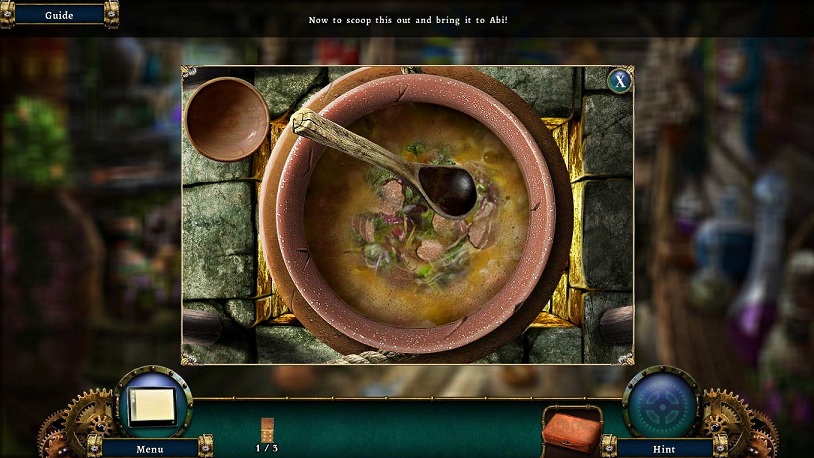
- Return to the Healer's hut
- Examine the pot
- Place the PURE TRUFFLES in the pot.
- The HERBS go in automatically.
- Use the spoon to stir the soup
- Use the bowl on the pot
- Pick up a TRUFFLE SOUP
- Return to Margaret's hut and give her the TRUFFLE SOUP
- She will give you a VILLAGE TOKEN
- Exit the hut and go forward to the gate
- Give the guard the VILLAGE TOKEN and go through the gate
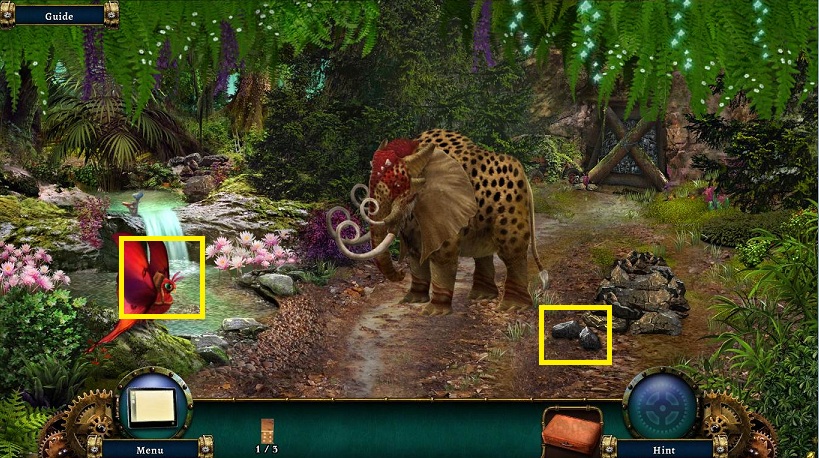
- Examine the red bird
- Click on the tube on its back
- Read the note
- Pick up the FLINT
- Go forward
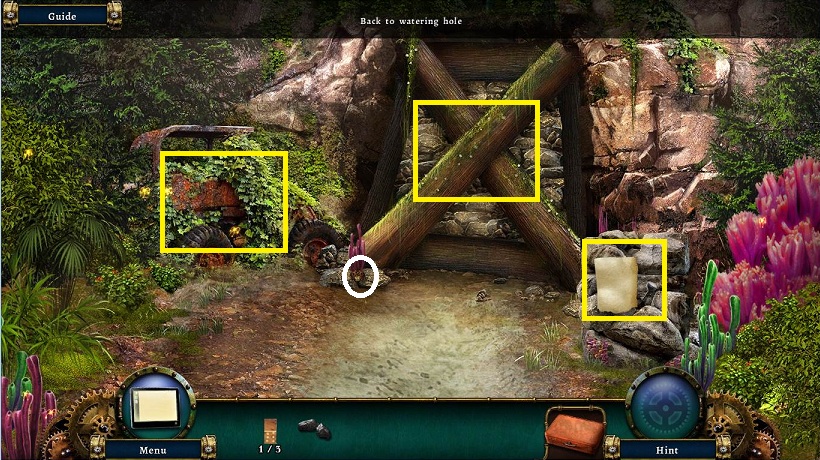
- Pick up collectible
- Examine the rocks to the right
- Read the note
- Pick up the LEVER
- Note the blocked mine entrance
- Examine the overgrown wreck to the left
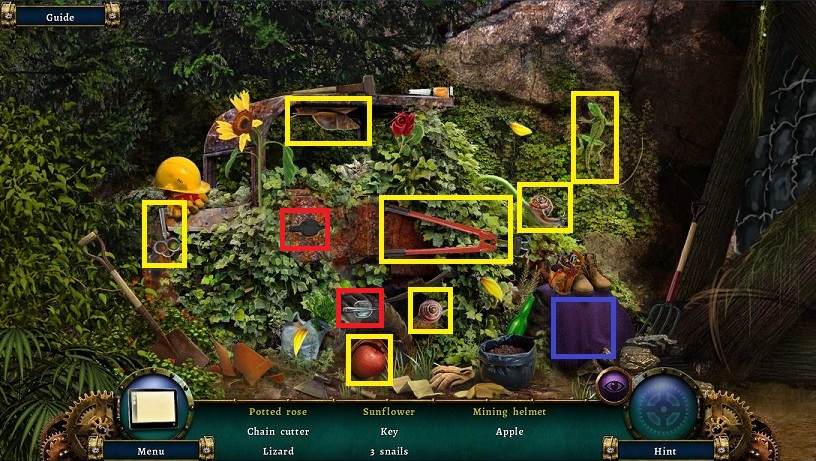
- Find the items in the open
- Use the door handle on the door
-
Click on the purple cloth
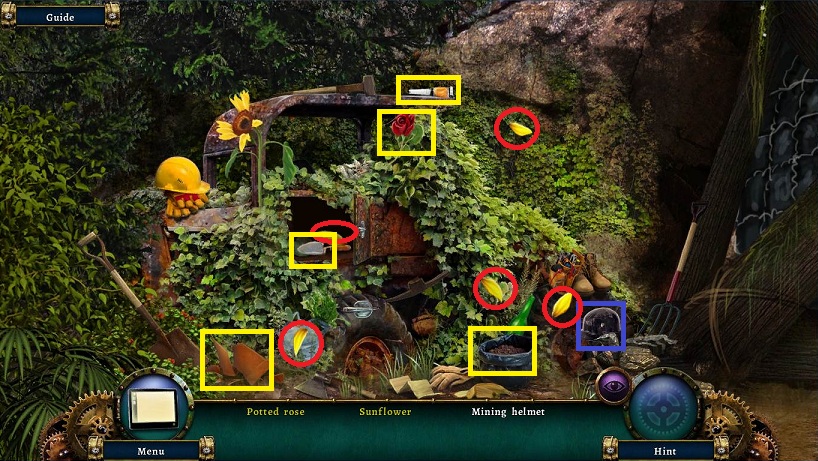
- Sunflower: Place the yellow petals on the sunflower
- Potted rose: Use the glue on the pot. Use the shovel on the bag of dirt. Use the shovel of dirt on the pot. Place the rose on the pot.
- Receive a SILVER KEY
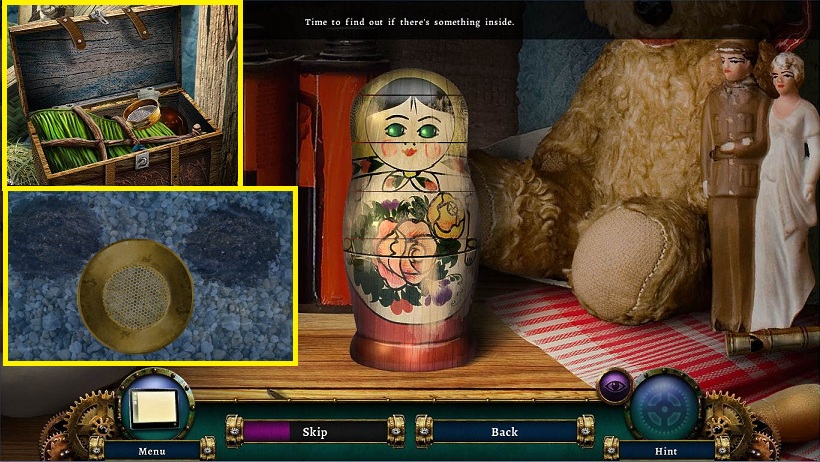
- Return to the watermill and examine the chest
- Use the SILVER KEY on the chest.
- Pick up the SIEVE and HARNESS
- Return to the watering hole
- Place the HARNESS on the ramephant
- Examine the pond
- Use the SIEVE on the 3 dark spots
- Pick up DOMINO (2/3) and MARBLE
- Return to Margaret's hut and examine the shelf
- Place the MARBLE on the doll
- Click the 5 sections of the doll so they match up (see solution)
- Pick up DOMINO (3/3)
- Return outside
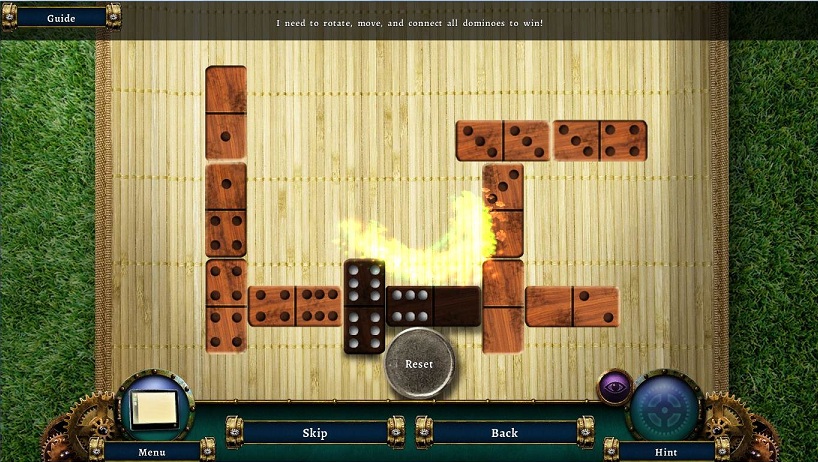
- Give the DOMINOES to Sam
- Place the dominoes to use all of them
- Number need to be matched end to end or at the side of doubles
- Once you win Sam will help you get bananas.
- Meet Sam at the golem area
- Receive BANANAS
- Return to the watering hole
- Use the BANANAS on the Ramephant twice, who will then pull open the mine entrace
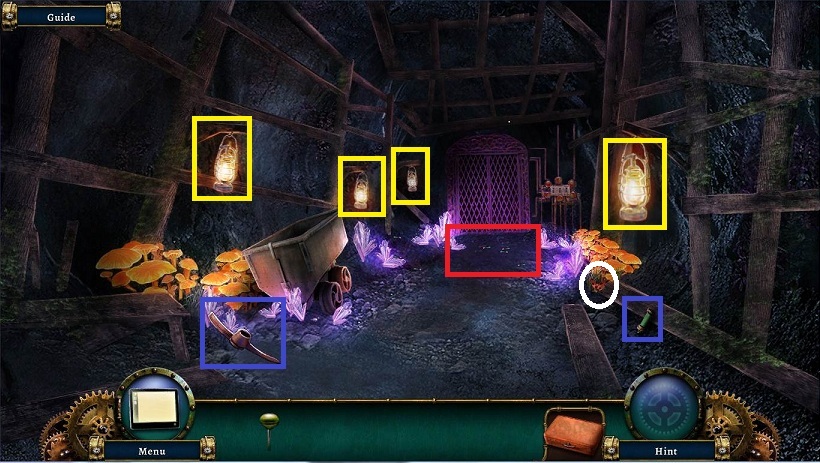
- Enter the mine
- Use the FLINT on the 4 langers
- Pick up collectible
- Pick up GREEN TUBE
- Note the pickaxe head
- Examine the back.
- Use the INCENSE on the closes lantern
- Use the LIT INCENSE on the bugs
- In the mini-puzzle, just move the cursor all around to fill the area
- Examine the back panel
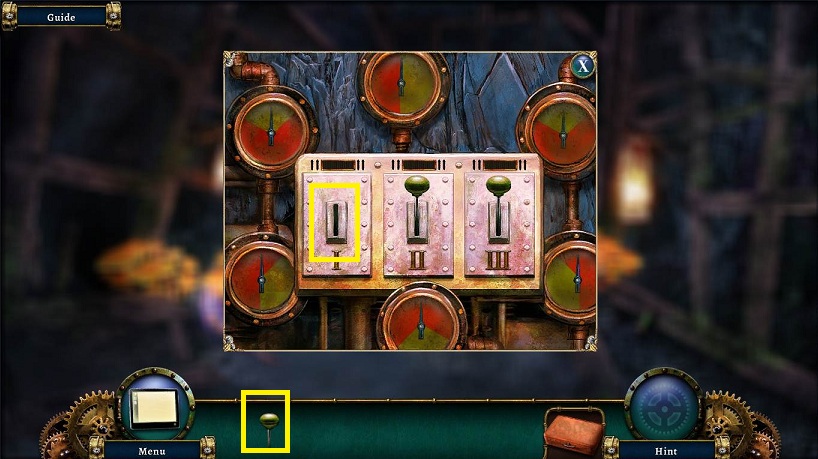
- Use the LEVEL on the panel
- Pull down lever I when the indicator is in the yellow
- Pull down level II when 2 indicators are in yellow
- Pull down level III when 3 indicators are in yellow
- Enter the elevator
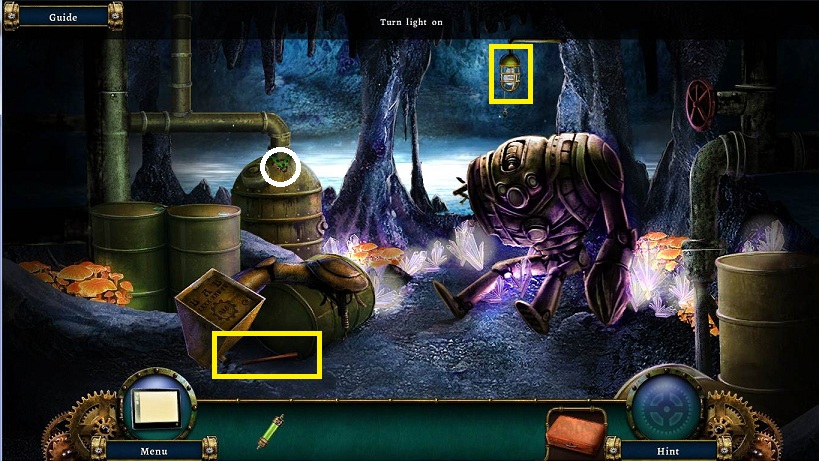
- Click on the light to turn it on
- Pick up collectible
- Pick up WOODEN HANDLE
- Back up once
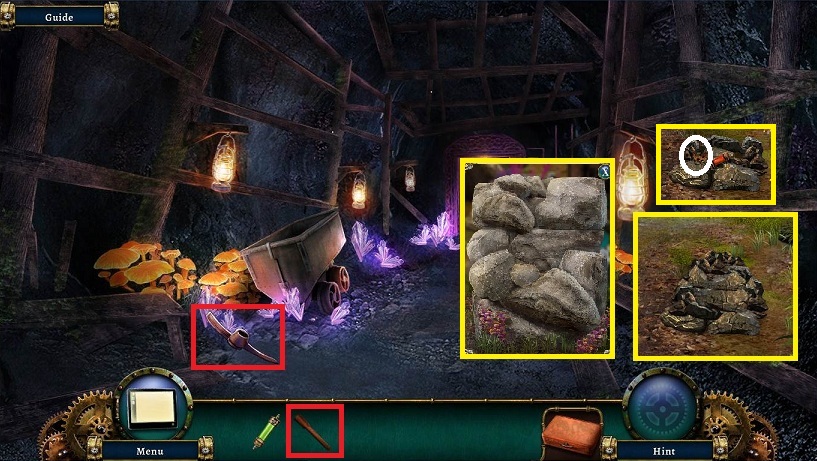
- Use the WOODEN HANDLE on the pickaxe head to get a PICKAXE
- Back up once
- Examine rock pile to the right
- Use the PICKAXE 3 times.
- Pick up BLUE TUBE AND MECHANICAL HEART
- Back up again
- Examine the rock pile
- Use the PICKAXE twice
- Pick up RED TUBE
- Pick up now exposed collectible
- Return through the elevator
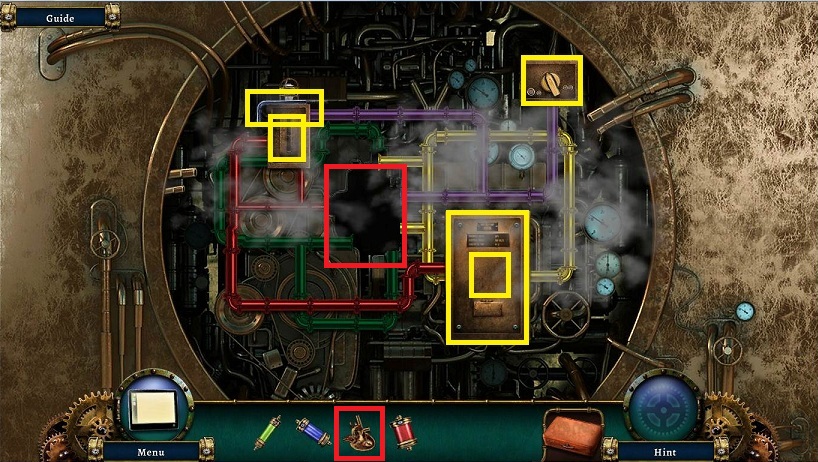
- Examine the mini-bot
- Enter the code that was on the panel on the box to the left
- The code is 80 clockwise, 25 counterclockwise, 55 clockwise.
- Place the MECHANICAL HEART in the center of the pipes
- Click on the knob at the upper right
- Use the allen wrench from top left on the panel at the bottom right (4 screws)
-
Use the lever in the open box on the switch at the upper left
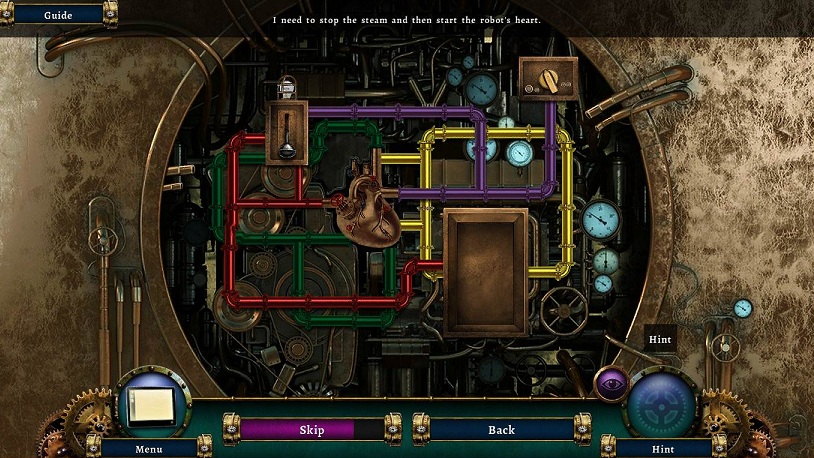
- Turn the tiles until they match up to have the different colored pipes connect
- Note that there are some tiles that just barely have an edge of pipe on them
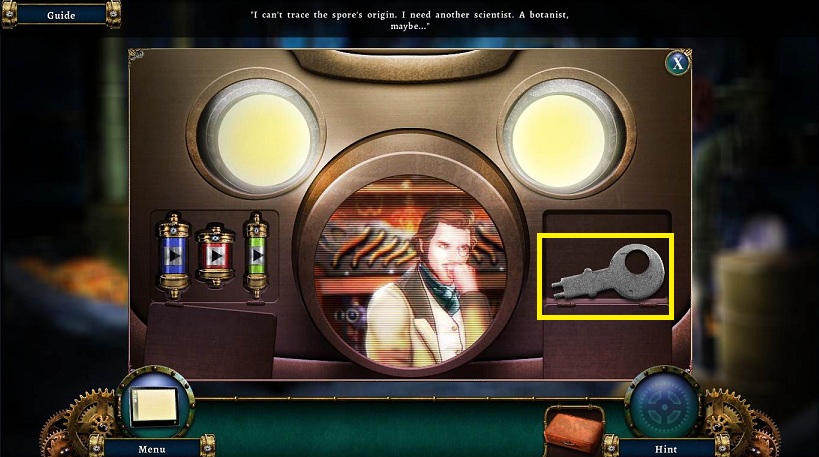
- Place the BLUE TUBE, RED TUBE, and GREEN TUBE one at a time and watch the monitor
- Pick up the KEY
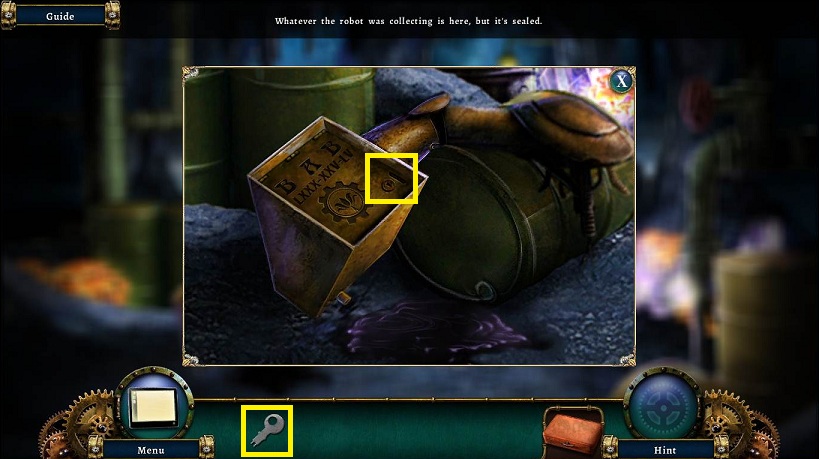
- Examine the barrel and box to the left
- Use the KEY in the lock
- Receive the PLATE
- Pick up the SPORE
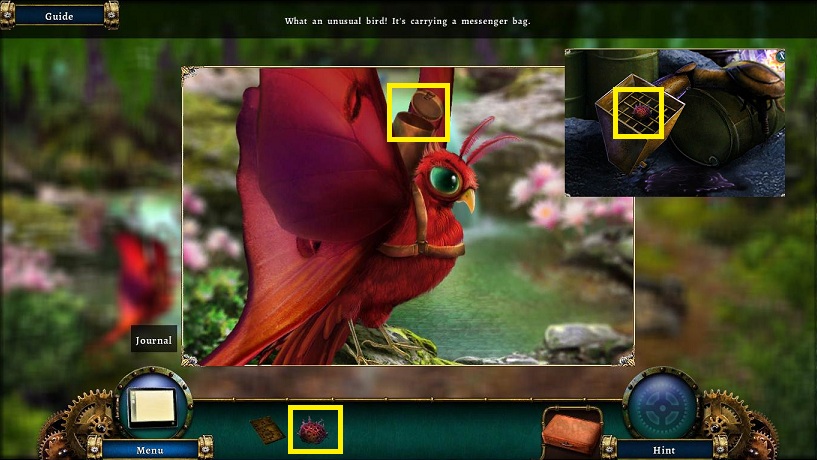
- Return to the watering hole
- Examine the red bird
- Place the SPORE in the container
- Watch cut scene to finish the chapter
Comments will load when you reach this part of the walkthrough.