

Bonus Chapter: Epilogue
For Collector's Edition of the game only:
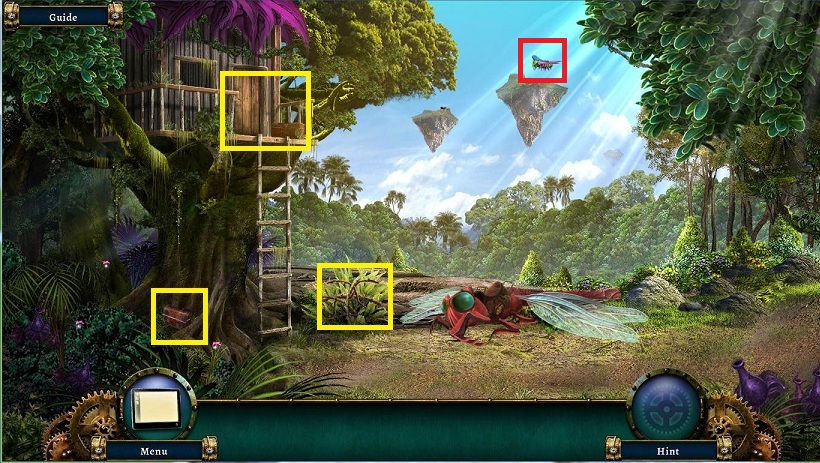
- Note that Eddie needs to be fed
- Note the box at the bottom of a tree needs a star shape
- Note the thorns in front of Eddie
- Note the MOTH
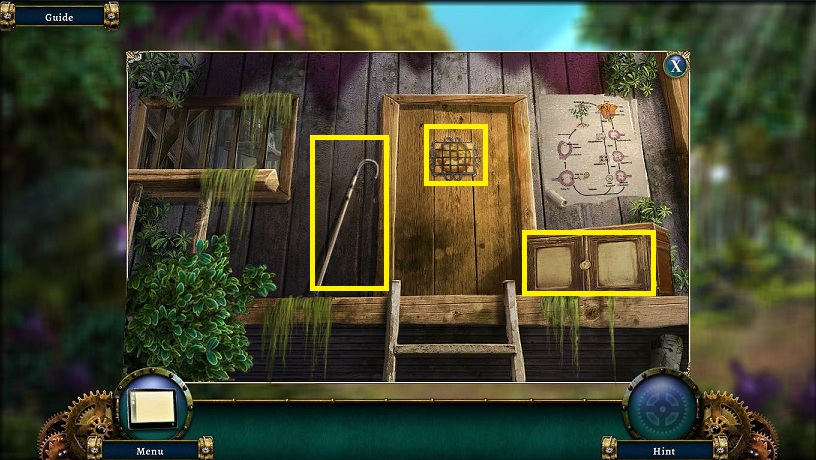
- Examine the tree house
- Pick up the WALKING STICK
- Note the door is missing a piece
- Note the locked chest
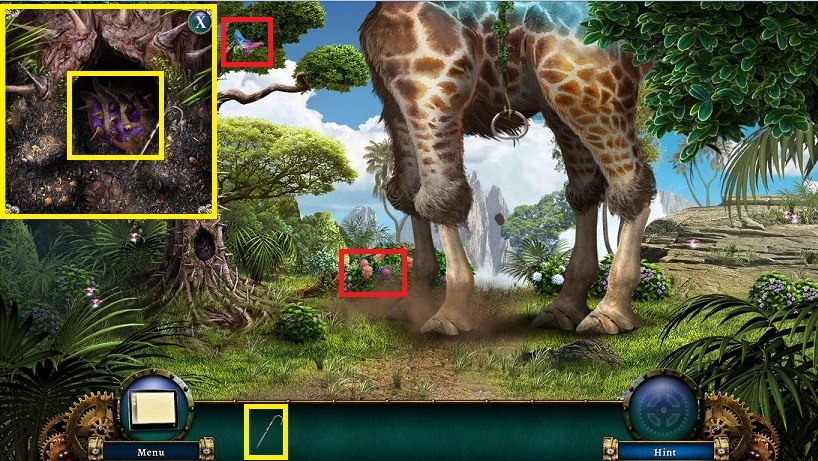
- Head right
- Examine the hole in the tree
- Use the WALKING STICK 3 times and pick up TIGERFRUIT
- Note the MOTHS
- Examine the bushes in front of the ZEBRAFFE
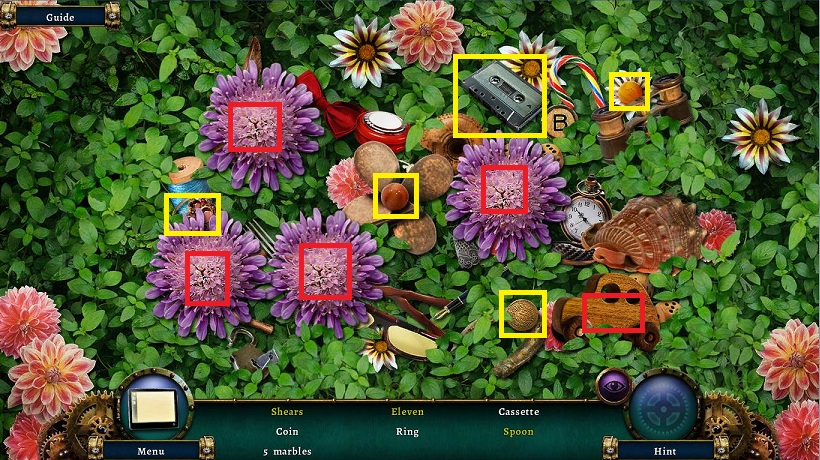
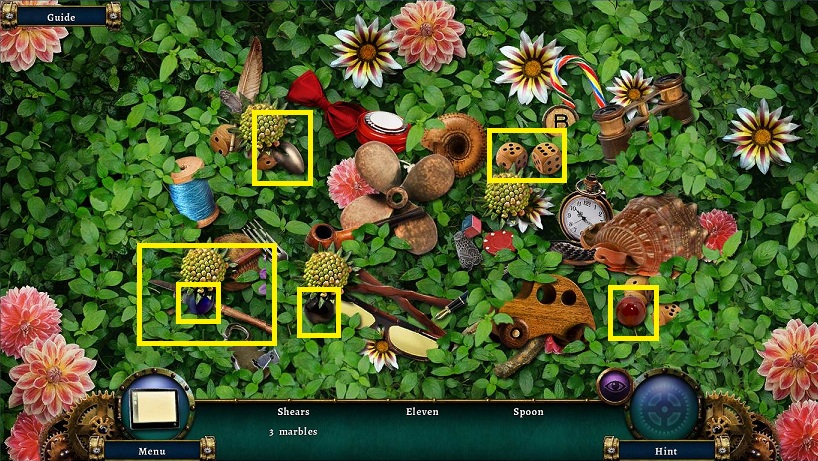
- Find the available objects
- Move the toy car
- Click on the 4 purple flowers to temporarily cause them to close
- Receive SHEARS
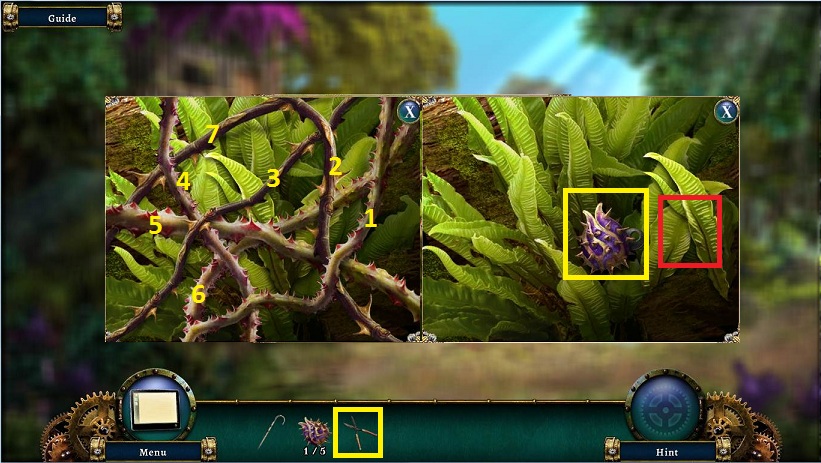
- Return and examine the thorns
- Use the SHEARS on the outermost vine and then on in
- Move the leaves
- Pick up TIGERFRUIT (2/5)
- Pick CHEST KEY
- Examine tree house
- Use CHEST KEY on chest
- Pick up ROPE and NET
- Use NET on the MOTH (1/5)
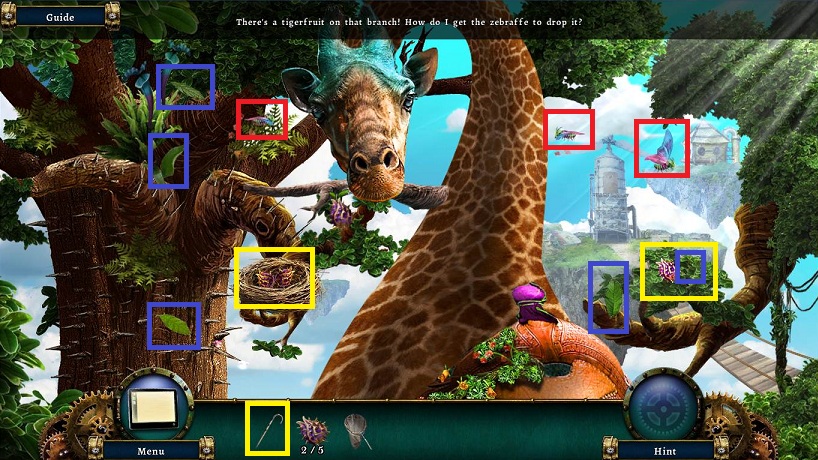
- Go right
- Use NET on the MOTH (2/5)
- Use ROPE on zebraffe rung
- Climb up
- Pet the zebraffe; you need to make a trade for leaves to get the TIGERFRUIT
- Use WALKING STICK on the nest 3 times and receive TIGERFRUIT (2/5)
- Use NET on 3 MOTHS (3/5, 4/5, 5/5)
- Pick up TIGERFRUIT (3/5) on the right and then the LEAF (1/5) next to it
- Pick up 4 more LEAVES
- Give the zebraffe the LEAVES
- Go back
- Pick up TIGERFRUIT (4/5) on the ground
- Examine the nest
- Give the baby bird the MOTHS
- Pick up the TIGERFRUIT (5/5)
- Back up
- Give Eddie the TIGERFRUIT
- Pick up the TOKEN he drops
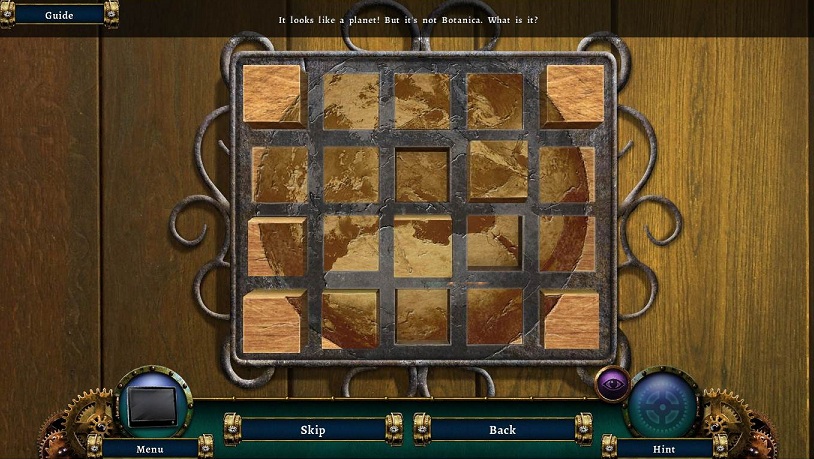
.
- Examine the tree house door
- Use the TOKEN on the door
- Click on the blocks to raise and lower them to make a plant
- Note the very faint outline on the metal grids; you want to match those
- You can also see the valleys to match up
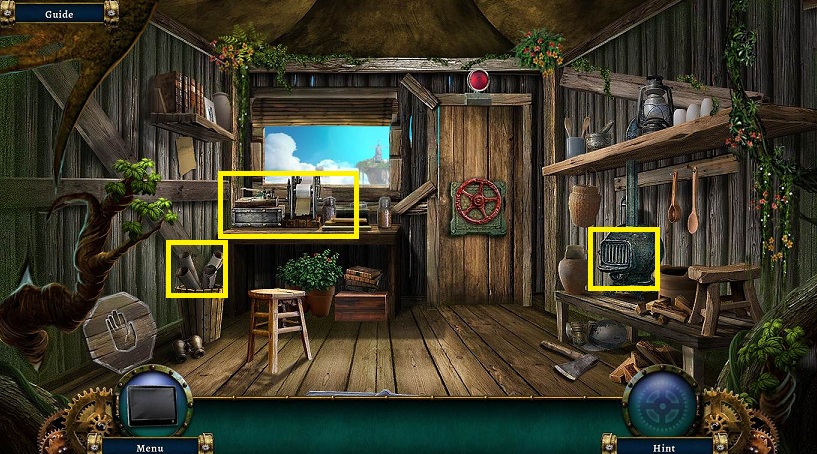
- Enter shed
- Examine the basket to the left
- Click to remove all the papers
- Pick up the STAR
- Back up
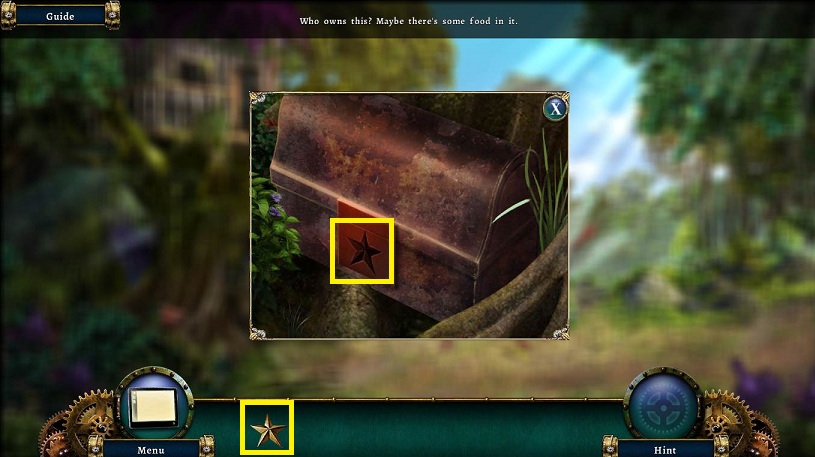
- Examine lunchbox
- Place the STAR and click on it
- Pick up the CODE BOOK and AWL
- Go back into the shed
- Examine the cook stove
- Use the AWL on the hinge
- Pick up the SLATS
- Examine the back table
- Click on the cover and click again
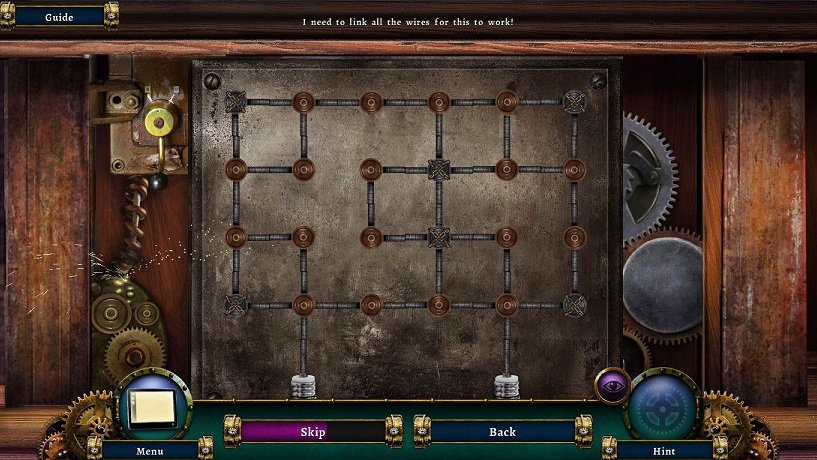
- Trade the tiles around until you get all the wires connecting
- Note you can start with the edge pieces first
- Place the CODE BOOK
- Click on the machine
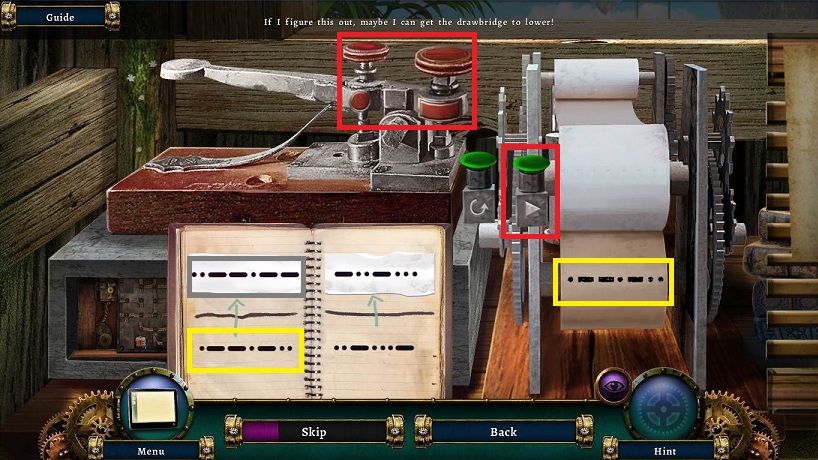
- Click on the dot or dash button to match the code shown
- Use the redo button if you make a mistake
- Press the play button and you will receive a reply
- Flip through the code book to find the matching code on the bottom of the page
- Enter in the top code and enter
- Do this 3 times
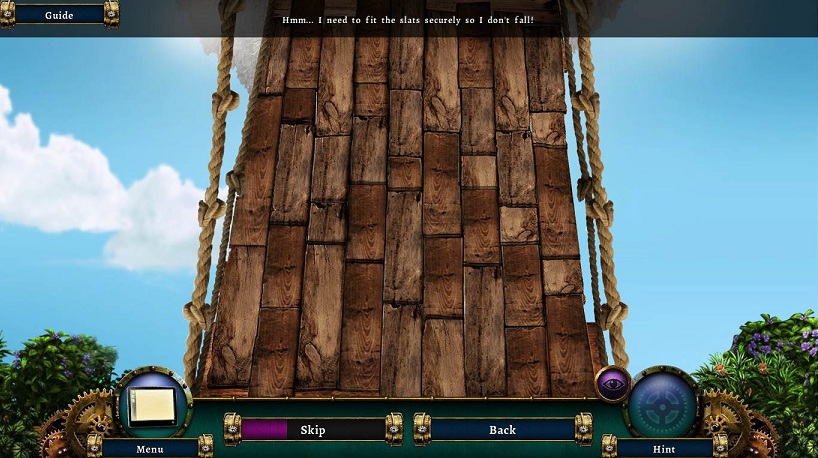
- Turn the red door handle
- Place the SLATS on the bridge
- Place the individual slats in the correct spot
- They will click into place if they are in the correct place
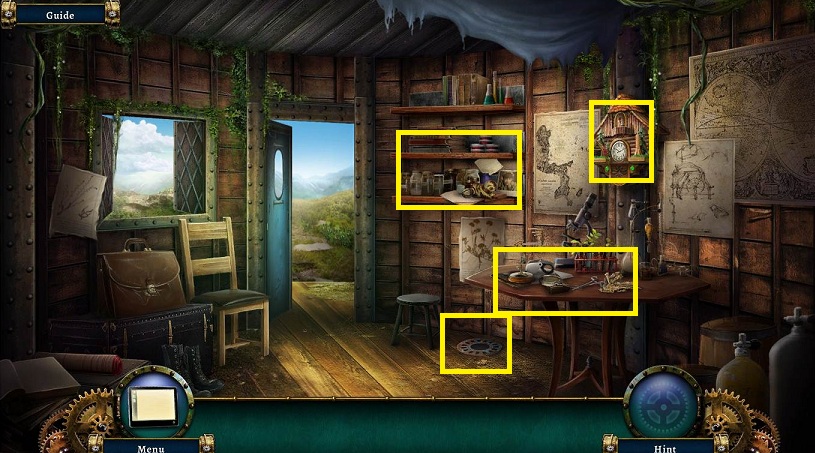
- Head across the bridge
- Examine the table
- Pick up the BATTERY (1/2)
- Examine the clock
- Examine the drain in the floor
- Examine the bookshelf
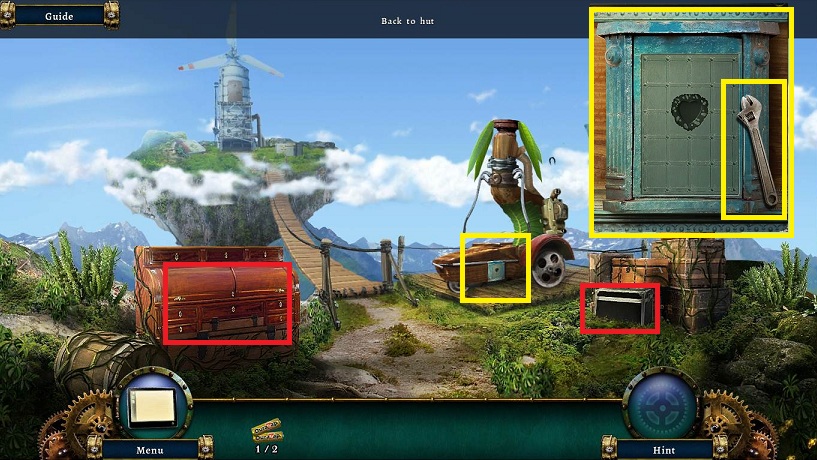
- Head out
- Examine the flying machine
- Pick up WRENCH
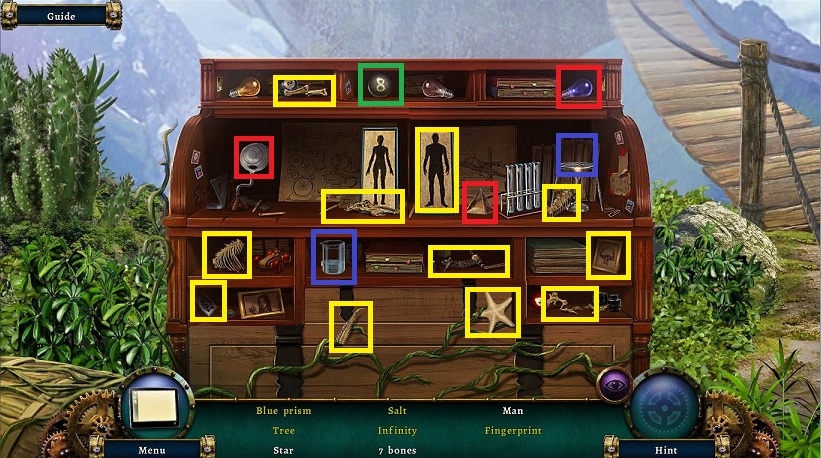
- Examine the desk
- Click on the various drawers to find all the objects
- Blue prism: Place the blue light bulb into the lamp. Place the glass prism on the blue light.
- Salt: Place beaker of solution on top of the burner
- Infinity: Click on the 8 ball to turn it on its side.
- Receive SMALL BONES
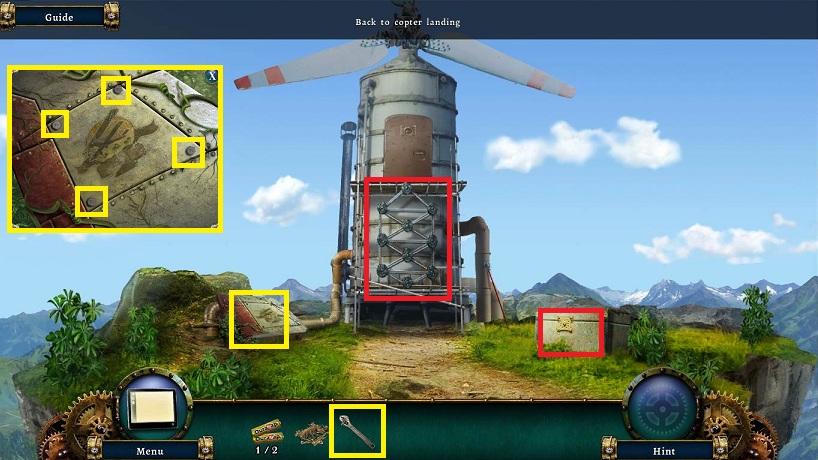
- Cross the bridge
- Examine panel to the left
- Use the WRENCH on the 4 nuts
- Pick up the SLIDE
- Pick up HOOKED SPEAR at the side of the turbine
- Note the metal chest
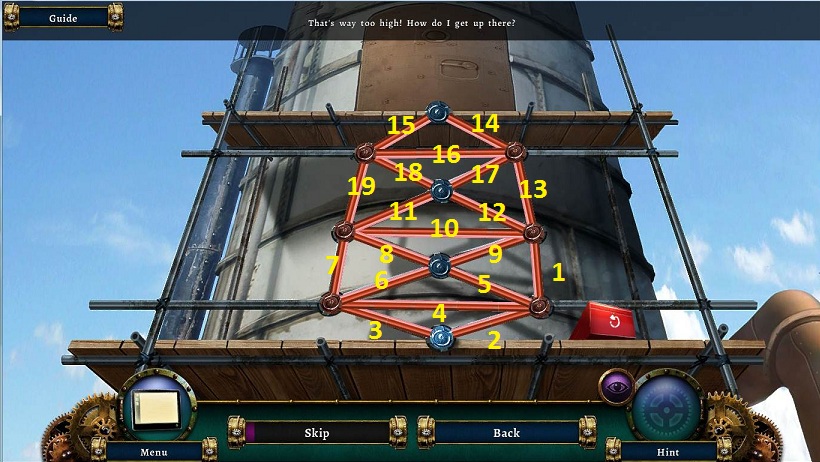
- Examine turbine
- Click on the circles to turn all the red lines to green without duplication
- You can cross over the lines.
- One solution is above. There are many more.
- Open the door
- Pick up the BATTERY (2/2)
- Note it's dark.
- Back up twice
- Examine the table
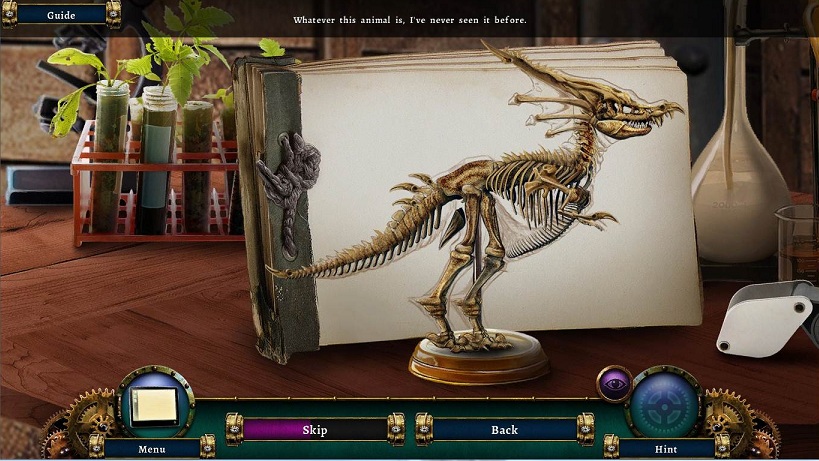
- Place the BONES on the toy man
- Arrange the bones to make a dinosaur according to the drawing
- Pick up the TOY WOODCUTTER
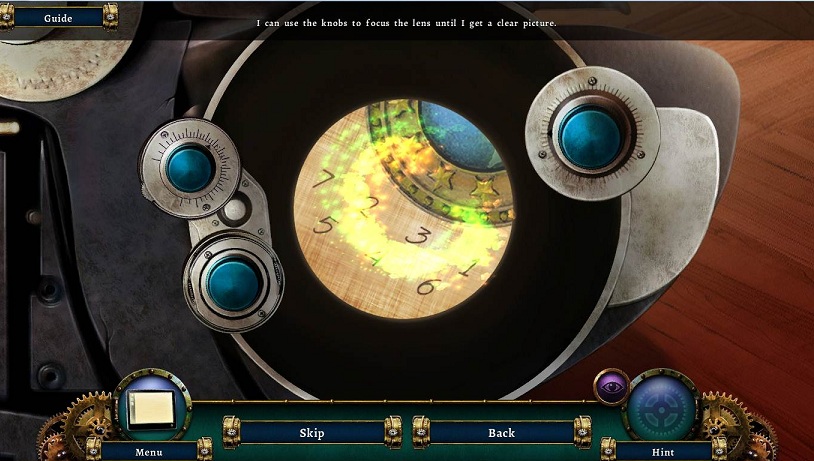
- Use the SLIDE on the microscope
- Use the 3 dials to bring the numbers into focus
- From the start it is twice for each one, but you probably did not count so keep at it.
- You can match 2 to get a clear number and then try the third. If that does not work, click to match 2 in another fashion and keep trying
- Receive a NUMBER CODE
- Examine the grate
- Use the HOOKED SPEAR to pick up the METAL KEY
- Go forward once
- Examine the crate to the right
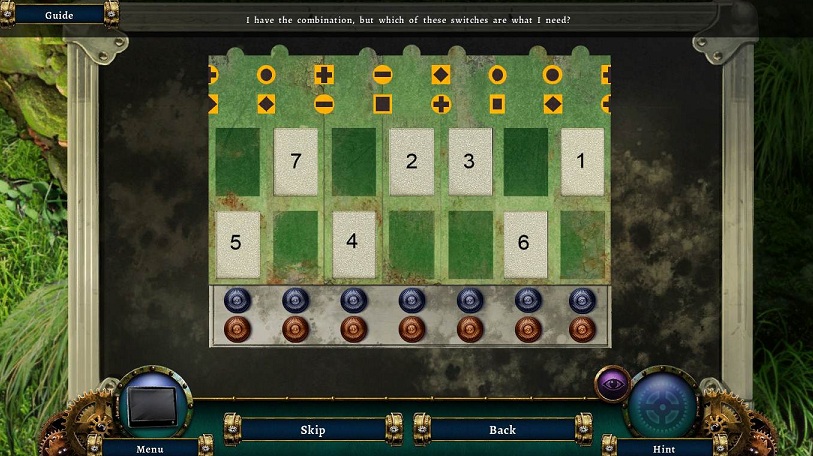
- Use the NUMBER CODE on the lock
- First you need to get 4 holes on the top and 3 holes on the bottom (this is not alternating)
- Second you need to do this while matching the yellow and black patterns above
- Third, click the blue buttons to get the correct top numbers visible in the window and the red button to get the bottom numbers visible
- 7 2 3 1
- 5 4 6
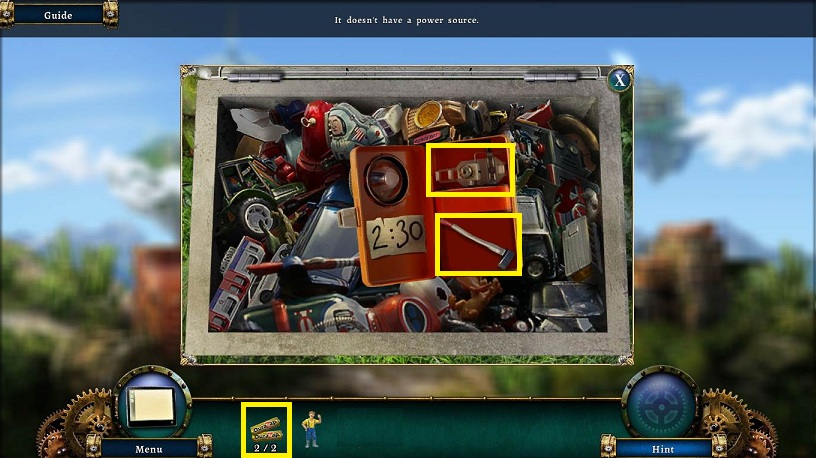
- Click on the flashlight
- Examine the time setting, which goes in the journal
- Pick up the TOY AXE
- Place the BATTERIES
- Close the flashlight and pick it up
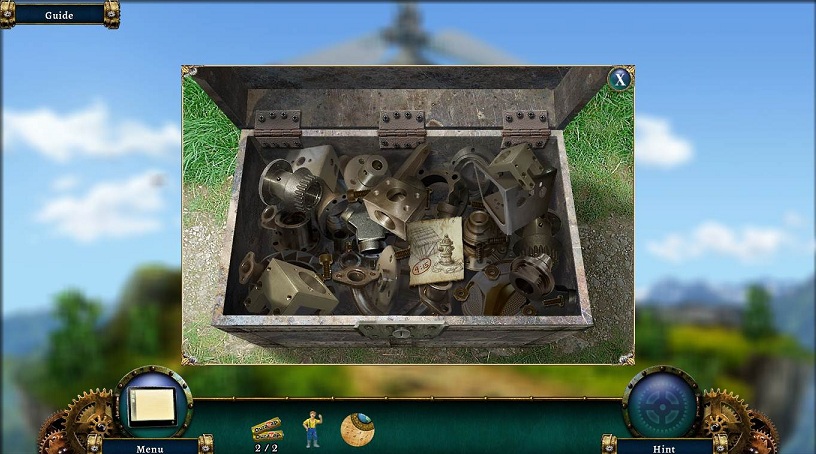
- Go forward once
- Examine the metal chest
- Use the METAL KEY
- Pick up a time setting, which goes in the journal
- Pick up TOY DOG
- Back up twice
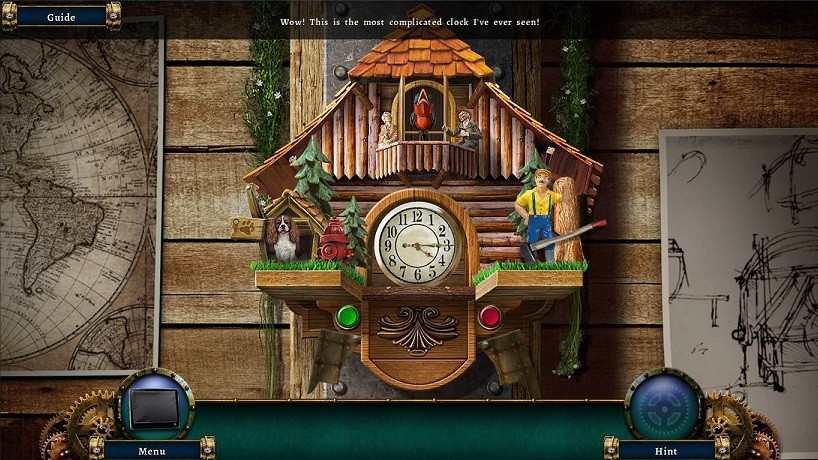
- Examine the clock
- Place the WOODCUTTER on the right
- Place the AXE in his hand
- Set the time from where you got the AXE (2:30
- The green button turns the minute hand
- The red button turns the hour hand
- Place the TOY DOG on the left
- Set the clock to 4:15
- Pick up the now exposed WINDER
- Examine the shelf
- Place the WINDER in the cat and click on it
- Note the time on the cat's paw
- Pick up the TOY BIRD
- Return to the clock
- Place the TOY BIRD
- Set the time to 9:10
- Pick up the METAL SHAPE
- Go forward once
- Examine the copter
- Place the METAL SHAPE
- Pick up the TURBINE MANUAL
- Go forward to the turbine
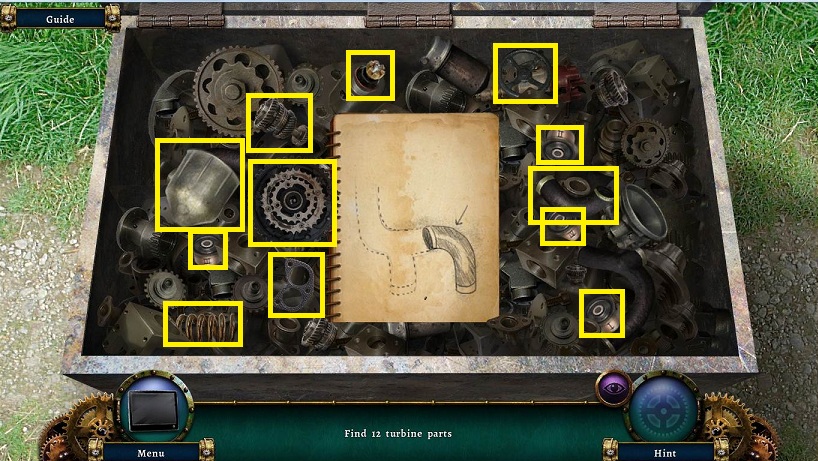
- Examine the crate with the parts
- Use the TURBINE MANUAL on the parts
- Find the matching part
- Click on the manual to turn the page and find the next parts
- Receive the TURBINE PARTS
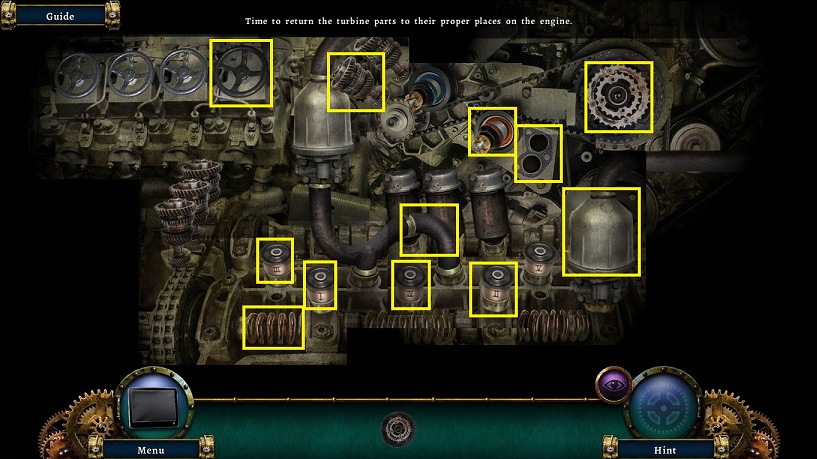
- Examine the turbine
- Use the FLASHLIGHT
- Place the parts in the correct place to fix the turbine
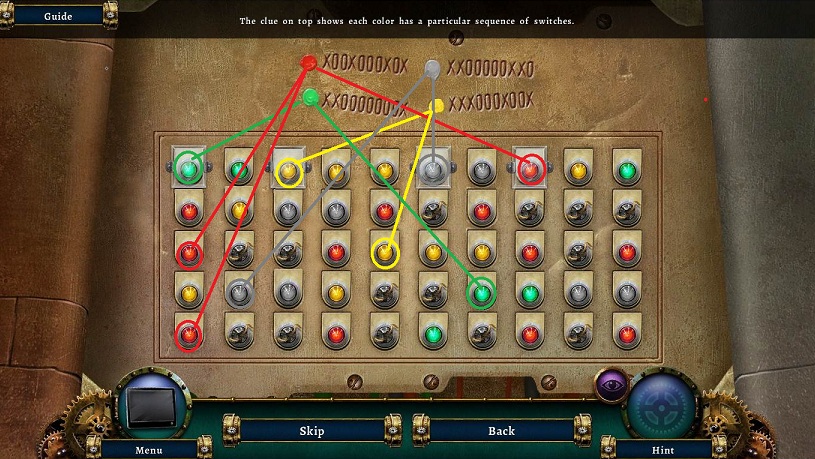
- Examine the panel to the left and click on it
- Your goal is to turn on the correct light in the correct order.
- With each color there is a pattern of X (on) and 0 (off).
- These patterns overlap with each other.
- There are some lights already fixed on.
- There are some unlit area that are fixed also.
- Start with green, then yellow in the first open lights after green, then gray, then red.
- On the 3rd line, iit's red, yellow, gray, green, and then red.
- See above for solution.
- Return to copter
- Flip the switch
- Ride the copter to finish the game
Comments will load when you reach this part of the walkthrough.