
Chapter One: The Cliff
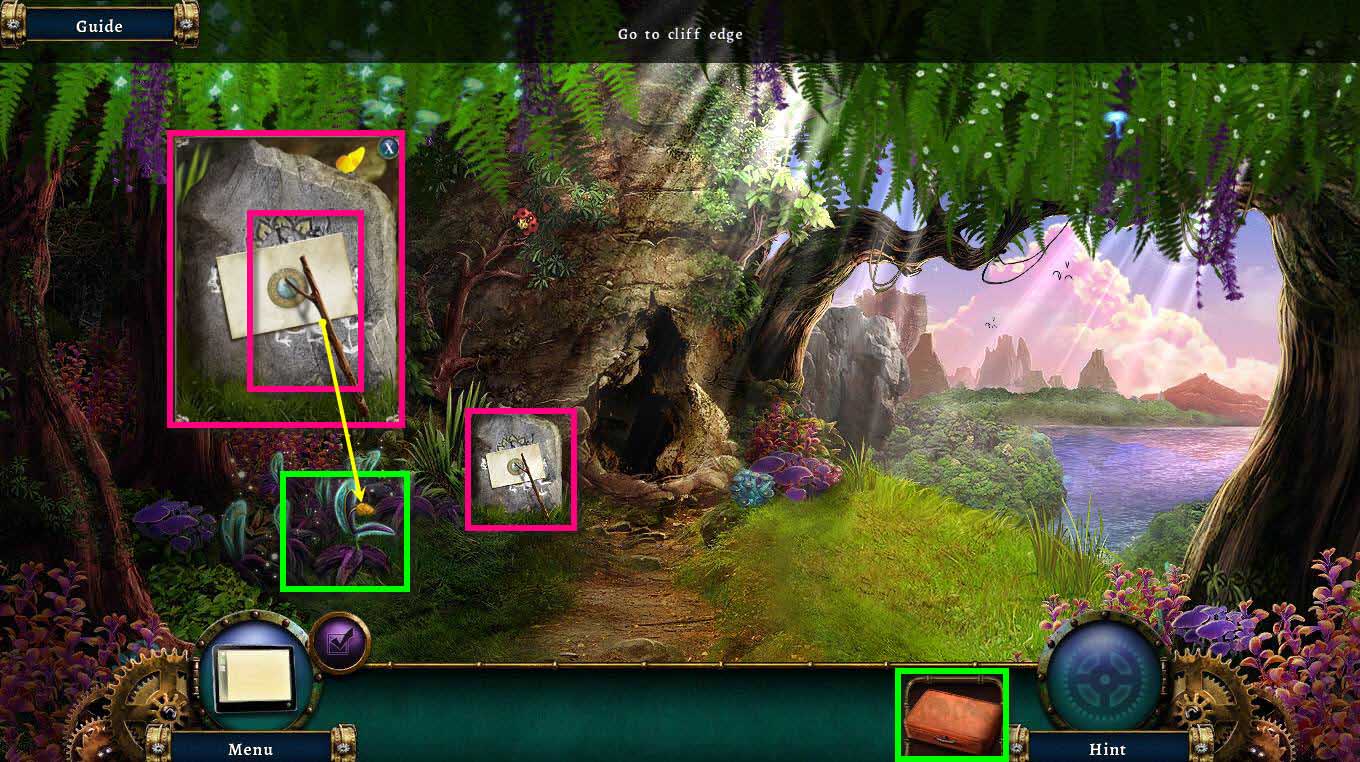
- Click on the stone to zoom in.
- Take the Note an the STICK.
- Click on the plant with the yellow flower to zoom in.
- Use the STICK on the plant to hold it open.
- Take the strange flower.
-
Click on the botanist kit to start a mini-game.
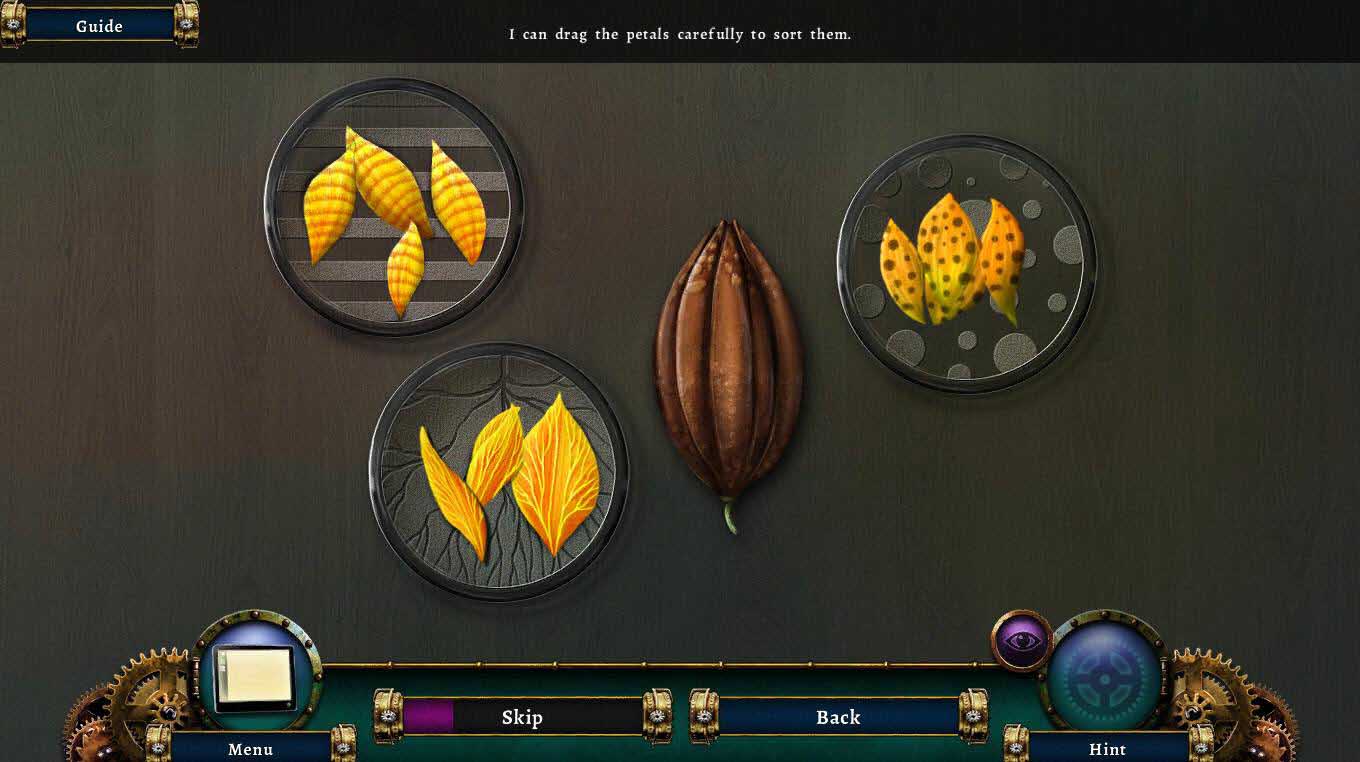
- The goal of the game is to move all the leaves to the three dishes.
- The spotted leaves go to the spotted dish.
- The striped leaves go to the striped dish.
- The leaves with the root pattern go to that dish.
- See the screenshot above for the solution.
- Once you are done, you will receive the STRIPED PETALS.
-
Go to the Cliff Edge to the right.
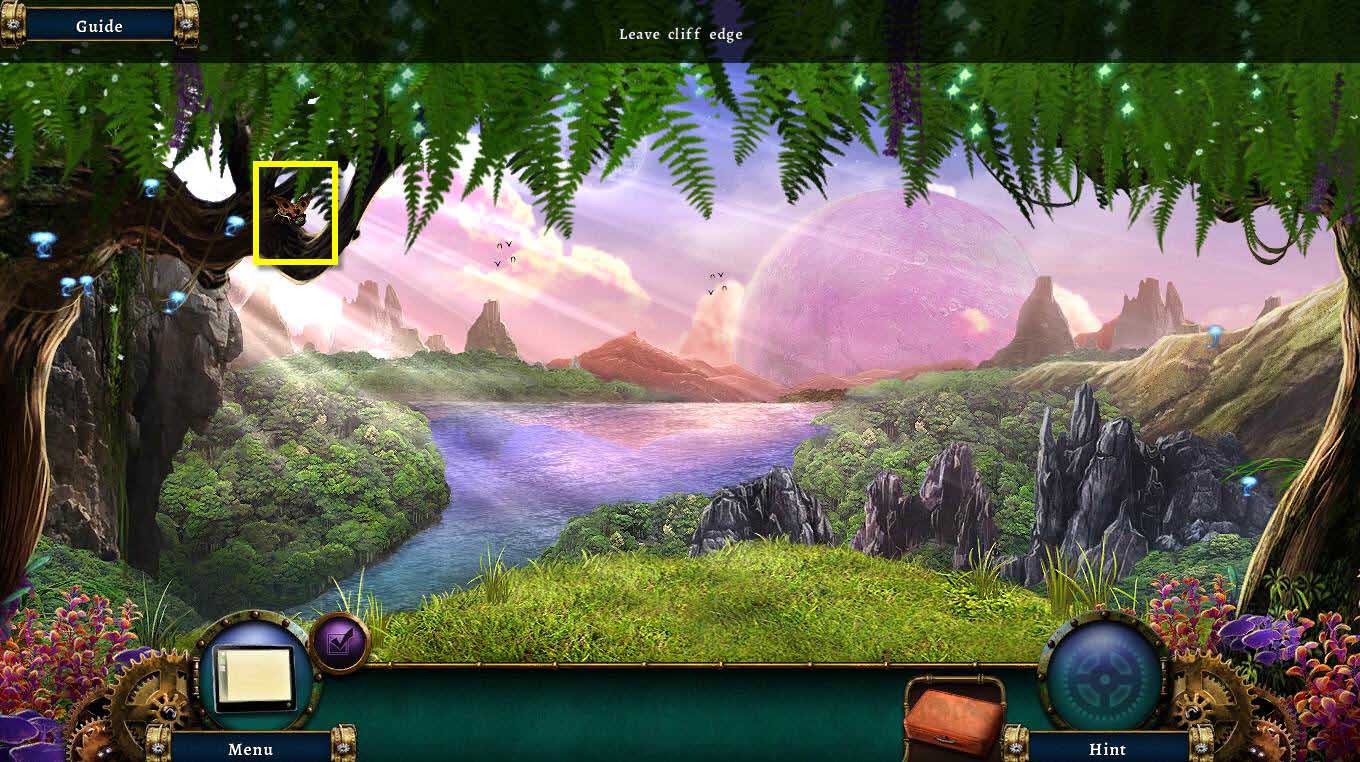
- Click on the collectible in the tree to take it.
-
Go back one screen.
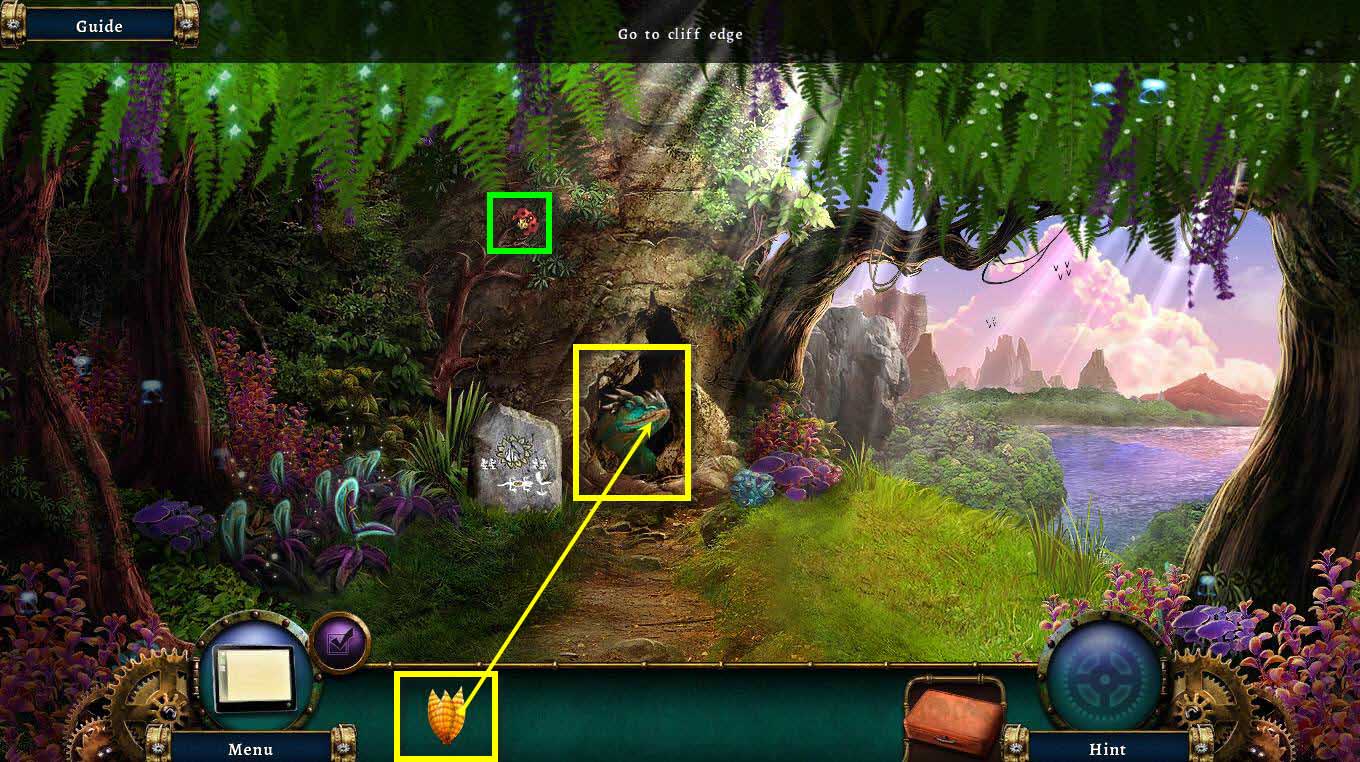
- Click on the collectible bug to take it.
- Click on the lizard to zoom in.
- Use the STRIPED PETALS on the lizard.
-
Watch the cutscene.
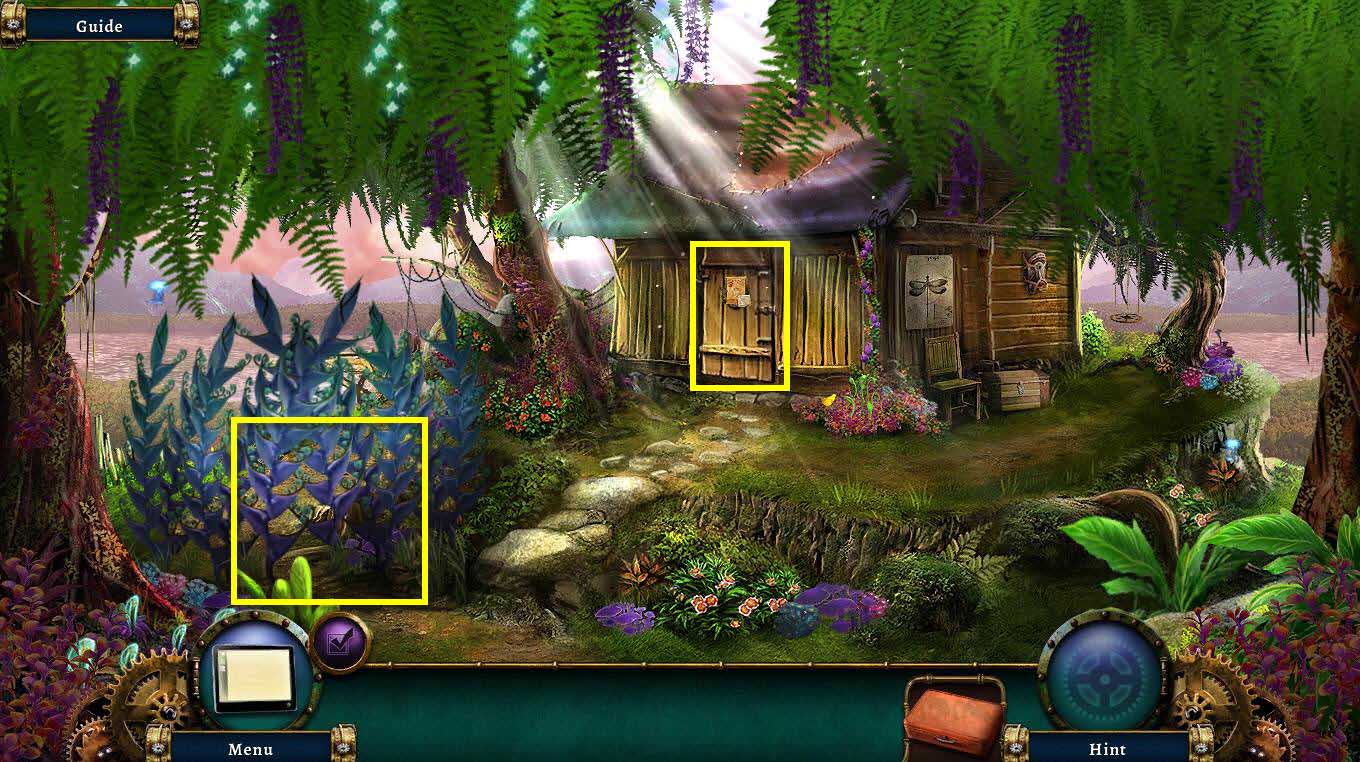
- Click on the purple plants on the left to zoom in.
- Click on the note on the ground to read it.
- Click on the door to zoom in.
- Take the ID CARD.
- Click on the arrow to unfurl the note.
- Take the note.
-
Go to the right to the porch.
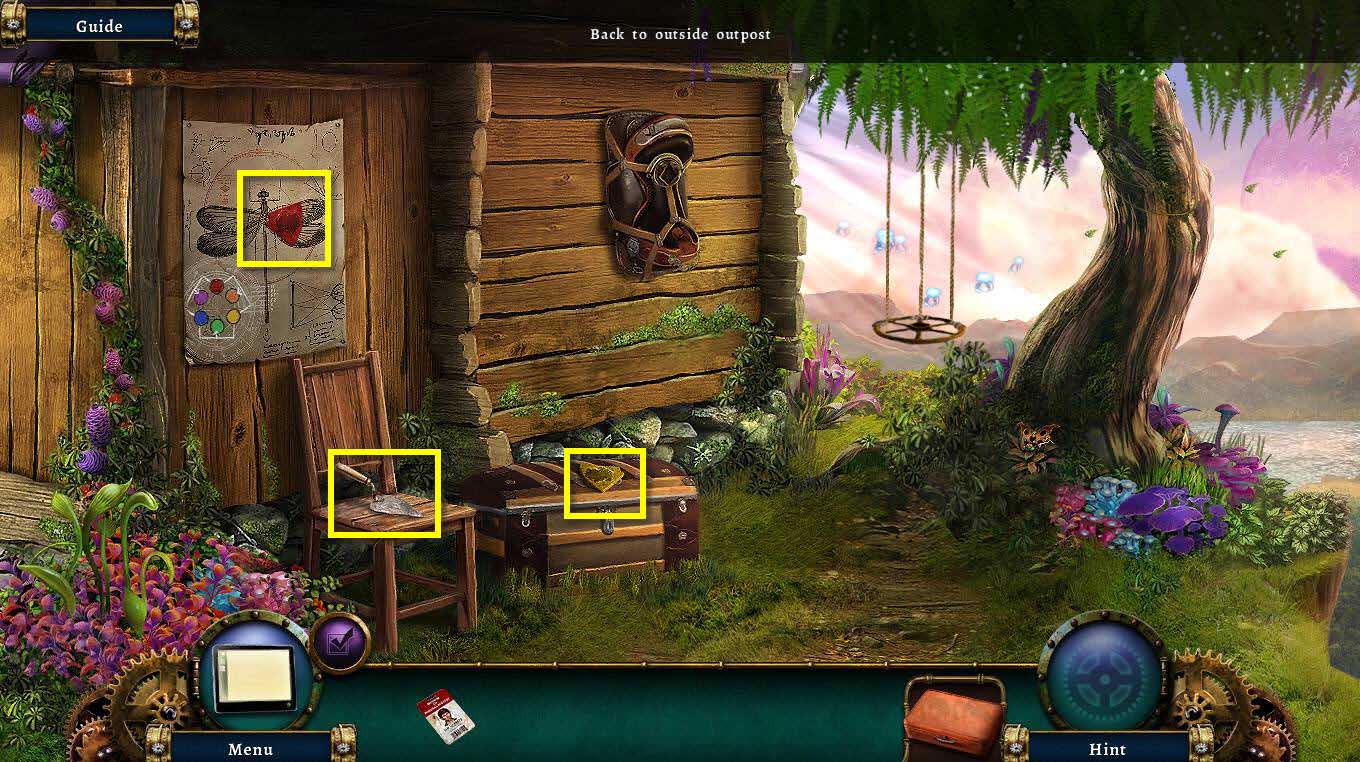
- Click to zoom in on the chest.
- Take the YELLOW SHAPE.
- Click to zoom in on the poster.
- Take the RED SHAPE.
- Take the TROWEL.
-
Go back one screen.
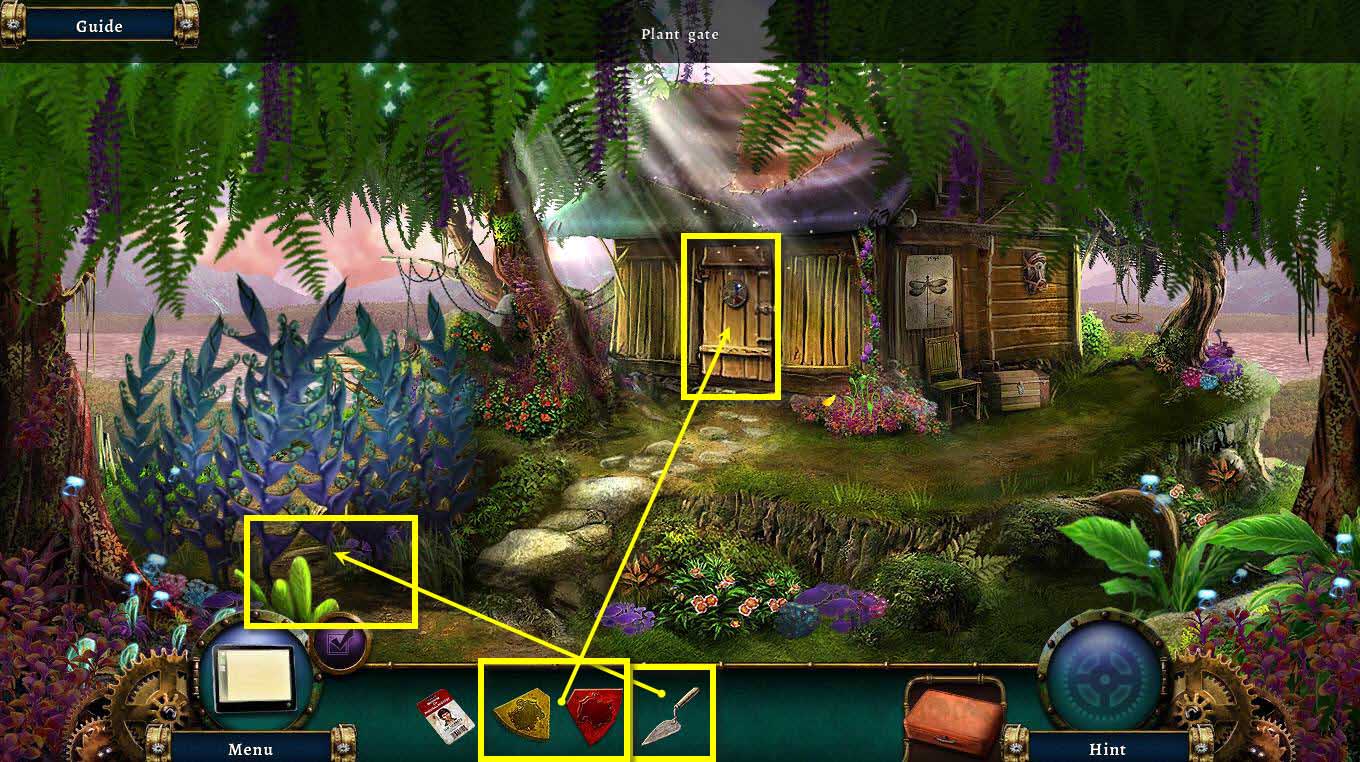
- Click to zoom in on the plant gate.
- Use the TROWEL on the dirt mound a few times.
- Take the BLUE SHAPE.
- Click on the door to zoom in.
- Use the RED, YELLOW, and BLUE SHAPE on the door.
-
This will start a mini-game.
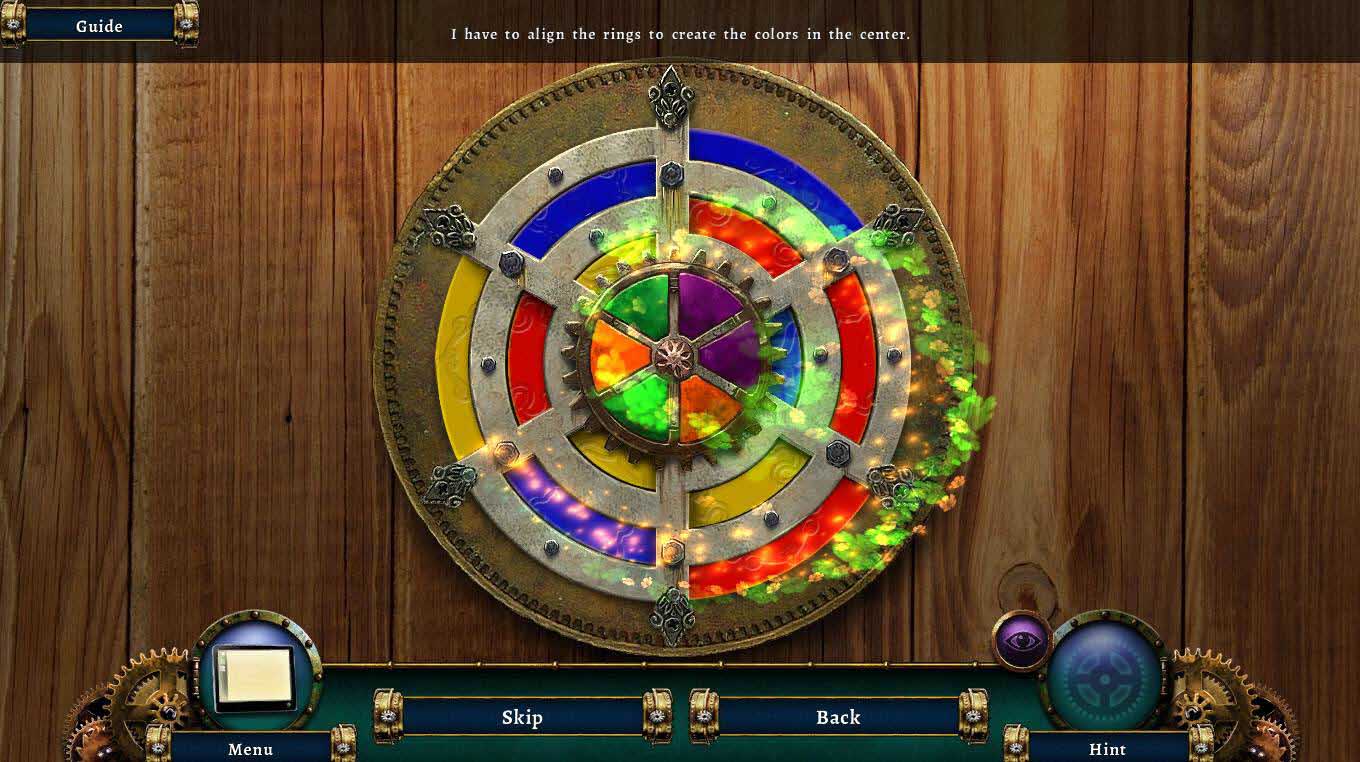
- The goal of the game to get all of the colors aligned correctly so they form the right color.
- Red and blue make purple.
- Red and yellow make orange.
- Blue and yellow make green.
- See the screenshot for the solution.
-
Go into the abandoned outpost.
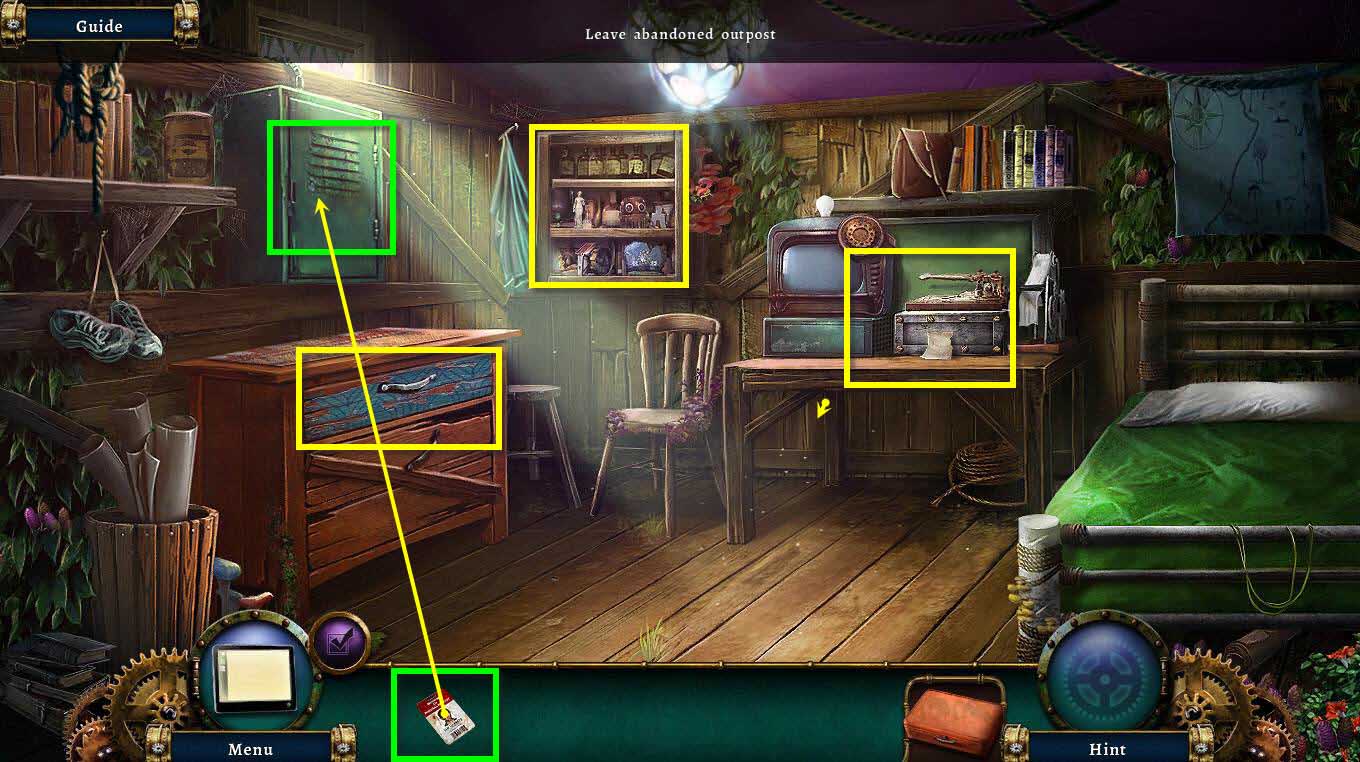
- Click to zoom in on the telegraph machine.
- Take the Note.
- Click on the dresser on the left to zoom in.
- Click to pull the drawer open.
- Click on the note and turn the pages to read it.
- Take the RUBBER GLOVE.
- Click on the Control box to zoom in.
- Use the ID CARD to jimmy it open.
- Take the FEATHER DUSTER.
- Click on the shelf to zoom in and note the 4 artifacts.
-
Go back one screen.
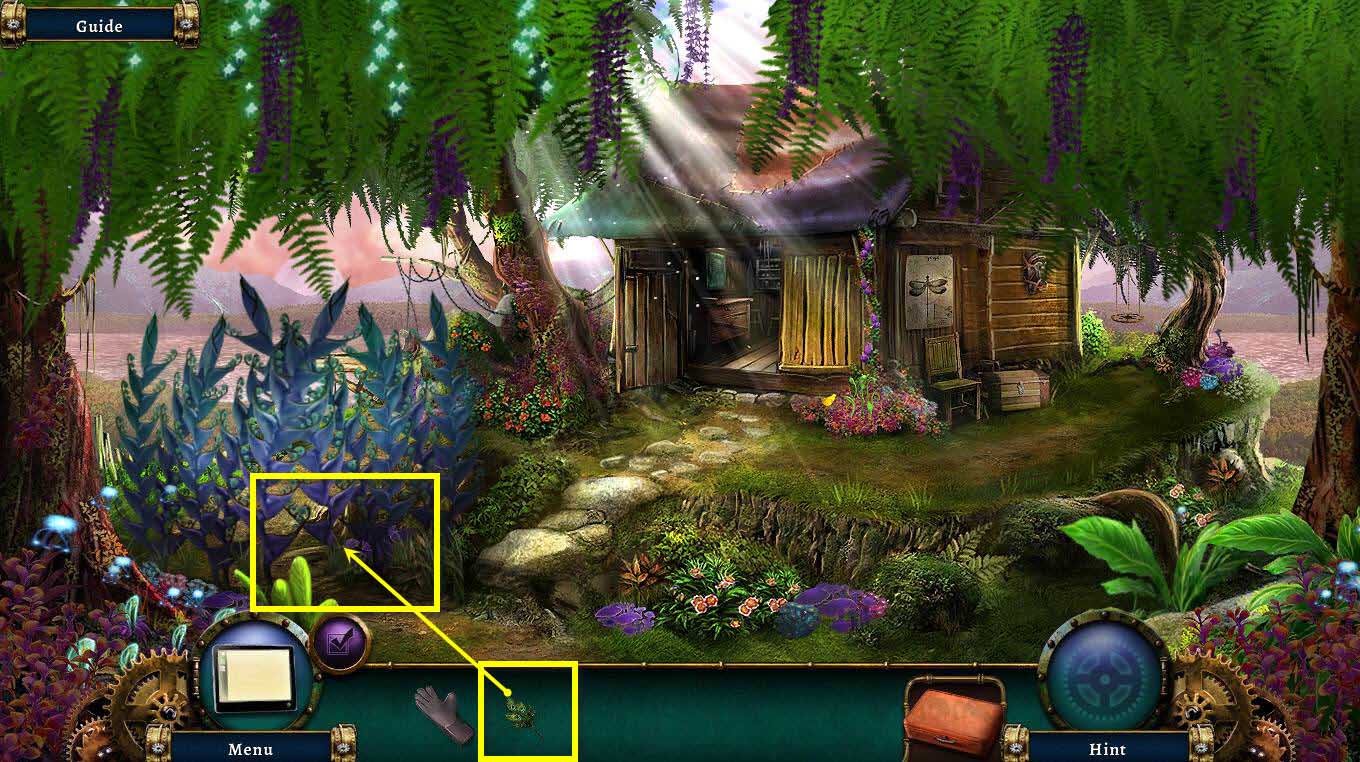
- Click on the plants to zoom in.
- Use the FEATHER DUSTER on the plants.
-
Go to the landing pad.
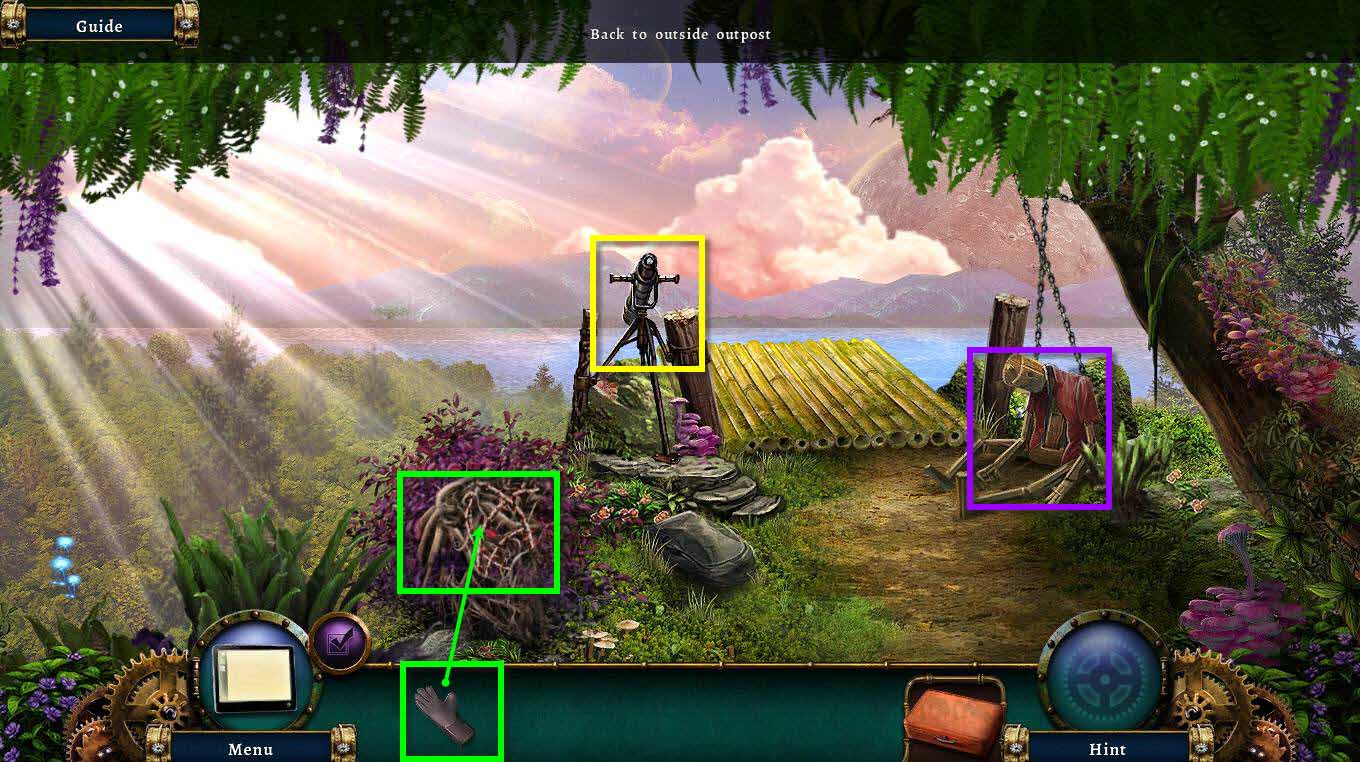
- Click on the telescope to look through it and see Ian.
- Click on the thorny bush to zoom in.
- Use the RUBBER GLOVE on the bush to get the BUTTON.
- Click on the dummy on the right to zoom in.
- Click on the compartment to open it.
- Take the SMALL KEY.
-
Go back one screen and then to the right to the porch again.
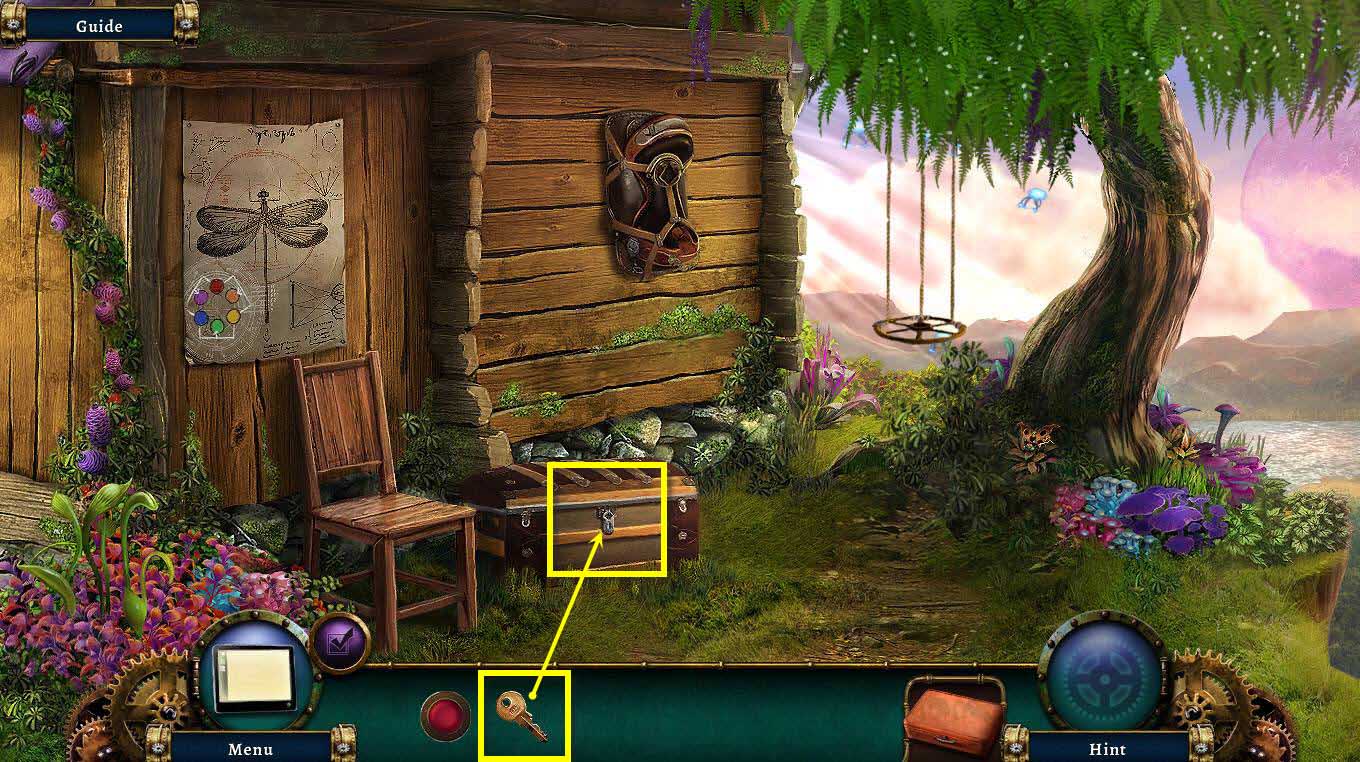
- Click on the chest to zoom in.
- Use the SMALL KEY on the chest to unlock it.
-
This will start a hidden object scene.
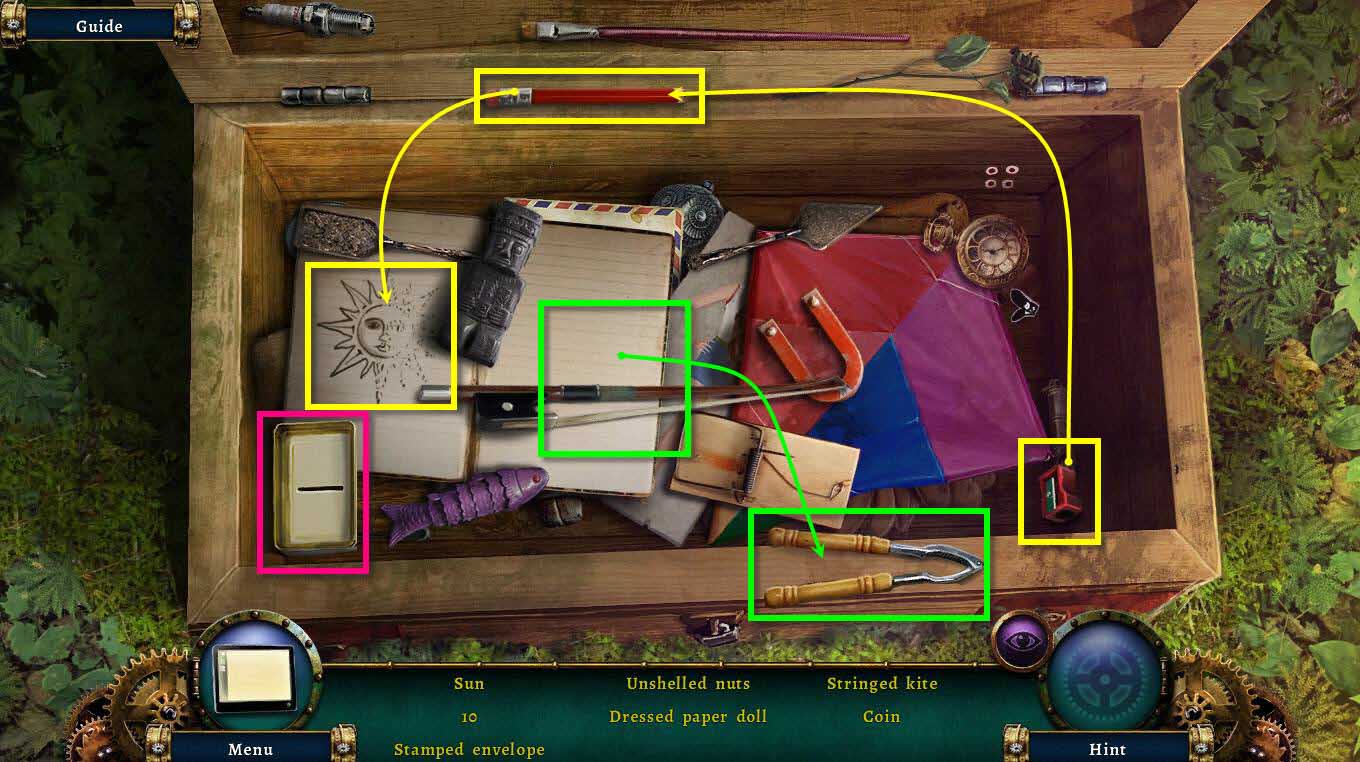
- Find all the items on the list. Each item requires an extra step or two to find it.
- Sun: Use the pencil sharpener on the pencil. Use the pencil on the half sun.
- Unshelled Nuts: Use the shelled nuts that were under the sun notebook on the nut cracker.
-
Coin: Click on the box in the bottom left to open it and find the coin.
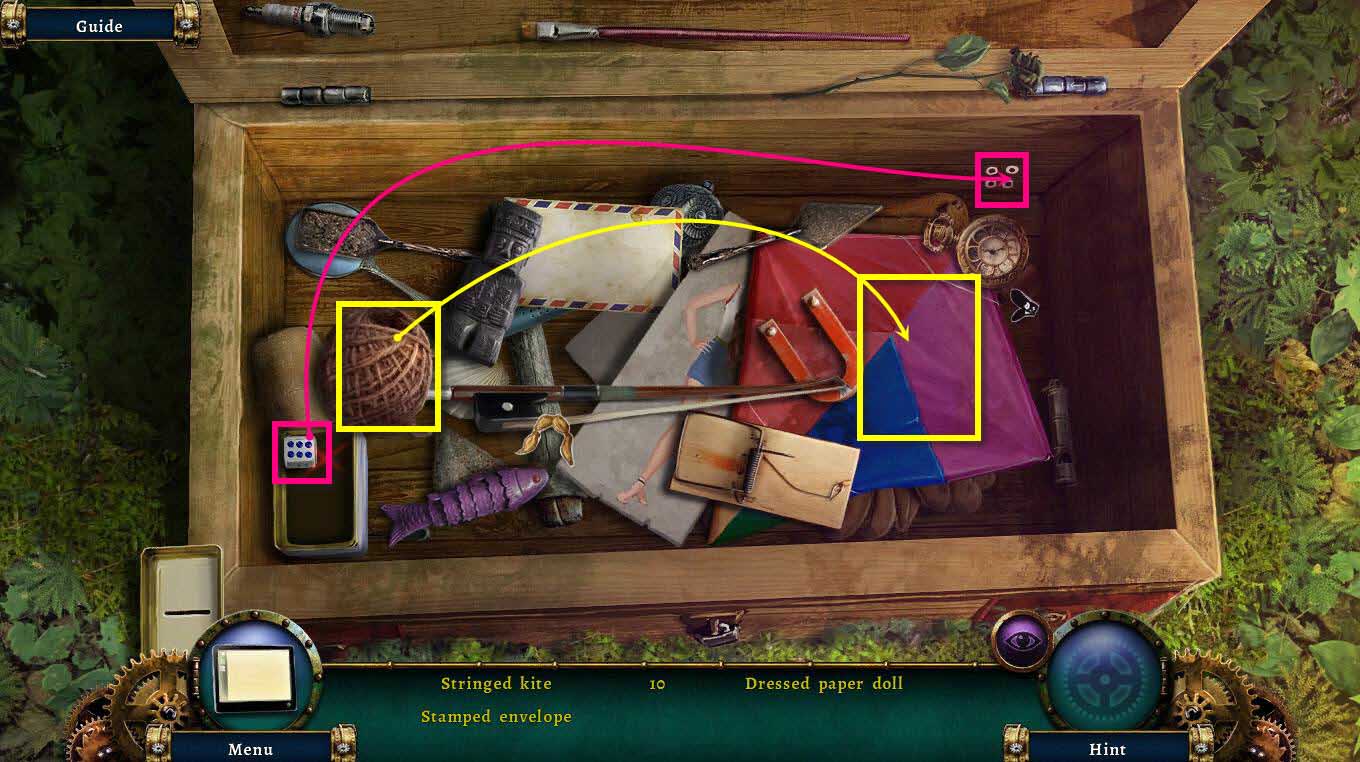
- 10: Move the die near the 4 spots on the chest.
-
Stringed Kite: Use the string on the kite.
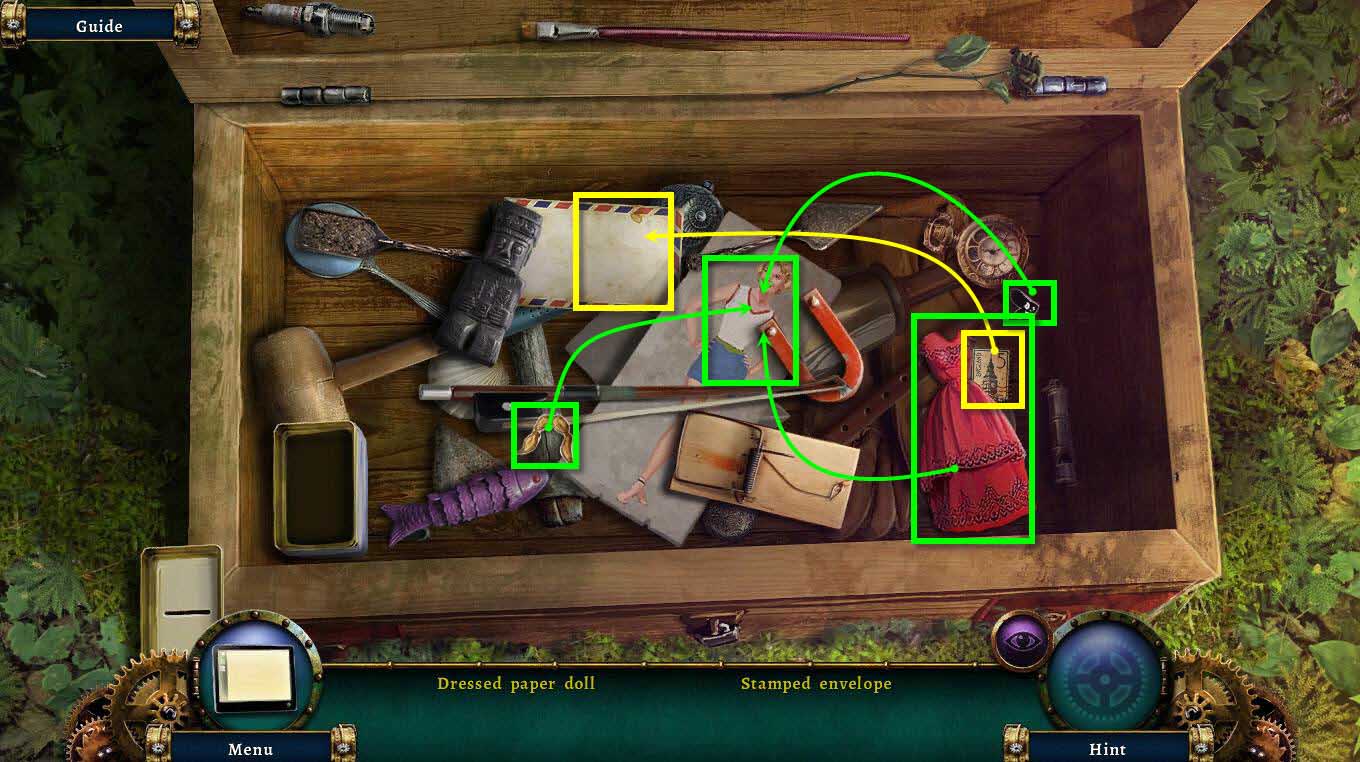
- Stamped envelope: Use the stamp on the envelope.
- Dressed Paper Doll: Use the shoes, the wig, and the dress on the doll.
- You will receive the COIN.
-
Go back to inside the outpost.
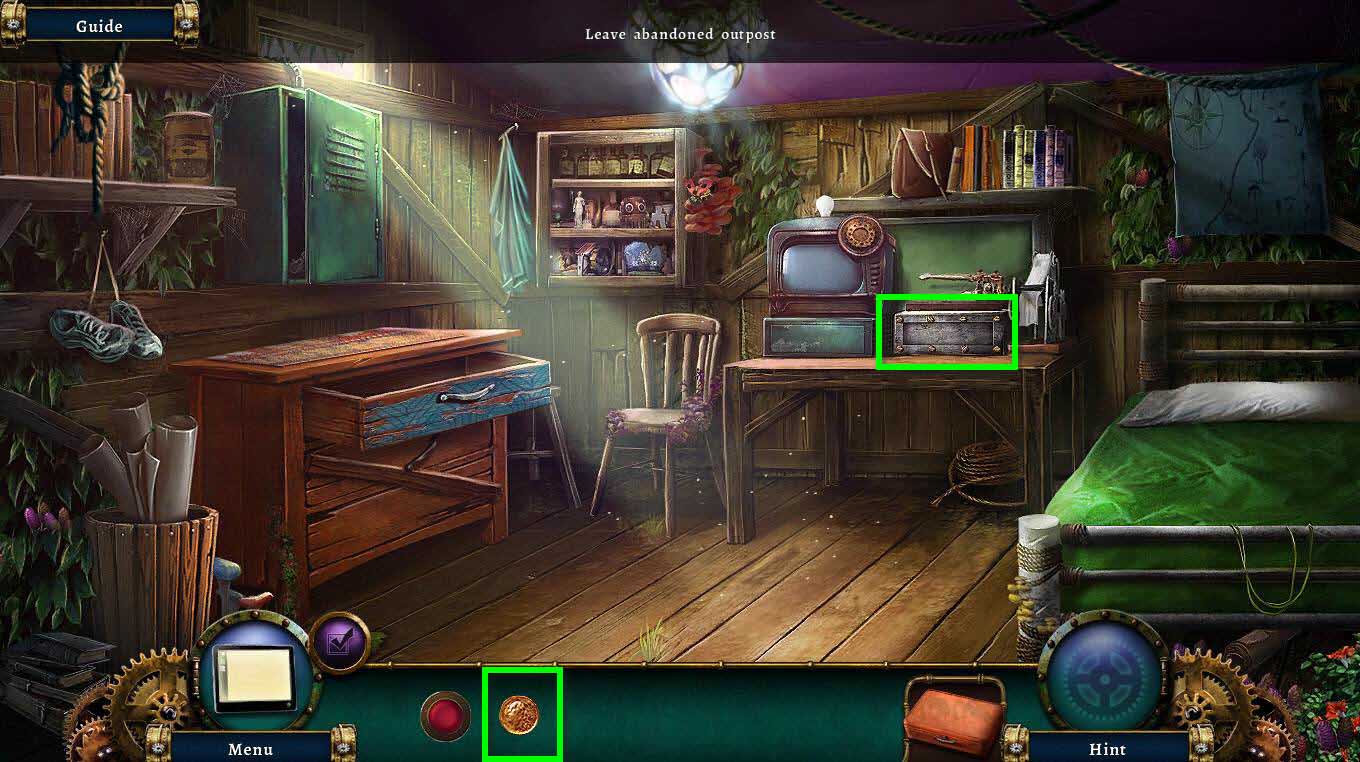
- Click to zoom in on the telegraph machine.
- Use the COIN on each of the 8 screws to remove them.
-
Click on the panel to start a mini game.
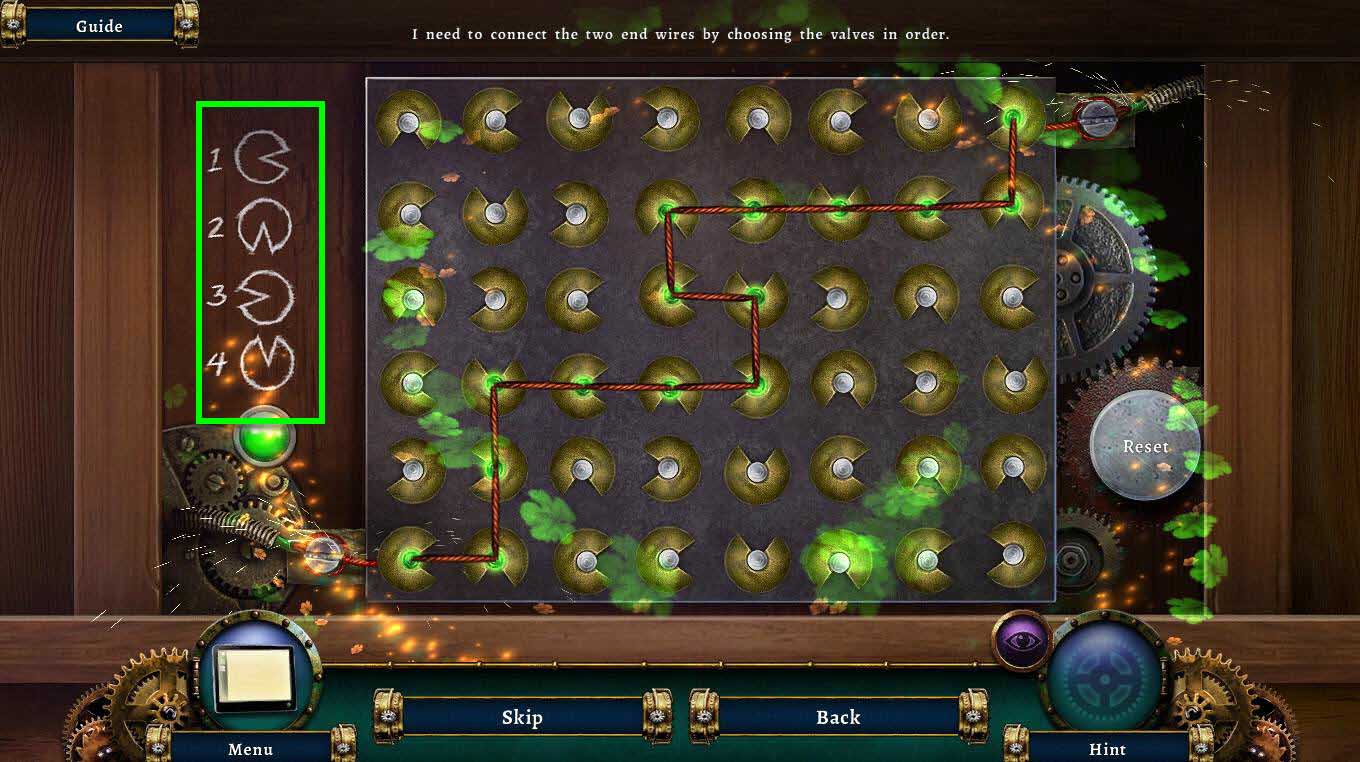
- The goal of the game is to connect the wires using only the amount of part designated on the left.
-
See the screenshot for the solution.
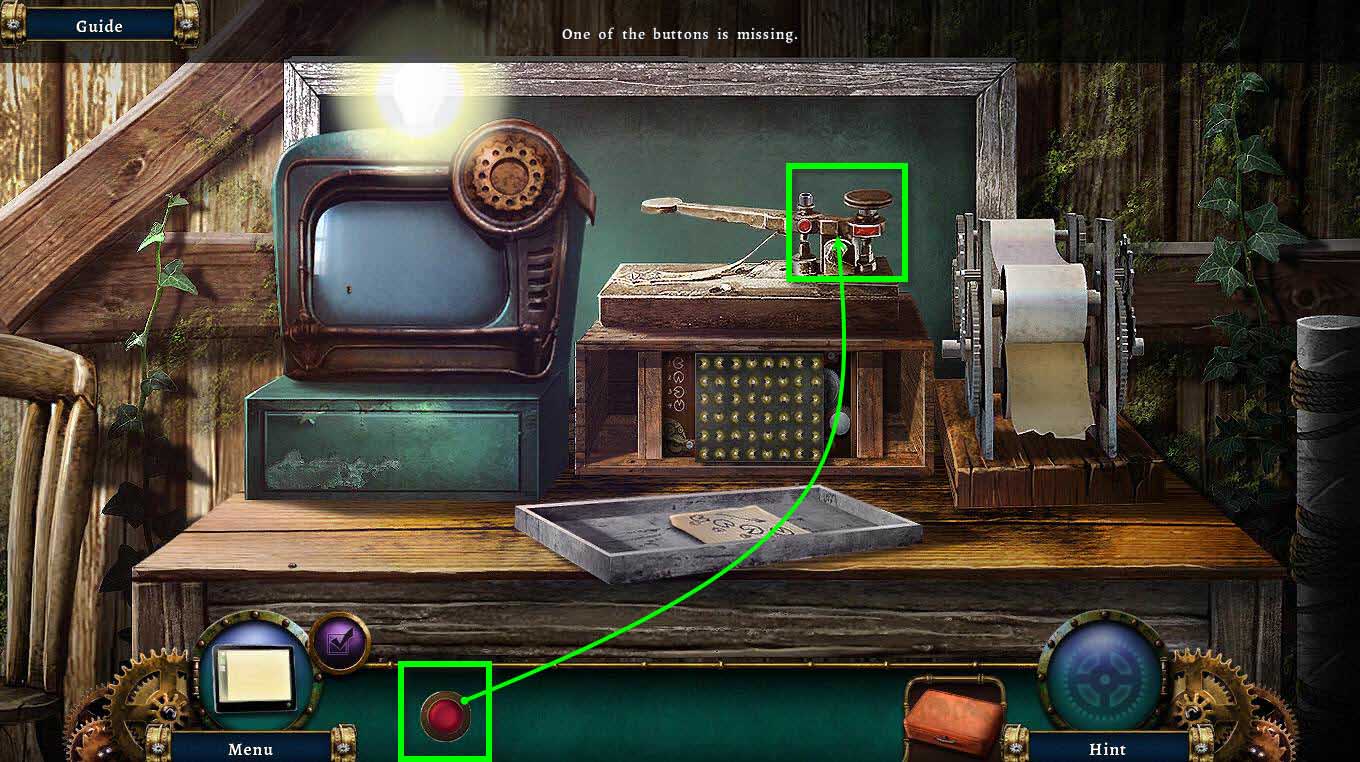
- Now use the BUTTON on the top of the telegraph machine.
- Click on the telegraph machine to use it.
- Take the KNIFE.
-
Exit the outpost and go back to the porch.
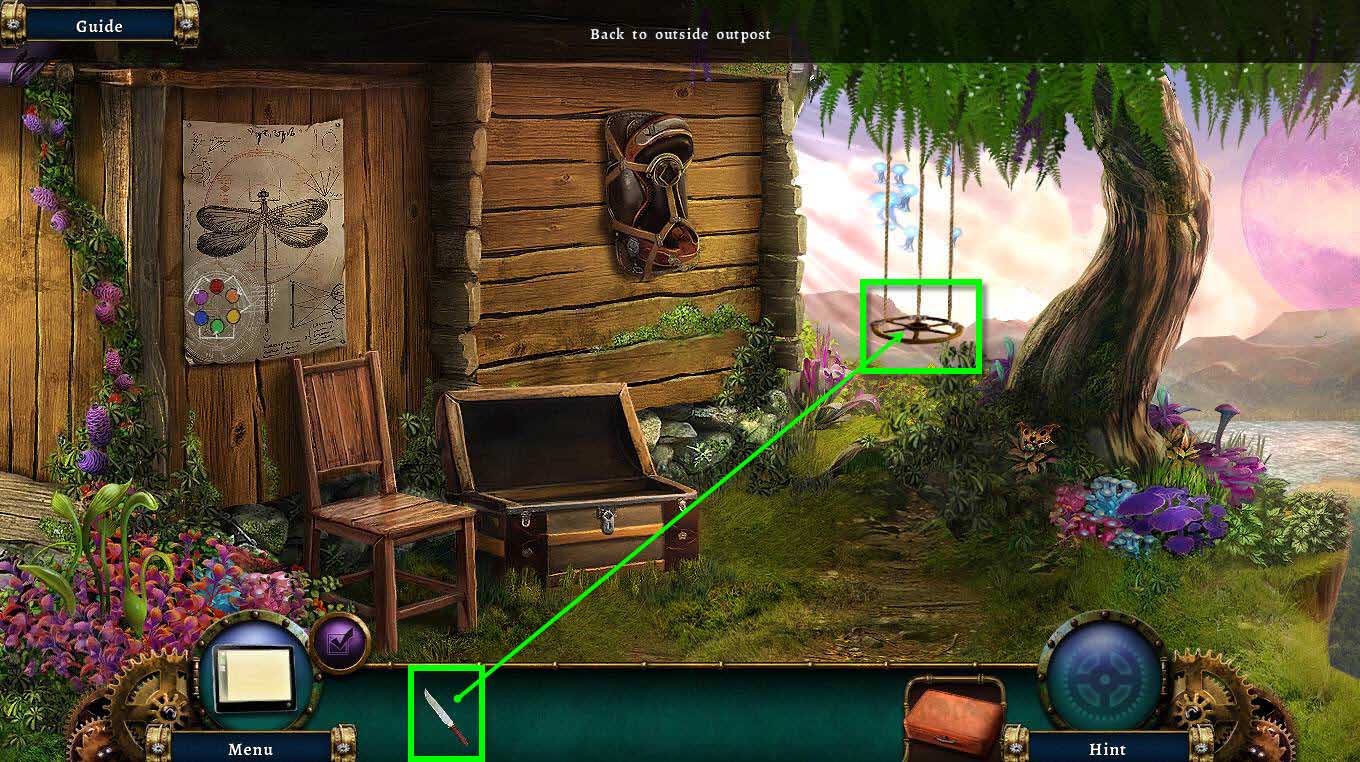
- Click on the swing to zoom in.
- Use the KNIFE on it to cut the rope.
- You will receive the VALVE.
-
Go back inside the outpost.
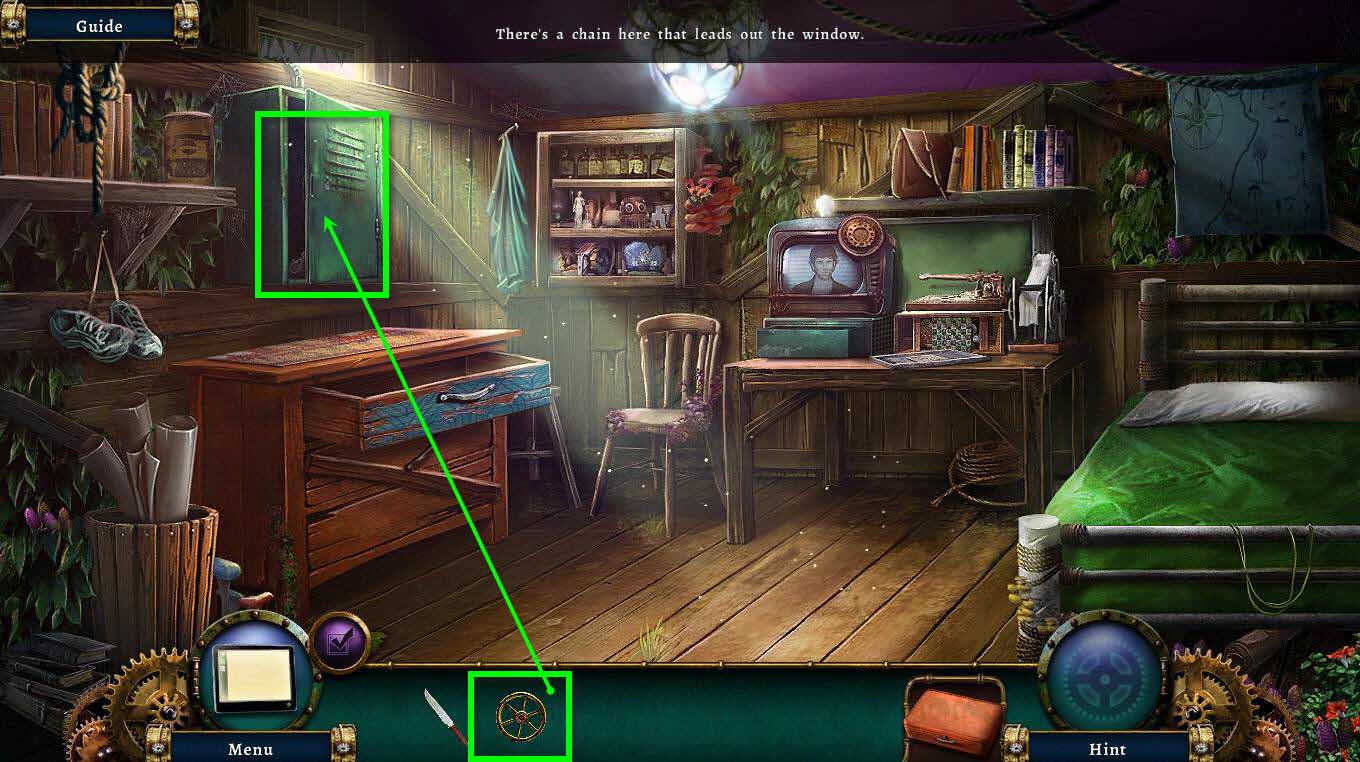
- Click on the control box to zoom in.
- Use the VALVE on the spoke.
- Click and turn the valve clockwise to raise the dummy.
-
Go back out to the landing pad.
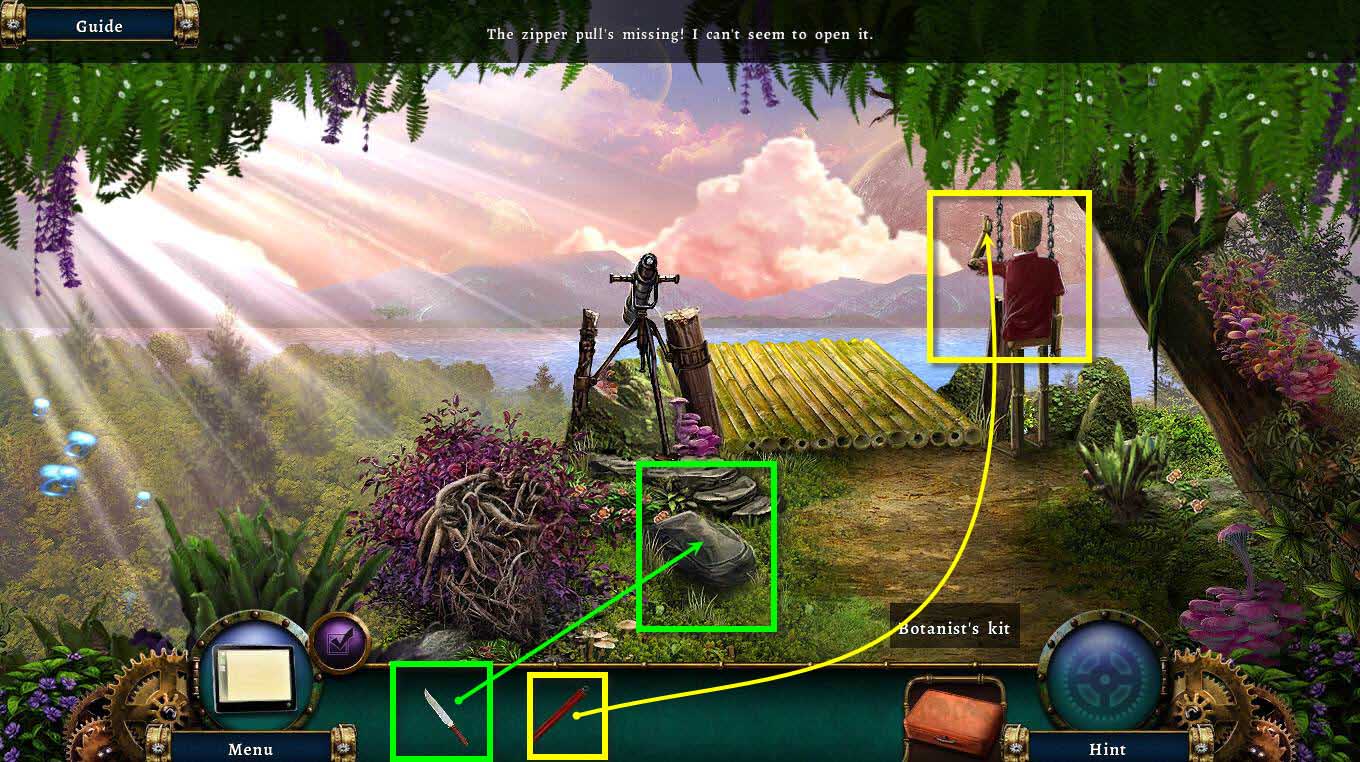
- Click on the backpack on the ground to zoom in.
- Use the KNIFE on the backpack to open it.
- Take the FLARE.
- Click on the dummy's hand to zoom in.
- Use the FLARE on the dummy's hand.
-
Click on the string to pull it.
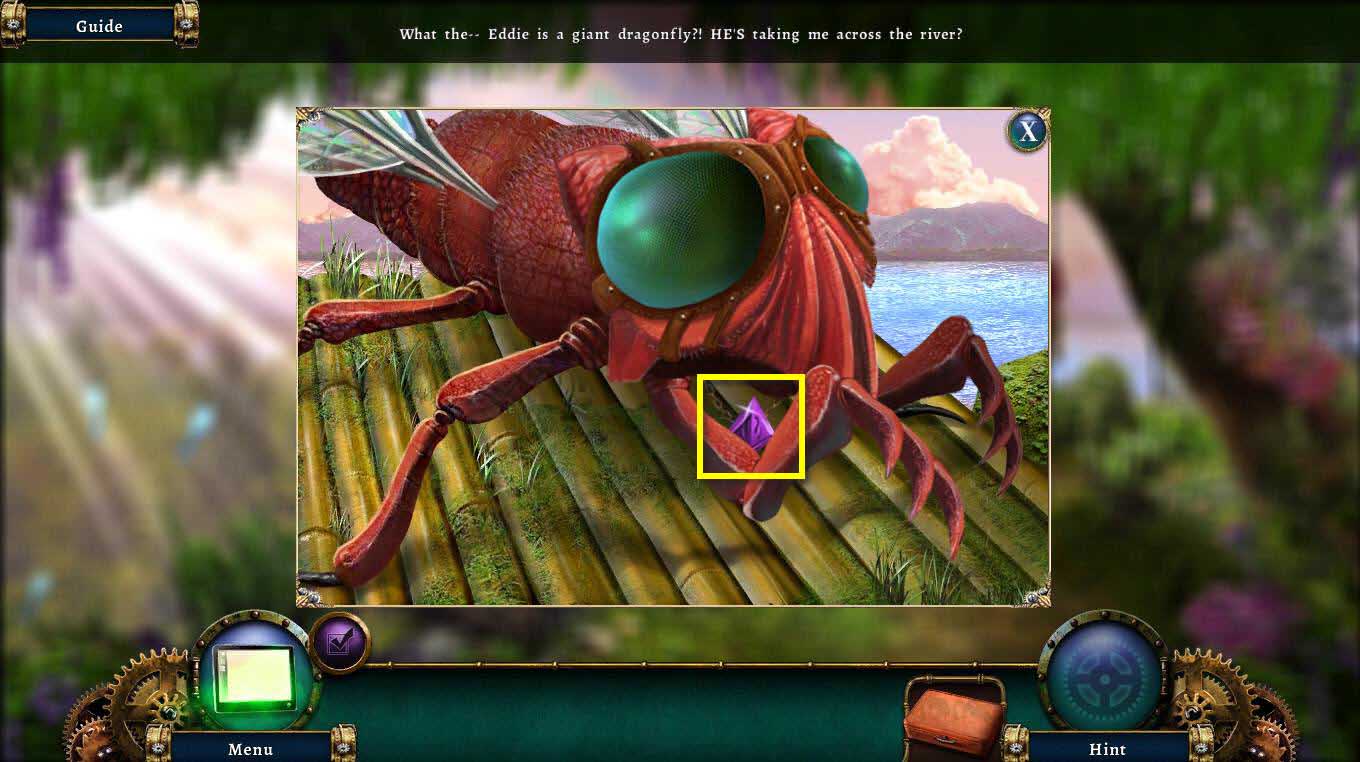
- Click on Eddie to zoom in.
- Take the TAG from around Eddie's neck.
-
Go back to the porch.
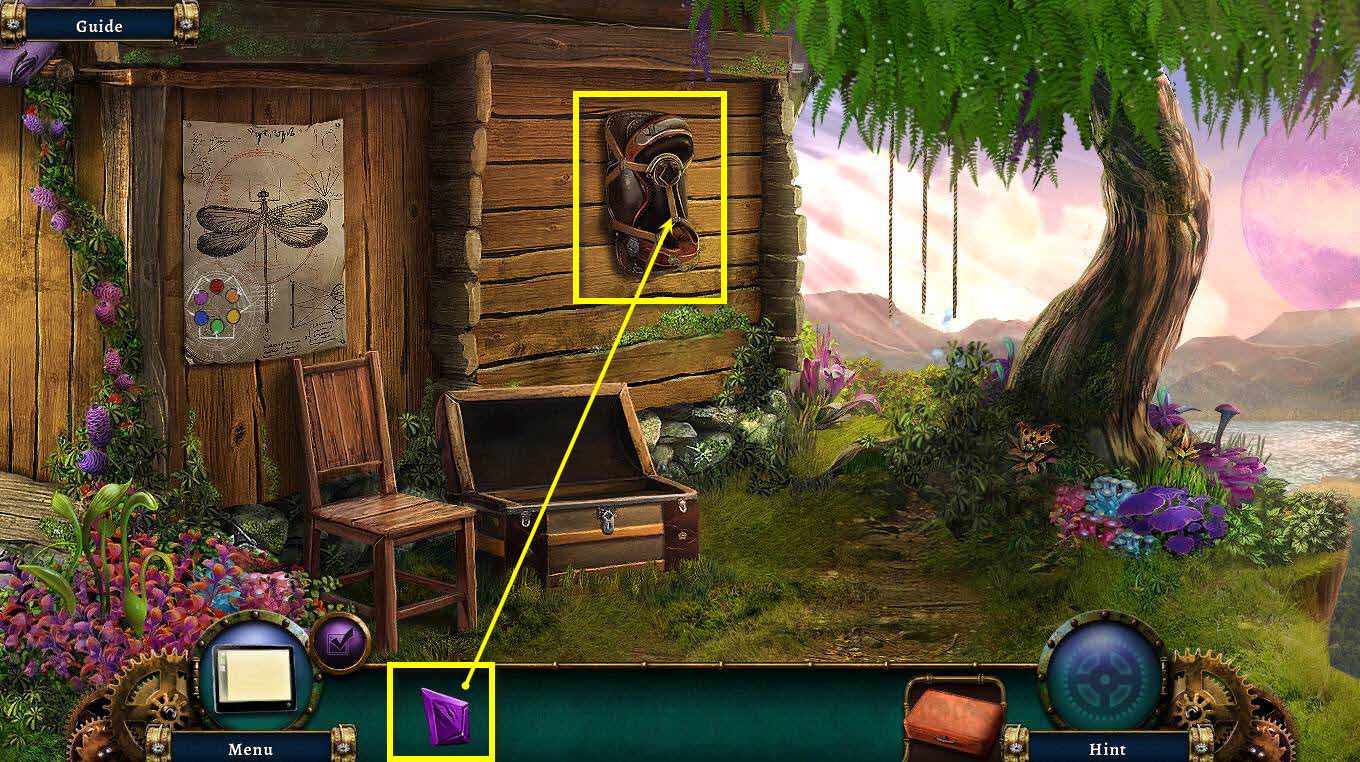
- Click to zoom into the saddle on the wall.
- Use the TAG on the saddle.
- Take the SADDLE.
-
Return to Eddie.
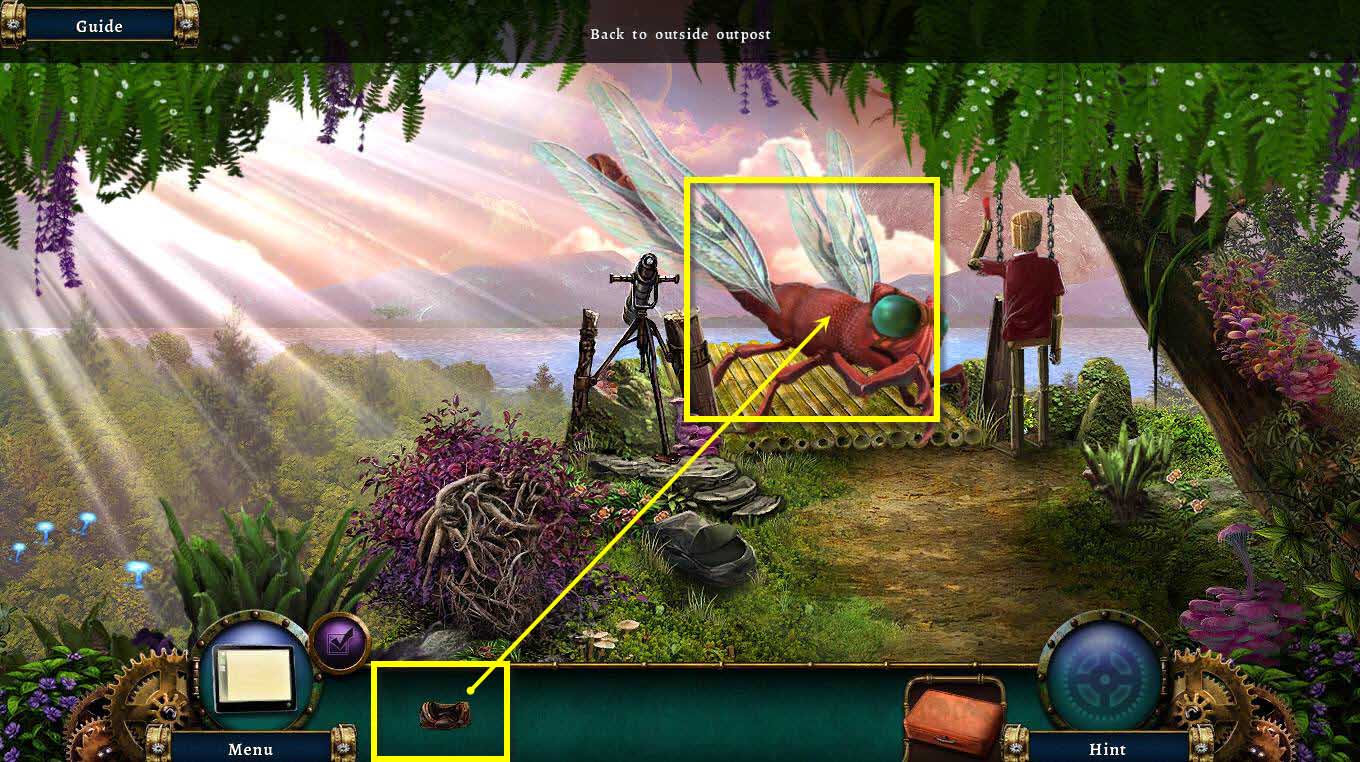
- Click on Eddie to zoom in.
- Use the SADDLE on Eddie.
- Click to get on Eddie.
Comments will load when you reach this part of the walkthrough.