
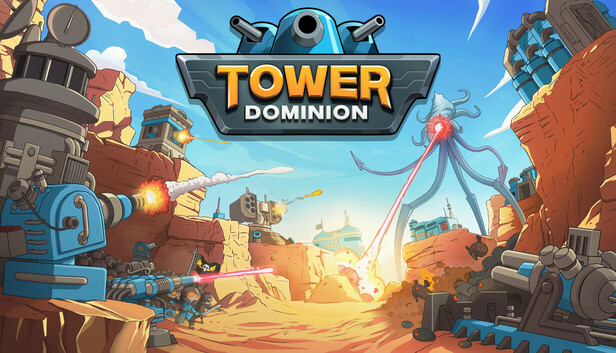
War Mode Strategy and Final-Wave Checklist
War Mode loves this scene: four roads are open, three platforms look like dropped sandwiches, and the reward screen offers a glorious cannon that fits nowhere useful. Meanwhile, a flying or cloaked threat is already warming up. Do not force the shiny blueprint. First decide where the Artronid traffic jam should happen, then spend on the defense that controls the next revealed threats.
PC patch 1.66 rules, checked July 13, 2026: Before faction or commander bonuses, War starts with 1,000 Supply, 25 Recon, 10 Tech, and four battlefronts. Supply pays for most buildings and upgrades. Recon rerolls terrain choices and buys certain buildings or upgrades. Tech is a rare upgrade currency.
A battlefront is a separate, connected path network leading to one or more Headquarters entrances. An entry point is a location where enemies enter the map. If paths from two battlefronts connect, they become one battlefront. Ordinary tile placement cannot separate them again because placed tiles cannot be removed, although the number of entry points can still rise or fall as the battlefield grows.
War’s victory target is wave 35. Wave 35 uses a randomly selected final-wave scenario rather than one guaranteed boss. Threat Majoris is one possible scenario; when it appears, its special final-wave foe has Rear Guard, which favors one of the longest valid routes. The rest of the assault is drawn from threats added to that run. Clearing wave 35 wins War. Playing beyond that point shifts into Endless pacing, so do not carry this schedule into Endless or Frontier Mode.
Choose the Route Plan Before You Spend
| Battlefield | Use this shape | How to build it |
|---|---|---|
| Several routes can meet beside one strong platform cluster | Merged kill zone | Connect as many starting fronts as the terrain safely allows. Make different road sections pass the same high ground or support cluster. Choose this when your commander and doctrines reward dense support, splash damage, or Headquarters-adjacent fire. |
| One route has good length and elevation while the others are cramped | Primary lane with shorter secondary routes | Give the primary lane more entry points when possible, but keep real firepower on every short route. Enemy batches are not guaranteed to use the lane you prefer, and a high-tier group can still land on a quiet side. |
| Your commander, doctrines, or buildings gain value from multiple battlefronts | Commander-supported multi-front | Keep the path networks separate. Give every front basic damage, then place long-range, anti-air, detection, and support buildings where they can cover two fronts. Skip this plan if every lane would need its own costly counter package. |
MERGED:        entry ─┐
entry ────────────────┼── kill zone ── HQ
entry ────────────────┼───────┘
entry ────────────────┘

PRIMARY:       long lane ═══ heavy defense ═══╗
short lane ── real guard ─────────────────────╬─ HQ
short lane ── real guard ─────────────────────╝
Hover over the battlefront and entry-point counters after every major connection. If a tile joins two fronts earlier than planned, the merge cannot be undone with ordinary tiles. Turn the new junction into a firing lane and stop extending the weaker route. That recovery is usually cheaper than draining Recon while asking the tile deck to apologize.
War Checkpoints
| Stage | What should be true before advancing |
|---|---|
| Early: waves 1–10 | Damage: every active route takes fire before reaching the Headquarters. HQ durability: inspect its health after each leak and cover every final approach. Economy: build steady Supply income instead of filling every platform. Detection and anti-air: reserve a central platform until the preview shows whether you need them. Shields and splitters: mark a fallback location, but do not buy a narrow counter before the trait appears unless it also deals useful general damage. |
| Middle: waves 11–24 | Damage: upgrade towers with long firing time or coverage over two road sections. HQ durability: take useful health, regeneration, or repair choices when offered. Economy: keep enough Supply flow to add a missing counter. Detection and anti-air: cover the main kill zone and the Headquarters approach. Shields: remove them before enemies enter your strongest sustained fire. Split control: place slowing or area damage before focused cleanup so the smaller bodies do not slip through. |
| Late: waves 25–34 | Damage: use the live damage ranking to improve defenses that are actually firing. HQ durability: buy useful repairs or durability and add close emergency fire. Economy: stop taking slow-payback choices. Detection, anti-air, shields, and splitters: give every revealed trait two useful coverage points, or one main counter plus an HQ-side fallback. A counter stranded on one distant lane is an invitation written in alien. |
Spend From the Threat Preview, Not From Hope
The baseline threat warning now reveals new threats three waves before their debut. Before placing a large building, read every visible threat card and find the first incoming flying, cloaked, shielded, or splitting foe. If it is one or two waves away, place or upgrade its counter now. If it is farther away and the current defense is stable, improve the economy or preserve the platform. A large footprint should cover multiple road sections, support several towers, or answer a revealed danger. If it does none of those jobs, leave the space open.
- Weak neutral building: Neutral type and placement are random. Ignore one if activating or covering it bends the route away from your real kill zone. A bonus is not free when it steals three platforms and half your firing time.
- Missing counter: combine partial answers. Put general anti-air near the Headquarters, detection where several towers overlap, or shield removal ahead of sustained fire. Upgrade a working fallback instead of saving forever for a blueprint that may never appear.
- Poor terrain: choose one defensible primary lane and stop extending weaker routes. Spend Recon when a tile choice would merge the wrong fronts, block a needed footprint, or leave a dangerously short approach.
- Unavoidable HQ damage: treat the Headquarters as the last defensive layer, not a perfect-score ornament. Add close cleanup fire, take repair or durability rewards when offered, and note which entrance leaked. Reinforce that approach before polishing the lane that already won comfortably.
Pause Before Wave 35: Final-Wave Checklist
- ☐ Final scenario: Read the wave-35 card. Do not assume Threat Majoris or any other final-wave result will repeat from an earlier run.
- ☐ Route integrity: Every visible entry point leads through at least one real firing zone. No short side lane reaches the Headquarters with only token coverage.
- ☐ Rear Guard check: If the final scenario is Threat Majoris, sustain fire along the longest routes instead of guarding only their entry points.
- ☐ Targeting order: Place shield removal before the main damage cluster. Let slowing and area damage meet groups next, then use focused damage and HQ-side towers for cleanup.
- ☐ Detection: Cloaked enemies remain detectable through the main kill zone and again near the Headquarters.
- ☐ Anti-air: Flying enemies ignore shaped ground roads, so central or HQ-side anti-air must cover their direct approach.
- ☐ Split control: Area damage, slowing, or rapid cleanup covers the section where large splitters are likely to die and release smaller bodies.
- ☐ Damage check: The live ranking shows that expensive towers are firing often. Upgrade productive towers before trying to rescue a badly placed one.
- ☐ Resources: Buy the last useful counter or upgrade before starting. Keep a reserve only when a known repair or emergency option is still available.
- ☐ HQ durability: Buy useful health, regeneration, or repairs that are currently offered. There is no prize for carrying a repair budget into the defeat screen.
- ☐ Emergency coverage: At least one reliable defense can hit each Headquarters entrance if the outer kill zone loses control.
When every box is checked, start wave 35 at normal speed and watch the first spawn pattern. The draft, final scenario, and terrain still matter, so no layout makes War automatic. This checklist removes the preventable losses: the forgotten air lane, the lonely detector, the splitter hiding behind a fat target, and the magnificent cannon staring into a hill.
Comments will load when you reach this part of the walkthrough.