
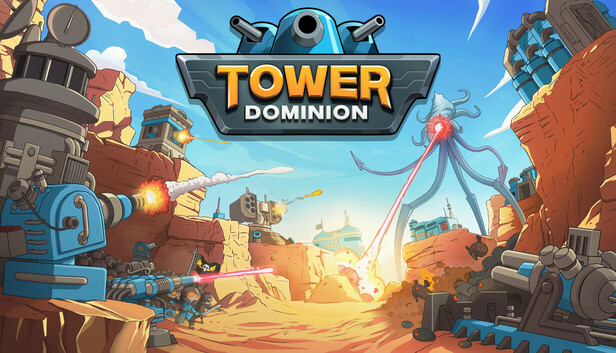
Enemy Counters: Flying, Camouflaged, Shielded, Heavy, and Splitting
The wave starts, your kill zone eats the front pack, and then a Camouflaged speck and three flying pests drift past like they own the Headquarters. We have eaten that exact loss. In Tower Dominion, the fix is not simply “more damage.” Build overlapping jobs: strip shields early, slow the crowd, focus high-health foes in the main firing lane, and keep Detection, Anti-Air, and area damage ready for cleanup.
The game calls hidden enemies Camouflaged, although “cloaked” means the same thing in player shorthand. A foe keeps its listed movement and passive traits, but the run changes the foes you face, their numbers, their entry points, and what shares each wave. Read the revealed threats before a large purchase. Do not copy an enemy order from an older run; the Artronids have declined to follow our filing system.
What Each Threat Does
| Threat | Stable behavior | What can vary |
|---|---|---|
| Flying | Air units ignore the ground lanes you shaped. Ordinary weapons can target them, but air units resist standard fire. Weapons marked Anti-Air gain bonus damage against them. | The selected air foe, its stats, its entry point, its numbers, and its supporting enemies depend on the run and mode. |
| Camouflaged | Most weapons cannot select Camouflaged foes without Detection. An area blast aimed at a visible foe can still catch a hidden unit inside the blast. | A Camouflaged foe may arrive alone, in a pack, or behind targets that rank higher under a detector’s targeting rules. |
| Shielded | Shields add durability that must be stripped. Shield-break weapons deal +200% damage against Shields, so they remove that layer much faster than ordinary fire. | The shielded foe, its total durability, its speed, and the rest of the wave can change. |
| Heavy or armored-looking | “Heavy” is guide shorthand for a high-health foe, not a universal Armor status. Use the foe’s actual health, movement, shields, and listed passives when choosing a counter. | Health, Shields, Air status, Camouflage, speed, and other passives depend on the foe shown in the threat preview. |
| Splitting | A Dividing parent produces smaller foes when it dies. Killing one beside the Headquarters can turn one leak into a tiny alien parade. | The selected parent, its children, and the enemies screening it depend on the revealed threat. |
Primary Counters and Backup Packages
- Flying — primary: Use a Puma Position, whose weapons carry Anti-Air. Place it where flyers cross a long part of its range, not merely beside the prettiest ground-path bend. Backup: A Sturdy Bunker with Second Heavy Vencedor gains another Heavy Vencedor and Air Units priority. A Retribution Position with Interdiction Protocol also gains an Anti-Air bonus and Air Units priority. If those options do not appear, overlap two offered weapons marked Anti-Air, with one covering the final approach.
- Camouflaged — primary: Give a Mirador Special Reinforcement, which grants Detection and another Defender M5. Put it in the last third of the defense so earlier guns remove some visible distractions first. Backup: Scout Hideout weapons and C2 mines have Detection. An Omega Emitter, Air Command bombing line, Advanced Durendal, or Grenadiers can also hit Camouflaged foes. Whatever appears, overlap Detection with enough damage to finish the job.
- Shielded — primary: Upgrade a Bastion with Roof-Based Pulse Cannon and place it toward the entrance side of the kill zone. Its Pulse Cannon has Shield-break. Backup: An Omega Emitter or any offered weapon marked Shield-break can fill the same job. If no specialist appears, slow the wave and stack ordinary damage along the longest shared lane, but expect that fallback to consume more firing time.
- Heavy — primary: Fit a Sturdy Bunker with the Reaper Cannon, which replaces its current weapon with a strong single-target cannon. Give the bunker’s limited firing arc a long straight view. Backup: Concentrate Durendal Positions or other hard-hitting weapons around one shared lane instead of scattering them across the map. Slow and infantry can buy time, but they support the gun line rather than erase a large health pool by themselves.
- Splitting — primary: Put a Warwolf Position with Shrapnel near the backline. Shrapnel expands its blast and raises its target count, helping when the children appear together. Backup: A Retribution Position with Anti-Swarm Protocol trades half its listed damage for more targets, a larger explosion, and faster fire. A Sanction Cannon covering a packed lane or several fast guns aimed at the same cleanup pocket can also work. The important resource is spare target capacity after the parent dies.
Layer the Kill Zone
Use this as a placement pattern, then bend it around the run’s unruly terrain. Each band should share part of its firing area with the next. A tower sitting alone on a remote platform is often a turret-shaped donation.
GROUND ENTRY
     |
     v
[ A: SHIELD-BREAK + SLOW ]
          overlaps
[ B: GENERAL DAMAGE + HIGH-HP FIRE + ANTI-AIR #1 ]
          overlaps
[ C: DETECTION + SPLITTER AREA DAMAGE + ANTI-AIR #2 ] --> [ HQ ]

AIR APPROACH  ~~~~~~~~~~~~~~~~~~~~~~~~~~~~~~~~> [ HQ ]
                    crosses bands B and C
Place shield removal near the outer edge so later weapons spend more time hitting health. Put slow inside the main damage band. Keep Detection deeper, where fewer visible targets can distract it. Anti-Air should cover the flyers’ direct approach in the middle band and again beside the Headquarters. This is the good stuff: awkward terrain becomes a layered machine, and alien traffic supplies the moving parts.
Fix Targeting Before Adding Another Tower
Pause and inspect each weapon rather than judging the whole building by its name. Read its effects, firing arc, and priority list from top to bottom. Priorities belong to individual weapons, and some upgrades change them; you cannot freely rewrite every weapon’s targeting order.
The Defender M5 lists Keep current target before Closest to HQ. Once it has chosen something, it can stay latched onto that target until the foe dies or leaves range. Even with Detection, that retention can delay a switch to a Camouflaged unit slipping behind the current target. Other weapons use priorities such as Most Shield, Most HP, or Full HP. A large or shielded foe can therefore soak up attention while a lower-priority Dividing foe moves beneath the fireworks. The tower is obeying its rules; the battlefield is simply being a little goblin about it.
Use placement as targeting control. Keep Shield-break in an early range band, Detection in a late band with fewer visible distractions, and splitter cleanup beside the final approach. Give a dedicated Anti-Air weapon Air Units priority when an upgrade provides it. For a weapon that keeps its current target, use a long firing lane so it has time to finish the job before that target leaves range.
Use the Threat Preview Without Draining the Run
- Open the revealed threat display and inspect every wave or threat currently shown.
- Find the first dangerous specialist: Air, Camouflage, Shields, a high-health foe, or Dividing.
- Check whether your defense has one working answer and one overlapping backup. Count actual firing coverage, not an unbuilt blueprint.
- If a reveal bonus lets you see the dangerous trait several waves ahead, reserve Supply and an open platform. Keep enough power for the current waves instead of buying the entire counter package immediately.
- One or two preparation waves before the threat, install the missing weapon or upgrade. Recheck its arc, effects, and priority before starting the wave.
Tip: Detection and Anti-Air are separate effects. A detector is not automatically strong against flyers, and an Anti-Air gun does not automatically detect Camouflage. If the ideal blueprint never appears, combine partial answers: Detection plus general area damage, or a basic Anti-Air weapon plus a second firing window near the Headquarters.
Mixed-Wave Priority Rules
- First, cover special movement. Confirm Detection and Anti-Air before buying extra general damage.
- Second, remove shields early. Let Shield-break weapons work before the pack enters the main guns.
- Third, slow the densest ground group. This adds firing time and helps keep splitter children inside area attacks.
- Fourth, focus the high-health foe. Keep your strongest single-target guns looking down the same lane.
- Last, preserve backline cleanup. A Warwolf, fast bunker, or multi-target weapon near the Headquarters should not be the wave’s first contact.
If Enemies Are Already Leaking
Stop extending the outer kill zone and reinforce the final approach. Put the cheapest useful detector, Anti-Air weapon, or area attacker where it covers both the last route segment and the Headquarters. Add slow just before that overlap if it appears. Headquarters health and any repair already active can buy time, but first give the leak a weapon capable of hitting it.
If only one threat is leaking, keep the repair narrow. Camouflaged foes need late Detection plus damage. Flyers need another Anti-Air firing window. Splitter children need fast area damage beside the Headquarters. High-health foes need a longer lane or concentrated single-target fire. Shielded foes reaching the backline usually mean the Shield-break layer starts too late or lacks enough damage. Make one change, watch the next wave at normal speed, and inspect what each weapon chooses. One clean adjustment can turn a doomed run back into a very satisfying traffic jam.
Comments will load when you reach this part of the walkthrough.