
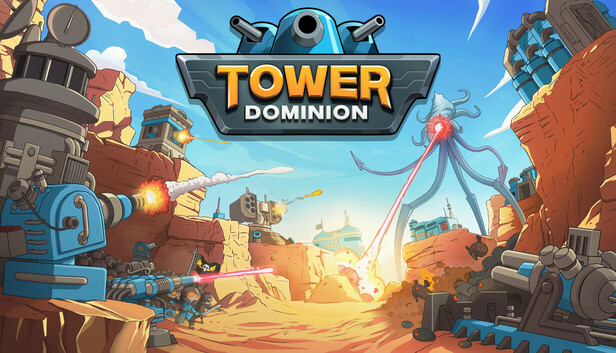
Battlefield Shaping, Pathing, and Pit Guide
You know the scene: Tower Dominion offers a lovely long firing lane, then hands you a wide building that misses every flat space by one square. Meanwhile, the next terrain tile has three exits and the manners of an alien roundabout. Do not place it just because it fits. Rotate it through every orientation, inspect the road preview, and decide what job that tile must do before you confirm it.
Your goal is not to draw the prettiest maze. Your goal is to keep the Artronids inside useful tower range for as long as possible while preserving room for later buildings. That is the fun of battlefield shaping: awkward ground becomes a custom-built traffic jam with artillery.
Read the Route Before Placing the Tile
An entry point is a location where enemies enter the battlefield. A battlefront is one unique connected route system leading to one or more Headquarters entrances. These counts are not the same. Several entry points can feed one battlefront, while route systems that never connect remain separate battlefronts.
Check the on-screen Entry Point and Battlefront counters before placing terrain and again after confirming it. Connecting two route systems can lower the Battlefront count even when several entry points remain. Merging entry points into one battlefront lets the same defense cover more traffic. Keeping two battlefronts active demands coverage on both HQ approaches, but it can support bonuses tied to active fronts. Let the commander, doctrines, and available towers decide which trade is worth making.
- Trace every road to the Headquarters. Look at the shortest approach first. That is the lane most likely to expose a weak side.
- Rotate the terrain addition through every orientation. Rotation changes which roads connect and which road mouths remain available for later expansion.
- Count useful firing time. A longer path is only valuable when towers can cover it. Empty road beyond every range circle is scenic gravel.
- Inspect the open edges. Preserve a road mouth facing open space when you want to extend that lane later.
- Check the buildable ground. A fine route can still ruin the plan if cliffs or neutral structures leave no valid tower footprint.
Choose a Battlefield Shape
| Shape | Use It When | Main Risk |
|---|---|---|
| Compact funnel | You have few towers, strong area damage, or several defenses that can cover the same junction. | Air units and tough leaks can survive a kill zone built mostly for ground targets. |
| Long two-front layout | Your commander, doctrines, infantry, or buildings gain value from active battlefronts, and you can defend two HQ approaches. | The short front can collapse while your best guns stare heroically at the long one. |
Shape A: Compact Funnel
E1 ─────┐
E2 ─────J════K════H
E3 ─────┘    ▲
             T

E = entry point
J = routes join
K = shared kill zone
T = tower covering the approach, junction, and exit
H = HeadquartersBuild this shape by bending nearby routes toward one shared lane. Rotate each new tile so it extends the covered lane instead of creating a short approach to the Headquarters. Place slowing, area damage, and shield removal around the join, where each connected ground route must pass.
This is a clean beginner choice when your draft is thin because several towers can attack the same traffic. It is not automatic, though. Some weapons cannot hit air units, so keep a verified anti-air weapon and emergency Headquarters coverage outside the ground-focused funnel. The road can be perfect while the sky remains deeply unimpressed.
Shape B: Long Main Front with a Short Support Front
E1 ─────────┐
E2 ─────────J════K1════H-A

E3 ─────────────K2════H-B
                   ▲
              reserve defense

K1 = main kill zone on the longer battlefront
K2 = smaller kill zone protecting the second HQ approachUse this shape when keeping more than one battlefront supports the current commander or doctrine package, or when the offered terrain refuses to form a safe single funnel. Extend the main front into a long firing lane. Give the second front enough slowing, basic damage, and Headquarters overlap to handle the traffic sent its way.
Do not split the arsenal evenly by habit. Put long-range or lane-based weapons where they cover several sections of the main route. Protect the shorter front with cheap coverage, infantry, or a tower that also reaches the Headquarters approach. If that lane remains dangerously short, pause work on the main front and use the next suitable terrain addition to extend or bend the weak approach away from the base.
Elevation, Range, and Footprints
Higher shelf:          [ T▲ ]
Range along road:    ( A══B══C )
Lower road:        E══A══B══C══D══H

Reserved level pad:            [F][F][F]
                               [F][F][F]

T▲ = small tower on higher ground
A-B-C = road sections inside its range
F = valid squares reserved for one large footprintBy default, height increases tower range rather than damage. Count a height-based damage bonus only when the current tower, commander, upgrade, or doctrine tooltip names one. Inspect the tower's range overlay and favor a shelf where its coverage follows several road sections, especially around a bend or junction. A tower touching one road square from a heroic mountaintop still has poor line coverage.
A footprint is the full patch of valid ground a building needs. Before spending resources, select the building blueprint and test its placement over the planned pad. Reserve broad, level spaces for large or asymmetric buildings, and put smaller towers on narrow shelves and odd corners. A platform raises its square by one height level and can support construction, so use platforms to fix the few squares a needed footprint is missing. Leveling half the countryside for a maybe-later blueprint is how Supply quietly leaves town.
Use Recon Without Rerolling the Run Into Poverty
Recon is the resource used to reroll offered terrain during expansion. It also pays for certain buildings and upgrades. Some run effects can raise the displayed reroll price, so check the cost each time. Treat Recon as an escape hatch, not a search engine for the mythical perfect spiral.
- Reroll immediately if every orientation creates a dangerously short approach, fails a needed merge, or leaves no usable pad for a building your defense needs.
- Keep a merely good tile if one orientation lengthens a covered lane and preserves a useful expansion edge.
- Allow a second reroll only when the bad tile would create a lasting route problem and the next revealed threat is already covered.
- Stop chasing a pit or funnel when each attempt consumes Recon reserved for a known building or upgrade.
A safe rule is to reroll for function: route control, firing coverage, or build space. Do not reroll for symmetry. The aliens are not grading the landscaping.
How to Create a Pit
A monster pit appears when a road ends in a fully enclosed dead end that cannot accept another terrain tile. The pit becomes a hostile entry point and can carry its own special effect, so this does not erase enemy traffic. It turns that dead end into a spawn you must still defend.
Step 1: Keep a covered road end beside open expansion space.

HQ ═════ defended route ═════ road end → open space

Step 2: Place later terrain around every space from which
that road end could be extended.

Step 3: Close the last legal extension without joining the
road end to another route.

HQ ═════ defended route ═════ [ PIT ]
                                  E

E = hostile entry point created by the pit- Choose a road end already covered by a long firing lane. Avoid attempting this beside an exposed Headquarters entrance.
- Keep that road end available while placing terrain around its possible extension spaces.
- Before the closing placement, rotate the offered tile through every orientation. The finished road must still connect the future pit to the Headquarters.
- Close the final extension space without joining the dead-end road to another route. Once the road end is fully enclosed, the pit appears automatically.
- Recheck the Entry Point counter and inspect the pit's effect before spending more resources around it.
Pursue a pit when its lane is long and well covered, when the run has spare Recon for the needed rerolls, or when the pit's effect supports your plan. Skip it when the pocket sits close to the Headquarters, the next threat needs an urgent counter, or the setup demands several speculative rerolls. A pit is a side project with teeth, not free real estate.
Recovery Branches
- Short lane: Put temporary coverage near that Headquarters entrance, then use the next workable tile to extend the lane away or merge it into a longer defended route. Stop adding length to safer fronts until the weak approach catches up.
- Awkward elevation: Move a small long-range tower onto the usable high shelf and reserve the lower, wider ground for large footprints. Use platforms only on the critical missing squares.
- Blocked footprint: Test the blueprint before placing more terrain. If the placement stays invalid, keep the building in reserve and take the next broad, level terrain option instead of packing the area with small towers.
- Tile refuses to join: Cycle every orientation while watching its road connections. If none gives you a legal, useful connection, attach the tile to a secondary edge for build space or reroll it when its roads would leave an unsafe approach.
- Failed battlefront merge: Do not restart on sight. Cover the shortest separate route near the Headquarters, then look for a later connector that joins it to the main firing lane. One cheap recovery tower can buy the terrain cycles needed to repair the plan.
Before each terrain confirmation, make the same four checks: previewed road connections, Entry Point and Battlefront counters, nearby tower range overlays, and the buildable footprint grid. That habit turns changing terrain from a guessing game into a plan. Tower Dominion will still hand you unruly tiles, but now you get to decide where the traffic jam happens.
Comments will load when you reach this part of the walkthrough.