
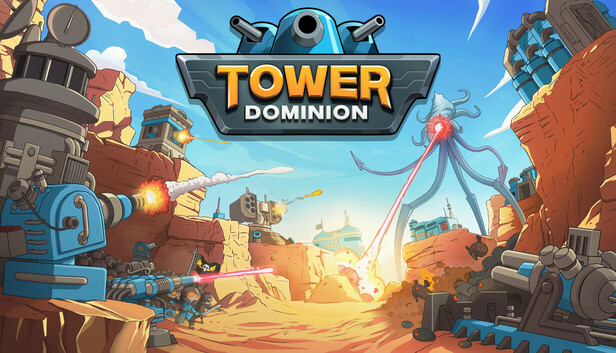
Frontier 19 Strategy and Modifier Checklist
You know the Frontier 19 special: the route finally looks tidy, then the reward draft refuses to hand over detection while an Alpha Lecos strolls toward the Headquarters like it owns the place. Do not chase one perfect build. Protect the Headquarters, or HQ, then make the draft work for you. That is where Tower Dominion gets delicious: an ugly patch of terrain becomes an alien traffic jam with bunkers on the good seats.
This checklist covers the 35-wave Frontier objective on PC version 1.66, checked July 13, 2026. It is not an Endless build. Frontier rewards spending enough to survive the next danger; there is no prize for reaching wave 35 with a beautiful savings account and a smoking crater where the HQ used to be. Modifiers, dotations, and balance values can change after a patch, so recheck the Frontier menu when the version number moves.
Exact Frontier 19 Modifier Set
Both setup cards below use all 14 modifiers for a total of 19 skulls. Supply is the main building currency. Recon pays for terrain rerolls and some buildings or upgrades. Tech buys certain upgrades. Reinforcements are the reward choices between waves. A battlefront is one unique route leading to one or more HQ entrances.
| Modifier | Skulls | Effect in PC v1.66 |
|---|---|---|
| Volcanic Underground | 1 | The HQ loses 5% HP each wave. |
| Cursed World | 1 | Every four waves, choose one negative doctrine from two. A doctrine is a run-long effect. |
| Rotten Atmosphere | 1 | Start with 900 Supply instead of 1,000. Each Threat Reveal removes 30% of current Supply. |
| Bryta Infestation | 1 | Bryta nests appear with the special tiles at waves 6 and 8. |
| Extended Supply Lines | 1 | Resource amounts offered in Reinforcements are reduced by 50%. |
| Feral World | 1 | Slow effects are 20% weaker. |
| Hostile Locals | 1 | Buildings beside a neutral building suffer 15% lower rate of fire. |
| Jagged Terrain | 2 | Each terrain reroll costs 10 extra Recon, raising the normal 25 cost to 35. |
| Foggy World | 2 | All buildings lose 1 Range. |
| Massive Lifeforms | 1 | Tier 3 foes gain 15% Speed. |
| Frozen Logistics | 3 | Reinforcements lose one choice every other wave. |
| Low Tech World | 2 | All foes gain 20% HP. |
| Teeming Invasion | 1 | When only one battlefront remains, all foes gain another 20% HP. |
| Lurking Alpha Lecos | 1 | Adds the cloaked Alpha Lecos threat. |
Together, these modifiers attack every part of the run. Rotten Atmosphere and Extended Supply Lines shrink the economy. Jagged Terrain turns careless tile fishing into a 35-Recon habit. Frozen Logistics narrows the draft. Foggy World makes central high ground more valuable. Volcanic Underground creates steady HQ risk even when nothing leaks. Threat Reveals occur on waves 7, 17, 27, and 32 in this setup, so spend useful Supply before starting those waves.
Two Exact Setup Cards
| Setup | Faction, commander, and version | Three dotations | Opening totals and assets |
|---|---|---|---|
| A: Elevated bunker funnel | Pargan Assault Group; Siege Master Obivim; PC v1.66 | Personal Stash: +1 Tech; Platform Delivery: +2 Platforms; Bunker Delivery: +3 Sturdy Bunkers | 900 Supply, 25 Recon, 11 Tech, +20 Recon production, two Platforms, two normal Miradors, and eight Sturdy Bunker blueprints. Obivim supplies five of those bunkers and grants all buildings +1 Range. |
| B: Armored HQ ring | Iron Dragoons; Army Command Staff Magel; PC v1.66 | Engineering Skills: HQ gains 5% Repair; Advanced Mirador Delivery: +1 Advanced Mirador; Special Delivery: +75 Supply and +20 Recon | 975 Supply, 45 Recon, 10 Tech, two normal Miradors, one Sturdy Bunker, the Iron Dragoons' Officers Quarters, one Advanced Mirador, and 5% HQ Repair. Magel offers one doctrine from three every other wave, while buildings beside the HQ gain +1 Range. |
The pre-run dotation draft varies. These are exact showcased packages, not required rolls. If one card is missing, take the fallback named below and keep moving. A good counter in hand beats a dream package hiding somewhere in the reward pool.
Dependable Opening Checklist
- Inspect all four starting approaches. Find the longest route to the HQ and mark its final shared bend as the future kill zone. A kill zone is a stretch covered by several towers at once.
- Choose a merge plan, not a magic number. Two fronts are a flexible target because they avoid Teeming Invasion while concentrating fire. One deep front is also viable if the 20% HP penalty costs less than defending scattered lanes. Do not keep three or four bad fronts alive merely to satisfy the skull icon.
- Reserve central high ground. Keep one raised inner platform able to see the main bend and at least two HQ approaches. Foggy World's range loss makes an edge platform much weaker than it looks.
- Build three layers. Put shield breaking or early splash before the bend, area damage and slowing on the bend, then detection and anti-air on the final approaches. Detection lets weapons target cloaked enemies.
- Spend before waves 7, 17, 27, and 32. Rotten Atmosphere removes 30% of Supply currently held when the threat is revealed. Buy a useful upgrade, emergency tower, or HQ defense first.
- Plan around the forced Bryta tiles. Waves 6 and 8 add nest tiles. Since patch 1.64, those nests do not count as normal Entry Points, but Brytas can still emerge there. Keep them inside at least one firing arc.
Setup A: Obivim's Elevated Bunker Funnel
Place the first Sturdy Bunker on the highest inner platform that can fire across the main bend. Put the second behind the bend so it catches leaks turning toward the HQ. Keep another bunker blueprint unbuilt until the preview shows whether you need air coverage or heavy ground fire. Obivim's +1 Range offsets Foggy World, while his bunker stock covers a flank without begging the next Reinforcement for a building card.
Entry cluster A ─┐
                 ├── [shield break] ── {MAIN BEND} ── [high bunker group] ── HQ
Entry cluster B ─┘                         │                         [detection]
                                           └── short second front ── [leak bunker]
Spatial recovery: If Platform Delivery is absent, use natural height for the main bunker and save the flattest open patch for a large support building. If the terrain will not complete the funnel, join only one side lane to the main bend and leave the second front short. If Bunker Delivery is absent, Obivim's five starting bunkers still provide the shell. Add a Warwolf for area damage or a Mirador with its first-left Special Reinforcement upgrade for detection.
Setup B: Magel's Armored HQ Ring
Put the Advanced Mirador on high ground just behind the main bend, with its range touching the HQ approach and short second front. The Advanced Mirador does not detect cloaked enemies by default; buy its first-left Special Reinforcement upgrade when detection is needed. Place Magel's next key defense beside the HQ to gain his +1 Range bonus. Engineering Skills offsets the 5% Volcanic Underground drain when no other damage gets through, but it cannot rescue an underbuilt lane forever.
Long main route ── [area damage] ── [high Advanced Mirador]
                                      ↘ detection after Special Reinforcement
Short second front ── [cheap guard] ── [HQ-adjacent tower] ── HQ
                                                ↑
                                      Magel range bonus
Spatial recovery: If Advanced Mirador Delivery is absent, use a normal Mirador and buy Special Reinforcement for detection. A Medium Mortar with Data Sharing can grant detection to adjacent buildings, including the HQ, but it requires a clear 2-by-2 patch at height 0. If Engineering Skills is absent, take HQ damage reduction or another repair dotation. If Special Delivery is absent, favor immediate Supply first, then Recon; one Jagged Terrain reroll costs 35 Recon.
Wave Checkpoints
| Stage | Economy check | Threat coverage check |
|---|---|---|
| Early: waves 1-9 | Buy enough damage for the pressure on waves 5 and 9. Use only the rerolls needed to secure a usable bend, and empty excess Supply before wave 7. | Have area damage, one weapon that can hit air, and detection covering the longest route before wave 5. Alpha Lecos return every four waves from wave 5. Keep the wave 6 and 8 Bryta nest tiles under fire. |
| Middle: waves 10-18 | Grow Supply or Recon only after the HQ stops bleeding. Keep one affordable blueprint ready, and spend spare Supply before wave 17. | Check the new wave-10 threat and add its counter. Cover both active fronts with detection. Add dedicated anti-air for shown flyers and shield breaking before shielded enemies reach the main damage group. Wave 13 is another pressure check. |
| Closing: waves 19-35 | Growth becomes secondary. Prepare for the pressure on waves 19, 25, 31, and 35, and spend excess Supply before reveals on waves 27 and 32. Preserve a small repair or emergency-building reserve. | Recheck the new threat groups at waves 20 and 30. Use overlapping anti-air, detection near the HQ, shield breaking before the bend, area damage on the bend, and heavy single-target fire behind it. Either accept Teeming Invasion and defend one deep route, or keep a short second front that one compact group can hold. |
Pivot Signals
- No detection before Alpha Lecos: stop buying economy. Take a Scout Hideout, or buy Special Reinforcement on a normal or Advanced Mirador. Place this coverage on the longest final route, with as little ordinary traffic as possible.
- Weak air coverage: place anti-air between the bend and HQ, not only at the outer entrance. A high Sturdy Bunker is the flexible fallback when a dedicated air tower never arrives.
- Cramped platforms: stop forcing a large building into the kill zone. Move support or economy structures behind the HQ and reserve high inner tiles for weapons whose range overlaps two route segments.
- No 2-by-2 height-0 patch beside Magel's HQ: abandon the Medium Mortar plan. Use upgraded Miradors or another detection package instead of chewing through Recon for a tile that may never appear.
- Three or four active battlefronts after the early game: merge the two weakest lanes or shorten them into one guarded junction. If the connector tile refuses to appear, build a temporary bunker on the uncovered approach and save Recon for a practical join.
- HQ health falls despite repair: repair is covering only the Frontier drain while enemies still leak. Add damage, detection, or air coverage immediately. More healing will not teach a tower to see an Alpha Lecos.
- The draft gives neither a needed tower nor an affordable upgrade: deepen one useful defense and reinforce the final HQ approach. A salvaged two-front defense can still reach the closing waves; a half-built four-front masterpiece usually becomes modern alien housing.
Before sending wave 35, trace every route from Entry Point to HQ. Confirm that shield breaking fires before the main damage group, detection covers the final approaches, anti-air overlaps the HQ, and no support building has stolen a reserved footprint. Spend Supply that Rotten Atmosphere would eat, repair what can be repaired, and keep one emergency blueprint ready. Frontier 19 still has reward variance, so neither setup guarantees a clear. What these packages provide is a battlefield that can bend without snapping when the draft gets ideas.
Comments will load when you reach this part of the walkthrough.