
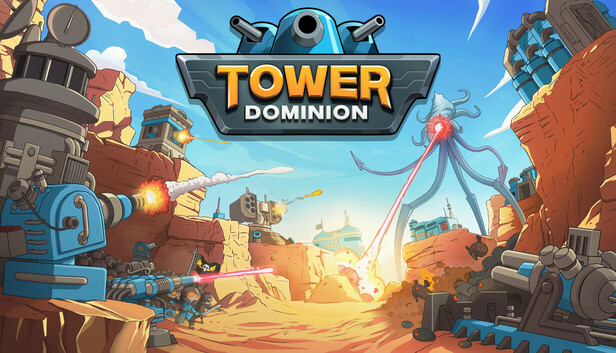
Tower Dominion Faction and Commander Strategy Guide
You picked an artillery commander, the reward screen forgot artillery exists, and your only open platform is barely wide enough for a sandwich. That is a normal Tower Dominion crisis. Do not force the commander's ideal build. Answer the next threat, upgrade towers with strong firing lanes, and save one useful platform for the missing piece. Commander powers can shape a run, but they cannot control the RNG.
This section covers the Windows PC version 1.66, released April 22, 2026. In an unmodified expedition, every faction starts with two Mirador blueprints and one Sturdy Bunker blueprint. Iron Dragoons also receive Officers Quarters, while Lions of Ravelski receive The Stars Call. Pargan Assault Group instead begins with 20 Recon production through its faction power. The commander bonuses below are added to those starting assets. Tower Dominion GO is a separate mobile version with different content and rewards, so it is not covered here.
New-player terms: Supply pays for most construction and upgrades. Recon pays for terrain rerolls and certain buildings or upgrades. Tech unlocks powerful upgrades. A blueprint is one copy of a building you can place, while a doctrine is a bonus that lasts for the entire run. An entry point is where enemies enter. A battlefront is a separate route they can follow to Headquarters, or HQ. Terrain, rewards, neutral buildings, and threats change from run to run.
Best Commanders by Situation
There is no single best commander in Tower Dominion. Terrain, platform sizes, threats, rewards, difficulty rules, and Frontier modifiers can all change the answer. For a quick choice, pick the commander whose starting advantage addresses the part of the game that causes you the most trouble.
| Situation | Strong commander choice | Why it works |
|---|---|---|
| Beginner reliability and leak recovery | Sergeant Gurtag | Gurtag strengthens the HQ and adds a turret that improves each wave. This creates a useful second defensive line while you learn pathing and tower placement. |
| General draft flexibility | Marshal Tander | An extra Reinforcement choice and 100 additional Supply production make poor drafts easier to rescue. Tander does not depend on one tower family or terrain shape. |
| Artillery builds | Master of Ordnance Silnio | Silnio starts with four artillery blueprints and improves their reload speed. He is the clearest artillery specialist when the map provides suitable platforms and long firing lanes. |
| Economy through rerolls | Brigadier Kosagi | Each reroll grants Supply, and the starting Zone Command can support the economy. Reroll to solve an immediate problem, not to chase a perfect reward. |
| Upgrade-focused economy | Artifex Hertas | Cheaper upgrades let a few well-positioned towers mature quickly, while fully upgraded buildings provide Relay Antennas. Hertas rewards careful investment instead of building everything offered. |
| Terrain and draft flexibility | Major Delcia | Extra Recon can fix a poor expansion or help find a missing counter. Two Scout Hideouts also provide an adaptable opening. |
| Pit-focused terrain play | Lieutenant Delven | Delven can create a Pit in an enclosed, empty zone with a road leading into it, even if that road is not a dead end. Revealing the Pit grants a doctrine choice. |
| Early warning on harder runs | Tank Commander Beryt | Seeing threats two waves earlier gives you more time to find and fund the correct counter. That information becomes especially useful when mistakes are costly. |
If you are still undecided, Gurtag is the forgiving HQ-centered choice, Tander is the flexible generalist, Silnio is the direct artillery option, and Delcia provides adaptable Recon play. These are situational recommendations, not a permanent tier list. Even a strong commander must pivot when the next threat requires anti-air, Detection, shield damage, or a different platform footprint.
Pick the Faction That Fits the Battlefield Job
| Faction | Economy and terrain identity | Buildings and arsenal identity | Practical starting plan |
|---|---|---|---|
| Iron Dragoons | This blue desert faction has no general blueprint multiplier or Recon head start. Its economy usually comes from Officers Quarters, commander powers, doctrines, or careful Supply rewards. Desert terrain is procedural, so do not count on broad, flat artillery shelves. | Overwhelming Force sends Grenadiers from HQ every eight seconds, while Impregnable Fortress turns HQ into a combat building. Imperial Barracks, Frontline Trench, Officers Quarters, infantry support, artillery, and HQ upgrades favor concentrated fire. | Shape a route that crosses the HQ firing arc before bending past one shared damage cluster. Let Grenadiers meet enemies near that bend. Iron Dragoons can be forgiving when a few enemies leak, although that is a tactical evaluation rather than a promise that the faction will dominate every mode. |
| Lions of Ravelski | This red tundra faction gains twice as many blueprints from Reinforcement through Noble Houses. That expands your choices and long-term building supply, but it does not provide the Supply or platforms needed to place everything. Preserve open space and take Supply before your inventory becomes an expensive parking lot. | Blazing Commanders places the commander on the battlefield. The Stars Call improves that commander, while heavy structures such as Armored Staging Ground and Tactical Fortress support a commander-led defense. The arsenal rewards strong building packages and good use of spare blueprints. | Build one reliable lane before chasing a large synergy. Place the commander where enemies enter the main kill zone, not at the map edge. Save a large platform for a heavy building and use smaller blueprints to close coverage gaps. |
| Pargan Assault Group | This green jungle faction starts with 20 Recon production through Shock Troops. That makes terrain and reward correction easier, but repeated rerolls can still consume the entire budget. Tactical Forces gives HQ special options for shaping your force. | Joint Operations, Assault Teams, Barricades, scout tools, pulse weapons, and flexible support buildings favor controlled lanes and quick pivots. The faction is good at buying time while a draft takes shape. | Use early Recon to reject one truly harmful tile or find a missing threat counter. Place Barricades at the inner edge of the kill zone, where several towers can attack anything they stop. Do not hold enemies in a spot that only one gun can reach. |
A Commander-Friendly Kill Zone
Entry point(s) -- long firing lane -- slow or barrier -- main damage cluster -- HQ
                                             commander or infantry contact point

Keep large platforms beside the main cluster. Put support buildings behind it, not in the last open gun slot.
This is a starting pattern, not a universal map solution. A commander with battlefront bonuses may favor two defended routes, while an HQ or adjacency commander wants a tighter inner ring. If a second route cannot overlap your main guns, merge or shorten it before investing in economy.
Iron Dragoons Commanders
All ten commanders below are restricted to Iron Dragoons. Their two named Powers are fixed effects or starting assets. The strategy and relative-strength notes are tactical evaluations for ordinary expeditions.
| Commander and fixed PC 1.66 Powers | Path, tower, doctrine, and economy plan |
|---|---|
| Commissar Anysia On the Field: Anysia spawns with each Grenadier charge. Extreme Combat Doctrine: produces one extra Grenadier every wave. | Build a compact funnel so every charge reaches the same fight instead of crossing empty desert. Support the infantry with slowing, area damage, and HQ fire. Favor infantry, HQ, and reload doctrines. Fallback: if infantry support never appears, use the charges as extra delay and build a standard mixed-damage core. |
| Warden Gerhard Imperial Supervision: buildings adjacent to at least one Mirador gain 15% damage. Grim Overwatch: starts with five Miradors. | Use each Mirador as an adjacency anchor for one or two stronger towers. A corner or horseshoe cluster works better than scattering all five along the route. Favor Mirador building doctrines, range, and construction discounts. Fallback: on a cramped map, strengthen one good cluster with two Miradors and save the rest for later coverage. |
| Master of Ordnance Silnio Master of Ordnance: Light and Medium Mortar Positions, Slovek Howitzers, and Sanction Cannons gain 50% reload speed. Field Artillery: starts with one of each of those four artillery blueprints. | Create a long lane with plenty of firing time, and reserve broad platforms before placing small towers. Add slowing and Detection so the artillery can keep working. Favor artillery building doctrines, range, reload, and Supply economy. Fallback: build only the pieces that fit. One protected artillery gun with cheap anti-air is safer than four poorly placed guns. |
| Marshal Tander Imperial Connections: gains one extra Reinforcement choice. Imperial Wealth: starts with 100 additional Supply production. | Tander is a flexible draft commander. Use the extra choice to answer the next revealed threat instead of collecting pieces for a future build. Most path shapes work as long as several towers share the lane. Favor economy early, then improve the best-placed weapon. Fallback: without a clear synergy, take anti-air, Detection, shield damage, or a direct upgrade for your current carry tower. |
| Air Marshal Trevia Air Superiority: starts with one Smoke Signal. Air Command: starts with one Air Command. | Give the starting air package a long shared lane and keep conventional guns beneath its coverage. Favor air, range, Recon, and cooldown or reload support. An offensive air package is not a complete anti-air defense. Fallback: if air upgrades stall, use the starting buildings as support and pivot to general damage with a dedicated answer for flying enemies. |
| Army Command Staff Magel Personal Retinue: chooses one doctrine from three every other wave. Headquarters Office: buildings adjacent to HQ gain one range. | Save a ring of small and medium platforms around HQ. Place short-range or high-impact towers there, then use doctrines to strengthen the package. Favor economy and building doctrines before narrow late-game bonuses. Fallback: if the doctrine choices do not cooperate, take broad cost, damage, range, or resource bonuses and let the HQ ring carry the defense. |
| Sergeant Gurtag Sectorial Domination: HQ gains one range, 20% damage and HP, plus 10% repair. Personal Turret: Gurtag adds a turret to HQ that grows stronger each wave. | Turn the final approach into a second kill zone. Route enemies past the outer guns and across the HQ arc, with slowing near the inner bend. Favor HQ damage, range, repair, and battlefront-scaled support. Fallback: if the outer defense breaks, stop expanding and upgrade the inner ring. Gurtag can recover from a leaky opening better than most commanders. |
| Colonel Agraft Air Surveillance: every building deals 15% more damage to air units. Field Duty: starts with Agraft's special manned Puma Position. | Place the special Puma where it can cover both the long approach and the HQ-side bend. Add ground area damage, Detection, and slowing because the faction-wide air bonus will not solve every ground wave. Favor Puma, air, range, and mixed-damage doctrines. Fallback: if no other air tower appears, upgrade a well-positioned general weapon that can target air instead of spending all your Recon on rerolls. |
| Colonel Astor Military Blockade: buildings at height 0 gain 30% damage. Fortified Place: HQ gains 150% HP. | Keep the main damage cluster on ground-level platforms and route enemies beside it. Use elevated shelves for support or long-range weapons only when the added coverage outweighs Astor's bonus. Favor height-0 damage, HQ, and construction doctrines. Fallback: on a steep map, protect one ground-level carry tower and use higher platforms for slowing, Detection, or economy. |
| Infiltrator Laethissa Lone Operative: Laethissa enters the battlefield; adjacent buildings gain Detection and 25% damage. Infiltration Tactics: gains 15 Recon production. | Build a dense cluster around Laethissa so several weapons share her Detection and damage bonuses. Since version 1.64, she remains on the field between waves. Favor Recon, adjacency, range, and mixed-damage doctrines. Fallback: keep an independent Detection option near HQ so one awkward platform does not make her aura your only cloak counter. |
Lions of Ravelski Commanders
All ten commanders below are restricted to Lions of Ravelski. Their battlefield presence can absorb attention and add damage, but your towers must still cover flying, cloaked, shielded, armored, and splitting threats.
| Commander and fixed PC 1.66 Powers | Path, tower, doctrine, and economy plan |
|---|---|
| Knazyh Denshikova Blessing of the First Saints: building doctrines are four times as likely to appear instead of regular doctrines. Lioness of Salida: the starting escort gains two Praetorian Guards. | Place your first important tower early so its building doctrines can enter the pool. Let the escort meet enemies inside that tower's range. Favor doctrines for one dependable general-damage building before branching out. Fallback: if the desired doctrine does not appear, take Supply or a counter blueprint and let the guards buy time. |
| Artifex Hertas Innovative Patterns: upgrades cost 10% less. Perfect Structures: fully upgrading a building grants one Relay Antenna. | Fully upgrade a few useful towers instead of spreading Supply across everything. Reserve height-3 space for Relay Antennas, which provide 15 Supply production each. Favor upgrade discounts, efficiency, and range. Fallback: do not finish a weak tower just to earn an antenna. Wait until a building already answers several waves. |
| Prime-Knazyh Estelia Prime Infiltrator: gains 25 Discovery. Guerrilla Warfare: buildings beside a neutral building gain one range and 20% damage. | Discovery increases the chance of finding neutral buildings on new terrain. When a useful neutral building appears near the route, place damage towers along one side without blocking the enemy path. Favor Discovery, range, and neutral-building support. Fallback: ignore a neutral structure stranded away from the firing lane. The adjacency bonus is not worth ruining the map. |
| Rotmistr Vladask Mighty Fortifications: gains one platform every other wave. All Hands on Deck: buildings cost 35% less, but upgrades cost 20% more. | Build wide enough to use the extra platforms and cheaper structures. Overlapping coverage and multiple basic counters matter more than rushing top upgrades. Favor construction discounts, platform value, and broad range doctrines. Fallback: if the blueprints are weak, bank the platforms and Supply. Empty space is better than an upgraded tower that cannot hit the next threat. |
| Dvormester Lyubov Unorthodox Methods: buildings lose one range but gain 30% damage. Imperial Rule: Lyubov gains 5% HP and damage per building. | Build a short, tight funnel with slowing at the entrance. Add plenty of useful small buildings so Lyubov scales without filling every platform with junk. Favor range recovery, cheap construction, slow effects, and commander support. Fallback: if the terrain forces a long lane, draft naturally long-range weapons and keep Lyubov near the inner bend. |
| Tank Commander Beryt Armored Brigade: reveals threats two waves earlier. Special Dotation: starts with a discounted Armored Staging Ground. | Use the extra warning to buy the missing counter before it is needed. Place the staging ground where its tanks can join the fight quickly. Favor tank, economy, slow, and threat-specific doctrines. Fallback: if the staging ground would drain your Supply, delay it and spend the warning advantage on a cheaper counter. |
| Rotmistr Liza Against All Odds: buildings and troops gain 3% damage for each entry point. Special Armament: starts with one Rampart Missile Silo. | Keep several entry points only when they feed one defended corridor or remain beneath overlapping guns. The Rampart Missile Silo targets up to four entry points with each salvo by default; an upgrade removes that cap. Favor silo, range, and entry-point support. Fallback: merge dangerous routes. A smaller bonus is better than several enemy lanes that your towers cannot cover. |
| Konigmester Yevdoki Shadow of the Tsarina: all buildings gain 10% damage per battlefront. Hero of the Cladian Crusade: all buildings deal 15% more damage to shields. | Try to run two battlefronts through one broad central coverage zone. This captures the bonus without splitting the entire defense. Favor battlefront-scaled range, slowing, and shield-breaking support. Fallback: collapse to one front if either route lacks Detection, anti-air, or stopping power. Extra damage cannot protect an undefended lane. |
| Archaeologist Karia Archeotech: starts with one Xeno-Prognosis. Adventurous Life: Karia gains 50% HP. | Place Xeno-Prognosis where its support can reach the main cluster, then let Karia hold the contact point inside overlapping fire. Favor support, Discovery, commander durability, and economy doctrines. Fallback: if the footprint will not fit an ideal platform, keep the main route intact and use it as secondary support. |
| Legate Volkin Herald of the Knotev: starts with three Flames of the Tsarstvo. High Rank Special Dotation: starts with one Tech and 20 Recon. | Use the starting package to stabilize the opening while saving prime platforms for a lasting damage tower. Spend the bonus Recon on one meaningful correction, and reserve Tech for an upgrade that improves the defense immediately. Favor economy, range, and strong building doctrines. Fallback: if the preferred heavy tower never appears, take a Warwolf or another reliable general-damage weapon and continue banking resources. |
Pargan Assault Group Commanders
All ten commanders below are restricted to Pargan Assault Group. Recon makes it easier to pivot, but you can still reroll past a perfectly usable answer while hunting for the ideal one.
| Commander and fixed PC 1.66 Powers | Path, tower, doctrine, and economy plan |
|---|---|
| Architectus Droh Architectologist: buildings cost 15% less. Indestructible Structures: every building gains 50% HP. | Use durable Barricades and affordable towers to hold two connected firing lanes or one layered funnel. Favor construction cost, repair, barrier, and range doctrines. Buy new coverage before luxury upgrades. Fallback: if the draft lacks damage, use tough structures to delay enemies within range of one upgraded carry tower. |
| Captain Seculdi High Command Honor: starts with five extra Tech. Strong Line: starts with one Ammo Depot. | Build a compact gun cluster around the Ammo Depot and keep large footprints adjacent when possible. Favor adjacency, support, range, and efficient weapon upgrades. Treat the five Tech as reserved capital. Fallback: if no worthwhile Tech upgrade appears, save it. Rare Tech does not need to be spent just because it is available. |
| Brigadier Kosagi Rapid Deployment: each reroll grants 100 Supply. Sectoral Command: starts with one Zone Command. | Reroll when the available choices fail an immediate need, then turn the Supply return into construction or an upgrade. Develop Zone Command for economy unless the next wave demands another weapon. Favor Recon production, reroll control, and Supply doctrines. Fallback: stop rerolling once the rising Recon cost is worth more than the 100 Supply return. |
| Siege Master Obivim Weapon Expert: every building gains one range. First Line: starts with five Sturdy Bunkers. | Place bunkers on inside corners where the extra range lets them cover two sections of the route. Upgrade the best two before placing all five. Favor bunker, range, damage, and cheap-upgrade doctrines. Fallback: use spare bunkers for inner HQ coverage and spend later rewards on anti-air, Detection, and shield handling. |
| Major Delcia Delta Brigade: gains 15 Recon production. Reconnaissance Platoon: starts with two Scout Hideouts. | Use Scout Hideouts for early Detection and flexible damage, then spend the Recon advantage on terrain corrections or a missing counter. A long lane with overlapping hideout coverage works well. Favor Recon, Detection, range, and reroll doctrines. Fallback: after two failed rerolls, take a broad counter and move on. Recon must also protect the map from bad terrain. |
| Iron Captain Milio Alpha Bridgehead: buildings adjacent to HQ gain 25% damage, 25% rate of fire, and two range. Veteran of the 4th War: starts with two doctrines. | Reserve the HQ ring for small or medium damage towers with strong upgrade paths. Route enemies through that ring's fire before they reach HQ. Favor adjacency, building efficiency, and HQ defense doctrines. Fallback: if a large blueprint does not fit, place it for lane coverage and keep the HQ bonus on compact towers. |
| Colonel Eleonor Grande Ecole: chooses one blueprint from three every other wave. Meticulous Preparations: tier-two and tier-three blueprints are 20% more likely to appear. | Reserve platforms and build only what the defense can afford. Eleonor provides options faster than she provides Supply. Favor economy, platform, blueprint-control, and broad building doctrines. Fallback: if expensive blueprints arrive too early, leave them in inventory and improve a cheaper tower already covering the main lane. |
| Lieutenant Delven Pits Experts: an enclosed, road-connected empty zone can become a Pit even when the road leading into it is not a dead end. Exploration Program: revealing a Pit grants a choice of one doctrine from five. | To make a normal Pit, surround an empty map space so no legal terrain tile can be placed there, while leaving a road that leads into the space. Delven removes the dead-end requirement, but the enclosed space still needs a road connection. Finish the enclosure without cutting your safe route, and do not force a Pit until the main lane and next expansion direction are secure. Favor terrain, Pit, Recon, and flexible damage doctrines. Fallback: if the tiles refuse to form a useful enclosure, abandon the Pit plan. Delven can still use Pargan Recon to create a clean, ordinary funnel. |
| Techno-Adept Jorg Field Experimentations: starts with one Experimental Pulse Cannon. High Tech Defense: starts with one Plasma Fence. | Place the Plasma Fence at the inner edge of the main kill zone, with the pulse weapon behind or beside it so stopped enemies remain in range. Add anti-air and Detection. Favor pulse, shield-breaking, barrier, repair, and Tech doctrines. Fallback: if the fence cannot span a useful choke, use it as inner HQ delay instead of wasting the pulse weapon's platform. |
| Captain Scarlett Talon Infiltration: Scarlett can be deployed and redeployed on the battlefield. Fortified Command: HQ damage taken falls by a cumulative 2% each wave. | Scarlett suits two short fronts or maps where the danger keeps shifting. Redeploy her before each wave to the weaker contact point, then let the growing HQ reduction soften late leaks. Favor commander, troop, HQ, and repair doctrines. Fallback: if both fronts cannot be covered, merge them and place Scarlett beside the final bend as mobile emergency damage. |
When the Commander Synergy Does Not Show Up
- No affordable signature tower: upgrade the best-positioned general-damage tower and take Supply. Use the commander's starting asset as support.
- No anti-air or Detection: stop drafting economy. Take any compatible counter, even if it does not match the theme, and place it where the main lane and HQ approach overlap.
- No suitable platform: save the blueprint. Use a small tower or support building without blocking the next large footprint.
- Too many fronts: preserve the bonus only when the routes share firing coverage. Otherwise, merge them or build one main lane with a short HQ-backed secondary route.
- Too many rerolls: accept a workable answer after one or two misses. A plain defense with Supply left can still become a beautiful alien traffic jam.
For a first clear, Iron Dragoons generally provide forgiving HQ-based leak recovery, Lions offer the deepest blueprint bench, and Pargan provides strong early terrain correction through Recon. These are tactical evaluations for version 1.66, not a permanent tier list. Difficulty rules, Frontier modifiers, terrain, threats, and reward rolls can change which commander has the easiest job in any run.
Comments will load when you reach this part of the walkthrough.