

HUD and Stats Explained
You know the scene: the tank looked healthy, a ghost swarm stampeded through the gates, and now Refuel Efficiency is dropping while the tiny car prepares to become modern art. Pause before rebuilding everything. Fuel, Refuel Efficiency, boost, durability, and trigger timing are separate systems. Read each one on its own, then follow the trigger chain.
This section covers the full-release Version 1.0.2 interface. Older demo and playtest values do not belong here. The game now explains its Garage stats on hover, but patch-sensitive card and gate interactions still deserve a one-change test.
Where to Read Everything
| View | What appears here | What to check |
|---|---|---|
| Run HUD | Durability is the percentage at the upper left. The upper HUD shows the round and score against the current goal. The speedometer carries speed, drift, and freeze information; the fuel gauge shows current fuel; and the card row shows live triggers and charges. When Overdrive starts, its timer and indicator appear above the speedometer. | Use this view for current fuel, durability, speed, trigger animations, and the round goal. |
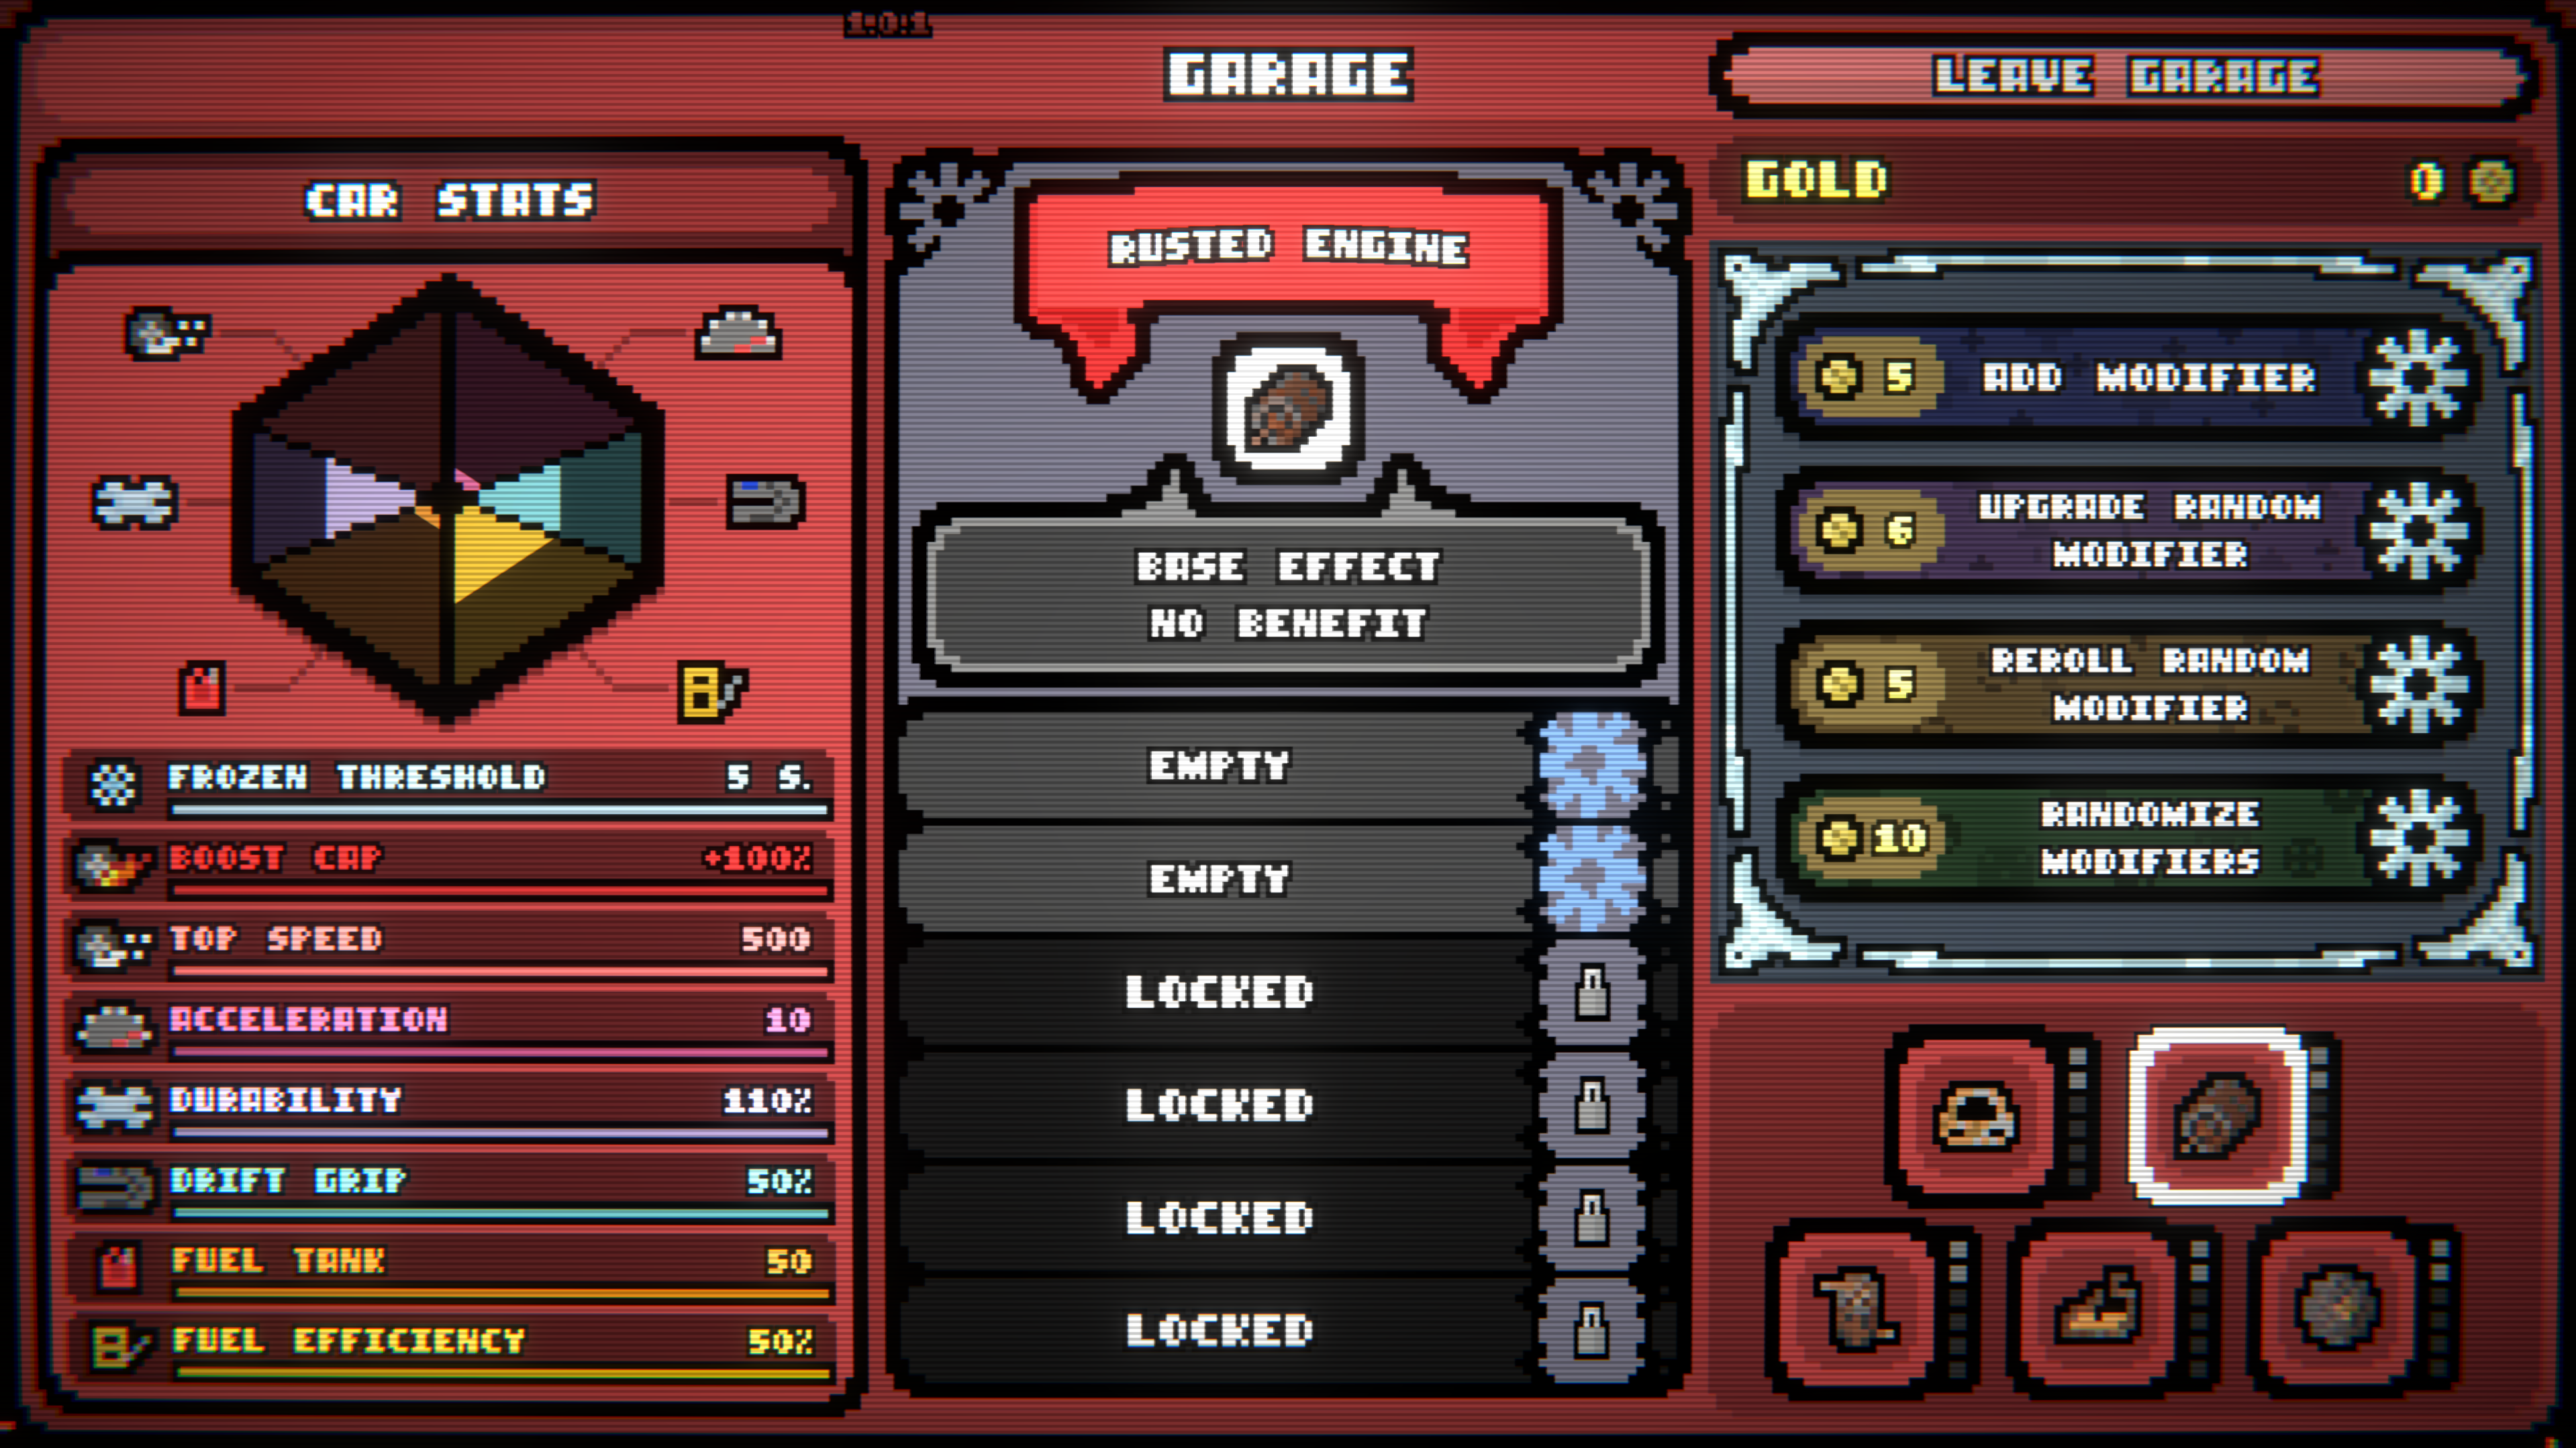
| Garage stats panel | Open Garage from its HUD button or the lobby. The panel lists Frozen Threshold, Boost Cap, Top Speed, Acceleration, Durability, Drift Grip, Fuel Tank, Refuel Efficiency, Loop Score, Overdrive Timer, Overdrive Pulse, and Lucky Chance. | Hover a row for its Version 1.0.2 explanation. Compare these current totals when changing car parts. |
| Car tab | The Garage car tab shows the active car's icon, name, and effect. | Read the car effect before blaming a card or gate. The body can change the engine you are trying to build. |
| Inspect Track | Open the Pit Stop and choose Inspect Track. Use it to follow travel direction, count gate slots, inspect placed gates, and read the current hazard or boss. | This view answers which gate is encountered next and whether its own condition or cooldown allows it to fire. It does not replace the Garage stat totals. |
Tip: When fuel is the problem, note current Refuel Efficiency, current fuel, and the next two gates before buying anything. One dependable refill is often easier to sustain than a pile of rapid refuels. Fast triggers and ghost traffic cause more refuel events, so they can spend efficiency much faster.
What Every Stat Means
| Stat | Plain-English meaning | Where to read it |
|---|---|---|
 Fuel Fuel | The resource consumed while the car runs. Reaching zero opens the On Emptied trigger window. | Current fuel is on the run HUD's fuel gauge. Maximum capacity is the Fuel Tank value in Garage. |
 Refuel Efficiency Refuel Efficiency | A limited stat used when fuel is restored. It starts draining when you refuel, so frequent refills cannot sustain a run forever without efficiency support. The exact loss is effect-dependent; do not assume a fixed formula. | Read the current total and tooltip in Garage. |
 Boost Boost | The added-speed pool created by boost effects. It is separate from normal acceleration and can carry current speed beyond Top Speed. | Watch the boost and speed readouts around the run HUD's speedometer. |
| Boost Cap | The boost boundary used by the current speed system. During Overdrive, boost below the cap is retained while boost above it decays. | Garage shows the percentage and, in Version 1.0.2, the speed that percentage allows in brackets. |
 Overdrive Timer Overdrive Timer | The time available for the final Overdrive attempt after durability reaches zero. | Garage shows the stat; the active countdown appears above the speedometer. |
 Overdrive Pulse Overdrive Pulse | The strength of the repeating speed pulses delivered during Overdrive. | Garage shows the stat. The Version 1.0.2 Overdrive Gate tooltip also shows the boost supplied by one pulse in brackets. |
 Durability Durability | The run's life percentage. At zero, Overdrive begins as a last attempt to reach the score goal. | Read it at the upper left of the run HUD and as a Garage stat. |
 Loop Score Loop Score | The base score credited for completing a loop. | Garage shows the base value. The upper score bar shows total round score against the goal. |
 Lucky Chance Lucky Chance | The chance stat used by effects that call for luck. It also affects card-pack rank floors and upgrades in Version 1.0.2. | Read it in Garage. Every complete 100% raises the lowest rank a pack can offer; at 100% or more, an upgrade may advance a card by two ranks. Extra Lucky Chance does not improve Golden Clover, Lucky Spring, or Lucky Refill. |
 Acceleration Acceleration | How quickly the car builds its normal speed. | Read the current value and tooltip in Garage. |
| Top Speed | The ceiling for normal accelerated speed before added boost is considered. | Read it in Garage; compare it with Boost Cap rather than treating the two as one stat. |
 Drift Grip Drift Grip | How much speed the car keeps while drifting through corners. | Read it in Garage. Drift activity appears around the speedometer during a run. |
| Fuel Tank | The car's maximum fuel capacity. | Garage shows capacity; the run HUD shows how much fuel remains. |
 Frozen Threshold Frozen Threshold | The amount of pooled freeze needed to enter the Frozen state. Frozen stops fuel consumption for its duration. | Read the threshold in Garage. The fuel gauge shows the frozen effect, while the speedometer's snowflake shows freeze and cooldown state. After Frozen ends, freeze cannot pool again until a cooldown equal to that frozen duration finishes. |
Overdrive Pulse vs. Overdrive Timer
| Readout | What it changes | How to check it |
|---|---|---|
| Overdrive Pulse | The output of a speed pulse. | Read the Garage stat and the Overdrive Gate tooltip. More pulse output does not add time to the countdown. |
| Overdrive Timer | How long the final attempt remains available. | Watch the active countdown above the speedometer. A longer timer does not itself strengthen each pulse. |
 Overdrive Gate Overdrive Gate | Triggers the number of pulses printed on that gate. | In 1.0.2 the tooltip also shows boost per pulse. Read this before comparing ranks. |
The final Overdrive state, Overdrive Gate, and a card with Overdrive in its name have different conditions. Read the printed trigger rather than assuming they all begin only when durability reaches zero.
Overdrive Is a Final Speed-Pulse State
Durability reaches 0% → Overdrive starts → speed pulses repeat while the timer runs → meet the score goal or the car explodes and the run ends
Overdrive does not replace fuel, restore durability, or turn a weak sustain plan into a safe one. It is the final sprint. Overdrive Timer controls how long that sprint lasts, while Overdrive Pulse describes its speed pulses. Treat both as last-chance output, not a dependable survival engine.
What Is Pooled Freeze?
Pooled Freeze is accumulated freeze that builds toward Frozen Threshold. Frozen Gate and Frozen Drift can add to the pool. Reaching the threshold enters Frozen, which stops fuel consumption for its duration. Frozen ending starts a cooldown; no more freeze can pool until that cooldown finishes.
- Read Frozen Threshold in Garage.
- Watch the freeze indicator while a matching effect adds pooled freeze.
- When Frozen ends, wait for its cooldown to finish before expecting another addition.
- If Frozen Gate still does nothing, check its own cooldown as well as the car's freeze cooldown.
These are two separate checks. Adding more Frozen Gates will not bypass the car's post-freeze cooldown. Use the fuel checks for a falling tank and the gate reference to compare Frozen with Efficiency Gate.
Trigger Windows: What Fires, and When
These are separate event windows, not an undocumented master priority formula. Read the exact card, gate, charm, or car tooltip inside the matching window.
 On Start:
 Press Start → an On Start card with a charge available spends one charge → its effect resolves. The Question Mark charm also transforms when Start is pressed in Version 1.0.2. On Loop:
 Car completes the circuit → the loop registers → Loop Score and On Loop effects resolve. A gate pass elsewhere on the track is not automatically an On Loop event. On Emptied:
 Fuel reaches 0 → charged On Emptied cards get their trigger window → a successful refill continues the attempt; otherwise the normal repair and durability-loss flow continues. On Adjacent Cards:
 A card triggers → cards directly beside it check for On Adjacent Cards → eligible effects resolve. Moving the same cards can therefore change the chain. Version 1.0.2 fixed Emerald and Diamond effectiveness penalties for this trigger. Per-gate:
 Car or ghost enters a gate's area → the gate checks its printed condition, time requirement, and cooldown → it fires only if those checks pass. Entry alone is not a promise that every gate will activate. The Efficiency Gate, for example, requires the car to remain in its zone long enough and can miss its tick at very high speed. Drift:
 Car enters a corner → drift begins → drift ticks build → eligible drift effects fire. Straight sections do not start drift. Screech Gate can trigger drift cards, but it does not charge the Drift Meter. Ghost:
 A ghost effect creates an extra car → the ghost makes passes during its listed duration → each gate still checks its own rules and cooldown → the ghost expires. More traffic means more chances to trigger gates, not a guarantee that every pass pays out. Round completion:
 Total score reaches the displayed goal → the round ends → Round Complete effects resolve → the next reward or route decision appears. This is tied to meeting the goal, not merely finishing another loop.
The fuel branch is worth memorizing: Fuel reaches 0 → On Emptied charge fires → refuel succeeds and the attempt continues, or repair costs durability → 0% durability starts Overdrive. Charges on On Start and On Emptied cards are counted per repair. Version 1.0.2 greys that charge count so it reads as information rather than another effect value.
For gates, follow travel direction in Inspect Track. Boost Gate → Fuel Gate → Score Gate means those gates get their chances in that order, but only if each one meets its own condition and cooldown. Reverse the placements and you have a different chain. Ghosts add more passes; they do not erase those checks.
Version 1.0.2 Changes to Remember
- Garage stat tooltips now explain each stat, and the Garage tutorial points out that rows can be hovered.
- Loop Score, Overdrive Timer, Overdrive Pulse, and Lucky Chance were added to the Garage stats panel.
- The Garage gained a car tab showing the current car's icon, name, and effect.
- Boost Cap now includes its allowed speed in brackets after the percentage.
- Frozen Threshold now explains that freeze cannot pool during the cooldown after Frozen ends.
- Lucky Chance raises card-pack rank floors at each complete 100%, and 100% or more allows two-rank card upgrades.
- Golden Clover, Lucky Spring, and Lucky Refill now state that extra Lucky Chance does not improve them.
- On Start and On Emptied charge counts are now grey information text.
- The Overdrive Gate tooltip now shows the boost supplied by each pulse in brackets.
- On Adjacent Cards now applies Emerald and Diamond effectiveness penalties correctly.
Already active from Version 1.0.1: On Start and On Emptied tooltips show charges per repair; boost below the cap is retained during Overdrive while above-cap boost decays; and Screech Gate triggers drift cards without filling the Drift Meter. These are current Version 1.0.2 behaviors, but they were not introduced by 1.0.2.
When an interaction looks odd, slow the run down and change one part only. Note the Garage value, use one matching card or gate, and watch the next trigger. That quick pit-crew check is safer than rebuilding the whole row around one enormous-looking number. The goal is still the good stuff: a modest car that feeds itself, chains cleanly, and lets the numbers escape containment without asking Overdrive to tow it home.
Comments will load when you reach this part of the walkthrough.