
12-Round Run Walkthrough
You know the run: the car is circling, the tank is coughing, and your pit box contains one Score card, one Ghost gate, and a Drift charm that have never spoken to each other. The Loopler can make three promising parts add up to almost nothing when their triggers do not match. Fix that in the opening rounds. Choose one engine, give it fuel, and arrange its gates in the order they need to fire. That is how the modest little slot car becomes a self-feeding number cannon.
This route was written for version 1.0.2. The node map, rewards, hazards, bosses, and pit-stop stock vary between runs. Follow the checkpoints and decision rules below rather than waiting for one exact item sequence.
Rounds 1–3: Name the Engine
An engine is the repeatable trigger-and-payoff chain that fills the score goal. For a first clear, use the strongest direction already present in your opening choices:
| Engine | Early signal | First matching gate | What it still needs |
|---|---|---|---|
| Speed | Reliable boost or rewards for frequent loops |  Boost gate Boost gate | Fuel support and a repeatable score payoff |
| Ghost | A way to create ghosts or reward ghost passes |  Ghost gate Ghost gate | Ghost uptime, fuel, and effects that pay on extra passes |
| Score | On Loop, per-gate, or other score triggers you can fire often |  Score gate Score gate | Enough speed to repeat the trigger before fuel runs out |
Do not commit because one reward has a huge printed number. Commit when a trigger and a payoff already connect. A Score card that fires On Loop and a gate that improves loop scoring belong together. A drift payoff in a build that rarely earns drift ticks does not.
Before placing the first gate, open Inspect Track. Find the car’s travel direction, then put setup before payoff. A simple early chain looks like this:
Fuel or support → Boost or Ghost → Score payoff
The exact slots depend on the track. The rule is stable: anything that creates the resource should fire before the effect that spends or multiplies it. Do not drop a gate into the first empty slot just to clear the placement marker.
Fuel is the opening survival job. Prefer a dependable On Loop refill or a Fuel gate over a narrow trick that may not activate. Since version 1.0.1, the first pit stop offers a Fuel or Brake gate when the run has no fuel source. Use that safety offer. Do not reroll past it while hoping RNG suddenly develops manners.
First Pit-Stop Purchase Order
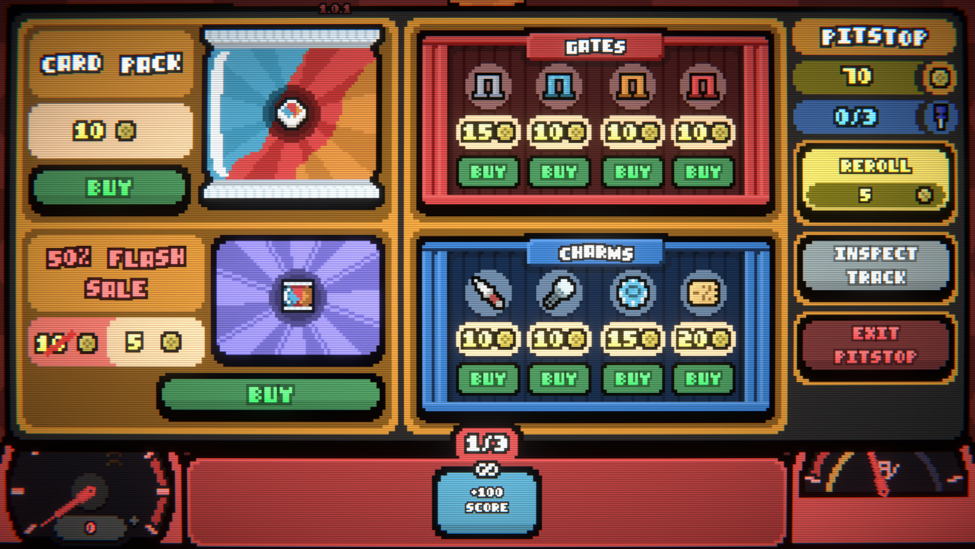
- Fix survival. Buy fuel support when the tank is ending each round lower than it began. Take repair or durability help when one rough round could end the run.
- Buy the first matching gate. Choose the gate for your named Speed, Ghost, or Score engine. Do not buy one of each.
- Add the missing trigger. Open a card pack only when the engine lacks a reliable way to fire, earn gold, or restore fuel.
- Upgrade repeatable value. Improve the gate or card that activates every ordinary loop before upgrading a rare condition.
- Buy multipliers last. A charm that doubles nothing remains extremely committed to nothing.
Use no more than one paid reroll in an early pit. Take a second only when it can solve an immediate survival hole and still leave enough gold to buy the answer. Reroll prices rise, and version 1.0.2 merely formats very large costs more clearly; it does not make them wise. Leave with gold unspent when the stock offers off-engine cards, unsupported charms, or a gate you cannot place in a useful chain. Saved gold can buy the next real upgrade. A shiny mistake cannot.
Rounds 4–6: Test the Whole Machine
After each round, check four trends before choosing the next branch:
- Fuel: Is the tank stable across a normal round, or does every clear leave less?
- Durability: This is the car’s health buffer. Can it survive one weak round or an unfriendly hazard?
- Economy: Can the next pit purchase something useful without selling the engine?
- Scaling: Is the score bar filling faster, at the same pace, or slower each round?
If fuel and durability are slipping, choose recovery or repair over another speculative reward. If survival is stable but score growth is weak, choose a reward or pit that can add a matching trigger, gate, or upgrade. If the engine works and gold is low, take economy rather than opening a pack that may dilute the plan.
Inspect every boss or hazard before selecting its branch. Avoid an effect that attacks the resource keeping the run alive. A refuel engine should not volunteer for a refuel-efficiency penalty just because the reward looks exciting. A durability-starved build should not take a damage-heavy boss while carrying enough gold to recover elsewhere. A boss penalty ends when that round’s goal is reached, but breaking the core engine to reach it can hurt every round after it.
Round 7: Make the Second Route Choice
Round 7 opens with another three-way route choice in the current build. Treat it as a mid-run inspection, not an invitation to start over. Choose by the run’s largest gap:
| Branch type | Take it when… | Skip it when… |
|---|---|---|
| Recovery or repair | Fuel trends downward, durability has no cushion, or the last clear relied on Overdrive, the last-chance sprint after durability runs out | Survival is already stable and the score goal is beginning to outrun you |
| Pit stop | You have buying power plus a specific need: fuel, a matching gate, or a core upgrade | You are broke or would only shop for a vague “maybe” piece |
| Reward or card choice | Your engine is missing a trigger or repeatable payoff | The current cards already cover the job and another draw would split the build |
| Boss or hazard | You have read its effect and can absorb or counter its tax | It attacks your fuel plan, durability, economy, or main trigger |
| Skull-risk option | Fuel is stable, durability has a cushion, and the bonus can fix scaling | You need the reward merely to survive the risk that grants it |
A skull marks a higher-risk lane. Treat that route as a calculated bet, not mandatory bravery. Take it when the engine already clears normal rounds cleanly and needs a stronger reward to keep scaling. If the tank is barely refilling or durability fell hard in the last round, use the safer lane. Tiny cars do not receive medals for dramatic mechanical failure.
Rounds 8–10: Upgrade, Do Not Wander
By now, upgrade the component that fires most often. For Speed, that may be reliable boost or the score effect paid by faster loops. For Ghost, extend or reward ghost activity before adding an unrelated score trick. For Score, improve the repeated scoring trigger before buying a luxury multiplier.
Use this pit sequence:
Survival gap → main trigger → matching payoff → multiplier → luxury
Stop after one reroll when the engine is healthy. Allow up to two only if poor stock leaves a clear blocker, such as no fuel support or no scaling payoff. Never spend the money reserved for the purchase itself. If a reroll leaves you staring at the perfect gate with an empty wallet, the pit crew has technically discovered comedy.
Recovery Branches
- No fuel appears: Take the guaranteed first-pit Fuel or Brake gate offer when you still have no fuel source, favor On Loop support, choose recovery routes, and stop adding speed until the tank trend stabilizes. Overdrive is not a fuel plan.
- Score growth is weak: Count which trigger fires most during one loop. Upgrade its payoff, add a matching gate, or replace a flat early bonus with a repeatable effect. Do not solve weak score by buying more unrelated setup.
- Pit stock is poor: Use one budgeted reroll, then leave. Bank the gold and route toward another pit or reward. Bad stock is temporary; wrecking the economy lasts.
- The engine is split: Compare the incompatible triggers. Keep the side that fires reliably with the current gates and car. Stop investing in the other side, and sell an off-plan card only when that gold immediately buys fuel or a core upgrade.
- Durability is collapsing: Choose repair or recovery, avoid skull-risk branches, and pause speed investment. More loops per second do not help if the car cannot survive the round.
Rounds 11–12: Close the Contract
These rounds are for finishing, not auditioning a second build. Buy only fuel, repair, or an upgrade that strengthens the engine already on the track. Skip unsupported packs and charms. Inspect the final hazard or boss effect, then choose the branch that preserves the resource with the smallest cushion.
Watch one late round at normal speed if anything looks wrong. Confirm that fuel or support fires before the main payoff and that adjacent cards still sit beside the effects they need. Two builds with the same parts can perform very differently when gate order or adjacency changes.
After round 12, settle the run when you want to bank the completed twelve-round contract and submit its score to the normal leaderboard. Version 1.0.2 makes the leaderboard split explicit: normal scores are submitted only when the run is settled. Continuing changes the objective to Infinity. From that point, the engine must survive rising goals rather than merely close a twelve-round contract.
Continue only when fuel is repeatable, durability is controlled, score is still scaling, and the build has room to improve. Otherwise, bank the win. Settling a sound normal run is not quitting early; it is bringing the tiny runaway machine home before it learns new and expensive ways to explode.
Keep these references nearby: gate icons and placement rules, build pivot checks, and Loadout and offer rules.
Comments will load when you reach this part of the walkthrough.