
Chapter Five: The Central Part
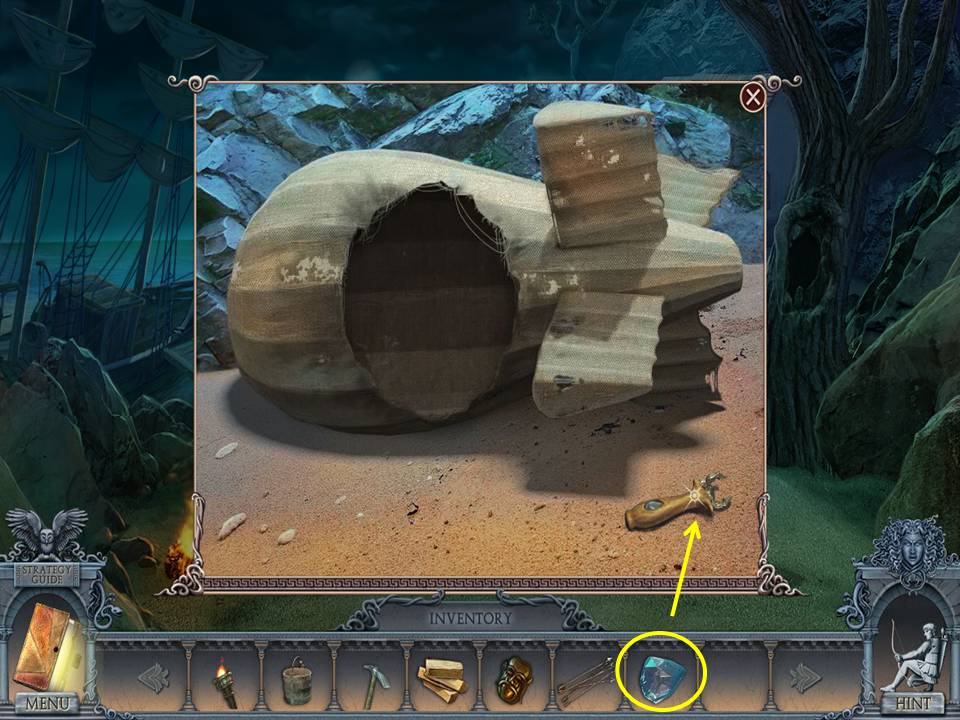
- Zoom into the blimp.
- Put the CRYSTAL in the holder of the glass cutter.
- Take the GLASS CUTTER.
- Go to Sofia’s art room.
- Cut the glass at right with the GLASS CUTTER.
- Take the GLASS BIRD.
- Click down twice.
- Ride the raft.
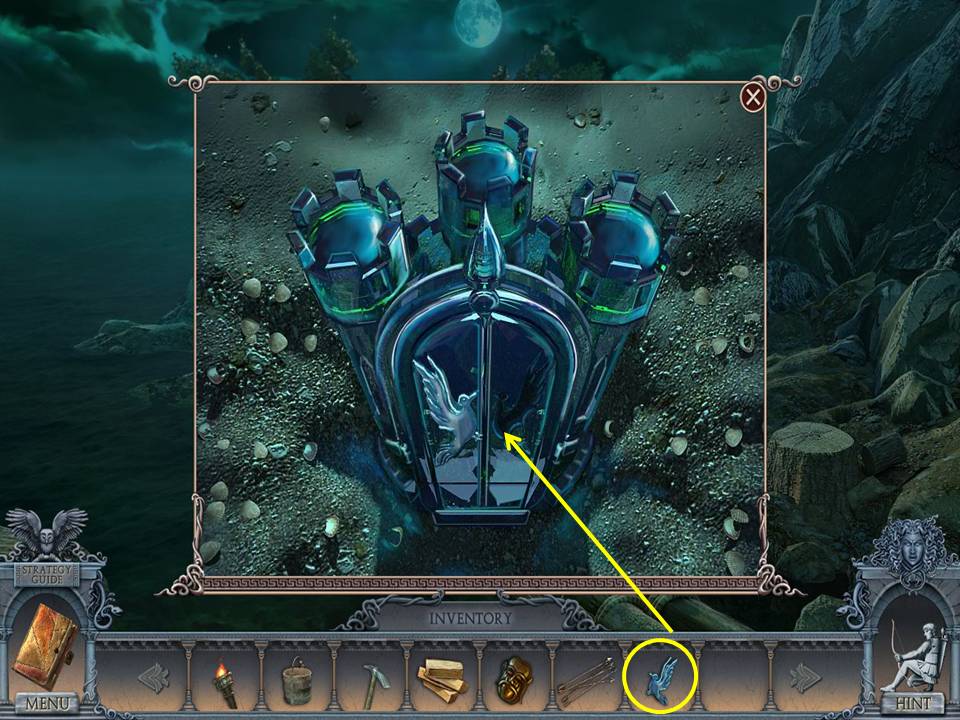
- Zoom into the glass castle.
- Put the GLASS BIRD on the door.
- Take the PORTRAIT PART.
- Click down three times.
- Go right.
- Zoom into the tree stump.
- Put the PORTRAIT PART on the empty space to initiate a puzzle.
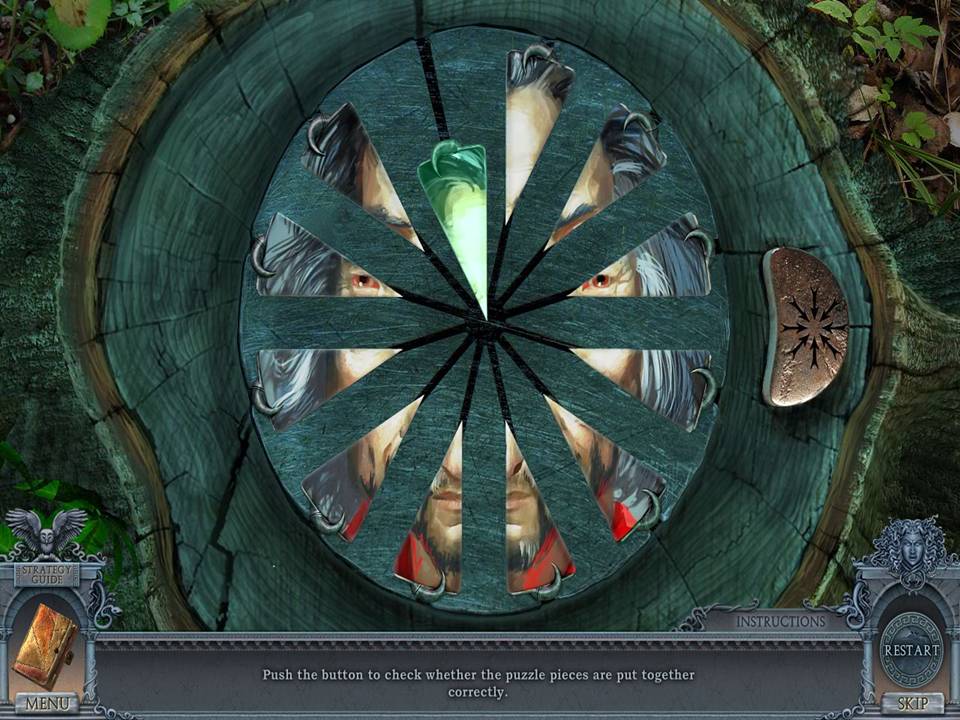
- The object of the puzzle is to swap pieces until you have completed a portrait.
- See screenshot for solution.
- When finished click the button on the right.
- Take the CAMERA KEY and CLAPPER.
- Go to the deck of the ship.
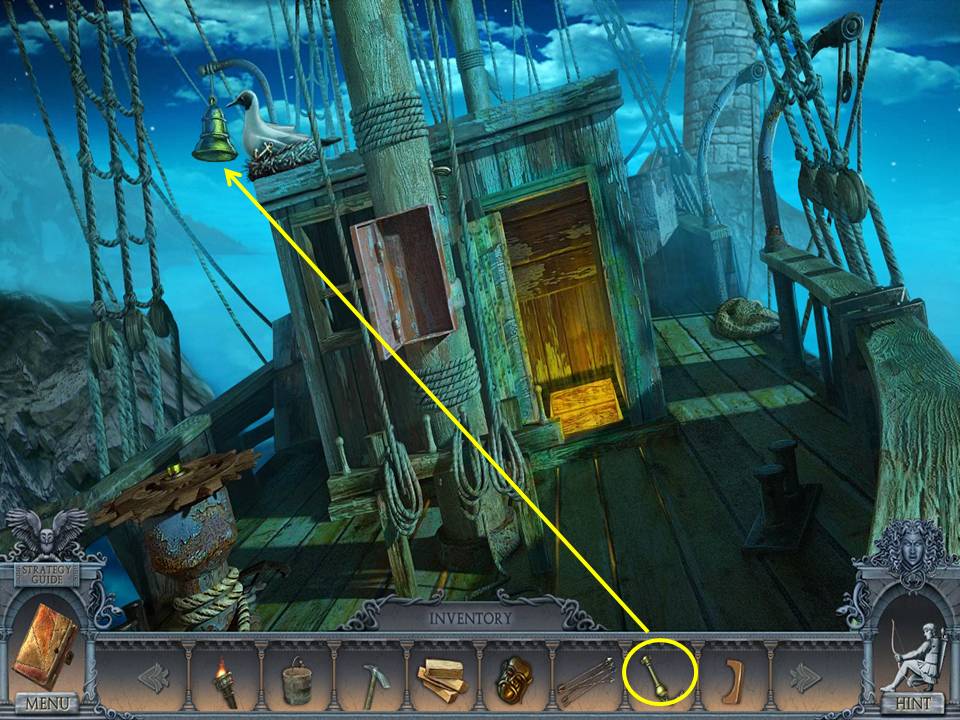
- Put the CLAPPER on the bell.
- Click to ring the bell.
- Take the MASTER KEY.
- Descend into the hold.
- Unlock the bag with the MASTER KEY.
- Take the ring.
- Return to the library.
- Change the lighting.
- Go left to the elevator.
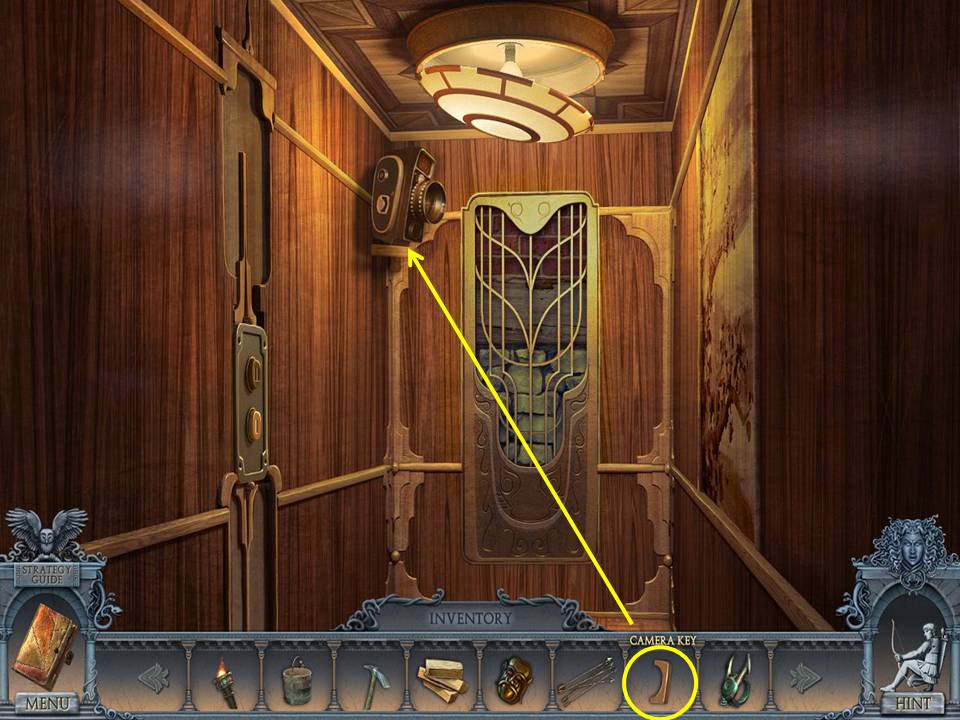
- Zoom into the camera.
- Use the CAMERA KEY.
- Take the TAPE.
- Click the down button.
- Put TAPE on the projector.
- Remember the code.
- Click down and ride up in the elevator.
- Zoom into the desk.
- Use the code (2706) on the disks.
- Insert the ARROWS into the arbalest.
- Take the MAGIC ARBALEST and HEXAGON.
- Return to the elevator and ride down.
- Zoom into the device on the right corner of the desk.
- Zoom into the front panel.
- Put the HEXAGON in the center to initiate a puzzle.
- The object of the puzzle is to move the wires so they all light.
- See screenshot for final move.
- Take the HOLDER.
- Return to the topiary garden and go right.
- Use the MAGIC ARBALEST on the ritual site doorway.
- Zoom into the woman.
- Take the CASKET KEY and TESLA KEY.
- Return to the mansion.
- Head upstairs and go right.
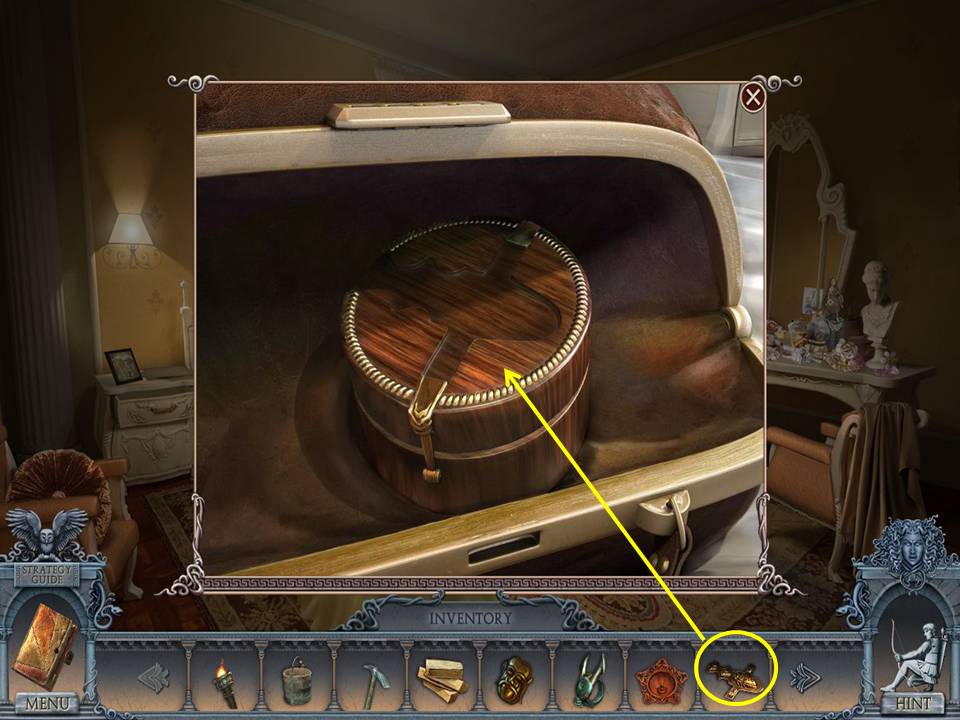
- Open the box contained in the bag on the bed with the CASKET KEY.
- Take the SLIDE.
- Click down.
- Go left.
- Zoom into the shelf.
- Insert the SLIDE into the device.
- Remove the SLIDE.
- Zoom into the telescope.
- Insert the SLIDE into the holder.
- Take the CRYPTEX CODE.
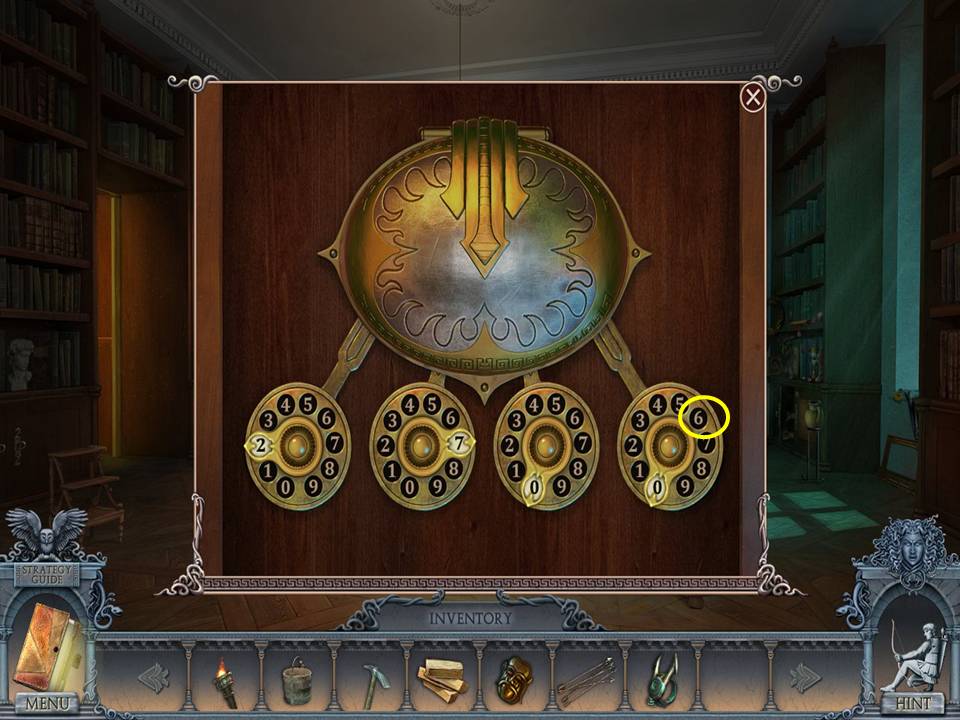
- Zoom into the shelves.
- Dial the CRYPTEX CODE to get a code.
- Click the dials under the code to match the code (lumen).
- Take the scroll and second RING.
- Return to the ritual site.
- Zoom into the door and put the two RINGS in the slots.
- Click the rings.
- Enter the machine room.
- Zoom into the bottom shelf to play an HOA.
- Return the items to where they belong in the scene.
- See screenshot for placements and final move.
- Receive a SAFE KEY.
- Click down.
- Zoom into the wall.
- PICKAXE the bricks.
- Unlock the safe with the SAFE KEY.
- Take the BLOCK and second TESLA KEY.
- Go left.
- Zoom into the device on the right wall.
- Insert the two TESLA KEYS in the slots.
- Take the KEY. Note the code.
- Click down twice.
- Put the BLOCK on the well hook.
- Take the MOSAIC PIECE.
- Return to Sofia’s house.
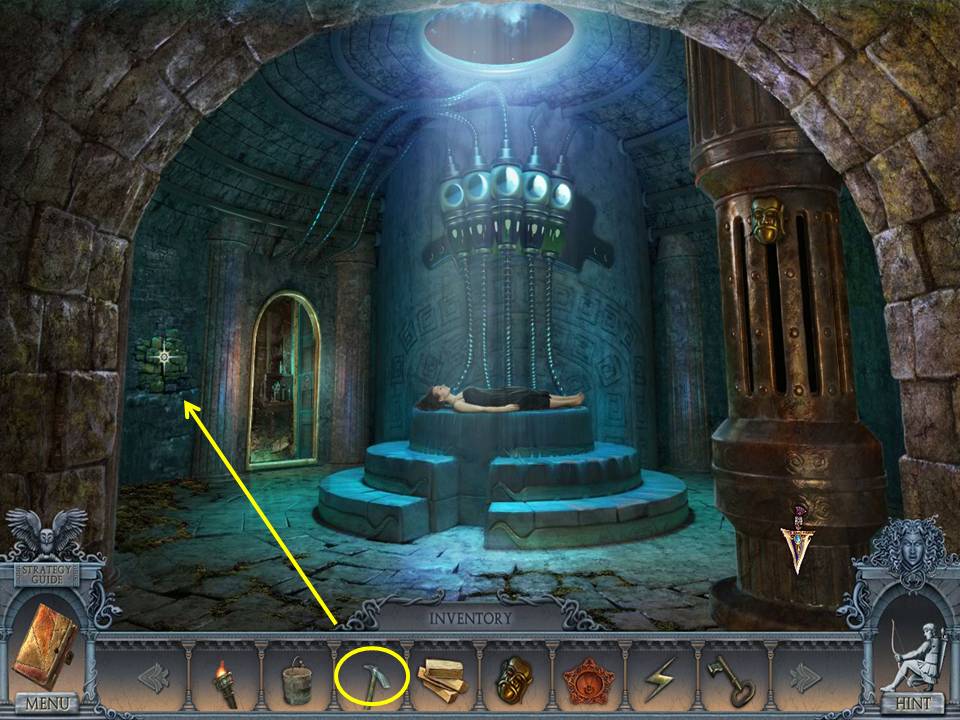
- Zoom into the bed footboard.
- Insert the MOSAIC PIECE to play a game.
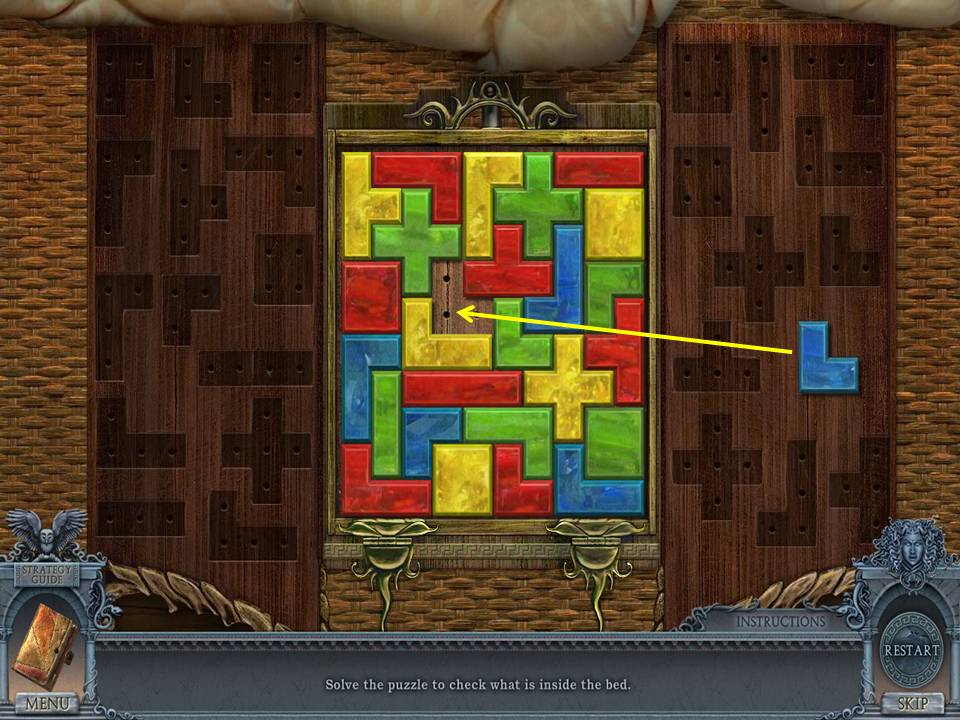
- The object of the game is to move the pieces so that no two of the same color are touching.
- See screenshot for final move.
- Take the second METAL HEAD.
- Click down.
- Return to the ship’s hold.
- Zoom into the chest.
- Unlock it with the key.
- Take the third METAL HEAD.
- Return to the ritual hall.
- Place the three METAL HEADS on the column.
- Placement reflects the clue in the journal.
- Moving left to right, click the second head twice and the farthest right head four times.
- Take the KEY. Go left.
- Unlock the device with the KEY.
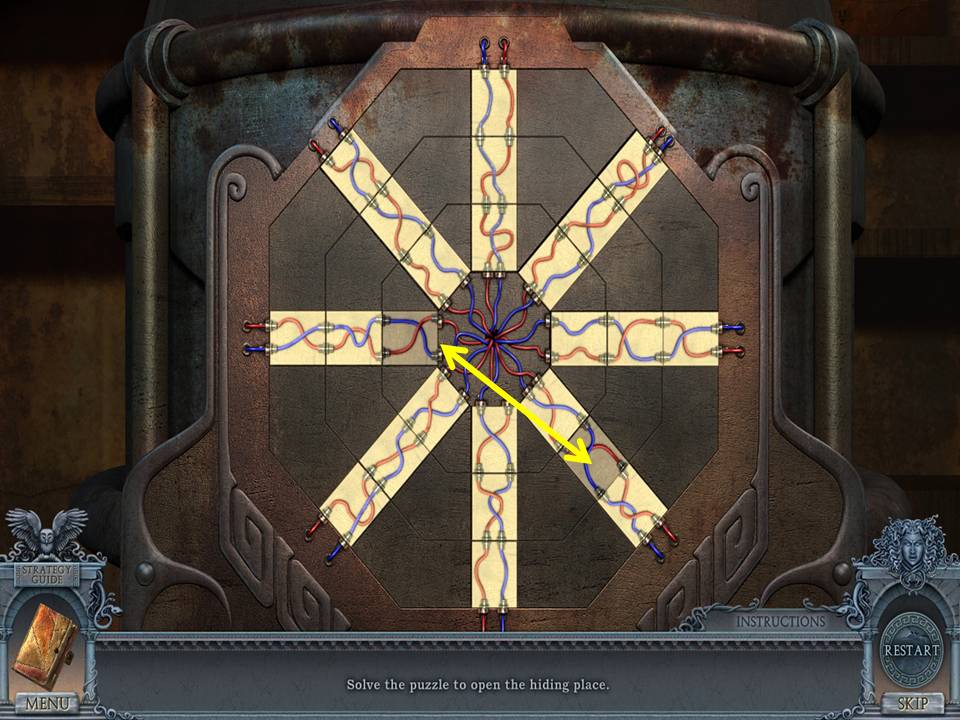
- Zoom into the device to initiate a puzzle.
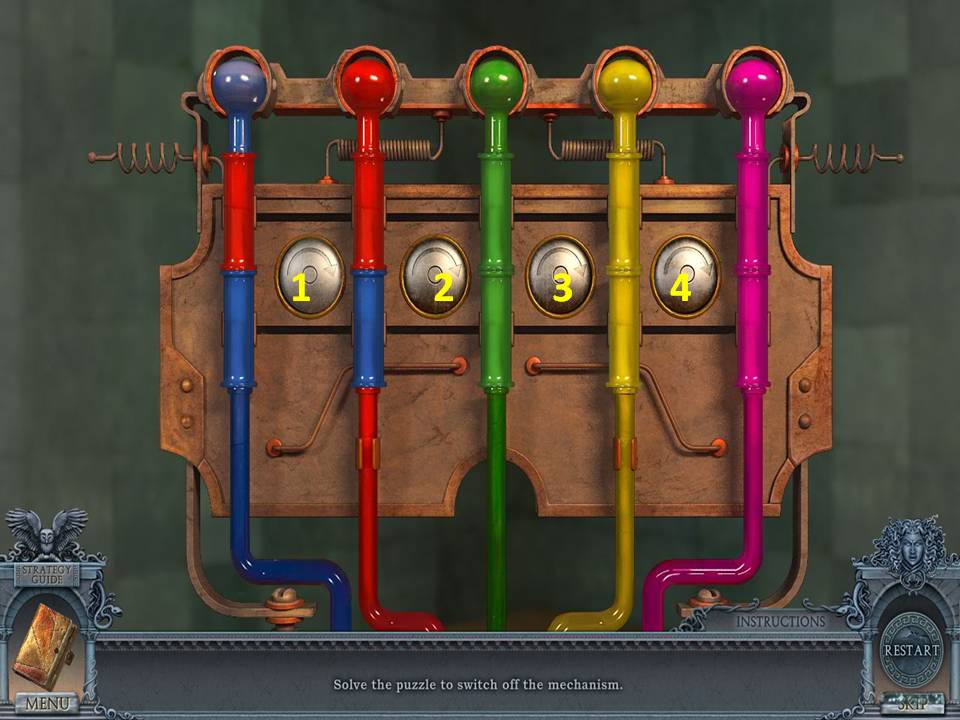
- The object of the puzzle is to move the tubes so that all of the same color are connected.
- Assuming the buttons between the tubes are numbered one to four from left to right, click in this order: 2, 2, 3, 4, 1, 2, 3, 4, 3, 1, 1, 2, 2, 2, 3, 2, 2, 1, 2, 1, 1, 1.
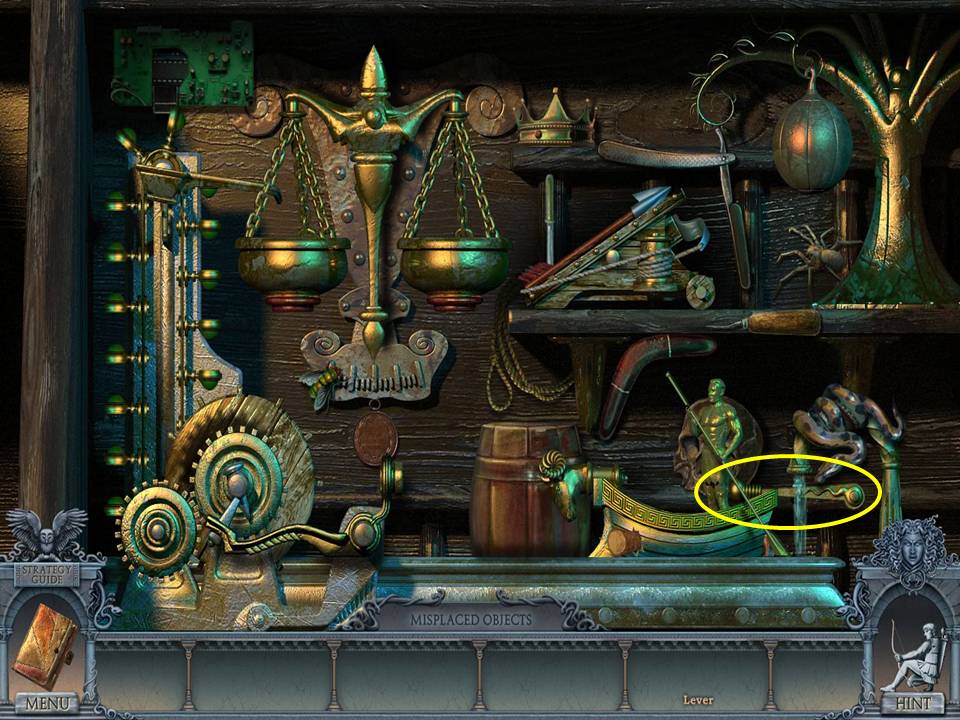
- Zoom into the shelves to play an HOA.
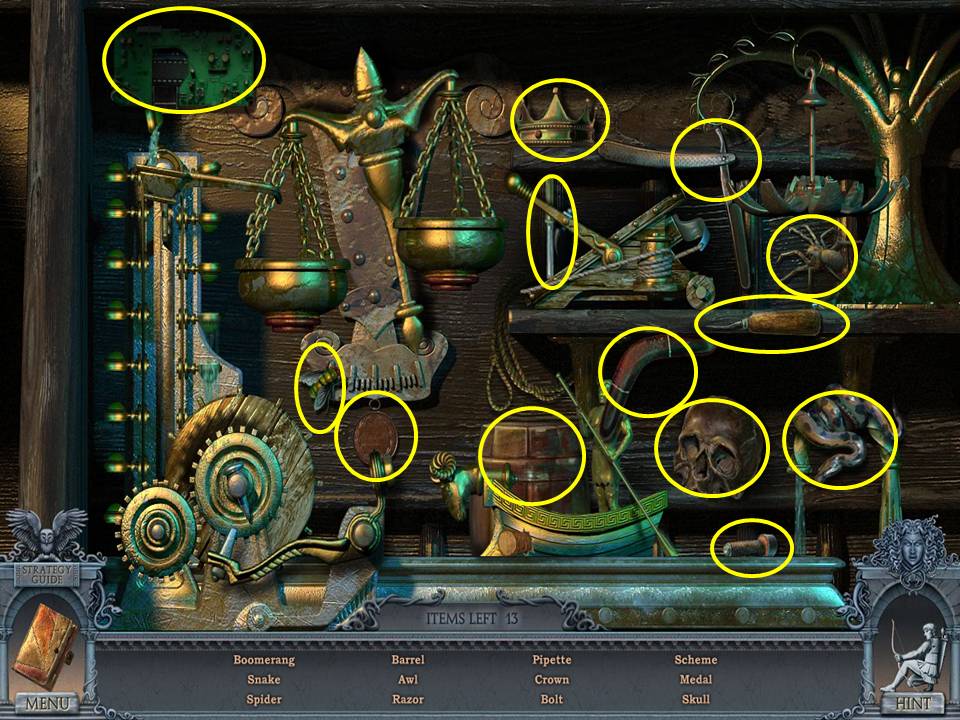
- Find the items listed.
- Receive a LASSO.
- Click down two times.
- LASSO the items in the water.
- Take the SPADE.
- Return to the ship’s hold.
- Zoom into the chest.
- Put the BUCKET next to it.
- SPADE the sand.
- Take the SAND.
- Return to Sofia’s art room.
- Zoom into the furnace.
- Put the FIREWOOD in and light it with the LIT TORCH.
- Pour the SAND in the funnel.
- Take the EMPTY BULB.
- Ride the cable car to Kleito’s house.
- Scale the ladder.
- Go left.
- Zoom into the device.
- Put the HOLDER and EMPTY BULB in the center to initiate a puzzle.


- The object of the puzzle is to charge each field with power.
- See screenshot for solution.
- Take the BULB.
- Return to the crypt.
- Insert the bulb in the center to finish your triumph over the dark forces.
- Congratulations! You've completed Secrets of the Dark: Mystery of the Ancestral Estate!
Comments will load when you reach this part of the walkthrough.