
Chapter Two: The Library
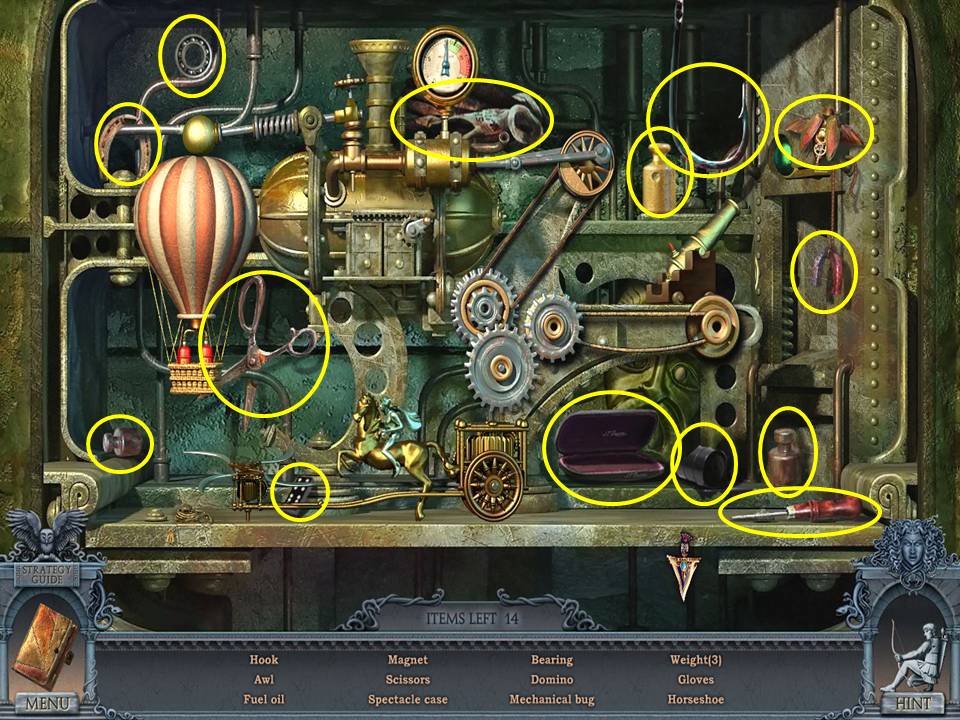
- Zoom into the alcove to play a HOA.
- Find the items listed.
- Receive the GREEK MASK.
- Go upstairs.
- Change the lighting.
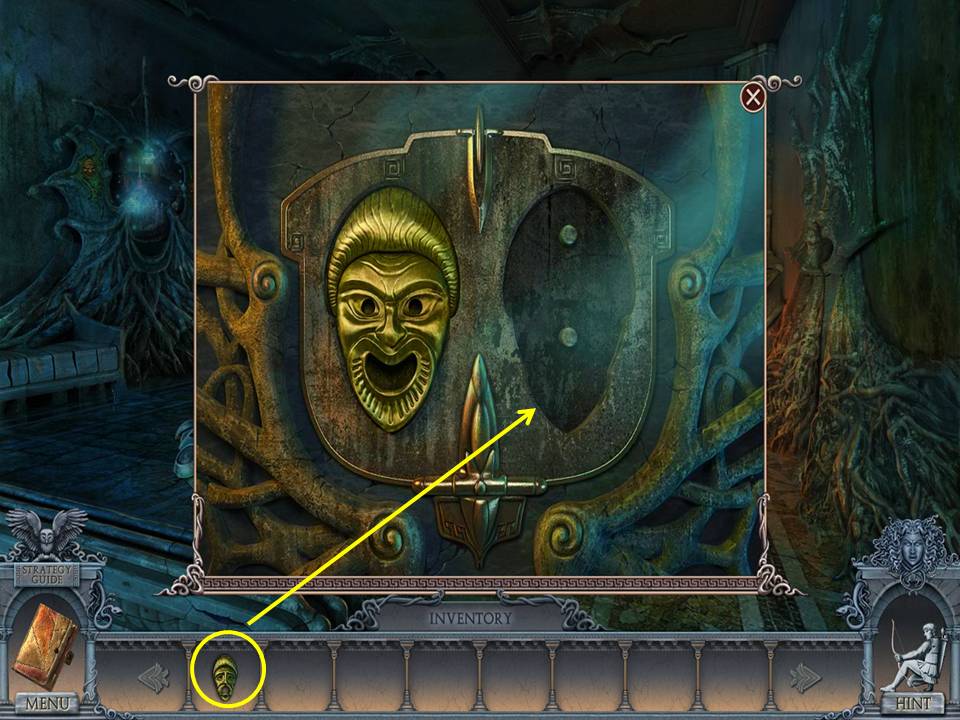
- Zoom into the top of the roots on the right and place the GREEK MASK in the slot.
- Take the CHEST BUTTON.
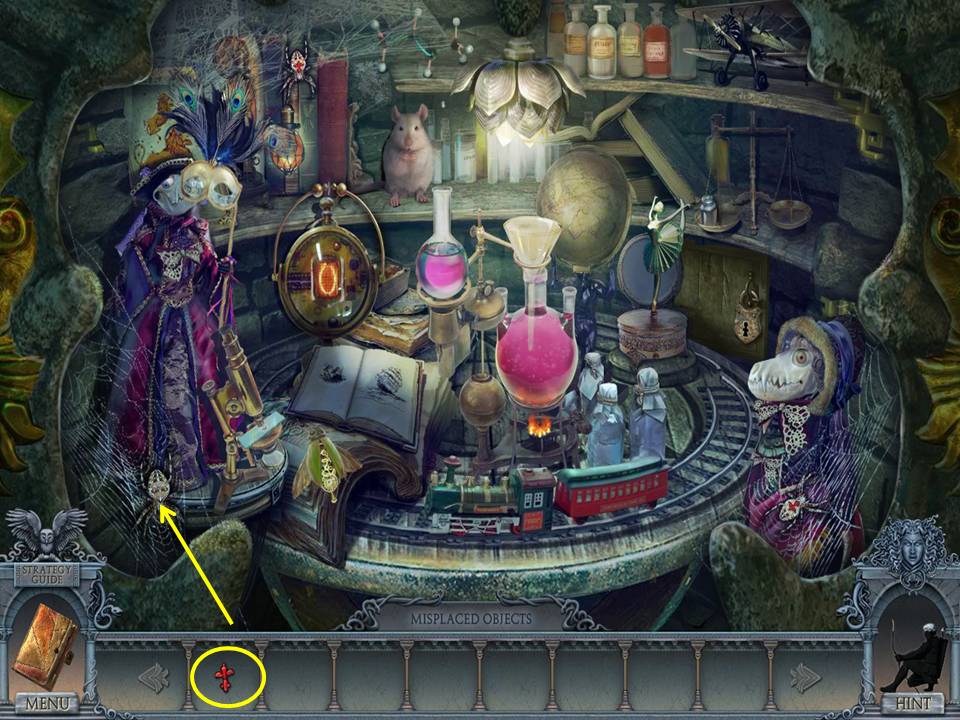
- Zoom into the left alcove to play an HOA.
- In this HOA game, you place the items along the bottom into the scene where they belong.
- Give the mouse the cheese.
- Pour the test tube into the beaker.
- See screenshots for placements and final move.
- Receive a KNIFE.
- Change the lighting and go right to the bedroom.
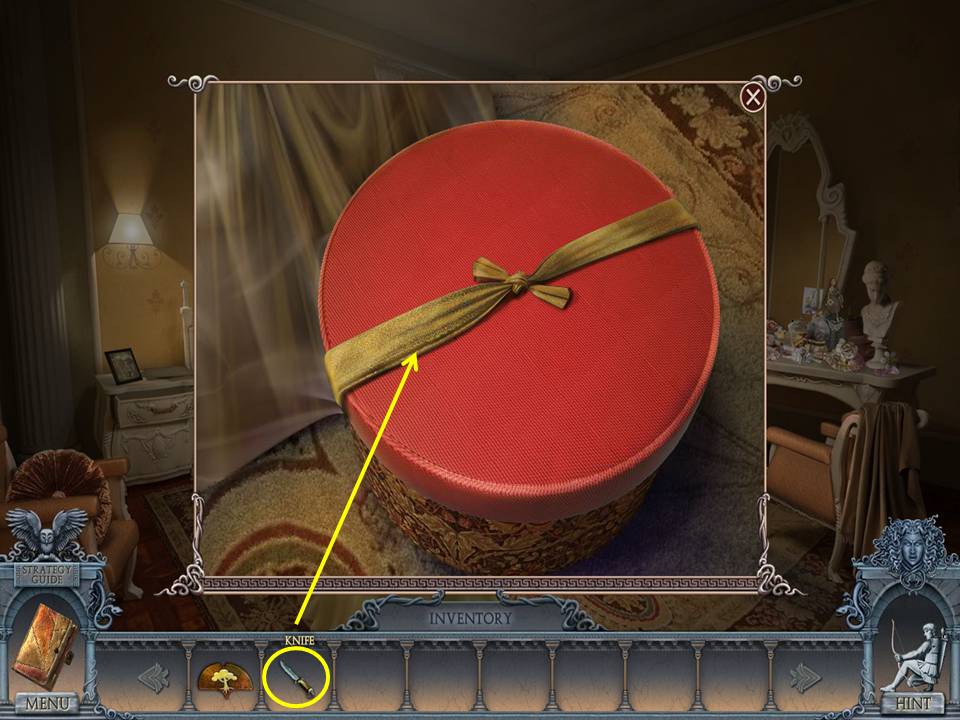
- Zoom into the box.
- Cut the ribbon with the KNIFE.
- Take the LENS and DOOR HANDLE.
- Zoom into the dresser to play an HOA.
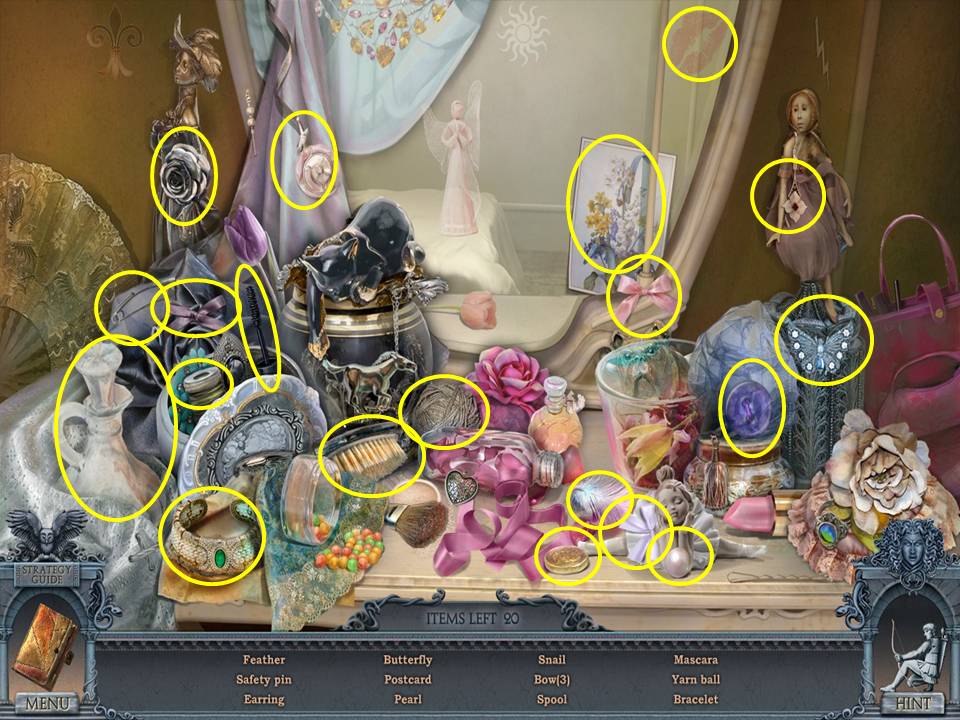
- Find the items listed. R
- eceive a POWDER WITH BRUSH.
- Click down twice.
- Zoom into the door to the right of the steps.
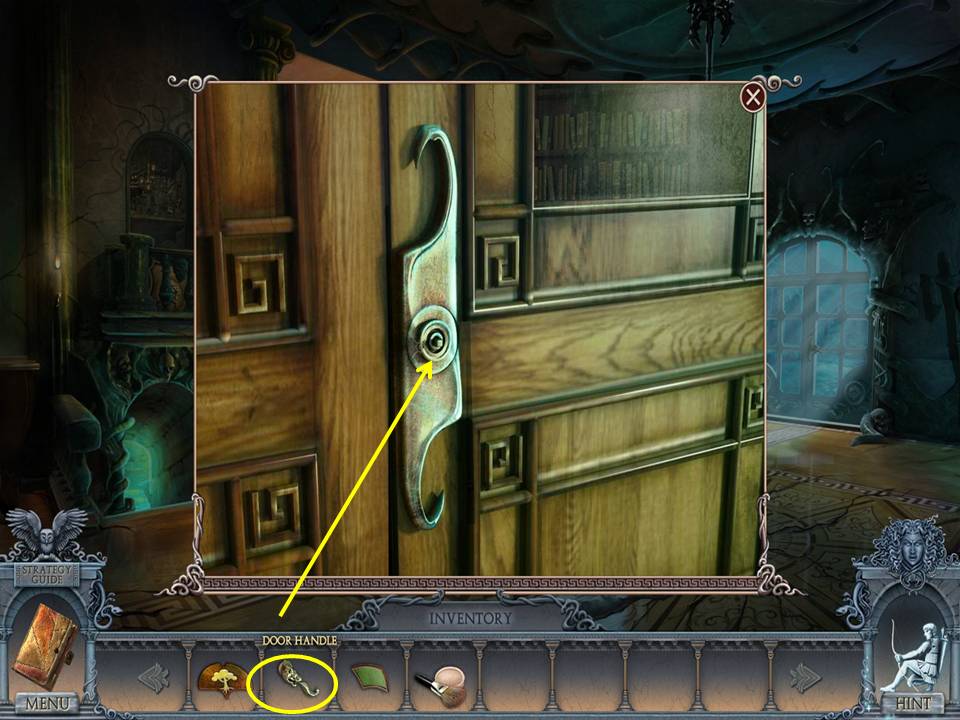
- Place the DOOR HANDLE on it.
- Go through the door to the library.
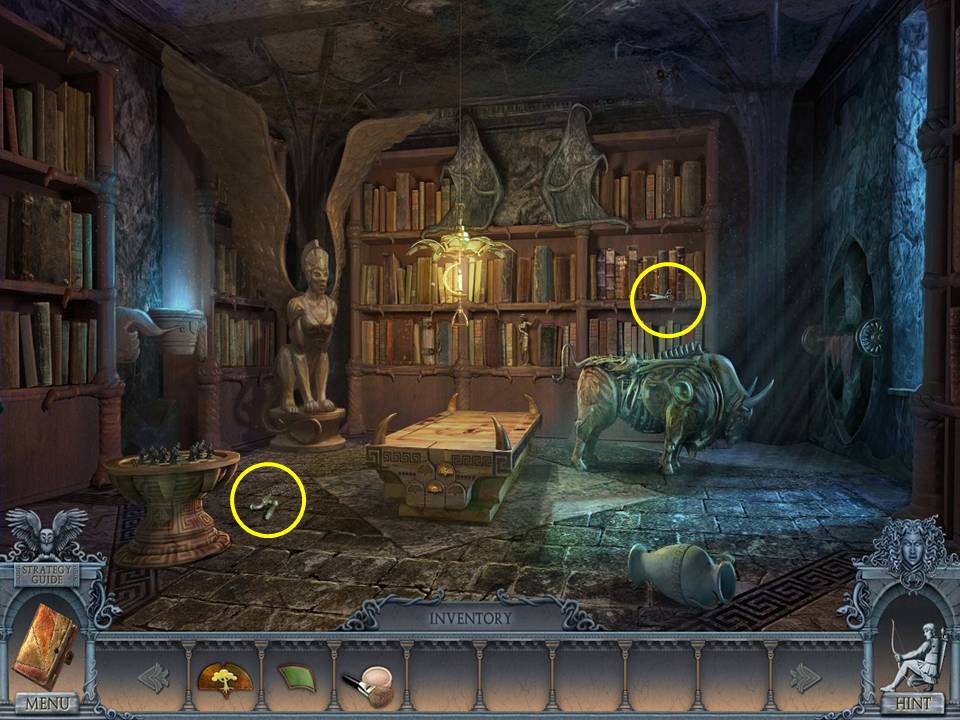
- Take the TAP.
- Zoom into the bookshelf.
- Take the SCISSORS.
- Read the note.
- Click down.
- Go upstairs and right to the bedroom.
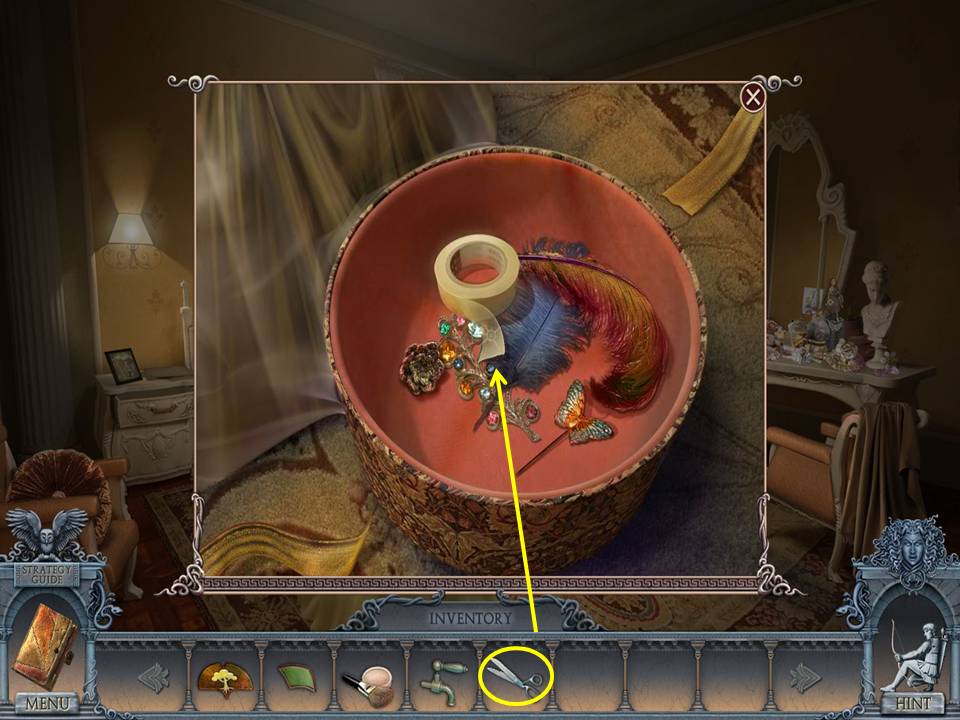
- Zoom into the box.
- Cut the tape with the SCISSORS.
- Take the TAPE.
- Click down.
- Go left.
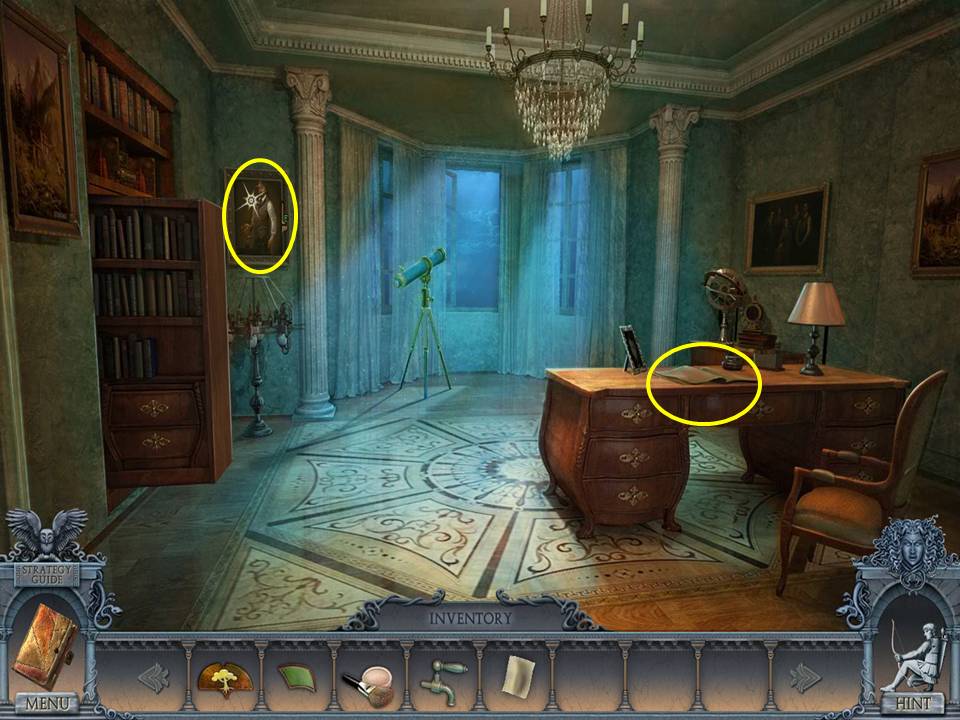
- Zoom into the desktop.
- Click the newspaper pages to read the articles.
- Lift the fingerprint with the POWDER WITH BRUSH and TAPE.
- Take the FINGERPRINT.
- Zoom into the portrait.
- Use the FINGERPRINT on the green button.
- Read the scroll.
- Take the SEED.
- Click down twice.
- Go to the library.
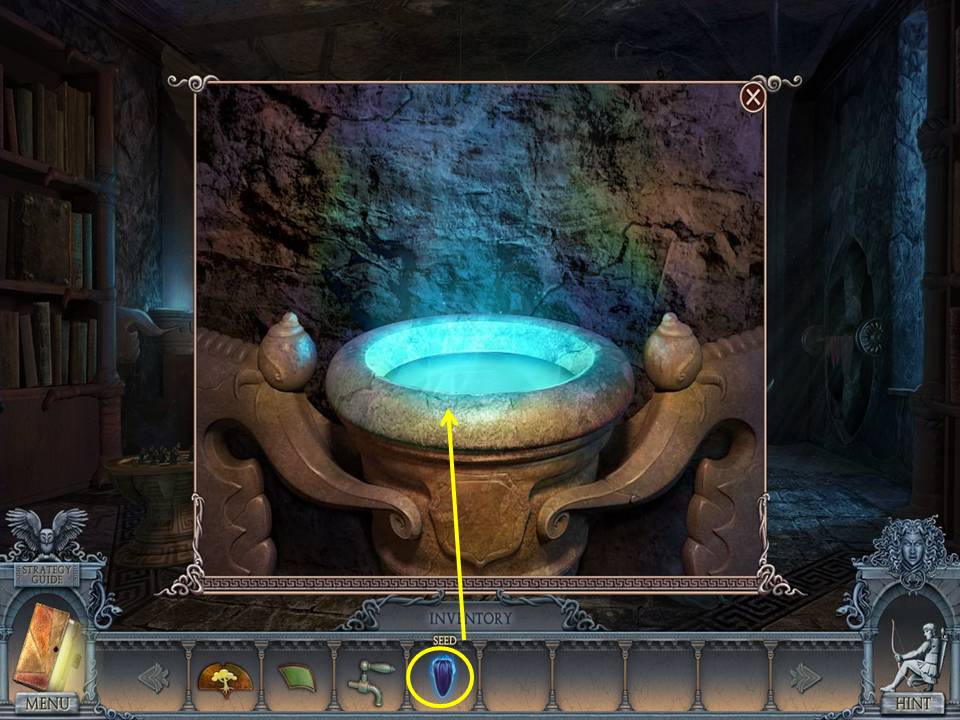
- Zoom into the magic pot.
- Plant the SEED in it.
- Take the FIRE FLOWER.
- Click down.
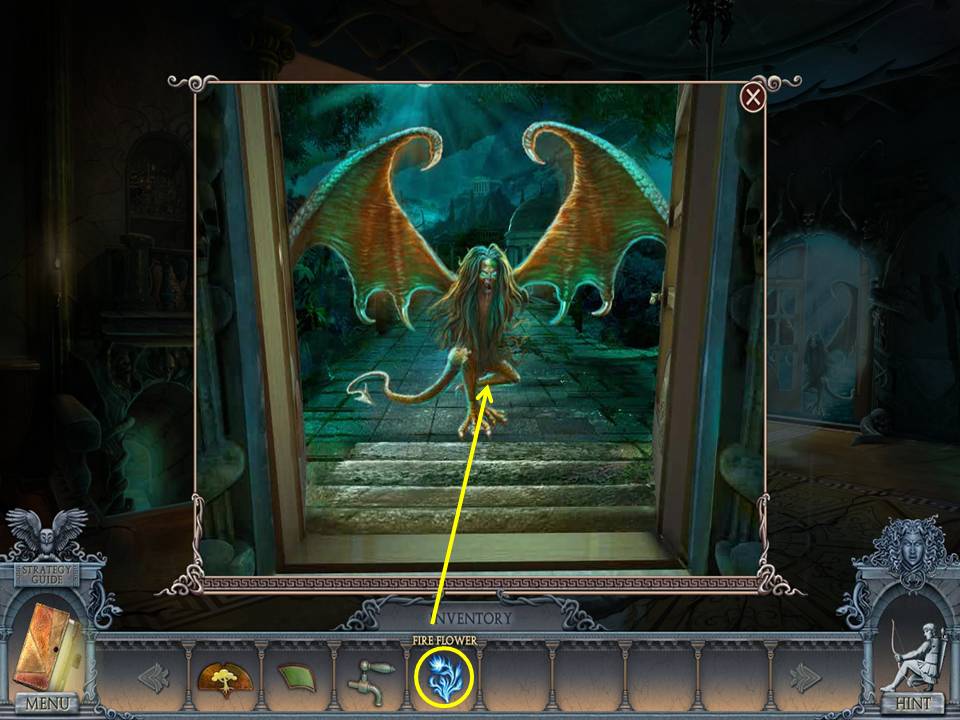
- Zoom into the glass doors.
- Open the doors.
- Use the FIREFLOWER on the Harpy.
- Go through the door.
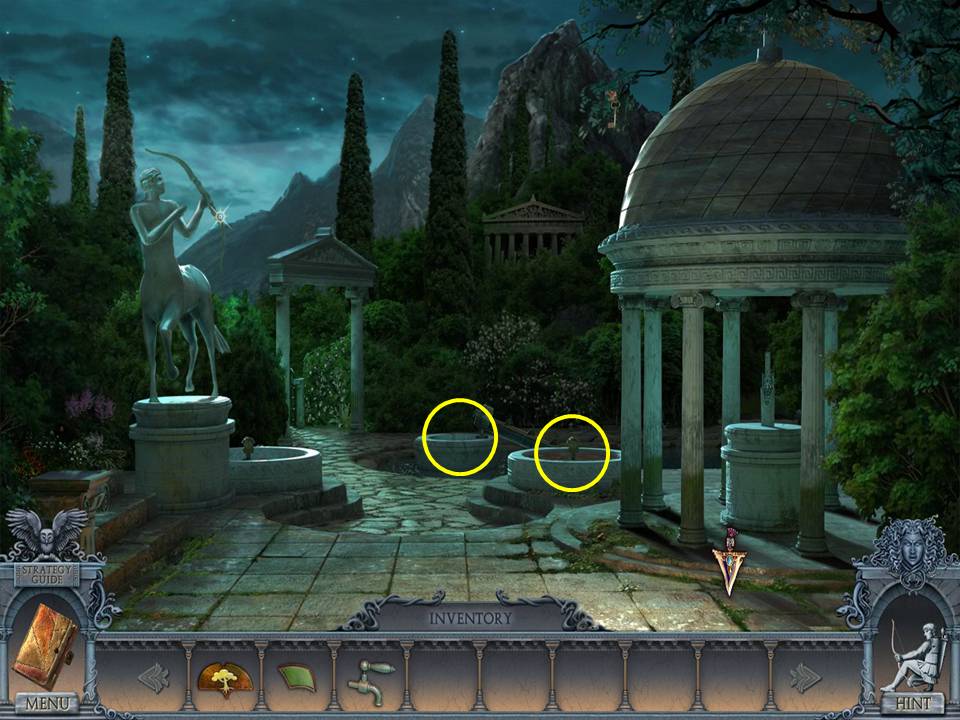
- Zoom into the center fountain.
- Take the CANE.
- Zoom into the right fountain.
- Take the second LENS.
- Go left through the arch.
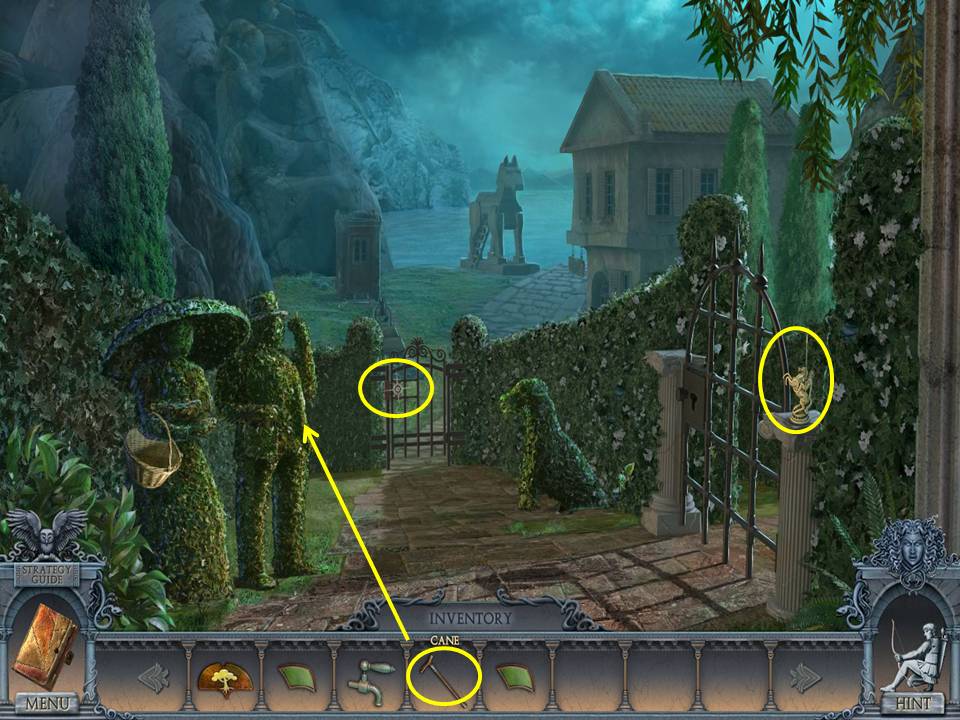
- Give the CANE to the topiary shaped like a man.
- Take the BOOK and the second CHEST BUTTON.
- Zoom into the gate.
- Take the third LENS.
- Take the KNIGHT.
- Click down twice.
- Go to the library.
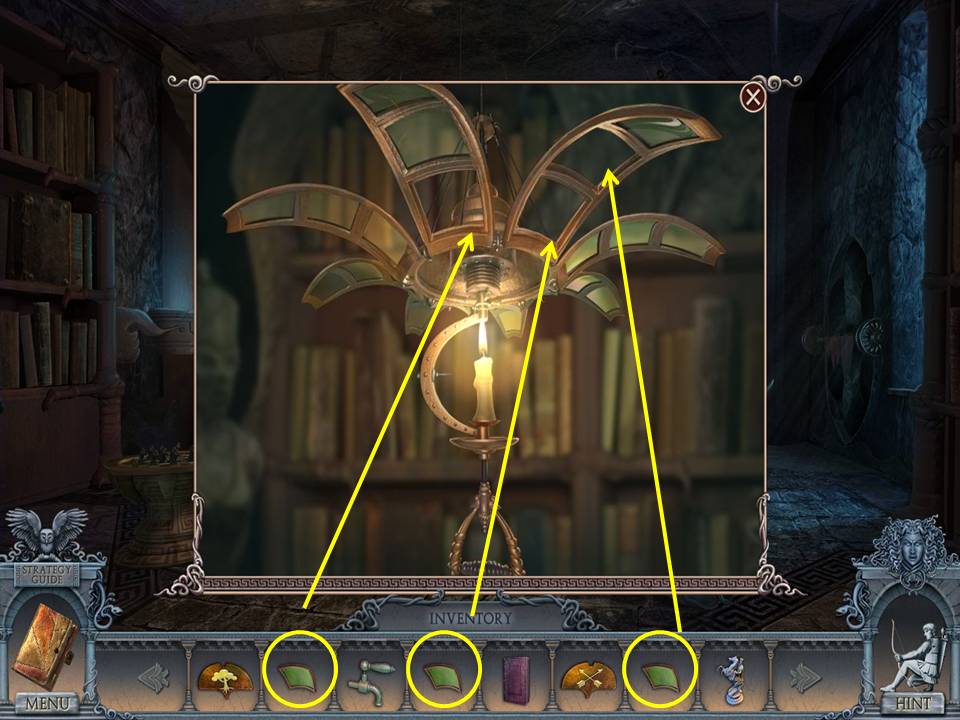
- Zoom into the lamp and place the three LENSES on it.
- Change the lighting.
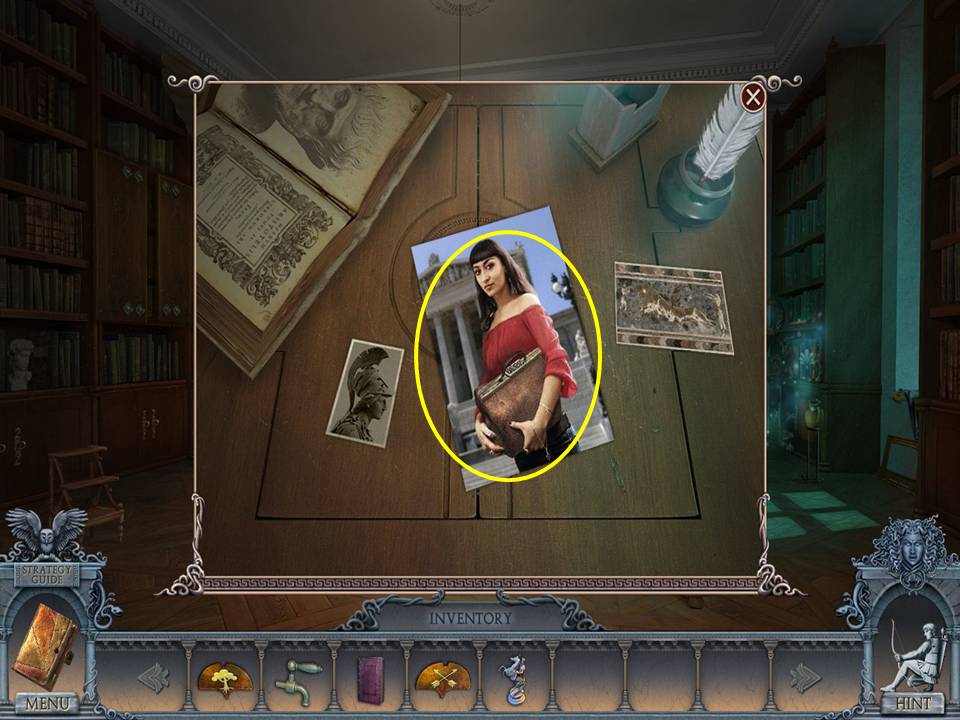
- Zoom into the desk.
- Click the picture to get the code from her bag entered into the journal.
- Zoom into the right bookcase to play a HOA.
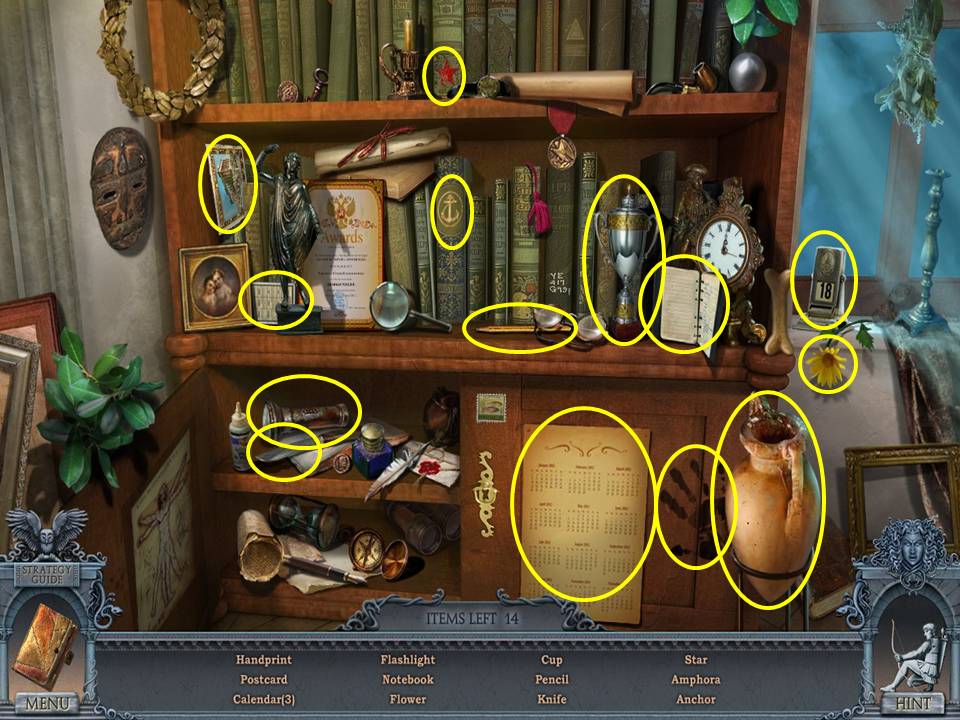
- Find the items listed.
- Receive a BONE.
- Change the lighting in the room to darkness.
- Click down.
- Go right and then left through the arch.
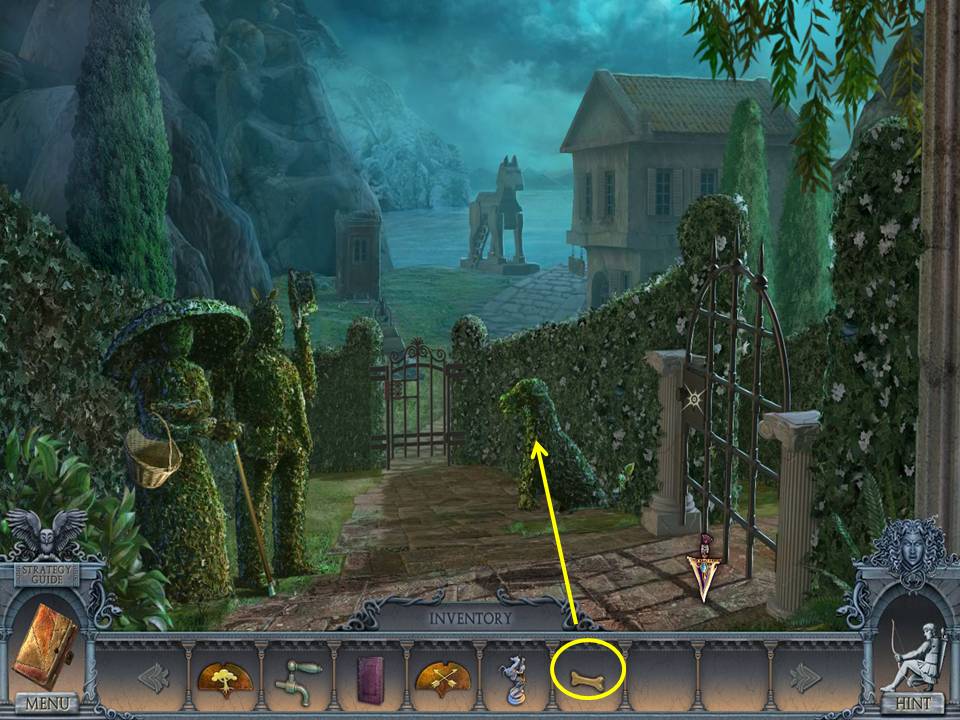
- Give the topiary shaped like a dog the BONE.
- Take the third CHEST BUTTON.
- Click down twice.
- Go upstairs to the bedroom.
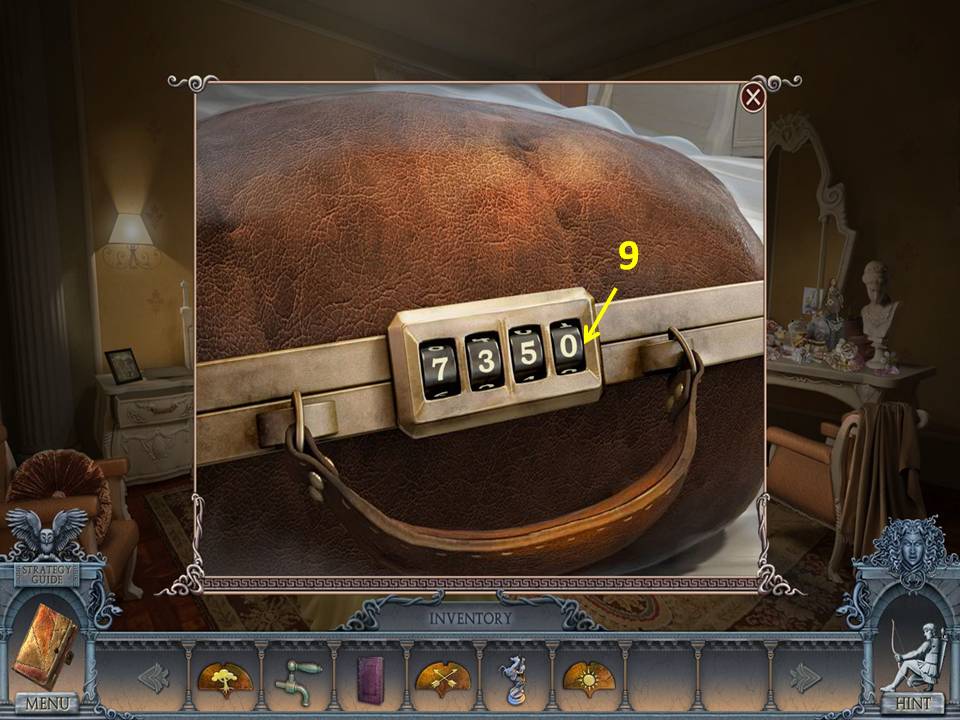
- Zoom into the bag and use the code from the picture that is now in your journal (7359).
- Take the second BOOK and second KNIGHT.
- Read the note.
- Click down twice.
- Go to the library.
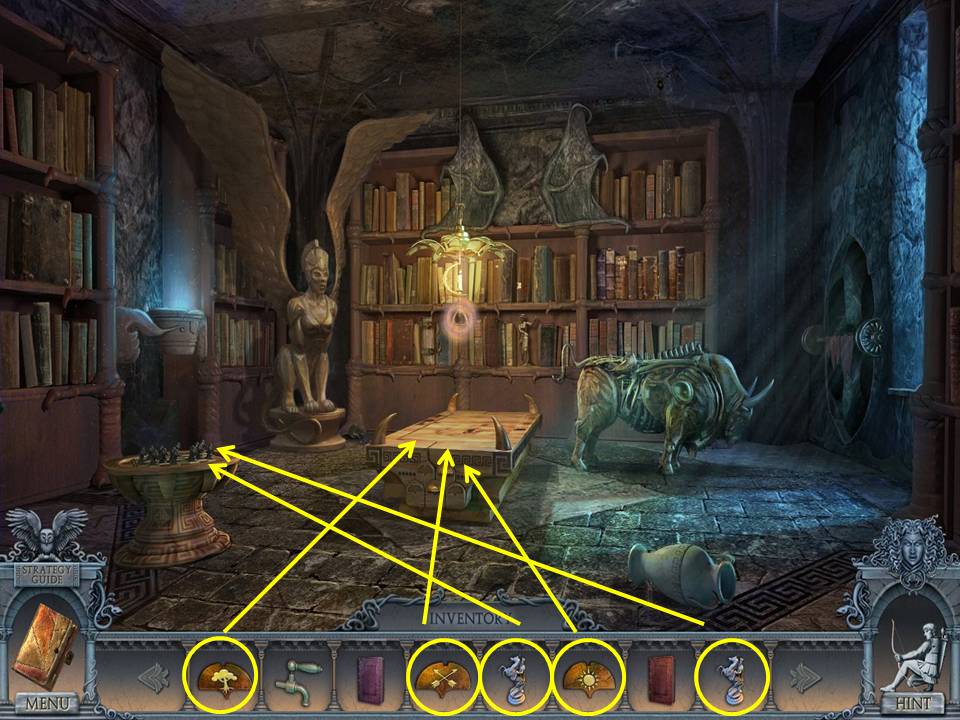
- Zoom into the chest.
- Place the three CHEST BUTTONS in their appropriate spaces.
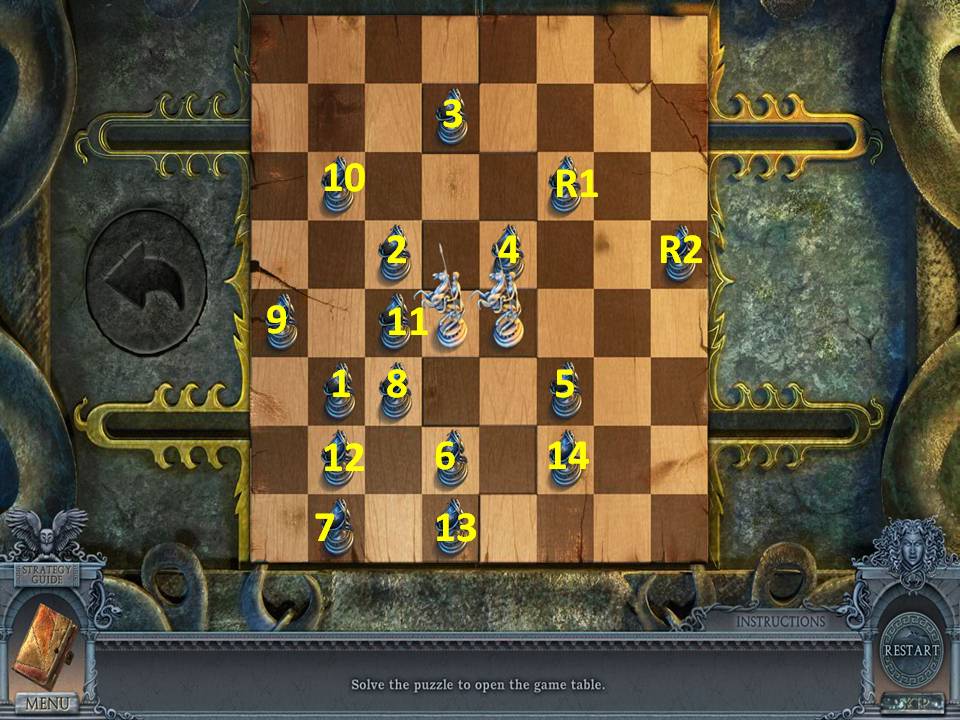
- Zoom into the chess board.
- Place the two KNIGHTS on it to initiate a puzzle.
- The object of the puzzle is to move the knights to remove all the pawns.
- The knight on the right only removes two pawns (marked R1 and R2). All others are removed by the left knight.
- See screenshot for solution.
- Take the GLOBE PART.
- Change the lighting in the room.
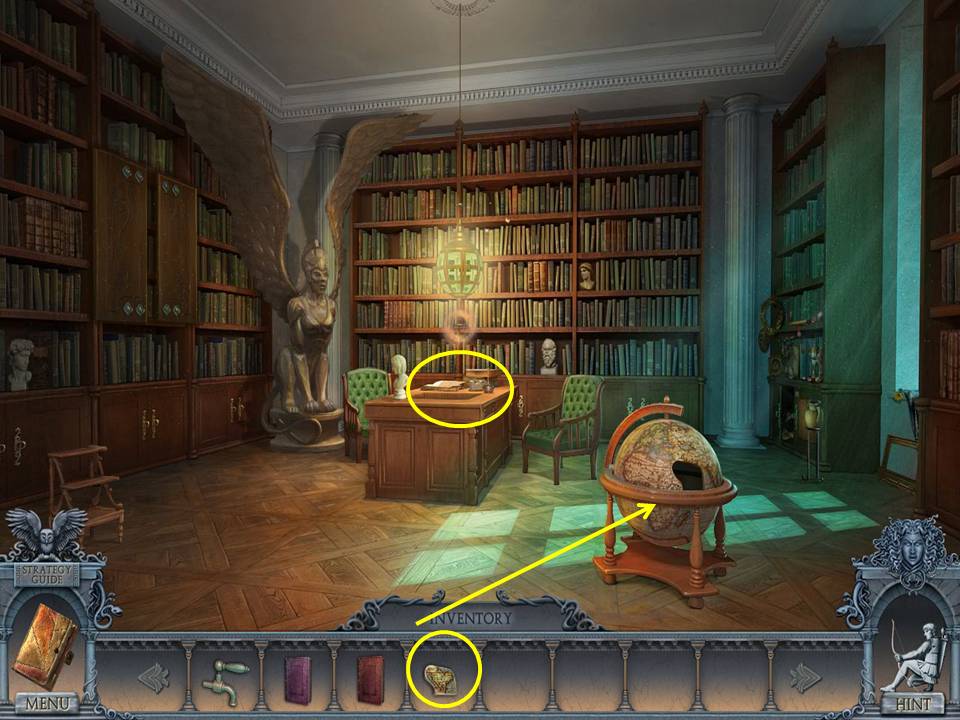
- Place the GLOBE PART on the globe.
- Take the SWORD HANDLE.
- Zoom into the desk.
- Take the HELMET.
- Click down and go right through the door.
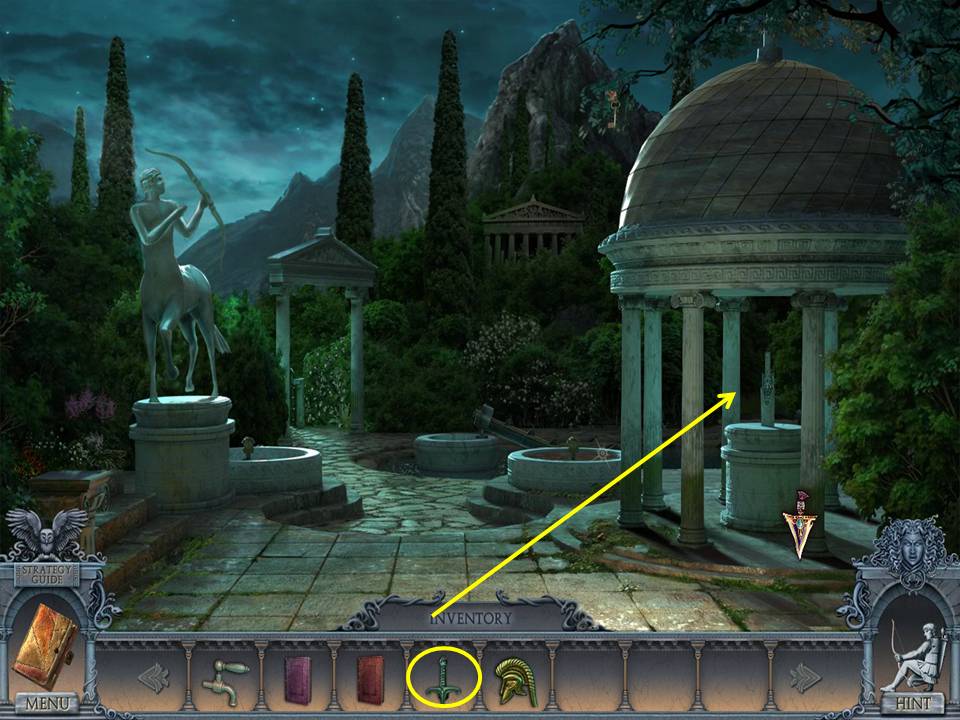
- Place the SWORD HANDLE on the blade.
- The sword will rise, exposing a mechanism.
- Zoom into the mechanism.
- Click the chain to remove it.
- Take the second HELMET, which is on top of the now lowered dome.
- Go left through the arch.
- Zoom into the gate.
- Place the two HELMETS on it.
- Go ahead to the shore.
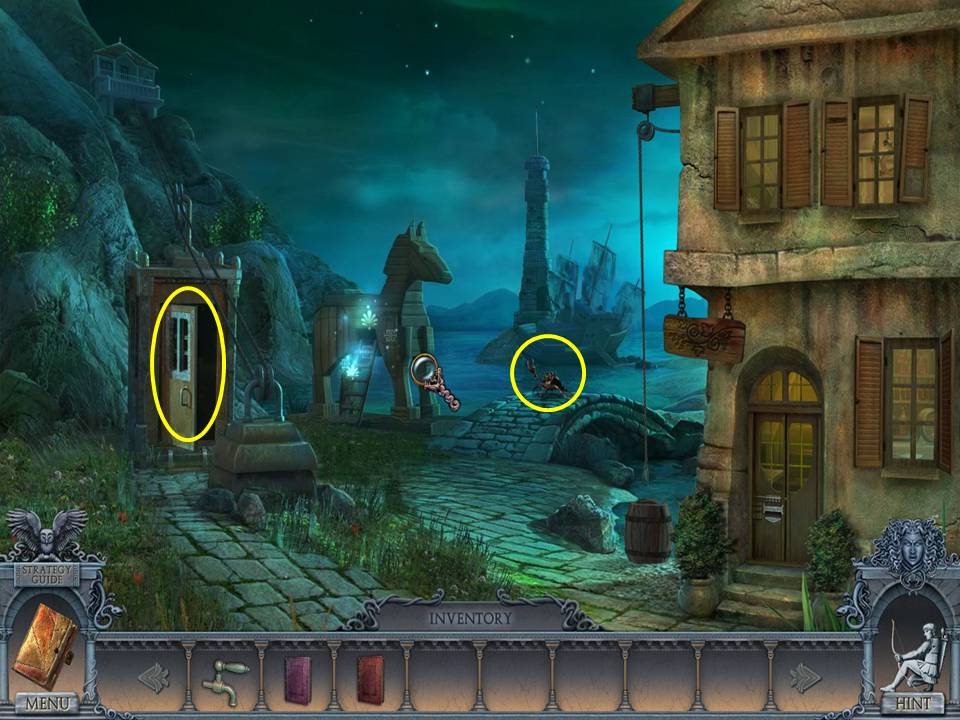
- Zoom into the crab.
- Take the CRANK.
- Enter the cable car.
- Take the BOWSTRING.
- Click down.
- Zoom into the Trojan horse to play an HOA.
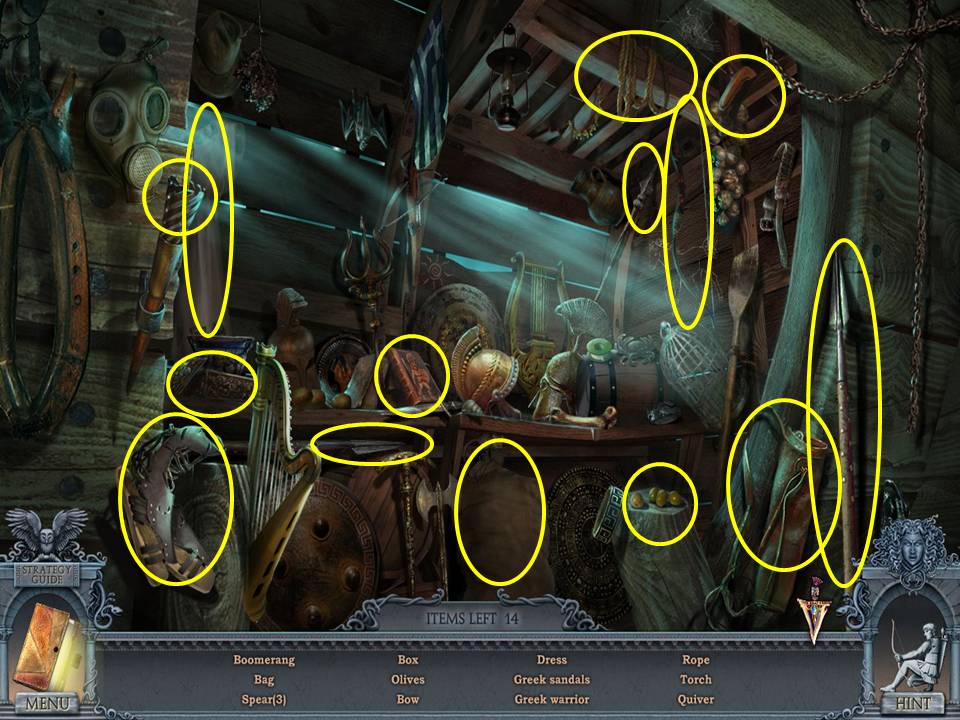
- Find the items listed.
- Receive the PLUMBER'S TAPE.
- Click down twice.
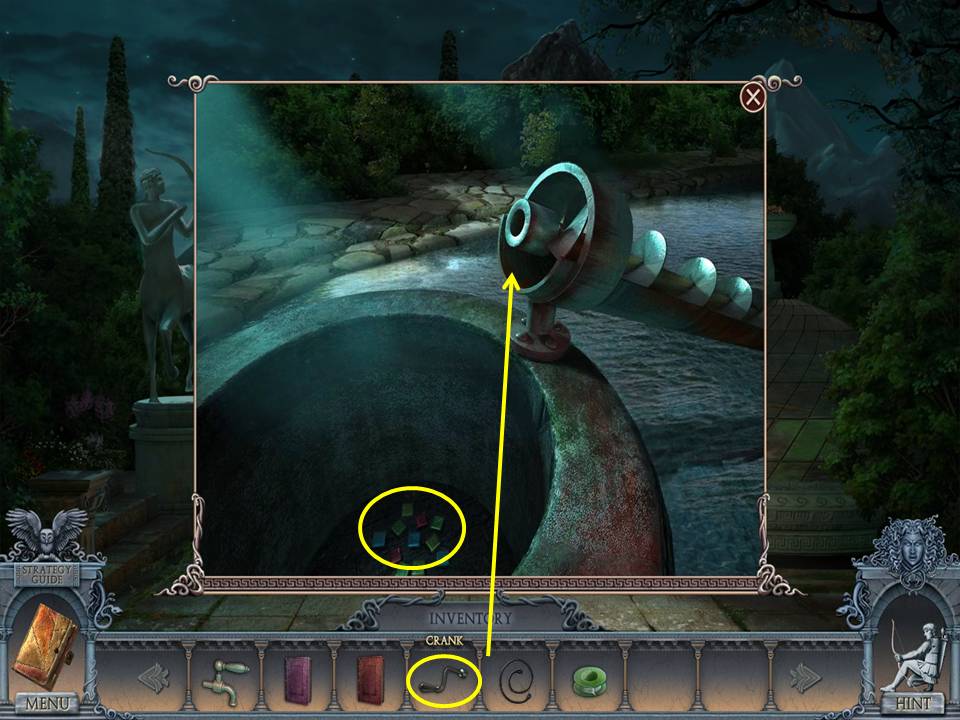
- Zoom into the center fountain.
- Place the CRANK on the mechanism.
- Take the TILES.
- Go back inside the cable car.
- Zoom into the box.
- Place the TILES on it to initiate a puzzle.
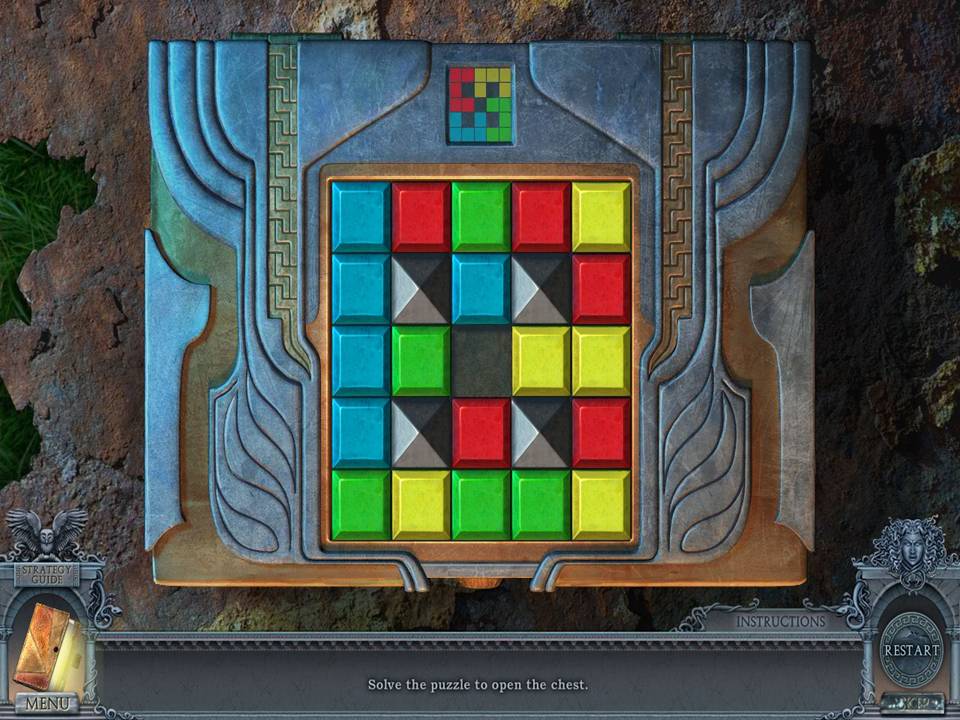
- The object of the puzzle is to slide the tiles to match the pattern in the inset above.
- The puzzle has several solution variations.
- Concentrate on moving the colors to their areas and then arranging to match the pattern.
- Take the CUTTING PLIERS and the WIRE.
- Click down.
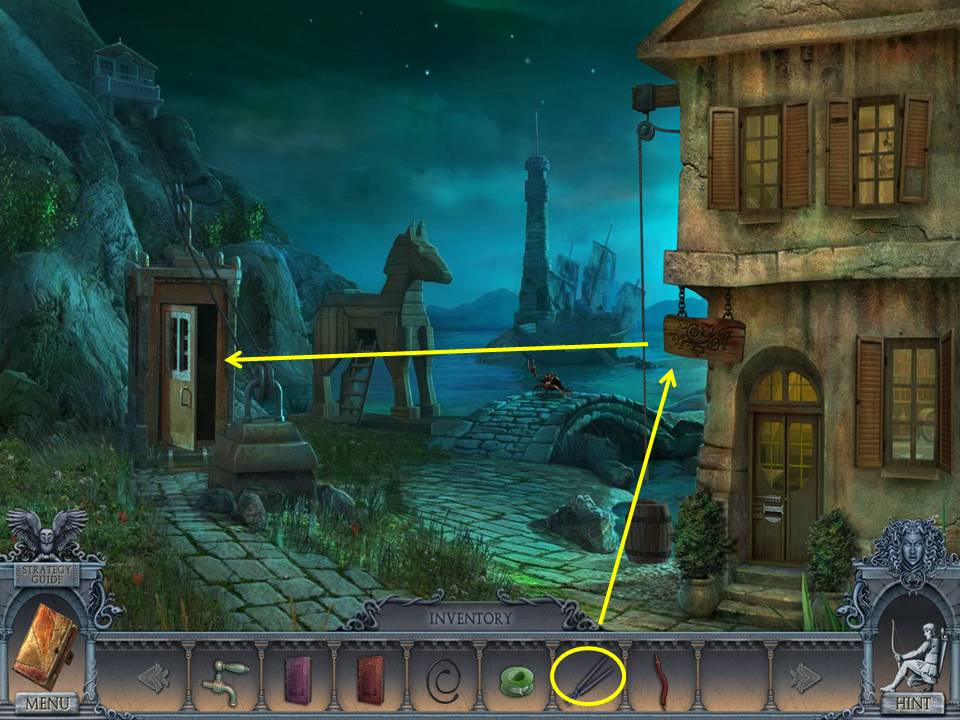
- Release the sign with the CUTTING PLIERS.
- Take the SIGNBOARD.
- Enter the cable car. Cover the gap with the SIGNBOARD.
- Move the lever.
- Zoom into the control panel.
- Take the third BOOK and remove the broken transistors.
- Go to the library.
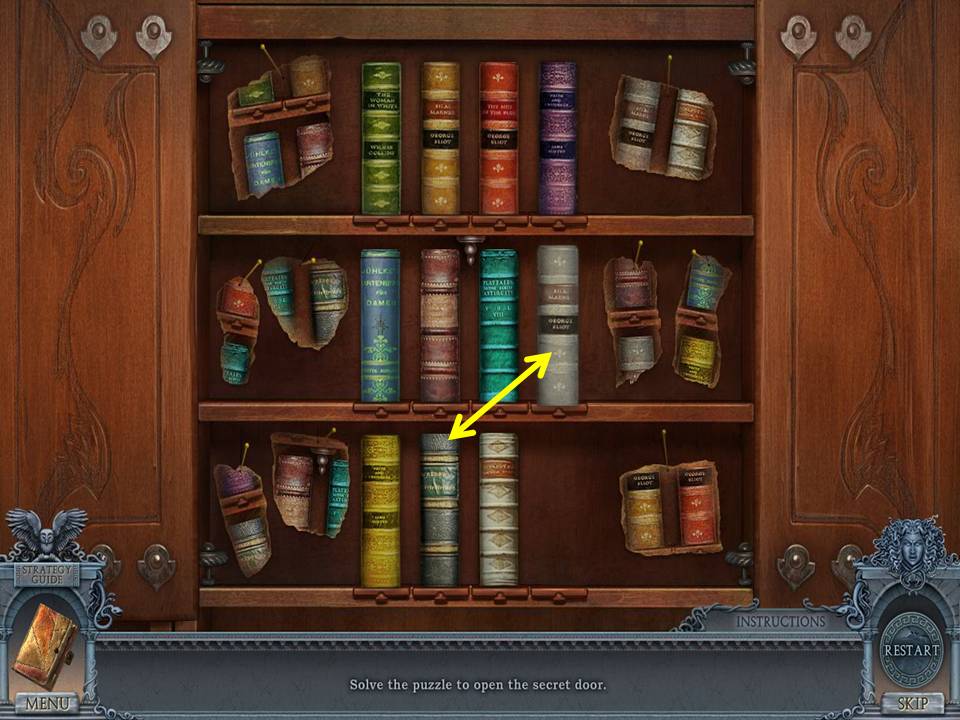
- Zoom into the bookcase.
- Place the three BOOKS on the shelves to initiate a puzzle.
- The object of the puzzle is to arrange the books based on the clues.
- The screenshot shows the final move.
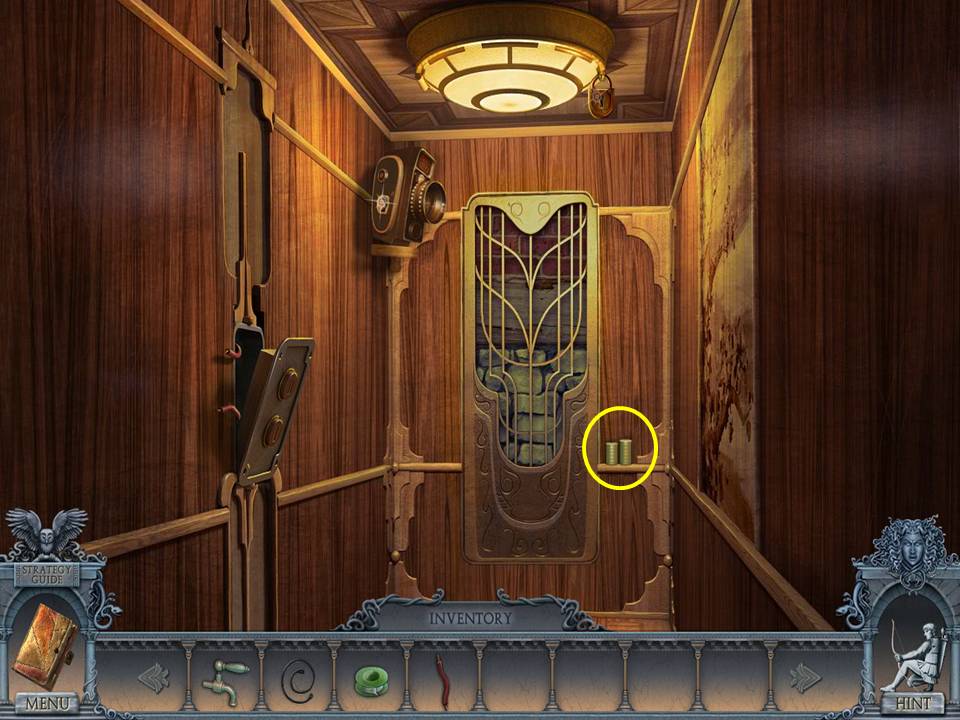
- Go left through the door to the elevator.
- Take the DOWELS.
- Go to the shore.
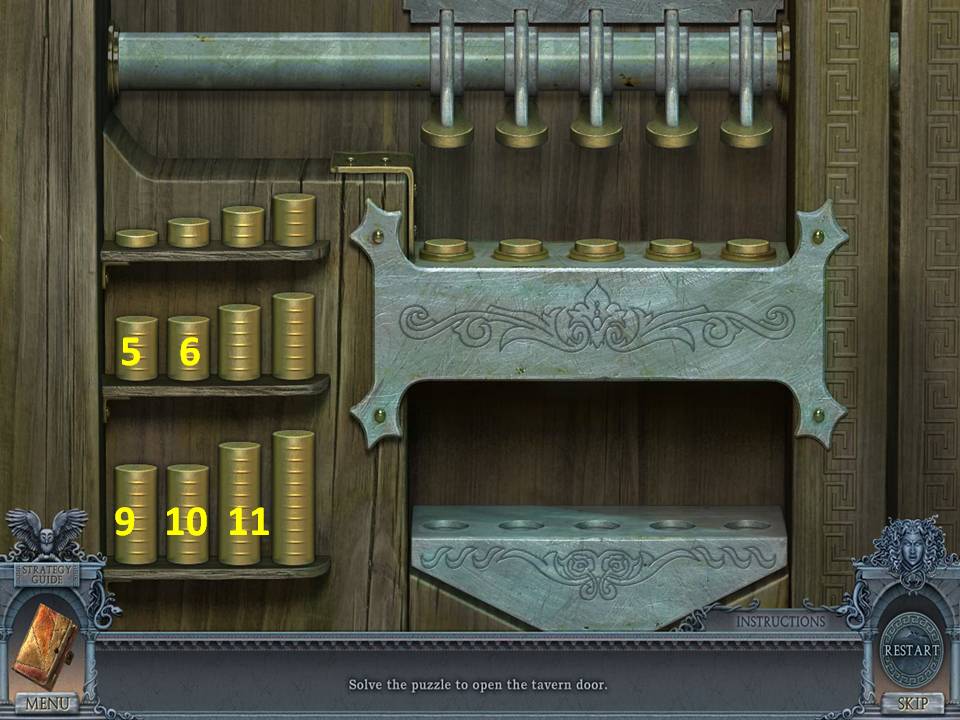
- Zoom into the door and place the DOWELS on the lock to initiate a puzzle.
- The object of the puzzle is to place the correct dowels in the proper slots.
- Assuming the dowels are numbered one to 12 from left to right and top to bottom, place these dowels along the bottom from left to right: 6, 10, 11, 9, 5.
- When finished, enter the building.
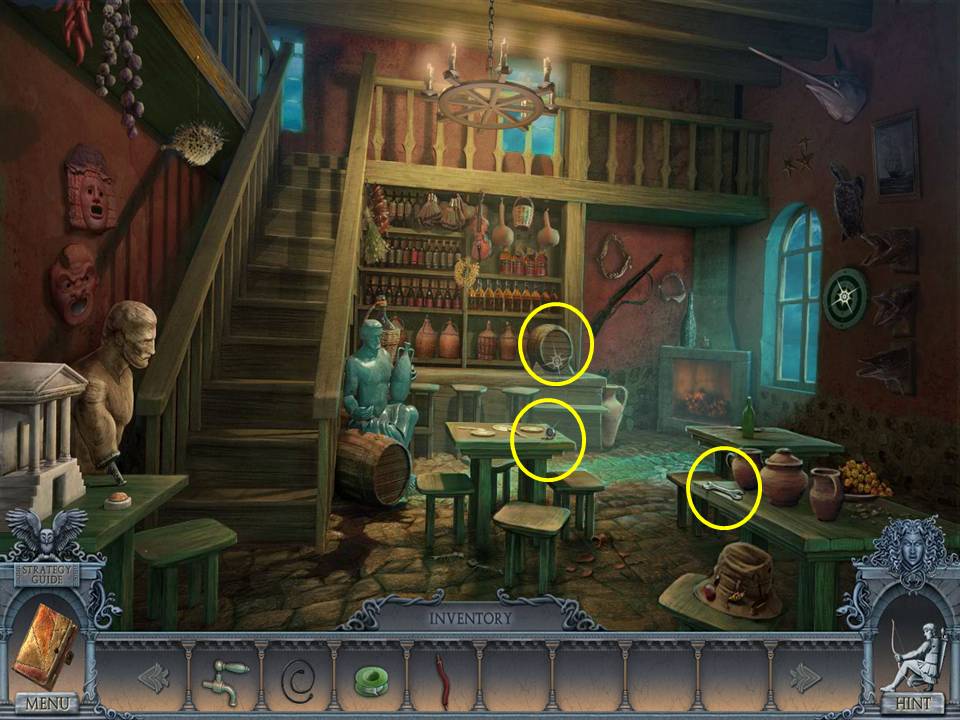
- Take the METAL BALL and the WRENCH.
- Zoom into the barrel at the back.
- Take the ELECTRICAL TAPE.
- Go upstairs.
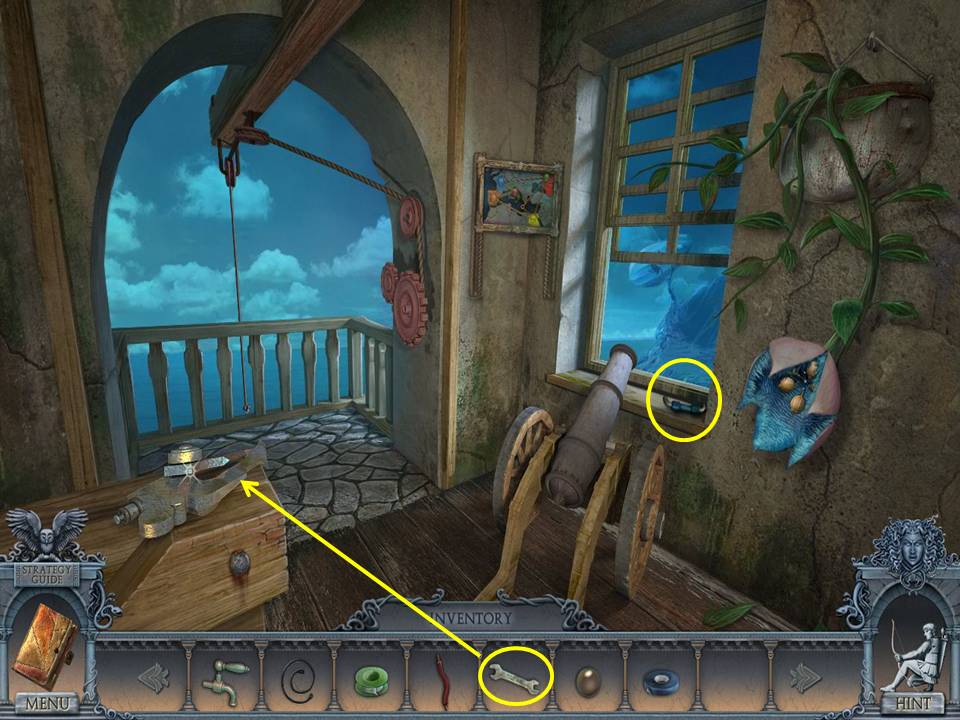
- Take the RESISTOR.
- Use the WRENCH on the claw.
- Take the MECHANICAL CLAW.
- Click down twice.
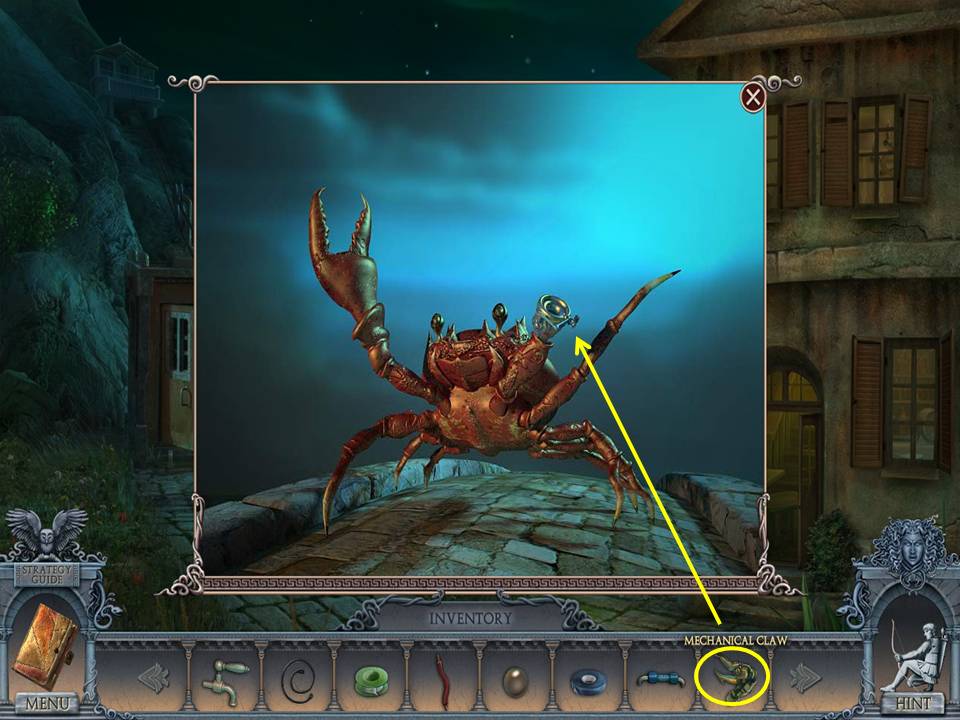
- Zoom into the crab.
- Place the MECHANICAL CLAW on it.
- Cross the bridge.
- Take the HOOK and ARROW.
- Click down.
- Place the HOOK on the rope to hook the barrel.
- Click down twice.
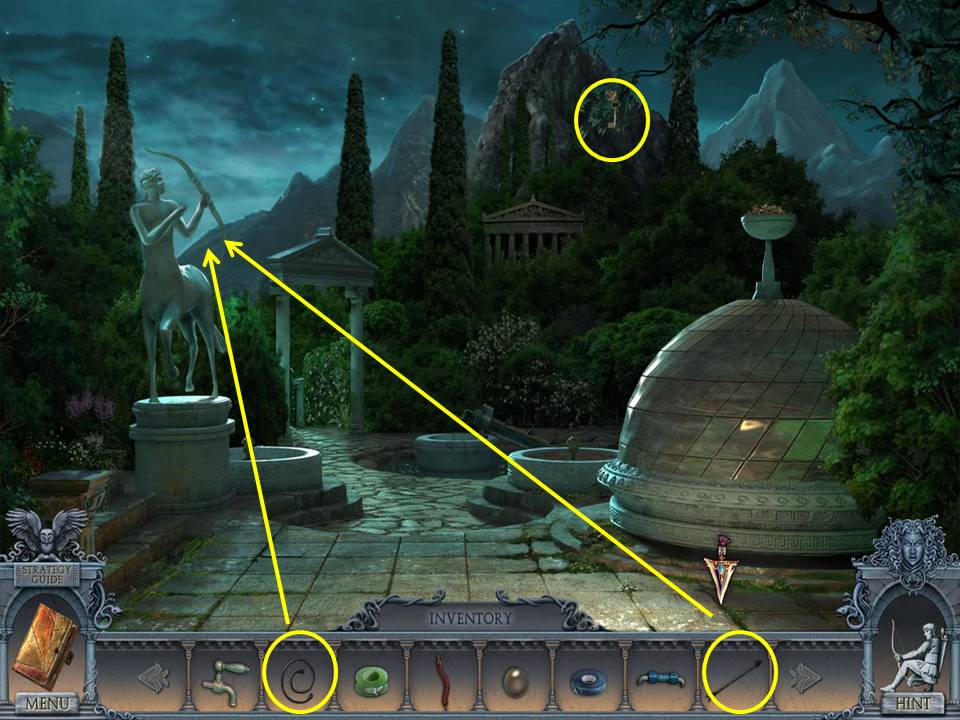
- Place the BOWSTRING and ARROW on the archer.
- Take the KEY.
- Return to the cable car.
- Open the first aid kit with the KEY.
- Take the REAGENT and second METAL BALL.
- Return to the elevator through the library.
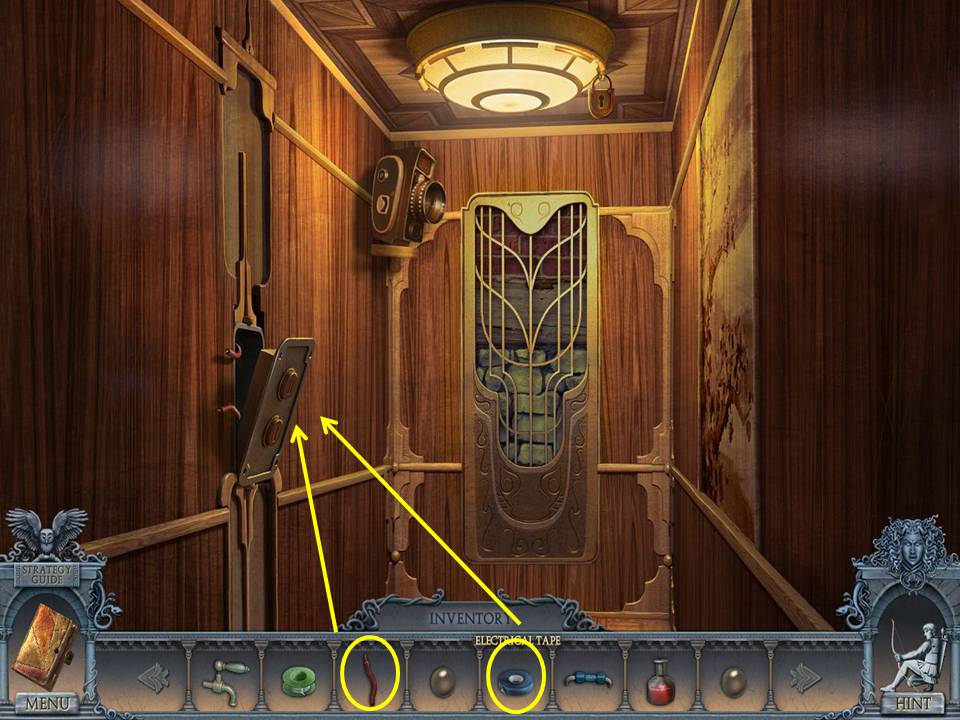
- Place the WIRE and ELECTRICAL TAPE on the back of the button panel.
- Click the button.
- You will be taken to a secret room.
- Take the TRANSISTOR from the desk at right.
- Click down to return to the elevator.
- Click the up button.
- Zoom into the right bookshelf to play an HOA.
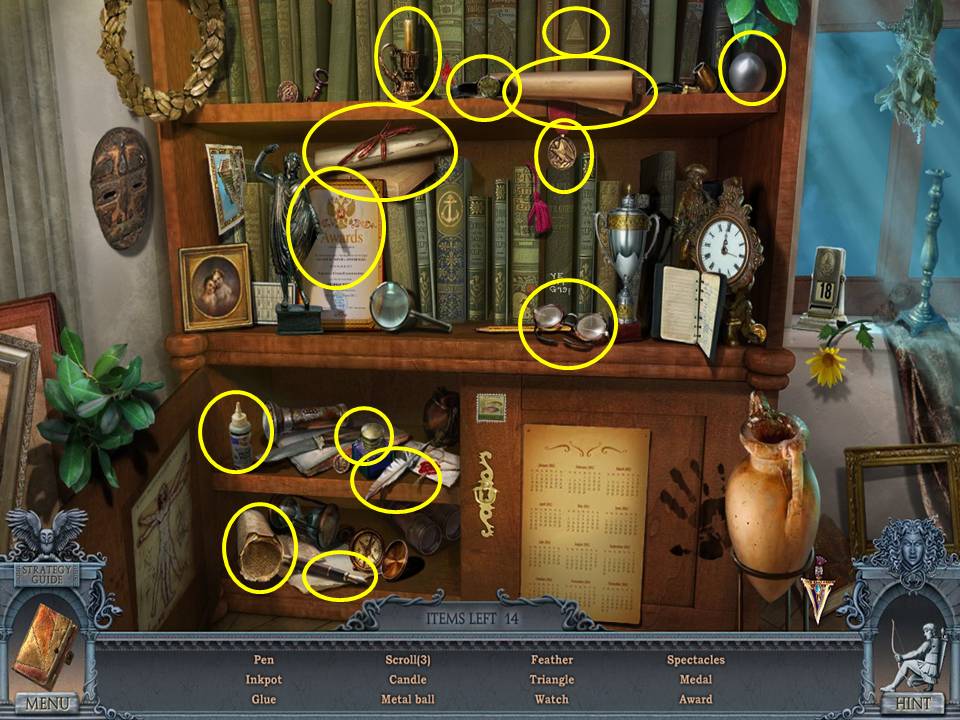 Find the items listed.
- Receive a PADLOCK KEY.
- Enter the elevator.
- Unlock the padlock with the PADLOCK KEY.
- Lower the light cover.
- Take the BATTERY.
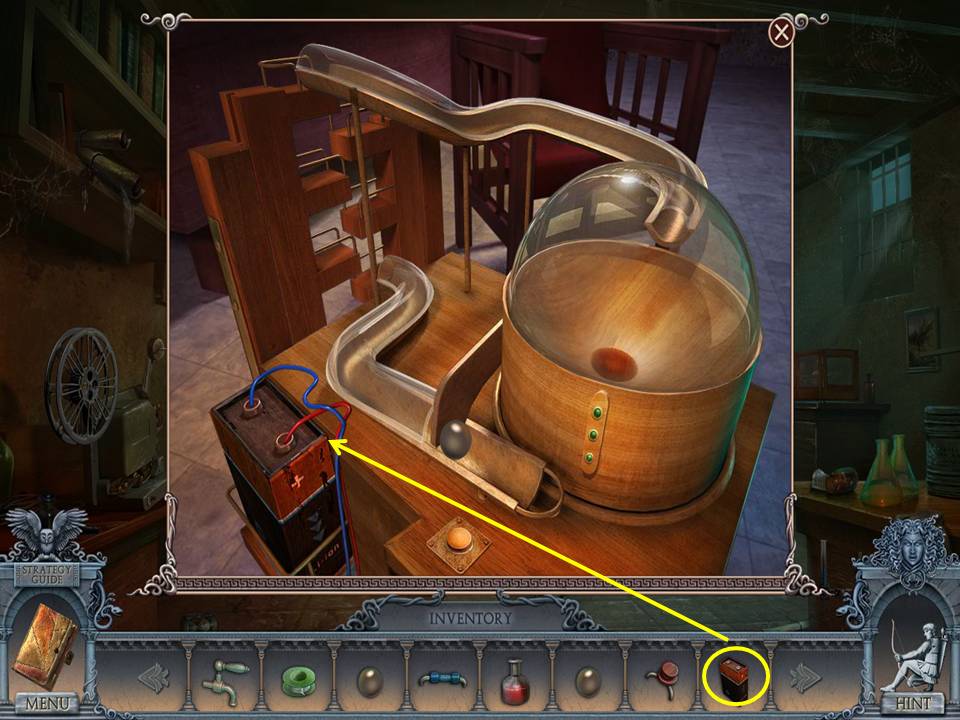
- Click the down elevator button.
- Zoom into the device.
- Click the button.
- Remove the dead battery.
- Place the BATTERY in the holder.
- Place a METAL BALL in the chute.
- Click the button.
- Repeat with METAL BALL 2.
- Take the MAGIC BALL.
- Click down.
- Click the up elevator button.
- Use the MAGIC BALL on the statue in the corner of the library.
- Zoom into the statue.
- Take the MAP PART.
- Go to the shore.
- Enter the tavern.
- Go upstairs.
- Zoom into the map.
- Place the MAP PART on it to initiate a puzzle.
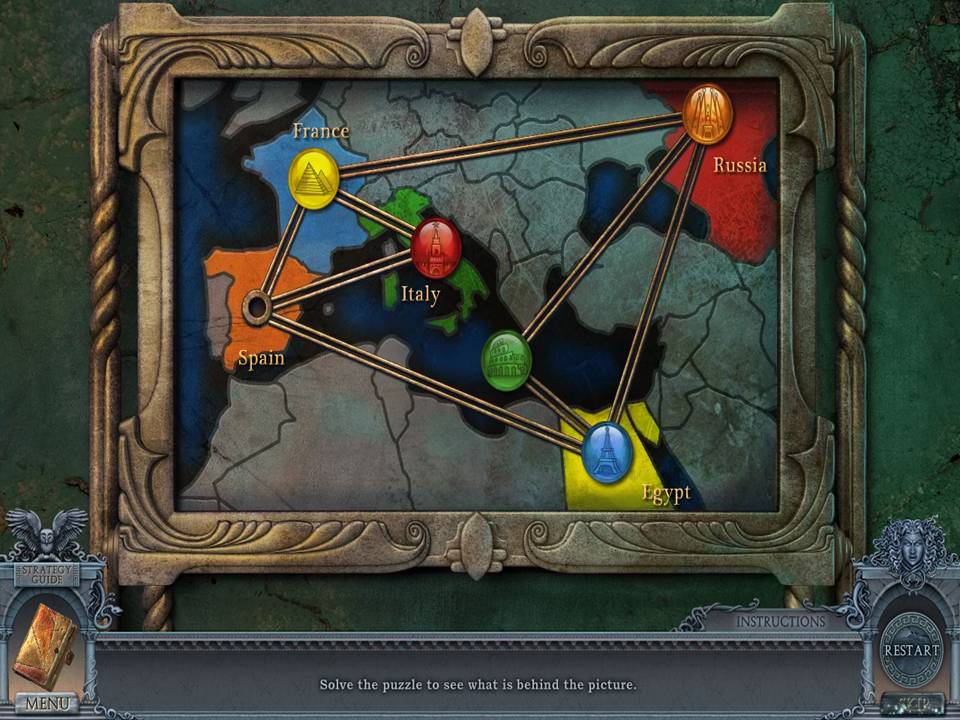
- The object of the puzzle is to move the circles to their matching colored locations.
- Click the locations in this order: Italy, France, Russia, Mediterranean Sea, Egypt, Spain, Italy, France, Russia, Mediterranean Sea.
- When finished, take the PLATE.
- Click down twice. Cross the bridge.
- Place the PLATE in the tree hollow.
- Take the DOVE.
- Return to the library.
- Zoom into the statue.
- Place the DOVE in its hands.
- Take the BULB.
- Return to the crypt.
- Zoom into the lamp.
- Insert the BULB in a slot.
- Click anywhere in the scene to receive a SECRET KEY. Return to the cable car.
Comments will load when you reach this part of the walkthrough.