
Chapter Five: Through the Maze
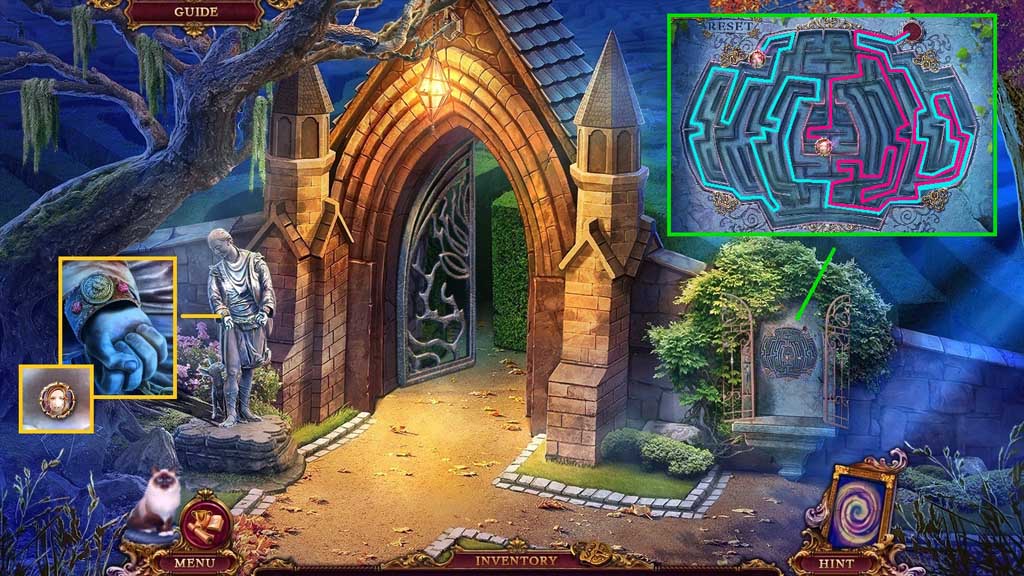
- Insert the lion tile and click it 3x’s.
- Collect the Anna tile.
- Insert the Anna tile to trigger a mini game.
- Solve the game by guiding the children to the exit.
- Collect the wing tile.
- Move to the Dovecote.
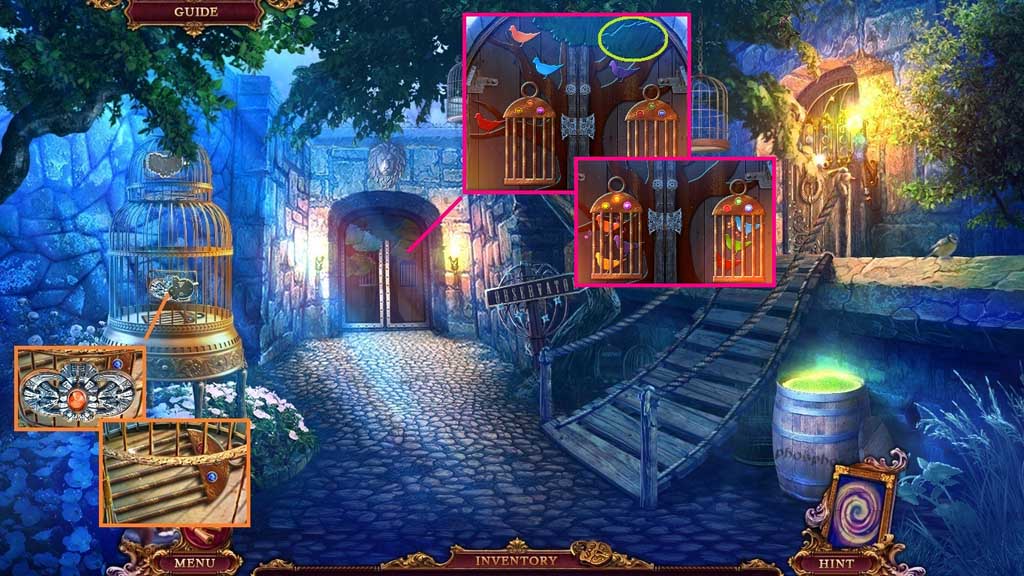
- Insert the wing tile; collect the cage.
- Insert the cage; click the leaves away.
- Arrange the doves correctly.
- Move ahead and click the hidden objects area.
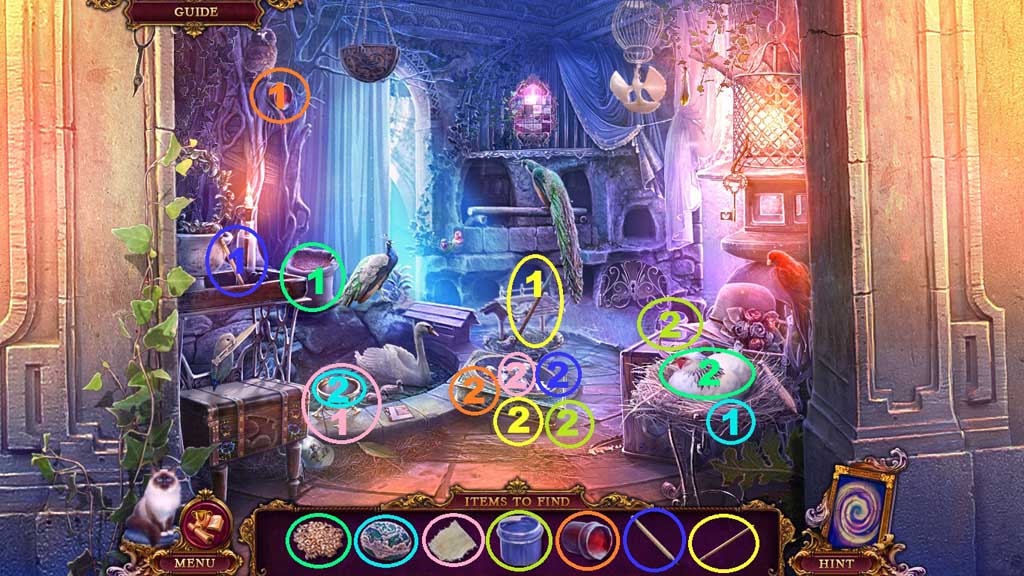
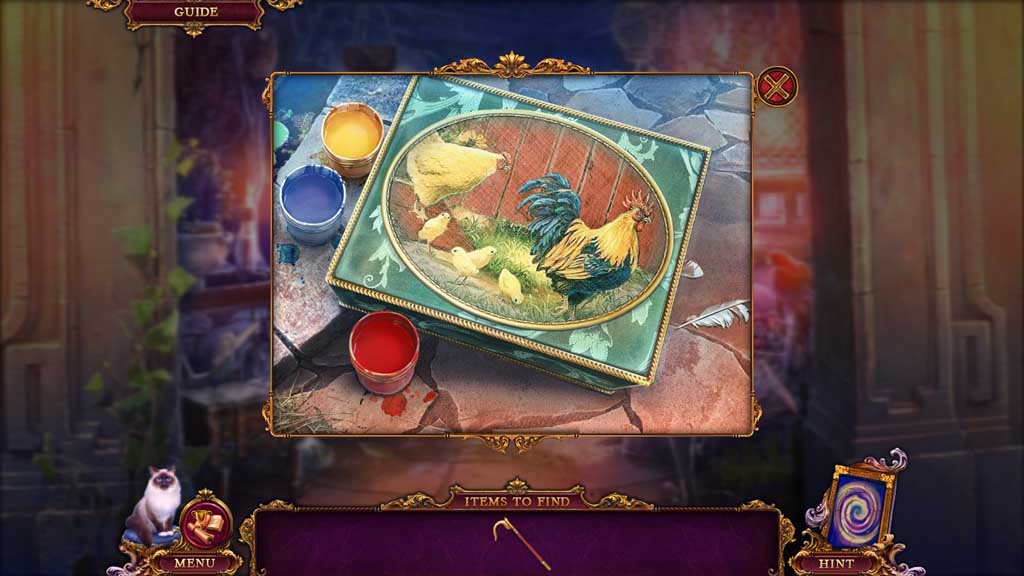
- Find the items.
- Select the red paint and place it next to the box.
- Select the paint brush and place it onto the box.
- Select the grain and give it to the chicken; collect the egg.
- Place the egg onto the pedestal; collect the canvas.
- Place the canvas onto the box.
- Select the pencil to draw on the canvas.
- Select the blue paint and place it next to the box.
- Paint the box using the paints.
- Collect the hook.
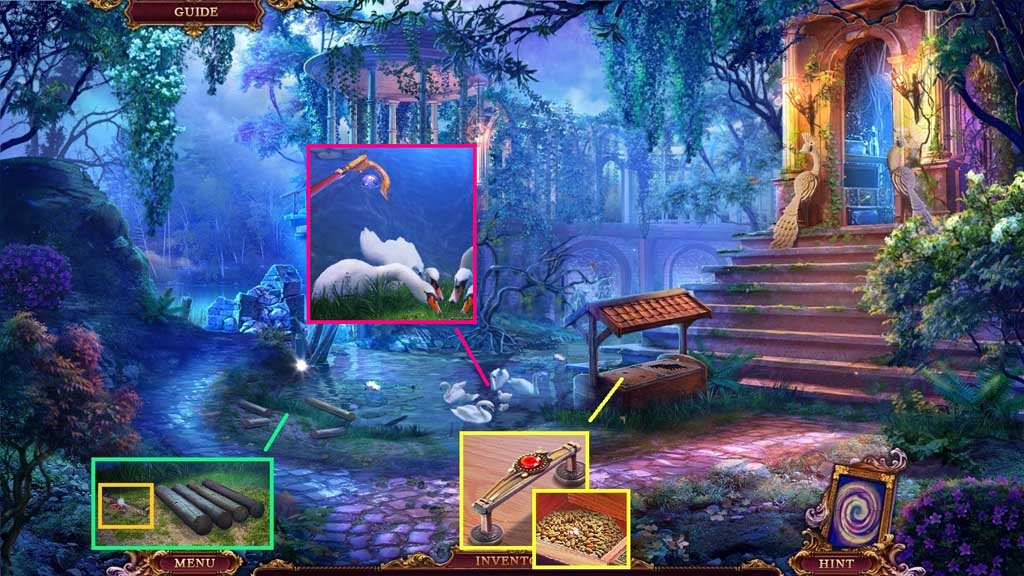
- Align the logs.
- Collect the handle and attach it to the feeder; collect the grain.
- Select the grain to feed the swans; collect 2 /2 balls using the hook.
- Move down once.
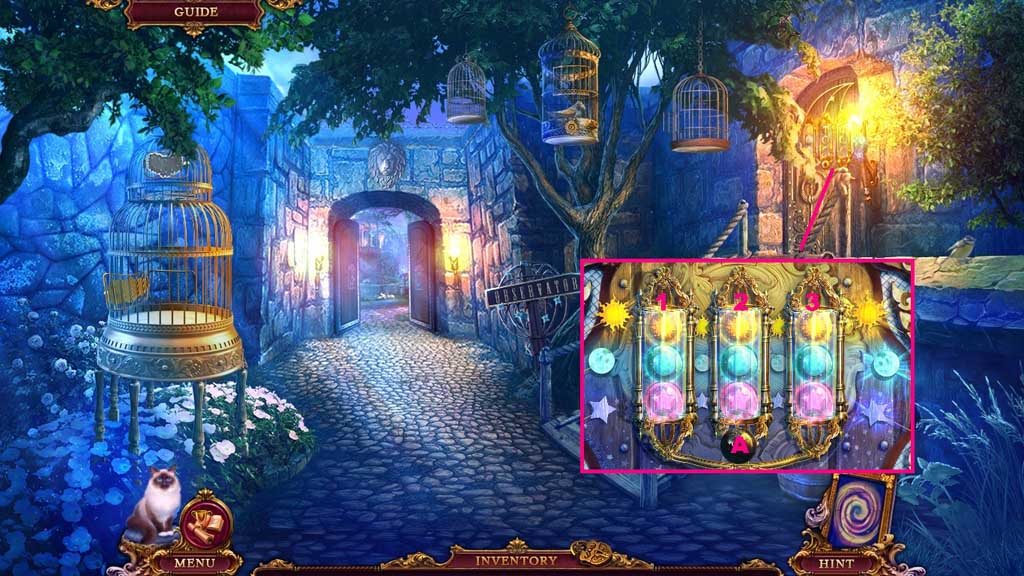
- Insert the 2 balls to trigger a mini game.
- Solve the game by aligning the balls correctly.
- Use the following sequence to solve: A3 – A1 – A2 – A1 – A3 – A3 – A2 – A2 – A3
- Move to the right.
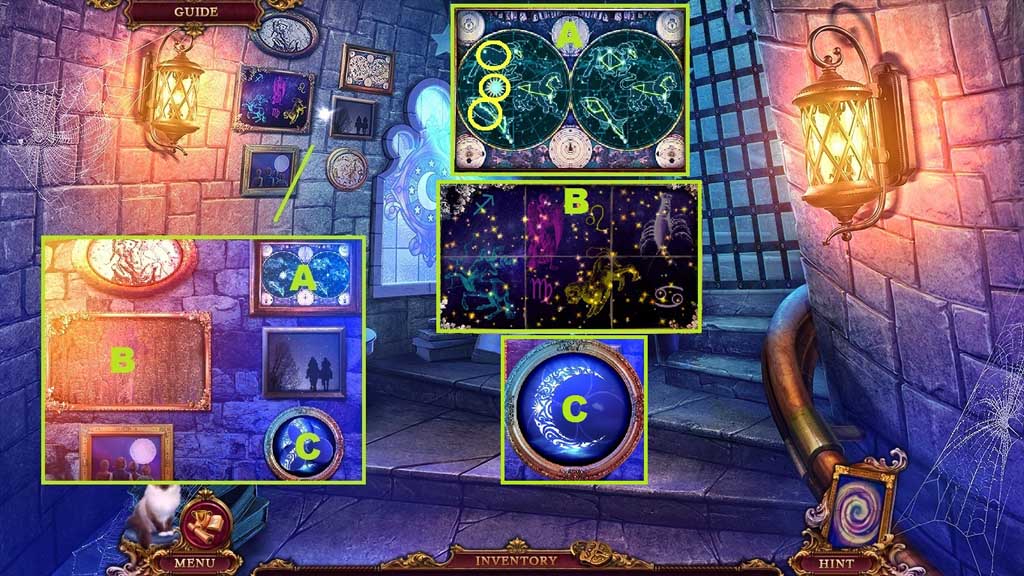
- Zoom into the frames to trigger 3 mini games.
- Spot the differences; collect 1 /2 codes.
- Clear the dust and arrange the images correctly; click the picture to collect the note.
- Adjust the dials to align the image correctly; collect 2/2 codes.
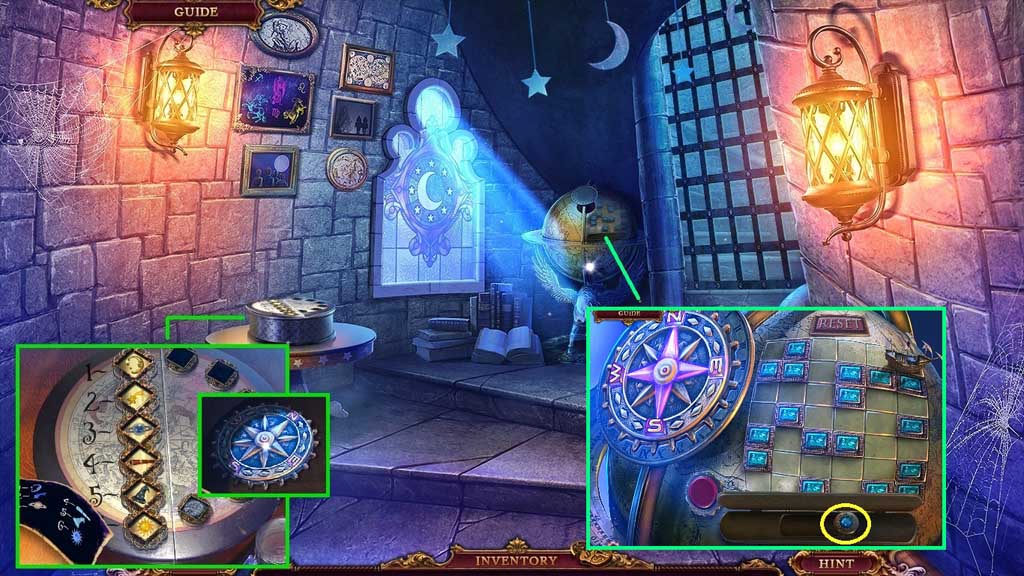
- Zoom into the table to trigger a mini game.
- Click the symbols as shown in the diagram to solve the game.
- Collect the compass.
- Insert the compass into the globe to trigger a mini game.
- Solve the game by finding the shortest route from the ship to the flag.
- Use the following sequence to solve: E – N – E x 3 – N x 2 – W x 2 – N x 3 – E x 3
- Click the lever.
- Move upstairs and click the hidden objects area.
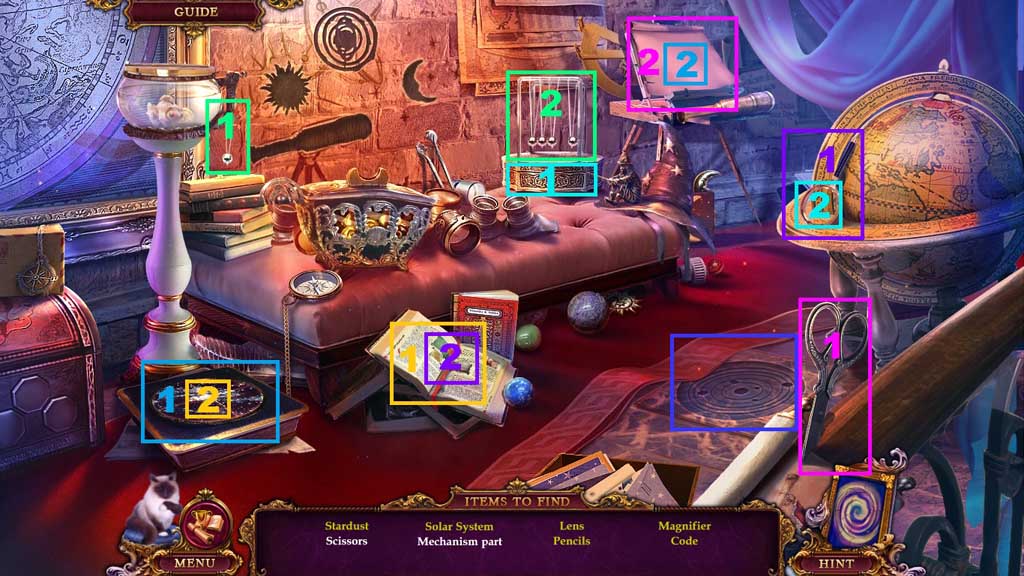
- Find the items.
- Select the mechanism part and place it into the mechanism; collect the lens.
- Place the lens into magnifier frame; collect the magnifier.
- Place the magnifier onto the book to reveal a symbol code.
- Recreate the symbol code on the tiles; collect the pencils.
- Use the pencils on the paper; create the solar system.
- Select the scissors to cut out the paper solar system.
- Place the paper solar system onto the floor print.
- Collect the stardust.
- Move down once.
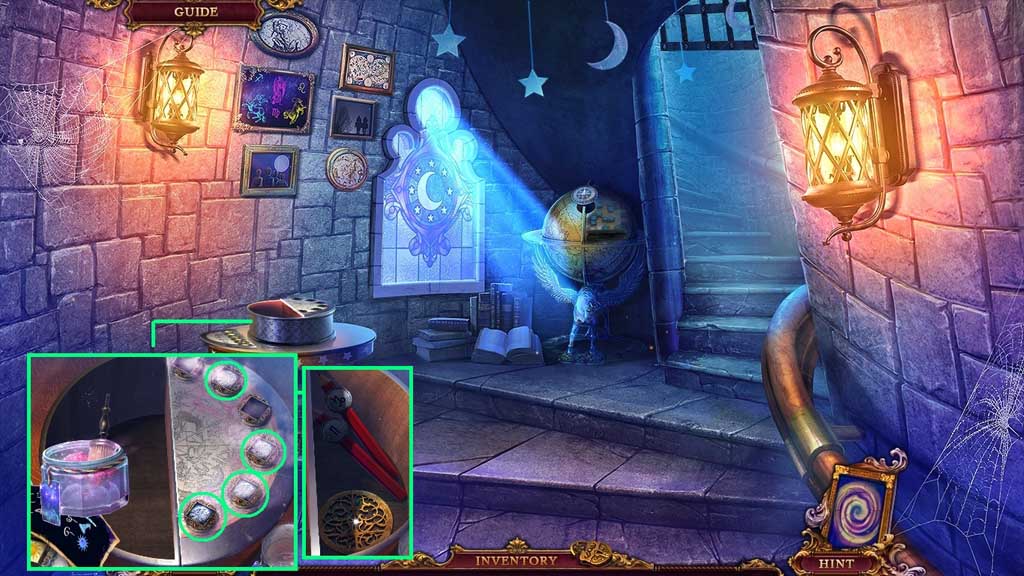
- Zoom into the table.
- Select the stardust to reveal the prints.
- Click the 4 buttons that have prints.
- Collect the astrolabe part and the pencils.
- Move ahead.
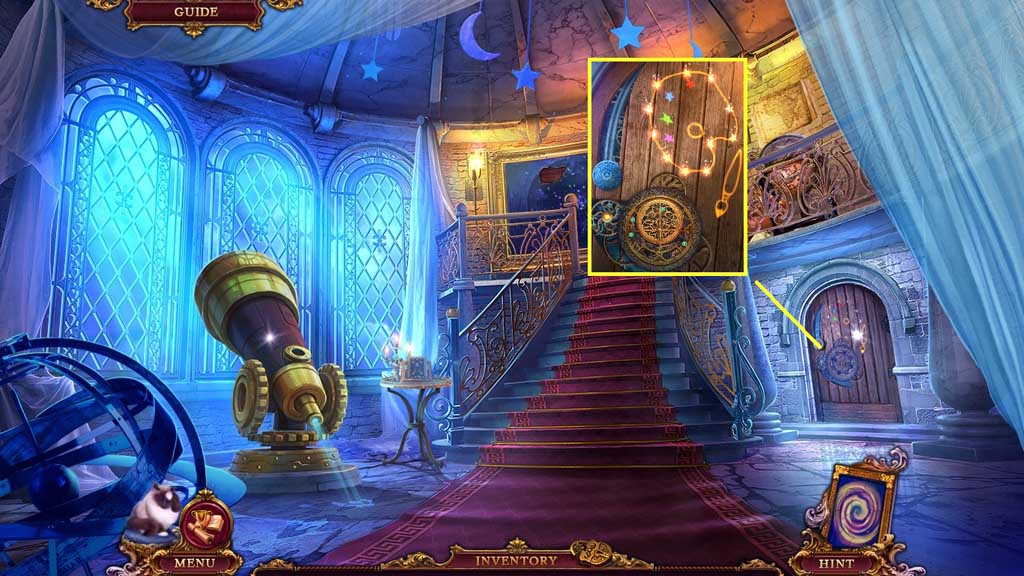
- Insert the astrolabe part to trigger a mini game.
- Solve the game by connecting the stars to create a palette.
- Move to Balcony.
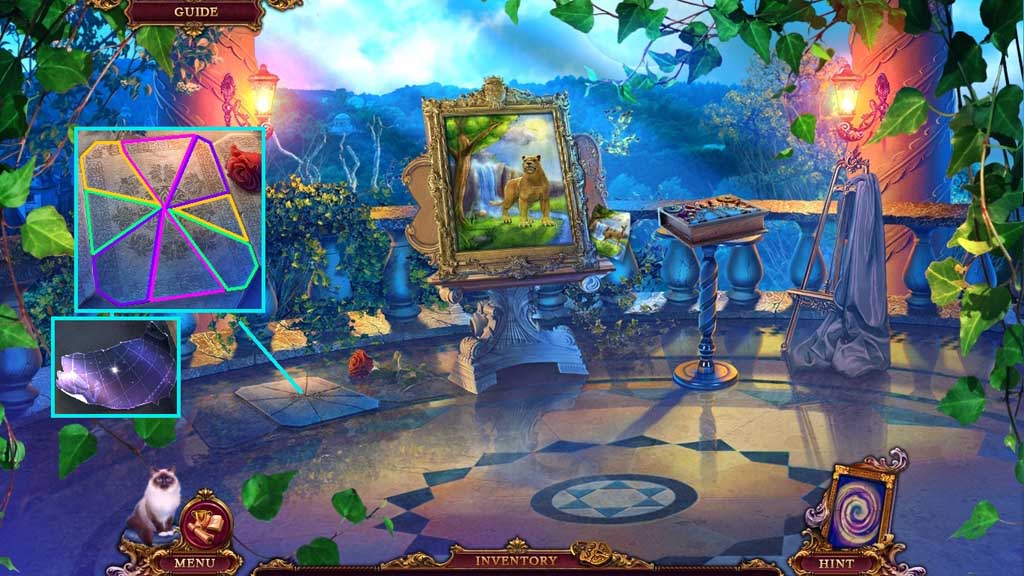
- Click the painting.
- Zoom into the broken floor tile to trigger a mini game.
- Solve the game by finding the matching symbols on the broken tile pieces.
- Collect the part of the star map.
- Move down once.
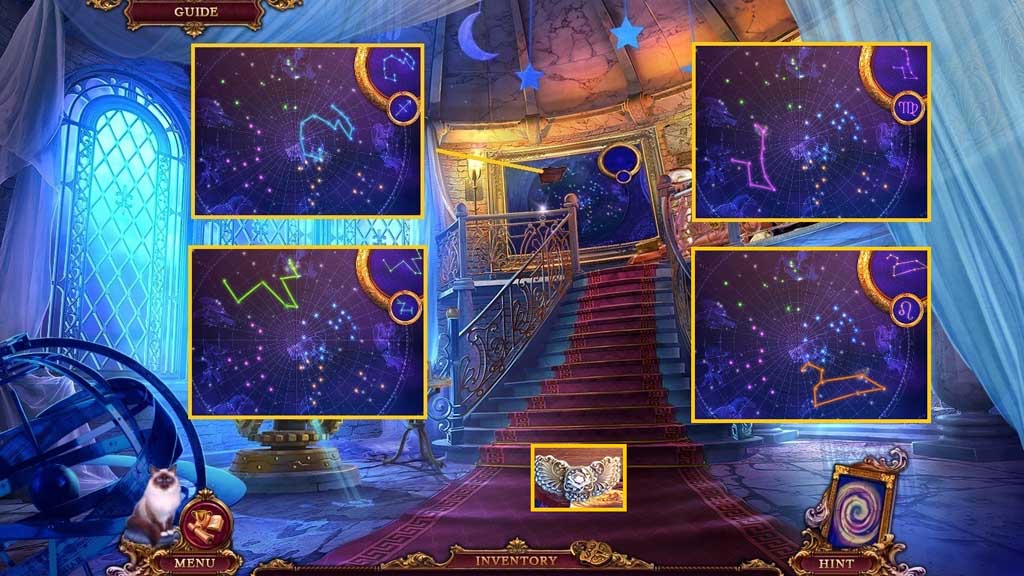
- Insert the star map to trigger a mini game.
- Solve the game by recreating the constellation.
- Collect the lock part.
- Move down 2x’s.
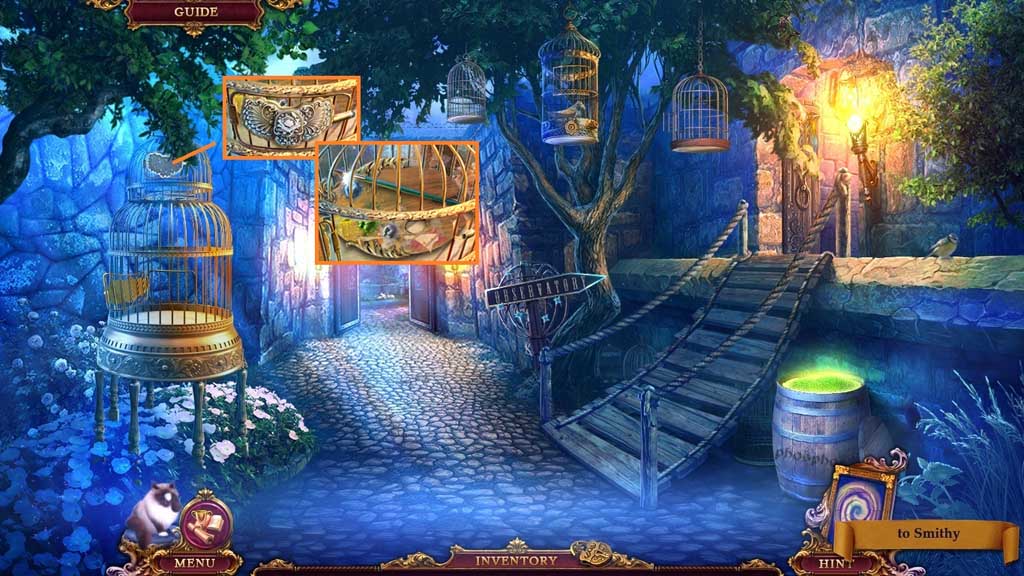
- Insert the lock part.
- Collect the brush.
- Move to the right and go upstairs; click the hidden objects area.
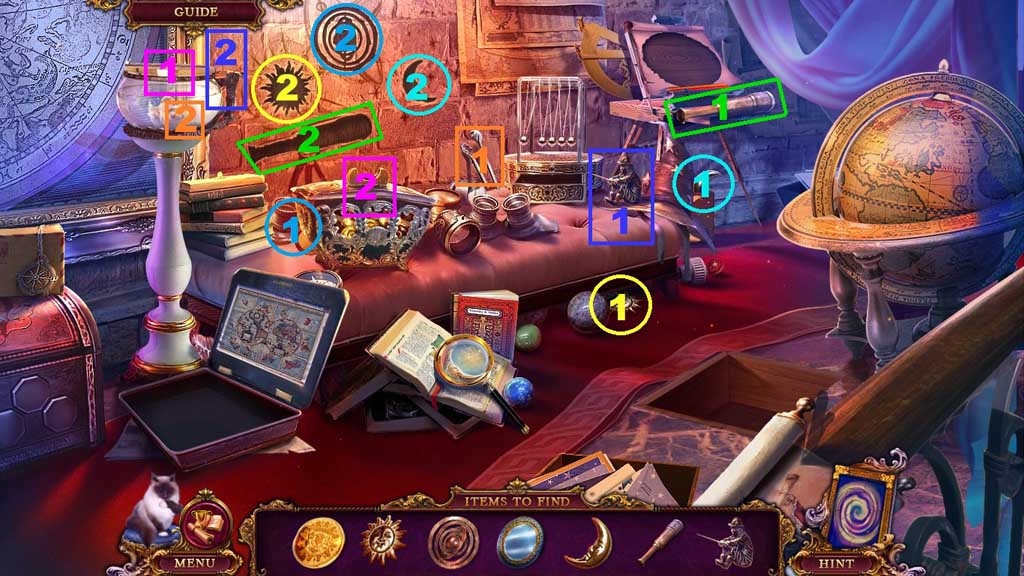
- Find the items.
- Select the fisherman and place him onto the fish bowl.
- Select the tongs to retrieve the coin from the fish bowl.
- Insert the coin into the machine; collect the galaxy.
- Insert the galaxy into the imprint.
- Collect the lens.
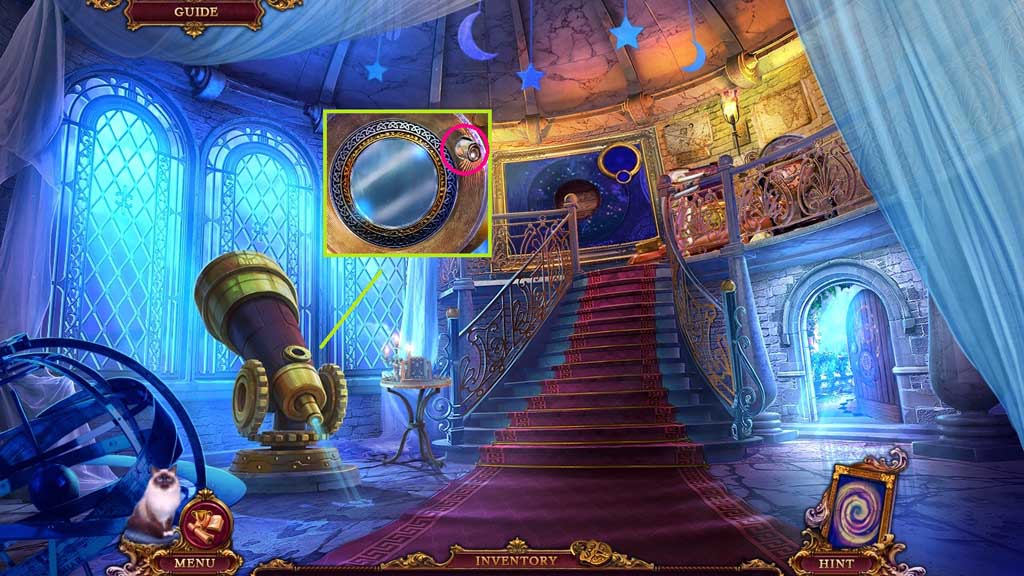
- Insert the lens; collect the picture piece.
- Move to the right.
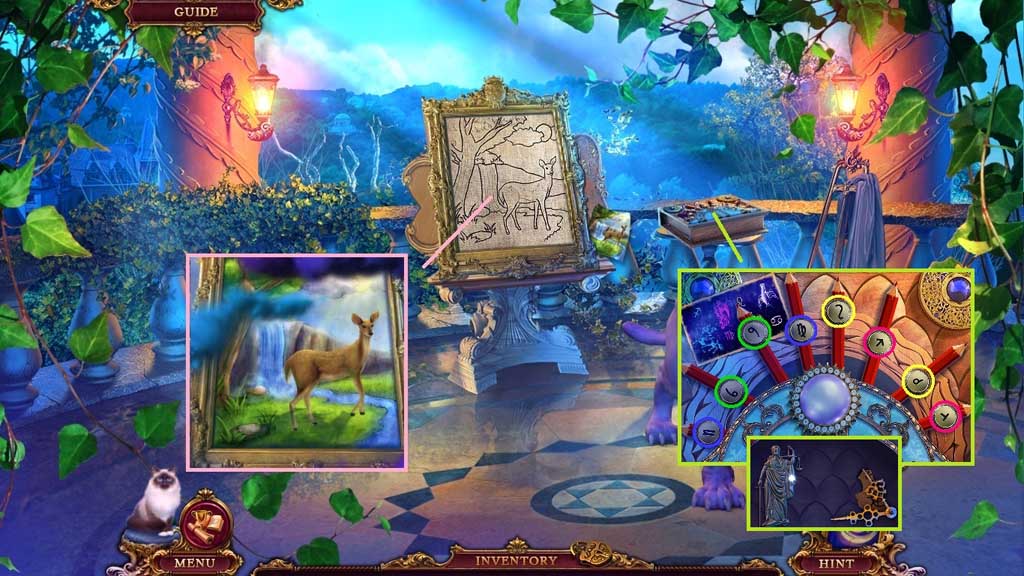
- Place the brush and palette next to the canvas to trigger a mini game.
- Solve the game by correctly painting the picture.
- Place the pencils to trigger a mini game.
- Solve the game by picking the pencil pairs.
- Collect Themis, the clock hands and 1 /4 rune books.
- Move down once.
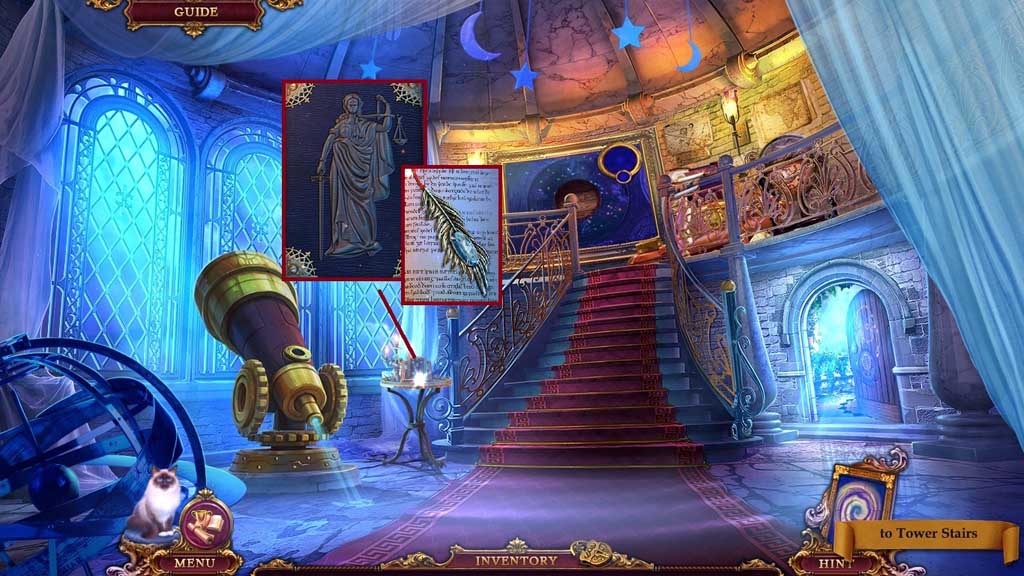
- Insert Themis; collect the feather.
- Move to the Poultry Yard and click the hidden objects area.
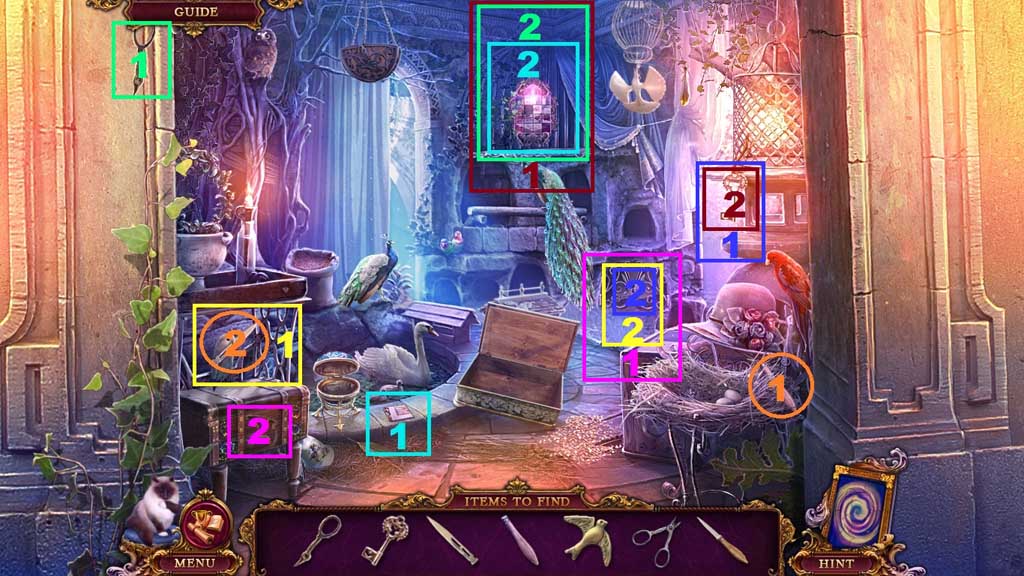
- Find the items.
- Select the handle and place it onto the blade; collect the dagger.
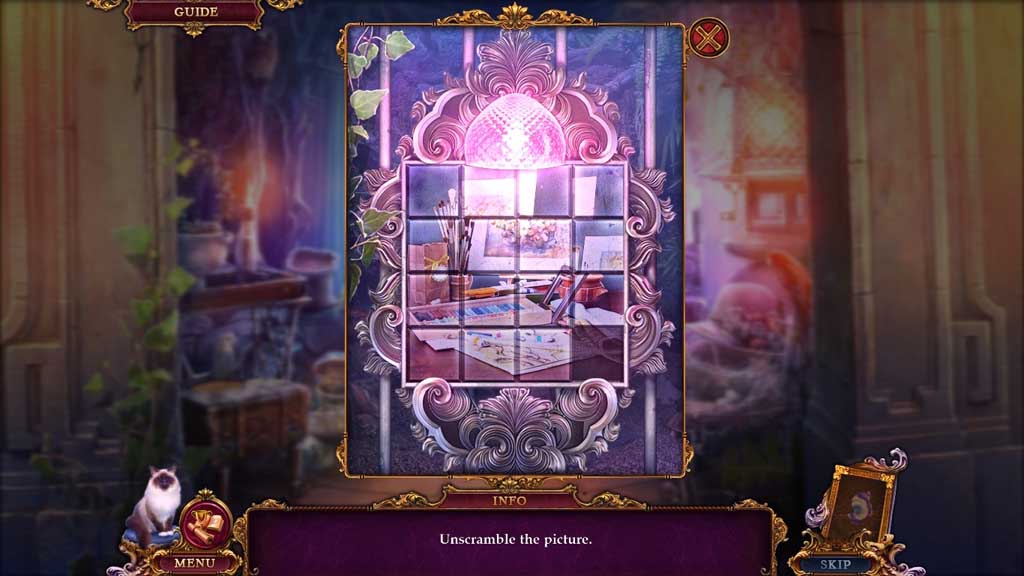
- Select the picture piece and place it into the frame to trigger a mini game.
- Solve the game by unscrambling the image; reveal the scissor half.
- Select the scissor half and place it along with the other scissor half to create and collect the scissors.
- Use the scissors to cut the key free.
- Insert the key into the grate lock.
- Select the dagger to slice the package; collect the bird.
- Insert the bird into the groove.
- Collect the vines.
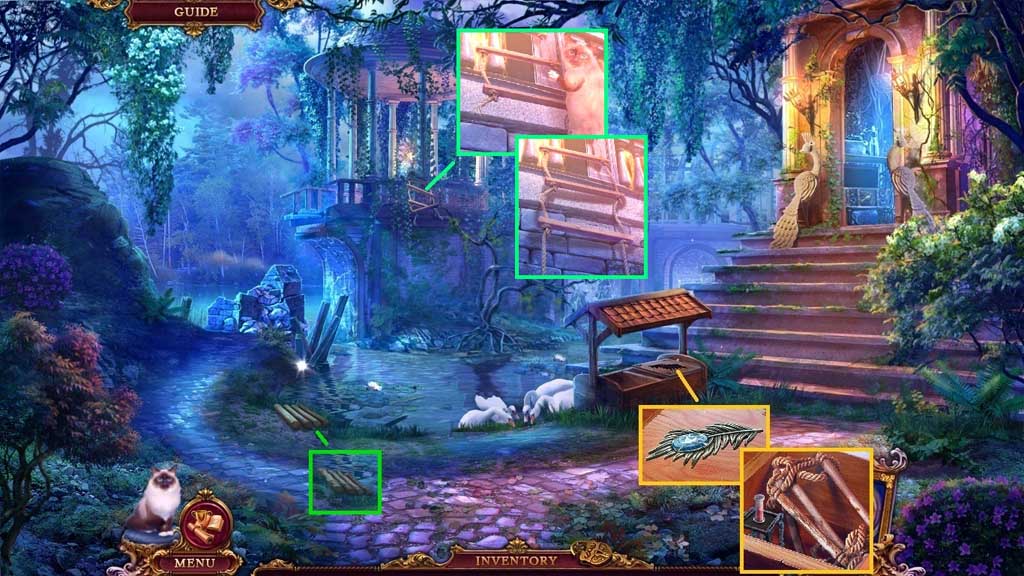
- Insert the feather.
- Collect the red paint and the rope ladder.
- Select the vines to tie the logs together and create a raft.
- Select Mr. Jenkins to loosen the broken rope ladder; attach the complete rope ladder to it.
- Move ahead.
Comments will load when you reach this part of the walkthrough.