

Chapter Four: Gnomes Gone Wild
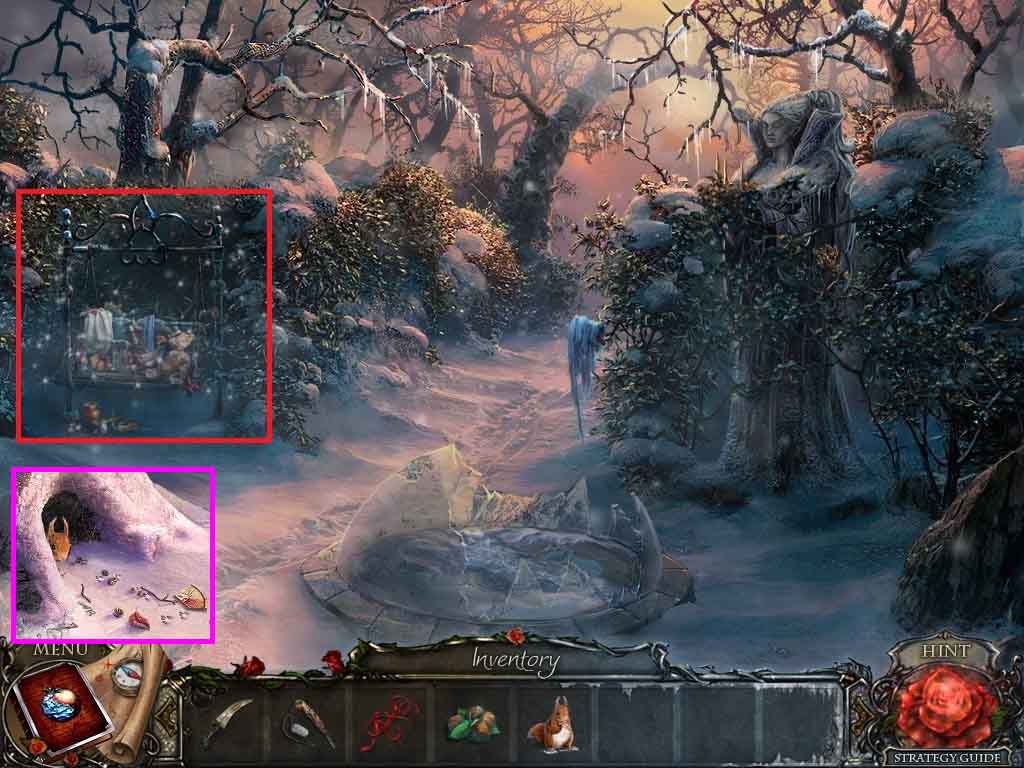
- Click the hole and place the nuts and the squirrel into it; collect the puzzle part.
- Click the swing to access a hidden objects area.
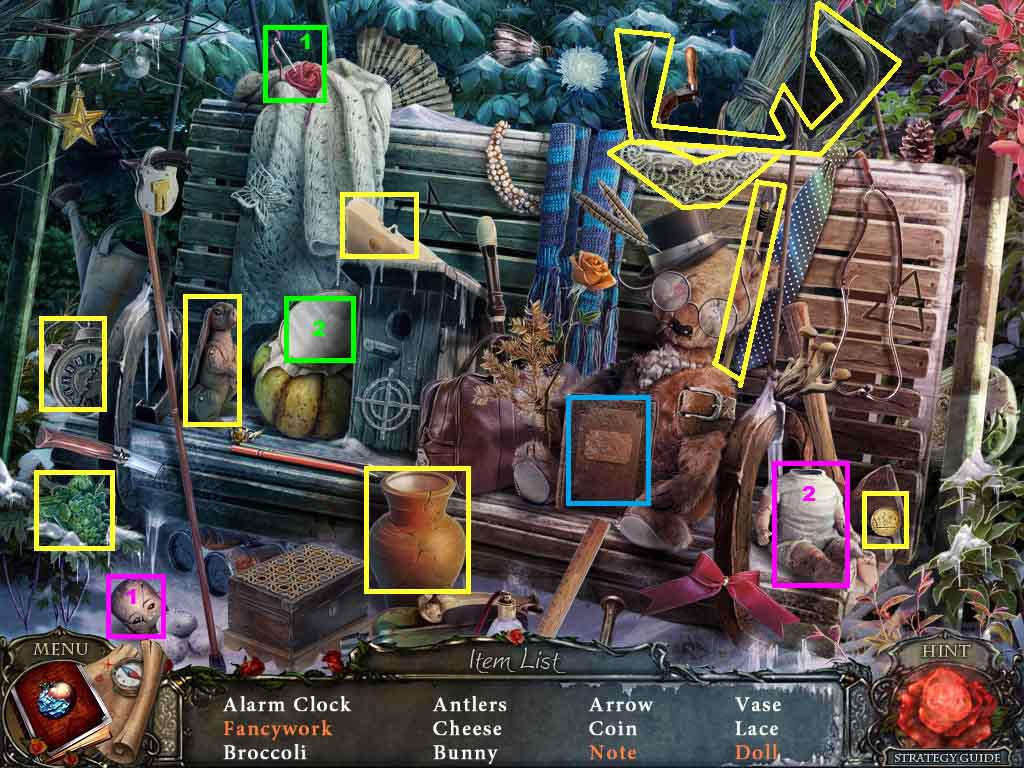
- Find the listed items.
- Click the book; collect the note.
- Attach the head onto the body; collect the doll.
- Select the needle and thread to complete the needle work; collect the fancywork.
- Collect the coin.
- Move ahead.
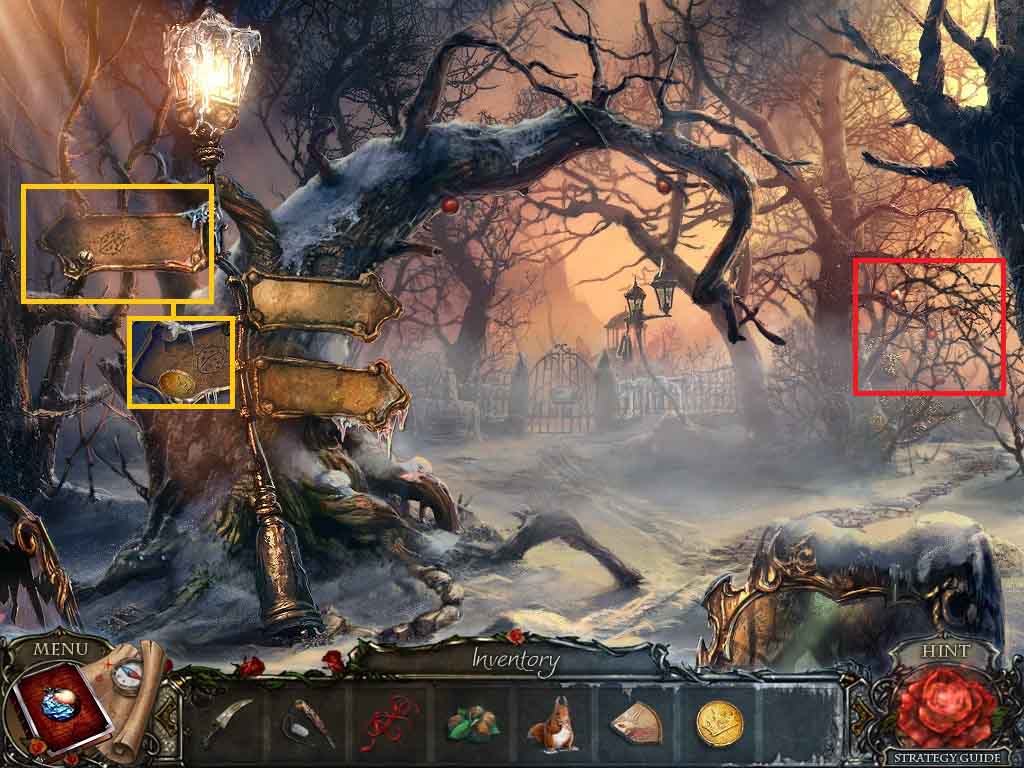
- Click the sign; collect the clue.
- Select the coin and use it to unscrew and collect the screw.
- Click the branches to access a hidden objects area.
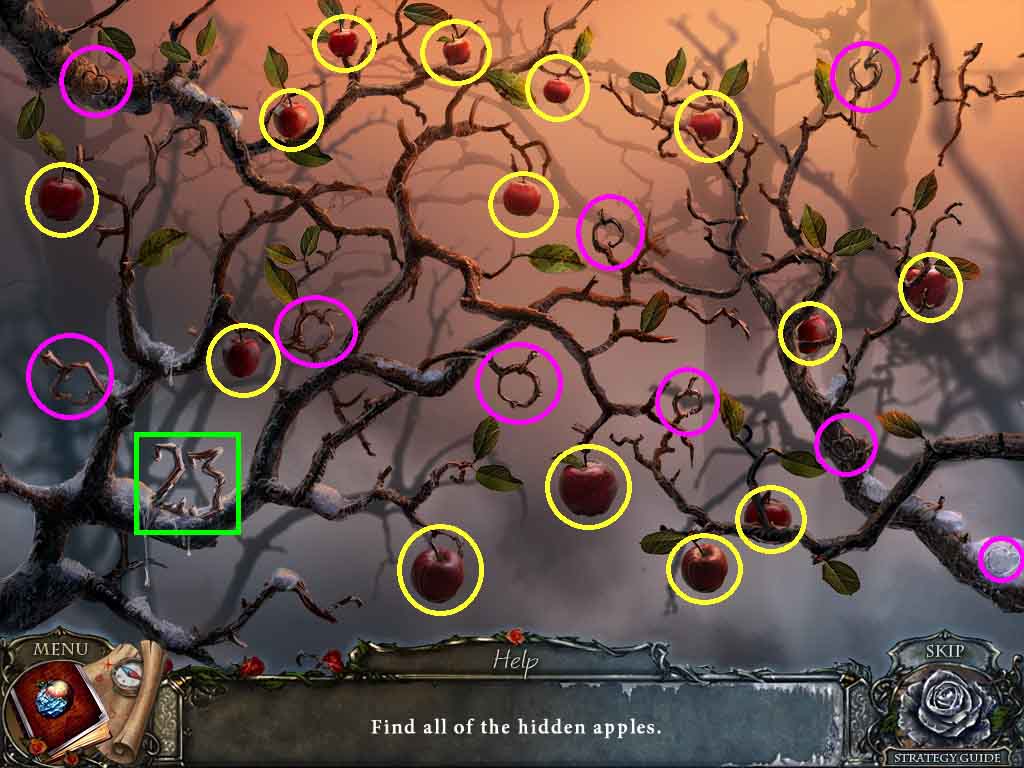
- Collect the 23 apples.
- Move up the path on the right.
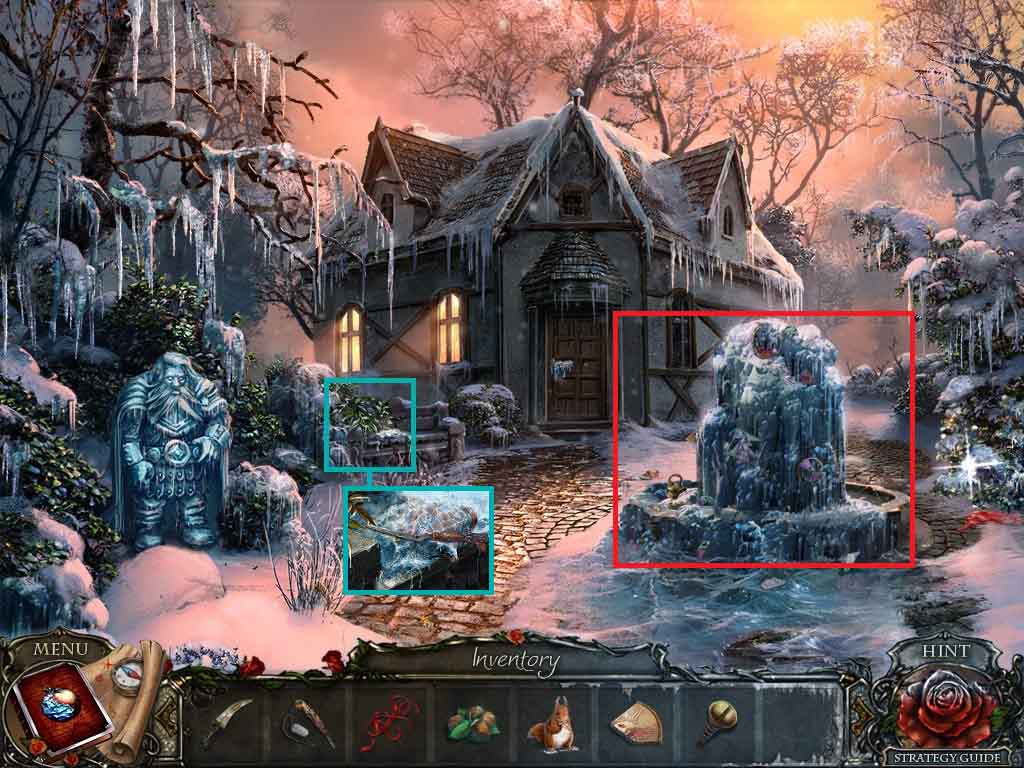
- Click the bench and then the branch; colt the half of pruners.
- Click the fountain to access a hidden objects area.
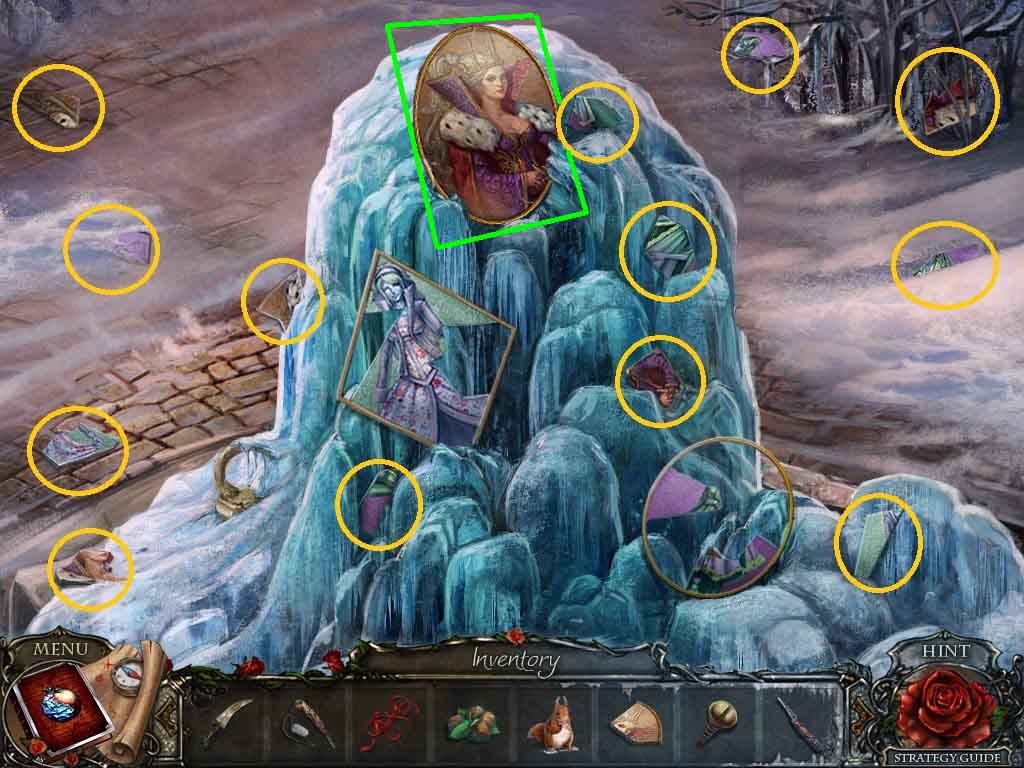
- Find the picture pieces.
- Insert the puzzle part into the top portrait to complete it; collect the Queenly portrait.
- Move into the Cottage.
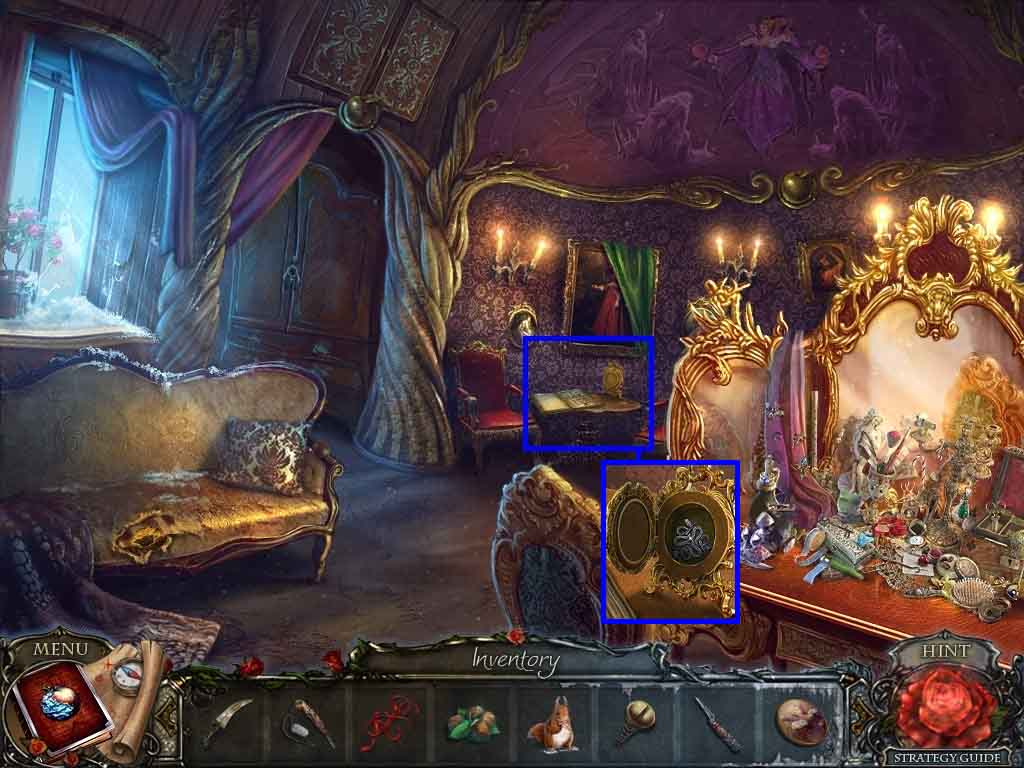
- Click the table.
- Insert the Queenly portrait into the frame; collect the snake medallion.
- Move to the Apple Tree.
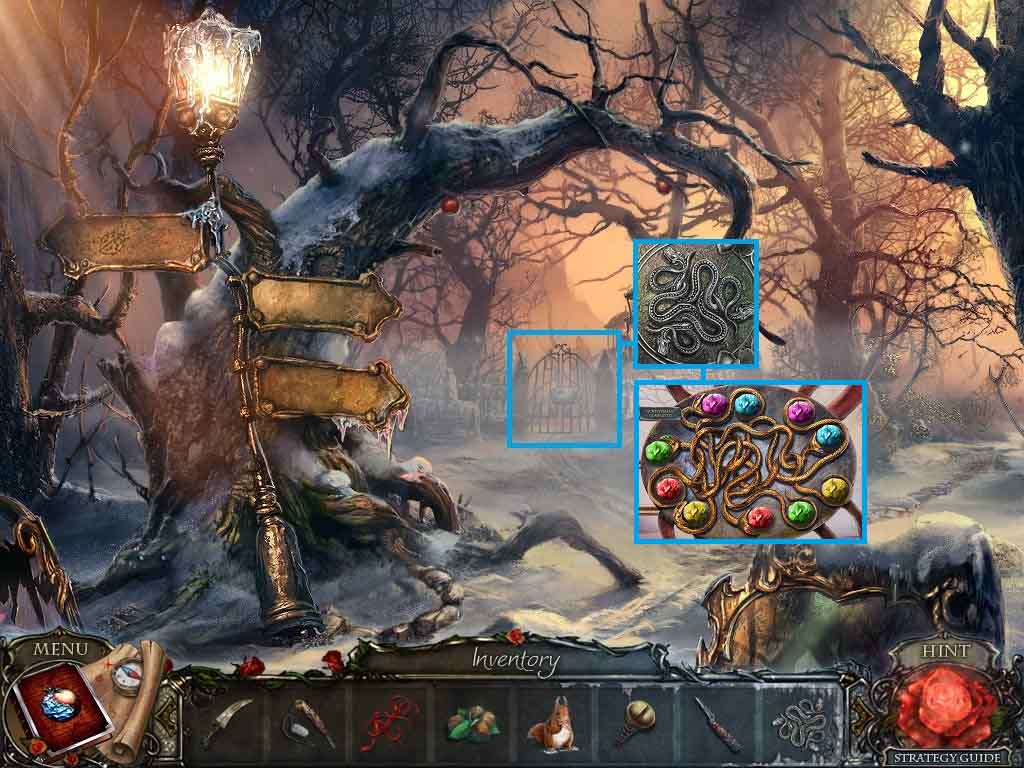
- Click the gate and insert the snake medallion to trigger a puzzle.
- Insert the colored apples onto snakes with matching eye color.
- Move ahead.
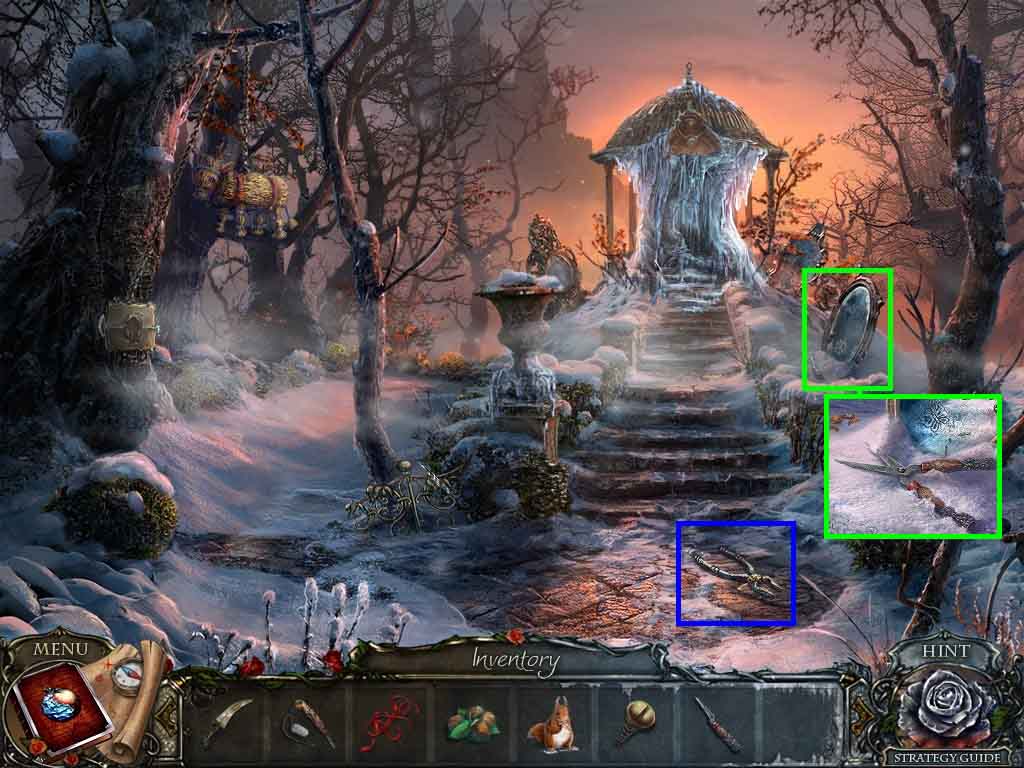
- Collect the tongs.
- Click the mirror and notice the clue.
- Attach the half of pruners onto the other half and select the screw to secure it.
- Collect the pruners.
- Move back 2 times.
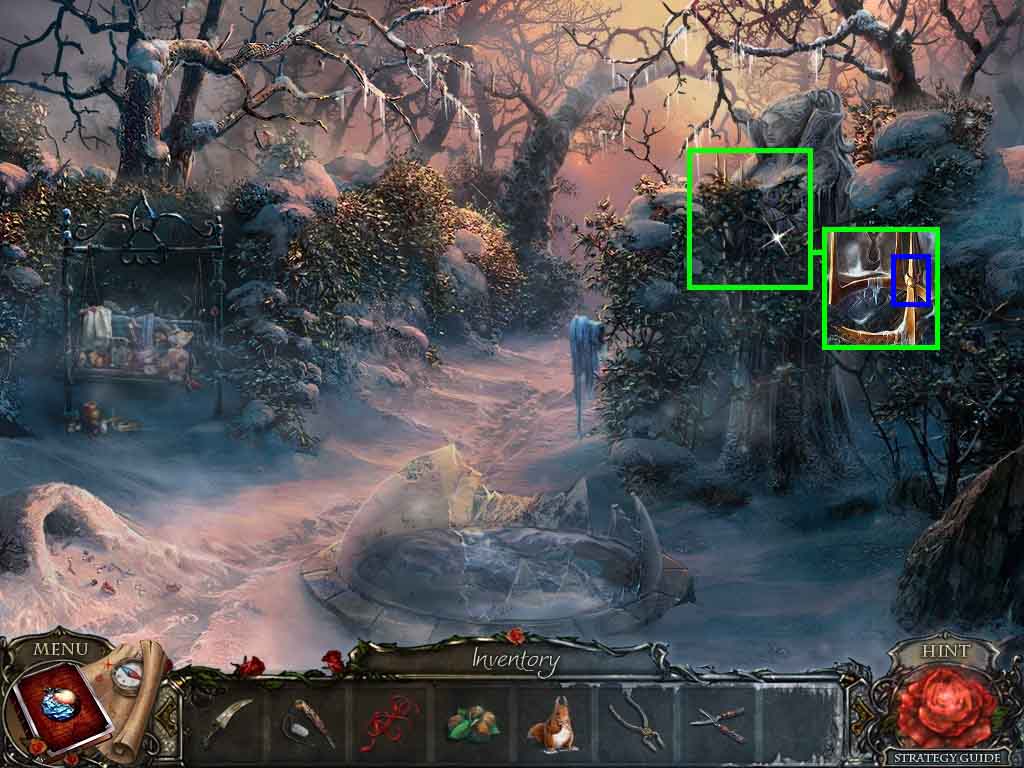
- Select the pruners to cut the brambles; click the crown and collect the ring.
- Move into the Cottage.
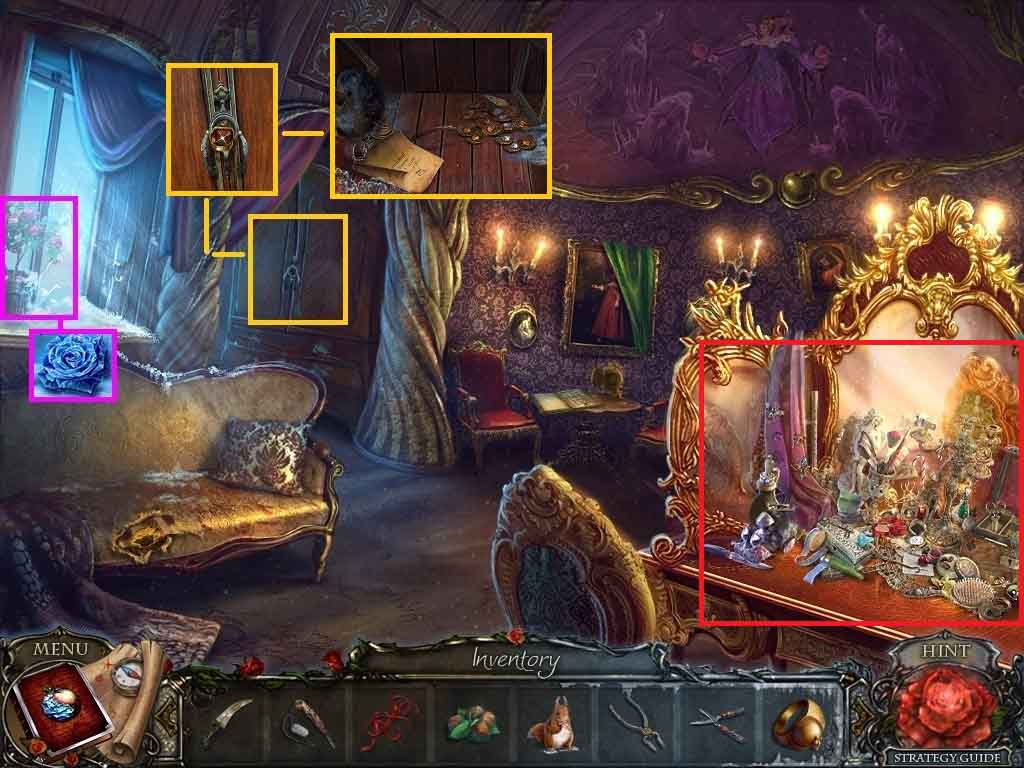
- Click the window and select the pruners to cut the roses; collect the ice rose.
- Click the armoire and insert the ring; click the ring.
- Read the note and collect the oilcan.
- Click the vanity to access a hidden objects area.
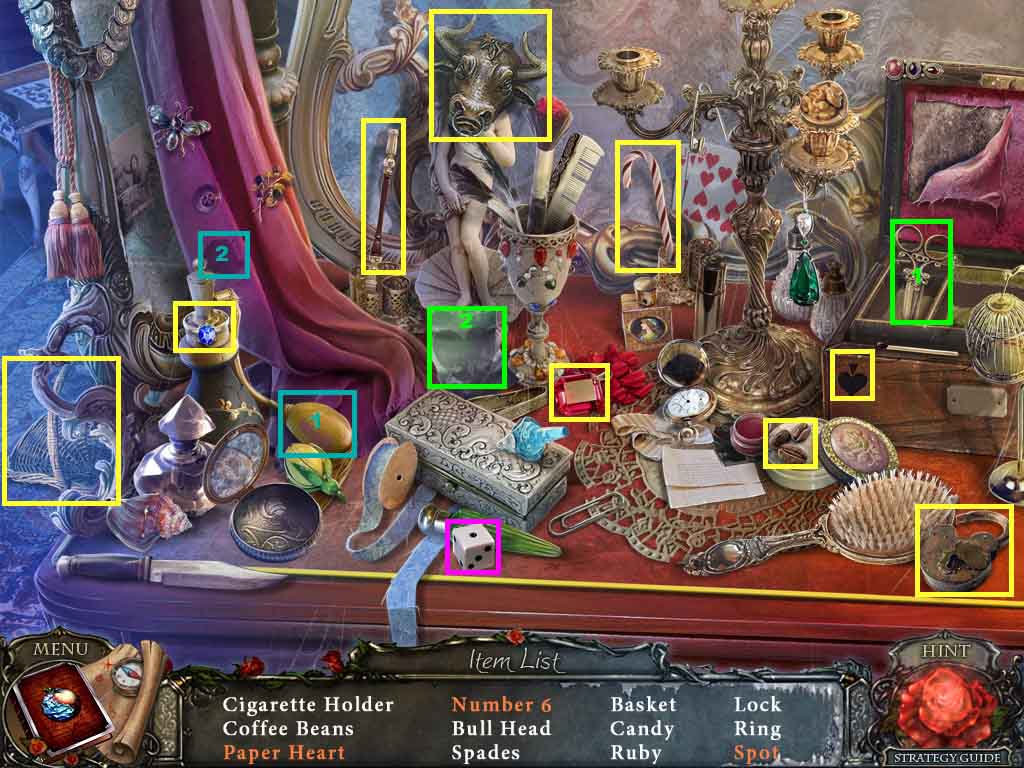
- Find the listed items.
- Click the atomizer to collect a spot.
- Roll the dice until you roll and collect the number 6.
- Select the scissors and use them to cut the paper; collect the paper heart.
- Collect the bullhead.
- Move to Near Altar.
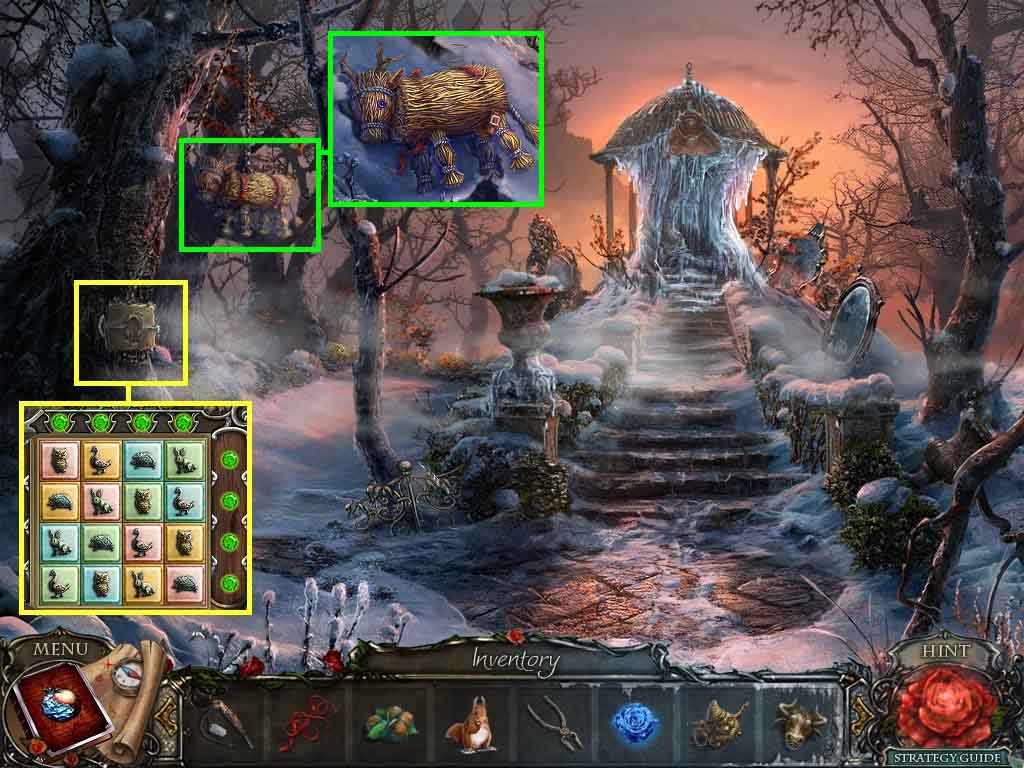
- Click the tree trunk and insert the bull head to trigger a puzzle.
- Align the tiles based on the instructions.
- Click the straw animal.
- Select the knife and use it to cut the 2 straps; collect the hay.
- Move back.
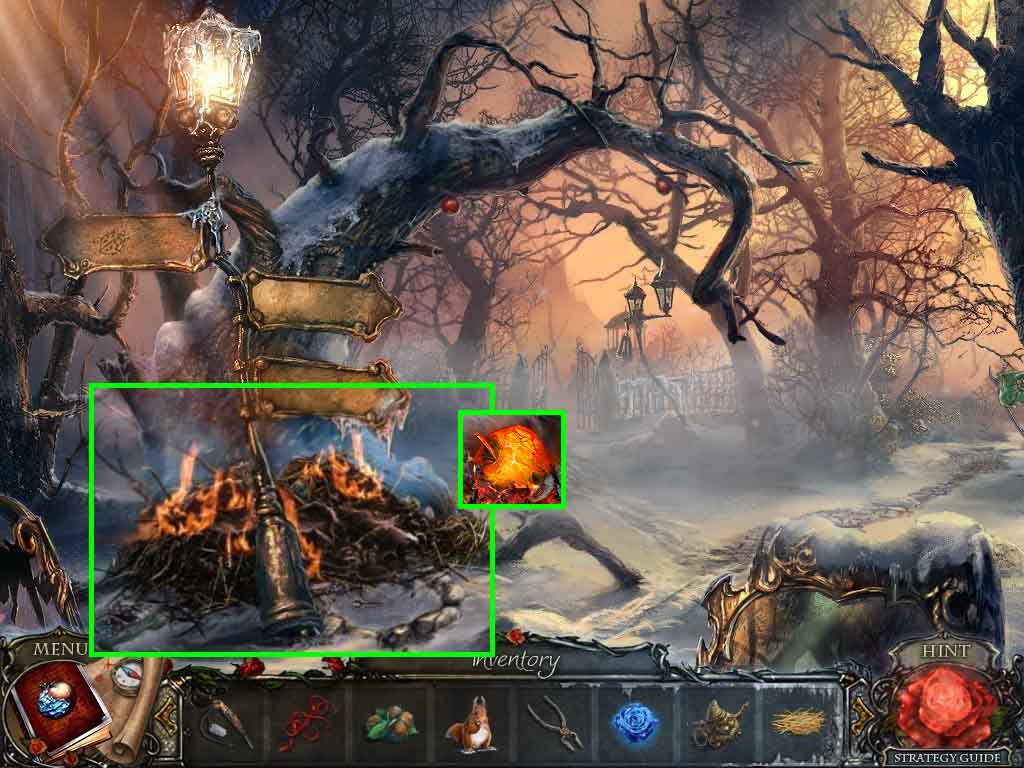
- Lay the hay onto the tree base and pour the oil can onto it.
- Select the flint and steel to ignite the oiled hay.
- Click the burnt tree; select the tongs to collect the apple ashes.
- Move up the path on the right.
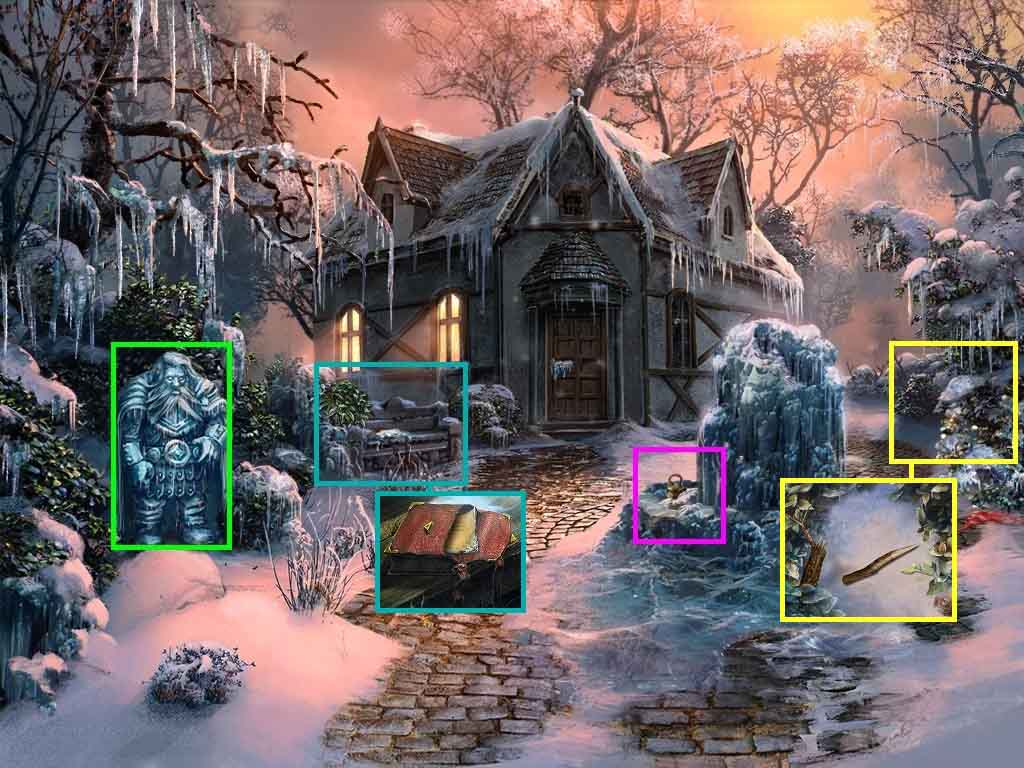
- Give the gnome the apple ashes.
- Click the fountain and collect the weight.
- Click the bench then click the purse.
- Read the note and collect the leaf.
- Click the bush and then the leaves.
- Select the knife to cut the branch; collect the peg.
- Move to Near Altar; move ahead once more.
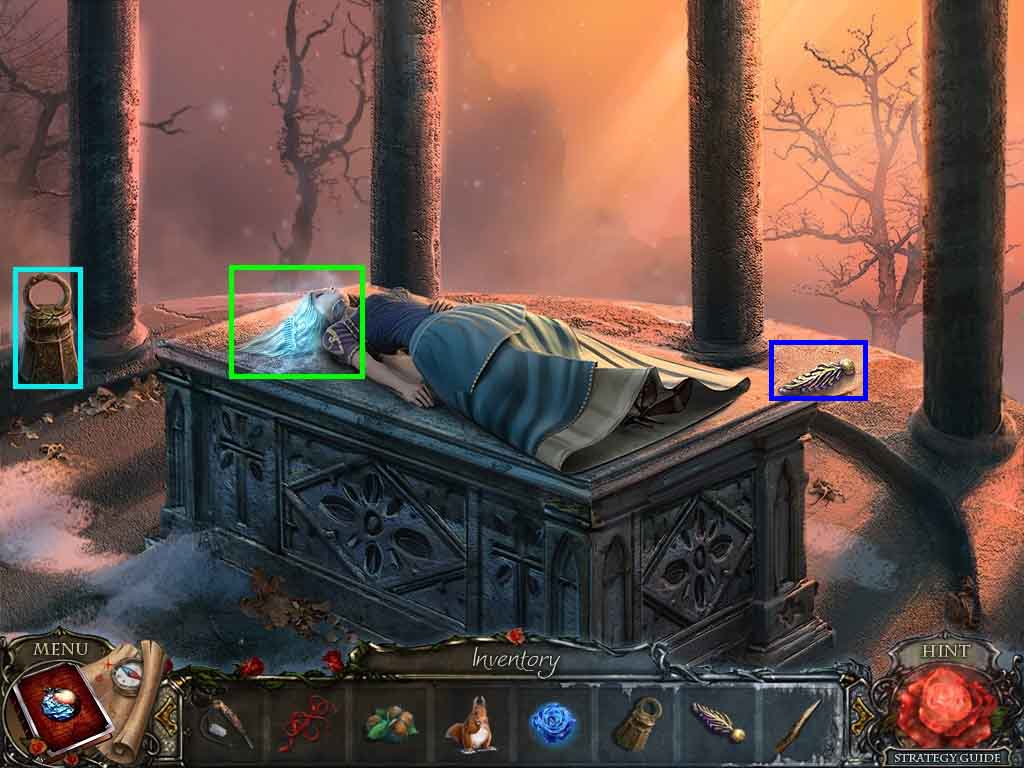
- Collect the 2nd weight.
- Click Elizabeth’s hair and collect the cursed comb.
- Speak to Elizabeth.
- Click the ledge; collect the 2nd leaf.
- Move to the Apple Tree.
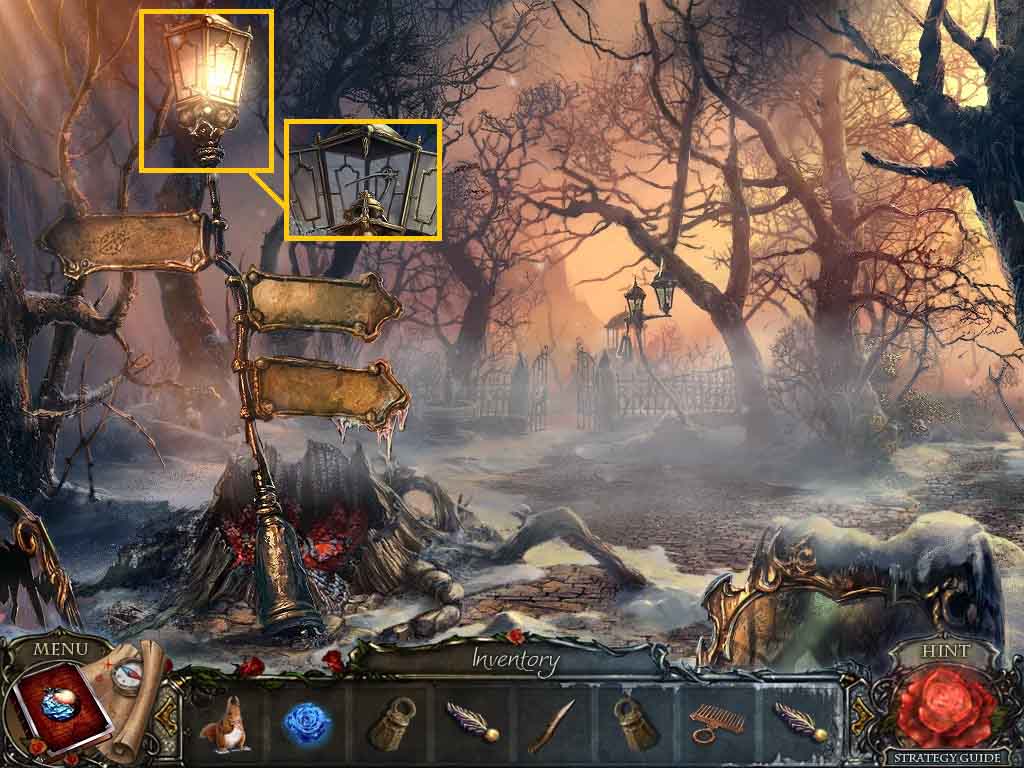
- Click the lantern and insert the 2 leaves and click the leaves.
- Collect the wire cutters.
- Move to the Gnome Garden.
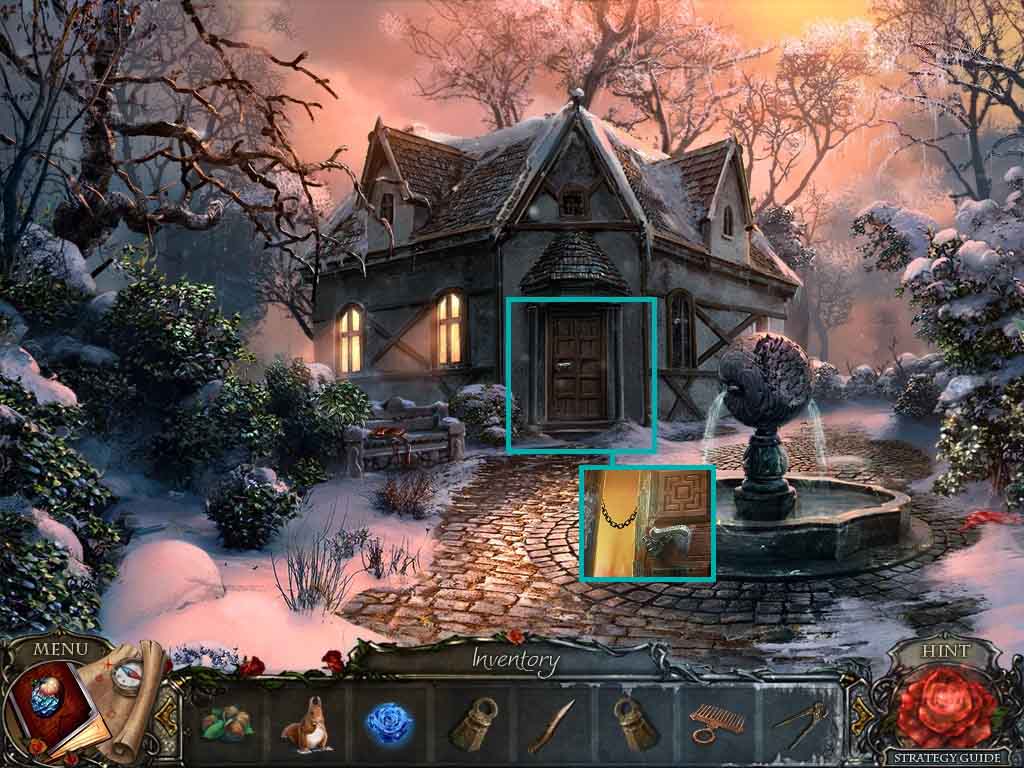
- Click the door and then the handle.
- Select the wire cutters to cut the chain.
- Move into the Workshop and click the table to access a hidden objects area.
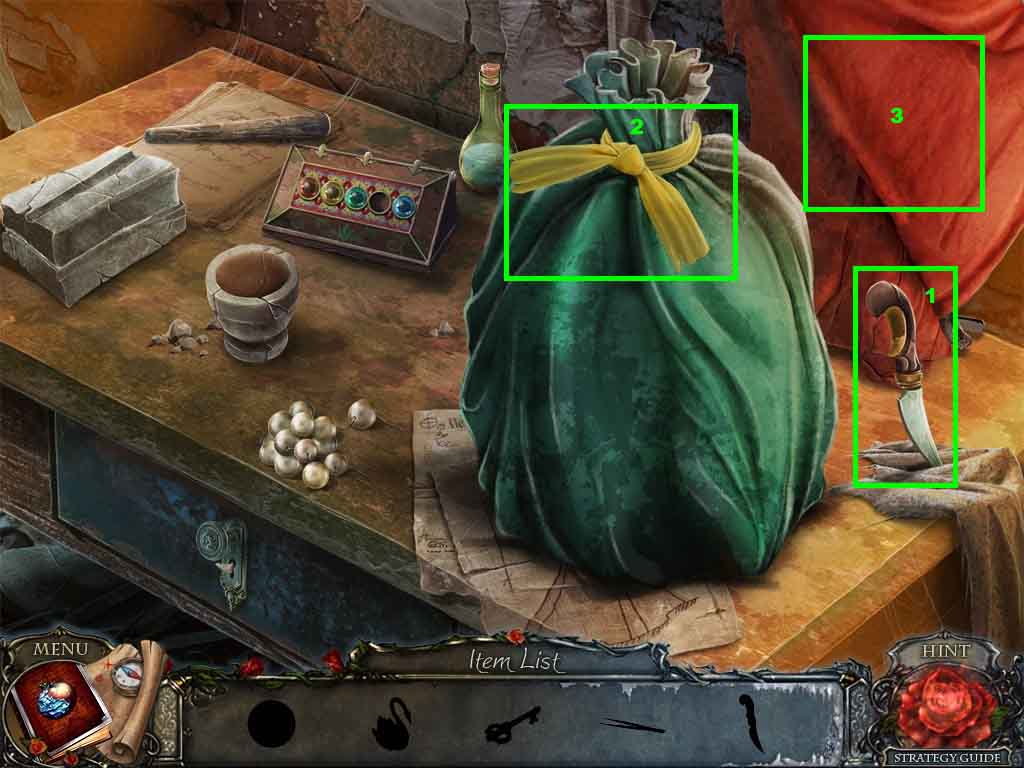
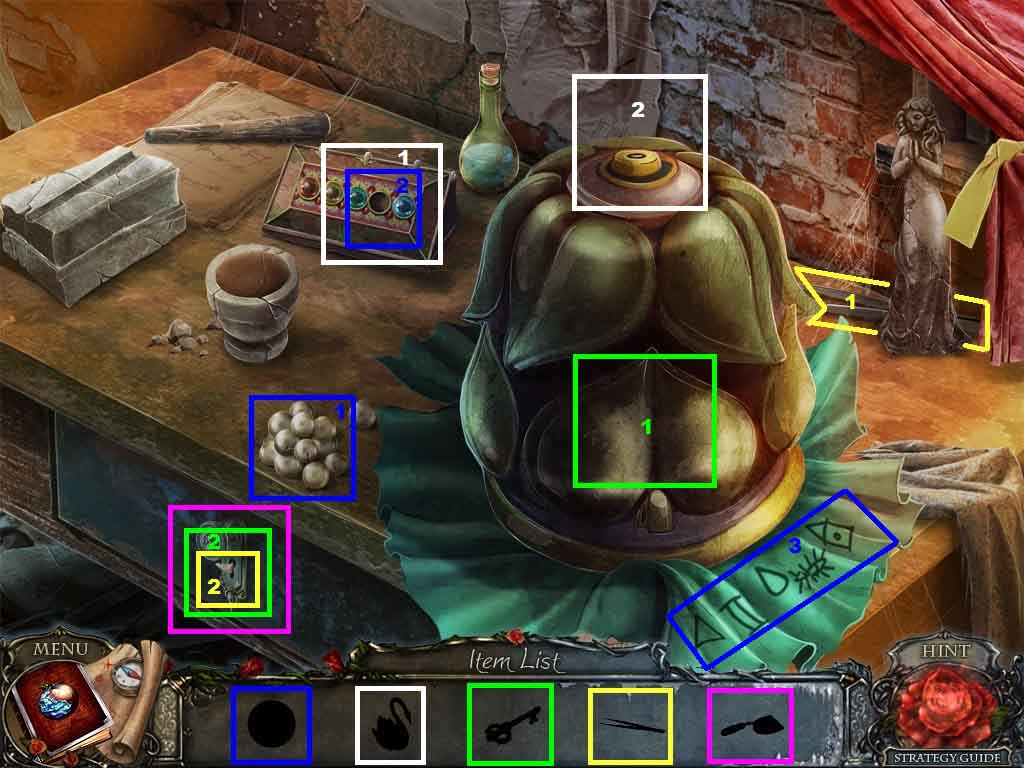
- Find the silhouetted items.
- Select the knife and use it to cut the ribbon.
- Use the ribbon to tie the curtain back.
- Collect the tweezers.
- Click the pearls; collect the part of lock.
- Click the box and place the part of the lock onto it.
- Click the symbols based on the clues; collect the swan.
- Insert the swan onto the device and collect the key.
- Click the drawer lock and insert the tweezers into the keyhole.
- Insert the key into the keyhole; collect the trowel.
- Collect a trowel.
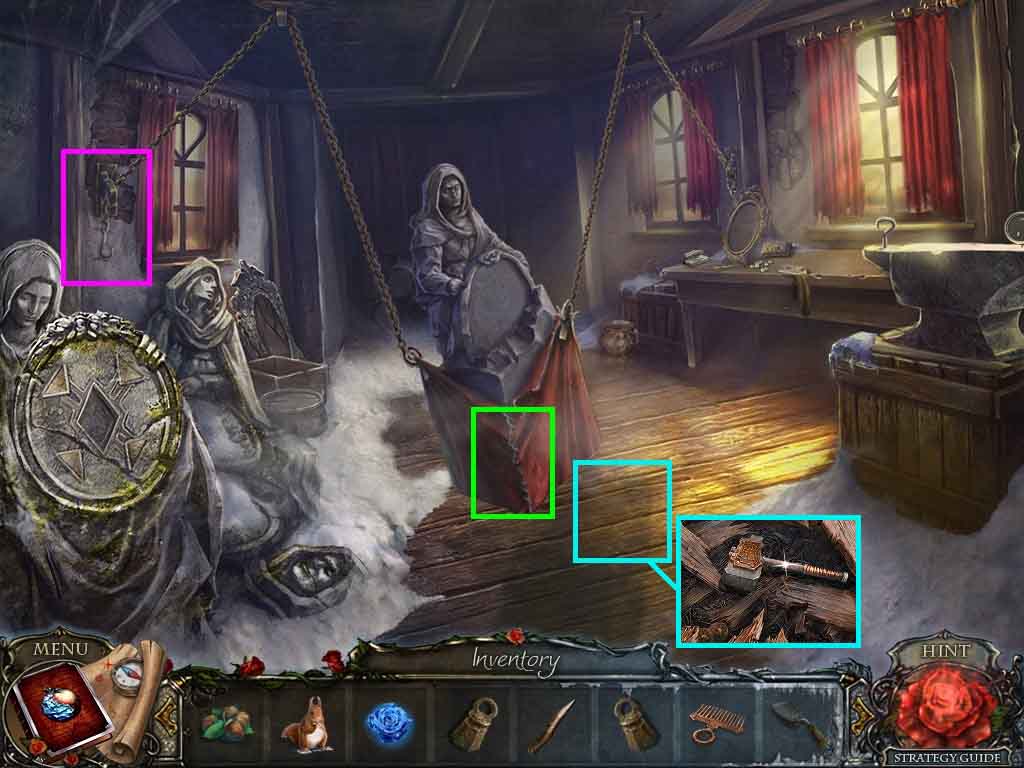
- Click the hook and place the weight onto it.
- Place the 2nd weight onto it.
- Click the sling and select the knife to cut the stitching.
- Click the broken floor and click the boards.
- Collect the hammer.
- Move to Near Altar.
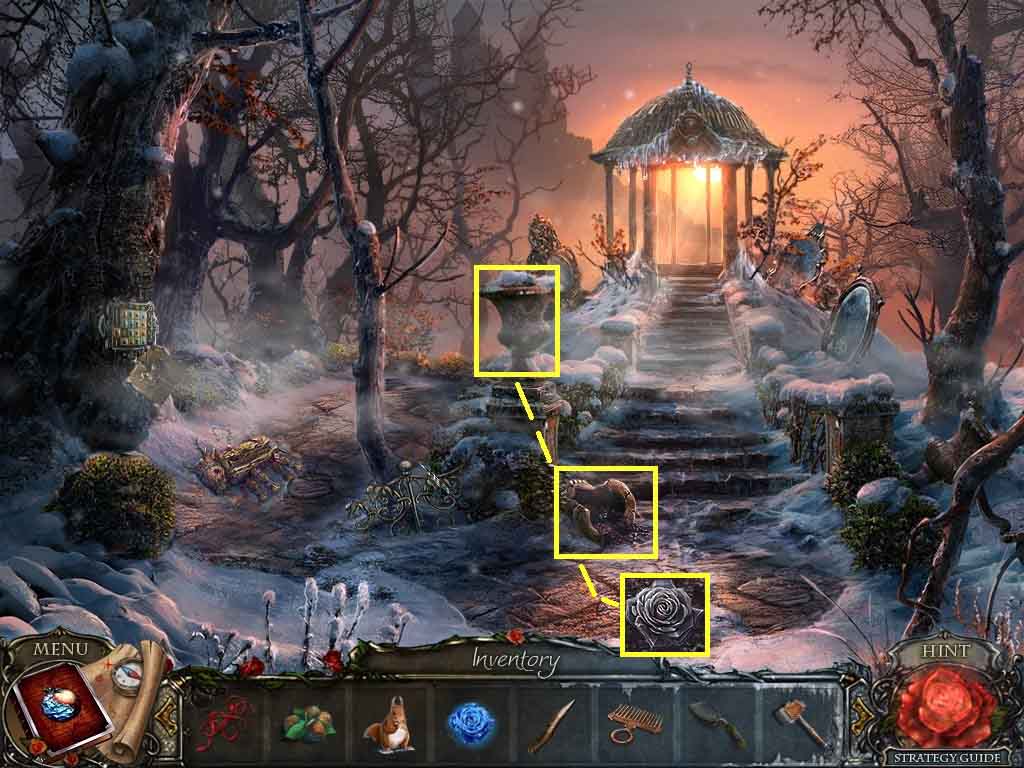
- Click the vase.
- Click the broken vase.
- Select the trowel and use it on the dirt 2 times; collect the metal rose.
- Move to the Forest Entrance.
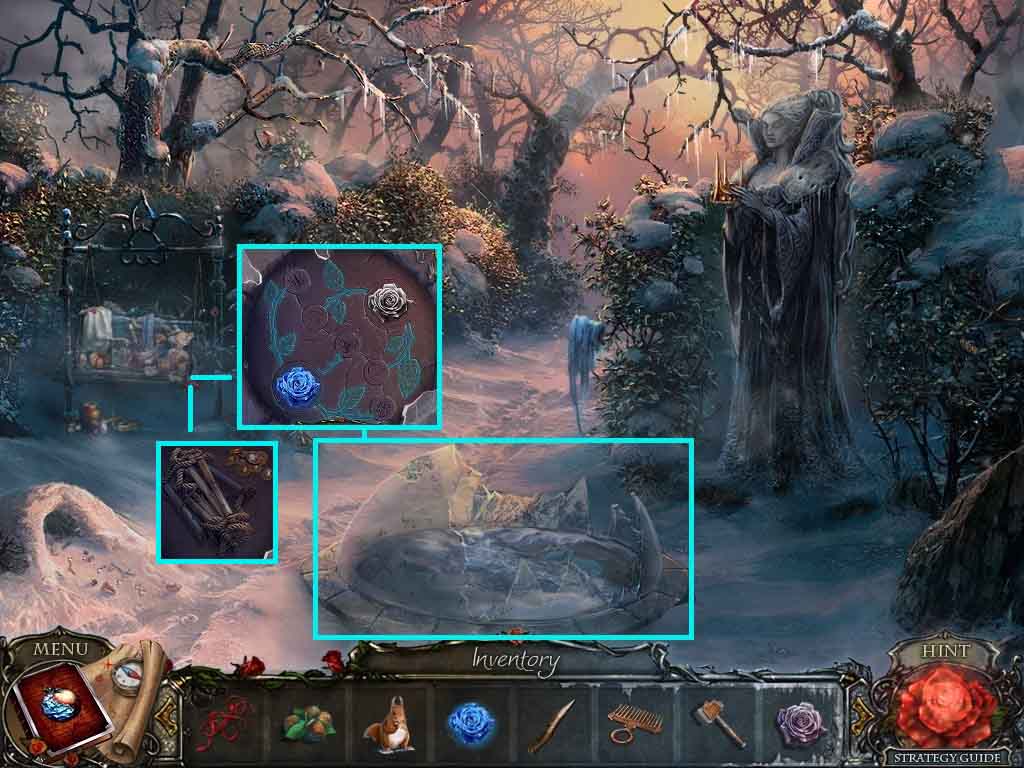
- Click the broken dome insert the ice rose and metal rose to trigger a puzzle.
- Click the correct disks based on the clues.
- Collect the rope ladder.
- Move into the Inside Workshop.
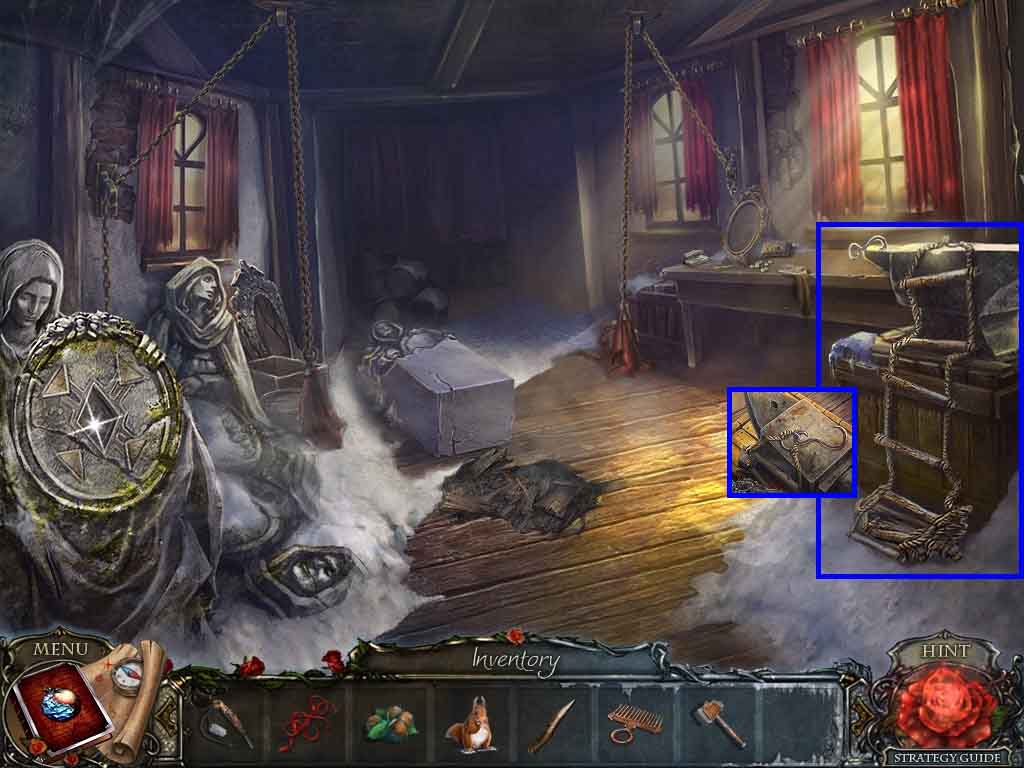
- Click the anvil and attach the rope to it.
- Use the hammer on the hook.
- Place the hook onto the ladder and collect the rope ladder with hook.
- Move to the Altar.
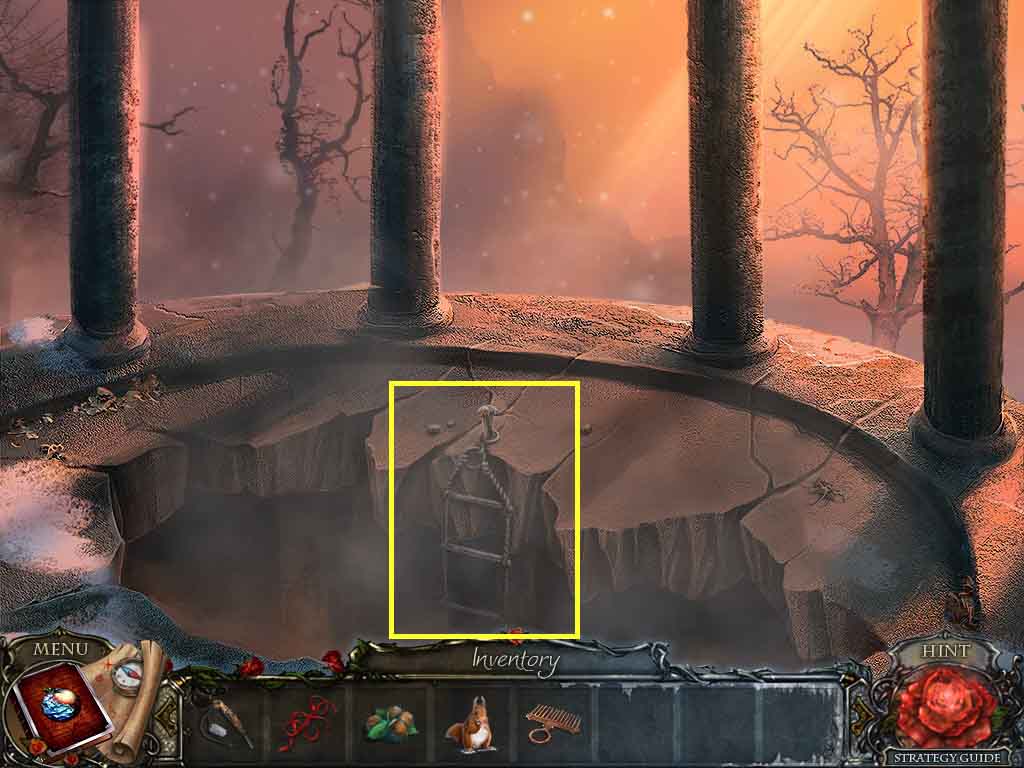
- Click the ledge and insert the peg into the crevice.
- Select the hammer to drive in the peg and place the rope ladder with hook onto the peg.
- Move down the ladder.
Comments will load when you reach this part of the walkthrough.