

Chapter Three: The Forest
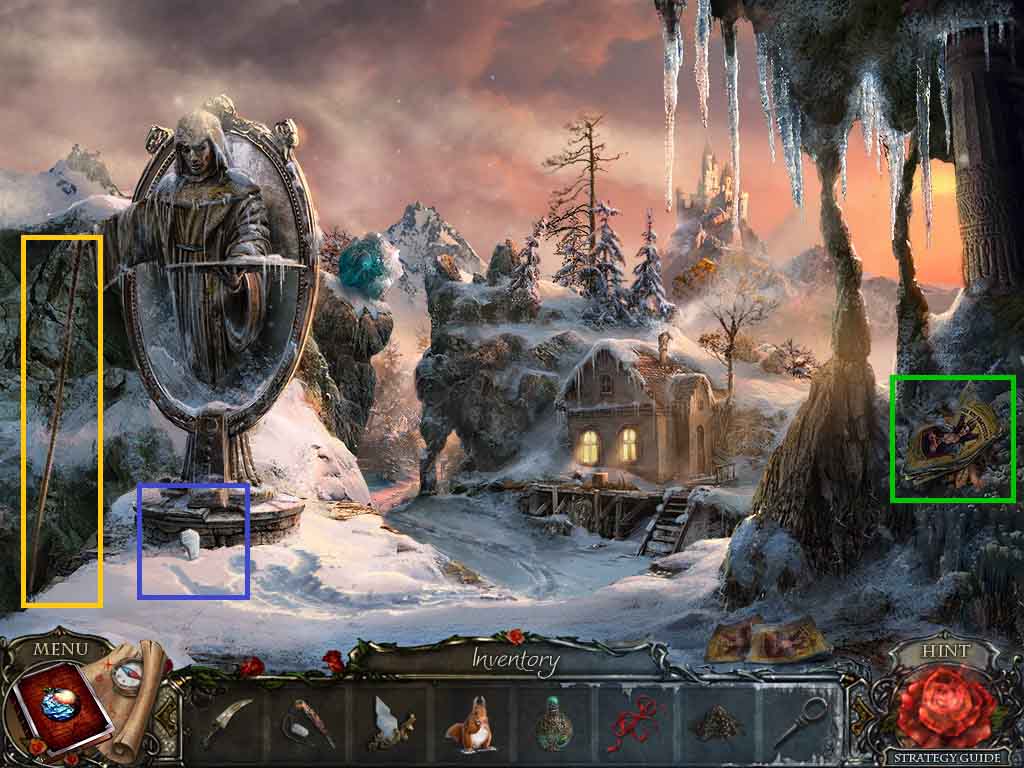
- Click the statue base; collect the 2nd mirror shard.
- Click the papers 2 times and read the note; collect the face part.
- Click the rope and use the knife on it.
- Move back 3 times.
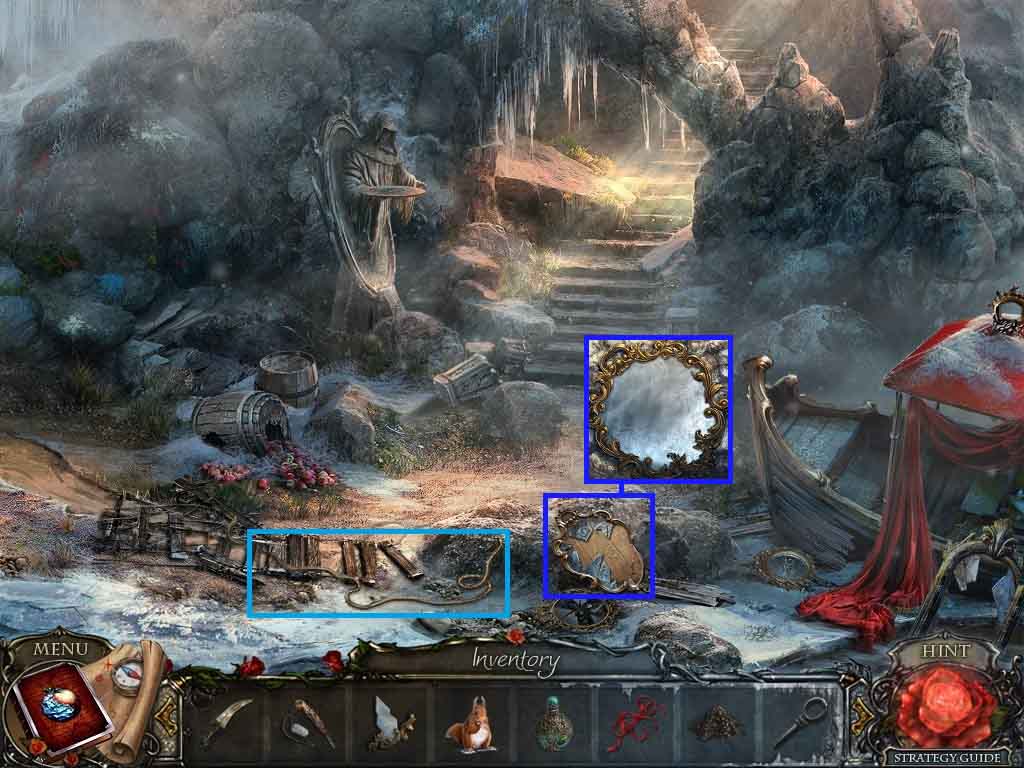
- Collect the rope.
- Click the mirror and insert the 2 mirror shards to trigger a puzzle.
- Assemble and collect the mirror.
- Move upstairs.
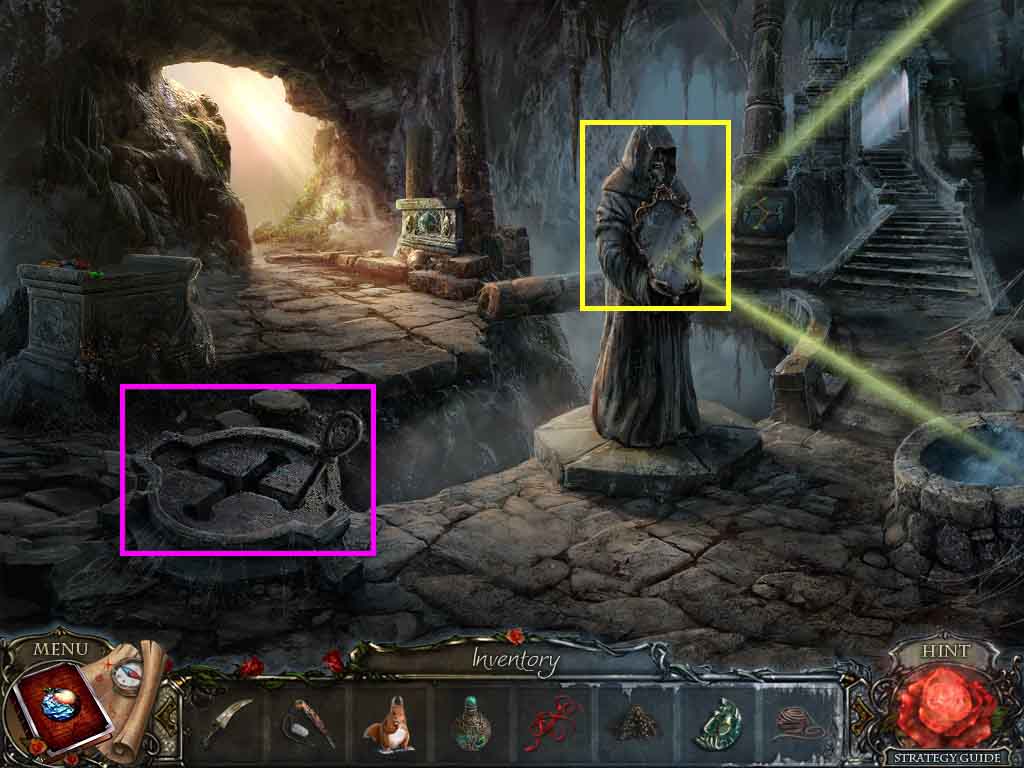
- Insert the lever into the mechanism and click it once.
- Click the statue and place the mirror into the hand.
- Move up the passage on the left 2 times and move ahead to the Narrow Pass.
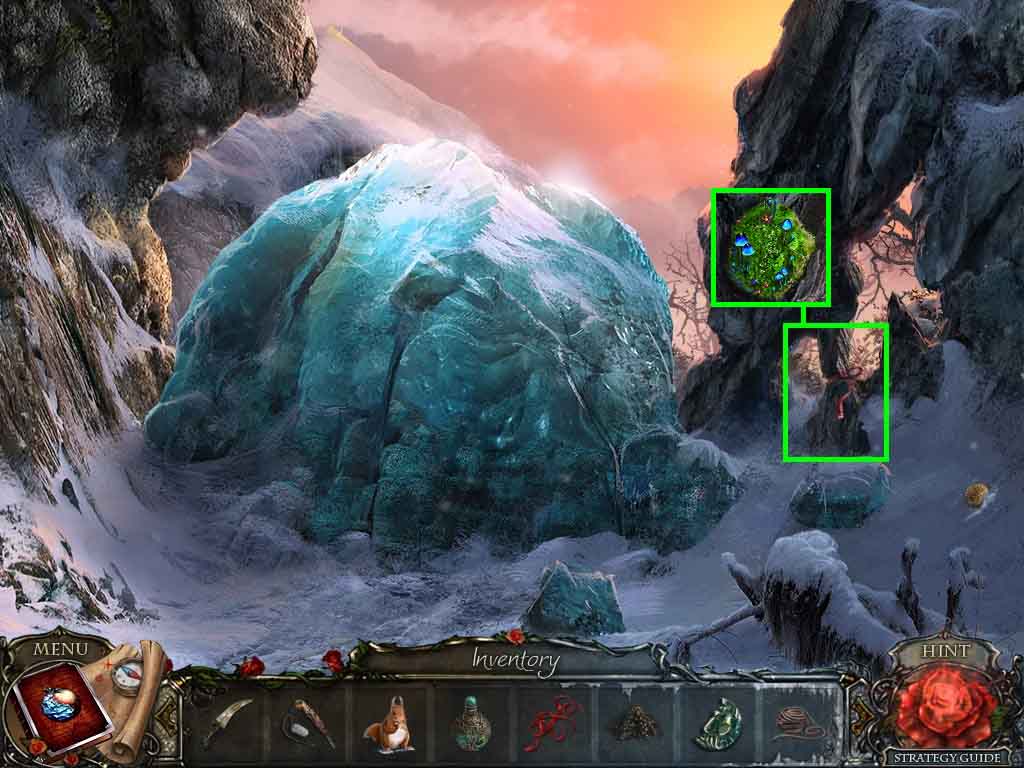
- Click the ribbon; collect the moss.
- Move back once and move ahead to the Cottage.
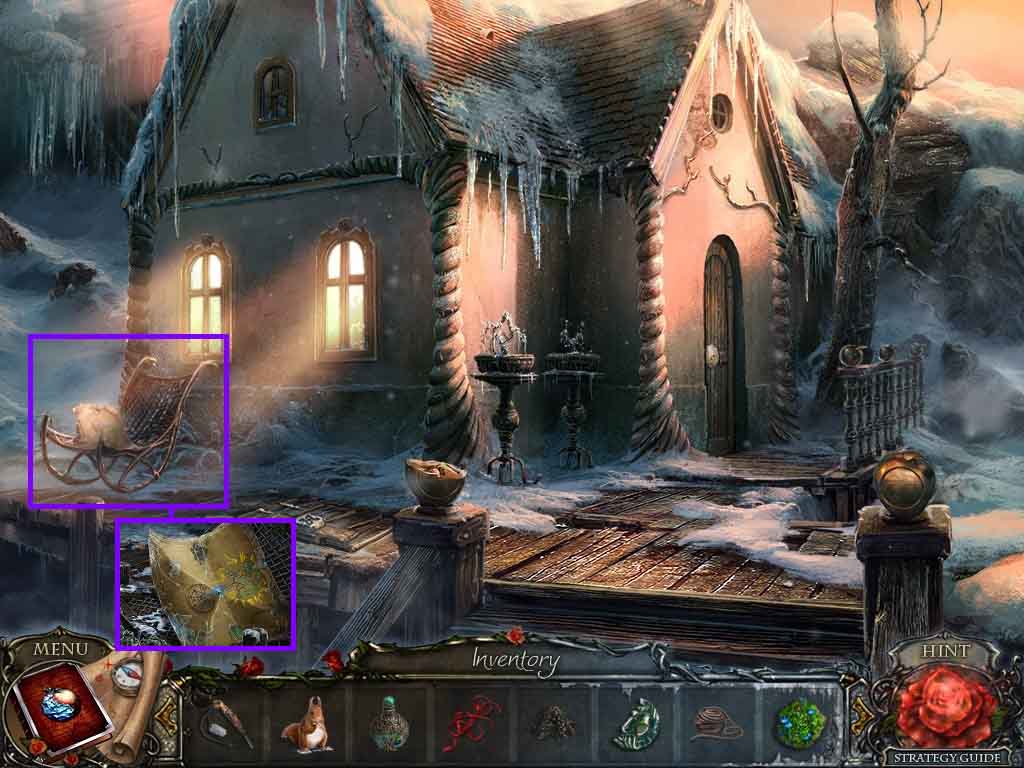
- Click the rocking chair; collect the recipe and the gnome.
- Move back once.
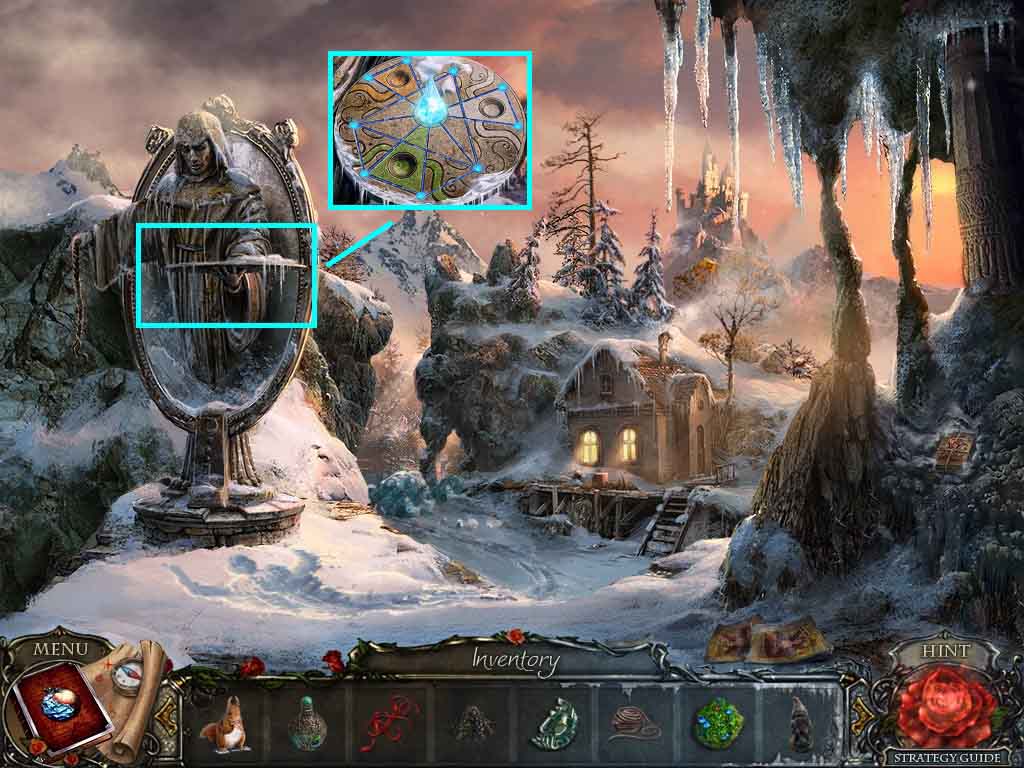
- Click the platter and place the dirt, moss and the elixir onto it to trigger a puzzle.
- Light up all the lines.
- Collect the magic soil.
- Move ahead to the Cottage.
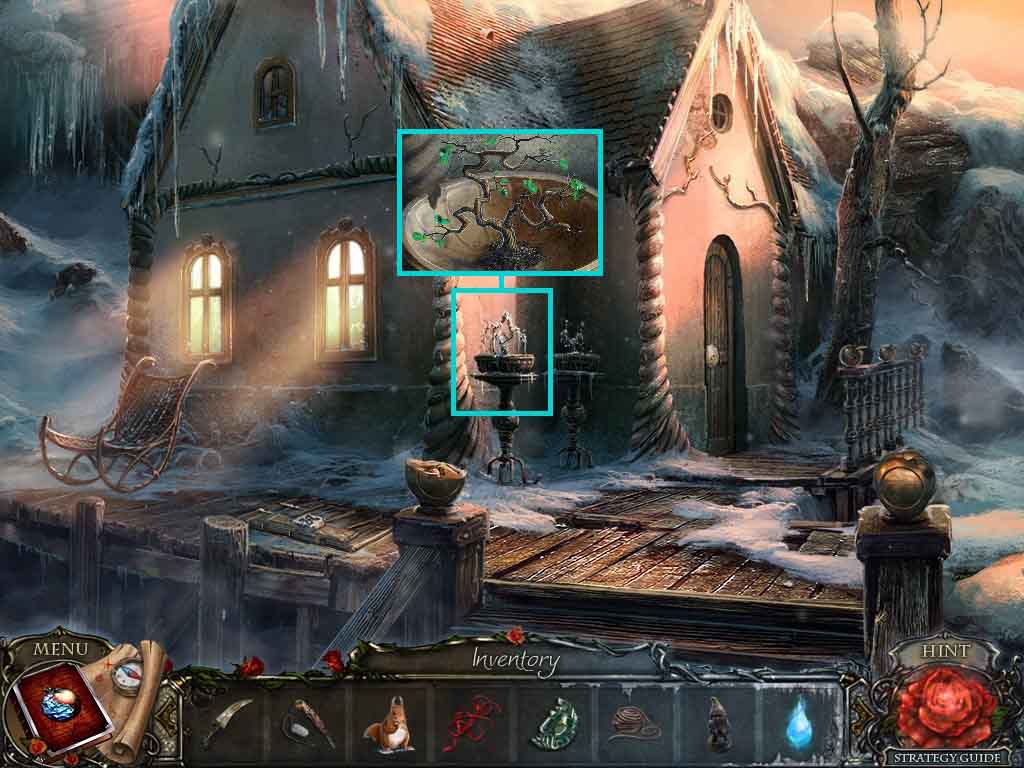
- Click the planter and insert the magic soil; collect the nuts.
- Move to the Narrow Pass.
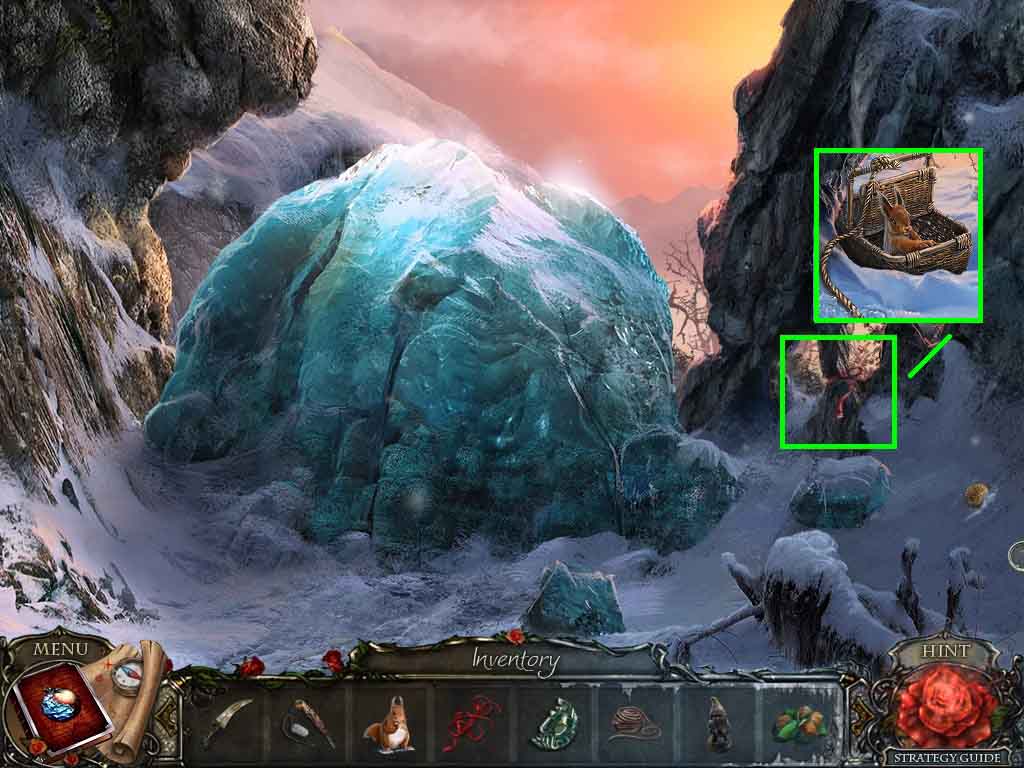
- Click the ribbon.
- Place the squirrel and the nuts into the basket; collect the ball.
- Place the rope onto the basket; collect the squirrel in a basket.
- Move back 3 times.
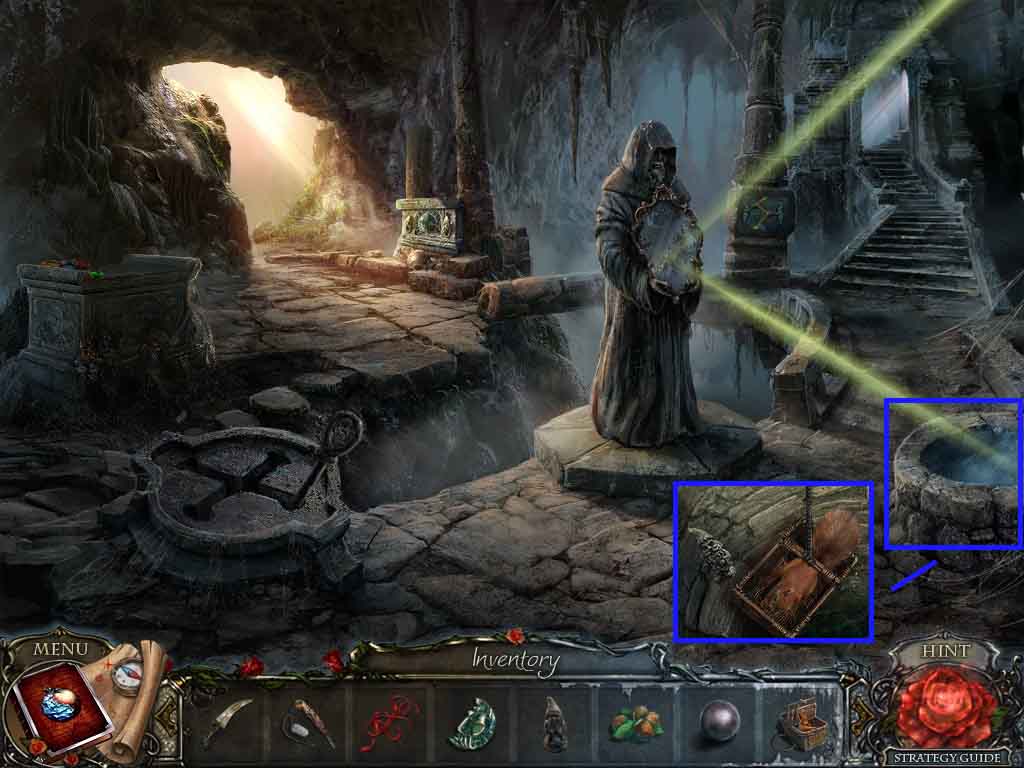
- Click the well.
- Select the squirrel in a basket to use on the gnome; collect the 2nd gnome.
- Collect the squirrel.
- Move to the right and go upstairs.
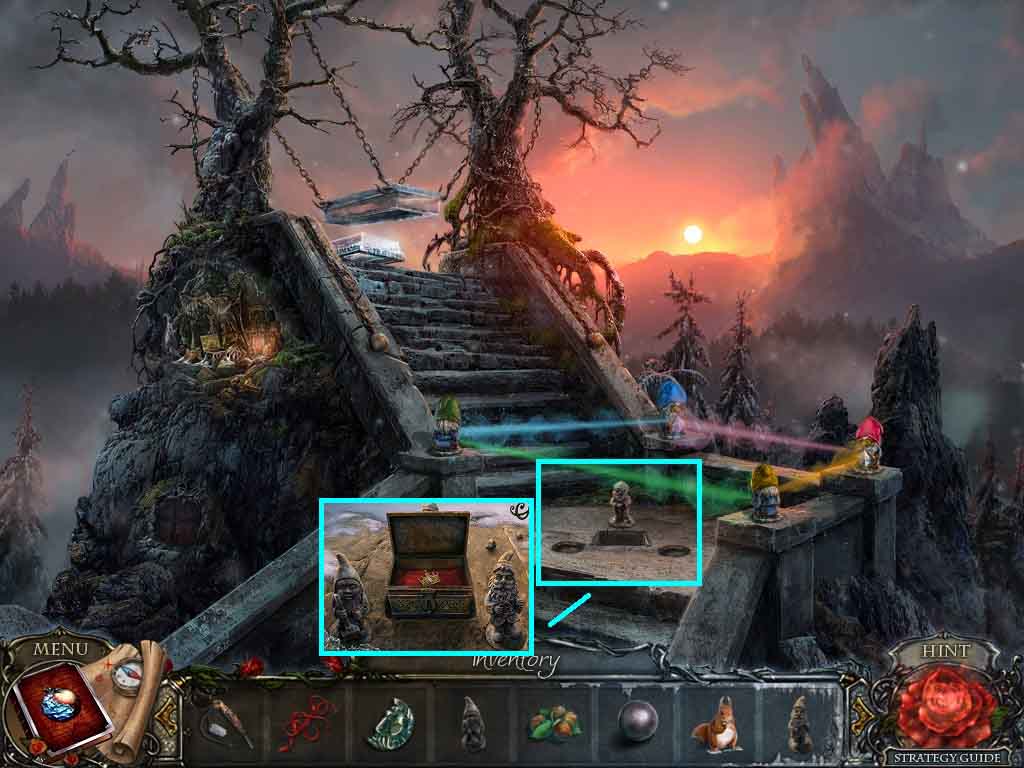
- Click the landing; insert the 2 gnomes.
- Click the chest; collect the crown.
- Move to the Cottage in the Forest.
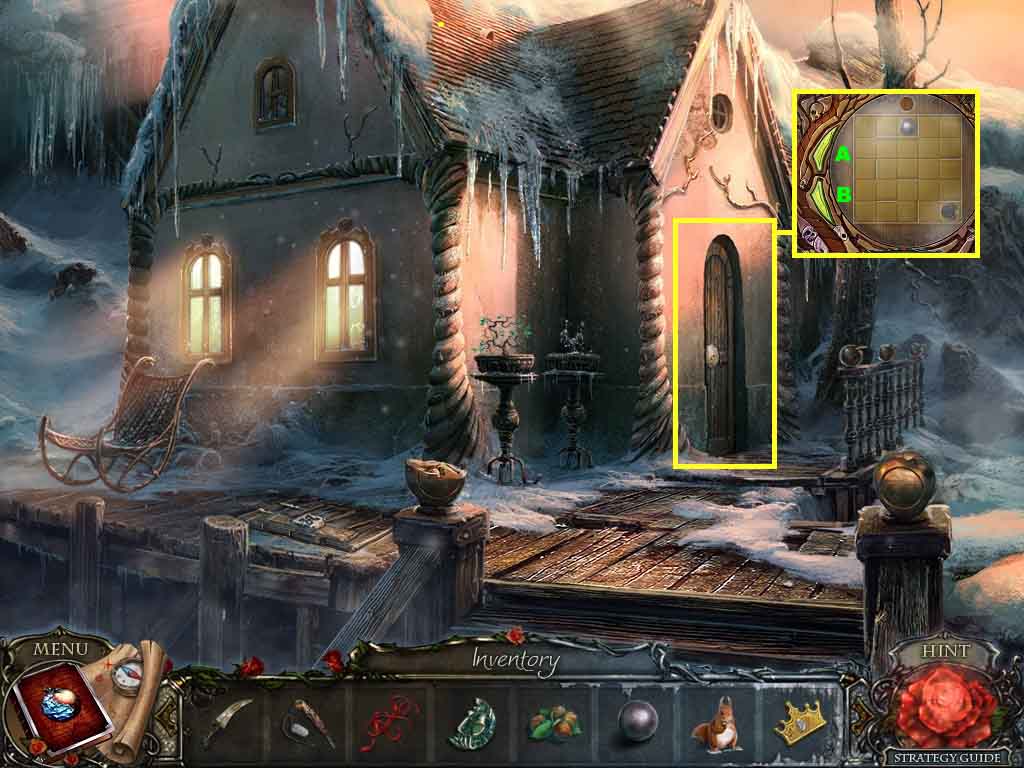
- Click the door and insert the ball to trigger a puzzle.
- Move the ball through the maze.
- Click the arrows as follows to solve:
- B – A – A – A – B – A – A – B – B – A – A – A – A
- Move inside the Cottage and click the vanity to access a hidden objects area.
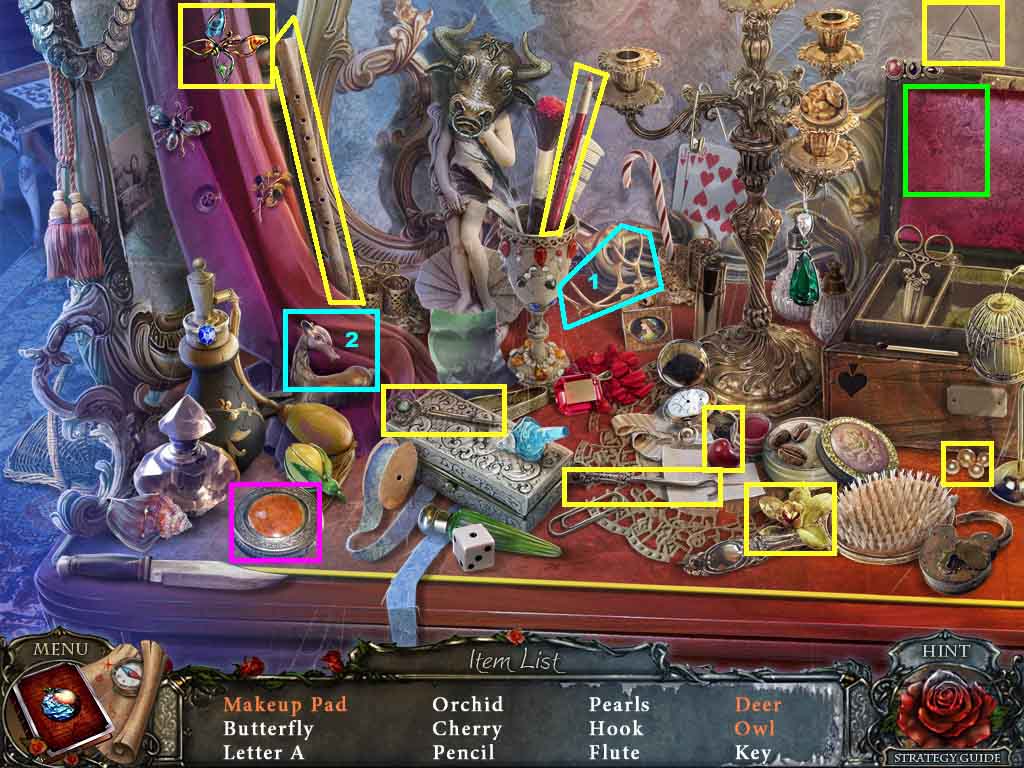
- Find the listed items.
- Attach the antlers onto the deer; collect the deer.
- Click the compact; collect the makeup pad.
- Click the cloth; collect the owl.
- Collect the butterfly.
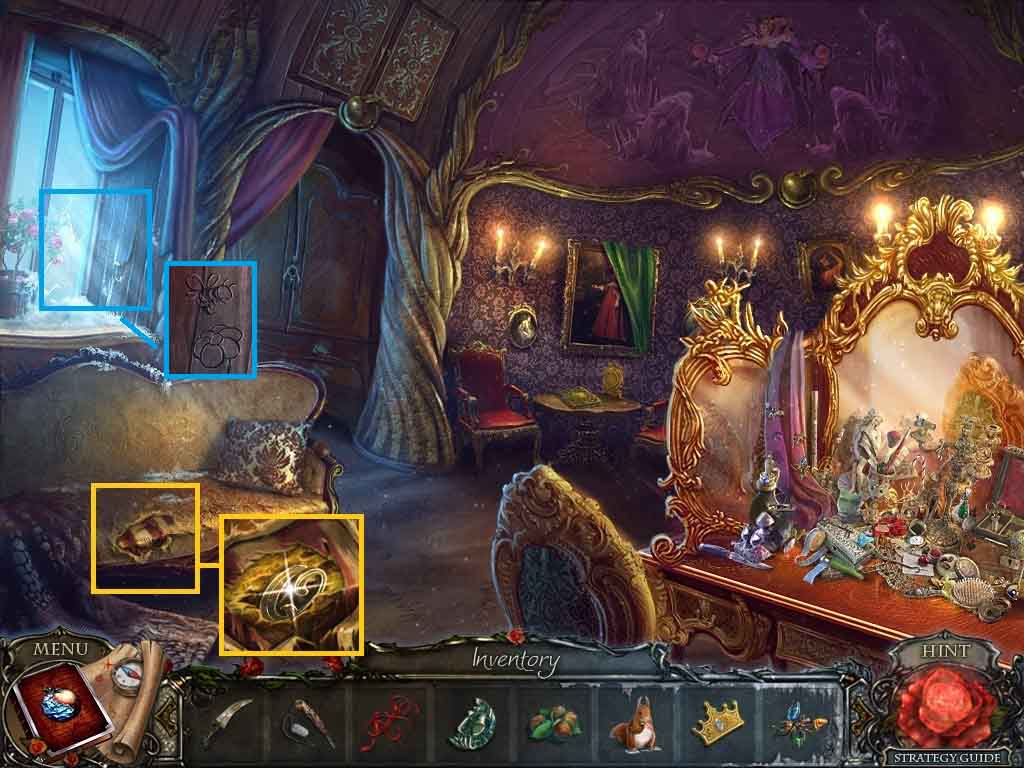
- Click the sofa.
- Select the knife to slice it open; collect the “Q.”
- Click the window; notice the code.
- Move out of the Cottage.
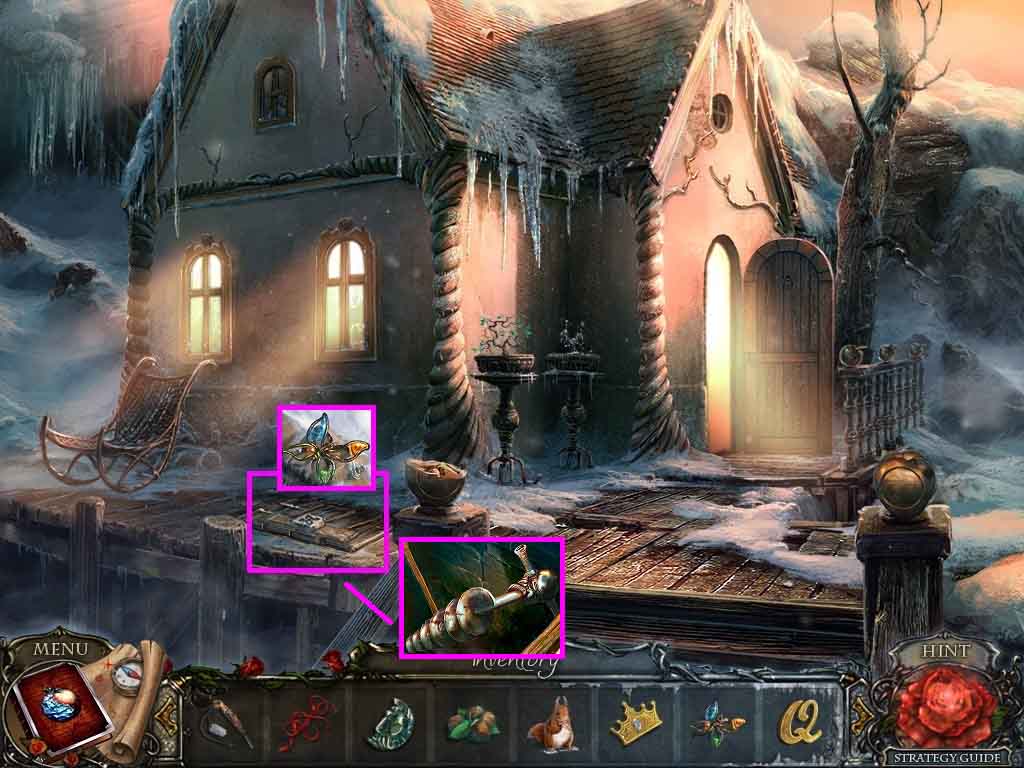
- Click the hatch and insert the butterfly.
- Click the latch and collect the drill.
- Move to the Narrow Pass.
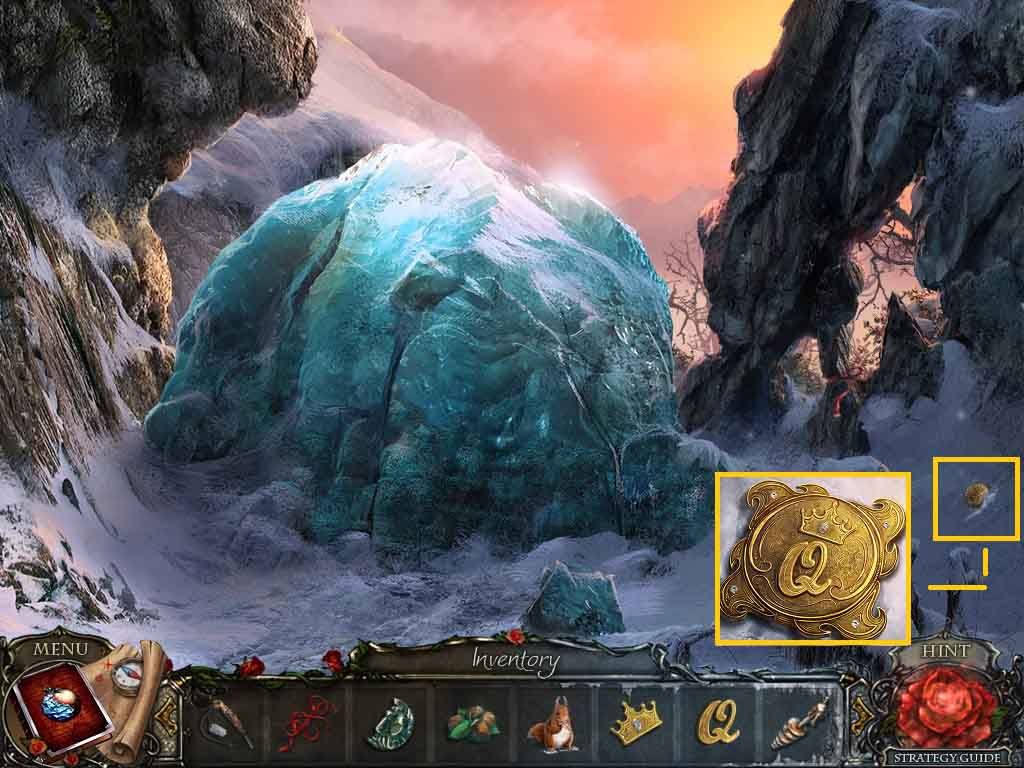
- Click the locket and insert the “Q” and the crown; collect the locket.
- Move inside the Cottage.
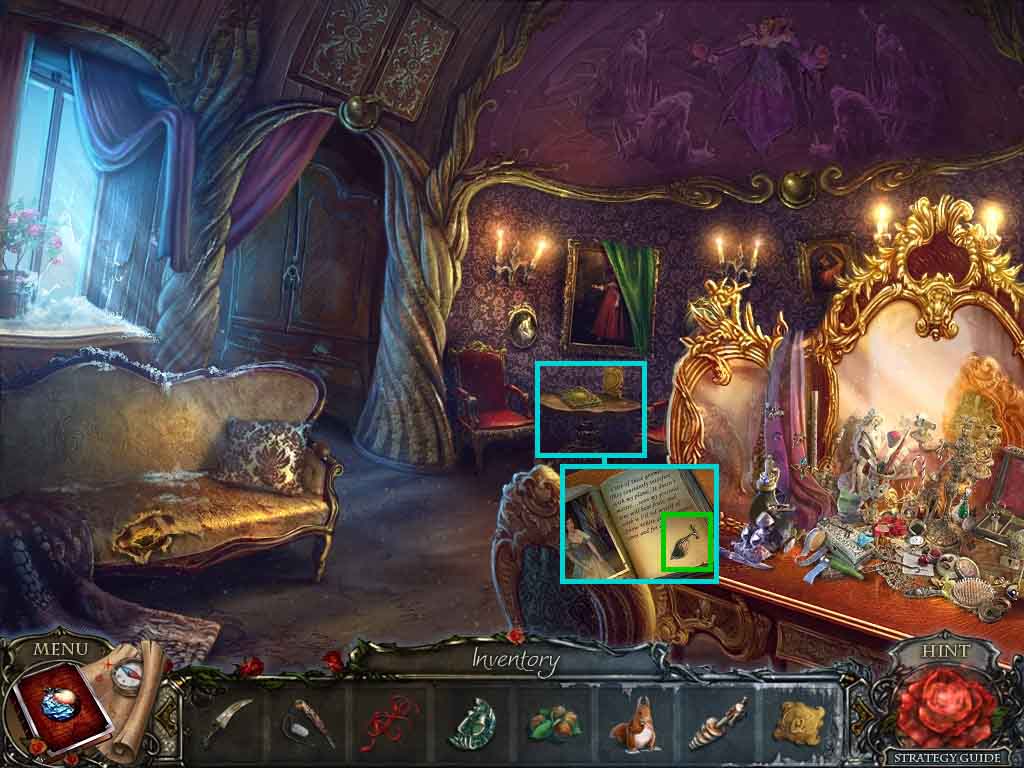
- Click the table and lay the locket onto the book.
- Click the page and collect the golden leaf.
- Move out of the Cottage.
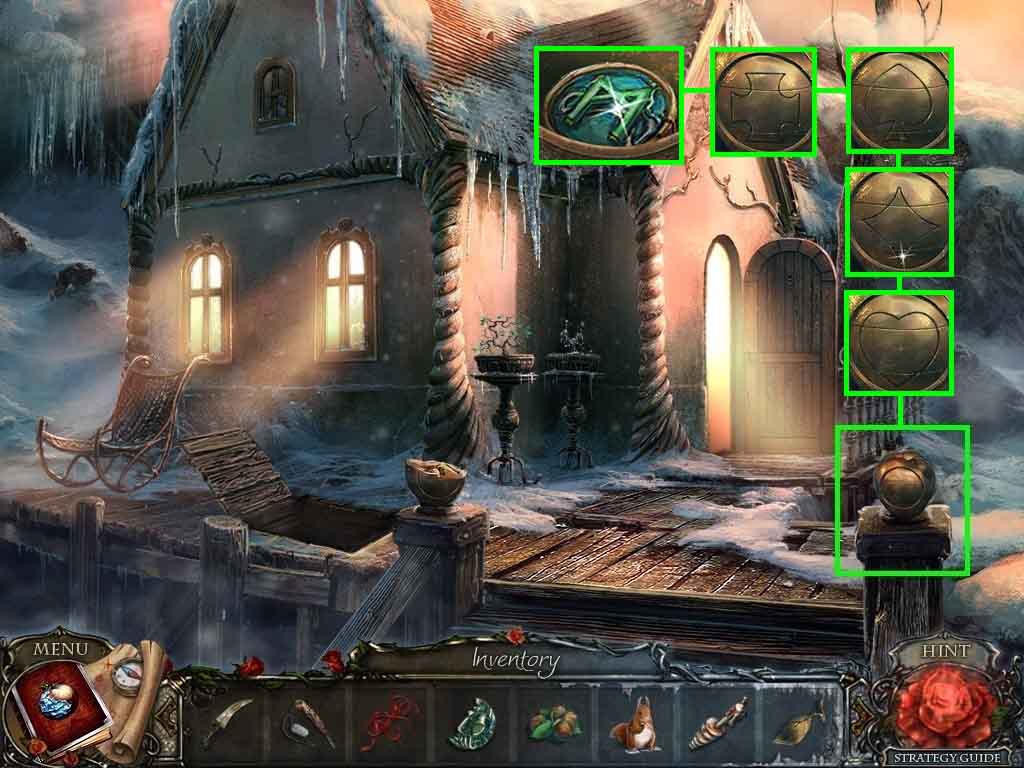
- Click the post and insert the golden leaf.
- Click the apple sections to create the symbols.
- Collect the rune.
- Move back 2 times.
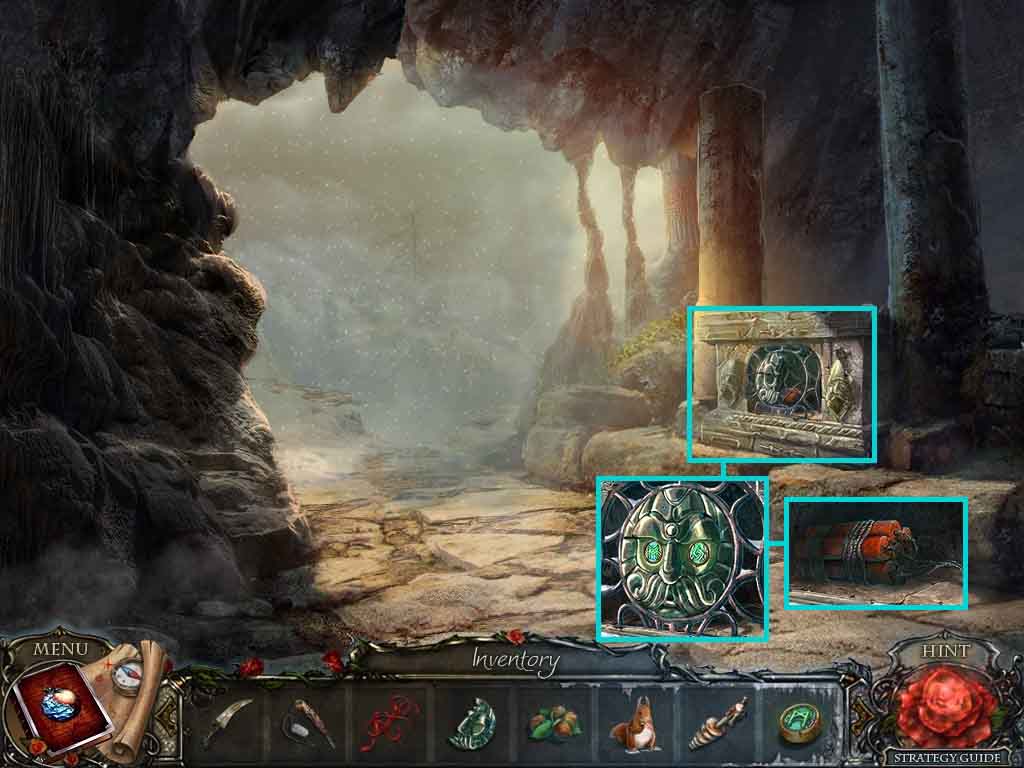
- Click the stone container; insert the rune and face part.
- Collect the dynamite.
- Move ahead 2 times and go to the Narrow Pass.
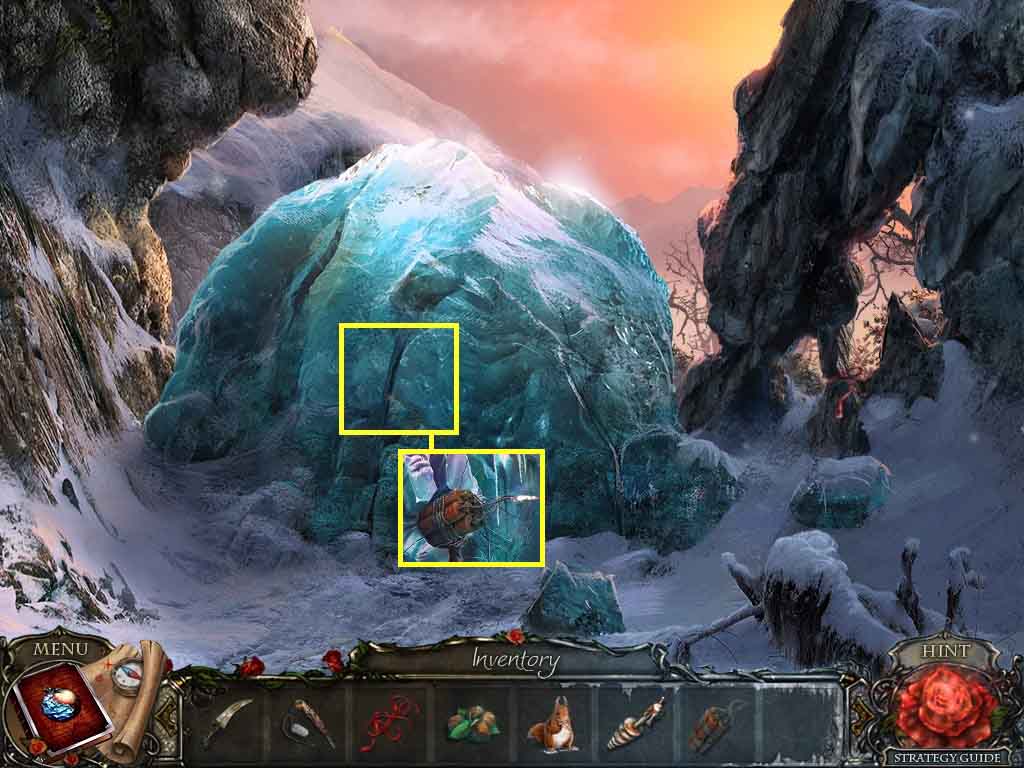
- Click the ice and use the drill on it.
- Insert the dynamite into the hole and place the flint and steel into it.
- Move ahead.
Comments will load when you reach this part of the walkthrough.