
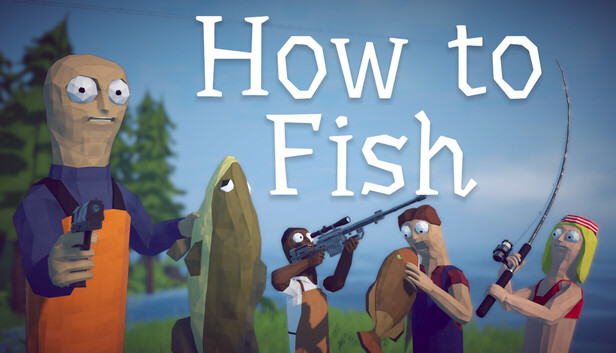
Boss and Miniboss Fight Strategies
You know the scene: the boss has one sad pixel of health left, the white escape bar is draining, and your last quest bait has already joined the ocean economy. Then the fish clips a rock, launches into orbit, and leaves. We have eaten that exact loss. In How to Fish, the fix is to prepare the landing area, learn one safe punish window, and protect enough supplies for a second attempt.
The boss escape bar is the white meter below the boss health bar. If it empties first, the creature escapes and returns at full health when summoned again. Story quest bait is consumed when used to start its fight. Purchased Boss Lures can sometimes survive a use, but they can also break, so budget as if each cast will cost a lure. The Albatross consumes its Tuna, and the crater sequence consumes the defeated Bowhead Whale. Keep the final whale fight near the Volcano camp; pulling it too far from its intended arena can reset it.
Boss Bait and Location Checklist
| Encounter | Encounter area | Required bait or trigger | Story use |
|---|---|---|---|
| Spider Crab | Lighthouse shore | Empty Beer Can on the Crab-Fishing Rod | Required |
| Sunfish | Forest shoreline | Beginner Boss Lure on the Fishing Rod | Optional collection fight |
| The Old Pike | Forest shoreline | Beginner Boss Lure on the Fishing Rod | Optional collection fight |
| Giant Piranha | Forest lake | Leech Bait on the Fishing Rod | Required |
| Blue Shark | Desert shoreline | Standard Boss Lure on the Fishing Rod | Optional for the ending; needed to unlock the Grill |
| Pufferfish | Desert shoreline | Carrot on the Fishing Rod | Required |
| Tuna | Rocks shoreline | Professional Boss Lure on the Fishing Rod | Required setup for Albatross |
| Albatross | Central grass patch on Rocks | Defeated Tuna dropped on the grass | Required |
| Goblin Shark | Open Volcano shoreline | Scientific Boss Lure on the Fishing Rod | Optional collection fight |
| Bowhead Whale | Open Volcano shoreline | Fish Bucket on the Fishing Rod | Required setup for the final boss |
| Mutated Bowhead Whale | Volcano crater trigger; fight near the camp below | Defeated Bowhead Whale thrown into the crater | Final required boss |
Required Quest Chains
- Lighthouse Keeper — Empty Beer Can — Spider Crab Shell: Buy a Beer, give it to the Lighthouse Keeper, take the Empty Beer Can, defeat the Spider Crab, and return its Shell to him.
- Forest woman — three Leeches — Giant Piranha Skeleton: Collect three Leeches from the Forest paths, trade them for Leech Bait, defeat the Giant Piranha in the lake, and return its Skeleton to the woman.
- Desert Tourist — endangered catch — Pufferfish Fin: Give the Tourist a Needlefish, Bowlfish, or Seahorse to receive the Carrot. Defeat the Pufferfish and return its Fin to the Tourist.
- Man hiding in the Rocks shop — Tuna — Albatross Head: Defeat a Tuna caught with the Professional Boss Lure, drop its body on the central grass patch, defeat the Albatross, and return its Head to the man.
- Hazmat Scientist — five ordinary fish — Whale Fin: Hand the Scientist five eligible ordinary fish to receive the Fish Bucket. Defeat the Bowhead Whale, throw its whole body into the crater, defeat the Mutated Bowhead Whale, and return the Whale Fin to the Scientist.
A Safe Loadout Floor
| Stage | Rod and weapon | Health, hunger, and inventory |
|---|---|---|
| Lighthouse | Crab-Fishing Rod plus a Knife or Brass Knuckles | Full health and hunger, two quick heals, one free trophy slot |
| Forest | Fishing Rod plus an upgraded Shotgun | Full health and hunger, three heals, loaded ammo, two free slots |
| Desert | Fishing Rod, upgraded Shotgun for Blue Shark, upgraded SMG for Pufferfish | Three or more heals, full hunger, two free slots |
| Rocks | Fishing Rod, upgraded Shotgun or SMG for Tuna, Sniper Rifle or accurate SMG for Albatross | Three heals and two free slots for the Tuna and Albatross Head |
| Volcano | Fishing Rod and an upgraded Assault Rifle | Full health and hunger, several heals, loaded ammo, and room for the whale body and final Fin |
These are safe starting points, not universal damage breakpoints. Difficulty, upgrades, extra connected players, aim, and airborne fish nonsense all change how fast a fight ends. Refill hunger before casting and put healing in known hotbar slots. Low hunger is a terrible co-pilot when a whale is falling from the sky.
Spider Crab: Bait the Charge
Cast the Empty Beer Can from the Lighthouse shore and reel the Spider Crab onto a clear patch of land. Stay close enough to invite its straight rush. When it commits, step sideways instead of backing up. The missed charge leaves stars circling the crab and creates the safe punish window. Move in for two or three Knife hits, then leave before the claws wake up. Sometimes a fourth hit fits, but greed is how the crab starts wearing your weapon as a hat.
Raised ground can slow its approach, but do not hide so long that the escape bar drains. Solo: use short punish rounds and heal only after creating distance. Co-op: one player draws the charge while the others strike from the sides. If someone drops, the bait player keeps the crab busy while a teammate revives.
Sunfish: Give the Flop Room
Use a Beginner Boss Lure from the Forest shoreline. The same lure can produce Sunfish or The Old Pike, so do not spend your last one expecting a certain name. Clear a wide landing patch before casting. Read the direction of the Sunfish's body movement, strafe across that line, and fire while it settles before the next flop.
Open ground is safer than a tight obstacle because you can see the whole body. Solo: keep moving and reload only after the fish has passed or landed away from you. Co-op: spread into a loose triangle so one wild flop cannot flatten the whole fishing department. Keep one player healthy enough to revive.
The Old Pike: Tail Out, Shotgun In
Use a Beginner Boss Lure from the Forest shoreline for a chance at The Old Pike. Its close-range danger is the body flop and tail sweep. Stay outside the body line, let the movement finish, then step in for a short Shotgun burst. Back out before the next swing. Open ground keeps the tail visible instead of hiding it inside grass or props.
Solo: do not trade health for one extra shell; keep a steady shoot-and-step rhythm. Co-op: the closest player calls each lunge while the other shooters hold different angles. Leave a clear lane for anyone handling a revive.
Giant Piranha: Control the Adds
Use the Leech Bait in the Forest lake. The Giant Piranha brings smaller piranhas, called adds: extra enemies that join a boss fight. Clear the adds that block your movement, then return fire to the boss. When the large fish lines up a lunge, move sideways rather than retreating along its bite path. Shoot as it passes, lands, or turns for another run.
Use the broad lake edge rather than a narrow pocket between trees. Solo: let the Shotgun pellets clear nearby adds while you circle the boss; dead small piranhas can become emergency food. Co-op: assign one player to add control, one to lead the boss across open ground, and the rest to damage. Keep one healthy player outside the pile so a revive remains possible.
Blue Shark: Break the Charge Line
Cast a Standard Boss Lure from the Desert shoreline. The Blue Shark closes quickly with spinning or jumping rushes. Start moving before it reaches close range and cut sideways across its path. Palm trees can block a rush, but treat a snag as free damage rather than a permanent cage. Fire as the shark passes, hits cover, or turns.
Solo: use an upgraded Shotgun and keep a tree near the edge of your movement loop. Preserve the dead Blue Shark and give it to the Grillmaster beside the unlit Grill. Co-op: one player leads the shark around the trees, another shoots from the far side, and a third stays ready for revives. Do not stack together unless synchronized ragdolling is the plan.
Pufferfish: Run the Shop Loop
Use the Carrot from the Desert shoreline. The Pufferfish rolls toward its target and grows larger as its health falls. In its later phase, it leaves a purple poison trail. Keep running and shooting around the shop and nearby trees, then widen your turns as the boss grows. Do not stop inside the purple trail; repeated poison damage can erase a healthy run fast.
The safe punish window comes after a roll misses, hits cover, or swings wide around a corner. Shoot while it corrects its path, then move again. Solo: an upgraded SMG gives you useful damage while running. Heal behind the shop rather than in the open. Co-op: one runner leads the boss, the damage players spread out, and one teammate watches poison-free routes for revives. Do not rely on a permanent tree lock; a physics bump can free the fish at once.
Tuna: Dodge the Launch, Then Burst
Use the Professional Boss Lure from the Rocks shoreline. The Tuna bounces and launches its body at the target. Strafe early instead of waiting at the water's edge. Turn and fire after the Tuna passes or lands, then move before it lines up again. Buildings can interrupt its route, but the cramped rooms can trap you too.
Solo: use an upgraded Shotgun or SMG and keep a full movement lane clear before casting. Co-op: have one player call each launch and lead it away from the buildings while the others fire from the sides. Store the dead Tuna immediately. Do not sell, cook, eat, or gamble the bird bait. Drop it on the central grass only when the crew is ready for Albatross.
Albatross: Shoot, Hide, Repeat
Drop the defeated Tuna on the central grass patch at Rocks. The Albatross circles at range, dives at players, and fires a damaging white barrage after an audible windup. Use the casino, shop, or another hut as hard cover. Get fully indoors during a dive or barrage. When the attack ends, step to a doorway or window and take a scoped shot while the bird climbs or turns.
Solo: the Sniper Rifle is the simplest safe choice; an accurate upgraded SMG can also work. Reload and heal indoors. Co-op: place shooters at separate buildings while one player calls dives and watches for downed teammates. Revive under a roof whenever possible. After the kill, check the grass, shore, and shallow water for the Albatross Head before the physics engine files it under lost luggage.
Goblin Shark: Optional, Expensive, and Very Bitey
Use the Scientific Boss Lure from an open Volcano shoreline. This fight is optional, so fund the whale route before buying its costly lure. The shark pursues living players and can keep steering toward a target while airborne. Its clearest warning is its direct approach: cross that line sideways, stay clear of the body, and fire after it passes or lands far enough away to create a gap.
Choose flat ground away from lava, steep slopes, the crater route, and stored quest items. Solo: use a strong ranged weapon and postpone the fight if replacing the lure would drain your story budget. Co-op: one player draws pursuit away from lava, two maintain ranged pressure, and the healthiest player stays mobile for revives. No story hand-in is needed after this optional kill.
Bowhead Whale: Move When It Rises
Earn the Fish Bucket from the hazmat Scientist, equip it as bait, and cast from the Volcano shoreline. The Bowhead Whale charges on the ground and launches high for a body slam. The instant it rises, stop shooting and sprint sideways until the landing finishes. Turn back and fire during the grounded recovery, then move before the next charge or launch.
Solo: bring an upgraded Assault Rifle, several heals, and space for the whole body. Do not heal beneath the whale's shadow. Co-op: spread out, call who has its attention, and keep the revive player away from the landing lane. Preserve the defeated Bowhead Whale, carry it up the wooden route, and throw it into the crater.
Mutated Bowhead Whale: Respect the Lava
Throwing the defeated Bowhead Whale into the Volcano crater summons the Mutated Bowhead Whale. It uses charges and aerial body slams while adding lava blobs, meteorites, and burning pools. Sprint clear when it launches, watch the ground after every attack, and fire from range after a charge or slam finishes. A clean dodge into lava is still a very efficient way to become cooked bait.
Fight near the intended camp arena below the crater. Solo: use your best upgraded Assault Rifle, keep several heals, and favor survival over emptying the last few bullets of a magazine. Co-op: the targeted player leads each slam away from the group, two players maintain damage, and the healthiest player handles revives. Keep firing lanes apart so one lava field does not block everyone. After the kill, preserve the Whale Fin for the Scientist.
Recovery After a Failed Attempt
| Lost encounter | What to reacquire |
|---|---|
| Spider Crab | Buy another Beer, give it to the Lighthouse Keeper, and take a new Empty Beer Can. |
| Sunfish or The Old Pike | Keep the Beginner Boss Lure if it survived. If it broke, buy another; the next cast may produce either miniboss. |
| Giant Piranha | If the Leech Bait is gone, collect another three Leeches and return them to the woman by the lake. |
| Blue Shark | Keep the Standard Boss Lure if it survived. If it broke, buy another. |
| Pufferfish | Give the Tourist another accepted endangered catch—Needlefish, Bowlfish, or Seahorse—for a new Carrot. |
| Tuna | Keep the Professional Boss Lure if it survived. If it broke, buy another. |
| Albatross | Catch and defeat another Tuna. Replace the Professional Boss Lure first only if it broke or is no longer in your inventory. |
| Goblin Shark | Keep the Scientific Boss Lure if it survived. If it broke, buy another. |
| Bowhead Whale | Return to the Scientist for another Fish Bucket. If his five-fish request reopens, hand over five eligible ordinary fish again. |
| Mutated Bowhead Whale | Obtain another Fish Bucket if needed, defeat another Bowhead Whale, and throw its whole body into the crater again. |
If a loss empties your wallet, stop buying boss bait. Catch ordinary creatures, cook them if the Grill is unlocked, sell them, and rebuild your ammo and healing before retrying. That recovery loop is faster than casting your last expensive lure with half a magazine and the confidence of a doomed fishing documentary.
Comments will load when you reach this part of the walkthrough.