
Chapter Three: Moving Around the Museum
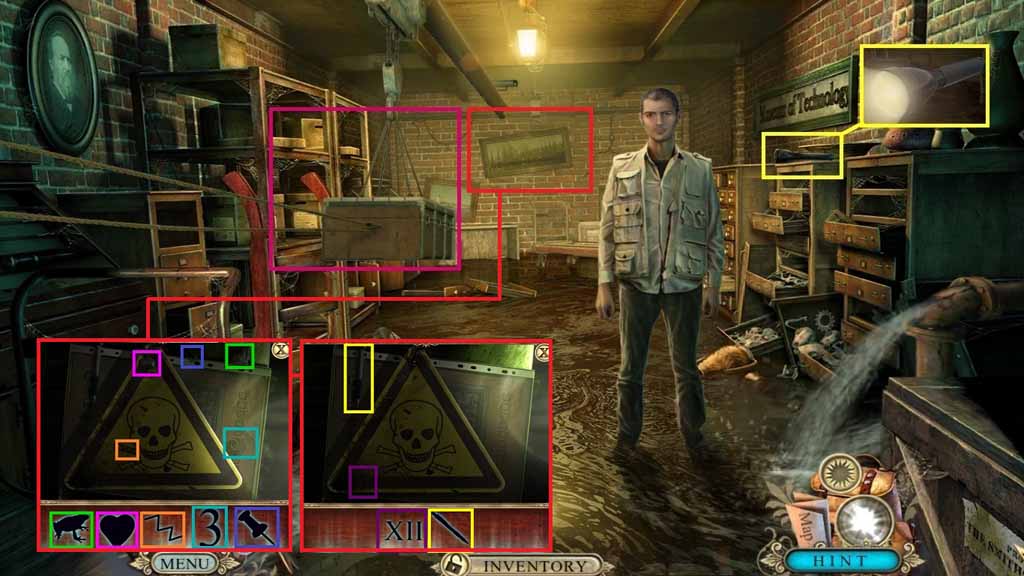
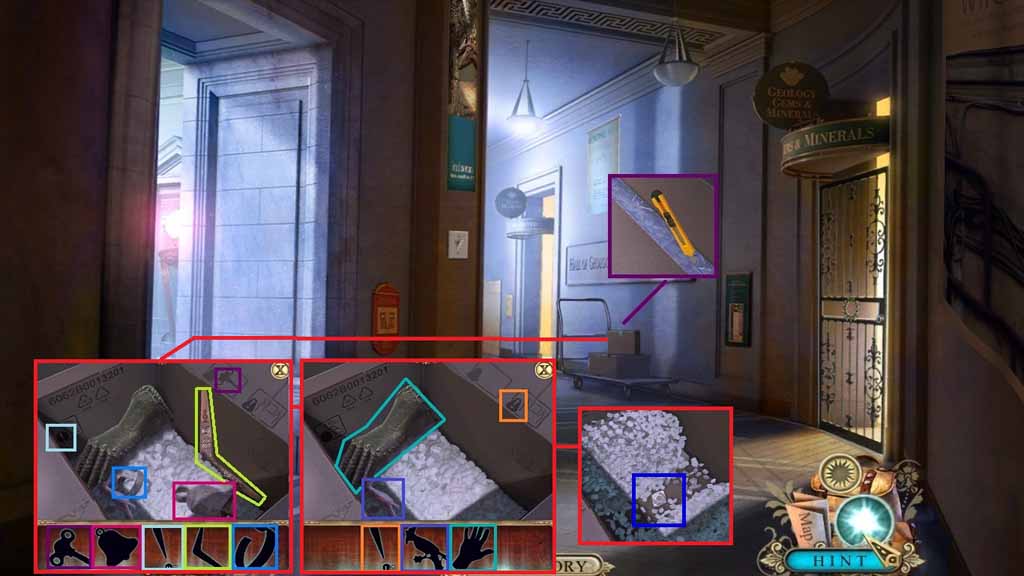
- Collect the empty flashlight.
- Click the empty flashlight and insert the two batteries.
- Use the shard to cut the wire.
- Select the flashlight to use on the sign and find and solve the hidden objects area.
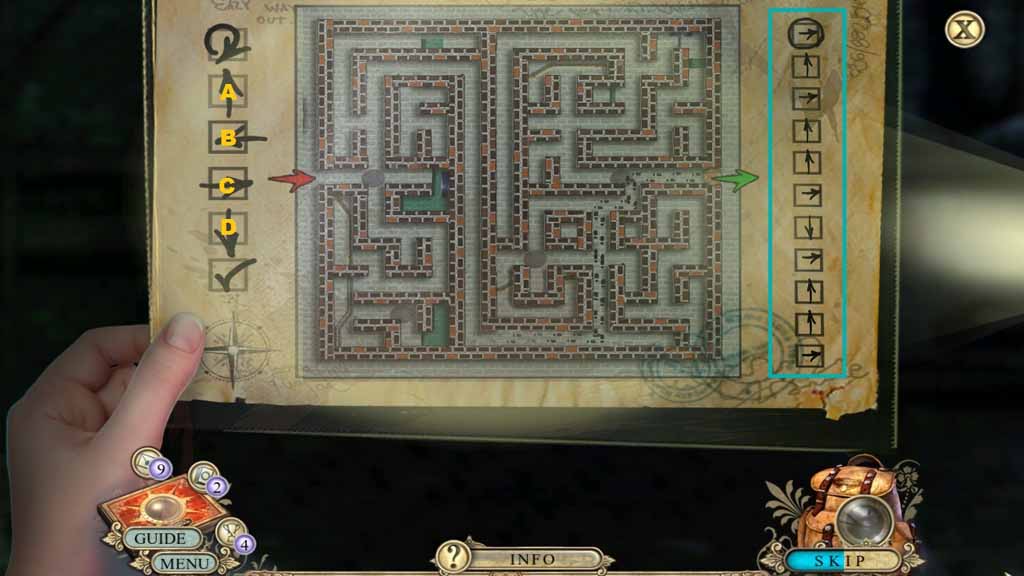
- Zoom into the map to trigger a puzzle.
- Solve the puzzle by using the arrows to move through the maze.
- Examine the hotdog stand on the left.
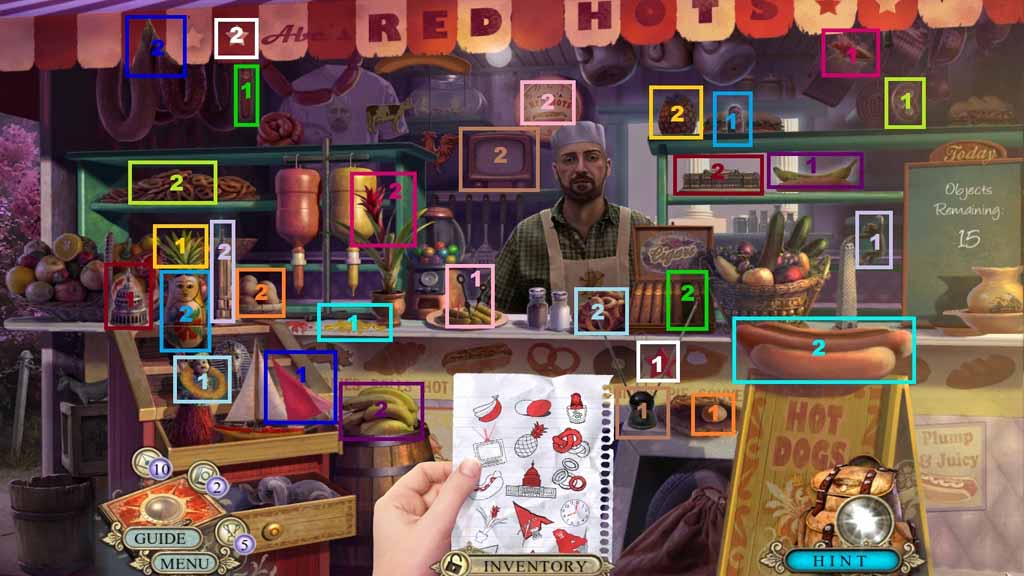
- Place the items where they belong.
- Collect the Smithsonian entrance card.
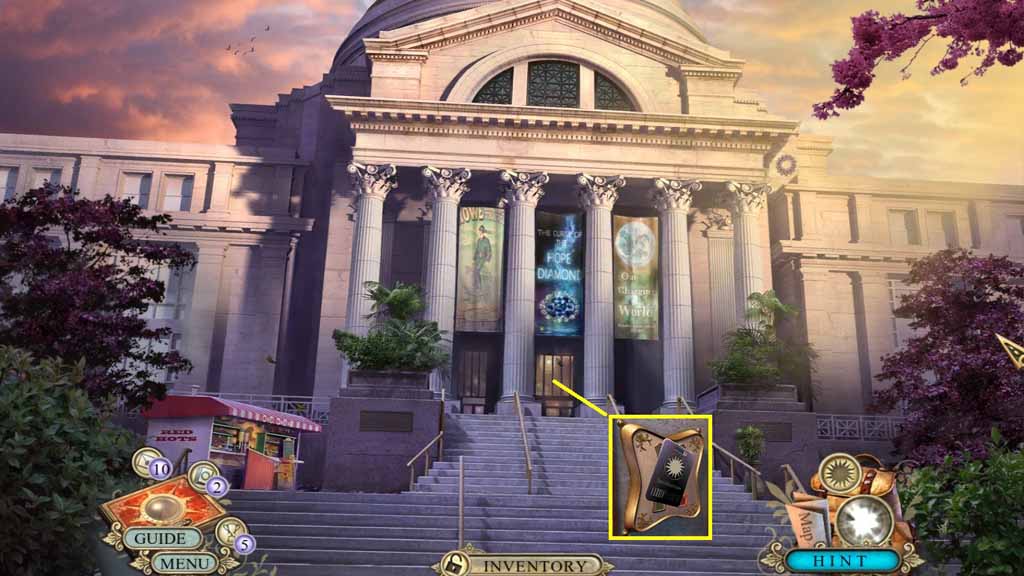
- Place the Smithsonian entrance card onto the lock.
- Move into the Museum lobby.
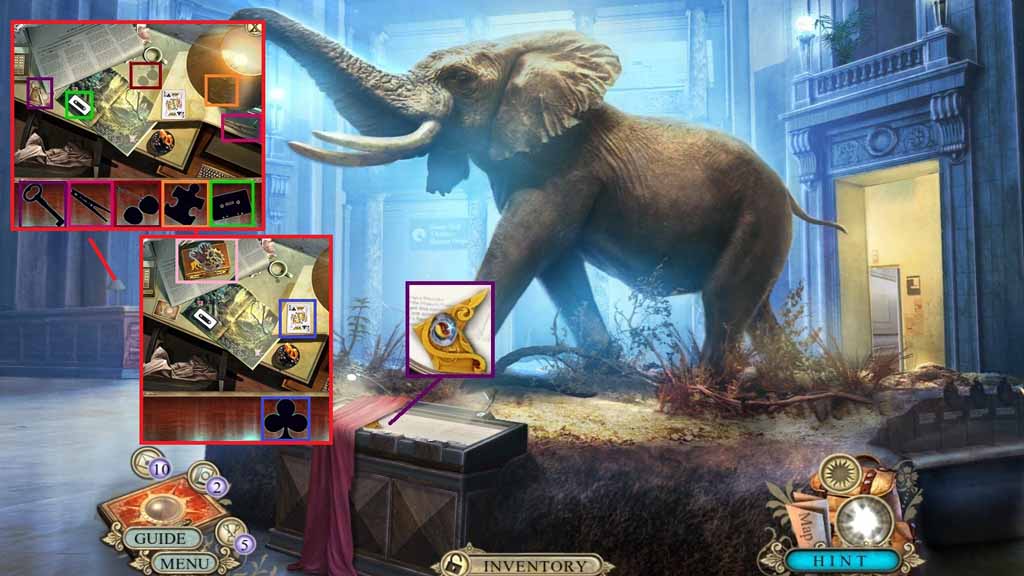
- Click the cloth and collect the puzzle piece.
- Insert the bulb into the lamp to trigger a hidden objects area.
- Find the items and collect the garden gloves.
- Move to the elevator.
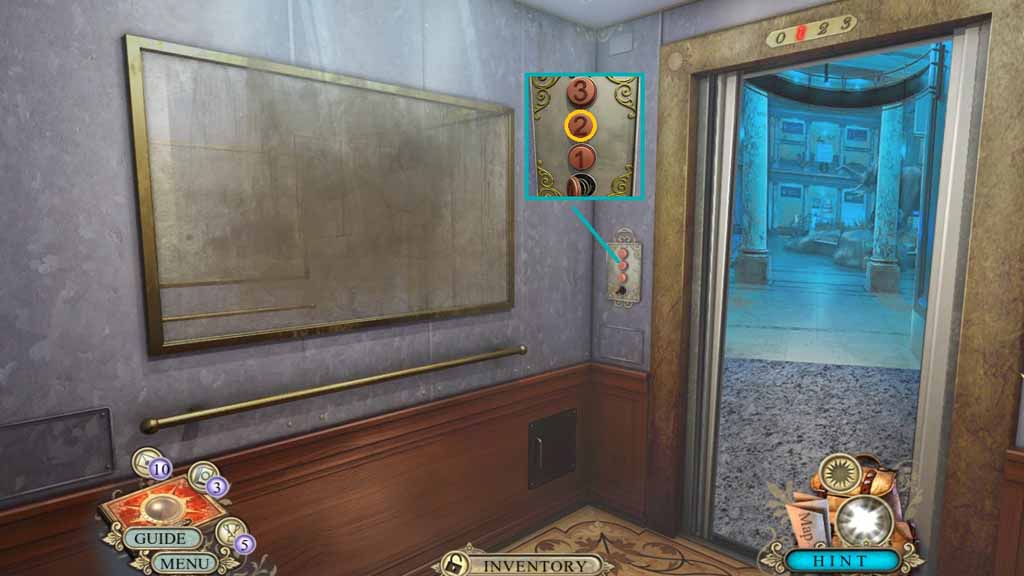
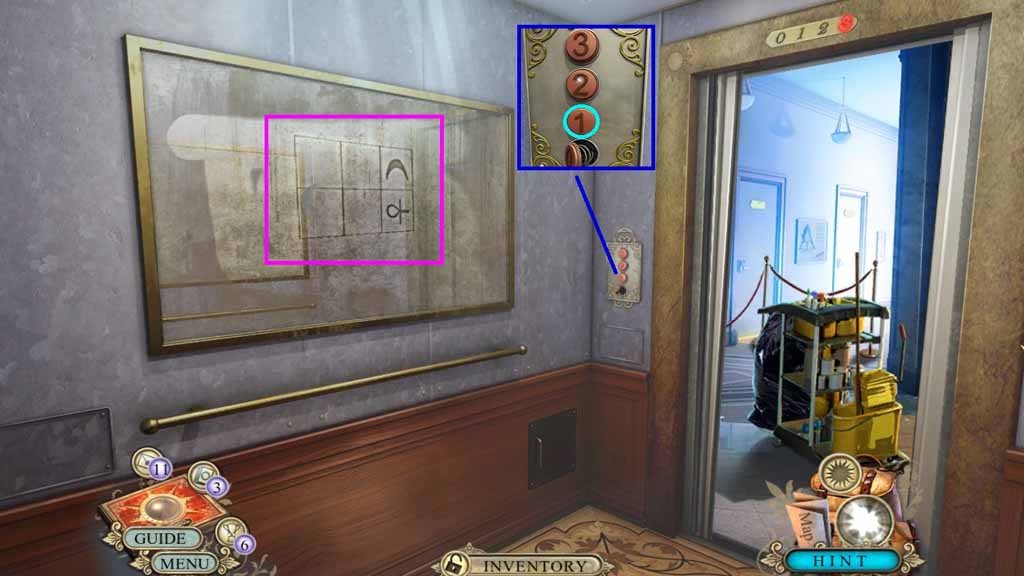
- Click the 2 button.
- Exit the elevator.
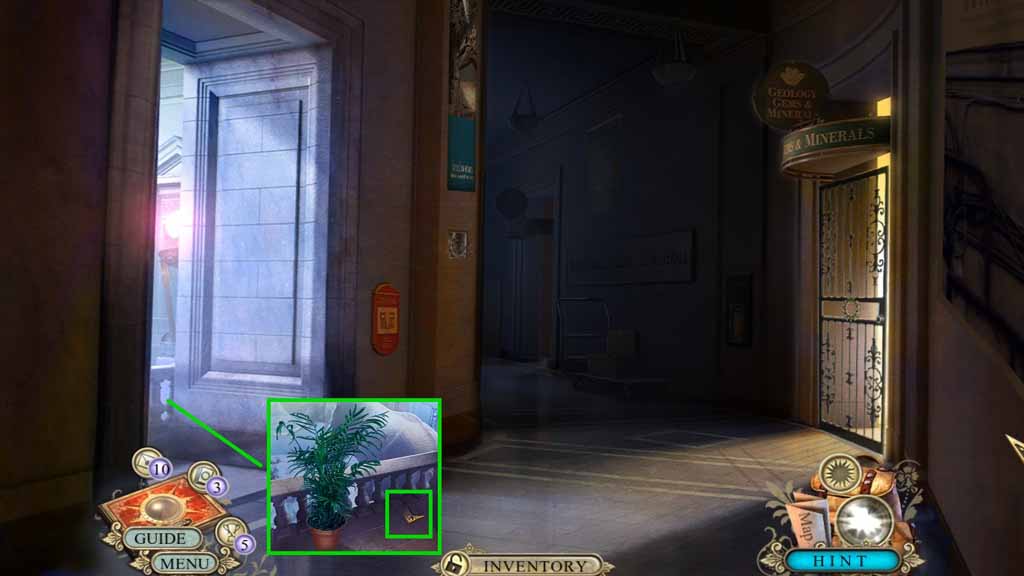
- Click the flowerpot and collect the puzzle piece.
- Move down once.
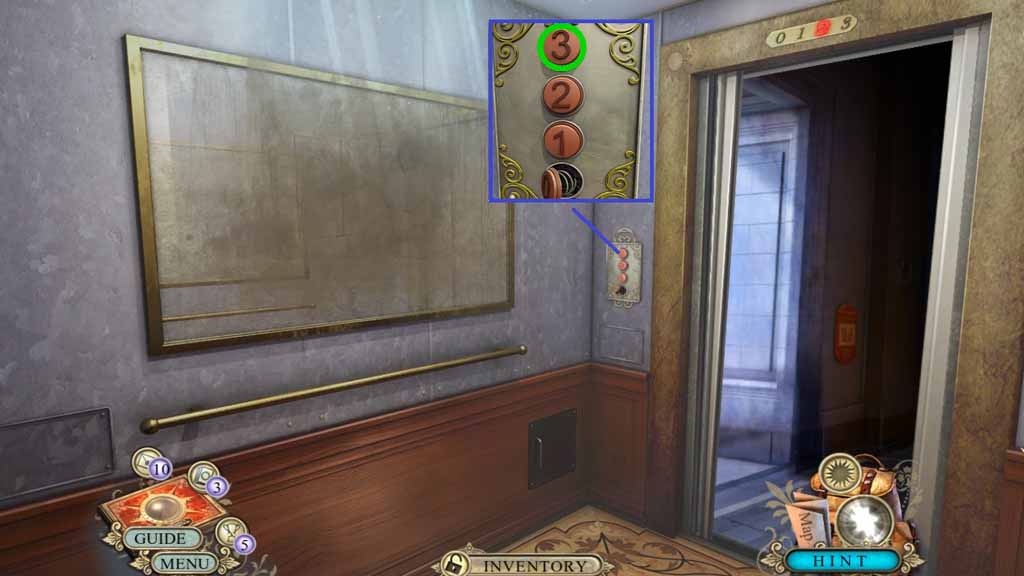
- Click the 3 button.
- Exit the elevator.
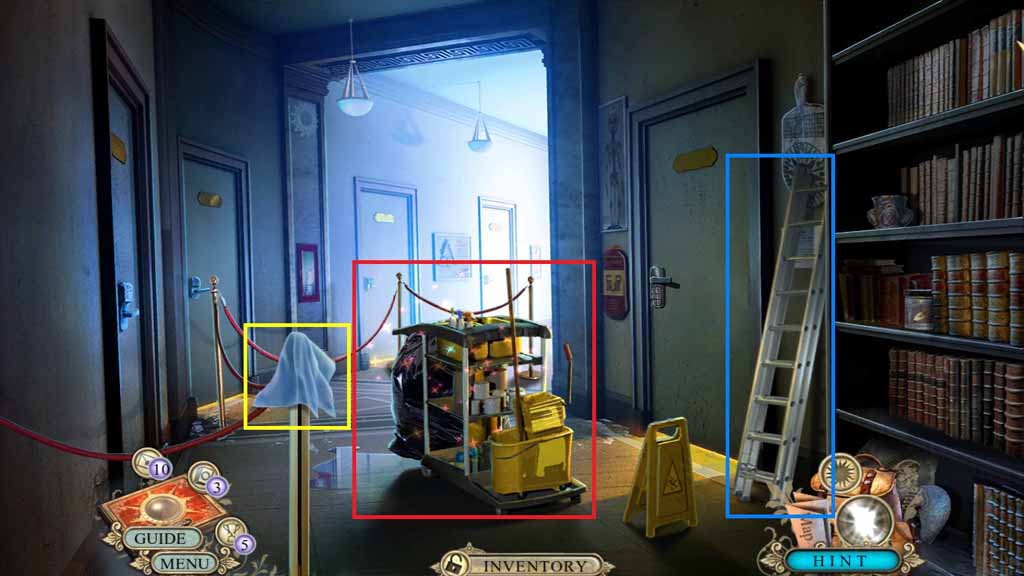
- Collect the ladder and the rag.
- Click the hidden objects area.
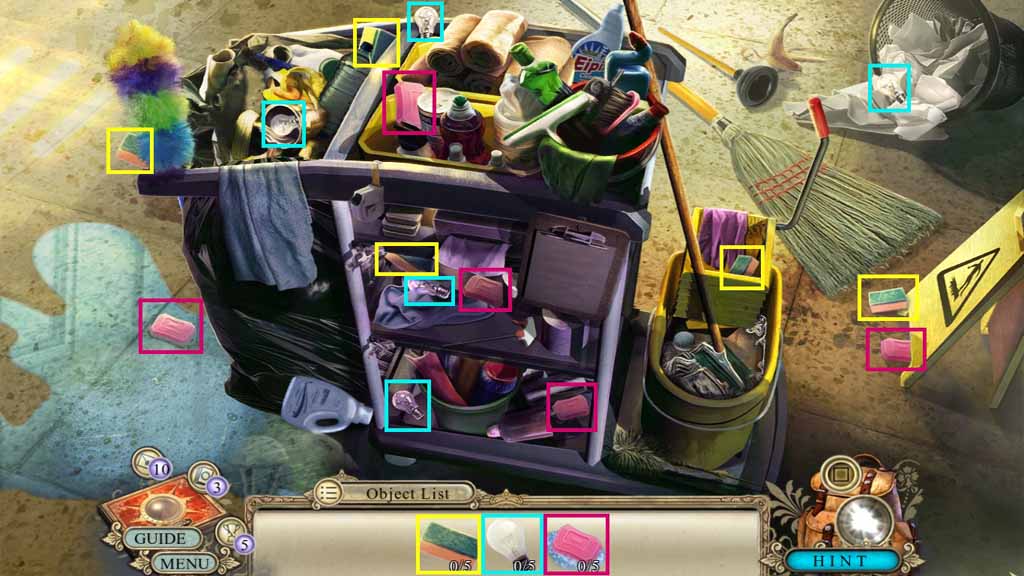
- Find the items shown.
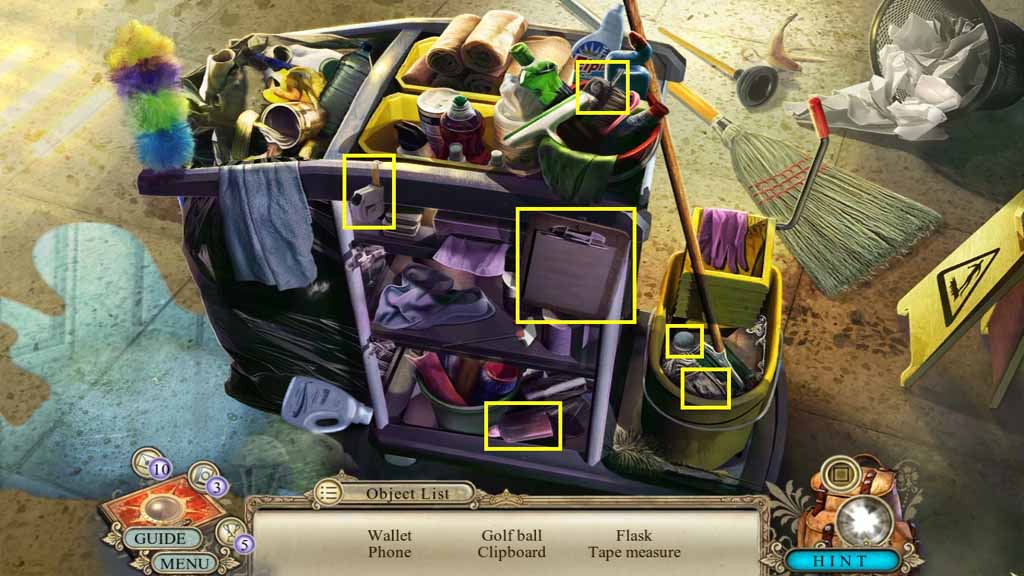
- Find the listed items.
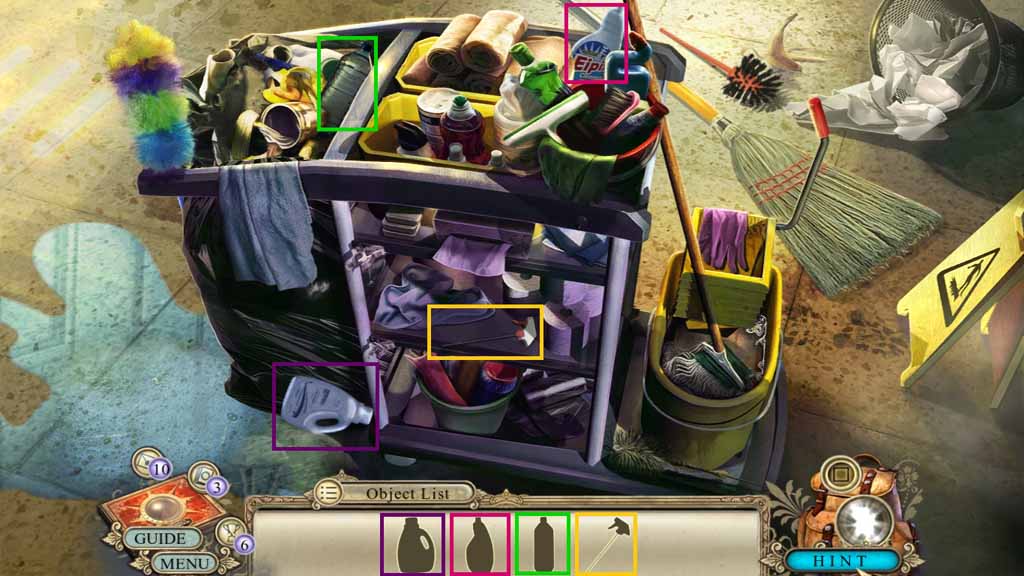
- Find the silhouetted items.
- Collect the glass spray.
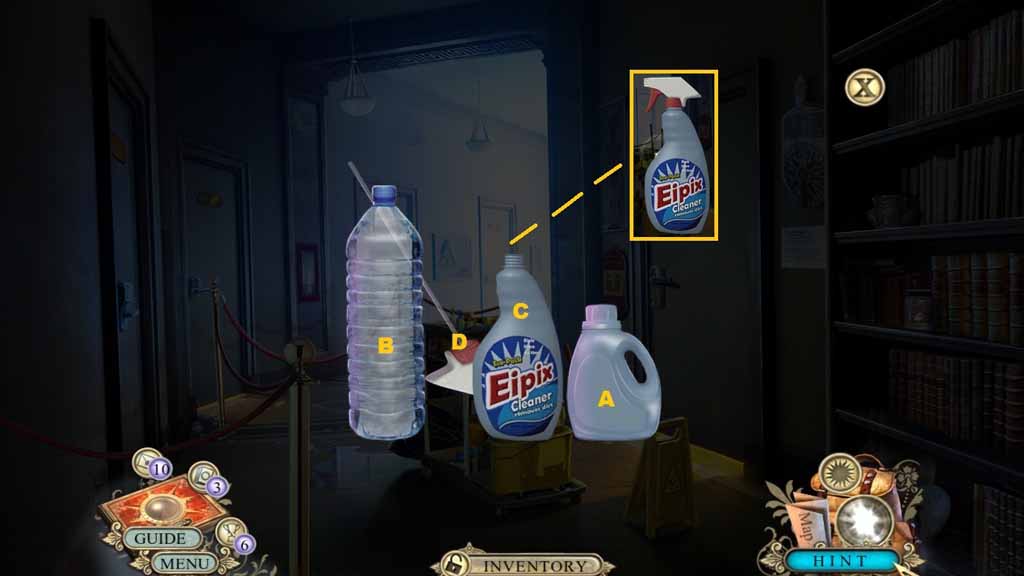
- Click the glass spray pieces.
- Pour bottles A and B into bottle C, then cap it using spray trigger D.
- Collect the glass spray.
- Move down once.
- Spray the glass spray onto the mirror.
- Use the rag to clean the glass.
- Click the 1 button and exit the elevator.
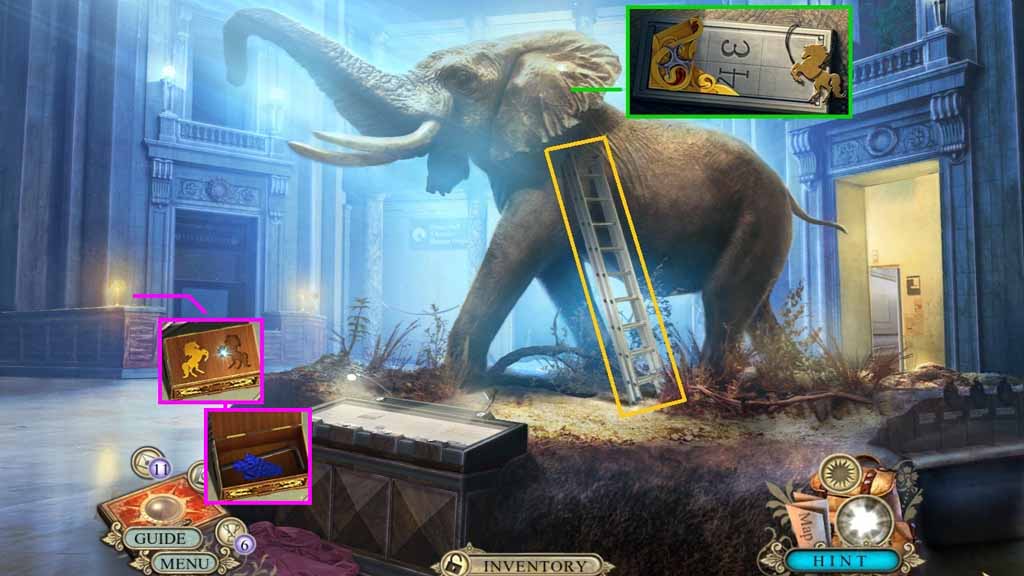
- Lean the ladder onto the elephant.
- Collect the horse.
- Click the ear and collect the puzzle piece.
- Place the horse onto the box and collect the 1/5 glass puzzle pieces and the hex key.
- Move to the Office hallway.
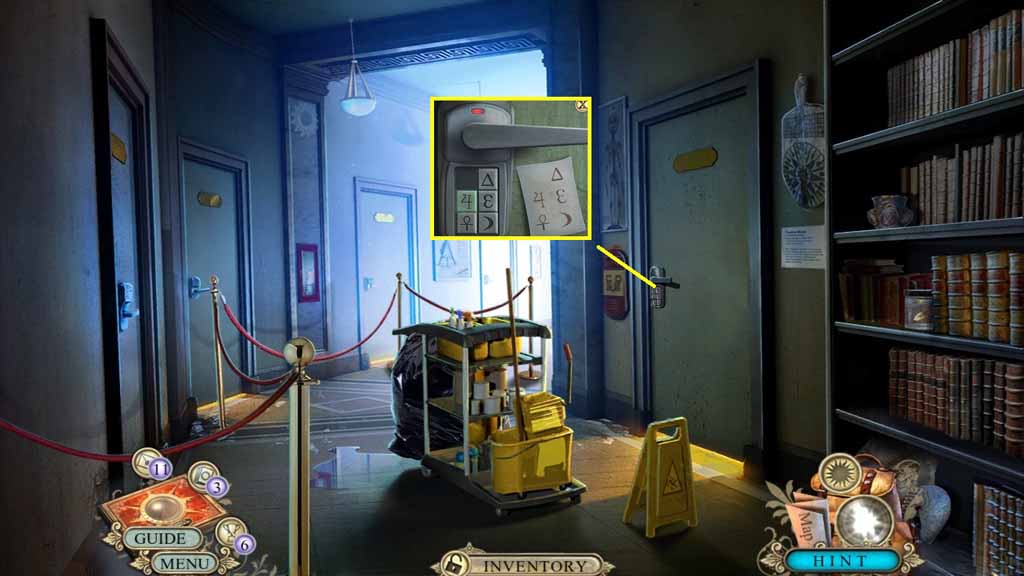
- Click the door lock to trigger a puzzle.
- Solve the puzzle by arranging the symbols are shown on the clue.
- Enter the doorway.
- Click the voicemail button on the phone.
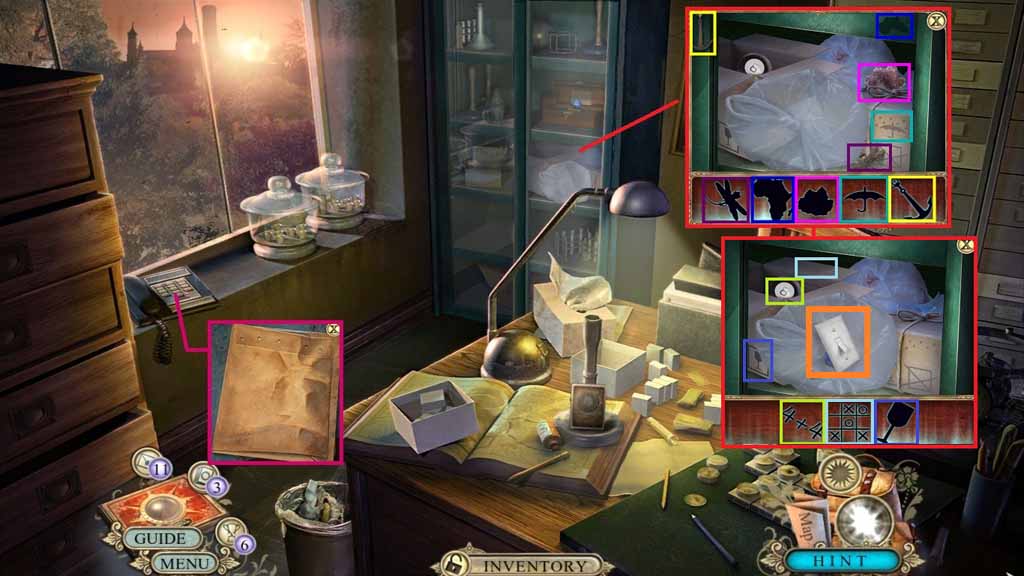
- Click the phone and collect the folder.
- Click the glass door to trigger a hidden objects area.
- Find the items and tear the bag open to collect the light switch and 1/6 gems beneath it.
- Move to the second floor hallway.
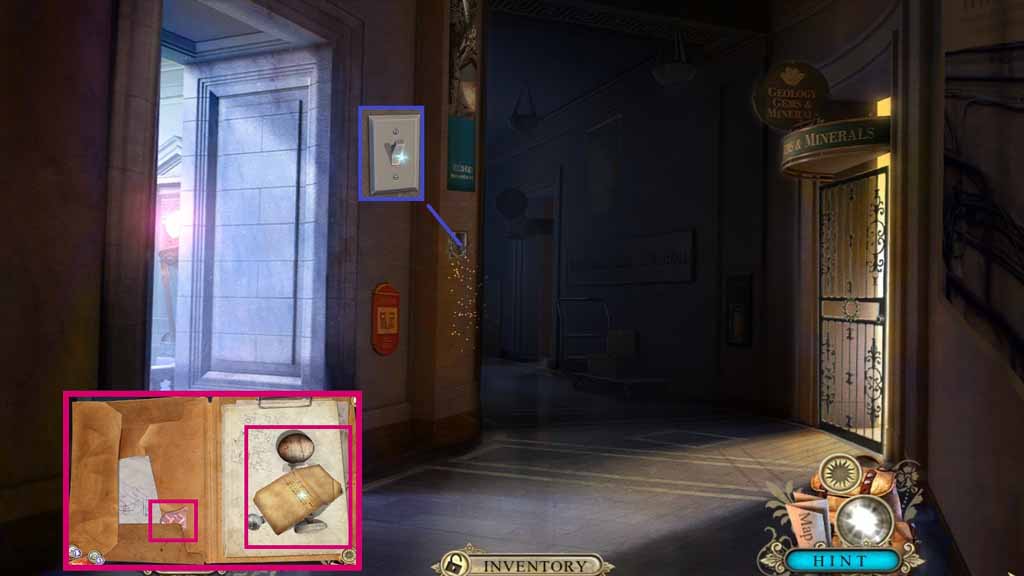
- Place the light switch onto the wall and click it once.
- Click the folder and collect the 2/6 gems, the note and the gem display key.
- Move to the Gem room.
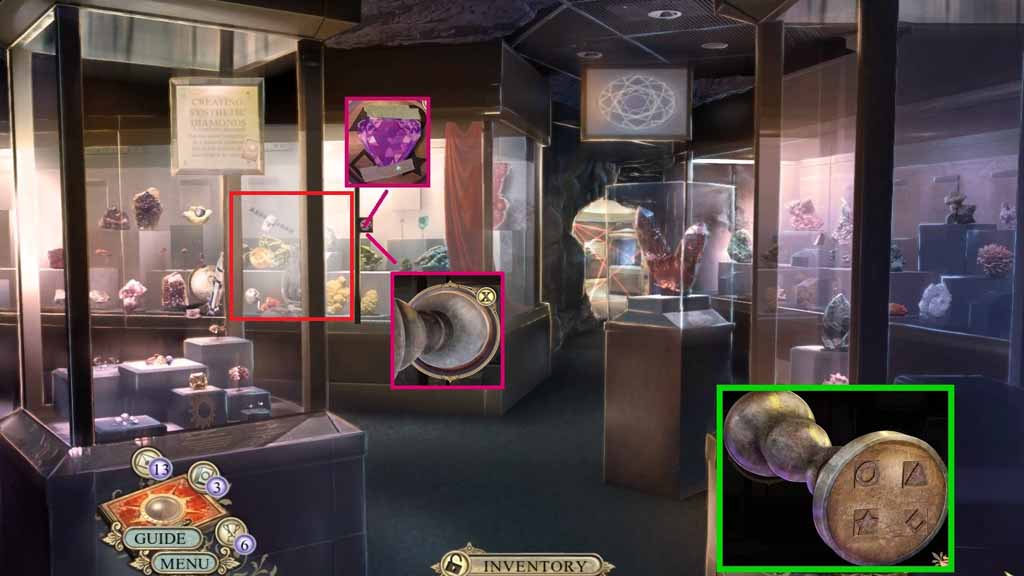
- Remove the two pieces of tape and collect the 3/6 gems.
- Click the gem display key.
- Switch to symbols to collect the correct gem display key.
- Insert the correct gem display key into the lock to trigger a hidden objects area.
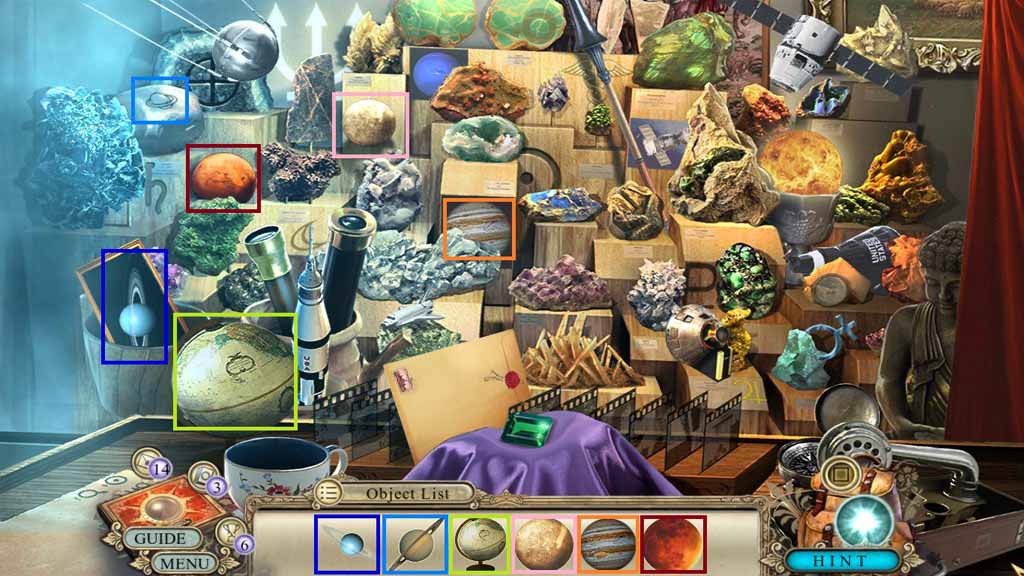

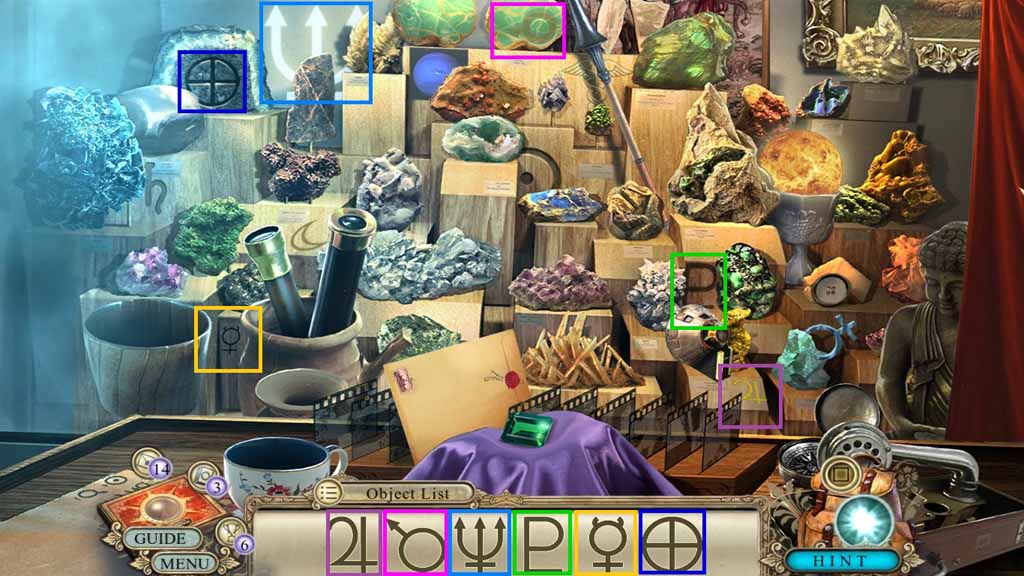
- Find the planets shown.
- Find the space craft’s shown.
- Find the symbols shown.
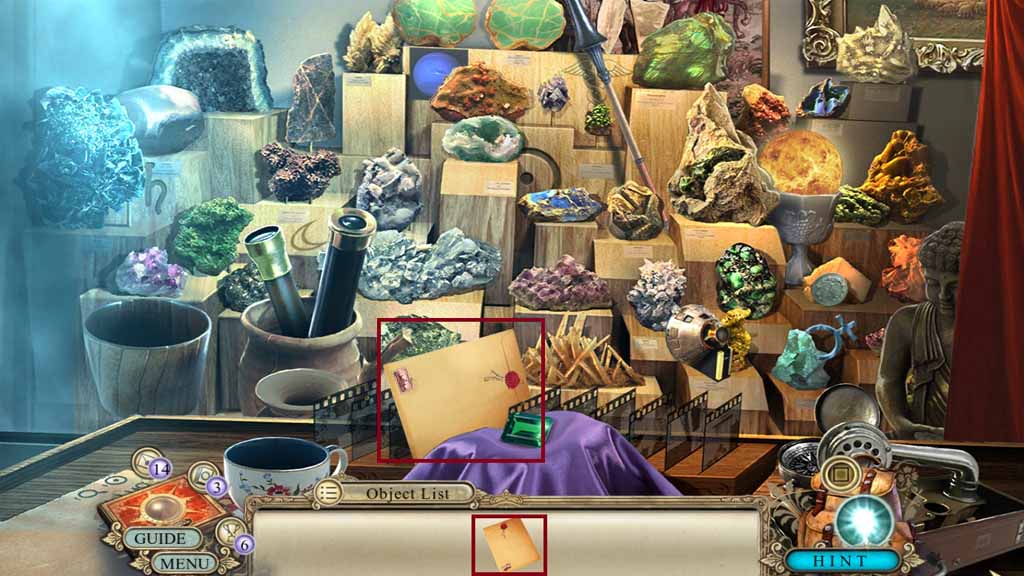
- Find and collect the envelope.
- Move to the Elevator.
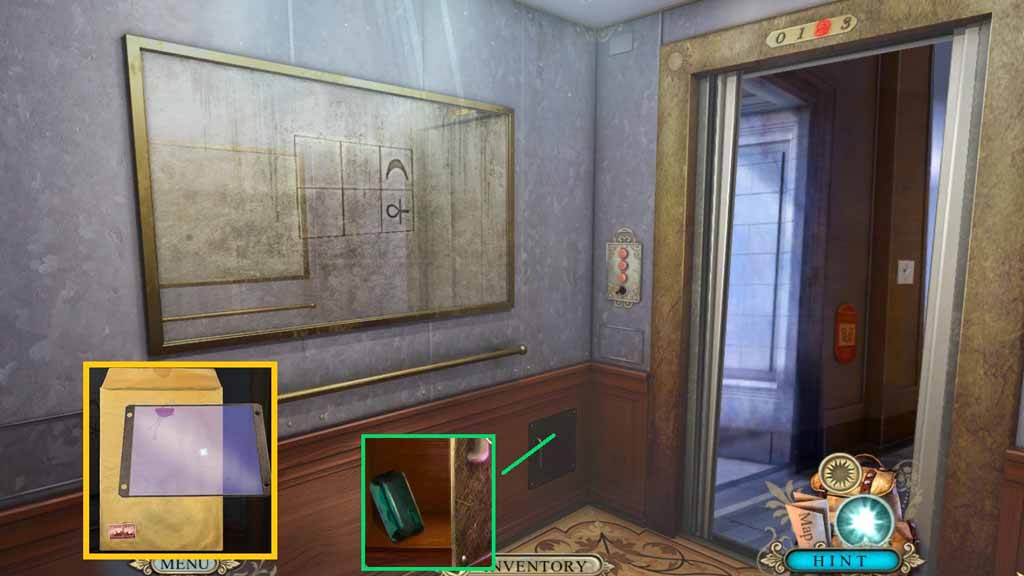
- Click the envelope and collect the UV viewer.
- Insert the hex key into the lock and collect the 4/6 gems.
- Move to Dr. Post’s office.
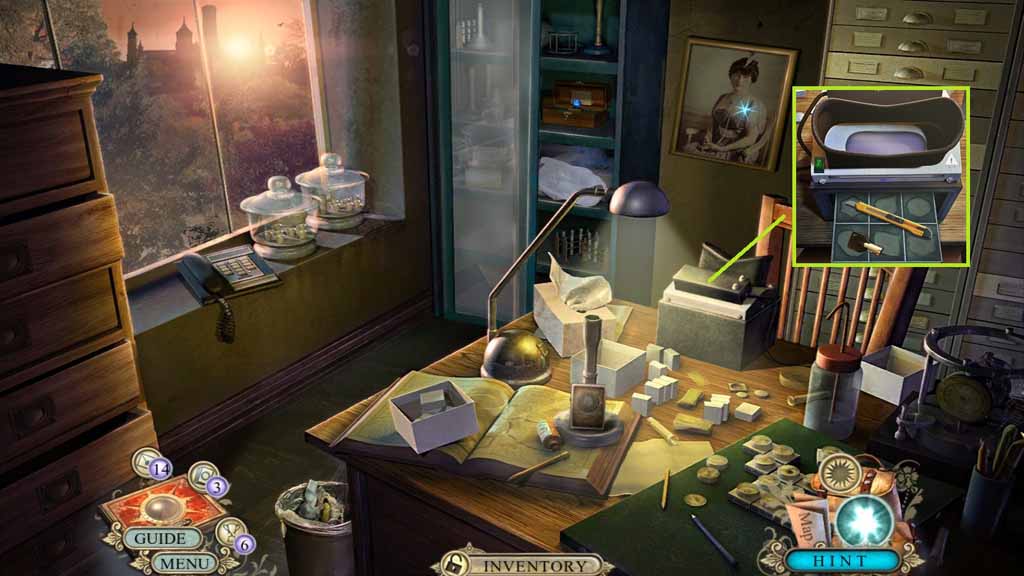
- Place the UV viewer onto the device and collect the box key and the box cutter.
- Move to the second floor hallway.
- Select the box cutter to open the box and trigger a hidden objects area.
- Find the items and clear the peanuts away to collect the 5/6 gems.
- Move to the Natural History Museum.
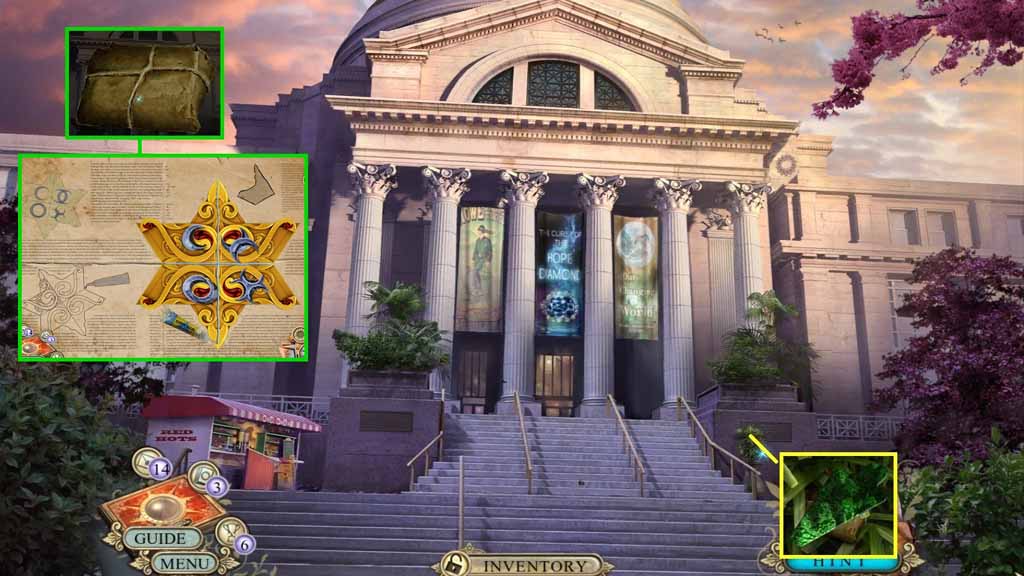
- Select the garden gloves to move the leaves and collect the 2/5 glass puzzle piece and the puzzle piece.
- Click the puzzle piece open and insert the three puzzle pieces to trigger a puzzle.
- Solve the puzzle by switching the parts correctly.
- Click the on the glue and use it to secure the puzzle pieces; collect the puzzle piece.
- Move to the Gem room and go forward once more to the Hope Diamond Room.
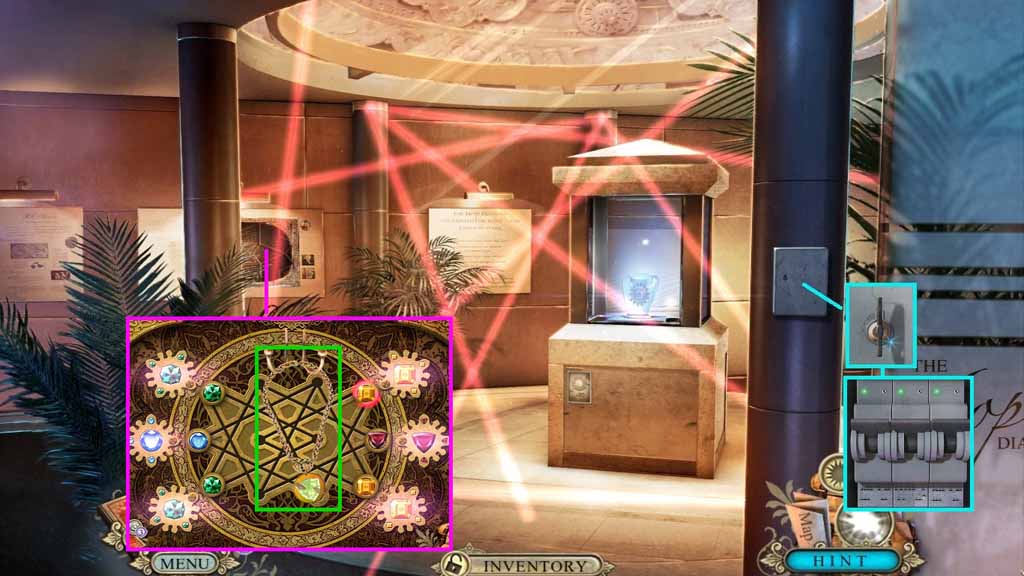
- Insert the box key into the lock and click all three switches.
- Insert the puzzle pieces into the board to trigger a puzzle.
- Solve the puzzle by placing the gems into the correct spots.
- Collect the necklace.
- Move to Dr. Post’s office.
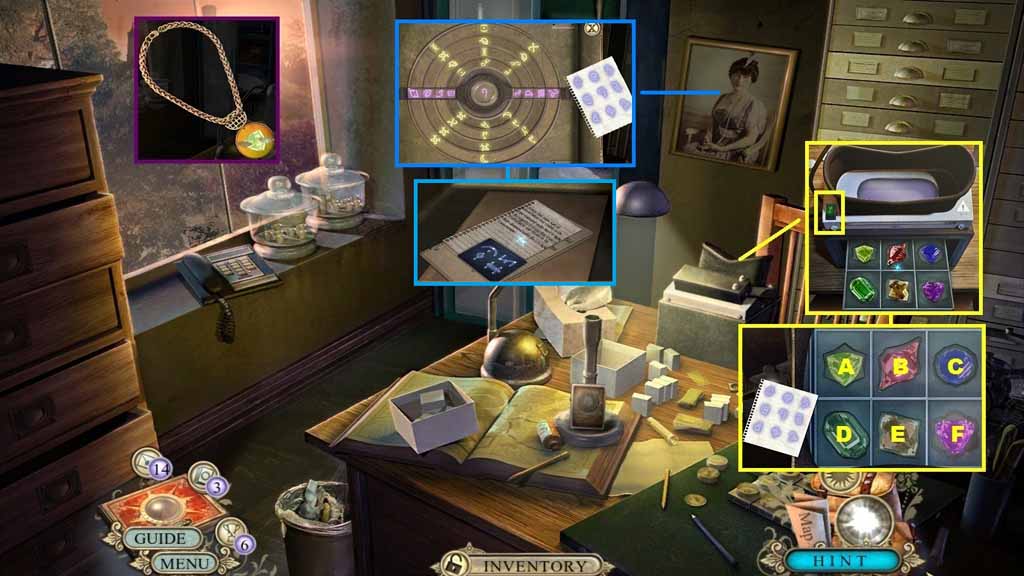
- Click the necklace.
- Click the two clasps and collect the 6/6 gems.
- Insert the six gems into the slots and click the button to trigger a puzzle.
- Solve the puzzle by flipping the gems to find all of the symbols.
- Click the picture and zoom in to the puzzle.
- Solve the puzzle by aligning the symbols correctly.
- Collect the 1/3 Temple entrance code.
Comments will load when you reach this part of the walkthrough.