

Chapter Two: Castle Expedition
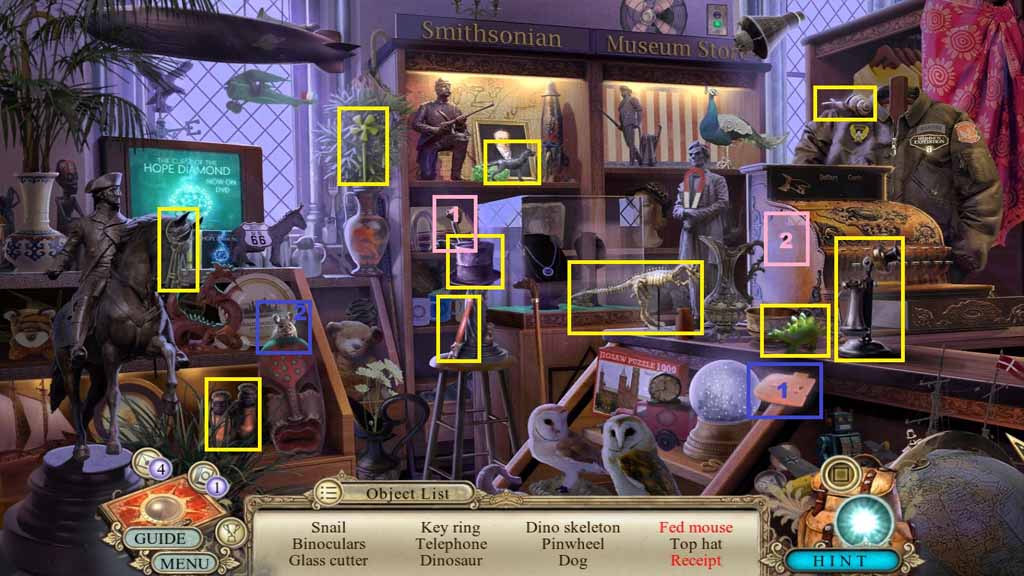
- Find the listed items.
- Select the cheese and give it to the mouse; collect the fed mouse.
- Select the handle and place it onto the register; collect the receipt.
- Collect the glass cutter.
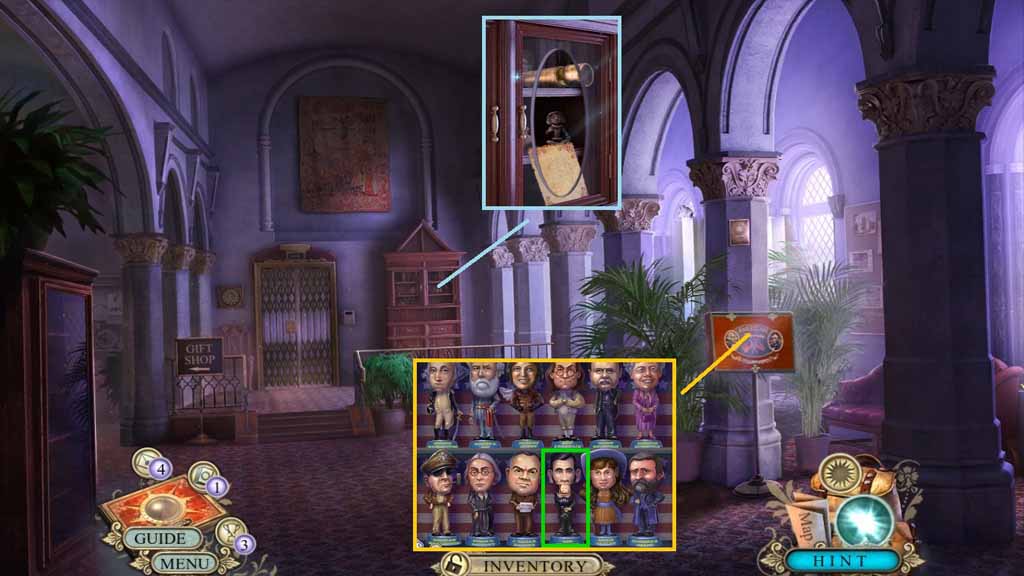
- Select the glass cutter to cut the glass.
- Collect the note, 4/4 bubblehead and the spyglass.
- Click the box and insert the four bobble heads to trigger a puzzle.
- Solve the puzzle by arranging the bobble heads correctly.
- Collect the penny.
- Move to the Castle foyer.
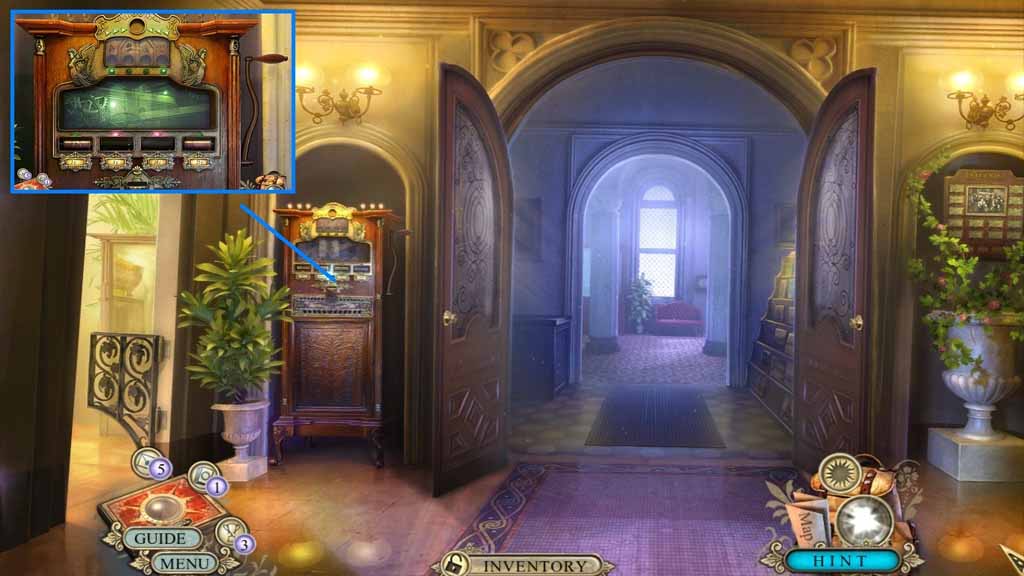
- Insert the fire cylinder and the penny into the slots.
- Click the handle to collect the fire coin.
- Move to the Castle lobby.
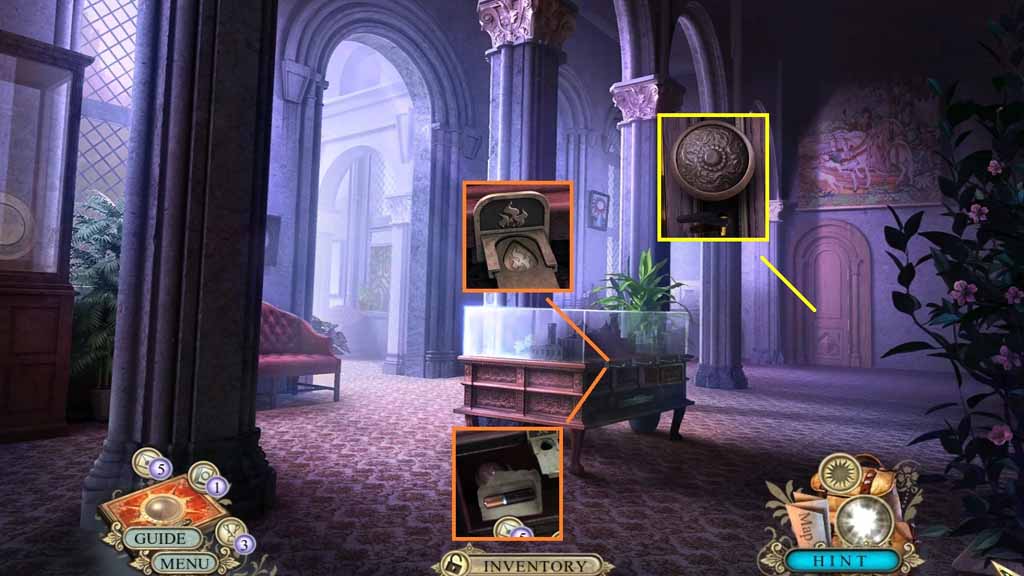
- Insert the fire coin into the slot.
- Collect the 1/2 batteries, the note and the doorknob.
- Attach the doorknob onto the door and insert the room key into the lock.
- Enter the doorway.
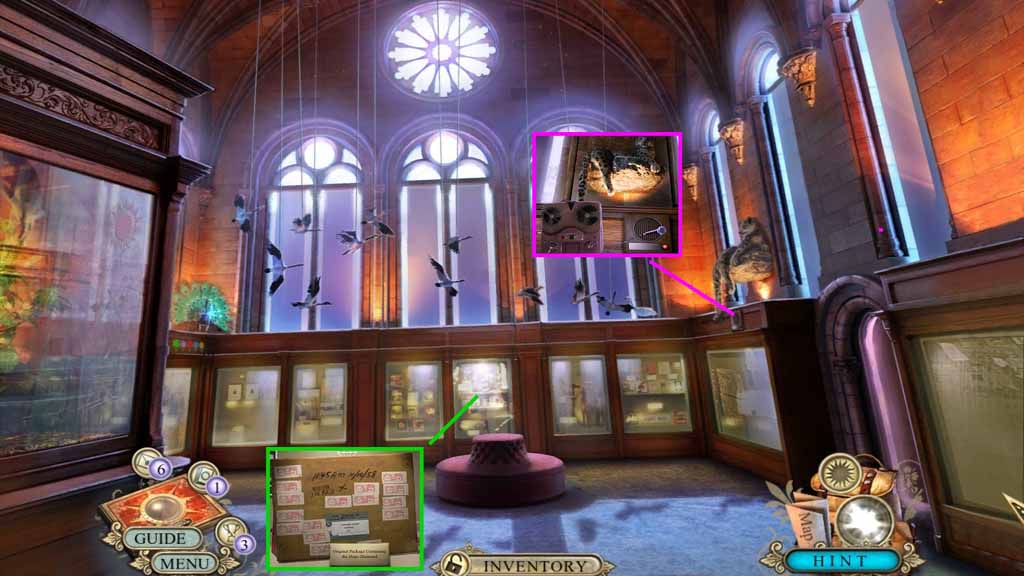
- Examine the package.
- Select the recorder with mic to use on the speaker and collect the recorded roar.
- Move to the Owl tower base.
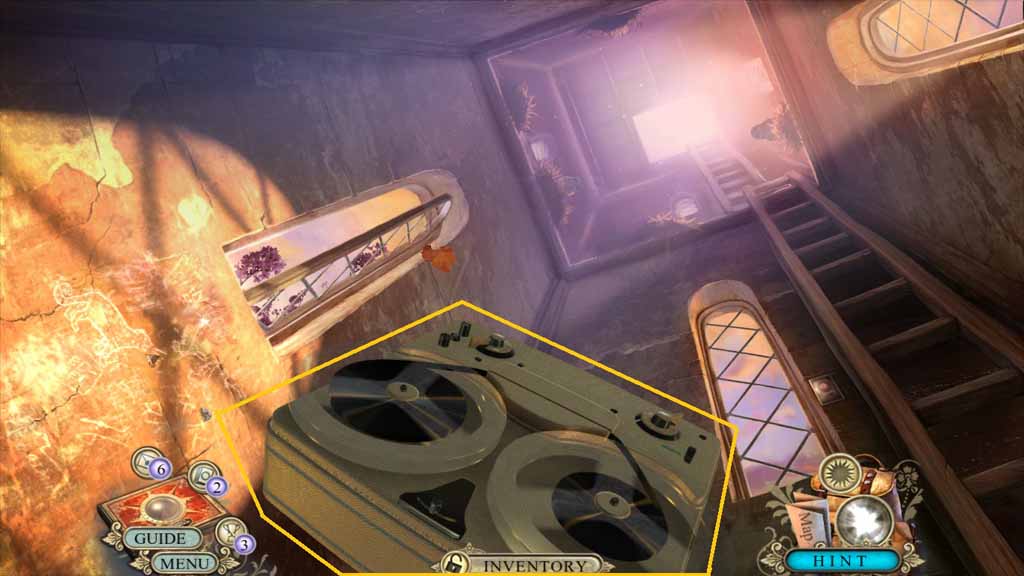
- Select the recorded roar to use on the owls.
- Move to the Owl tower top.
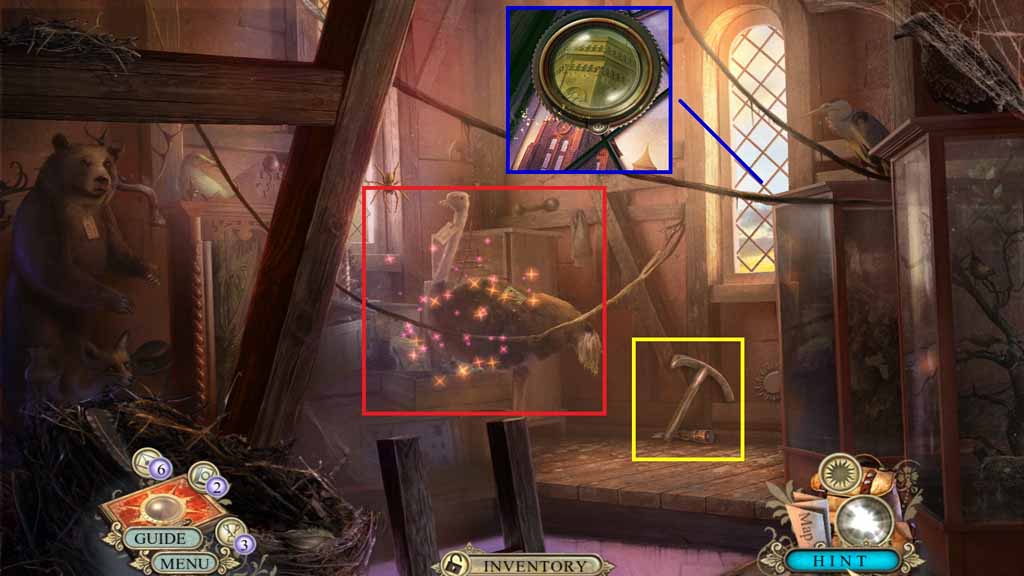
- Collect the hammer and the chisel.
- Select the spyglass and use it to focus into the image.
- Adjust the tab to create a clear view.
- Click the hidden objects area.
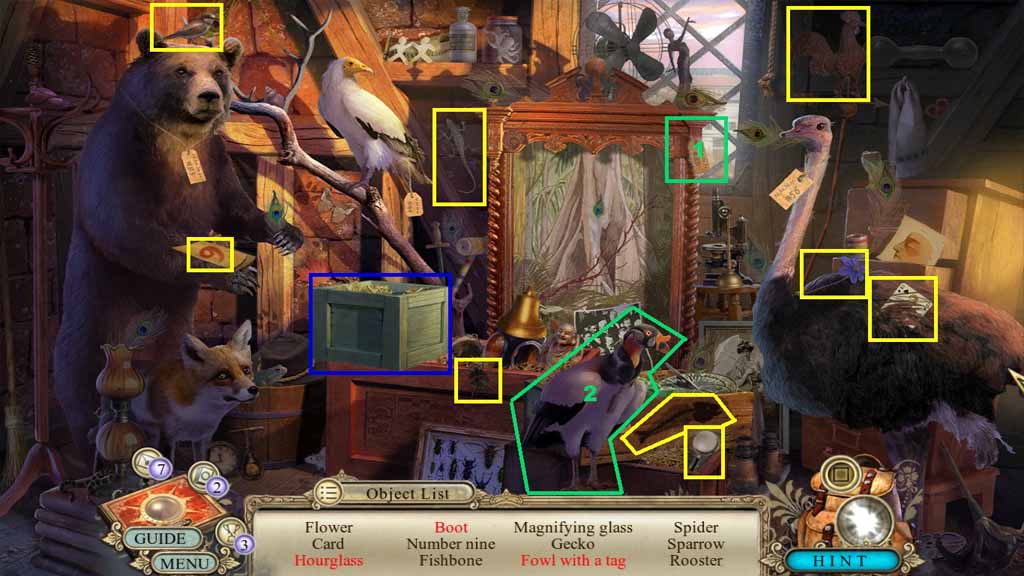
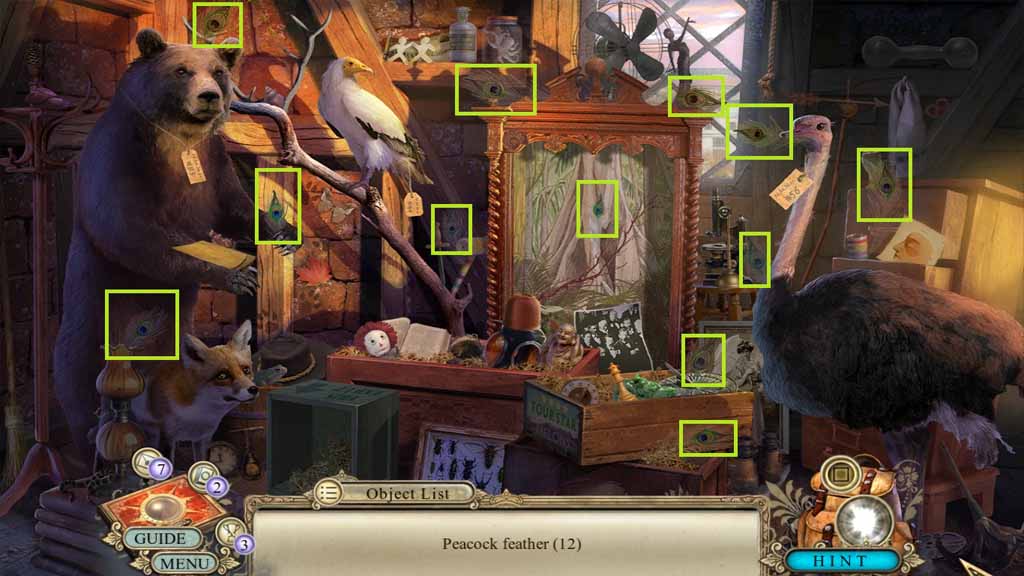
- Find the listed items.
- Click the crate and collect the hourglass and the boot.
- Select the tag and place it onto the fowl; collect the fowl with a tag.
- Collect the feathers.
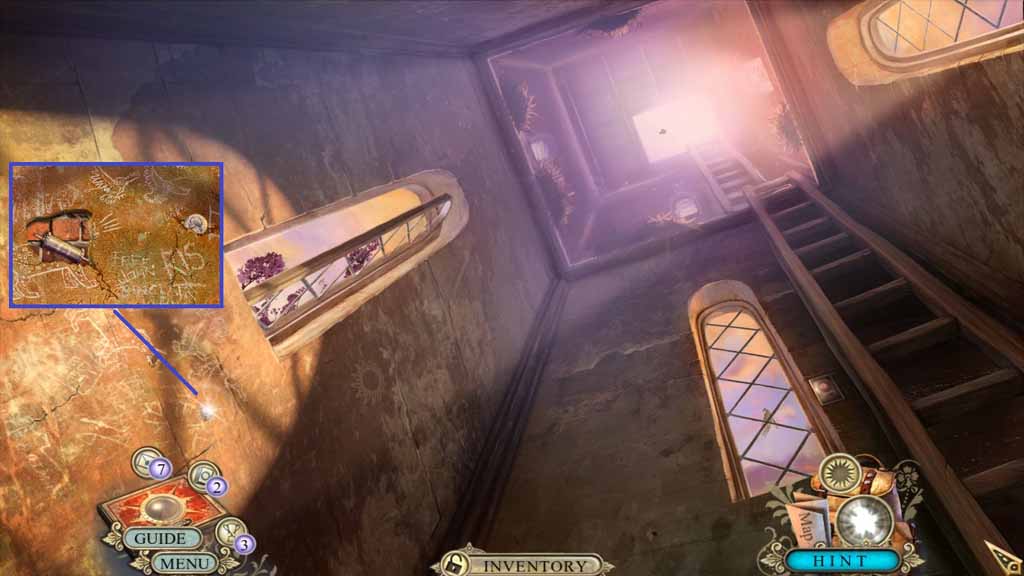
- Collect the nickel.
- Select the hammer and chisel to use on the crack.
- Collect the Smithsonian cylinder.
- Move down once.
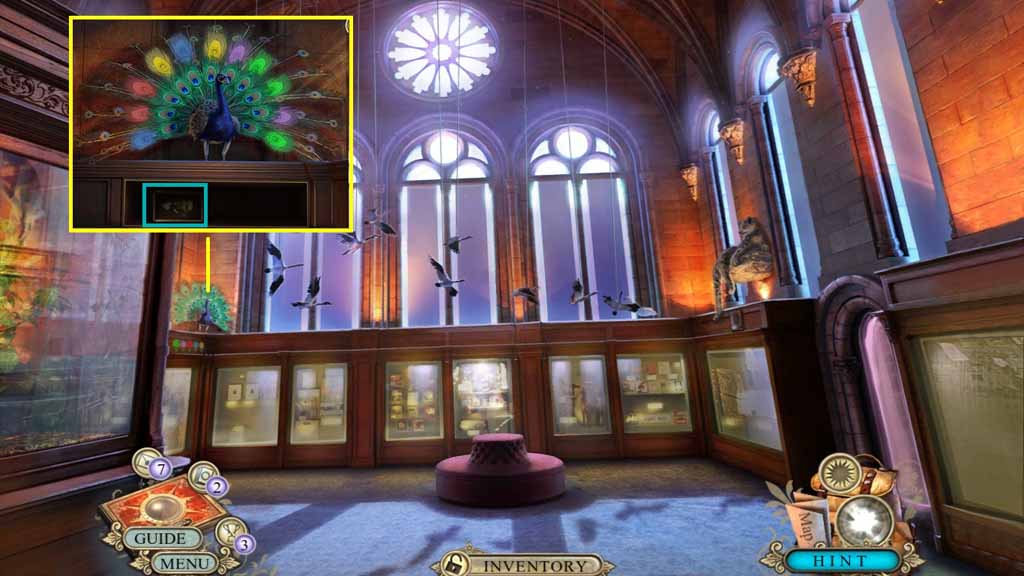
- Place with the others onto the peacock to trigger a puzzle.
- Solve the puzzle by arranging the feathers correctly.
- Collect the note and the 1/2 elevator cards.
- Move to the Castle foyer.
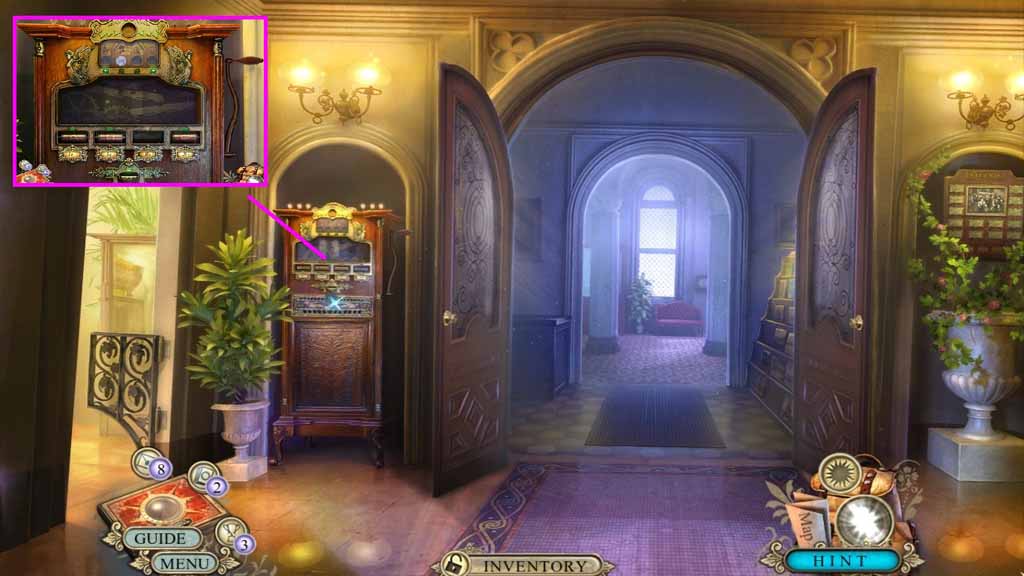
- Insert the Smithsonian cylinder and the nickel into the slots.
- Click the handle to collect the Smithsonian coin.
- Move to the Castle lobby.
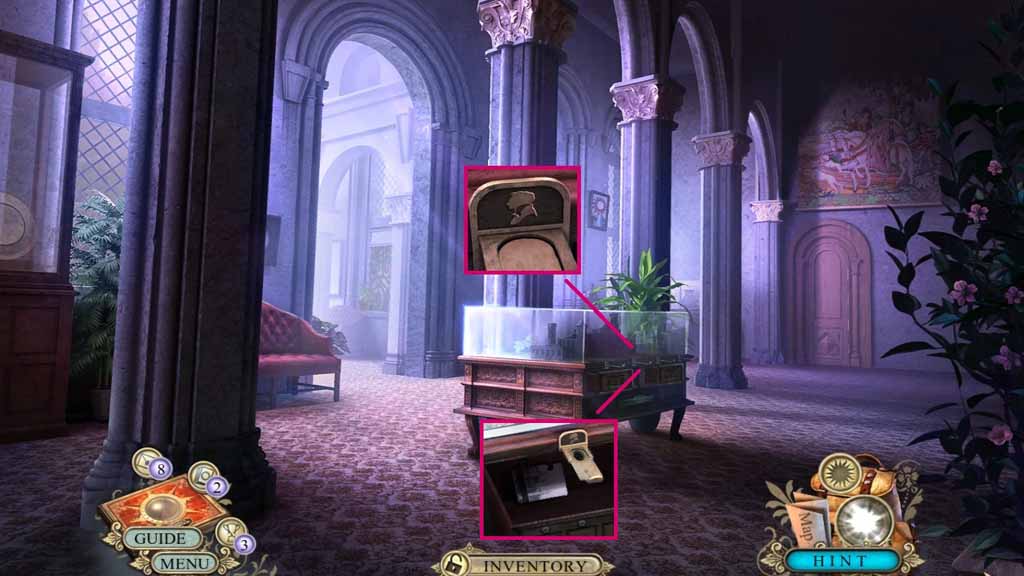
- Insert the Smithsonian coin into the slot.
- Collect the 2/2 elevator cards.
- Move to the elevator hallway.
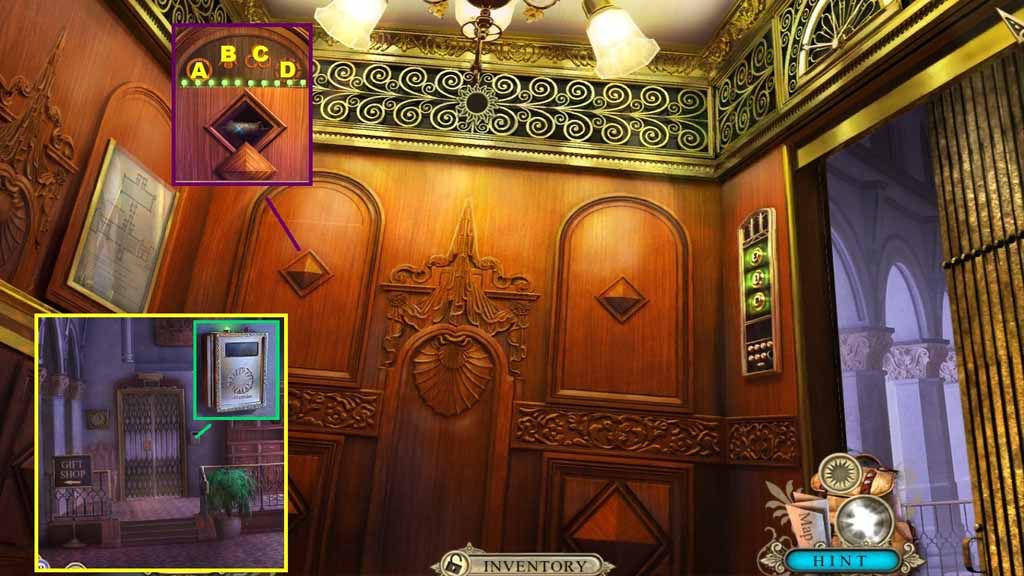
- Place the two elevator cards into the slot and move into the elevator.
- Click the panel to trigger a puzzle.
- Click the cylinders in ABC order to solve the puzzle.
- Use the following sequence to solve: A x 1, B x 4, C x 3, D x 2.
- Collect the owl cylinder.
- Move to the Castle foyer.
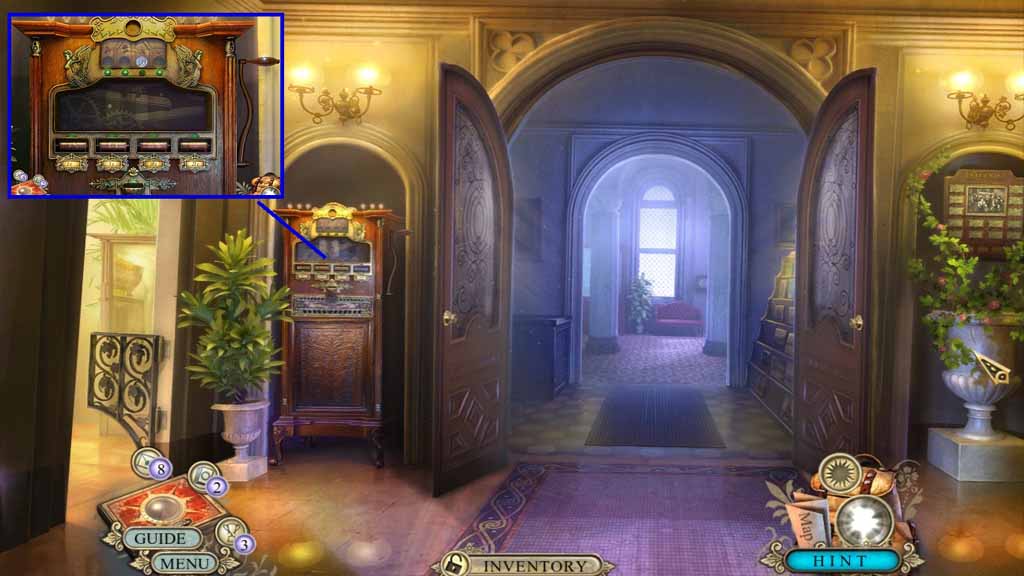
- Insert the owl cylinder and the dime into the slots.
- Click the handle and collect owl coin.
- Move to the Castle lobby.
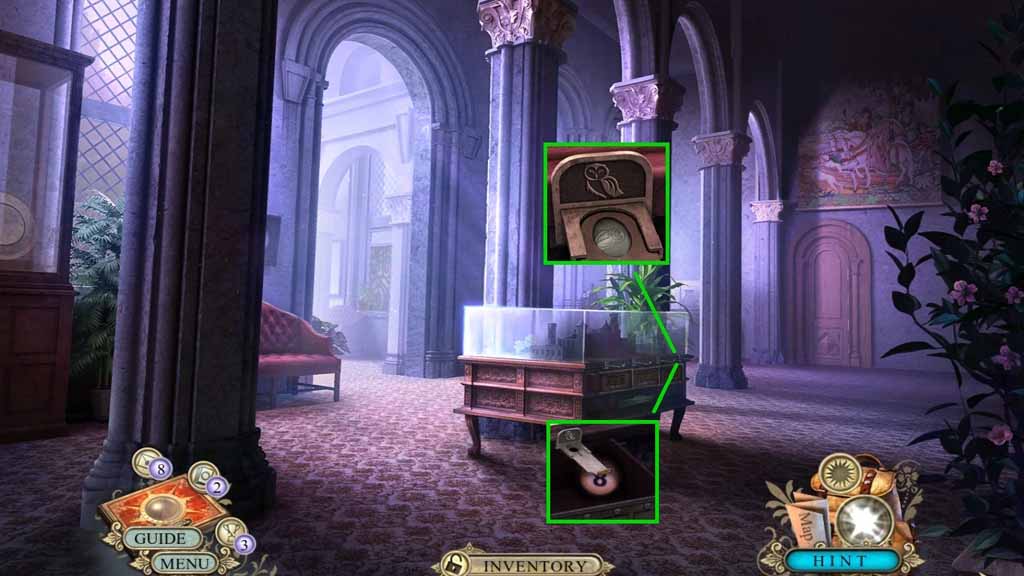
- Insert the owl coin into the slot.
- Collect the number 8 button.
- Move to the elevator.
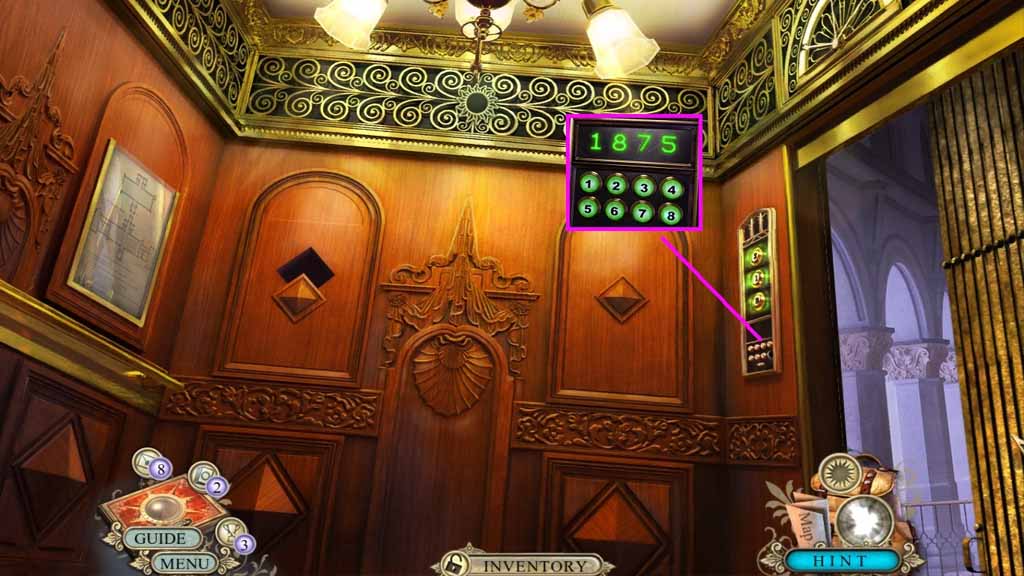
- Insert the number 8 button into the slot.
- Click 1 8 7 5.
- Exit the elevator.
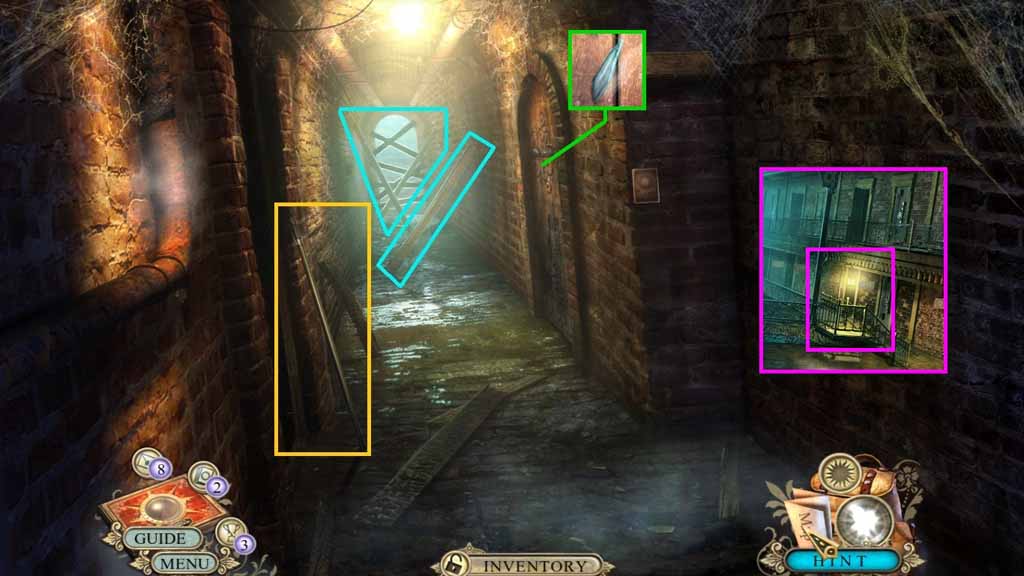
- Collect the long stick and the glass shard.
- Click the boards four times and move to the Sewer.
- Move ahead once more to the Sewer hallway.
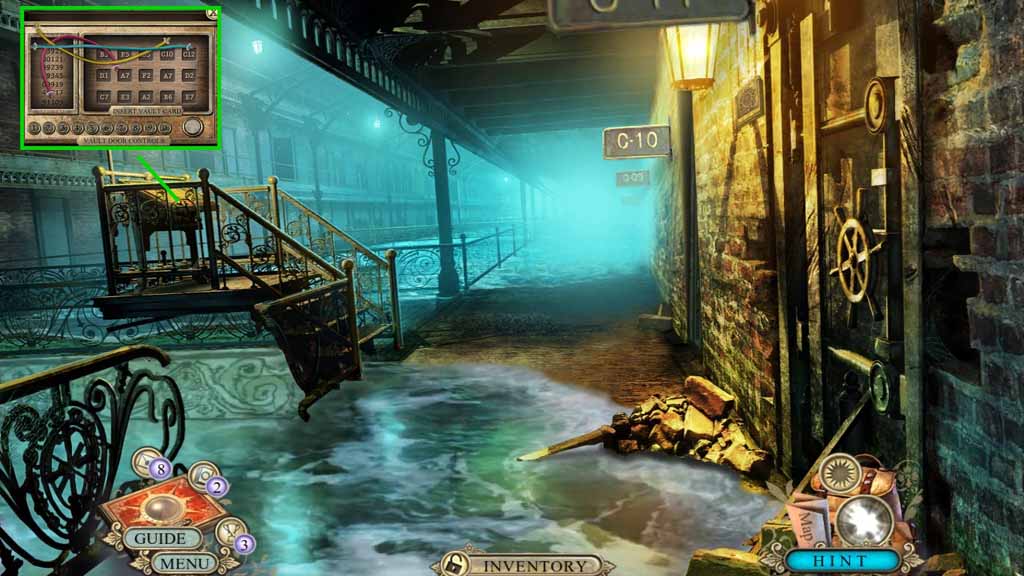
- Collect the wires.
- Move down once.
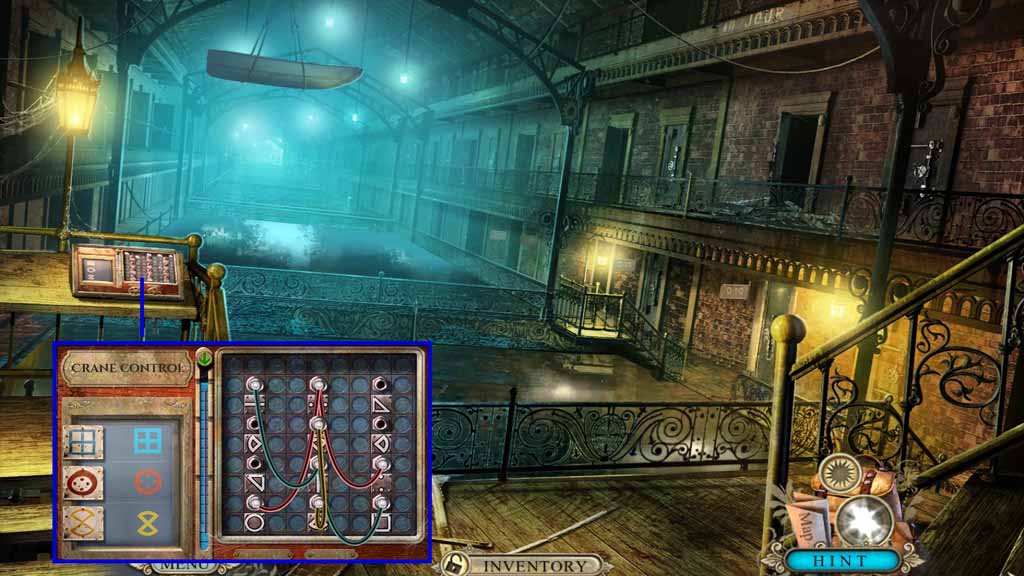
- Attach the wires onto the mechanism to trigger a puzzle.
- Solve the puzzle aligning the wires correctly.
- Move to the Sewer hallway and click the hidden objects area.
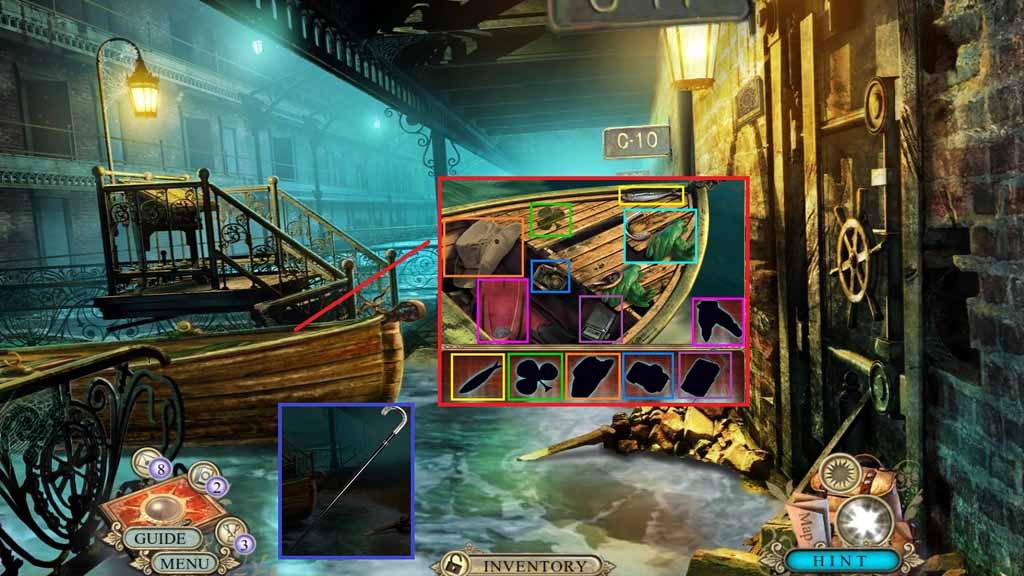
- Zoom into the boat to access a hidden objects area.
- Find the silhouetted items.
- Collect the hook.
- Click the long stick and attach the hook; collect the long hook.
- Move down 2 times.
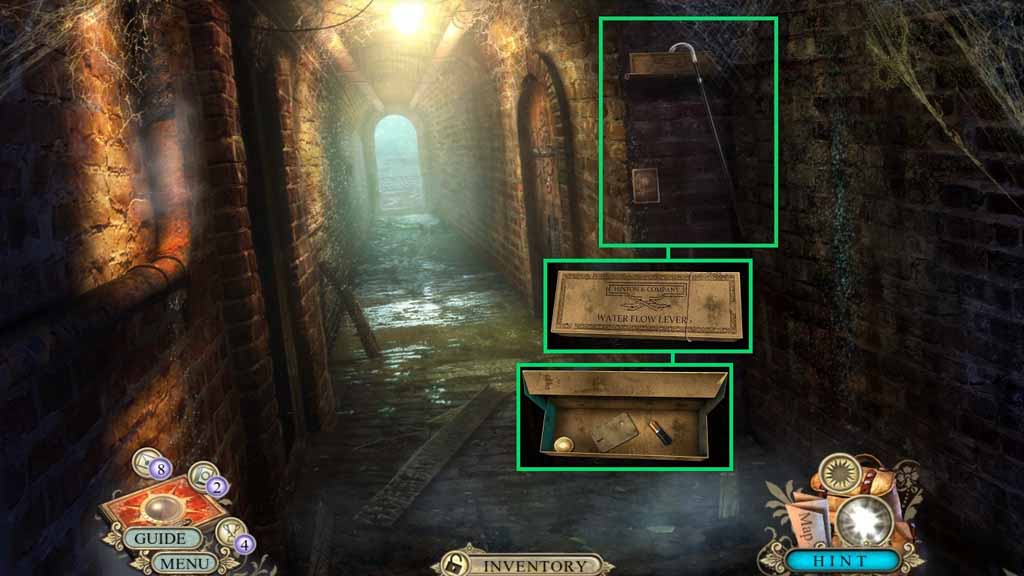
- Select the long hook to collect the box.
- Click the box and use the glass shard slice the ropes three times.
- Collect the 2/2 batteries, the Smithsonian coin and the vault card.
- Move to the Sewer hallway.
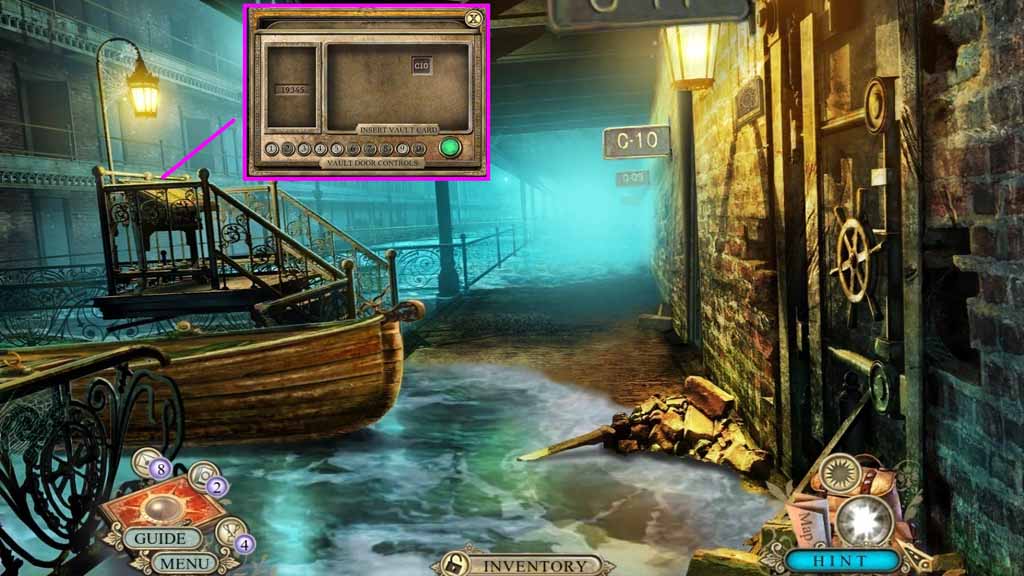
- Place the vault card onto the mechanism.
- Enter 1 9 3 4 5 and click the button.
-
Move through the doorway.
Comments will load when you reach this part of the walkthrough.