
Chapter Ten: The Greatest Treasure
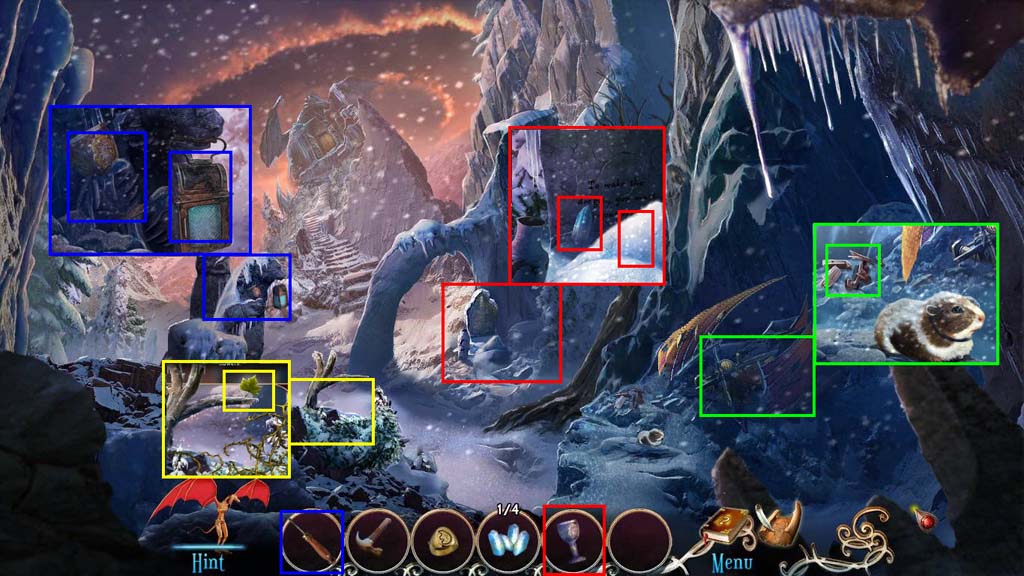
- Click to zoom in on the kite.
- Take the Wood Scraps.
- Click to zoom in on the thorns.
- Take the Green Leaves.
- Click to zoom in on the statue.
- Take the Chalice.
- Use the Screwdriver on the Lantern.
- Click to zoom in on the grave.
- Take the Crystal 2/4.
- Use the Chalice on the snow to get the Snow.
- Go forward.
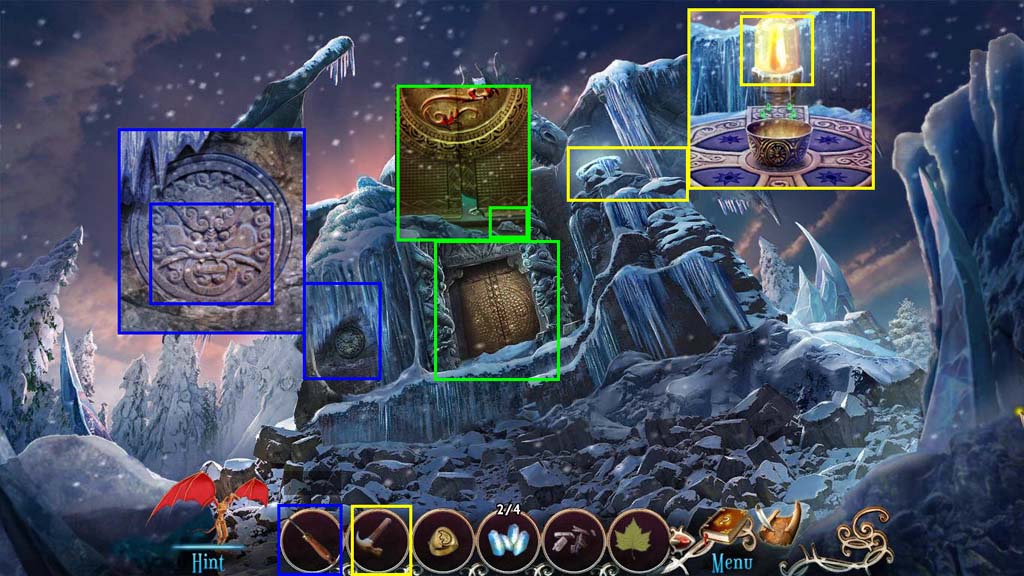
- Click to zoom in on the emblem on the left.
- Use the Screwdriver on the emblem.
- Take the Thick Gloves.
- Click to zoom in on the doors.
- Take the Mirror Shard 1/3.
- Click to zoom in on the altar.
- Use the Hammer on the glass.
- Use the Thick Gloves to take the Sun Prism.
- Go back one screen.
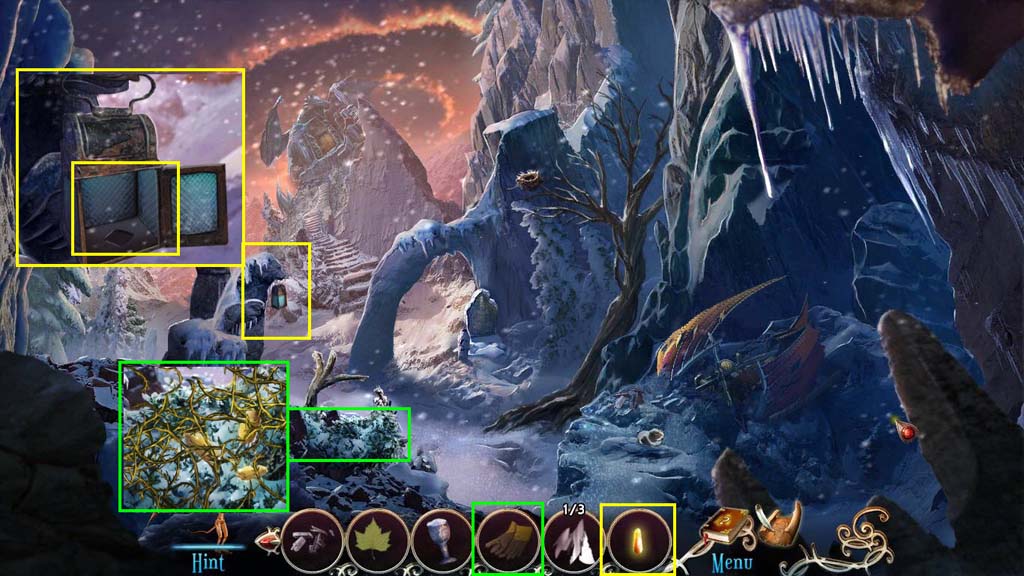
- Click to zoom in on the Lantern.
- Use the Sun Prism on the lantern.
- Take the Sun Lantern.
- Click to zoom in on the thorns.
- Use the Thick Gloves on the thorns twice.
- Use the Sun Lantern on the branch above the flowers.
- Take the Sun Lilies.
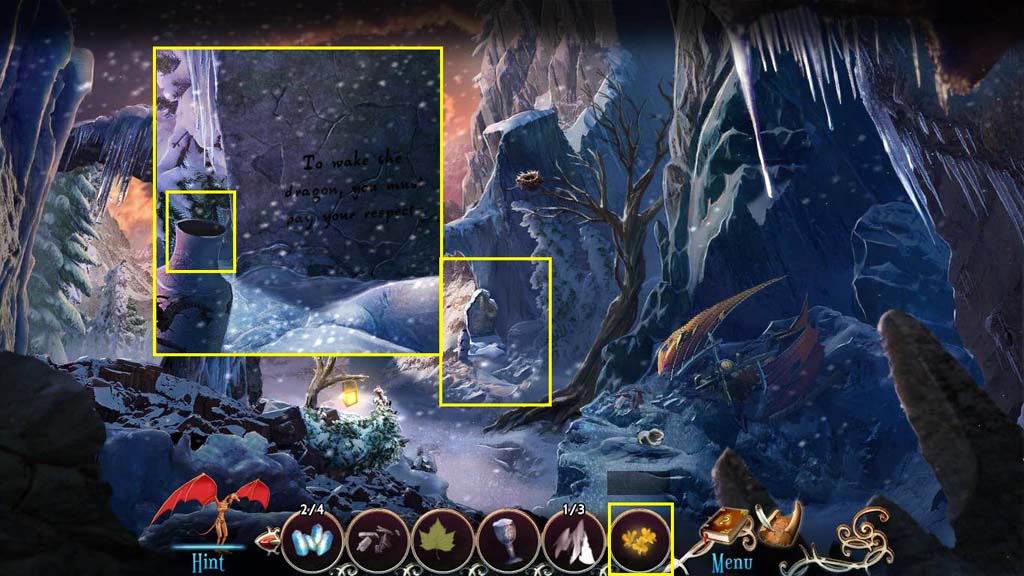
- Click to zoom in on the grave.
- Use the Sun Lilies on the vase.
- Talk to the Wisp.
- Click on the symbols on the grave to get the Glyph Note.
- Go forward.
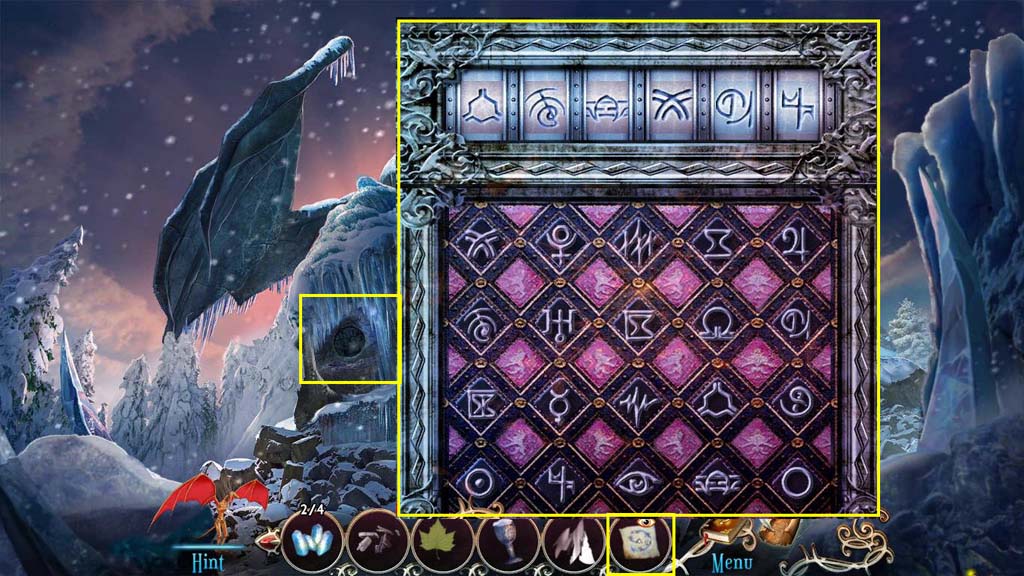
- Click on the Glyph Note to look at it.
- Click to zoom in on the left and play the mini-game.
- Start with the inner circle and go out when you input the symbols on the note.
- See the screenshot for the solution.
- When you are done click on the same area and play the HOG.
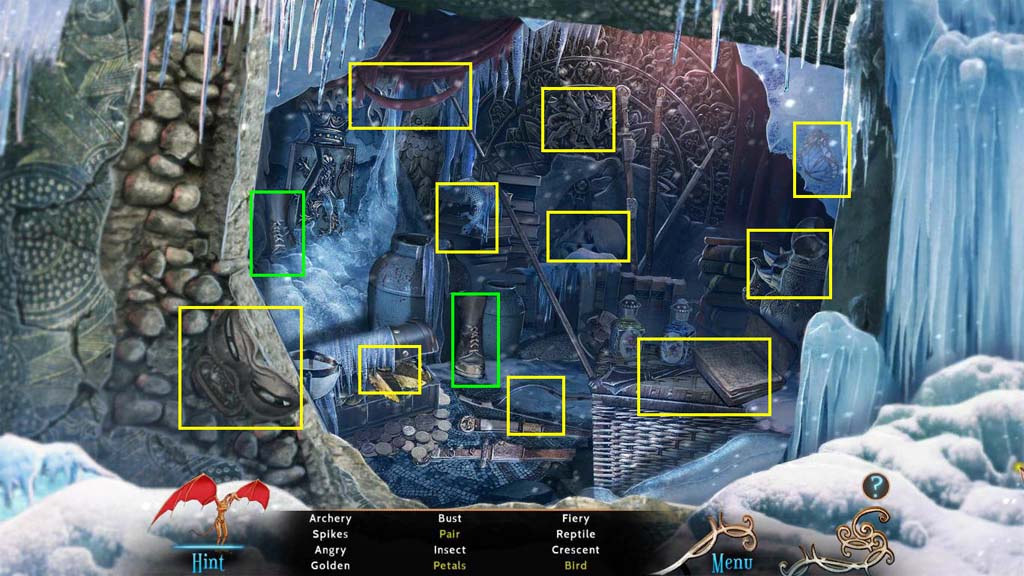
- Find all the items on the list.
- You will have to click away the two snow piles.
- You will receive the Toy Armor.
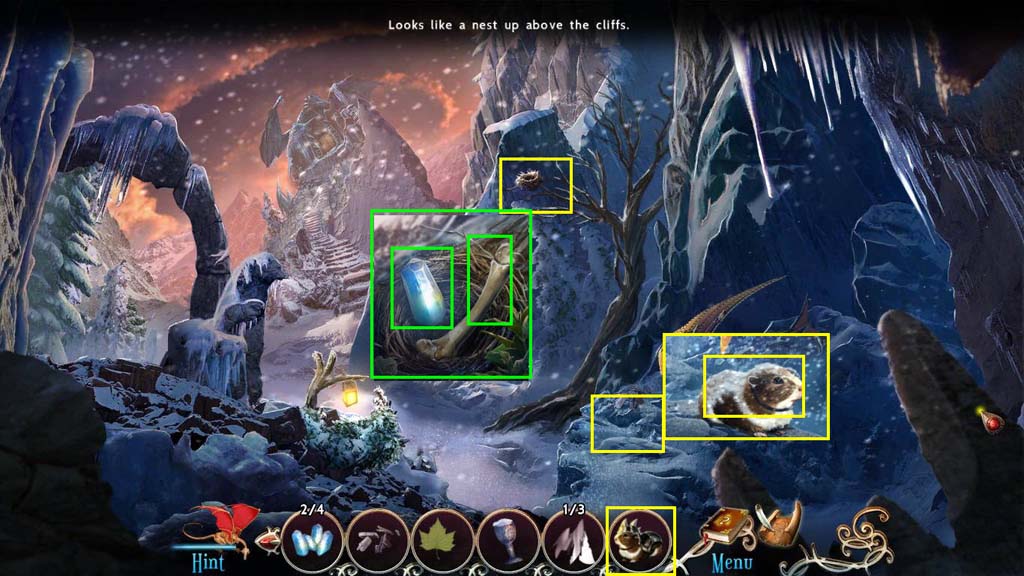
- Click to zoom in on the guinea pig.
- Use the Toy Armor on the guinea pig.
- Take the Armored Guinea Pig.
- Use the Armored Guinea Pig on the Nest.
- Take the Crystal 3/4 and the Bone.
- Go forward.
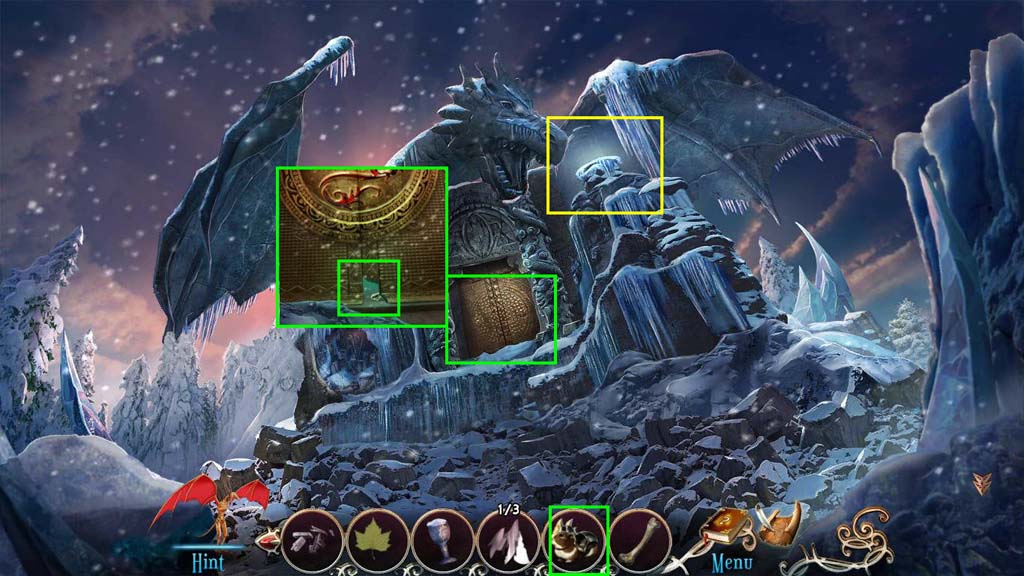
- Click to zoom in on the door.
- Use the Armored Guinea Pig to get the Crystal 4/4.
- Click to zoom in on the altar.
- Use the Crystals 4/4 on the altar.
- Play the Mini-game.
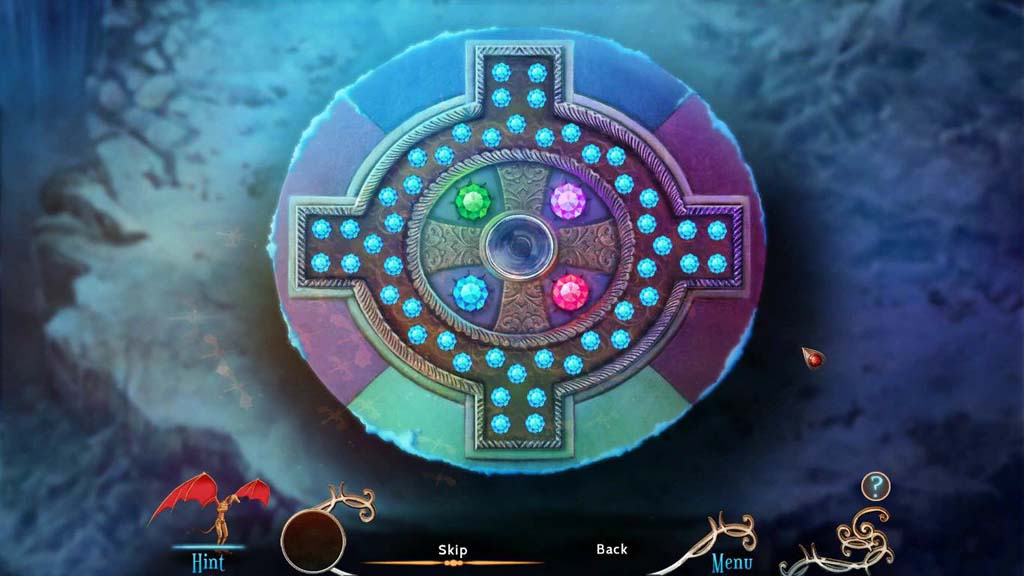
- The goal of the game is to turn all the gems the same color - blue.
- Whenever you click on the larger gem in the middle, the smaller ones will turn that color, starting at the top.
- You just need to move from the top to the bottom, changing the colors so that they all turn one color.
- When you are done, speak to Shadowfang.
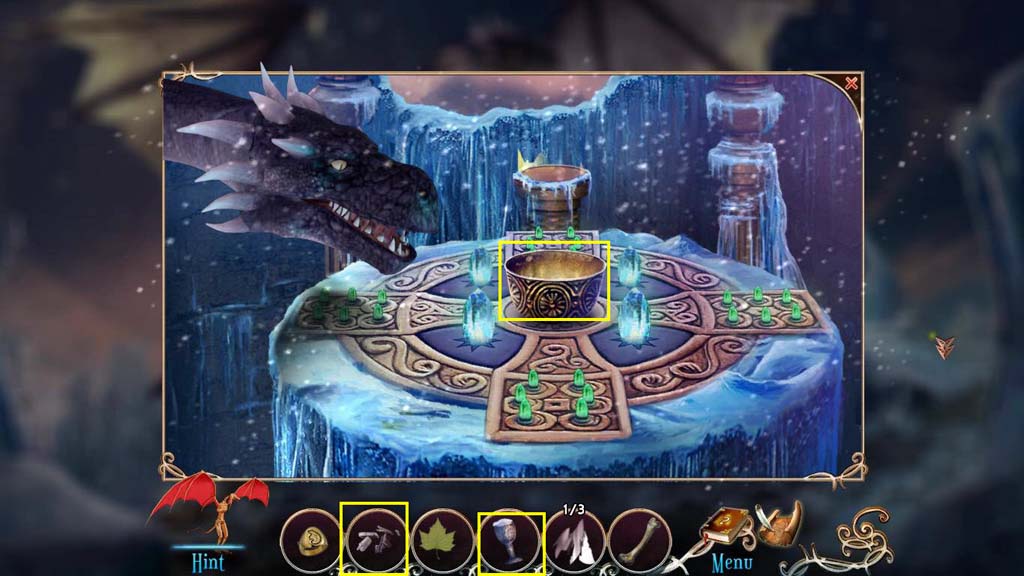
- Click to zoom in on the altar.
- Use the Wood Scraps on the bowl.
- Take the Ash.
- Use the Snow on the bowl.
- Take the Water.
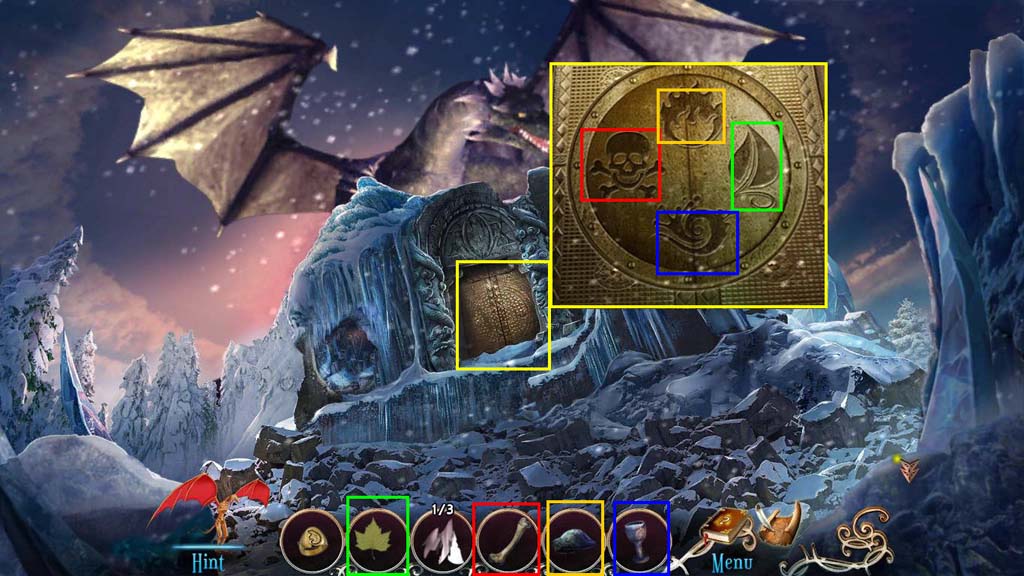
- Click to zoom in on the door.
- Use the Bone on the skull, the Green Leaves on the leaf, the Water on the wave, and the Ash on the fire.
- Enter the building.
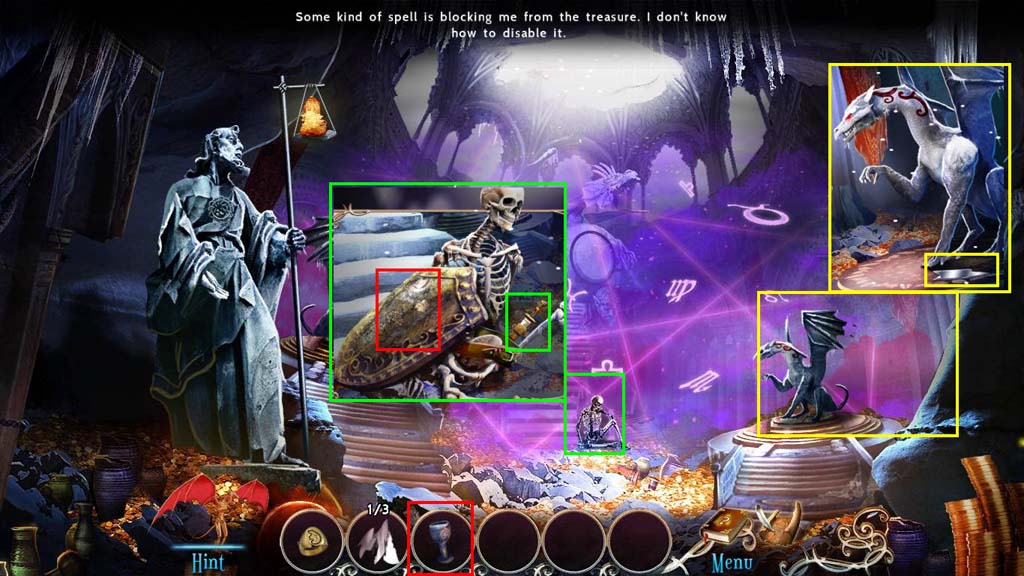
- Click to zoom in on the dragon statue.
- Take the Mirror Shard 2/3.
- Click to zoom in on the skeleton.
- Take the Dagger.
- Use the Water on the shield.
- Go back two screens.
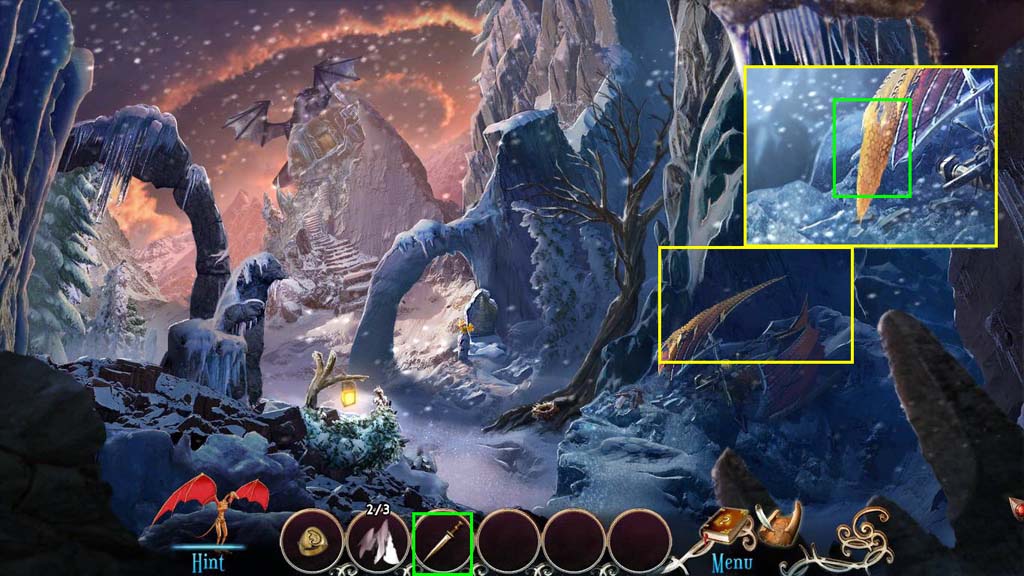
- Click to zoom in on the kite.
- Use the Dagger on the kite.
- Take the Cloth.
- Go back to the treasure room.
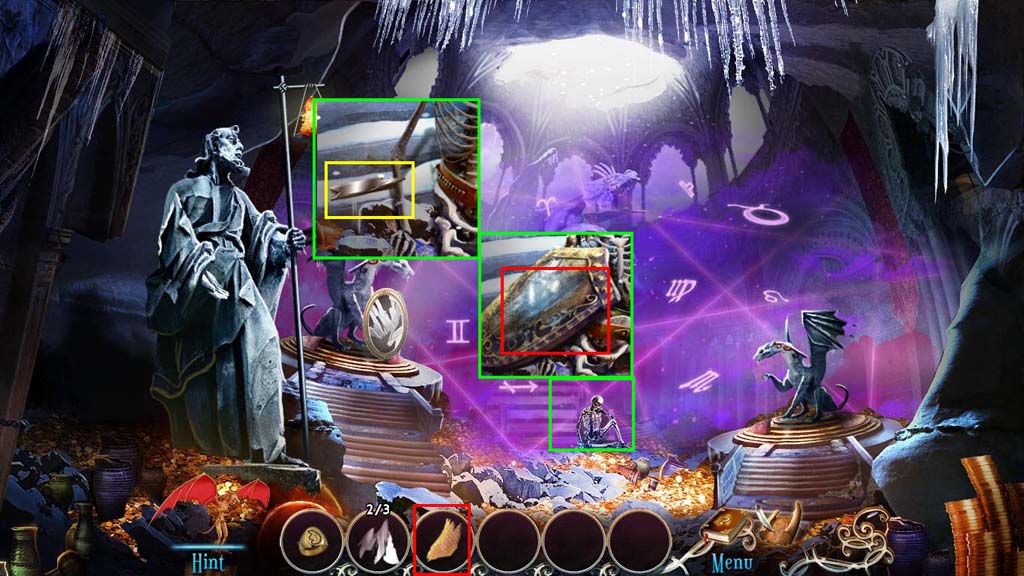
- Click to zoom in on the skeleton.
- Use the Cloth on the Shield.
- Take the Shiny Shield.
- Take the Mirror Shard 3/3 that was behind the shield.
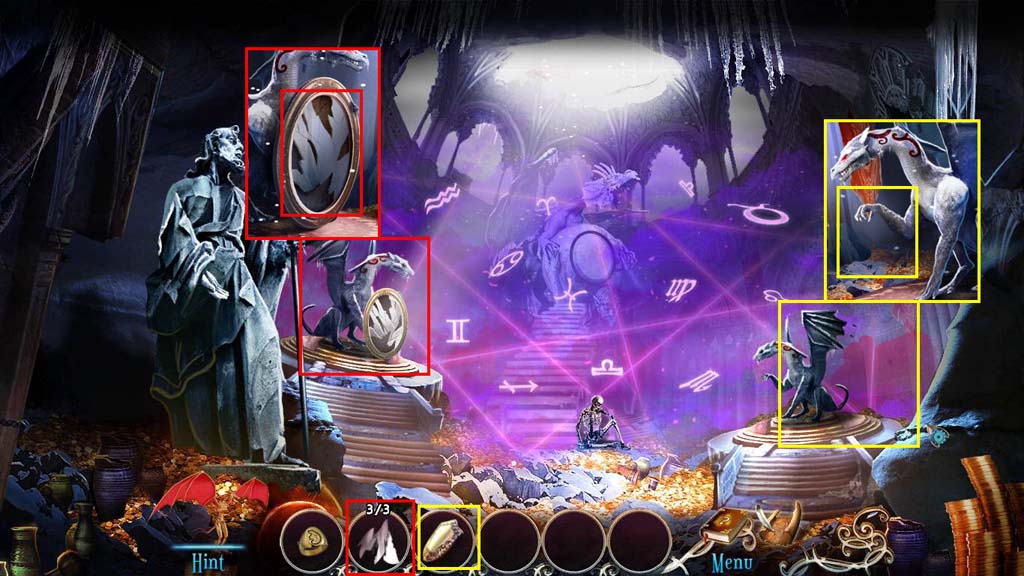
- Click to zoom in on the statue on the right.
- Use the Shiny Shield on the dragon.
- Click to zoom in on the statue on the left.
- Use the Mirror Shard 3/3 on the mirror.
- Play the mini-game.
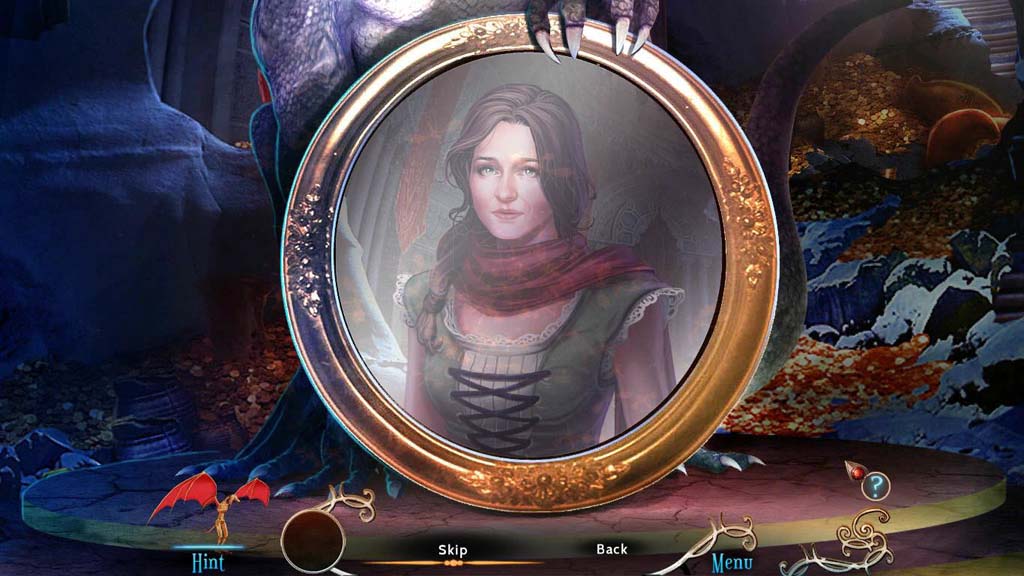
- Take the shards of glass and reform the mirror.
- See the screenshot for the final image.
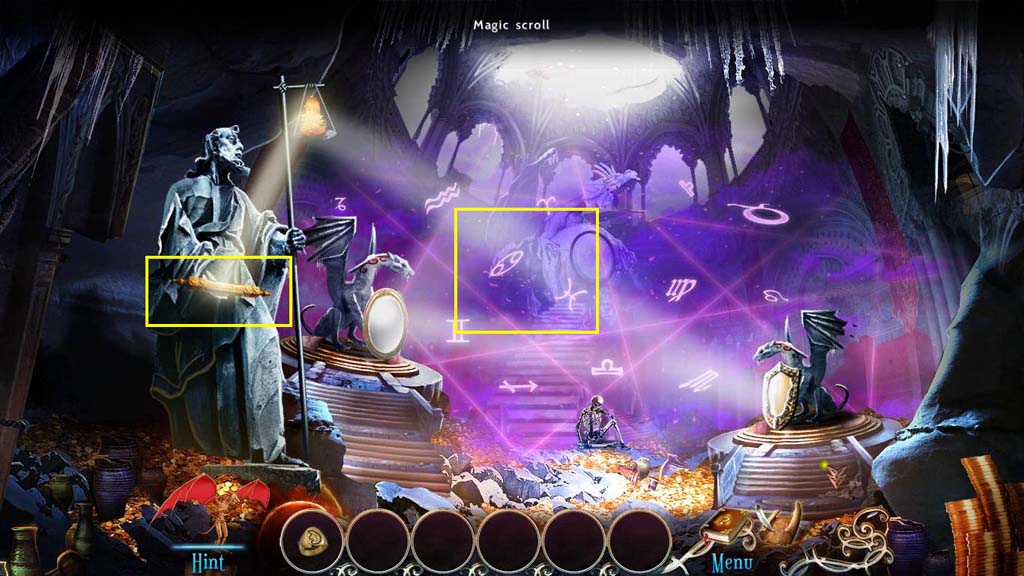
- Take the Magic Scroll.
- Use the Magic Scroll on the force field.
- Play the mini-game.
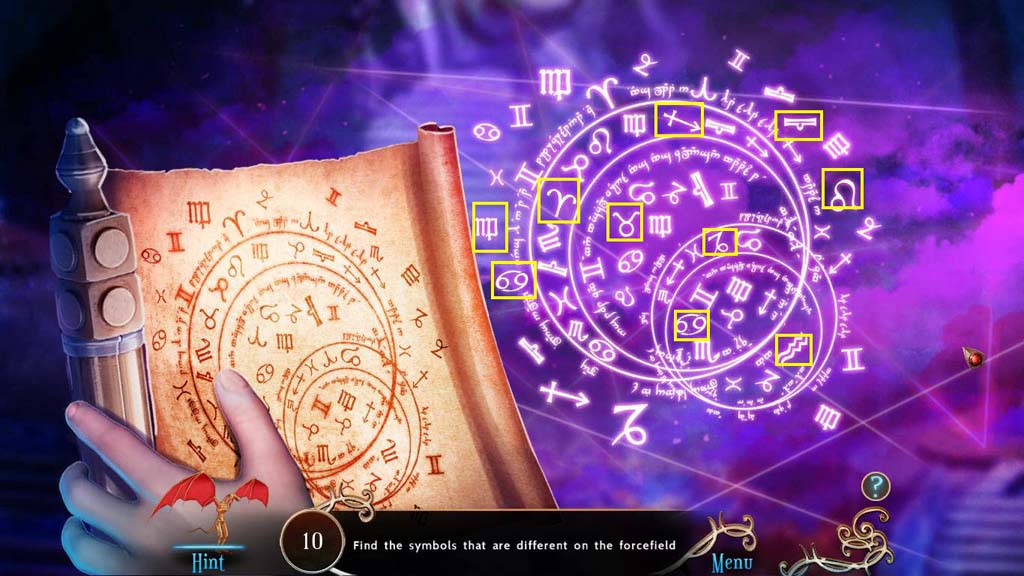
- You need to find the symbols of the force field that don't match the ones on the scroll.
- See the screenshot for the solution.
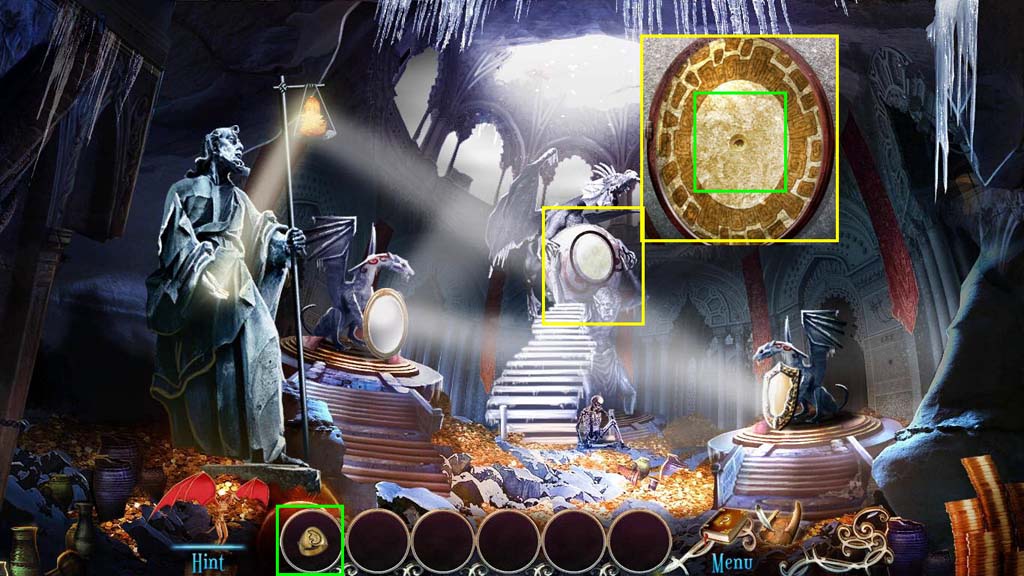
- Click to zoom in on the dragon statue.
- Use the Signet Ring on the slot.
- Take the Dragon Egg.
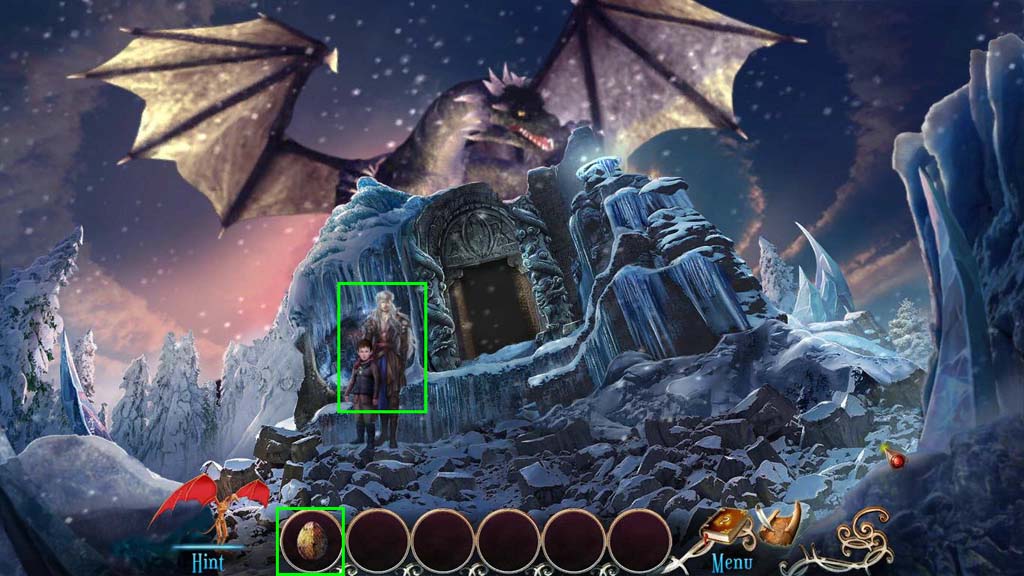
- Give the Dragon Egg to Eridan.
- Click to talk to the dragon.
- Click on yes when you are ready.
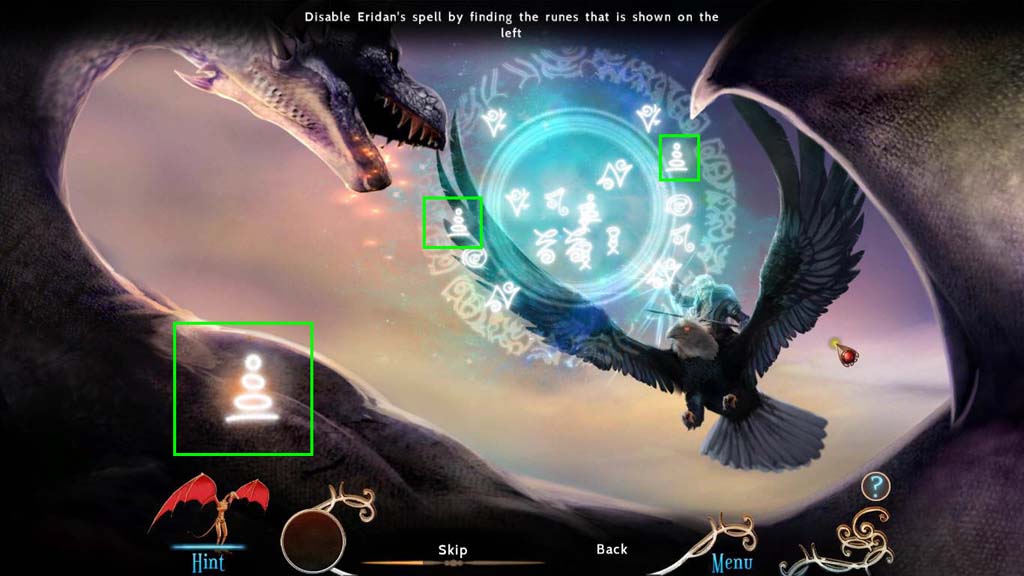
- In the final mini-game, find the symbol on the dragon's back.
- Then simply click on the symbols in Eridan's force field that match that symbol.
- You'll need to do this several times before hes' defeated.
- Congratulations! You've completed Emberwing: Lost Legacy!
Comments will load when you reach this part of the walkthrough.