
Chapter Two: Inside Eden
- Take the CABLE.
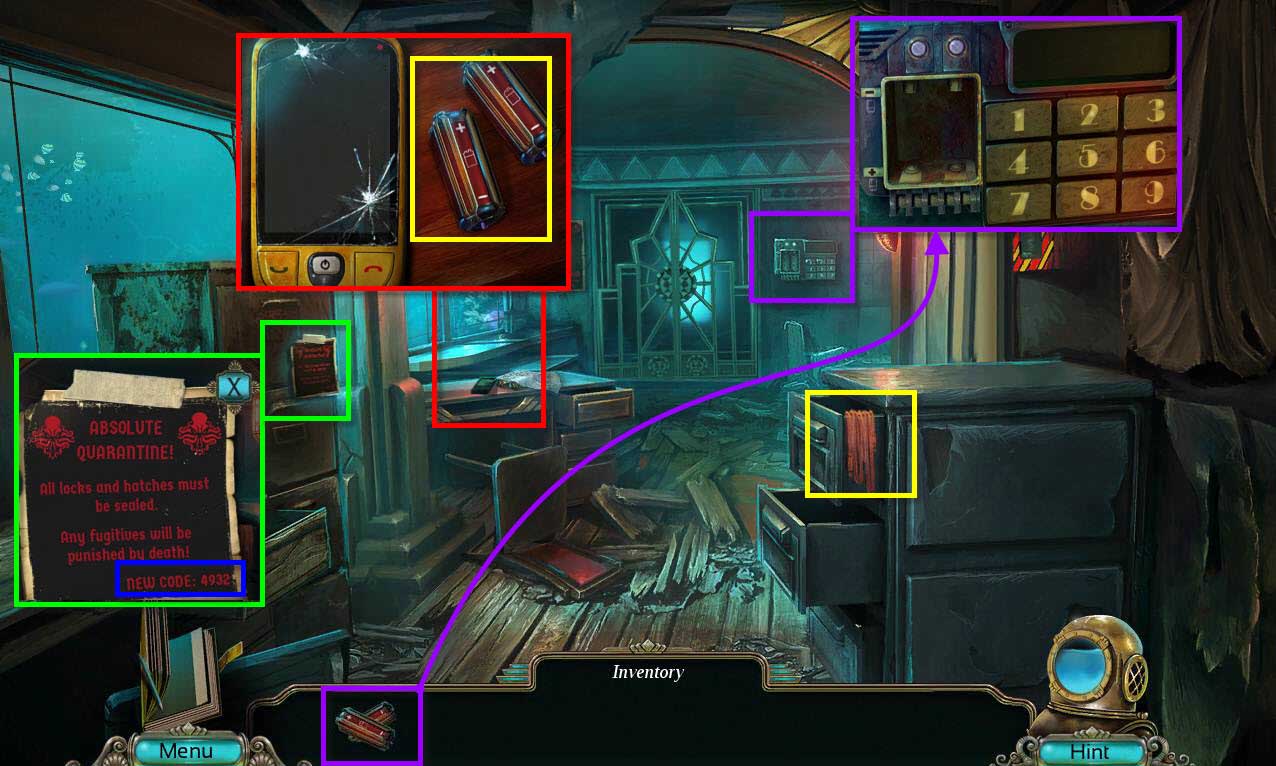
- Click on the desk to zoom in.
- Take the map and the BATTERIES behind it.
- Click on the cell phone to see Robert's text message.
- Click on the notice on the left and take note of the code 4932.
- Click on the door panel to zoom in.
- Use the BATTERIES on the controls.
-
Use the code 4932 on the door to open it.
- Click on the controls on the right.
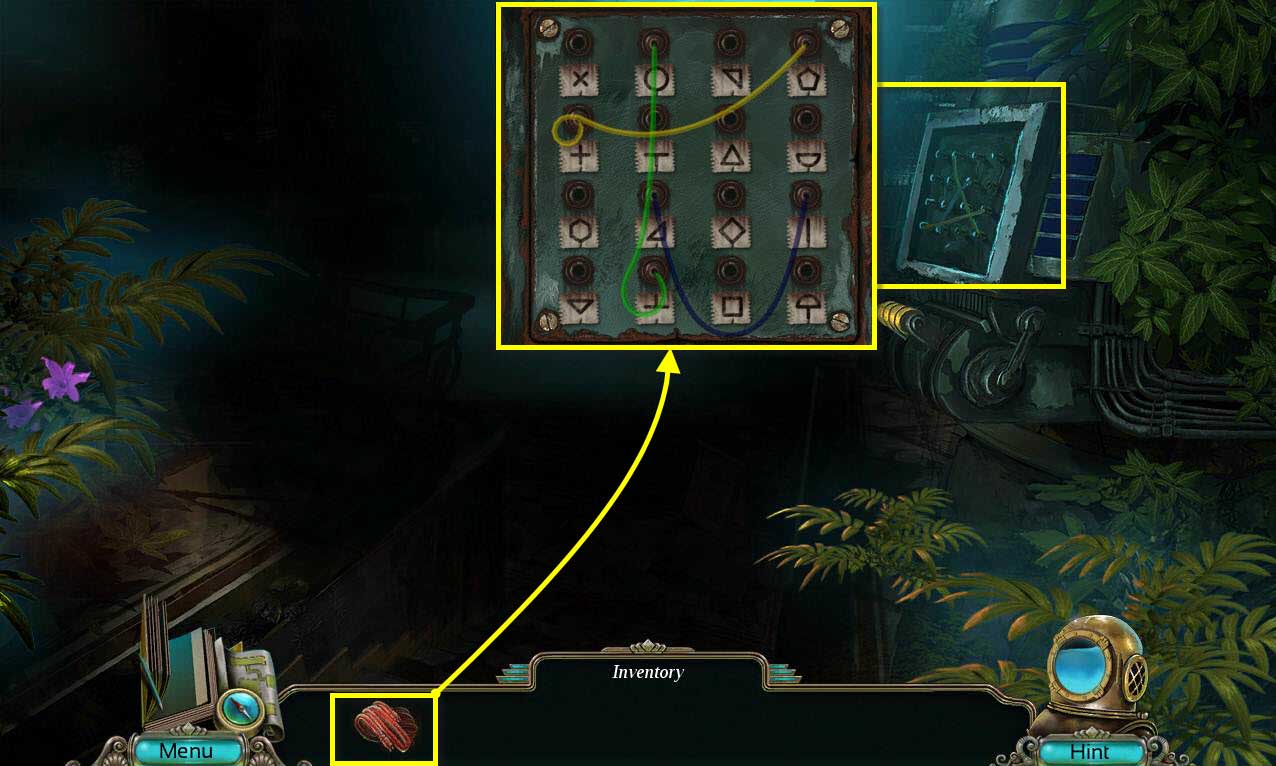
- Use the CABLE on the controls.
-
This will start a mini-game.
- The goal of the game is to connect the cables to the right outlet.
- See the images on the sides that relates to the cable color.
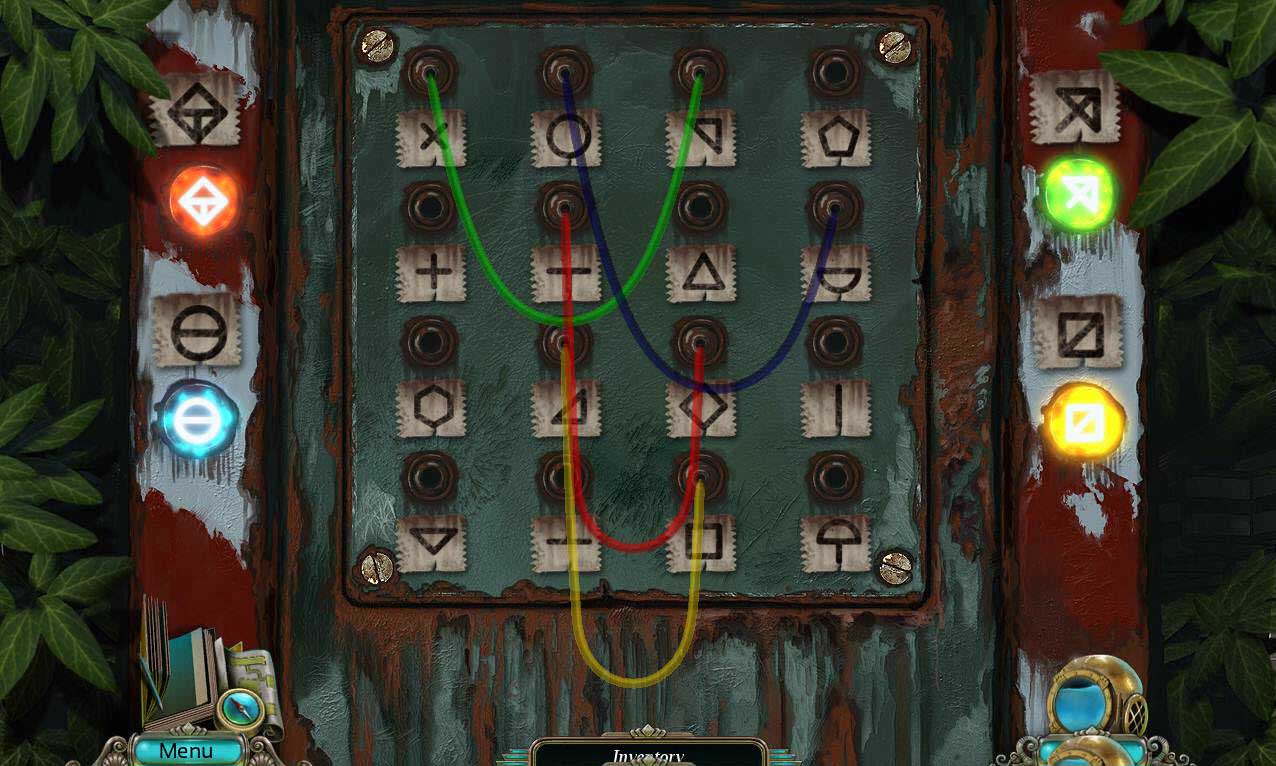
- See the screenshot for the solution.
-
When you are done, click on the lever to turn the lights on.
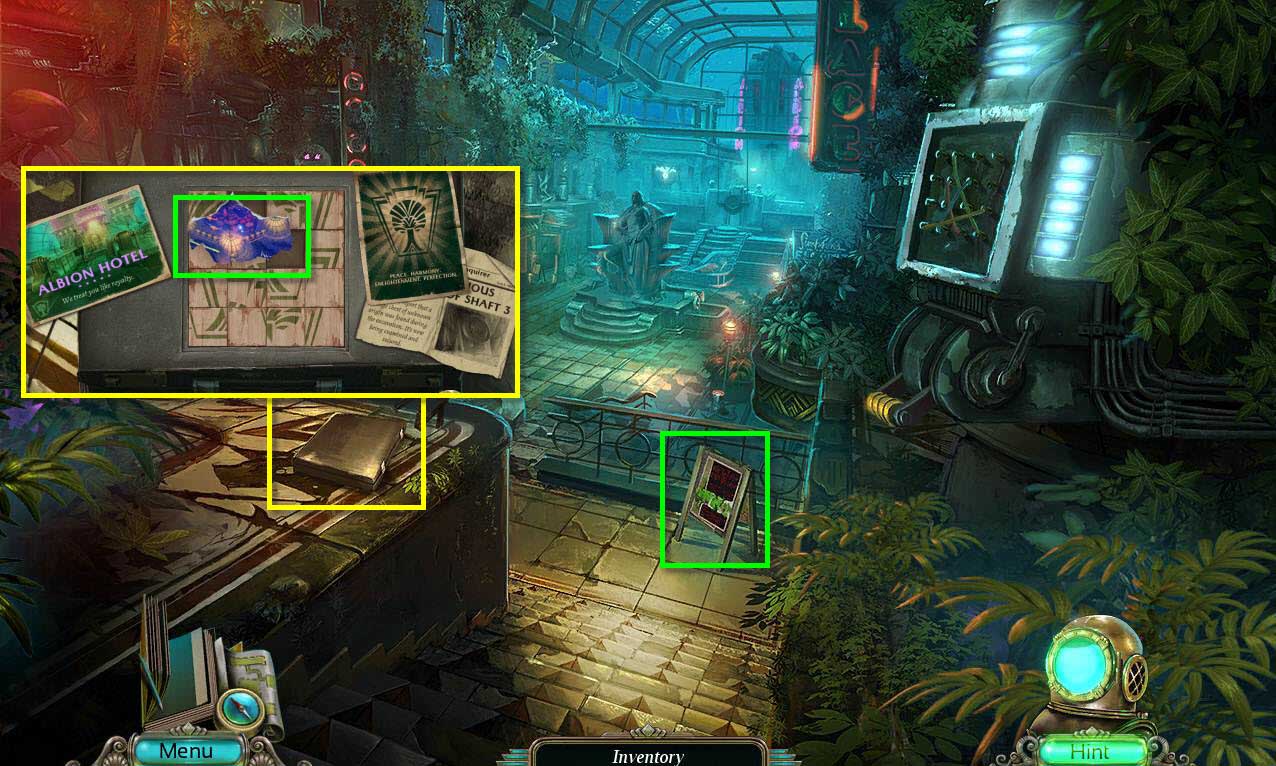
- Click on the briefcase to zoom in.
- Click on the latches to open it.
- Click on each of the brochures to move them.
- Take the MAP PIECE 1/4.
- Click on the sign to read it.
-
Head to the fountain.
- Take the FLASHLIGHT.
- Click on the bench a few times to move it off the grate.
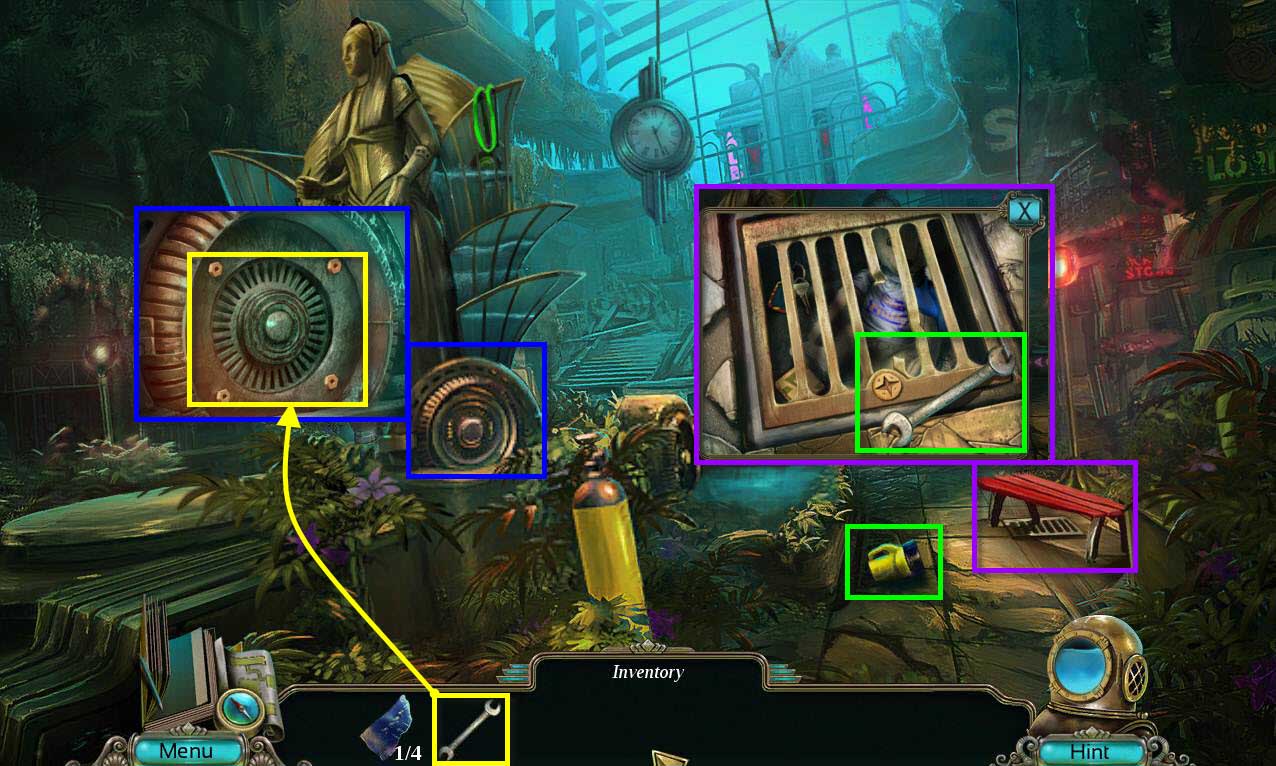
- Click on the grate to zoom in.
- Take the WRENCH.
- Click on the area by the statue to zoom in.
- Use the WRENCH on the bolts to remove them.
-
Take the GLOVES.
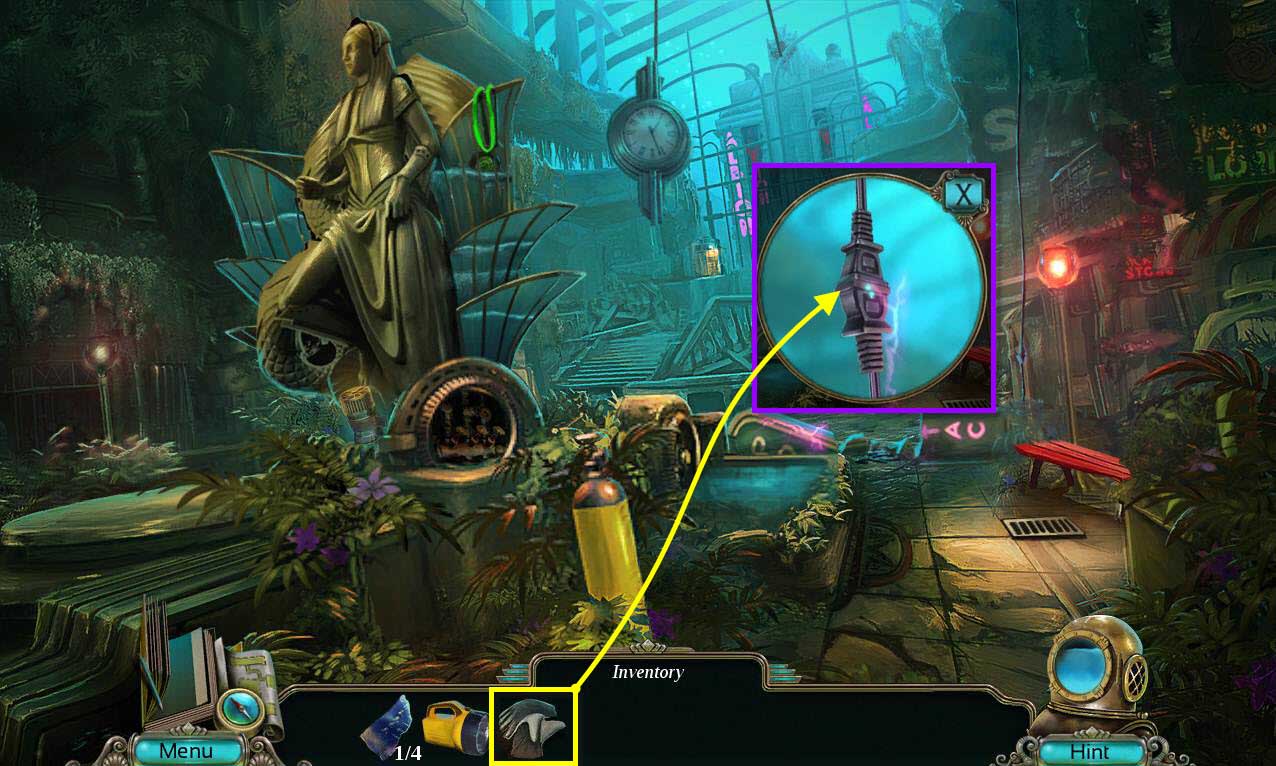
- Click on the wires to zoom in.
- Use the GLOVES on the wires to unplug them.
-
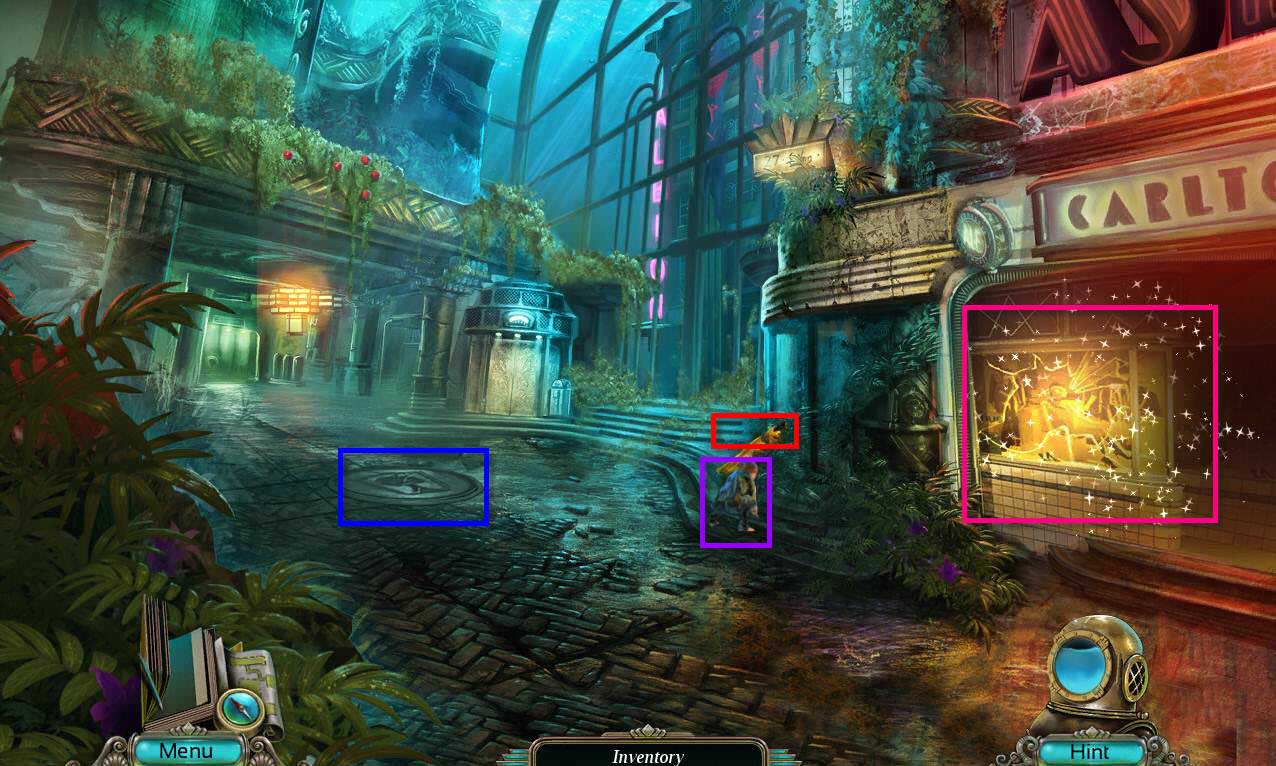
Go to the square.
 .
.
- Click on the girl.
- Click on the hatch and read the newspaper.
- Click on the fin to see that Robert has been here.
-
Click on the sparkles to start a hidden object game.
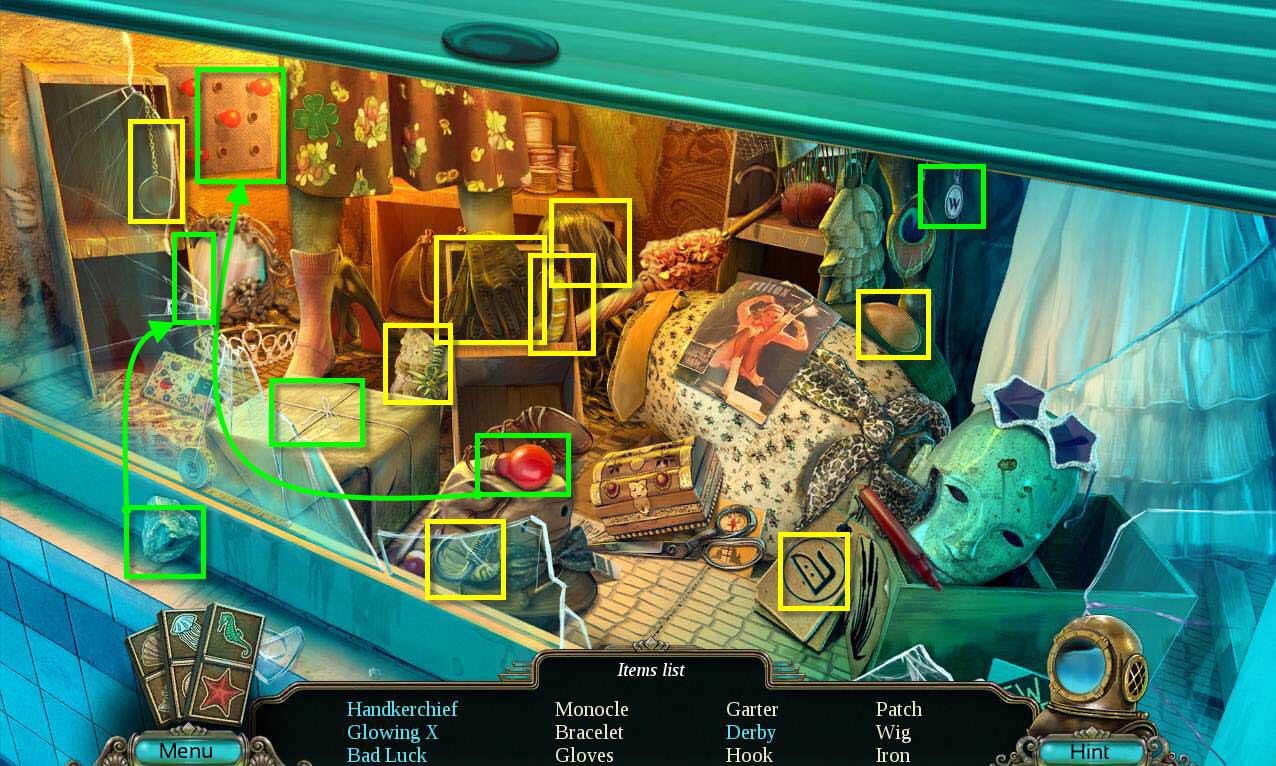
- Find all the items on the list.
- You will receive the FISHING HOOK AND LINE.
-
Go forward to the corridor.
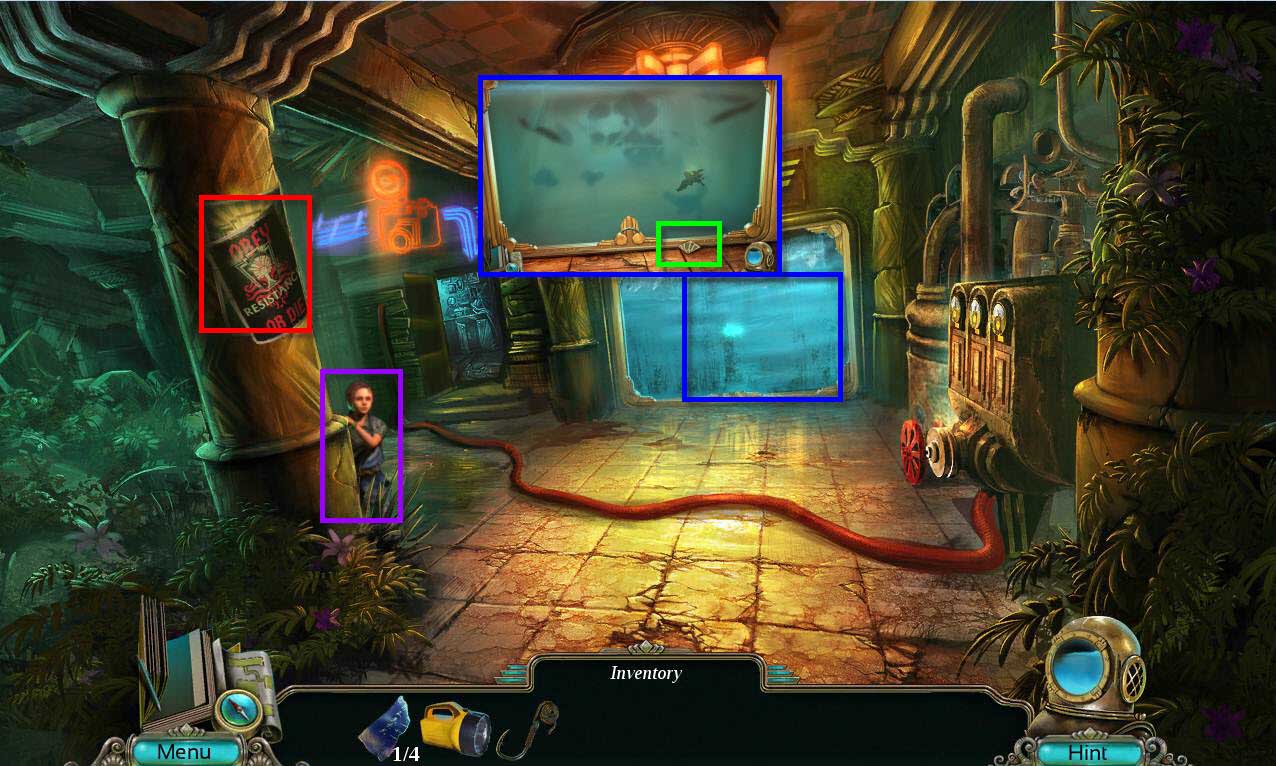
- Click on the girl.
- Click on the poster on the column to zoom in.
- Tear away the two posters to reveal something stuck in the wall.
- Click on the big window.
- Take the PUZZLE PIECE 1/2.
-
Go back two screens.
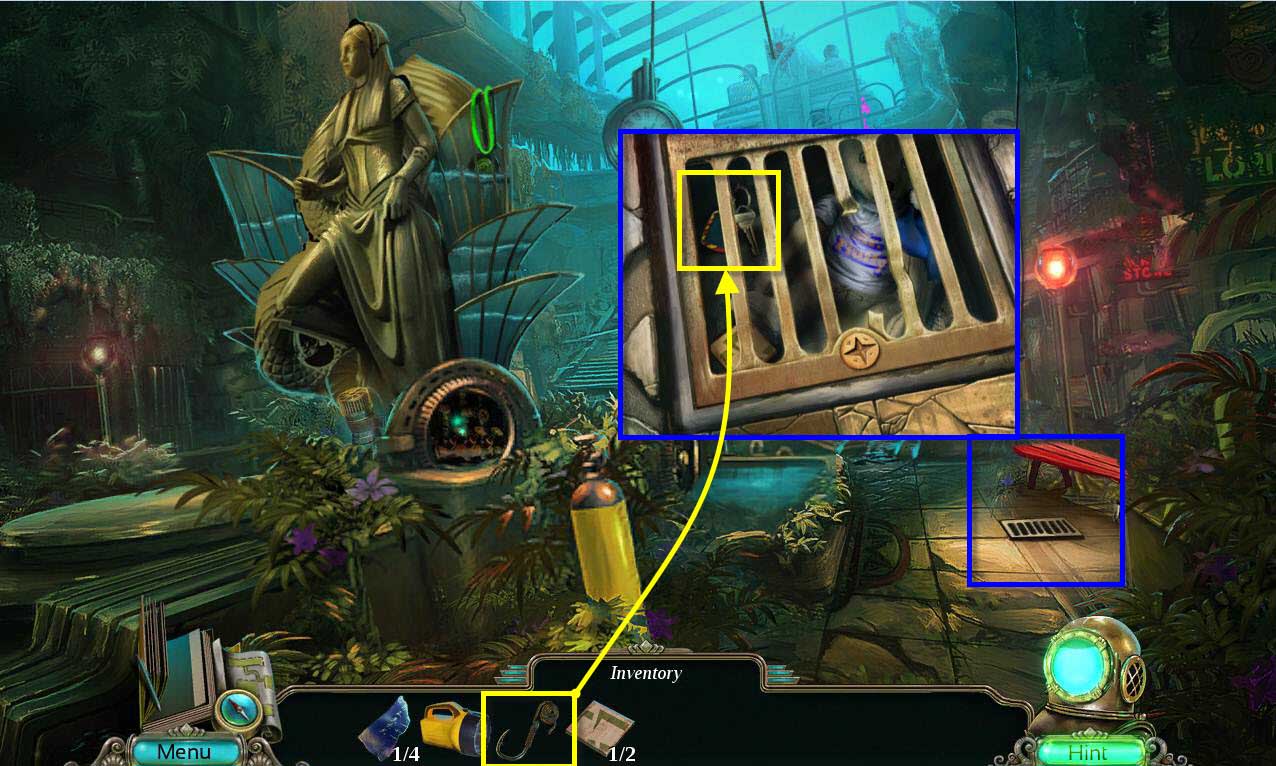
- Click on the grate to zoom in.
- Use the FISHING HOOK AND LINE on the key.
- You will receive the SMALL KEY.
-
Go back two screens.
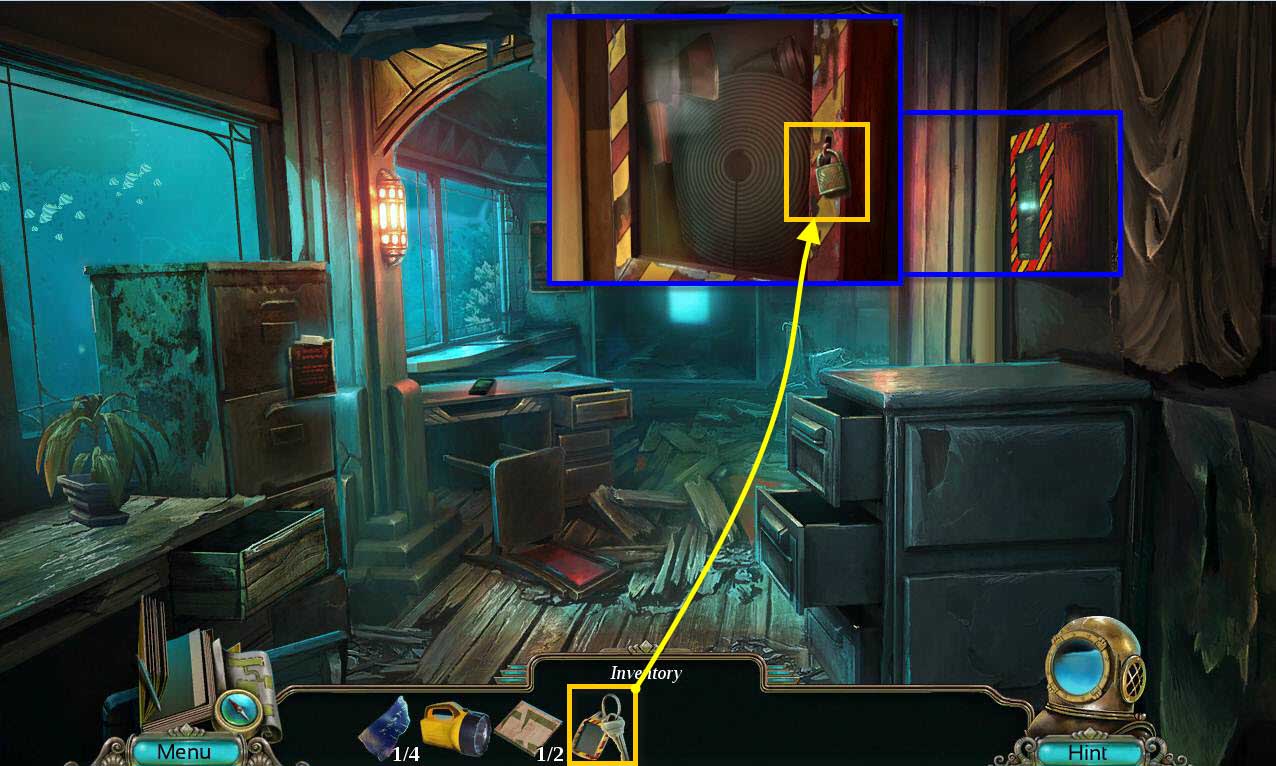
- Click on the emergency panel on the right wall to zoom in.
- Use the SMALL KEY to unlock the padlock.
- Click to open the door.
- Take the HATCHET.
-
Return to the Corridor.
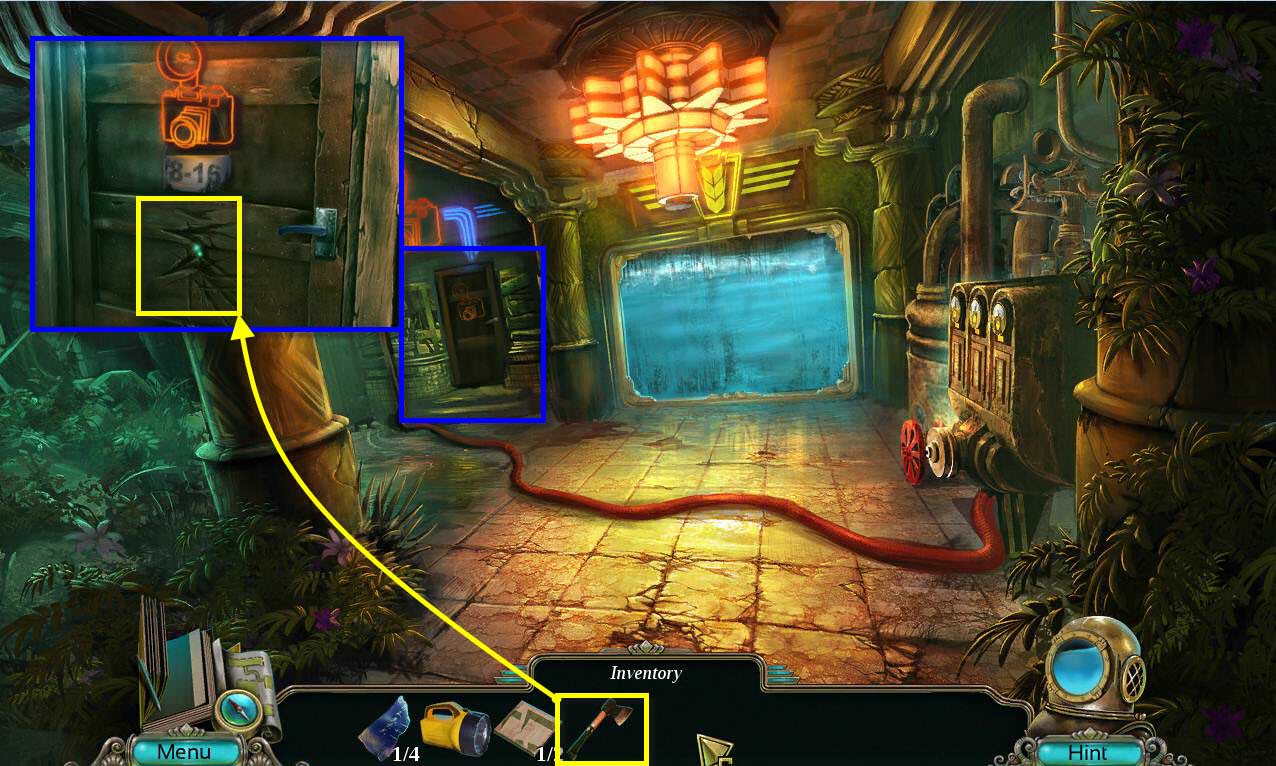
- Click on the door to zoom in.
- Use the HATCHET on the door a few times to break it down.
- Enter the Photographer's Studio.
Comments will load when you reach this part of the walkthrough.