
Shark Archipelago — Chapter 16
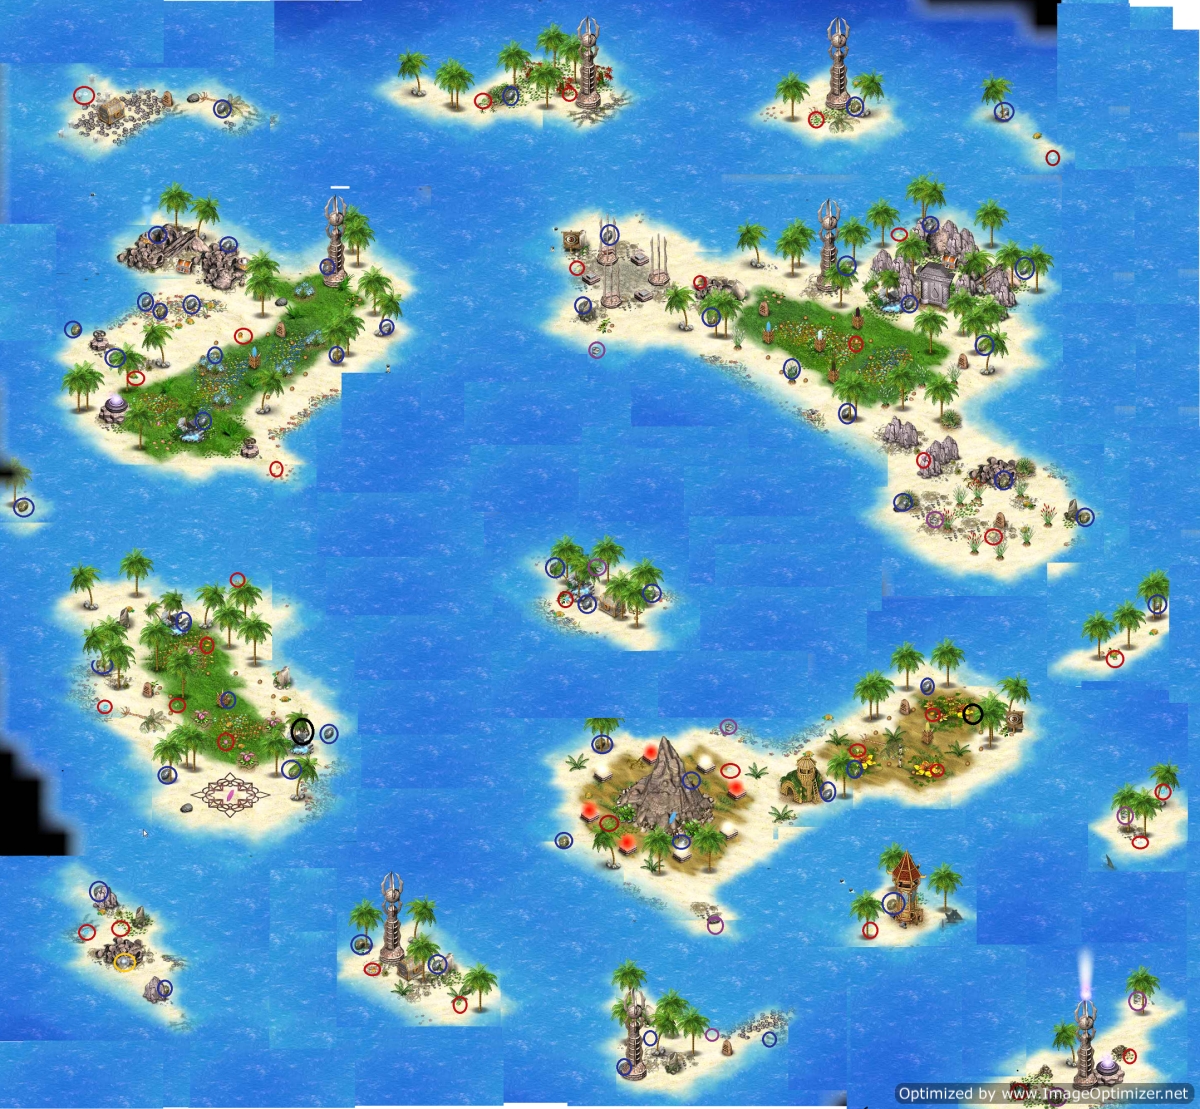
- You have just a scout and no building. Start exploring and you'll discover you are on a very small island, called Purple Island.
- Pick up turtle shells (blue circles) and skulls (purple circles) as you go.
- There is a tile turning puzzle at the south end of the island. See map for final image needed. Pick up a purple crystal.
- You will find a valve handle above the fountain in the south.
- Place the purple crystal in the gold device inside the circle of stones.
- When you are finished exploring, walk into the circle of stone and click on the device to travel to another island, Dirty Island.
- You need to get rid of the pulsating dirt blobs, by clicking on them twice.
- You will automatically get a yellow crystal when you get the last one.
- At the bottom of the island, there is a pattern of flowers that you will probably need.
- At the top of island, there is a puzzle. You need to get the balls down to the column directly below the starting.
- When you press the button, the heaviest ball moves; so you need to get the lightest ball to the ending point first, then the middle (white) one, and then the heavy (red) one.
- Press the buttons in this order: Left, right, bottom, left, right, bottom.
- Pick up the Energy Sphere.
- Place the yellow crystal in the bottom gold device, step into the circle, and press the center device.
- You will now travel to Yellow Island; keep picking up turtle shells and skulls.
- Find the second valve on Yellow Island (black circle).
- Find the red and white lights and match it to the flowers.
- Pick up the blue crystal.
- Return to the main island and use the blue crystal by placing it in the gold device, walk into the circle, and click on the center device.
- On the blue island, place the two valves and the Energy Sphere to empty the lagoon.
- Pick up the Aqualung (scuba gear) from the chest and now you can swim; but watch out for sharks.
- Go back to the main island and start swimming north and counter-clockwise. If you look at the main map you can see that there are sharks swimming around the center.
- Note that if you do die from a shark, then you will come back to life on the Yellow Island.
- In the northwest corner you will find a chest that needs 9 skulls. It holds the map to Ghost Island.
- In the southwest corner, you will find an Energy Sphere.
- When you get to the guide stone that says Do Not Feed the Sharks, take the shortest route up to the closest island (yellow)
- See the tower? Go to the yellow flower and swim over to that island. Hopefully you can clear the black before you get killed and find out that you need to give the Tower's occupants 24 green shells. They will kill off the the sharks down in the southeast.
- While they're doing that, you should try (and keep trying) to swim over to the center island.
- The sharks move around it in two groups, so just do your best to time it so that you get over there between groups; if you die, just plant your flag back at the scout lodge on yellow island until you come back. I didn't try this; but picking up your swimmer might help.
- Once you get over to the central island, pick up the stuff and see that you need 32 blue shells to open the chest. It holds the totem.
- Just plant your flag on the scout lodge and come back to life over there.
- Swim over to the southeast island once the sharks over there are gone.
- Put the energy sphere at the base of the lighthouse.
- Turn the light so that it lines up with the one to the west and turn that one to line up with one in the north, then east, south, west, and then south.
- Open the chest with the Rune of Water.
- Return to the main island and place the rune on the gate.
- Open the chest and pick up the Shaman's Mask.
- You will need to return later after you get a harpoon from Lonely Iceberg.
- Fight the Great White to the north of the central island. You'll need to kill the other sharks first.
Comments will load when you reach this part of the walkthrough.