
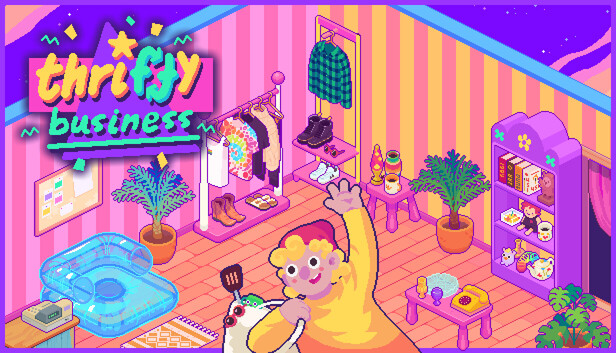
Best Shelf, Rack, and Room Layouts
Every Thrifty Business player eventually meets the same tiny thrift-shop tragedy: you find the perfect odd little object, carry it to the shelf where it clearly belongs, and the game says, politely but firmly, no. The fix is to stop treating every display like a junk drawer. Build each shelf, rack, and room around one clear job, then let tags, color, and item size decide the final spot.
A tag is an item label that tells you what kind of thing it is, such as a theme, color, use, or style. A customer request is when a shopper asks for a certain kind of item. A shop score is a score tied to your shop's organization. The game also rewards clean grouping with community points. Good layouts help all three at once: they make the shop easier to read, make likely request items easier to find, and keep bulky flea-market chaos from eating the whole room.
The goal is not to make your shop look sterile. This is still a cozy secondhand treasure cave. You want the happy Unpacking feeling of putting a mug, a toy, and a book where they finally make sense. Use the layouts below as a starting map, then adjust when a new room or better display piece opens up.
Starter Layout Rule
In the first room, keep the middle walk path clear and push displays against the walls. Place your smallest, easiest-to-read items near the front. Put bulky decor and awkward objects farther back until you learn which items sell, which groups raise score, and which requests you see often.
| Area | Best Use | Why It Works |
|---|---|---|
| Front-left shelf | Books, small toys, small decor | Easy to scan fast when a request comes in. |
| Front-right shelf or table | Color set or theme set | Good place to test tag grouping without moving the whole shop. |
| Side wall rack | Clothes and hanging items | Keeps soft goods away from small clutter. |
| Back wall shelf | Large decor, odd shapes, overflow | Useful holding zone for items that refuse the obvious shelf. |
| New room entrance | Best tag group or request items | Makes the next room feel useful right away. |
Best Shelf Setups
Think of each shelf as a tiny story. A shelf with six unrelated objects may look thrifty, but it is harder to read. A shelf with one clear tag plan is easier to improve your organization score, easier to shop from, and nicer to look at.
| Shelf Type | Use It For | Layout Pattern | Do Not Waste It On |
|---|---|---|---|
| Small shelf | Books, figures, mugs, tiny decor | One tag per shelf, or one color from left to right | Large items that leave empty dead space |
| Tall shelf | Mixed small collections | Top row decor, middle row books, bottom row toys or heavy-looking items | Only one tiny item per row |
| Wide shelf | Theme displays | Place the biggest object in the center, then smaller matches on both sides | Random overflow unless you are sorting after a box |
| Table | Bulky decor, statement pieces, request staging | One large item plus two or three small matches | Items that could sit neatly on a shelf |
If an item will not fit where your brain says it should, do not fight it for five minutes. Move it to a temporary back-wall table or overflow shelf. Finish the rest of the box first. Once the room is calm again, test that awkward item on wider furniture. This keeps one stubborn lamp, toy, or mystery object from freezing the whole day.
Rack Layouts for Clothes and Soft Goods
Racks work best when they are treated like their own department, not as decoration. Put every clothing-style item on the same wall when possible. If you split racks across rooms, split them by tag or color, not by whatever came out of the box first.
- Color rack: Put similar colors together. This makes the rack easy to read and helps you spot request matches quickly.
- Style rack: Keep fancy, casual, cozy, or themed clothes together if the item tags support it.
- Overflow rack: Use one rack as a holding rack near storage or the back wall. Clear it at the end of the day.
- Request rack: When a customer asks for clothing, move likely matches to one rack until you solve it.
Do not place racks in the center of a small room unless you have no other choice. They block the visual flow and make the room feel smaller. Against a wall, they read like a neat little vintage section. In the middle, they can look like laundry developed a business plan.
Tag-Friendly Display Plans
Use this table when shop score feels unclear. You are not trying to guess magic. You are making each display send one clean signal, like color, theme, or purpose.
| Goal | How to Arrange | Best Display | Good For |
|---|---|---|---|
| Theme score | Group items with the same theme or use | Wide shelf or table | Decor sets, toys, hobby items |
| Color score | Keep close colors together in a row | Small or tall shelf | Books, mugs, tiny objects |
| Clean request search | Keep likely request items in one zone | Front shelf or front rack | Fast customer checks |
| Bulky item control | Give each large item breathing room | Table or back wall | Lamps, big decor, odd shapes |
| Pretty shop feel | Mix one large object with smaller matches | Table or wide shelf | Screenshot-ready room corners |
Room Layout Checklist
When you unlock a new room, do not spread every category thinner right away. First, give the room one job. A new room is most helpful when it removes pressure from the first room.
- Move one full category into the new room, such as clothes, books, toys, or decor.
- Keep the first room for fast-selling items and customer request checks.
- Put bulky pieces in the room with the most open wall space.
- Leave one empty shelf or table for mystery-box sorting.
- Keep one display near the entrance for your best tag group.
- Do a final walk-through before opening: if two displays have the same job, merge them or split by color.
A good early split is simple: front room for small readable items, side or back room for clothing and larger decor. This keeps the first room bright and easy to shop while still giving your weird treasures a place to be weird with dignity.
Customer Request Setup
Requests are easier when your shop has zones. You do not need to remember every object if the room is arranged well. Let the layout do the memory work.
| Request Clue | Check First | Backup Spot | Layout Habit |
|---|---|---|---|
| Book or reading item | Book shelf | Small decor shelf | Keep all books on one shelf until you have many. |
| Toy or playful item | Toy shelf | Theme table | Do not mix toys into every room. |
| Clothing or wearable item | Clothes rack | Overflow rack | Sort by color when tags feel vague. |
| Home decor | Wide shelf or table | Back wall | Give decor more space than books or toys. |
| Color-based request | Color shelf | Rack of same color | Keep at least one display sorted by color. |
If you get stuck on a request, pause your normal sorting and make a small search zone. Pull every possible match onto one front table or shelf. Compare them there, pick the best fit, then return the rejects to their normal homes. This is faster than checking the whole shop over and over.
Achievement Cleanup Layout
Late in Thrifty Business, your shop may be full, pretty, and still hiding a few cleanup goals. Use a practical layout for those final runs. You can make it cute again after the last box, request, or shop-score push is done.
- Collection cleanup: Keep one shelf empty for new finds so you can see what is actually new.
- Request cleanup: Place common request types near the entrance: books, toys, clothes, and decor.
- Score cleanup: Build three strong tag displays instead of many weak mixed shelves.
- Room cleanup: Visit each room and give it one clear category before buying more furniture.
- Furniture cleanup: Add displays only when they solve a space problem. Do not buy a new piece just to hold one tiny object.
The best layout is the one that makes your next action obvious. If you open a box and already know where books, clothes, toys, decor, and awkward large items go, your shop will feel calmer right away. That is the sweet spot: tidy enough to work, thrifted enough to feel loved, and just messy enough to make the next perfect find exciting.
Comments will load when you reach this part of the walkthrough.