Chapter 4: Bad Dreams
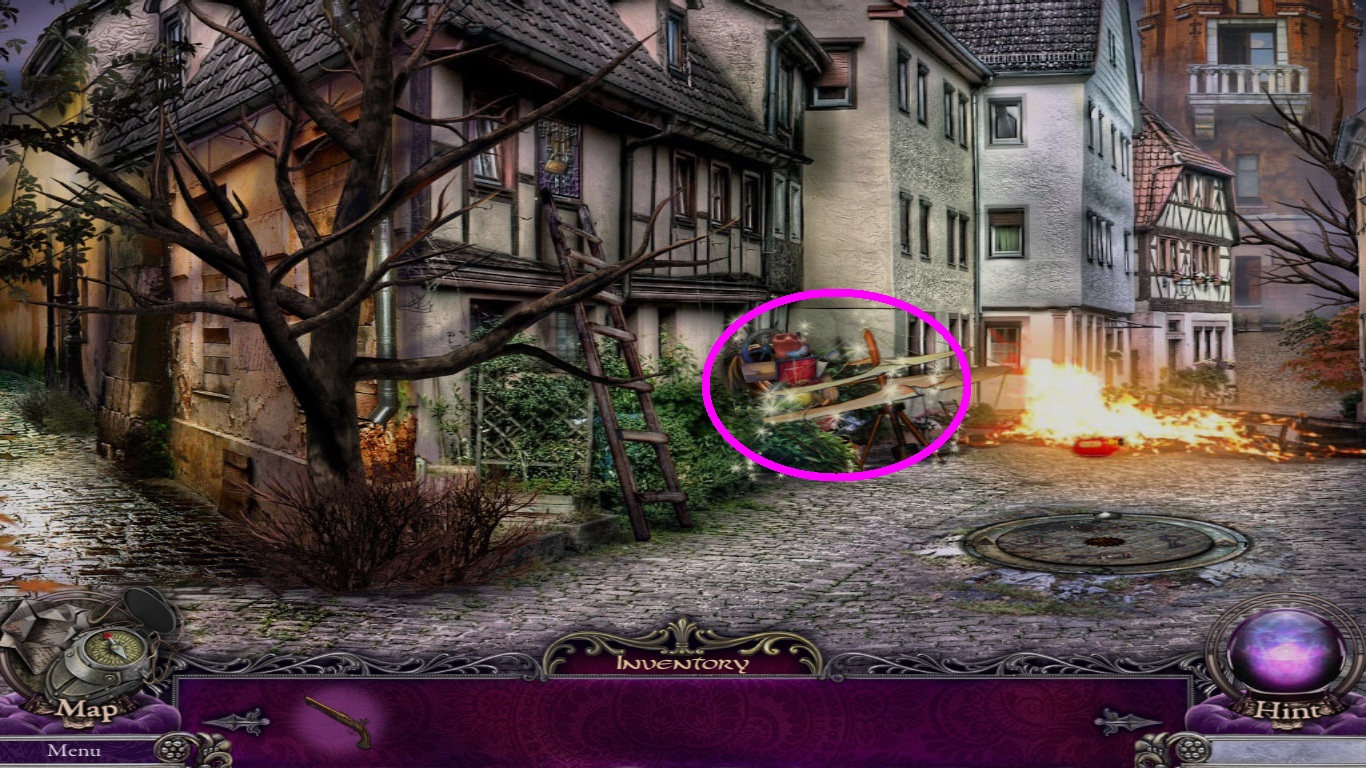
- Click the crashed flying machine (pink circle) to open a hidden object area.
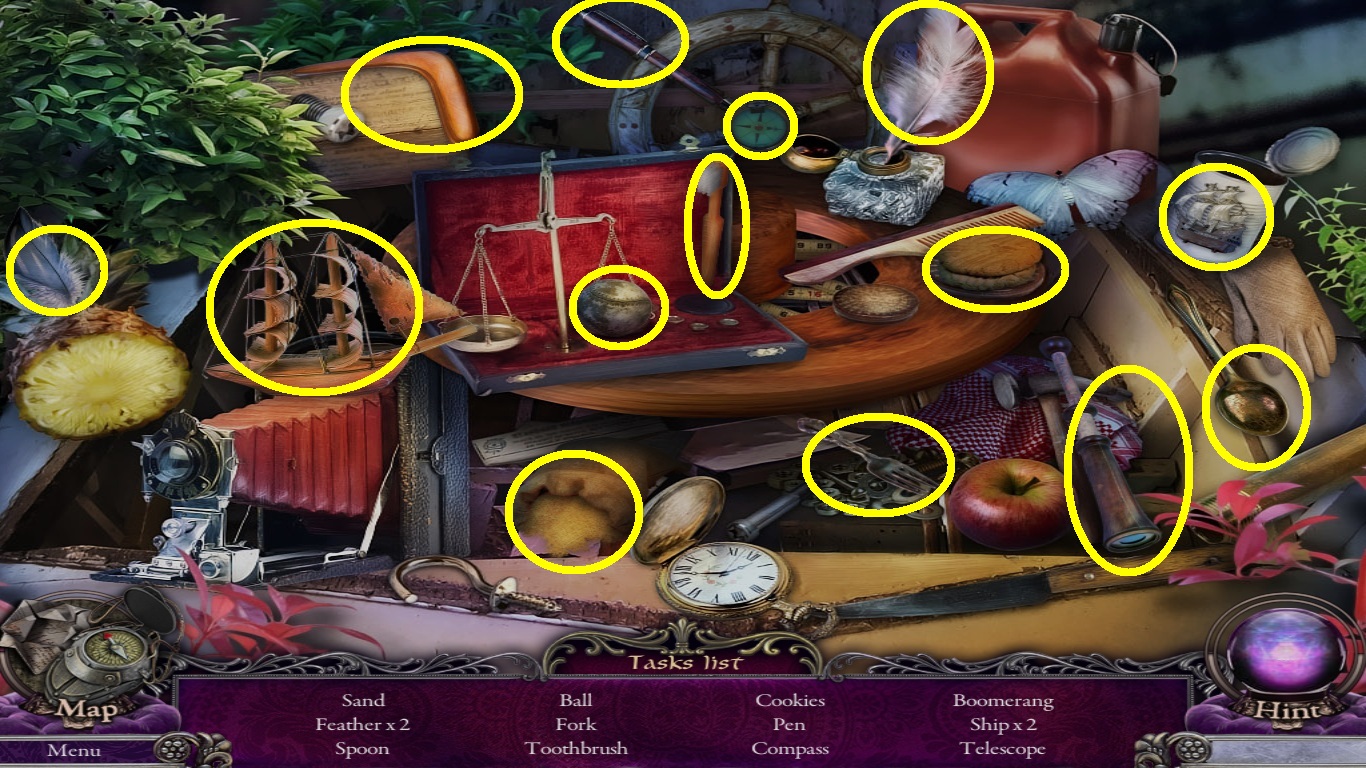
- Find all the objects on the list (yellow circles).
- Pick up the sand.
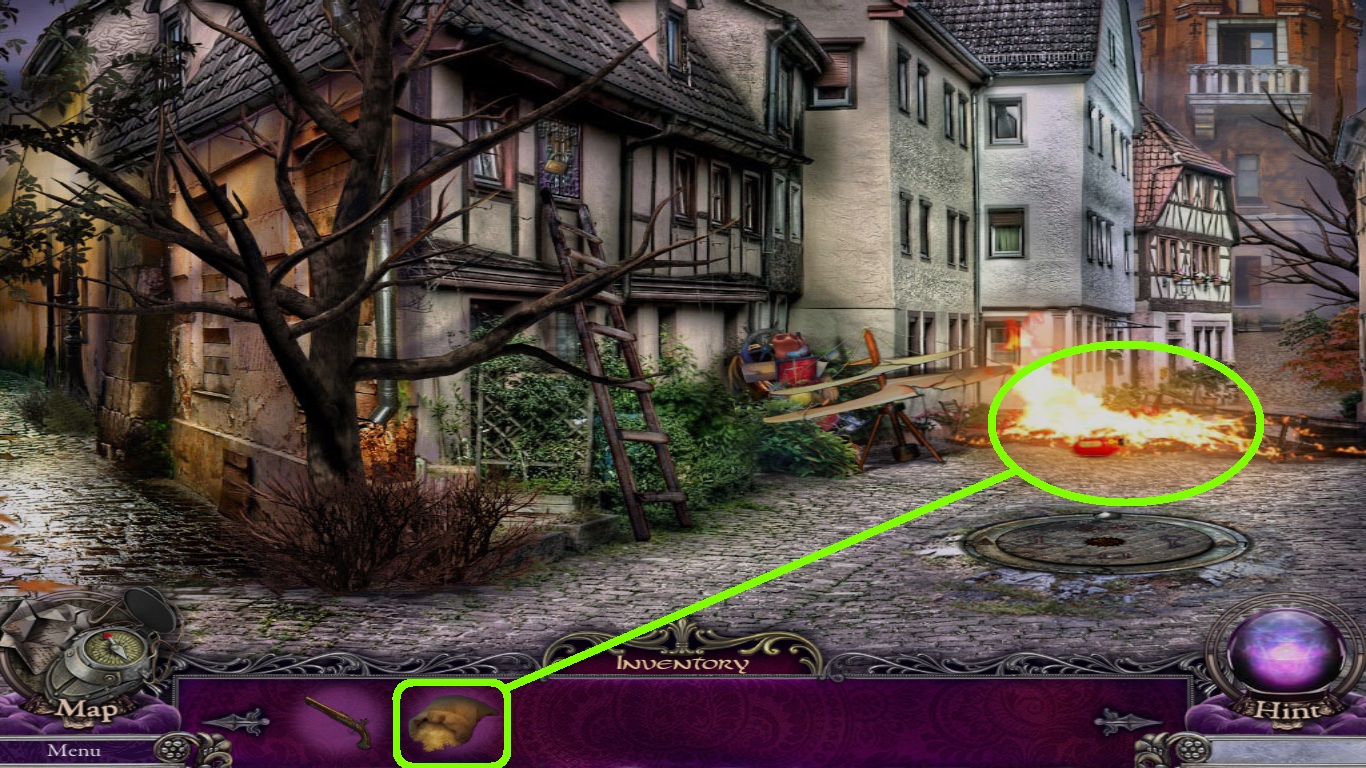
- Zoom into the fire (green circle).
- Select the sand (green square) from the inventor inventory; throw it onto the fire.
- Go to the tower entrance.
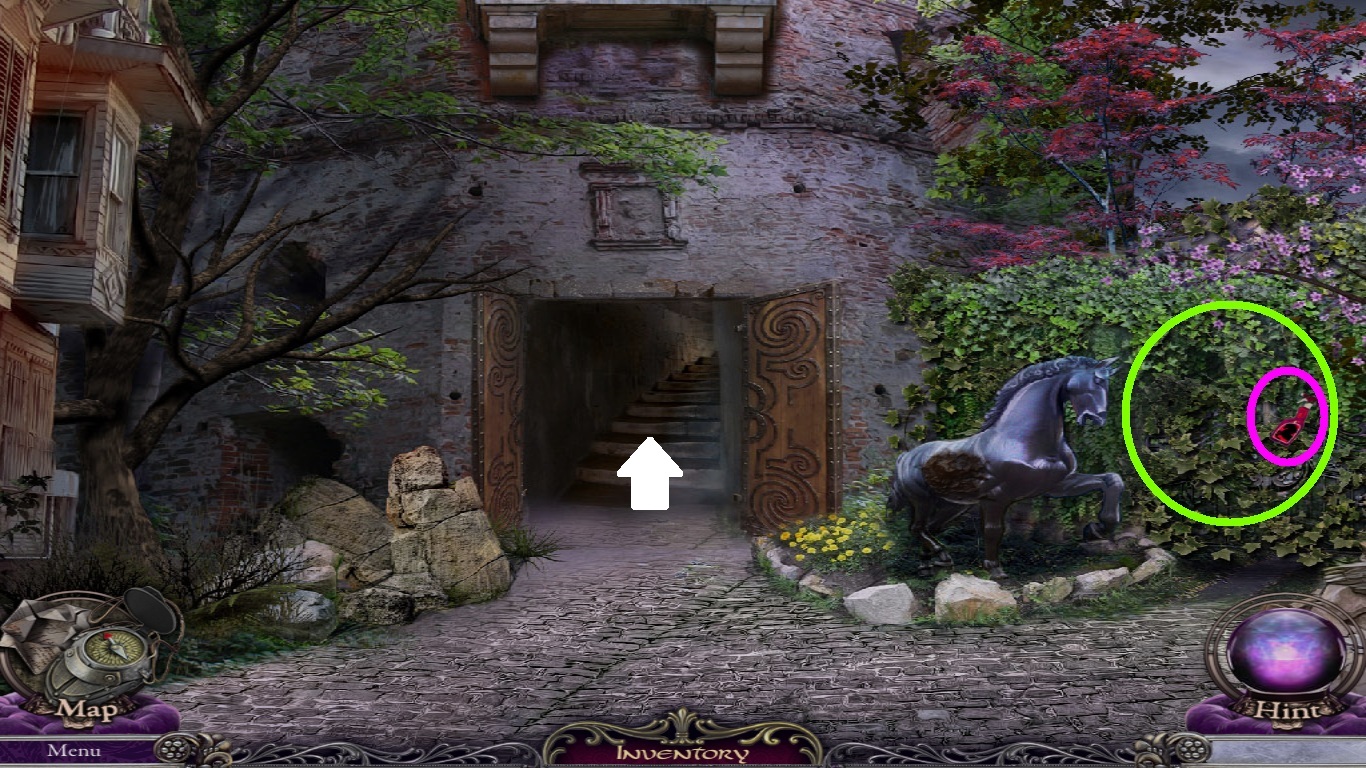
- Zoom into the bushes (green circle).
- Pick up the detergent (pink circle).
- Go up the stairs (white arrow) to the throne room.
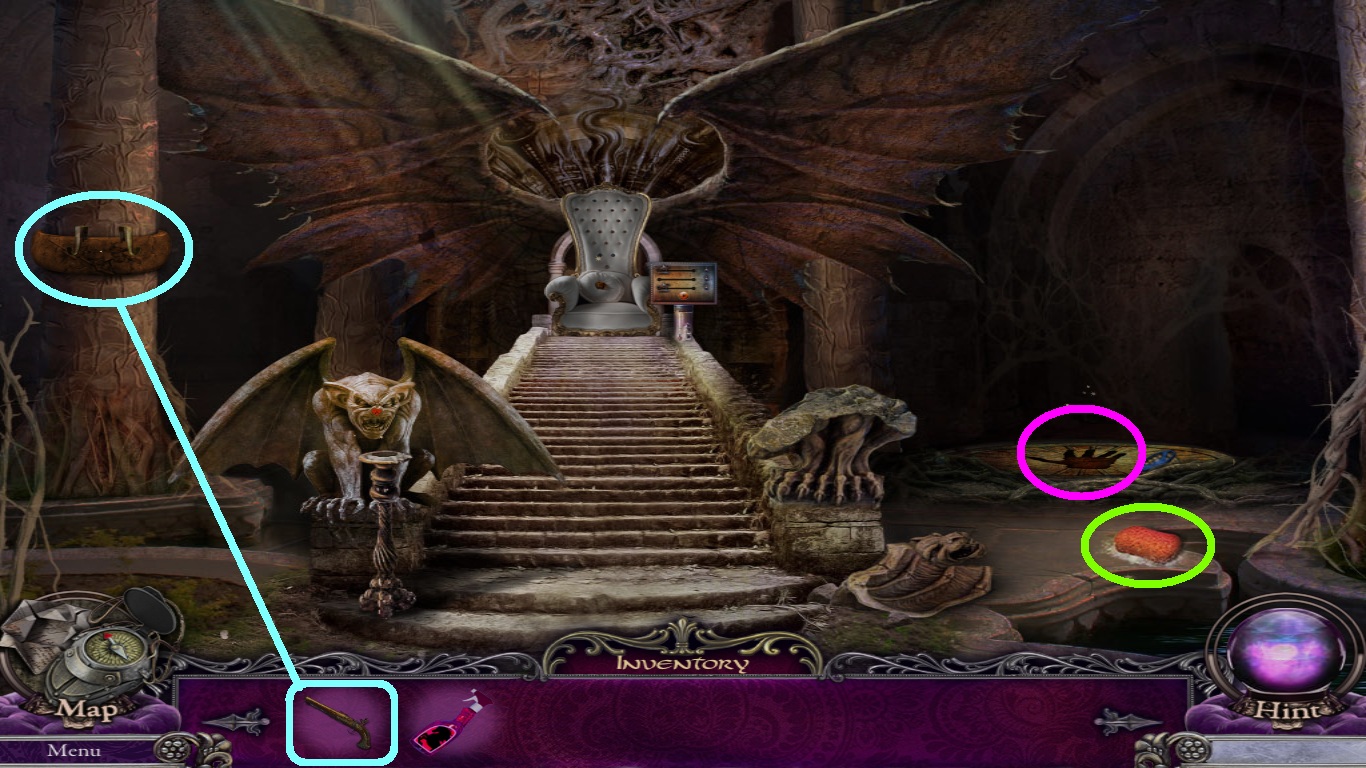
- Pick up the sponge (green circle).
- Zoom into the handprint (pink circle).
- Pick up the valve.
- Zoom into the tree (aqua circle).
- Select the musket (aqua square) from the inventory; place it on the tree.
- Pick up the bullet.
- Place the bullet into the musket.
- Pick up the loaded musket.
- Go back to the entrance.
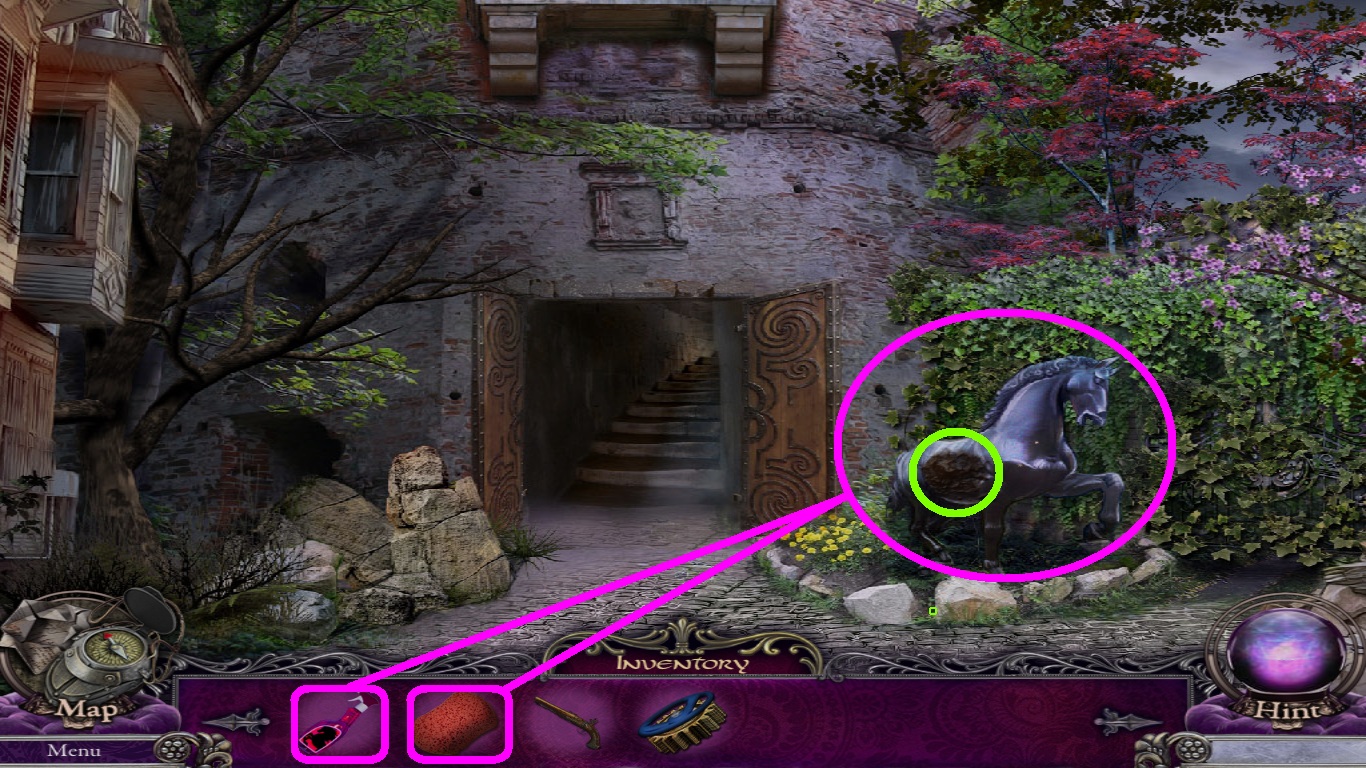
- Zoom into the horse (pink circle).
- Select the detergent and the sponge (pink squares) from the inventory; use both items on the horse.
- Open the opening (green circle) in the horse; pick up the horse rider.
- Go back to the throne room.
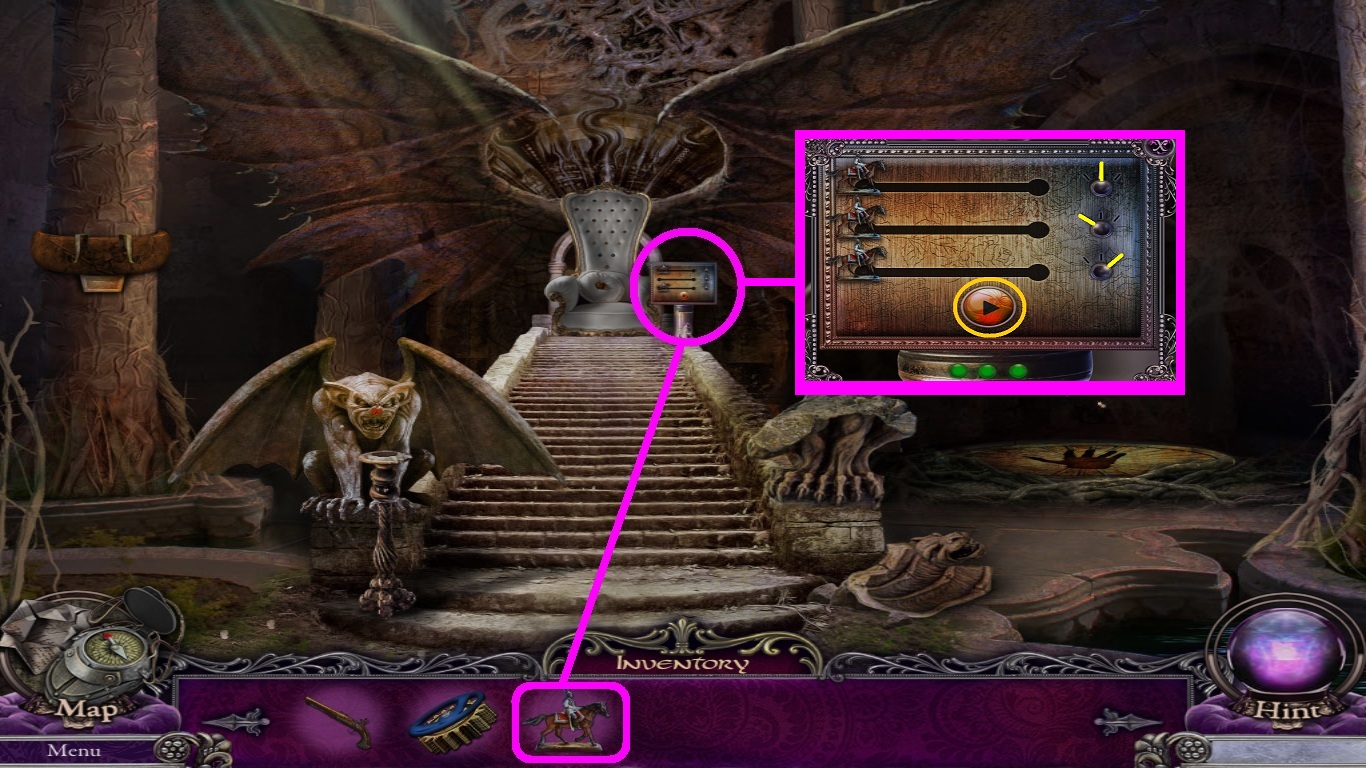
- Zoom into the contraption near the throne (pink circle).
- Select the horse rider (pink square) from the inventory; place it into the contraption to start a mini game.
- Your goal is to make all of the horses move at the same speed.
- Notice the dial settings (yellow lines); once the setting is correct a green light will appear.
- Push the orange button (orange circle).
- Go to the secret room behind the throne.
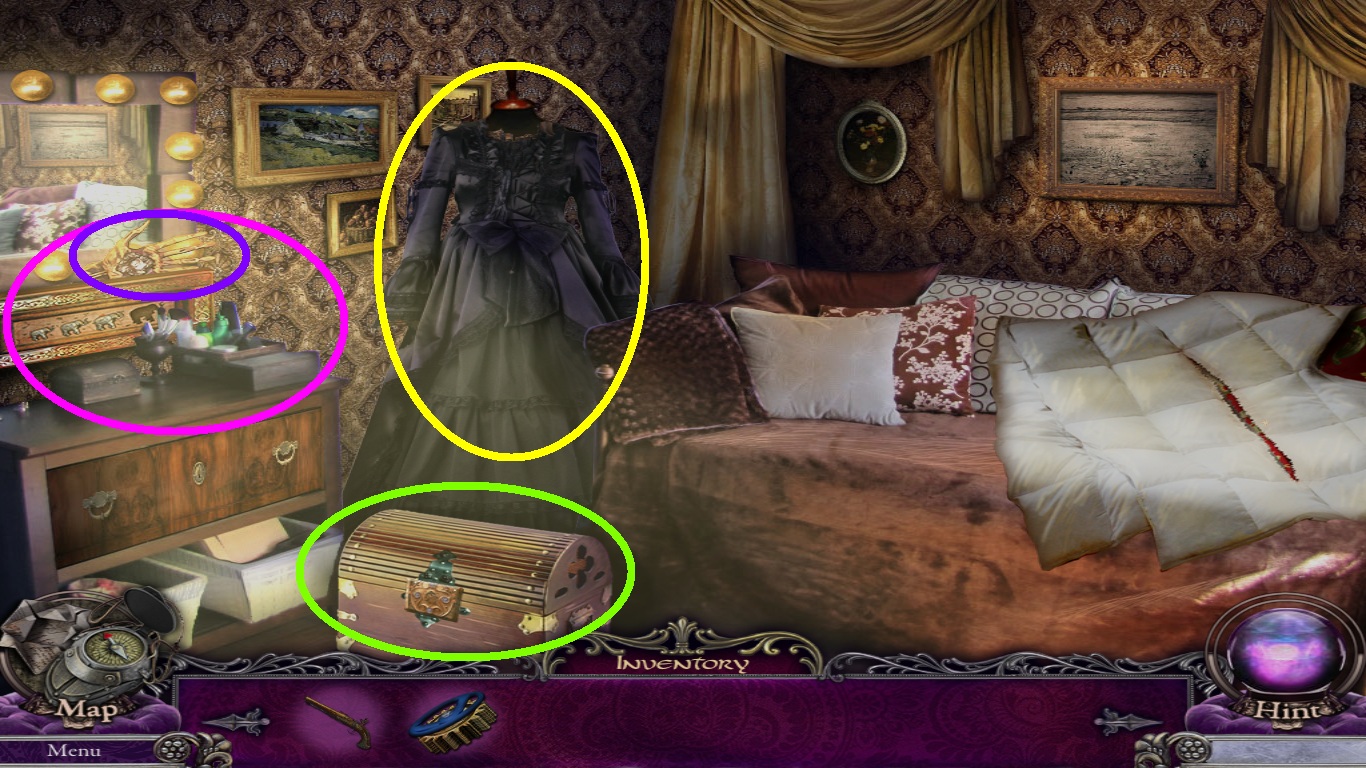
- Zoom into the vanity (pink circle).
- Pick up the plastic hand (purple circle).
- Take the dress off of the dress form (yellow circle).
- Notice the chest (green circle).
- Go to the throne room.
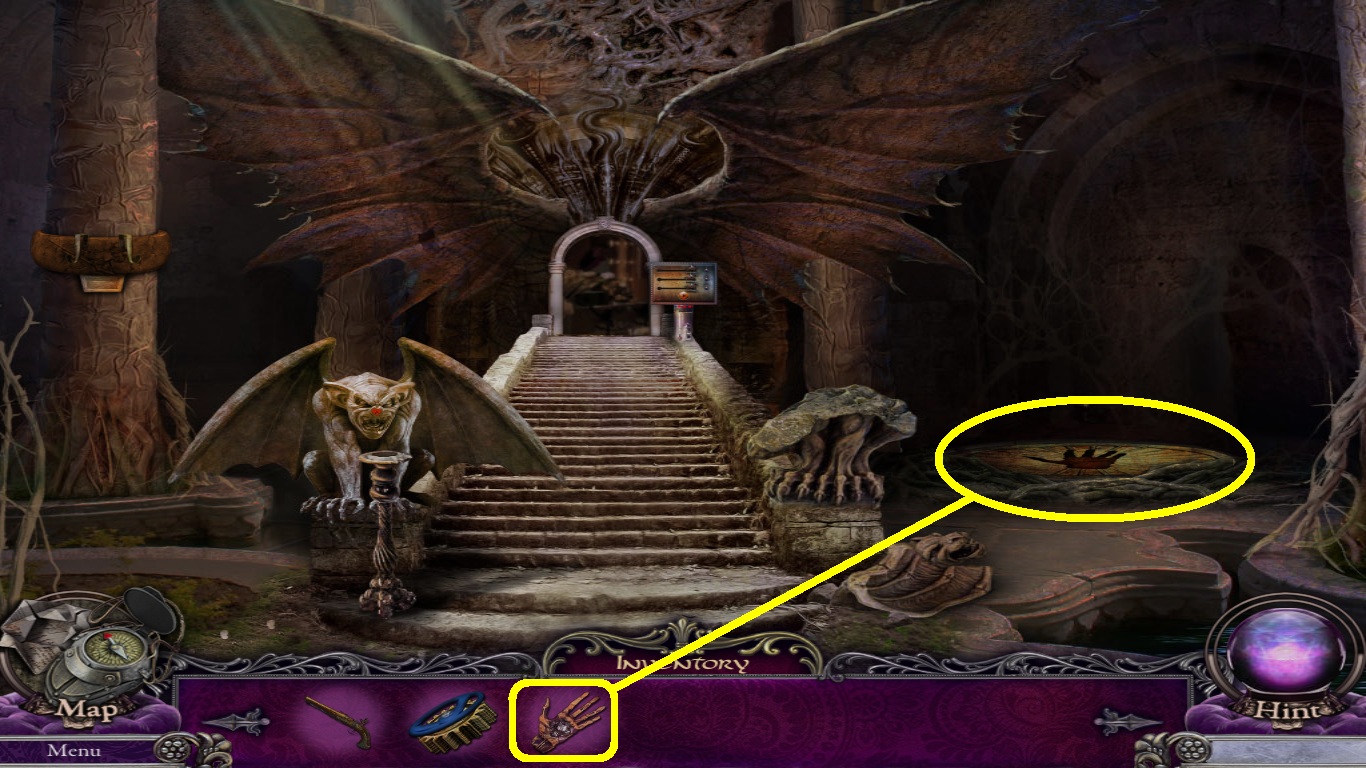
- Zoom into the handprint (yellow circle).
- Select the plastic hand (yellow square) from the inventory; place it onto the handprint.
- Pick up the pin.
- Move forward in that direction.
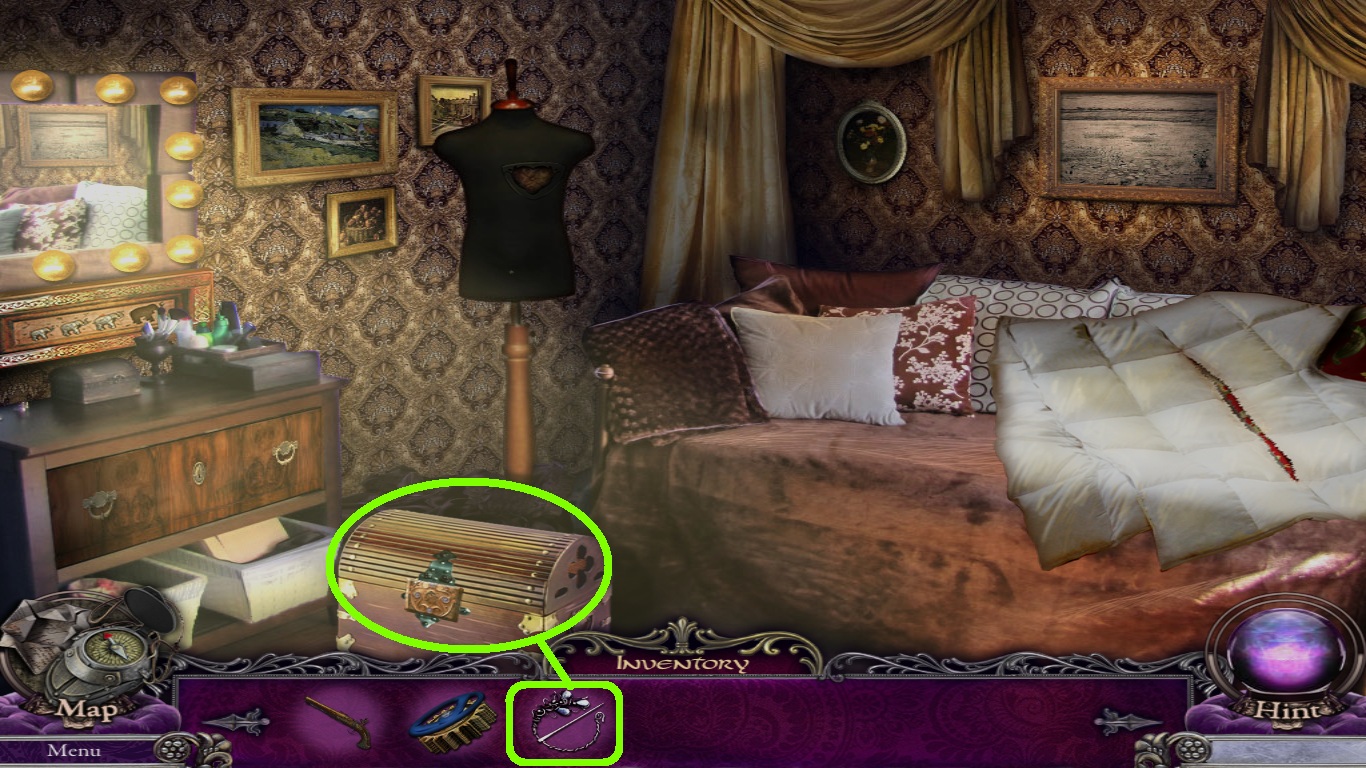
- Zoom in to the chest (green circle).
- Select the pin (green square) from the inventory; place it into the groove to open a mini game.
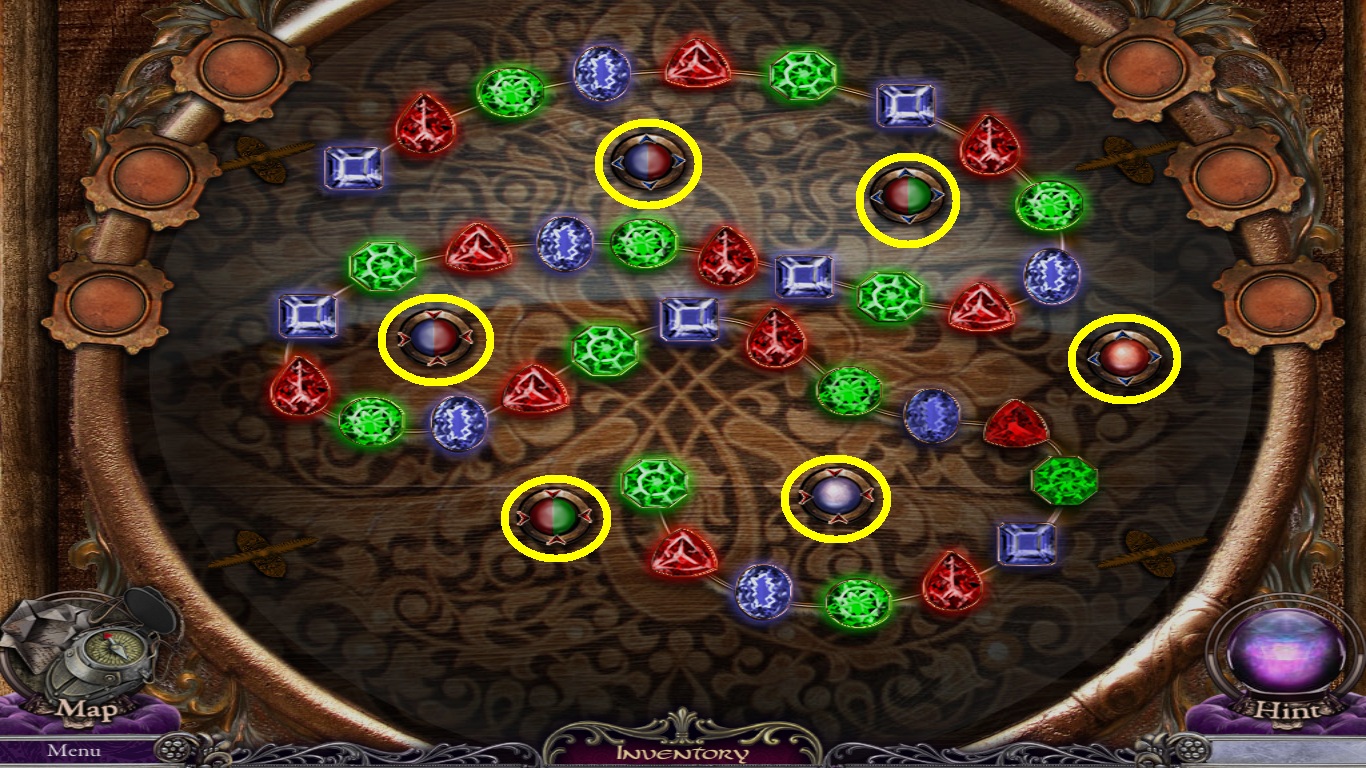
- Using the magnets move the gemstones to their outlines.
- To solve the puzzle; follow the magnet patterns (yellow circles).
- Click the magnets into their positions and let go.
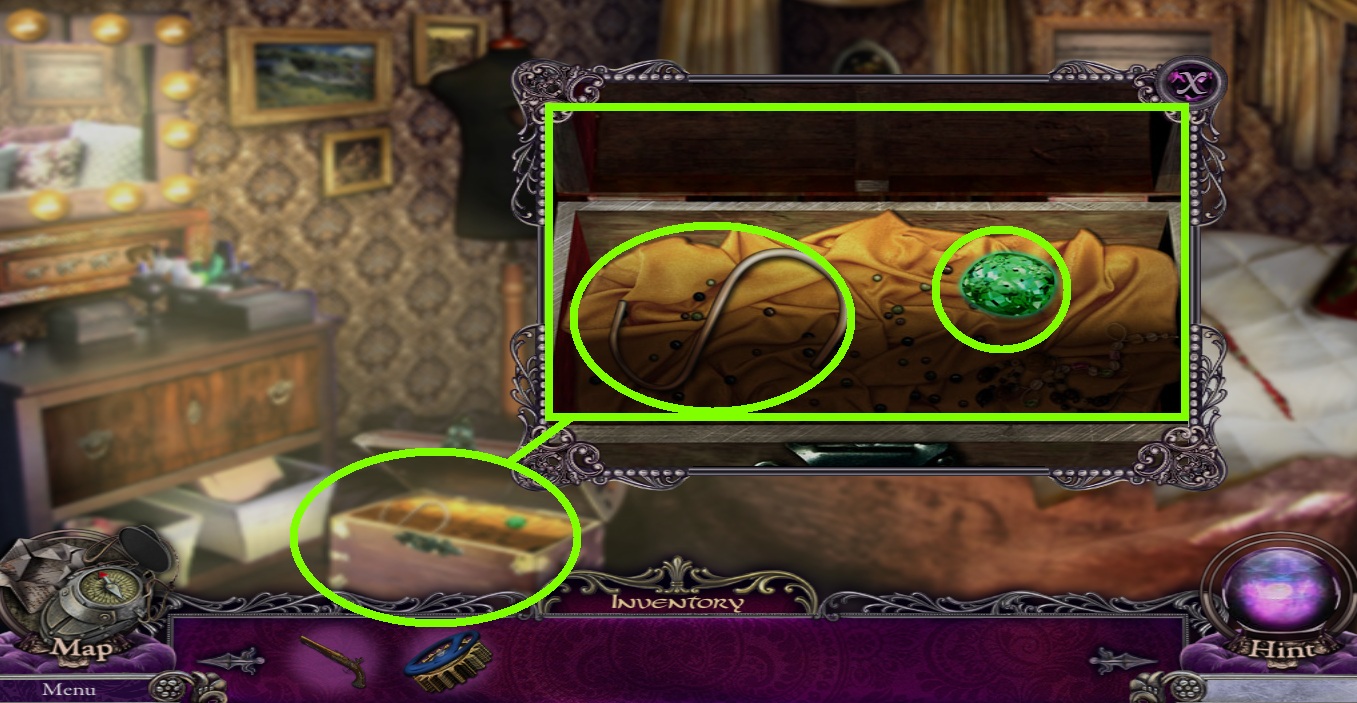
- Zoom into the chest (green circle).
- Pick up the page.
- Pick up the hook and the green gemstone (green circles).
- Go to Main Street.
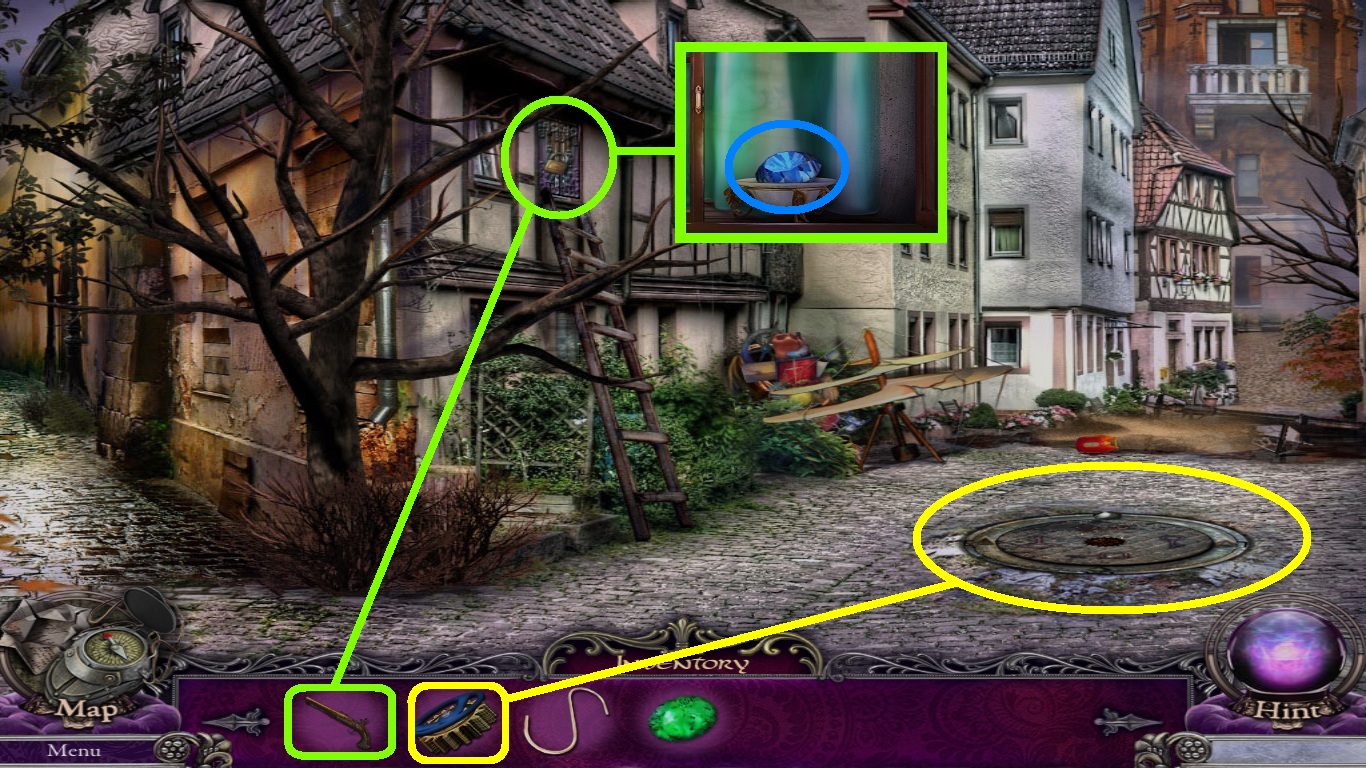
- Zoom into the window (green circle).
- Select the loaded musket (green square) from the inventory; shoot the lock on the window.
- Open the window.
- Pick up the blue gemstone (blue circle).
- Zoom into the manhole (yellow circle).
- Select the valve (yellow square) from the inventory; place it in the middle of the manhole.
- Click the manhole 5 times and match the key heads to the outer icons.
- Pick up the gardening shears.
- Go to the tower entrance.
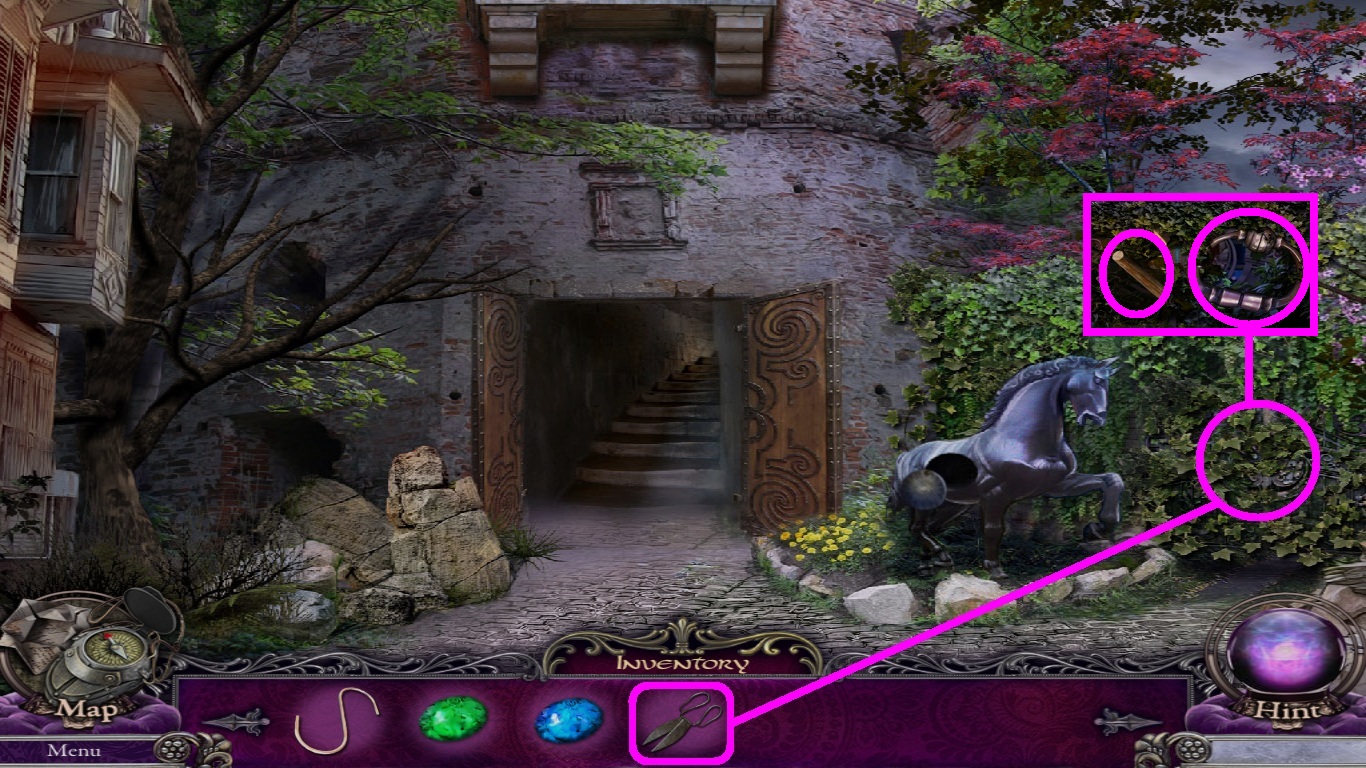
- Zoom into the ivy (pink circle).
- Select the gardening shears (pink squares) from the inventory; cut the ivy with them.
- Pick up the peg and the door knocker (pink circles).
- Go down the dark alley.
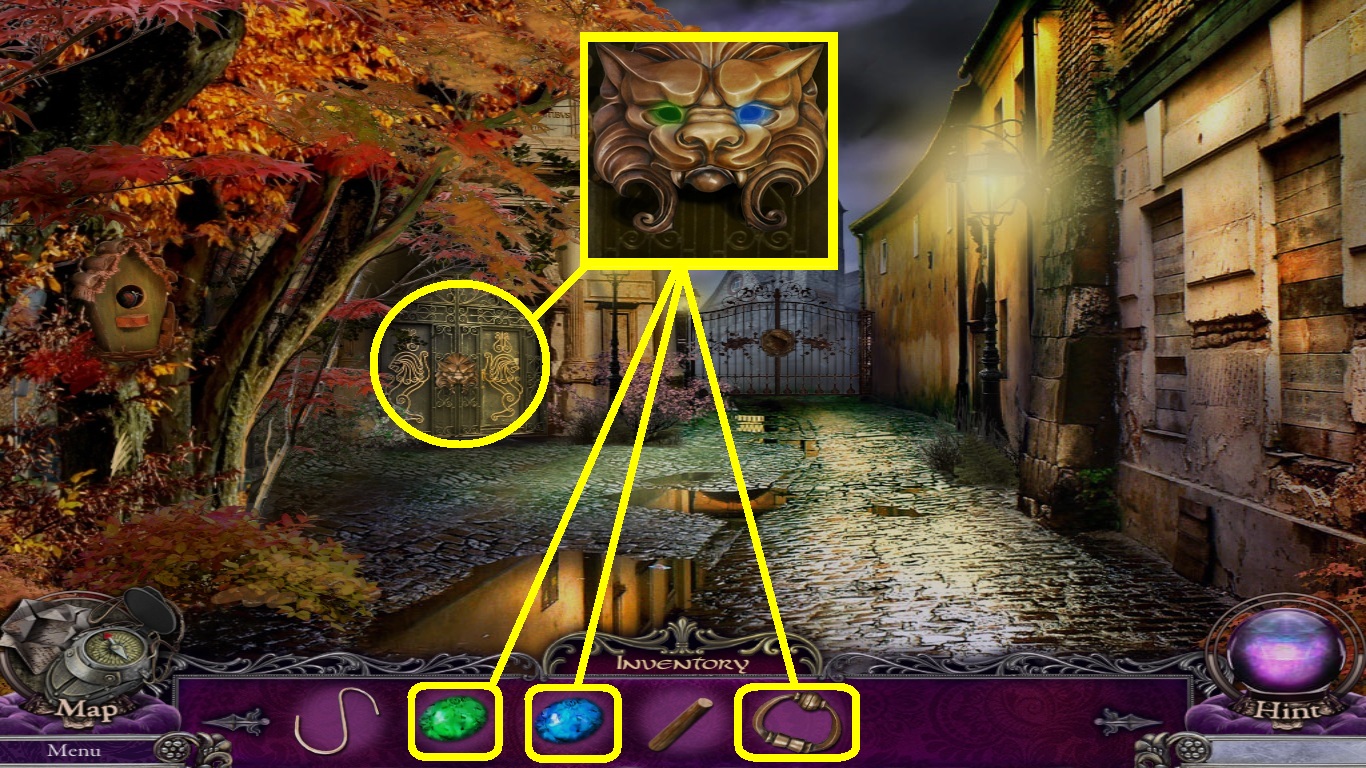
- Zoom into the door (yellow circle).
- Select the blue and green gemstones (yellow squares) from the inventory; place them into the empty eye sockets.
- Pick the door knocker (yellow square) from the inventory and place in the lion’s mouth.
- Click the door knocker; enter the memorial.
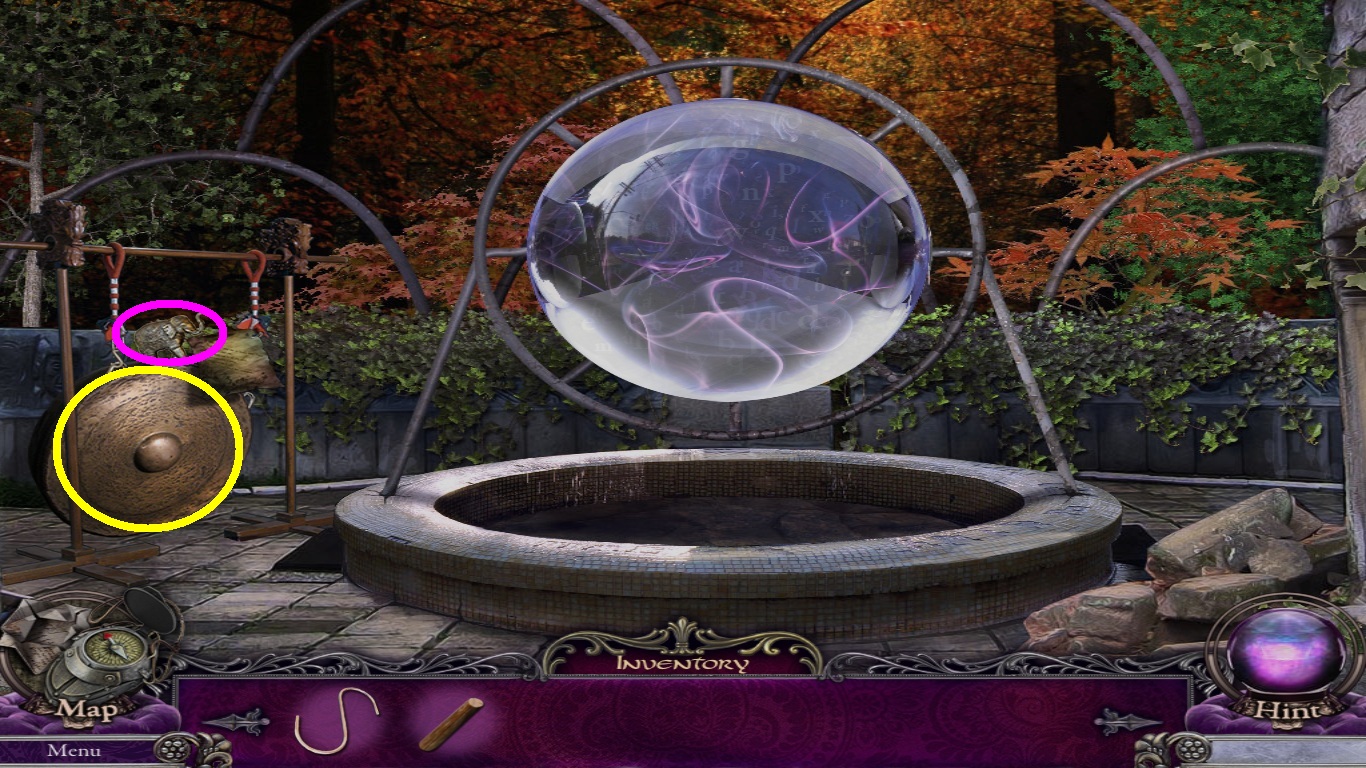
- Zoom into the gong (yellow circle).
- Pick up the page.
- Pick up the elephant figurine (pink circle).
- Go to the secret room.
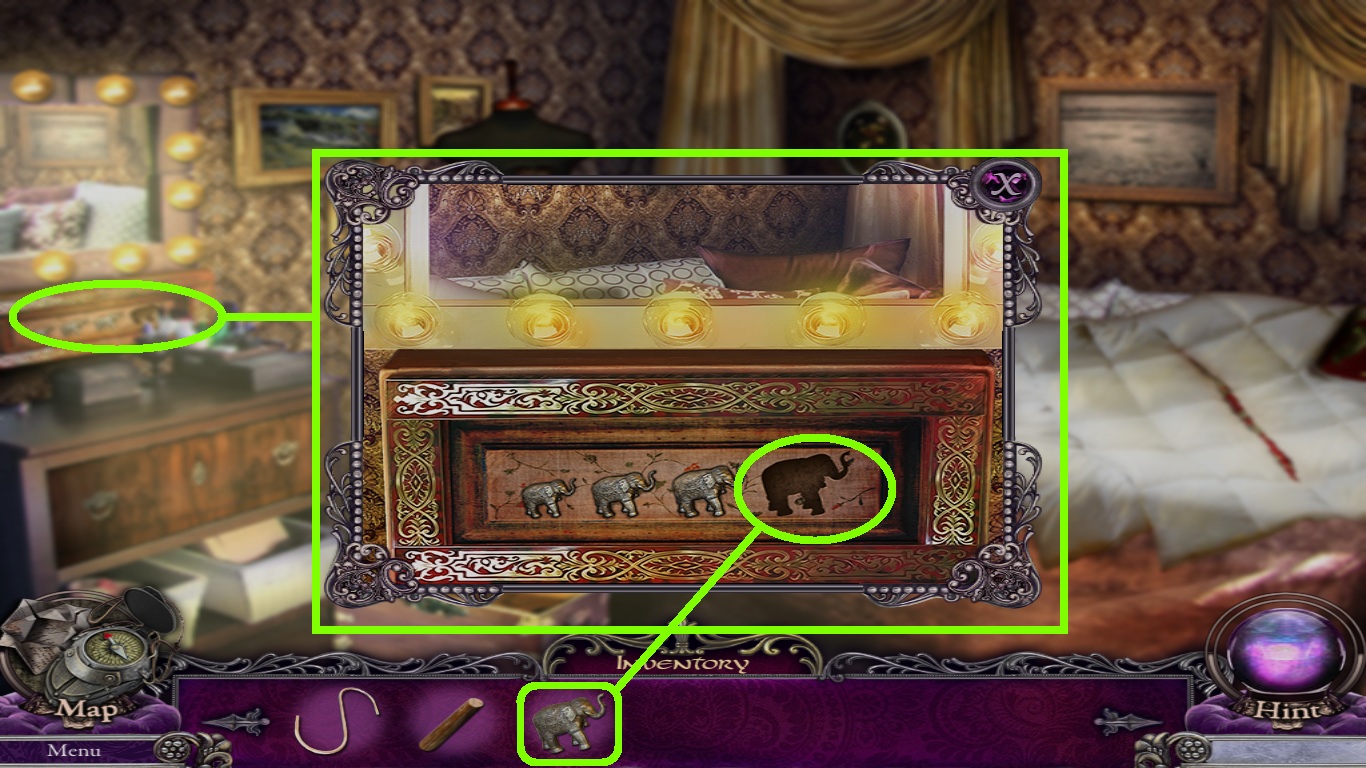
- Zoom into the mirror base (green circle).
- Select the elephant figurine (green square) from the inventory; place it into the open space on the mirror base.
- Pick up the gong mallet.
- Go back to the memorial.
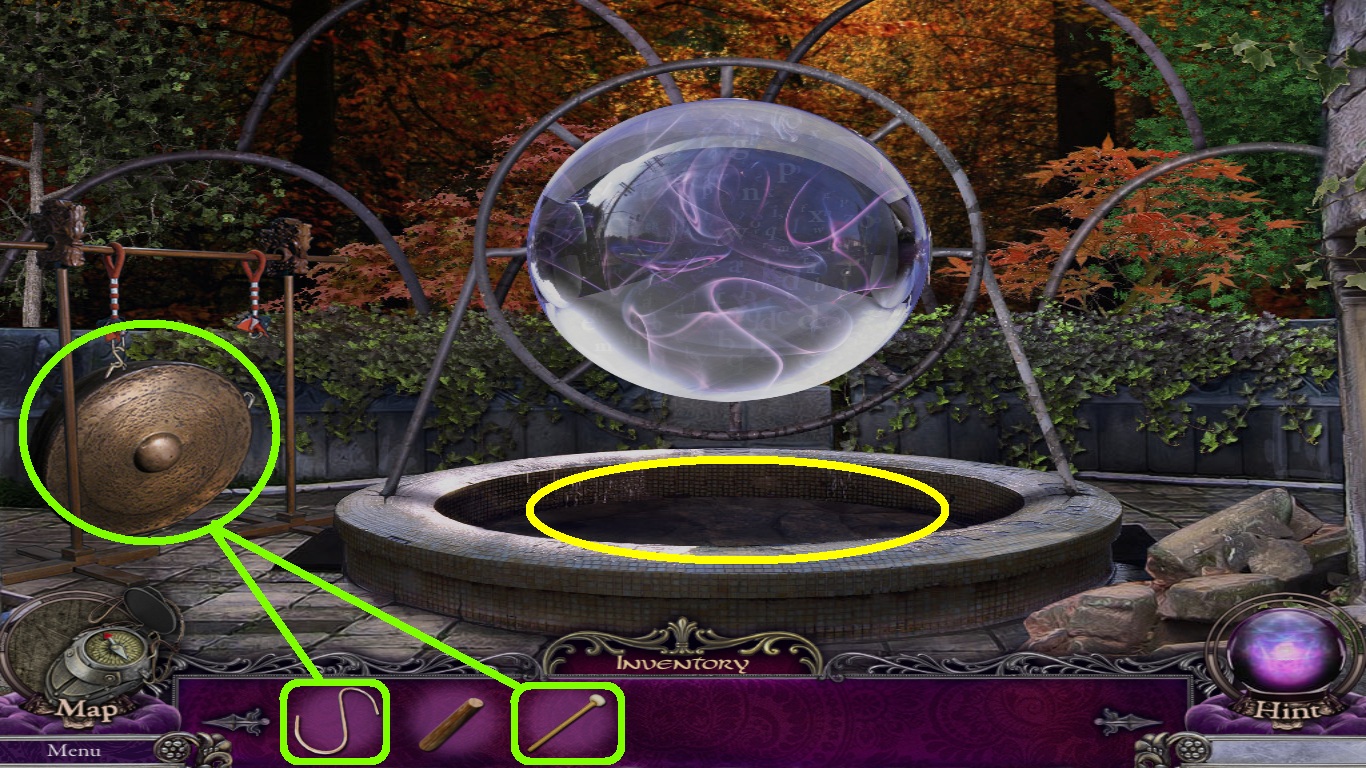
- Zoom into the gong (green circle).
- Select the hook (green square) from the inventory; place it on the gong.
- Select the gong mallet (green square) from the inventory; hit the gong.
- Zoom into the fountain (yellow circle); pick up the nameplate
- Go into the dark alley.
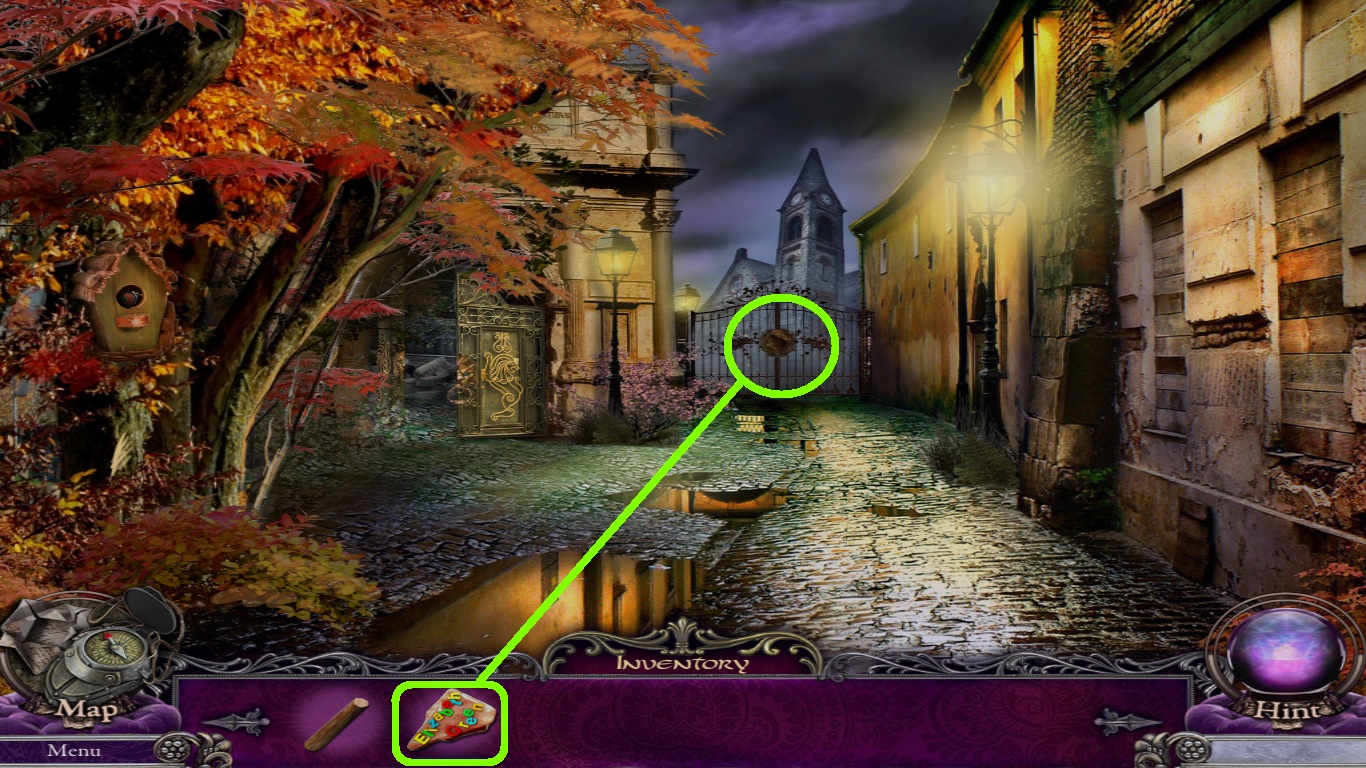
- Zoom into the gate (green circle).
- Select the nameplate (green square) from the inventory; place it in the groove.
- This will open a mini game.
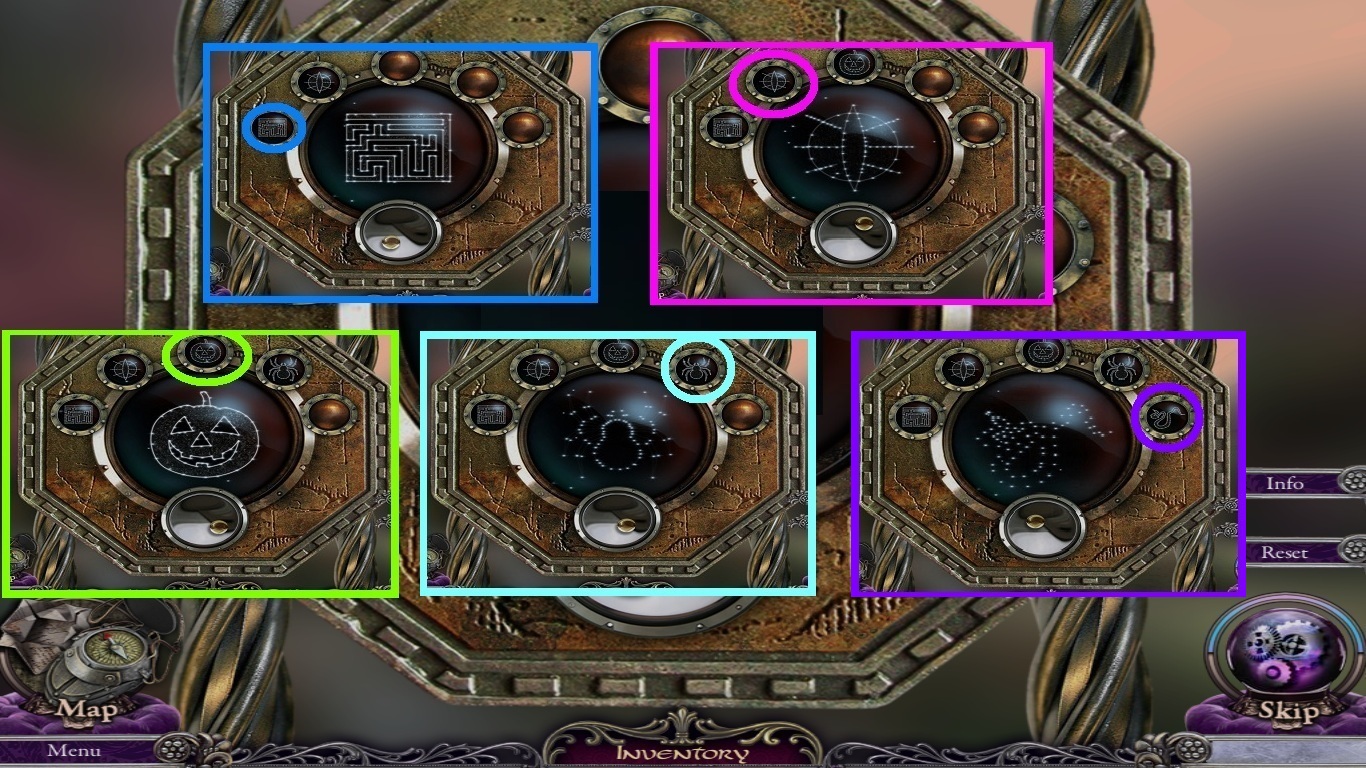
- Adjust the glass circles.
- The constellations in the middle need to reflect what is displayed in the colored circles.
- Go to the old chapel.
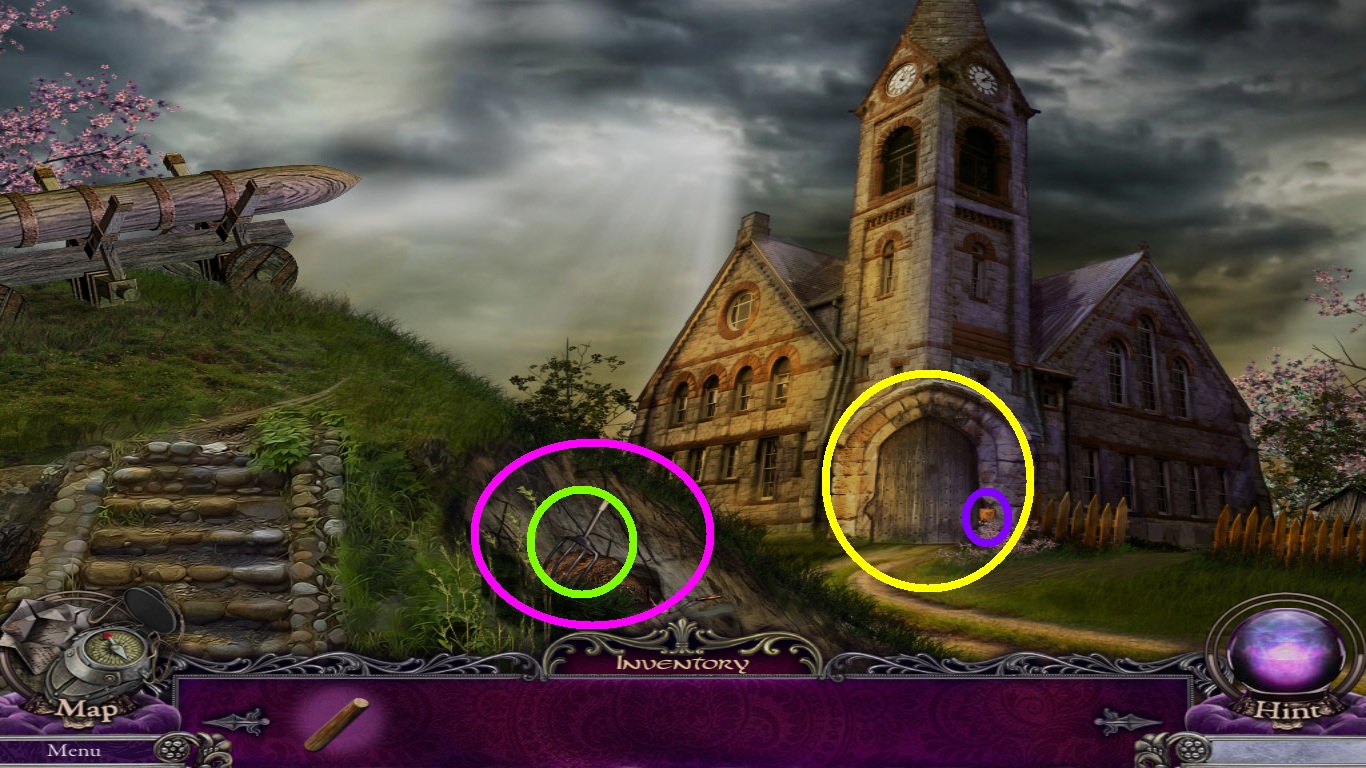
- Zoom into the mound (pink circle).
- Pick up the scythe (green circle).
- Zoom into the door (yellow circle).
- Pick up the candle (purple circle).
- Go to the backyard.
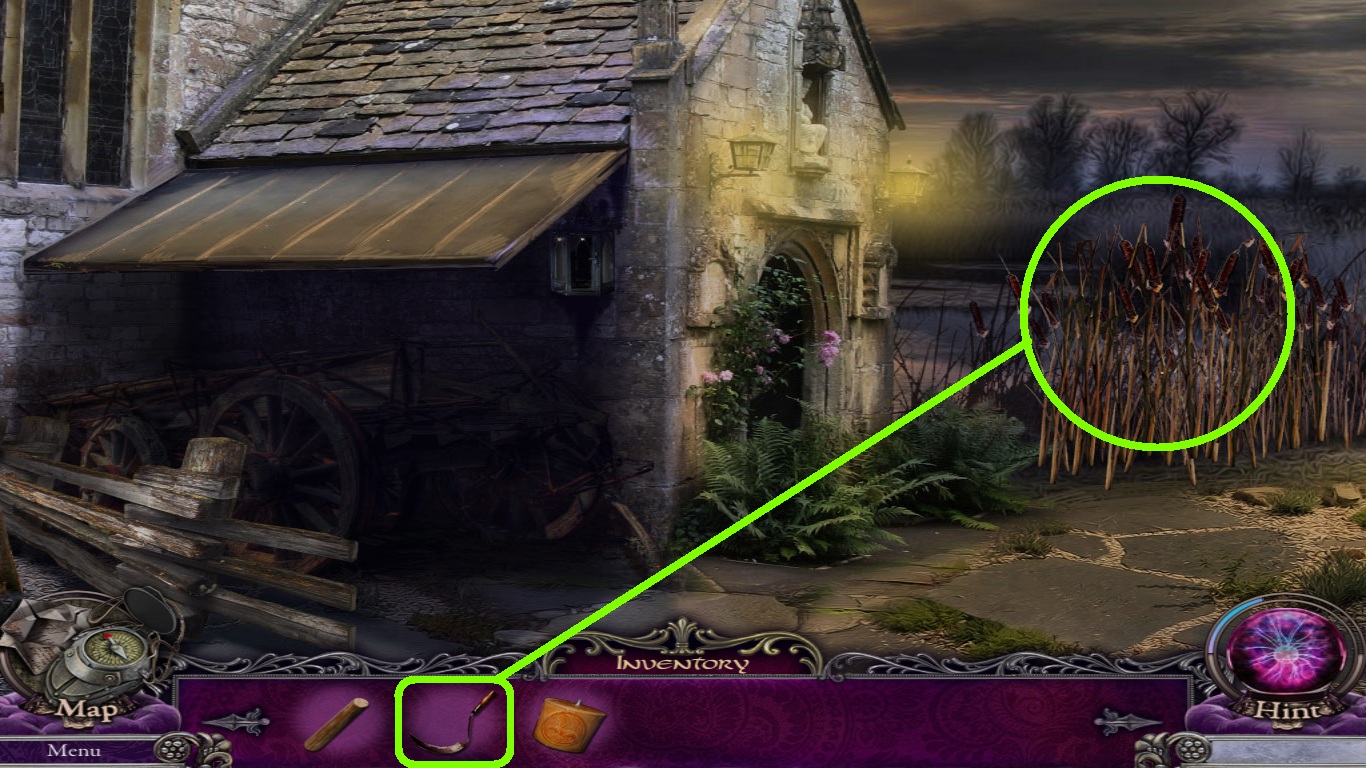
- Zoom into the reeds (green circle).
- Select the scythe (green square) from the inventory; use it to cut the reeds.
- Pick up the rag and the dragon tooth.
- Go to the throne room.
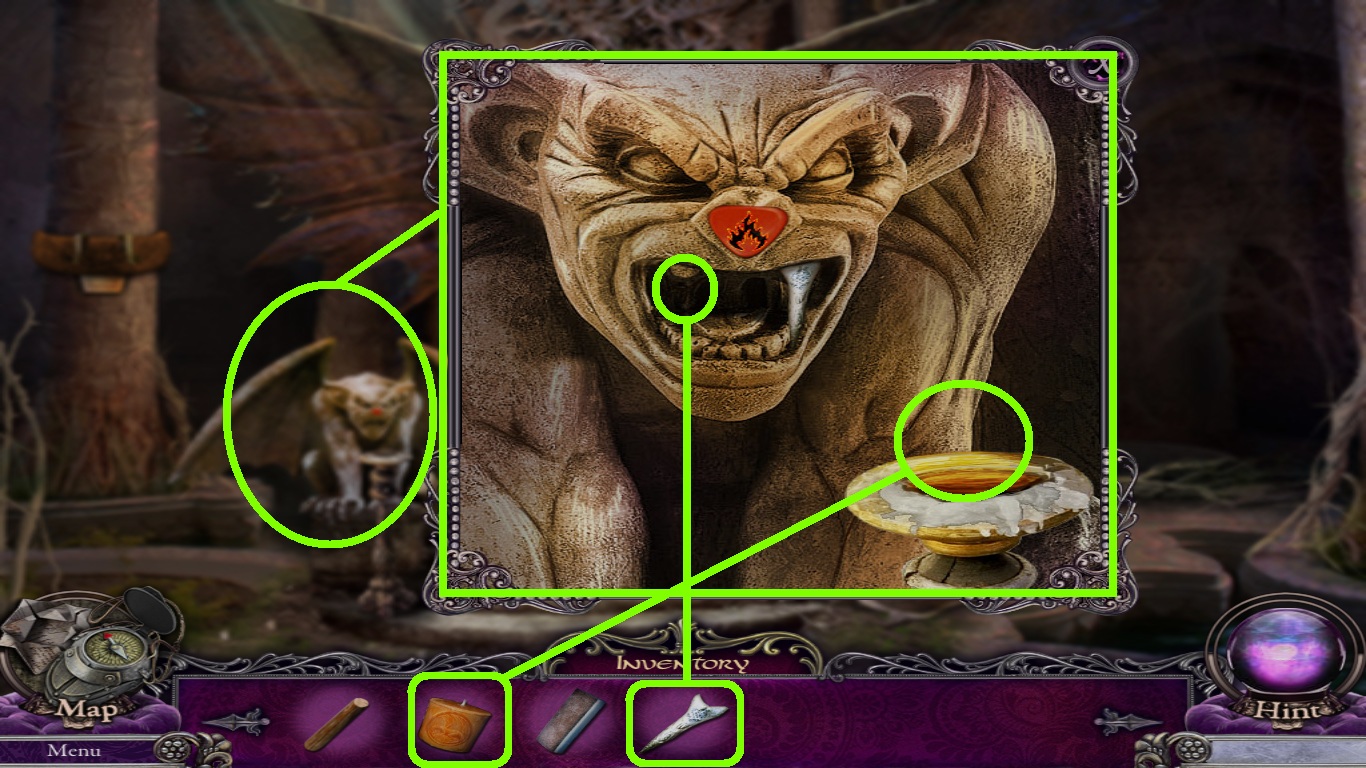
- Zoom into the statue (green circle).
- Select the candle (green square) from the inventory; put it onto the candle holder.
- Select the dragons tooth (green square) from the inventory; place it into the statues mouth.
- Click the statues nose; pick up the lit candle.
- Go to the backyard.
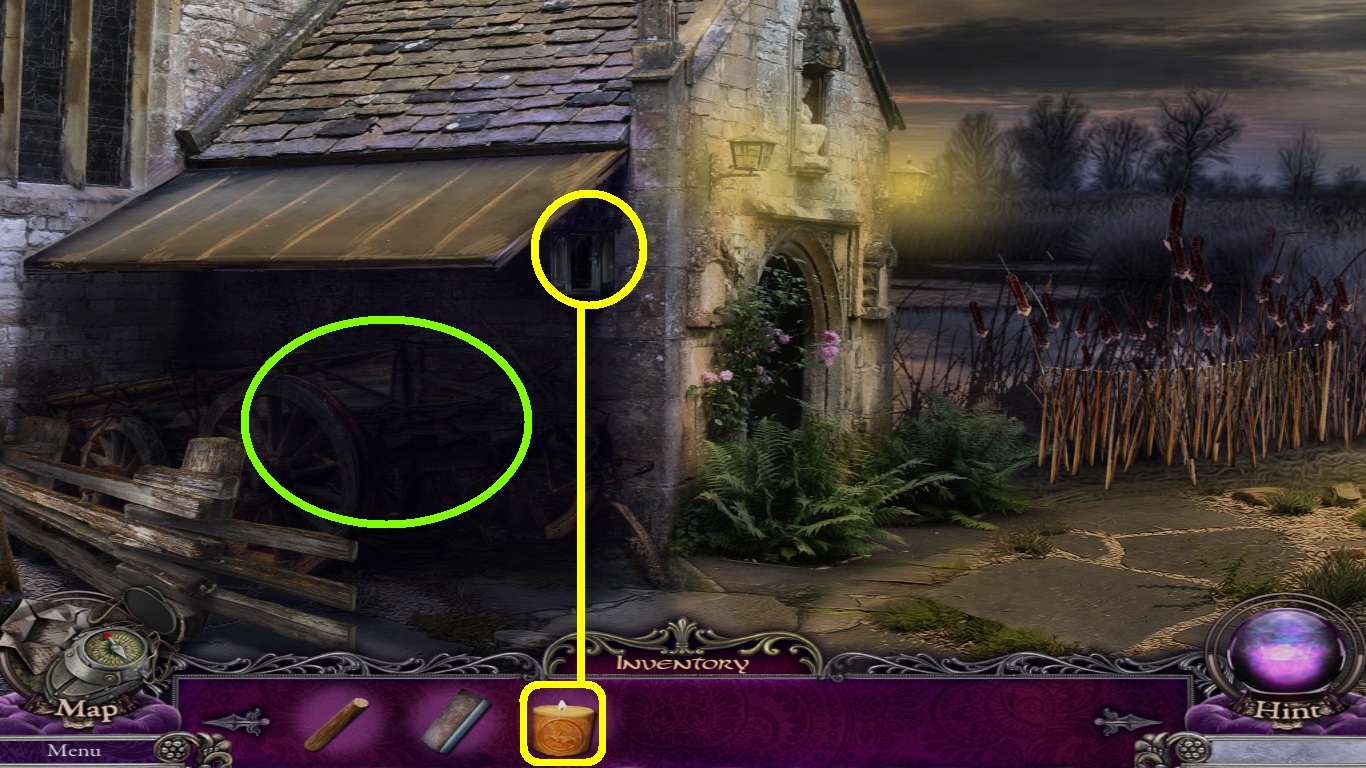
- Zoom into the lantern (yellow circle).
- Select the lit candle (yellow square) from the inventory; place it into the lantern.
- Zoom into the cart (green circle).
- Pick up the wheel.
- Go to the old chapel.
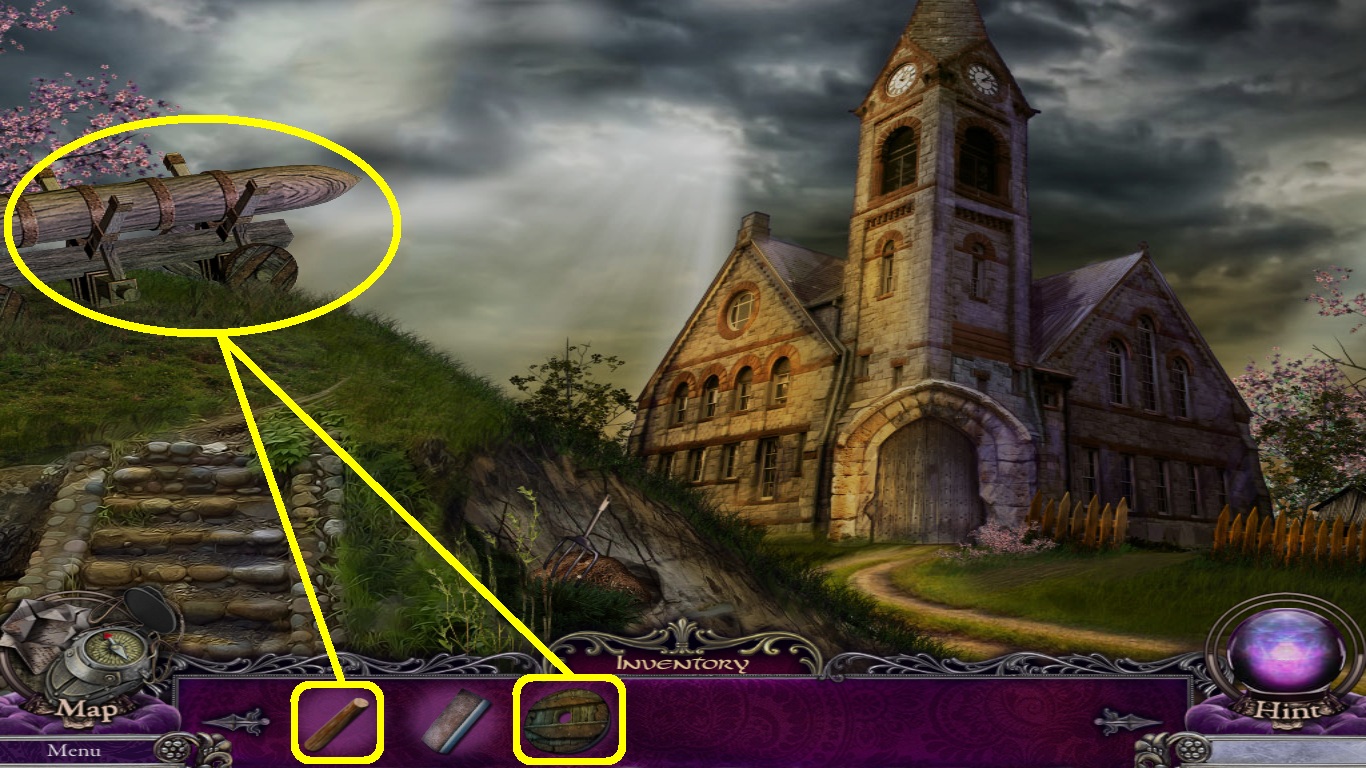
- Zoom into the battering ram (yellow circle).
- Select the wheel (yellow square) from the inventory; place it onto the battering ram.
- Select the peg (yellow square) from the inventory; place it on the wheel.
- Click the wheel.
- Go into the old chapel.
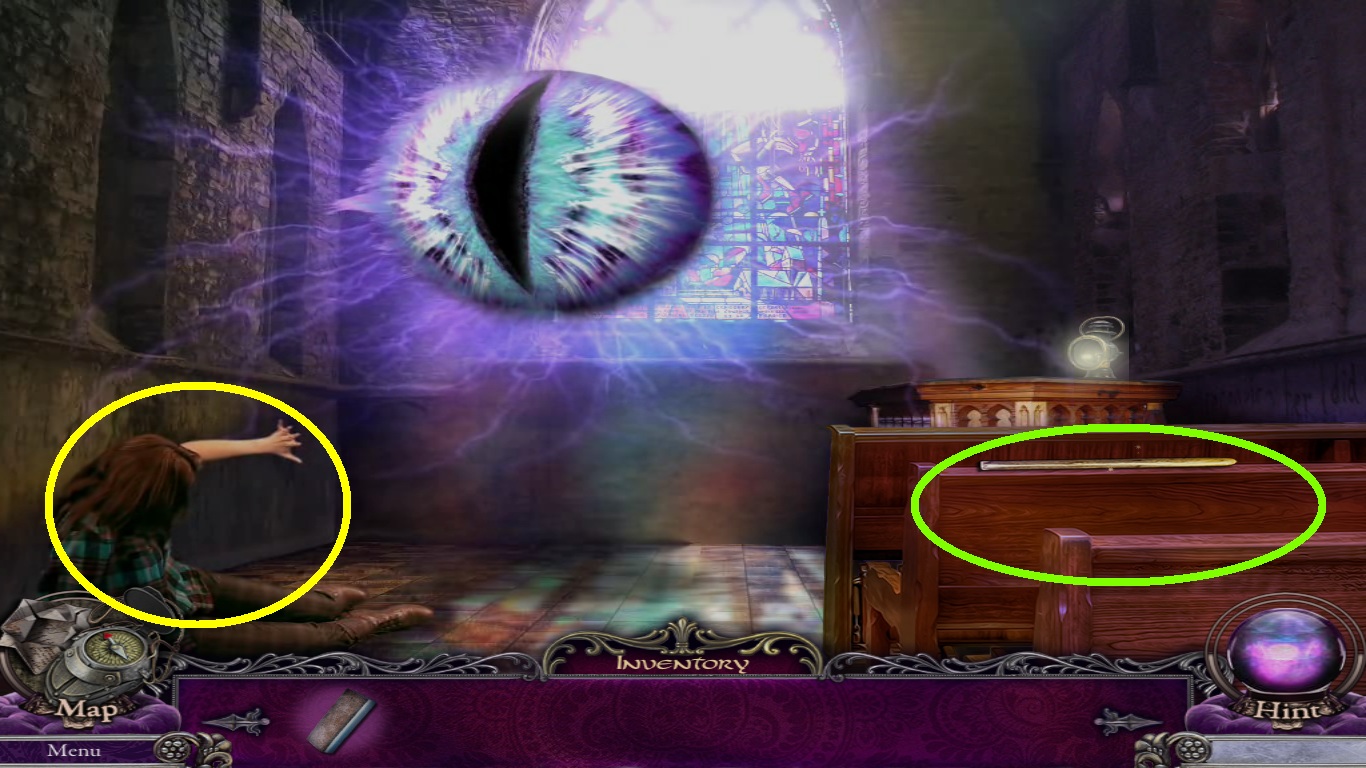
- Click Liza (yellow circle).
- Zoom into the pew (green circle); pick up the stick.
- Go back to the outer chapel.
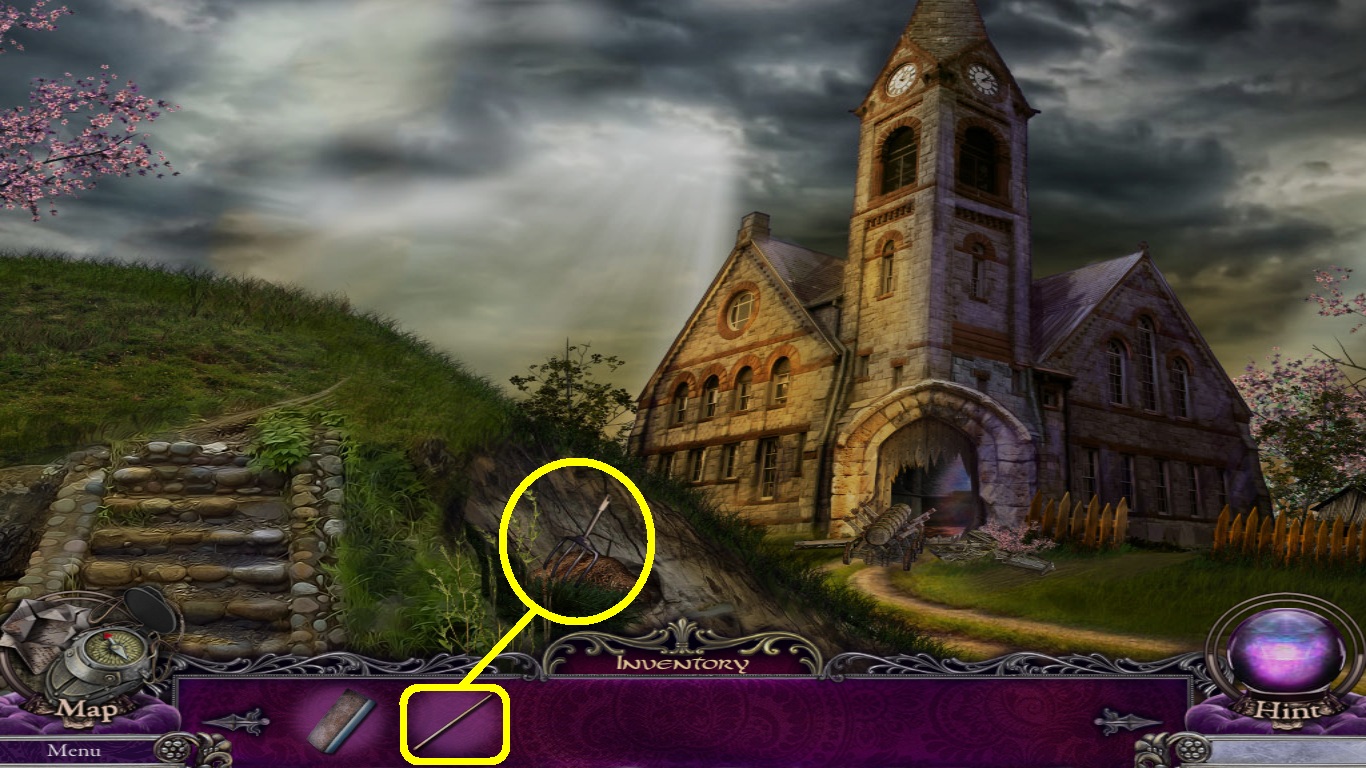
- Zoom into the pitch fork (yellow circle).
- Select the stick (yellow square) from the inventory; use it to fix the pitchfork.
- Pick up the pitchfork.
- Go to the backyard.
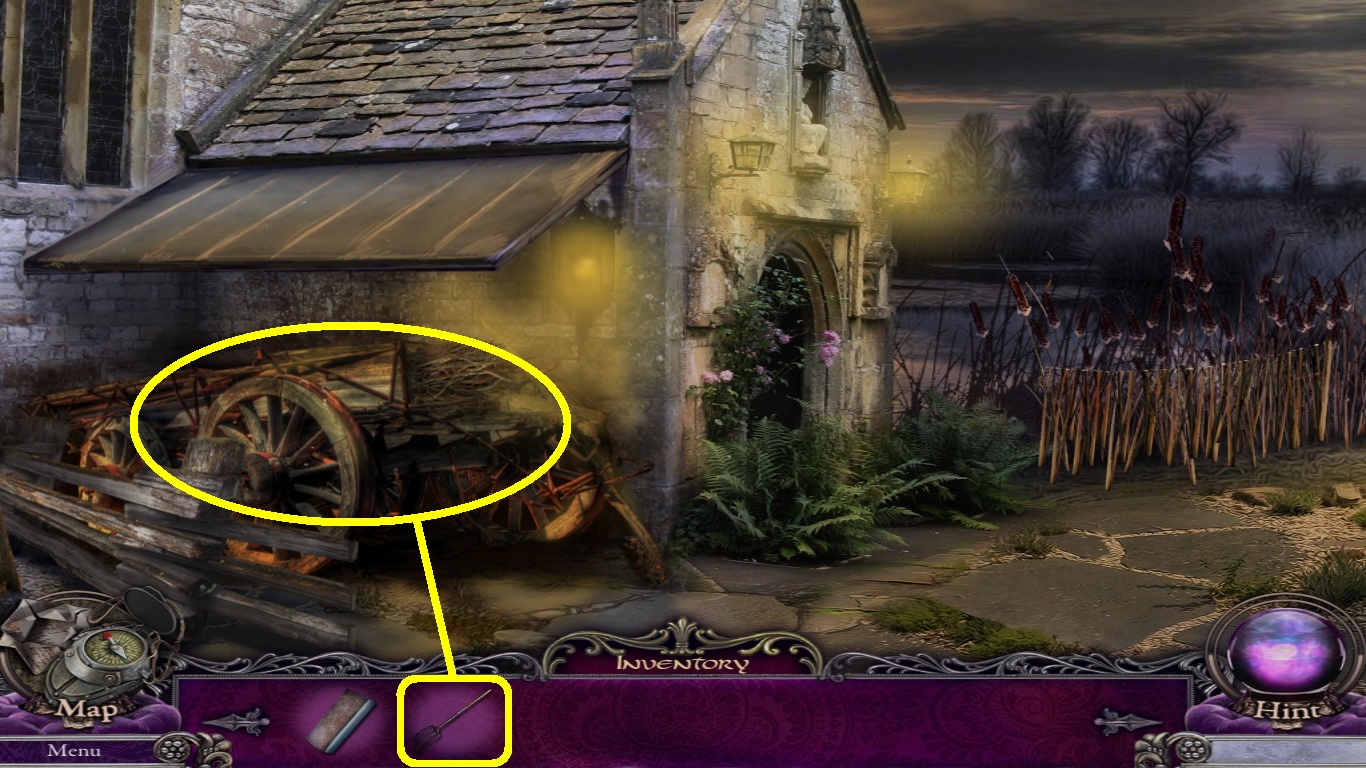
- Zoom into the cart (yellow circle).
- Select the pitchfork (yellow square) from the inventory; use it on the hay.
- Pick up the forceps.
- Go to the dark alley.
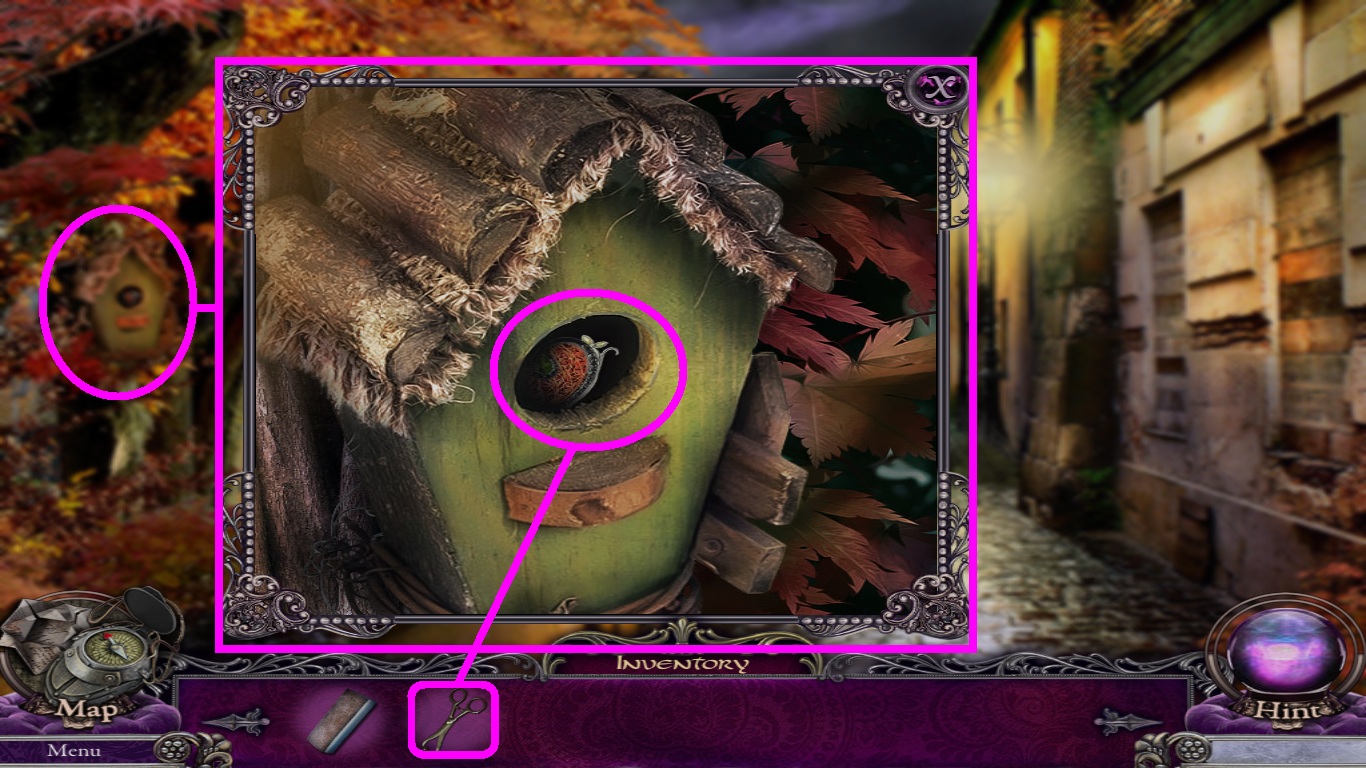
- Zoom into the birdhouse (pink circle).
- Select the forceps (pink square) from the inventory; use them to get the heart shaped badge.
- Go to the secret room.
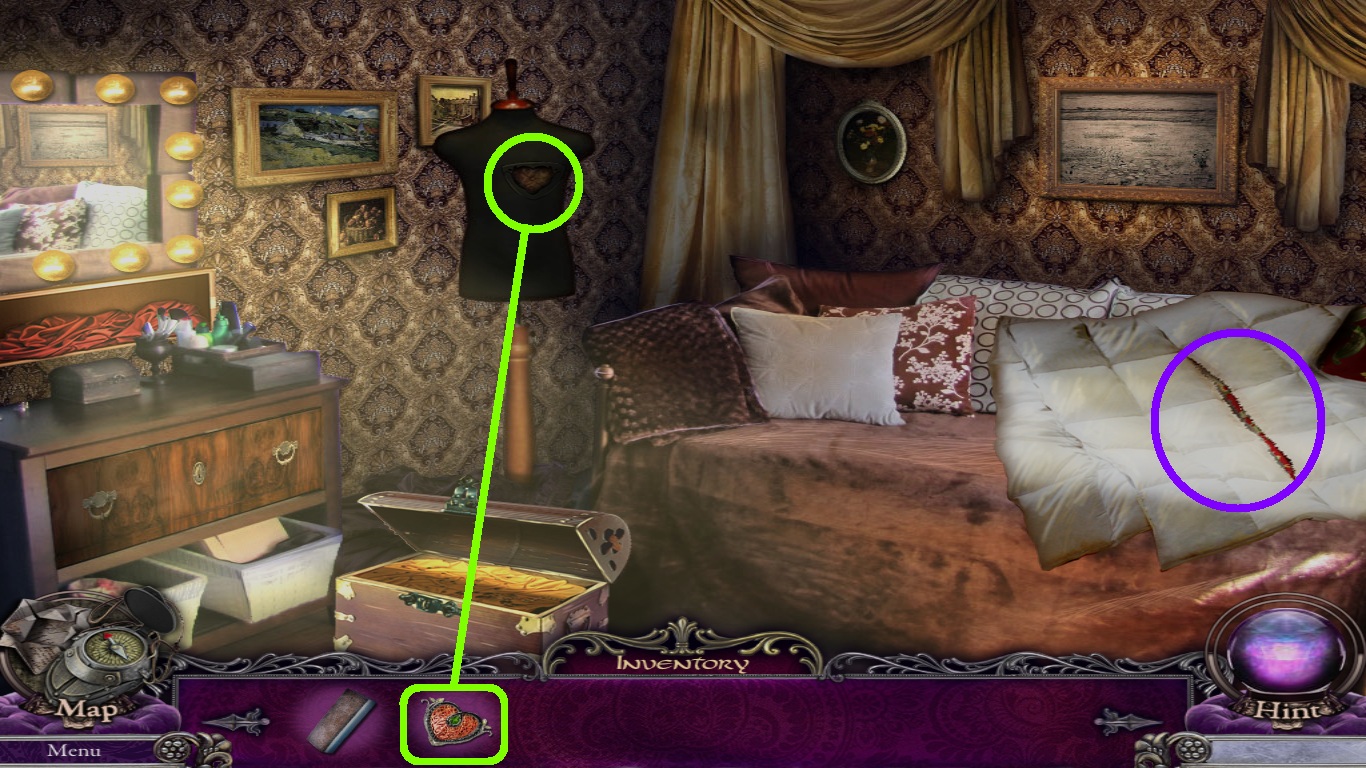
- Zoom into the dress form (green circle).
- Select the heart shaped badge (green square) from the inventory.
- Place it into the groove.
- Pick up the needle and thread.
- Zoom into the blanket (purple circle).
- Select the needle and thread from the inventory; use them to sew up the tear.
- Pick up the blanket.
- Go to the old chapel.
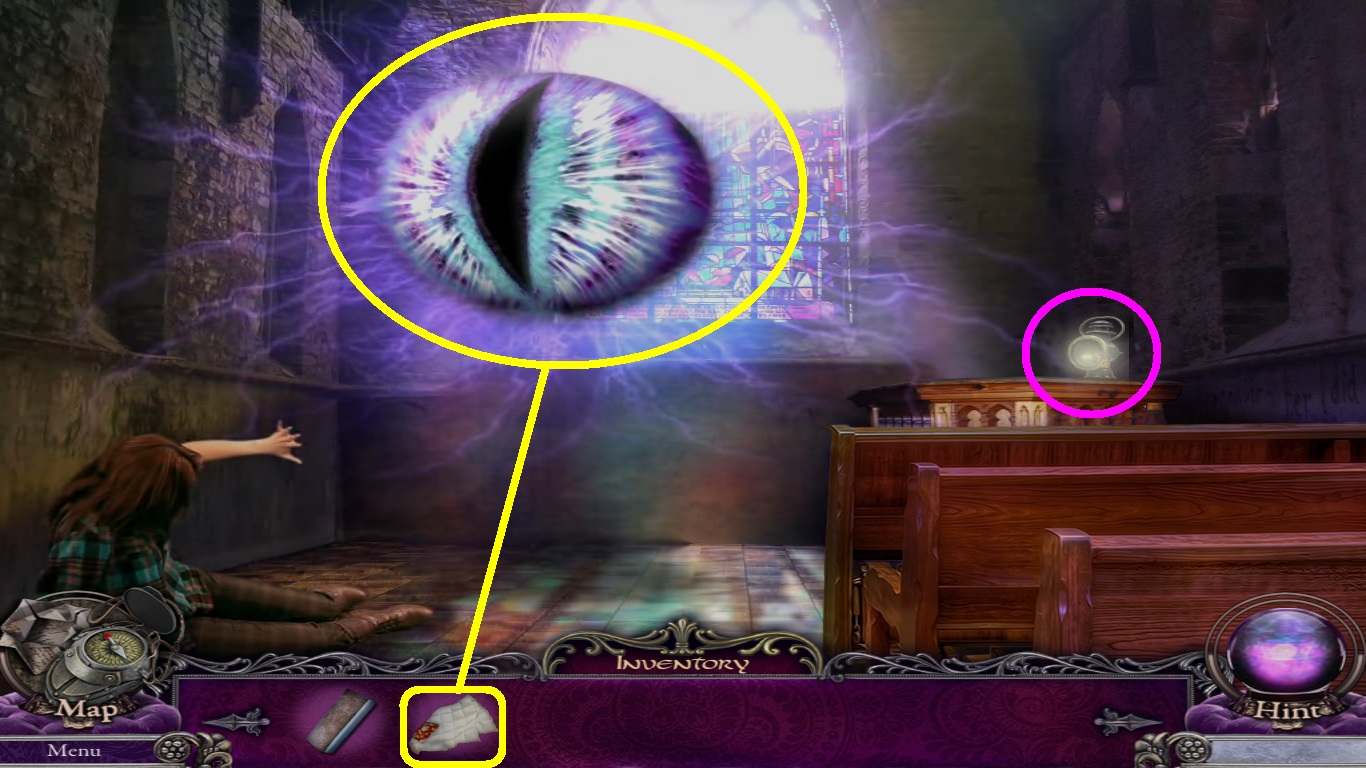
- Select the blanket (yellow square) from the inventory; place it onto the eye (yellow circle).
- Zoom into the lantern (pink circle).
- You will be sent to the school.
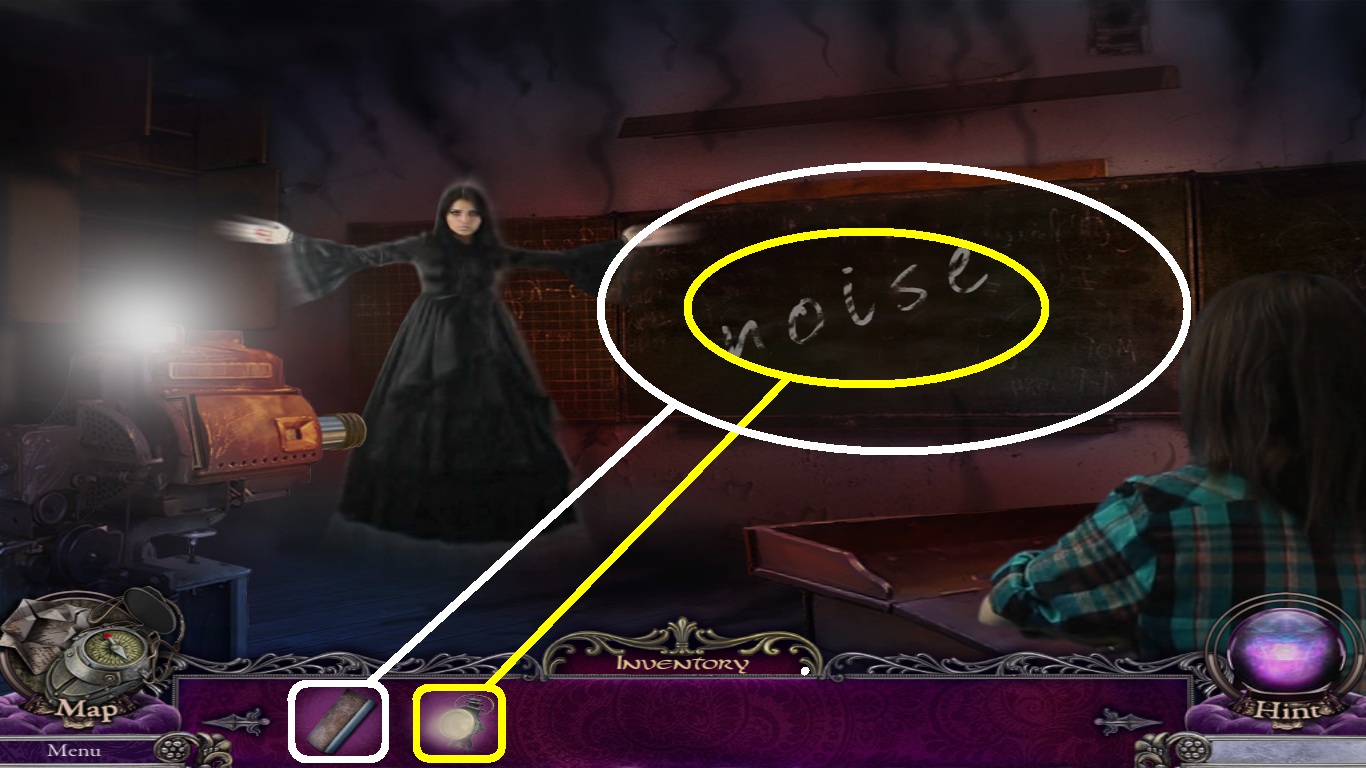
- Select the lantern (yellow square) from the inventory.
- Use it to highlight the noise (yellow circle).
- Zoom into the chalkboard (white circle).
- Select the rag (white square) from the inventory; use it on the chalkboard.
- You will be sent to the hospital.
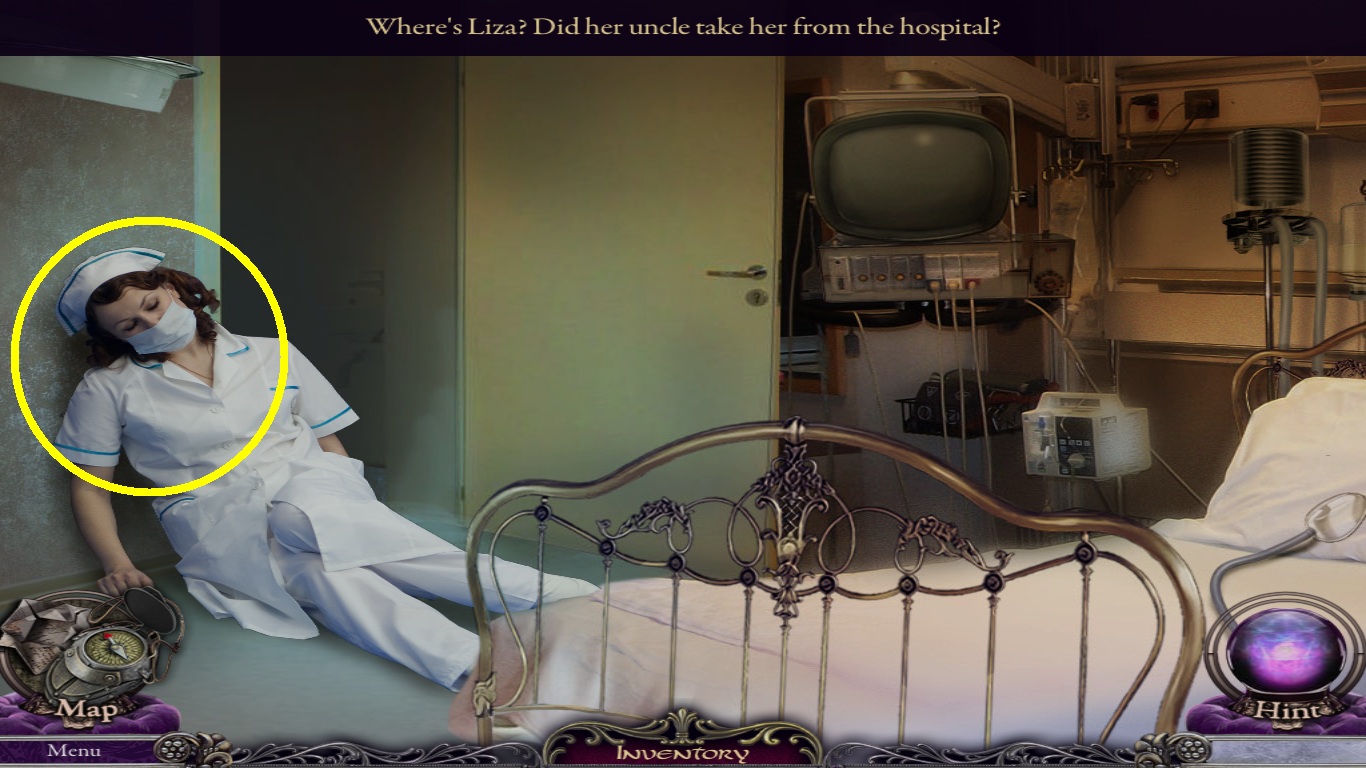
- Zoom into the nurse (yellow circle).
- Pick up the note.
- You will be sent to a hut.
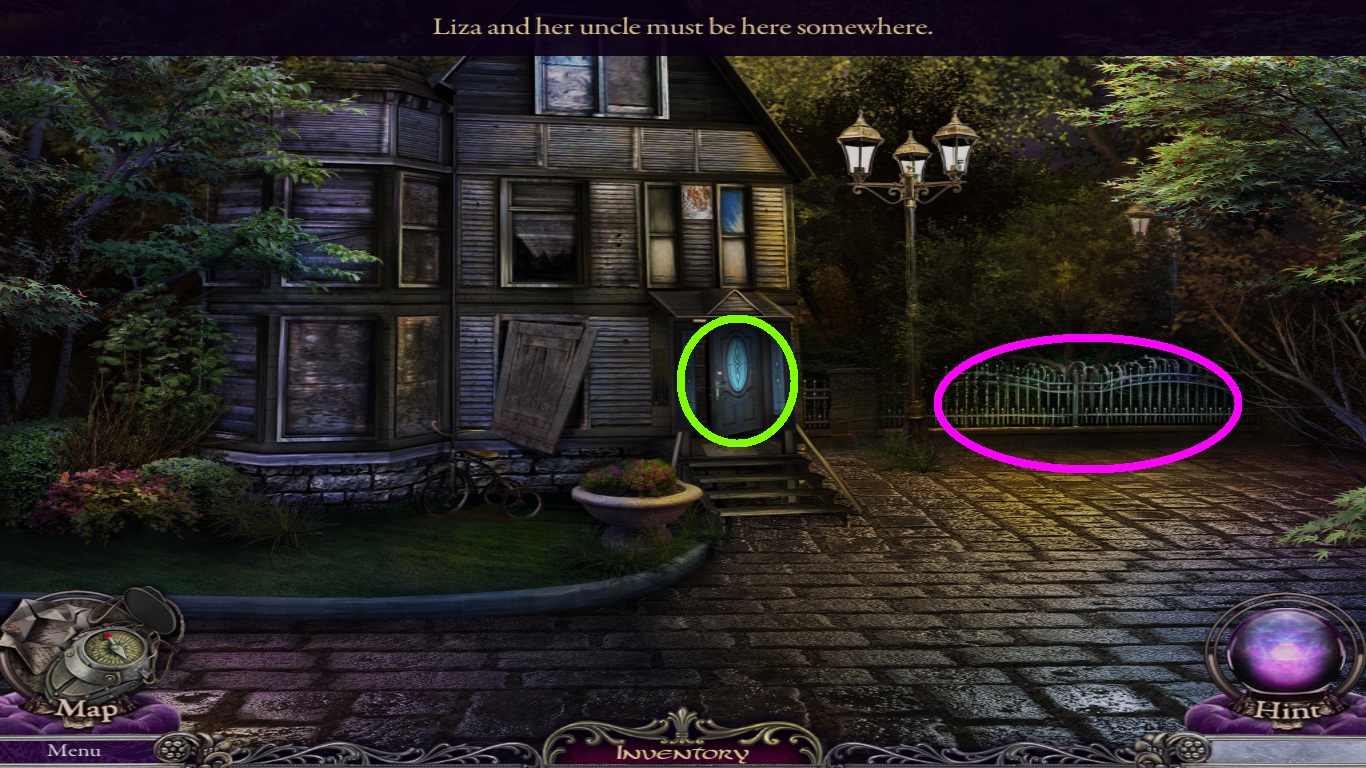
- Zoom into the door (green circle).
- Pick up the mat and the knob.
- Zoom into the fence (pink circle); place the mat onto it.
- Go into the backyard of the hut.
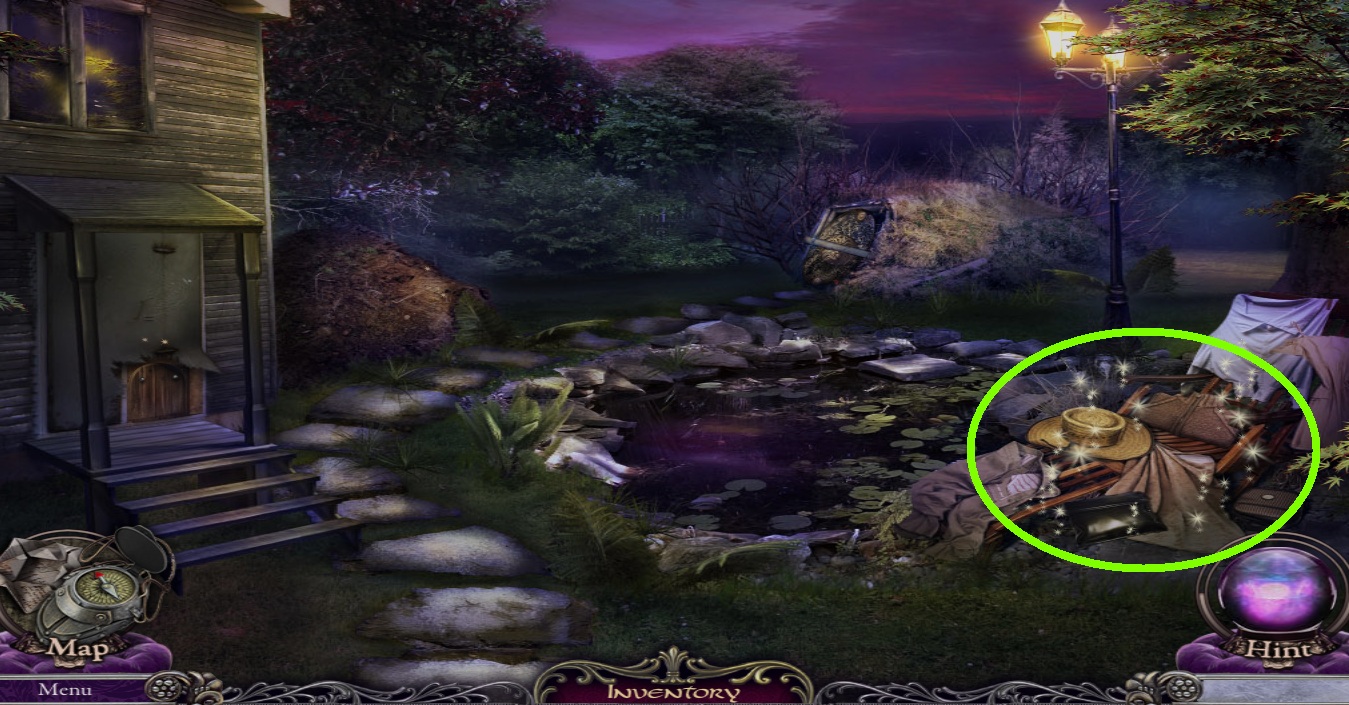
- Zoom into the lounge chair (green circle) for the hidden object area to open.
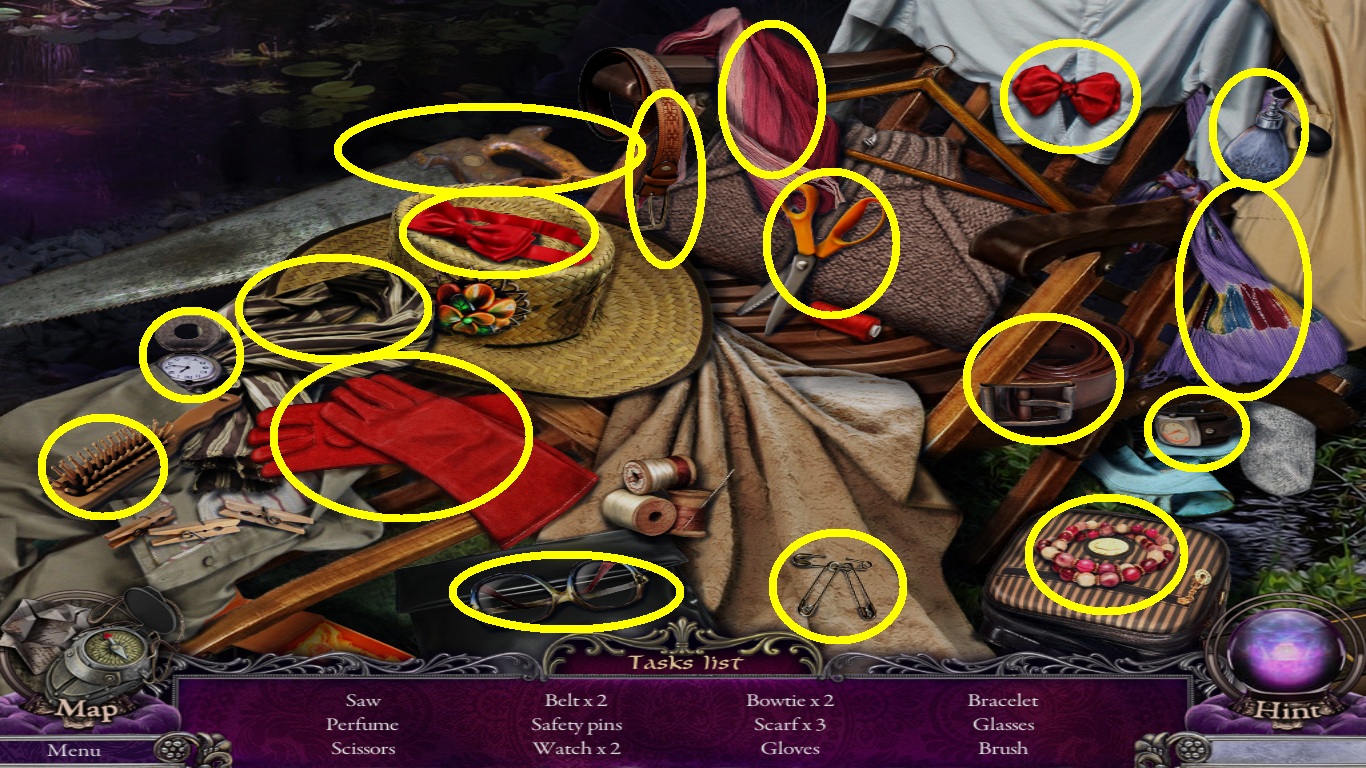
- Find all the objects on the list (yellow circles).
- Pick up the saw.
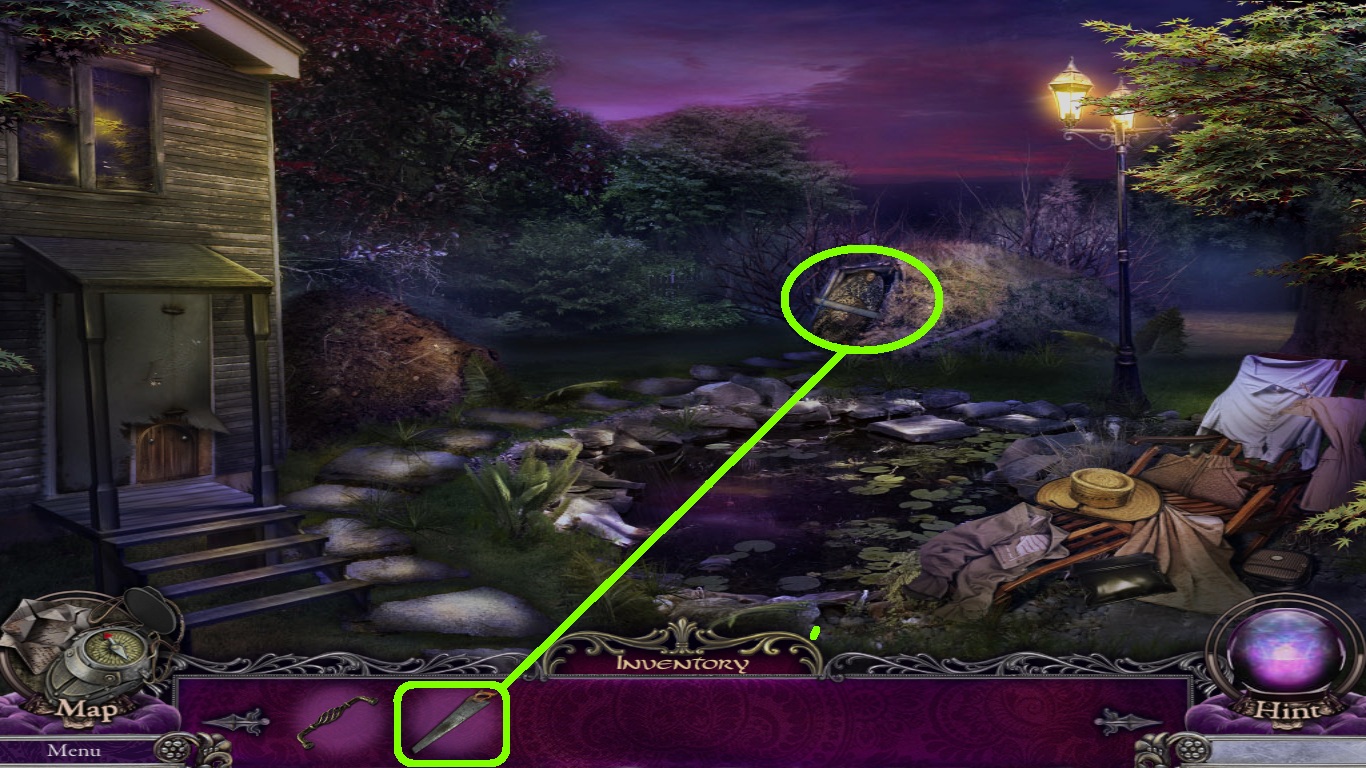
- Zoom into the well (green circle).
- Pick the saw from the inventory; use it to cut the beam.
- Pick up the lid to the well.
- Pick up the empty tranquilizer dart.
- Go to the front of the hut.
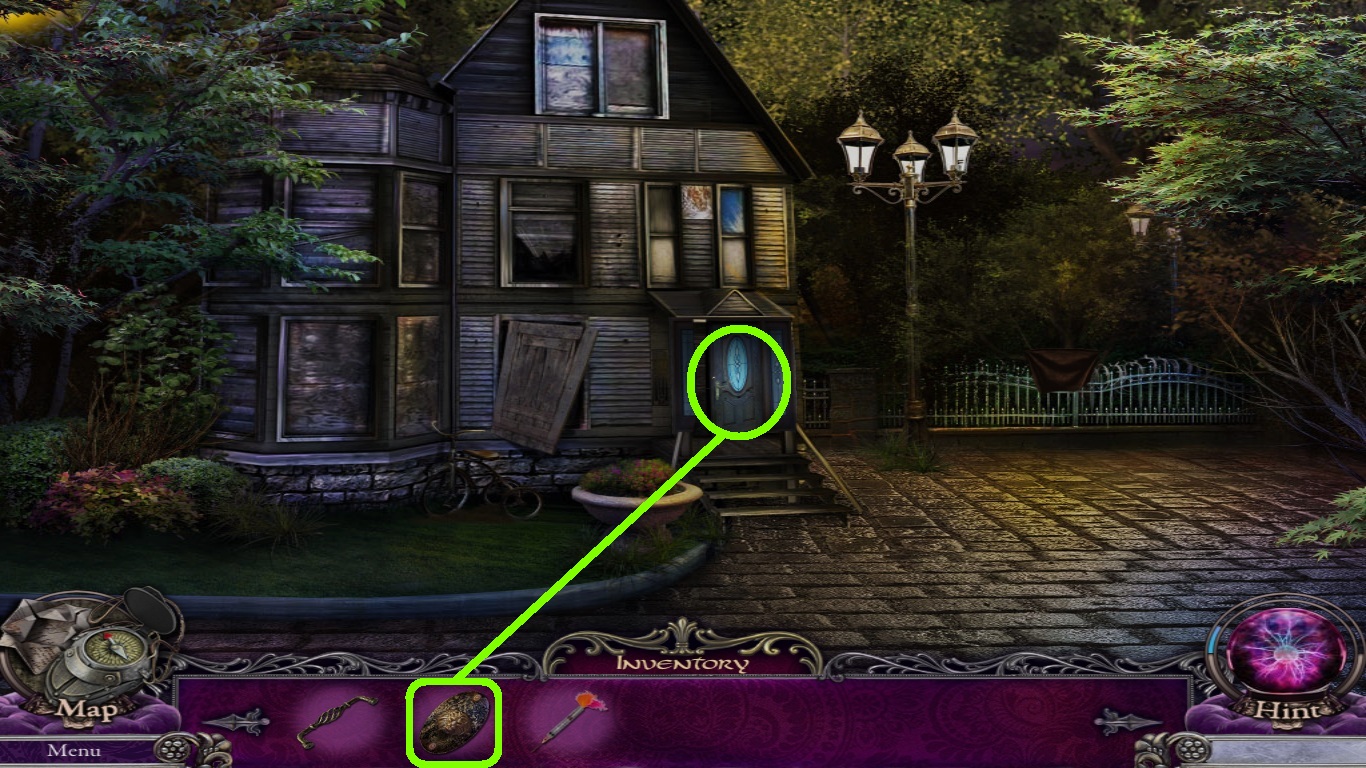
- Zoom into the front door (green circle).
- Select the well lid (green square) from the inventory; insert it into the front door.
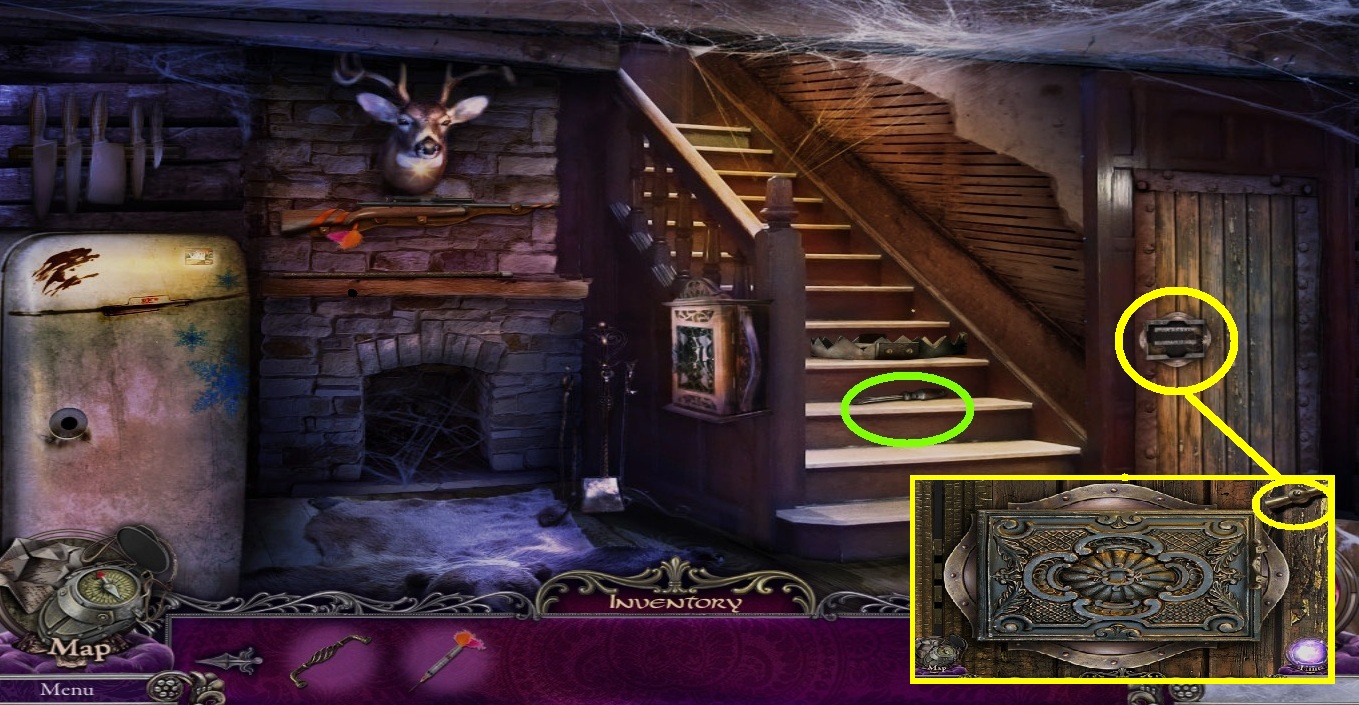
- Go into the living room.
- Zoom into the door (yellow circle); pick up the switch button.
- Zoom into the stairs (green circle); pick up the screwdriver.
- Go back to the backyard.
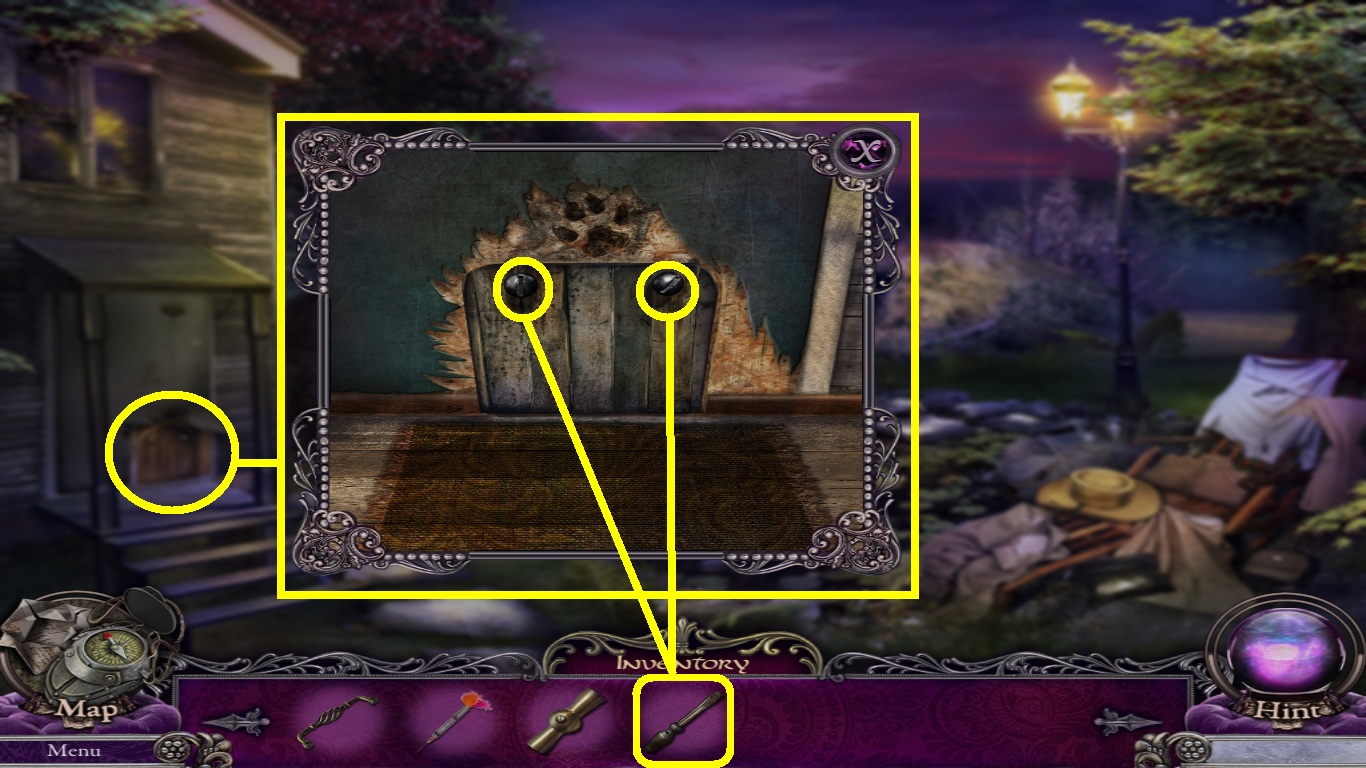
- Zoom into the door (yellow circle).
- Select the screwdriver (yellow square) from the inventory; use it to remove the screws.
- Pick up the fridge handle.
- Go back to the living room.
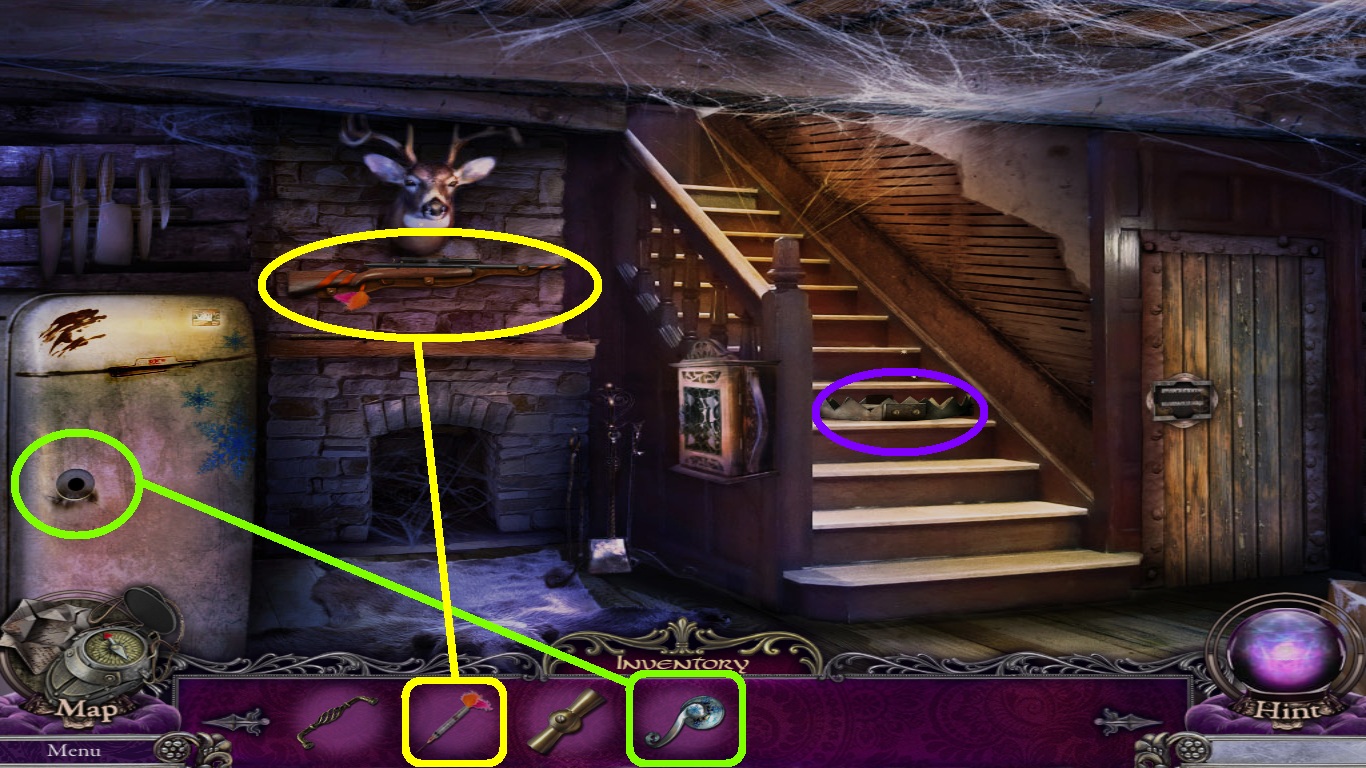
- Zoom into the fridge (green circle).
- Select the fridge handle (green square) from the inventory; place it on the fridge.
- Open it and pick up the pumpkin.
- Select the empty tranquilizer dart from the inventory; place it into the bottle in the fridge.
- Pick up a full tranquilizer dart.
- Zoom into the dart gun (yellow circle).
- Select the tranquilizer dart (yellow square) from the inventory; load it into the tranquilizing gun.
- Pick it up.
- Zoom into the stairs (purple circle).
- Select the pumpkin from the inventory; place it on the trap.
- Go to the second floor.
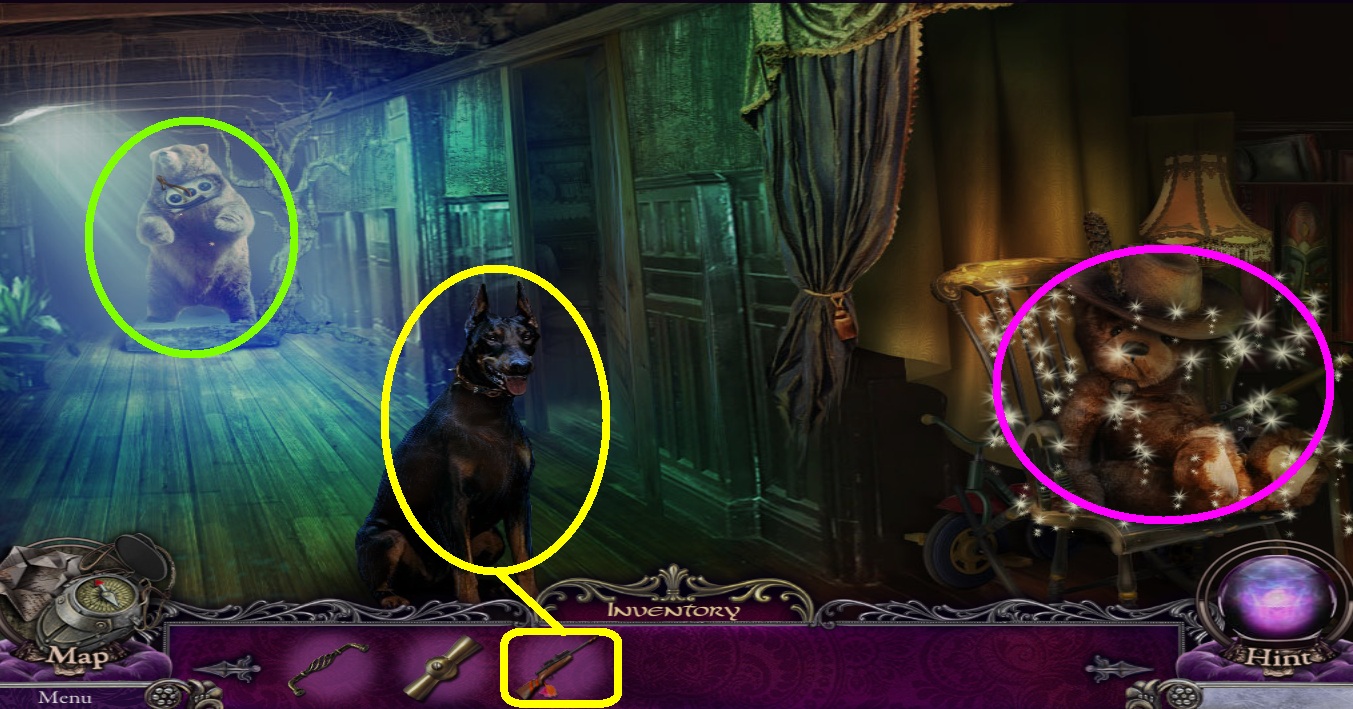
- Select the loaded tranquilizing gun (yellow square) from the inventory; use it on the dog (yellow circle).
- Zoom into the trophy bear (green circle).
- Pick up the nippers.
- Click the teddy (pink circle) to open a hidden object area.
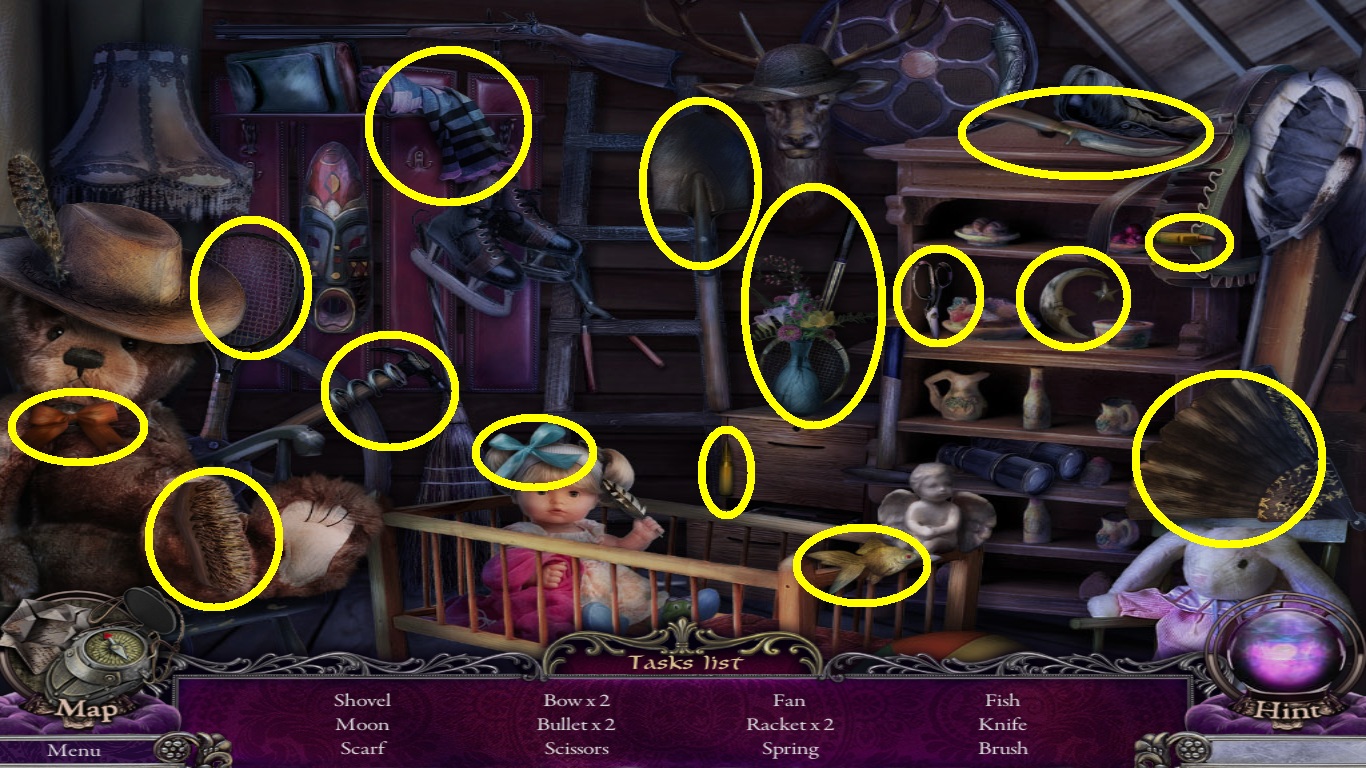
- Find all the objects on the list (yellow circles).
- Pick up the shovel.
- Go back to the backyard of the hut.
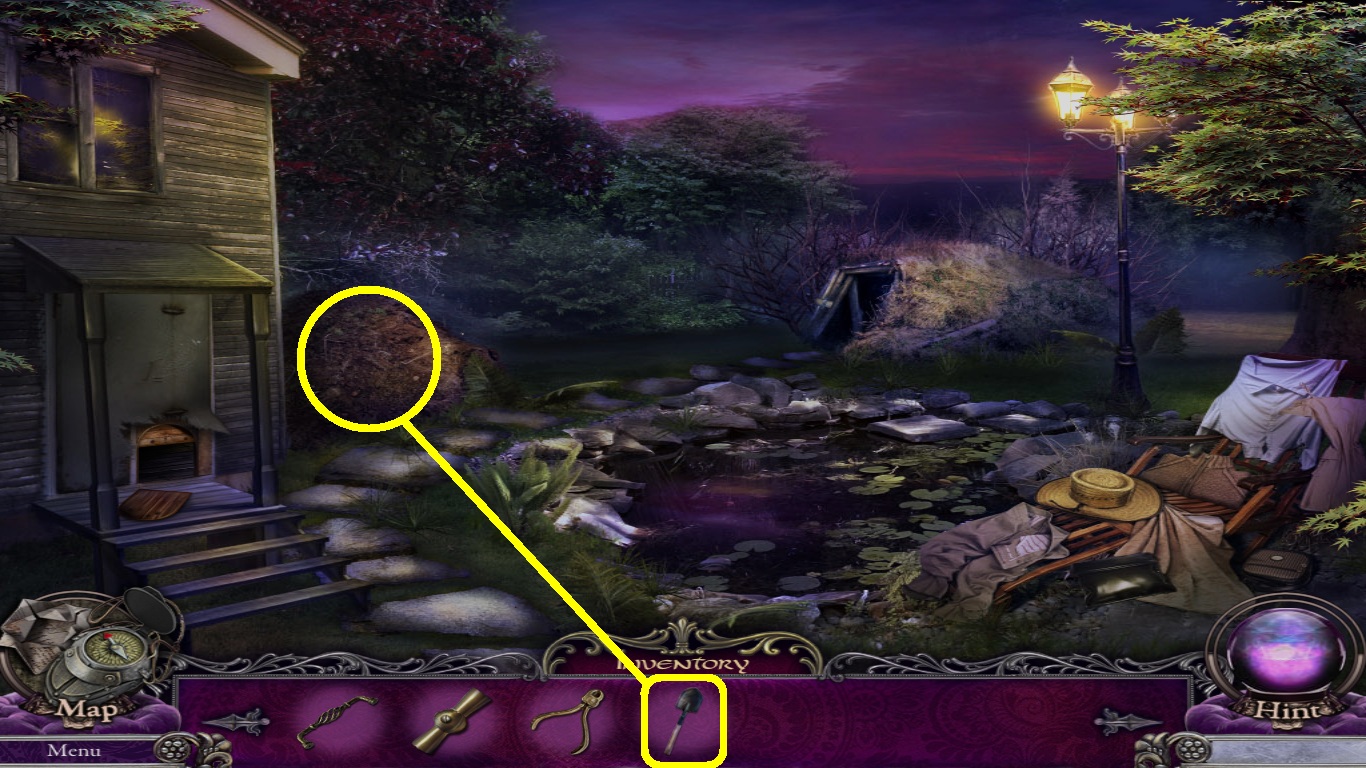
- Zoom into the mound (yellow circle).
- Select the shovel (yellow square) from the inventory; use it to dig the dirt.
- Pick up the wire.
- Go to the second floor.
- Go toward the right into Liza’s room.
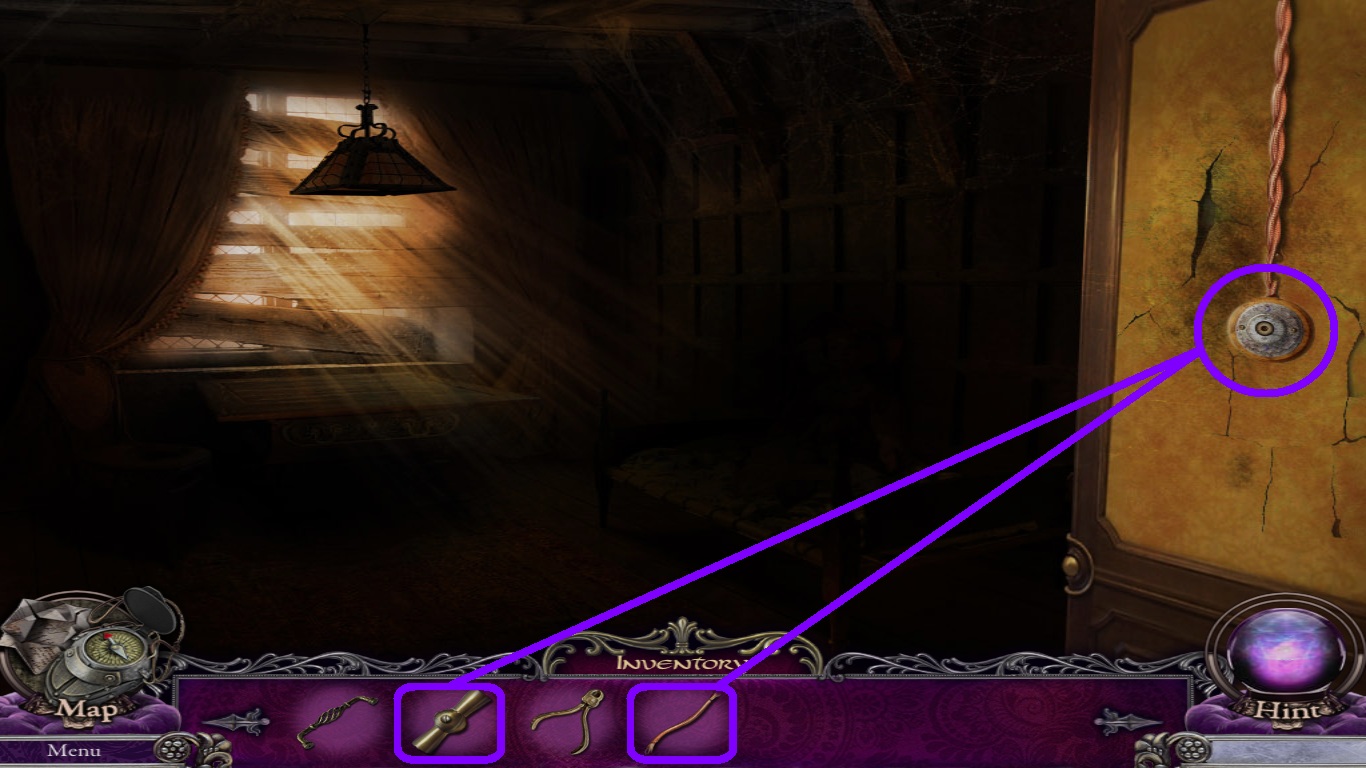
- Zoom into the switch (purple circle).
- Select the wire (purple square) from the inventory; use it to fix the faulty wire.
- Select the switch button (purple square) from the inventory; place it on the switch.
- Turn it on.
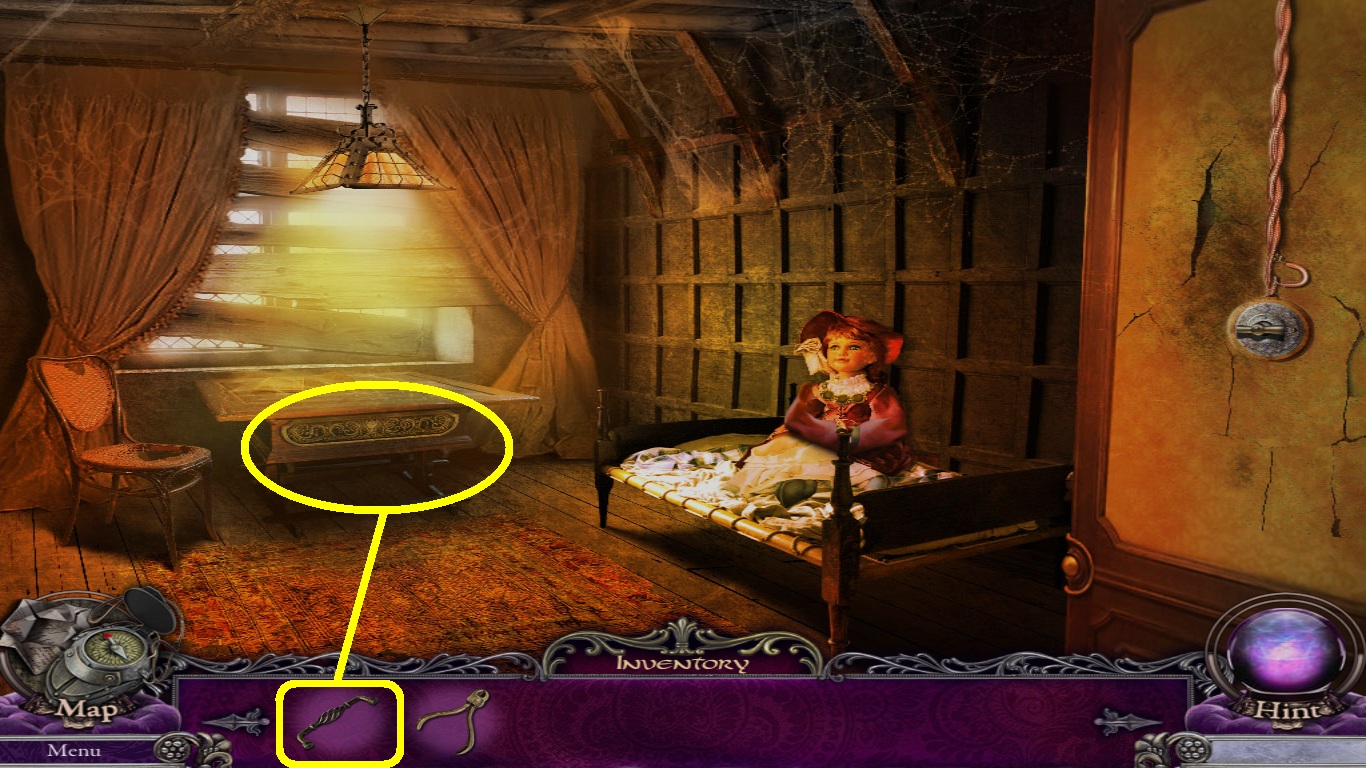
- Zoom into the drawer (yellow circle).
- Select the knob (yellow square) from the inventory; place it on the drawer.
- Open it; pick up the hunting horn.
- Go to the second floor.
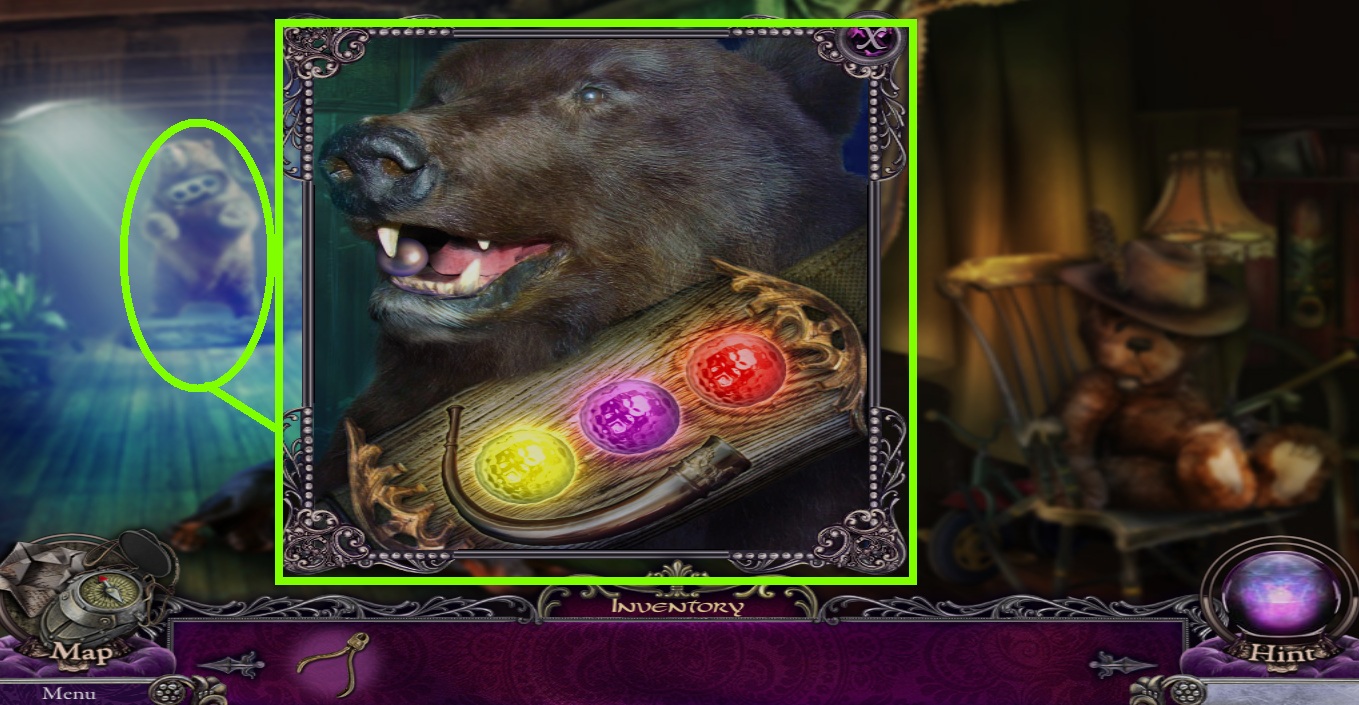
- Zoom into the bear (green circle).
- Select the horn from the inventory; place it into the groove.
- Press the buttons in the following order:
- Yellow, yellow, red; the goal is to make all 3 lights turn purple.
- Pick up the pearl.
- Go downstairs.
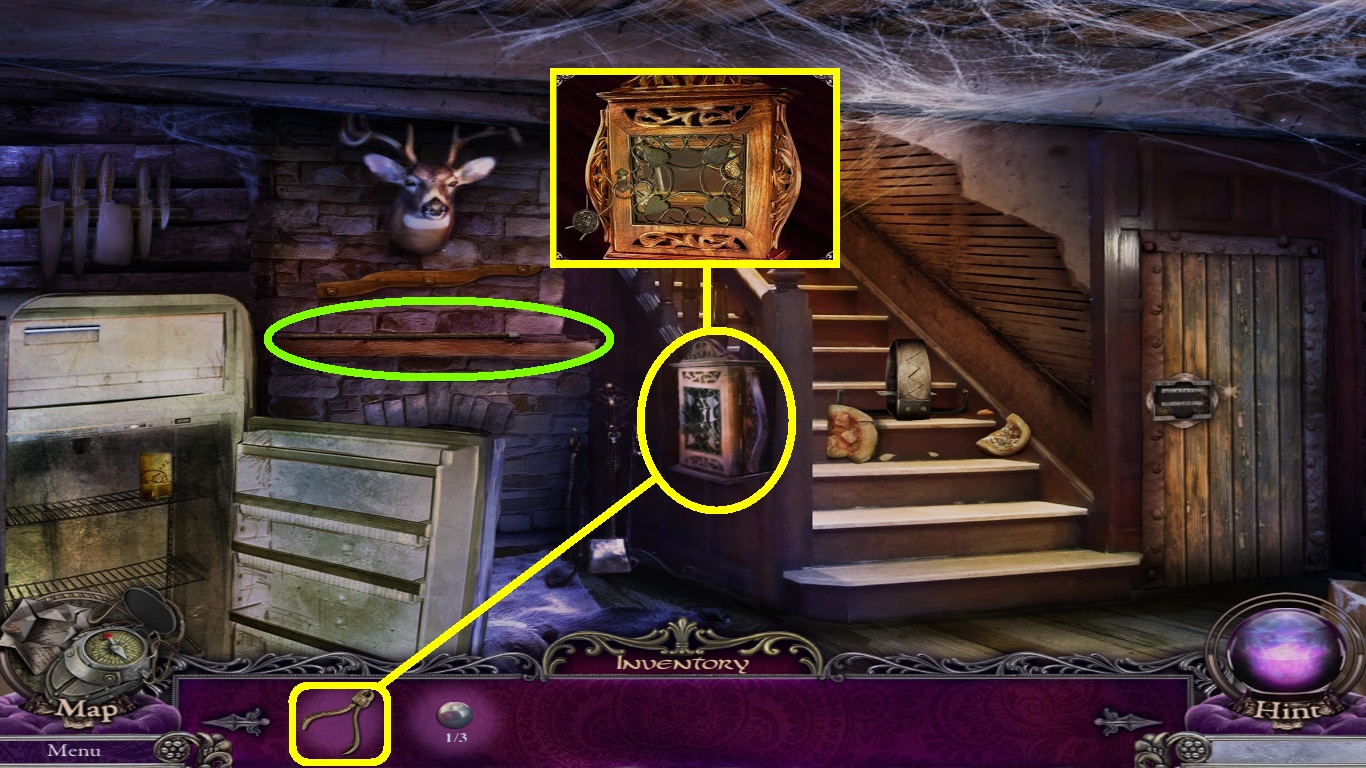
- Zoom into the key cabinet (yellow circle).
- Select the nippers (yellow square) from the inventory; use it to break the seal on the cabinet.
- Pick up the snake head and the key for Byron’s fetters.
- Zoom into the mantle (green circle).
- Select the snake head from the inventory; put it onto the cane.
- Pick up the pearl.
- Go to the backyard of the hut.
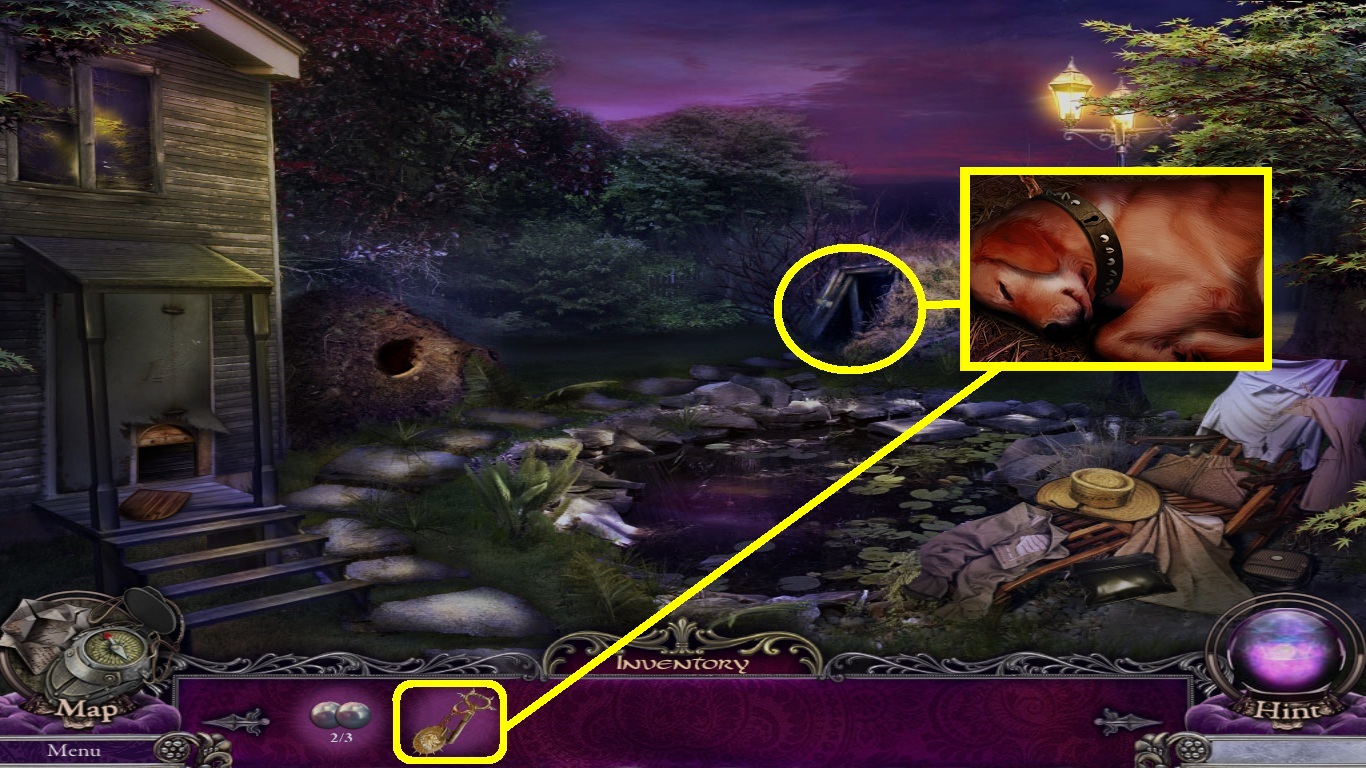
- Zoom into the well (yellow circle).
- Select the key for Byron’s fetters (yellow square) from the inventory; use it to free man’s best friend.
- Pick up the pearl.
- Go to Liza’s room.
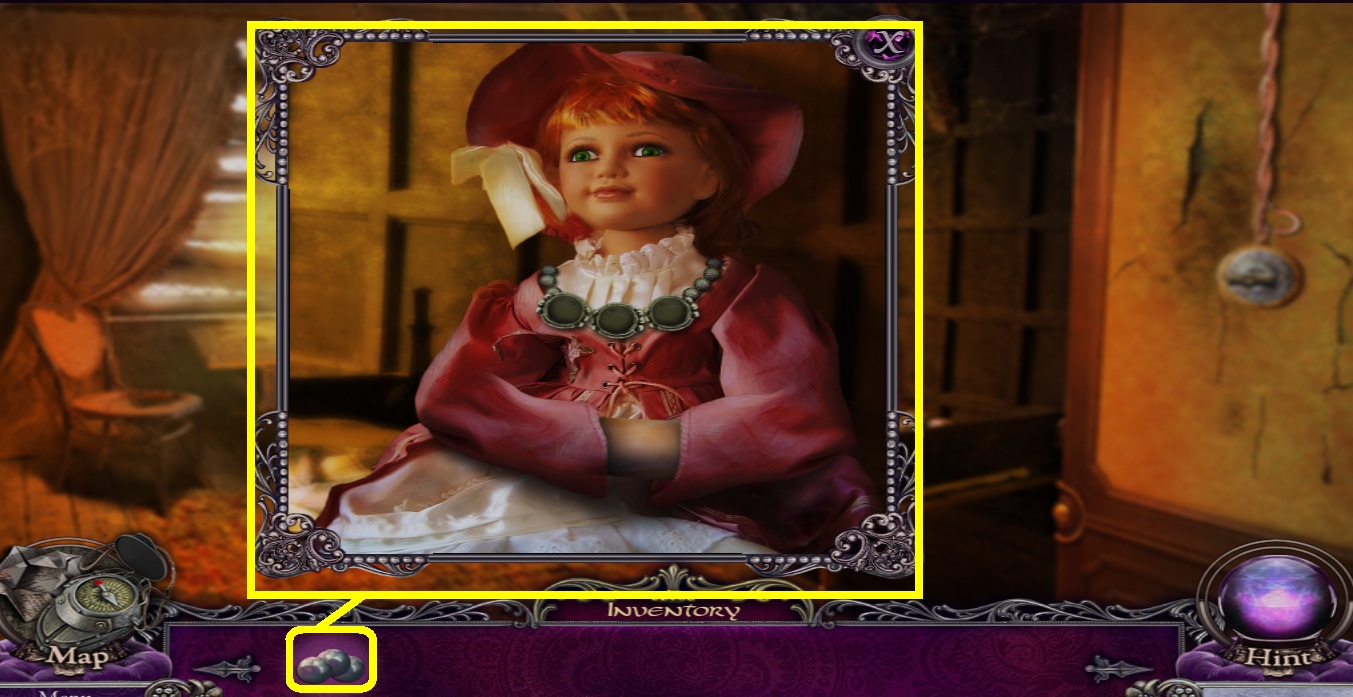
- Zoom into the doll (yellow square).
- Select the pearls (yellow square) from the inventory; place them into the slots in the necklace.
- Pick up the lock pick.
- Go to the living room.
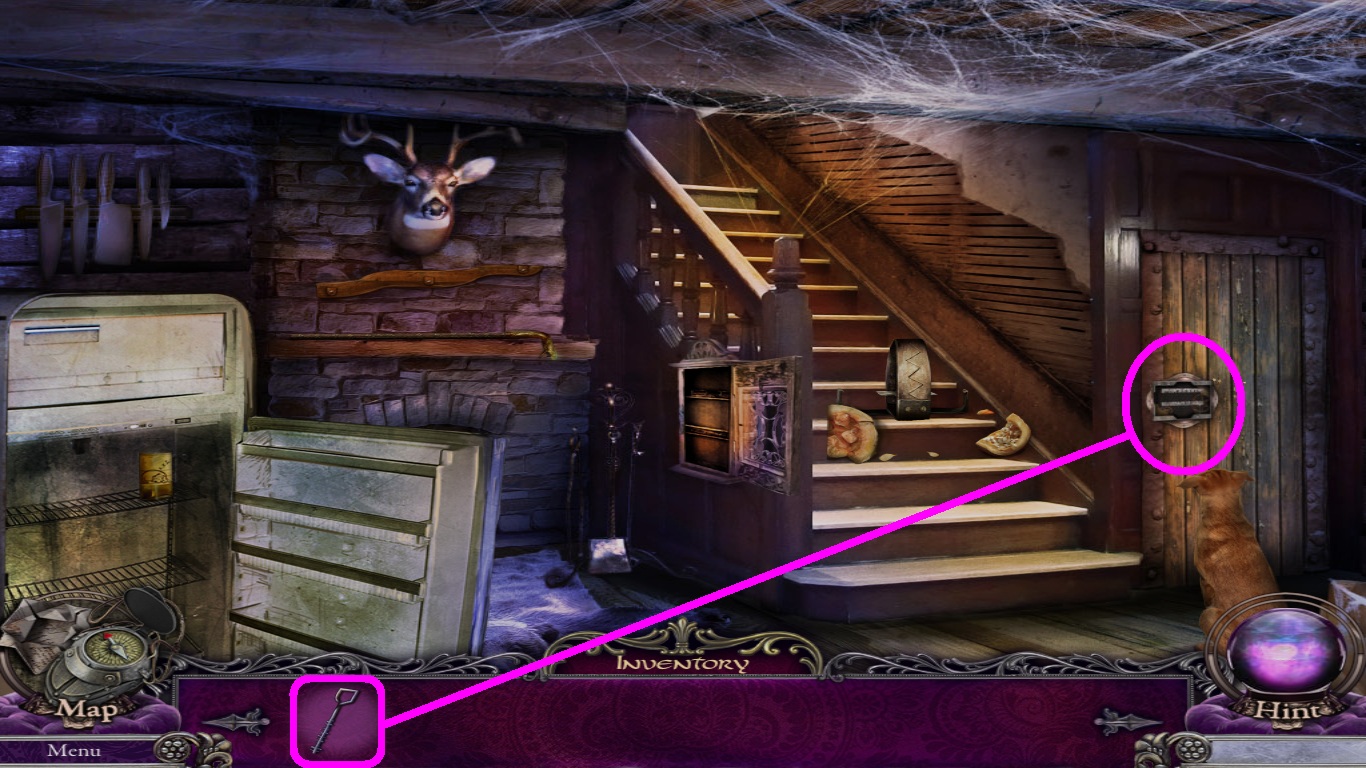
- Zoom into the door (pink circle).
- Select the lock pick (pink square) from the inventory; insert it into the door.
- A mini game will open.
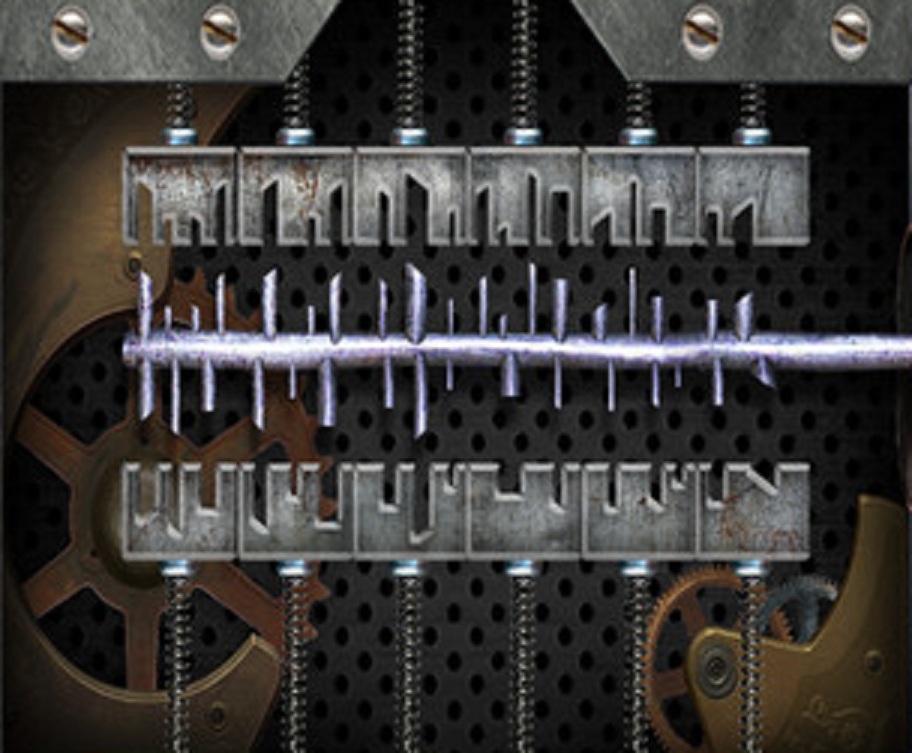
- Move the picks to match the openings.
- Switching is only allowed with picks next to one another.
Once done, you will have completed Surface: The Noise She Couldn’t Make. Congratulations!
