
Chapter 3: Numb
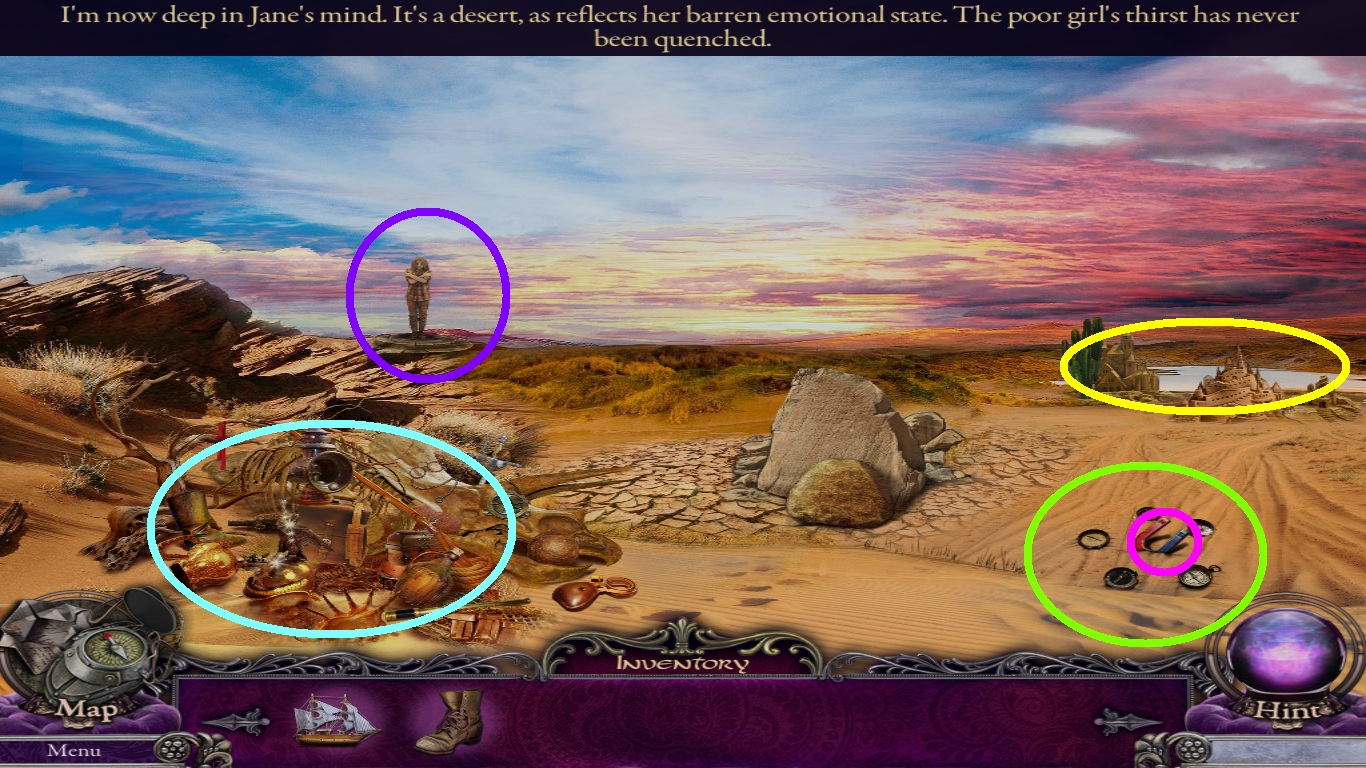
- Notice the sand river (yellow circle).
- Zoom into the compasses (green circle).
- Pick up the magnet (pink circle).
- Notice the statue (purple circle).
- Click the debris (aqua circle) for the hidden object area.
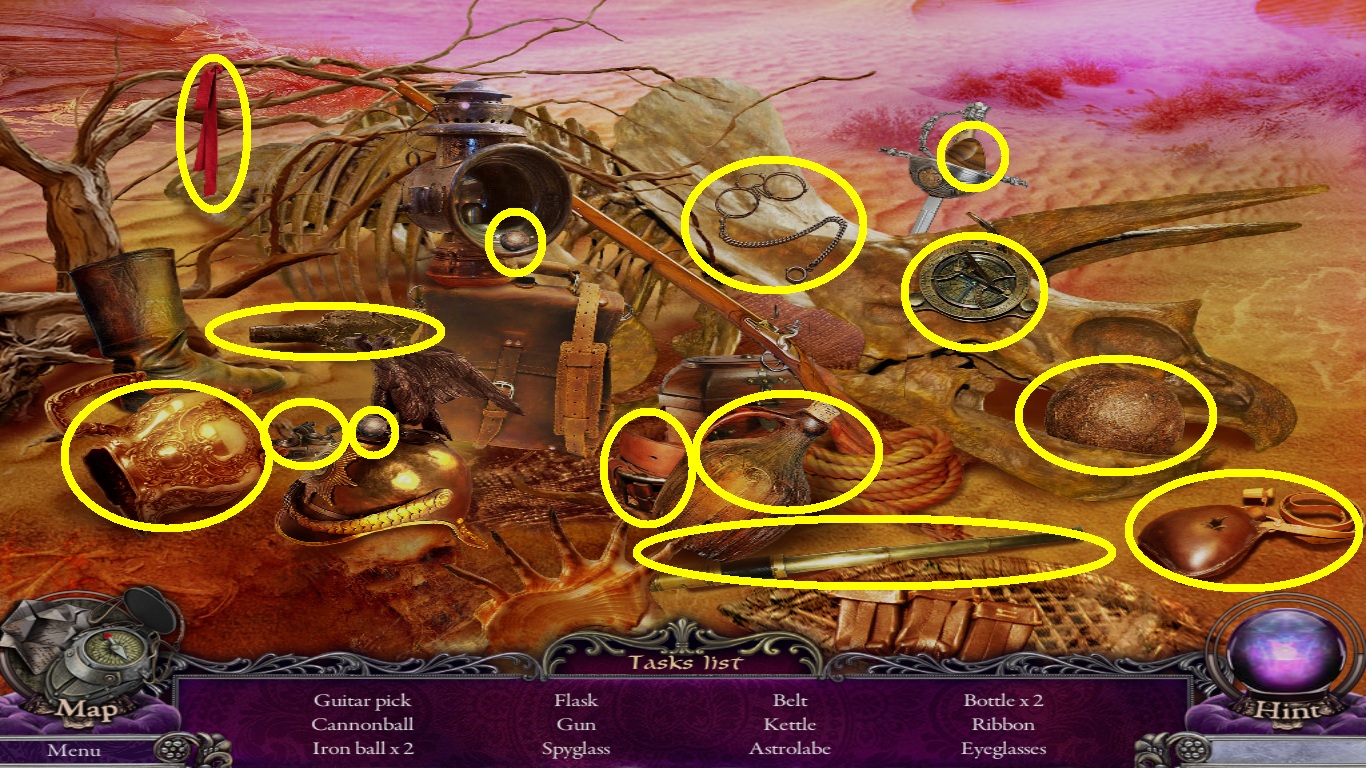
- Find the listed objects (yellow circles).
- Pick up the guitar pick.
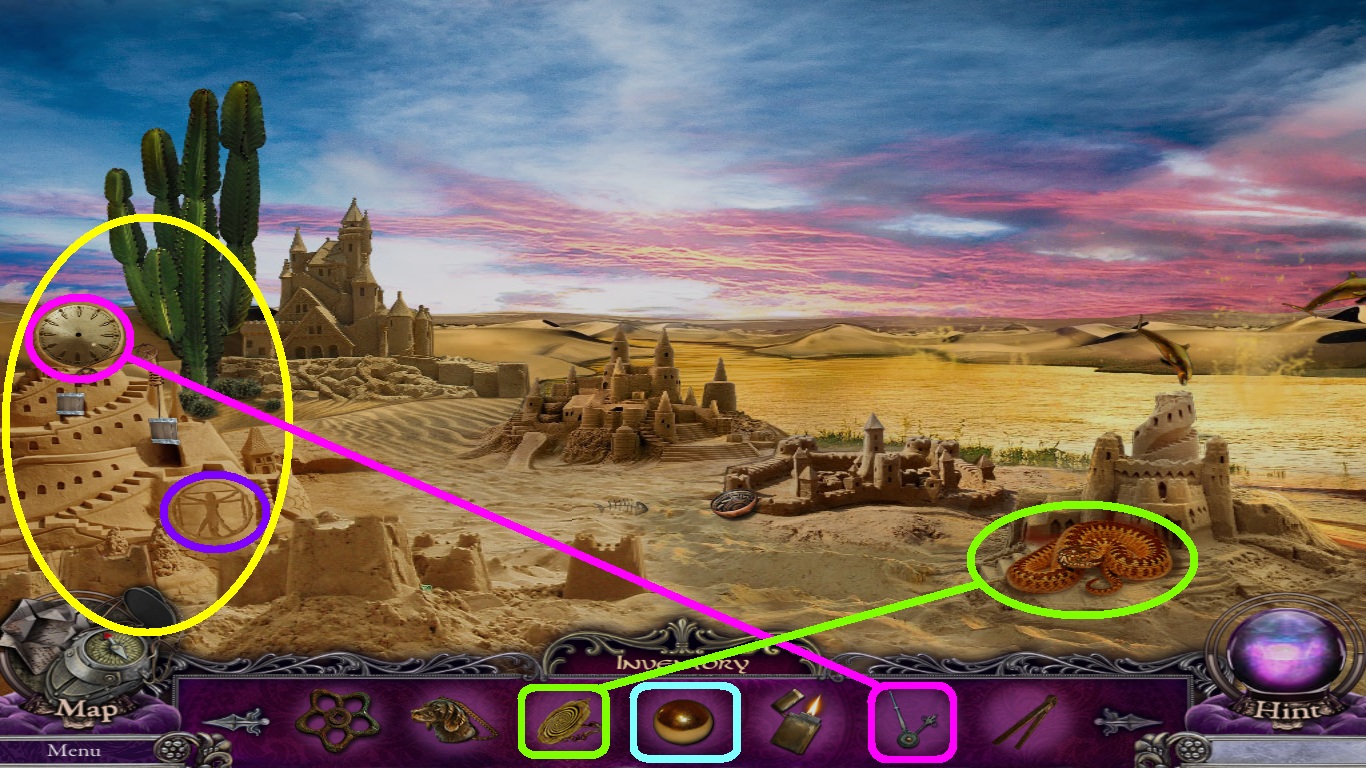
- Go to the sand river.

- Zoom into the sand castle (yellow circle).
- Pick up the lever (pink circle) and lift the gate (aqua circle).
- Zoom into the cactus (green circle).
- Select the magnet (blue square) from the inventory; use them to pick up the cactus needles (blue circle).
- Pick up the dropper.
- Go to the statue.
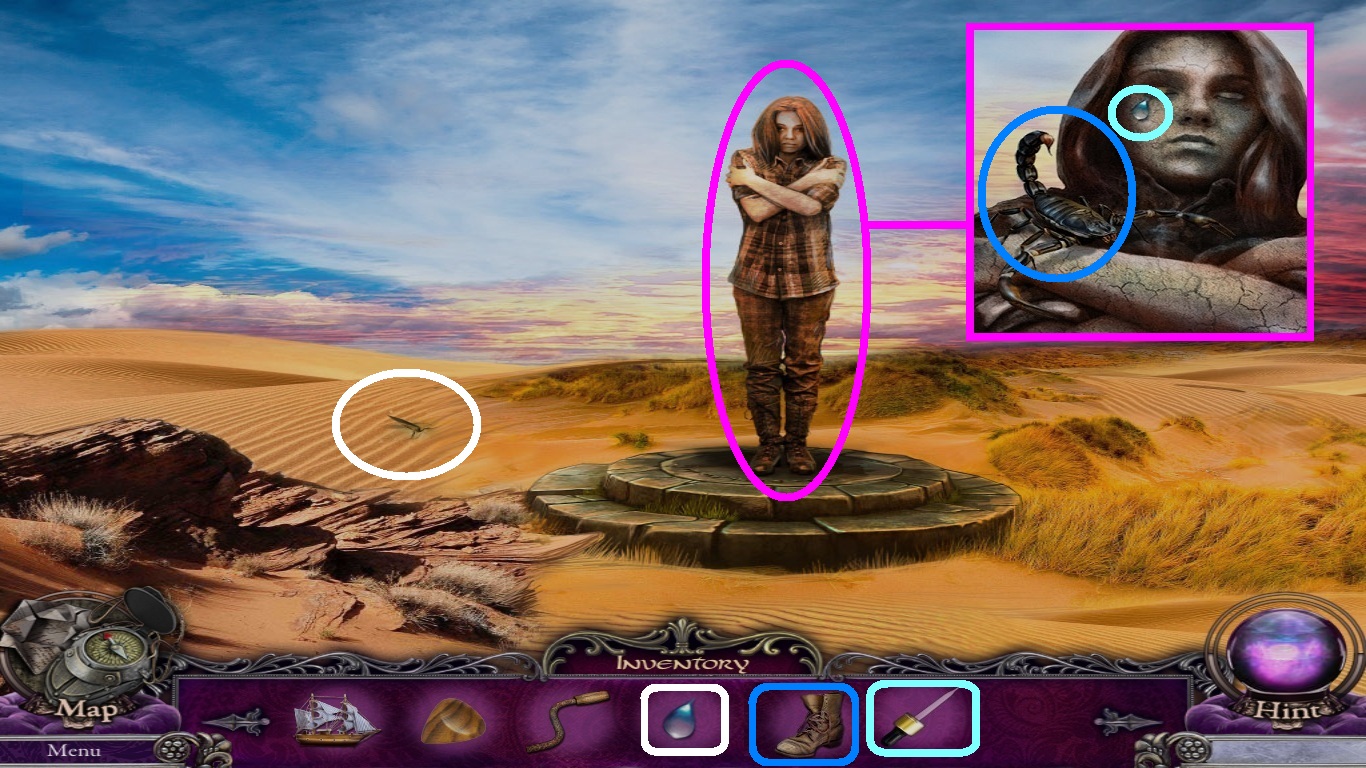
- Zoom into the statue (pink circle) to understand Jane’s symptoms.
- Select the boot (blue square) from the inventory; use it on the scorpion (blue circle).
- Select the dropper (aqua square) from the inventory; use it to capture her tears (aqua circle).
- Zoom into the plant (white circle).
- Select the tear (white square) from the inventory; use them on the plant.
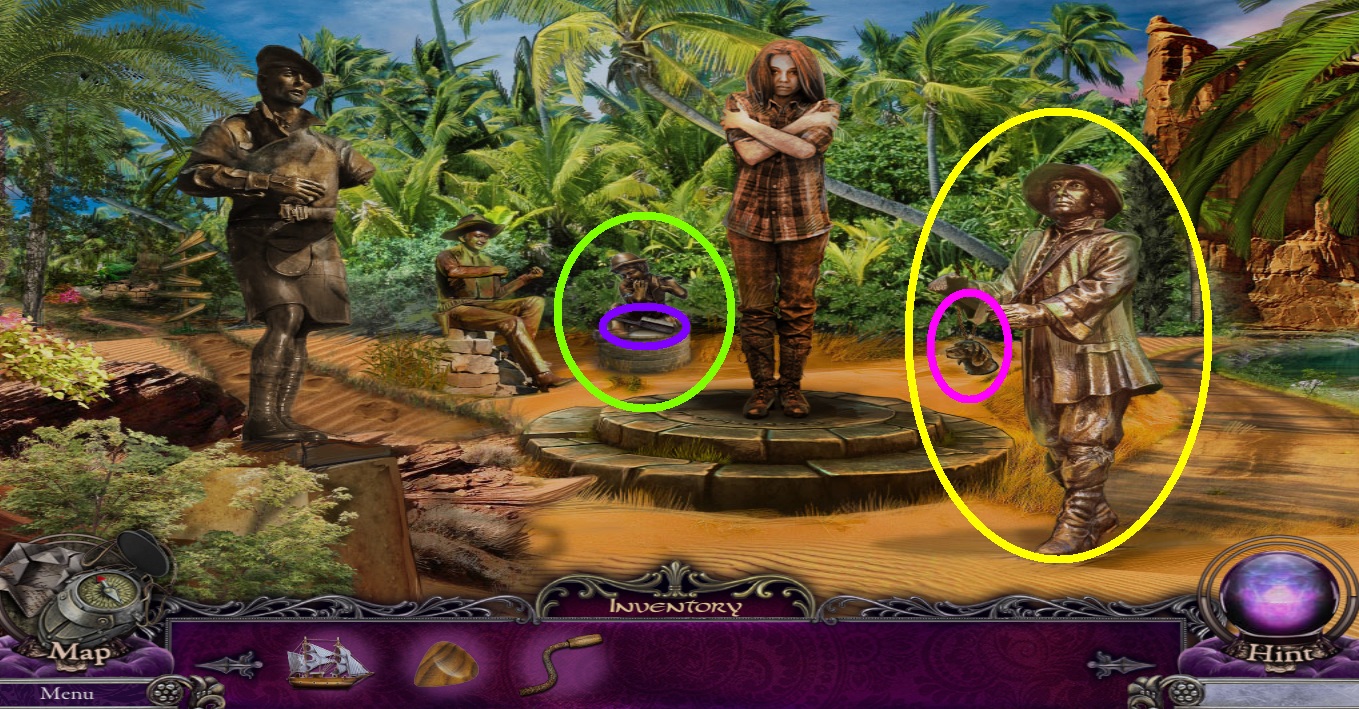
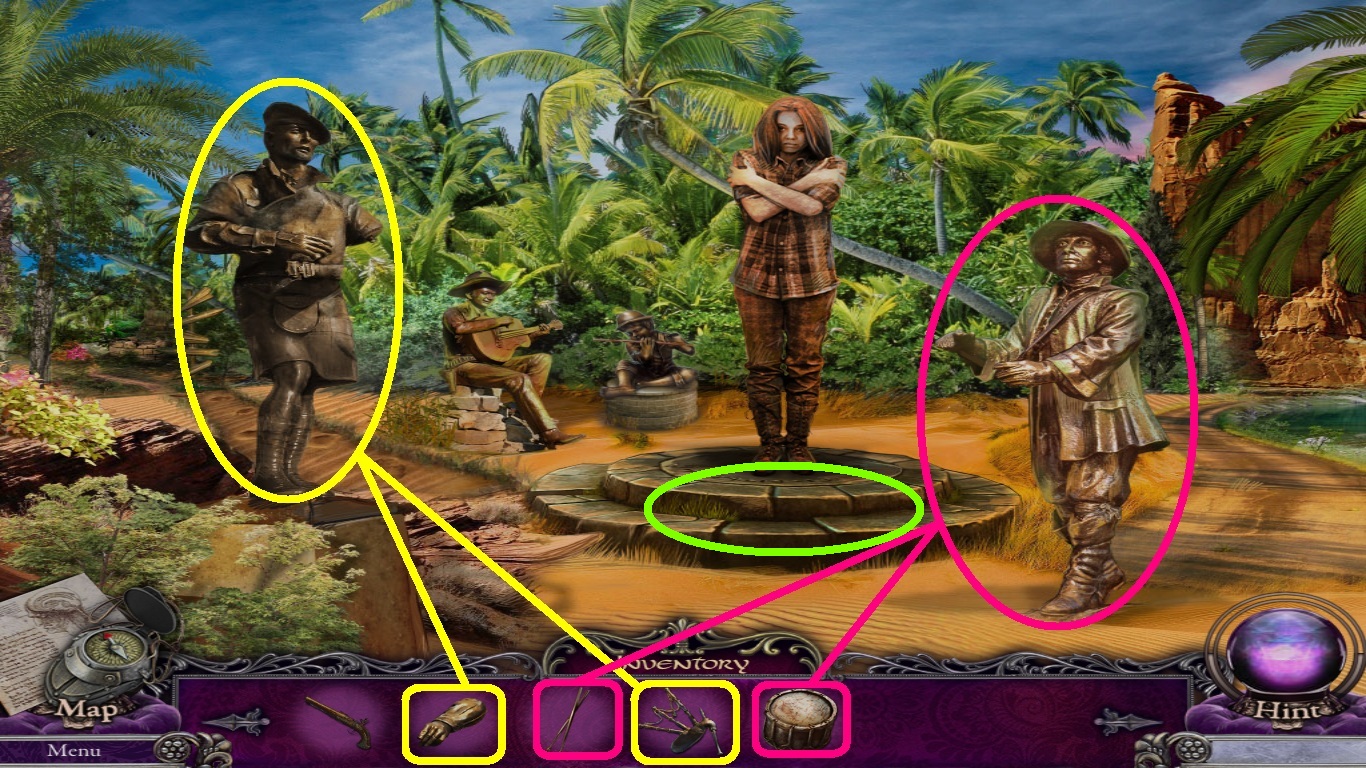
- Zoom into the drummer statue (yellow circle).
- Pick up the dog medallion (pink circle).
- Zoom into the piper (green circle).
- Pick up the brush (purple circle).
- Go to the oasis.
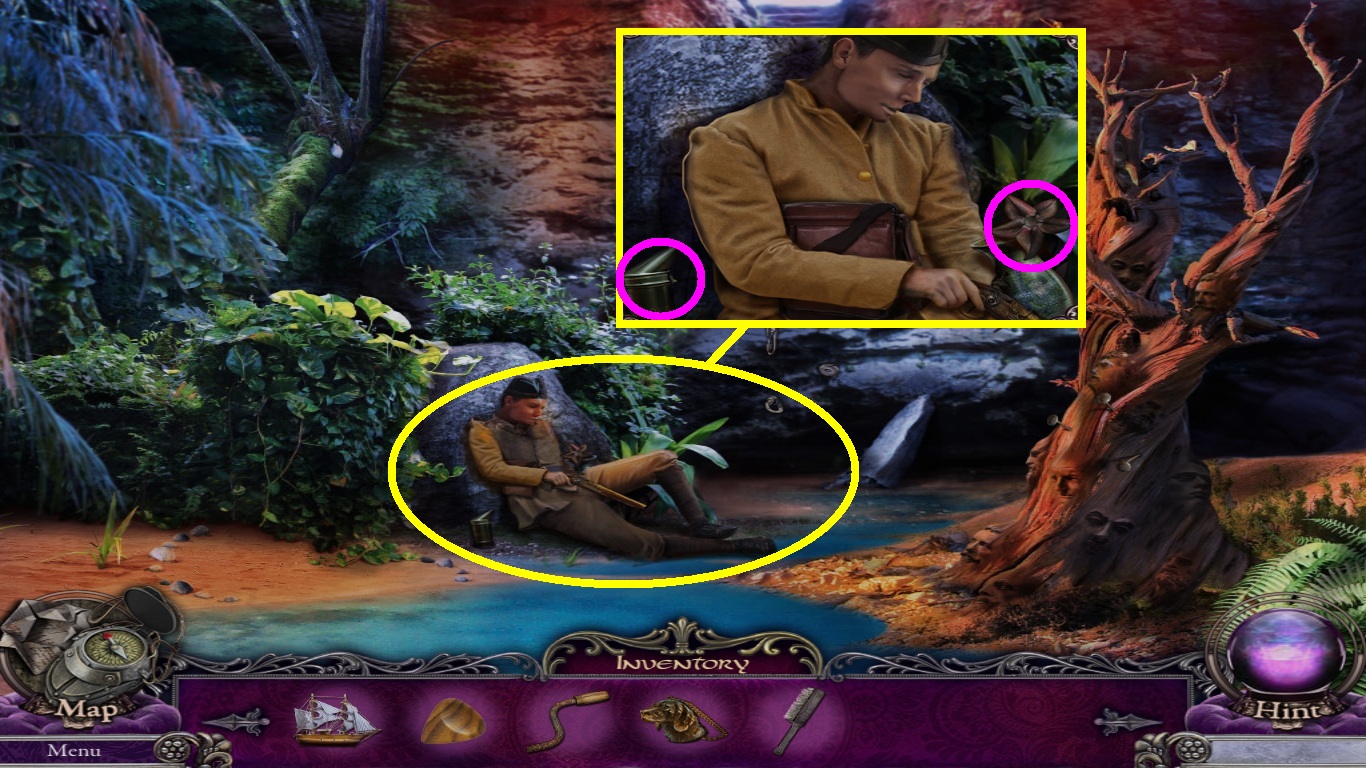
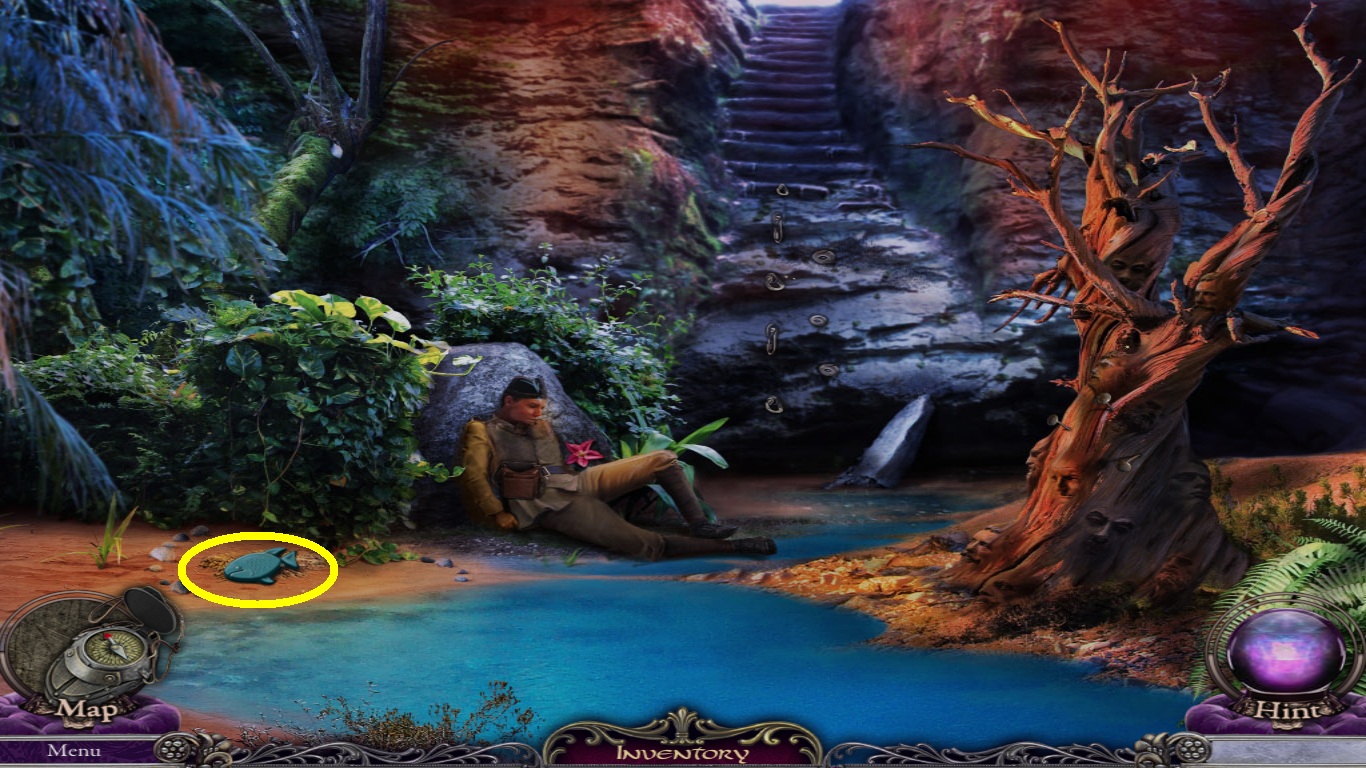
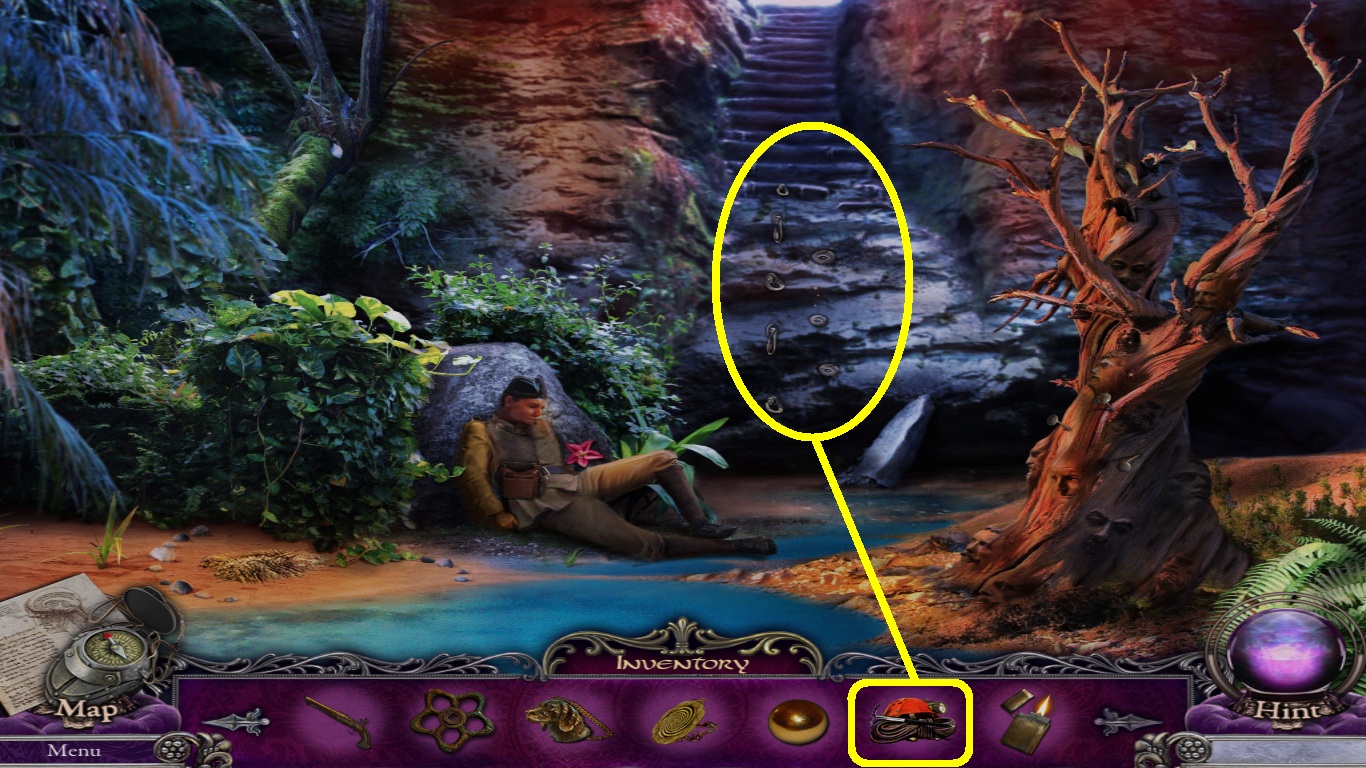
- Zoom into the soldier (yellow circle).
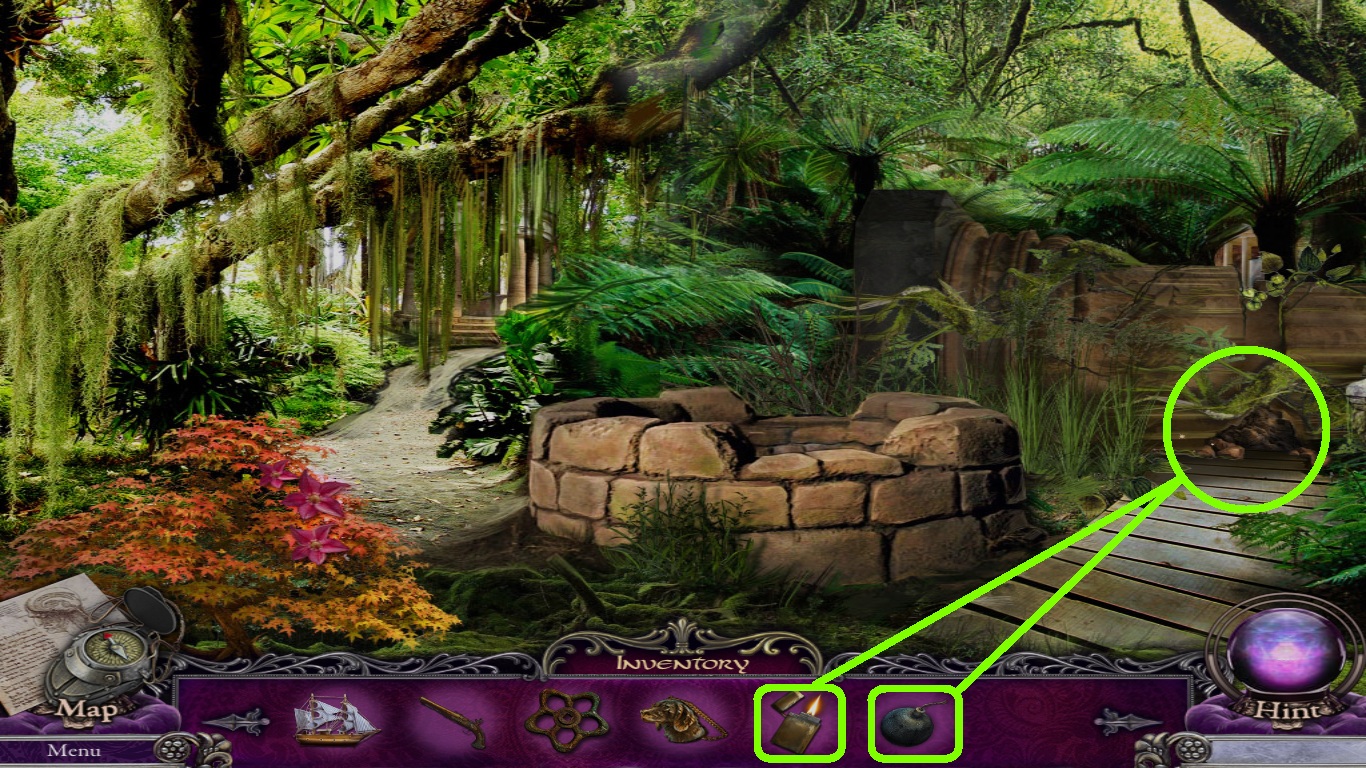
- Pick up the smoke bomb and the dead flower (pink circles).
- Go to the statue garden and then to the fork in the road.
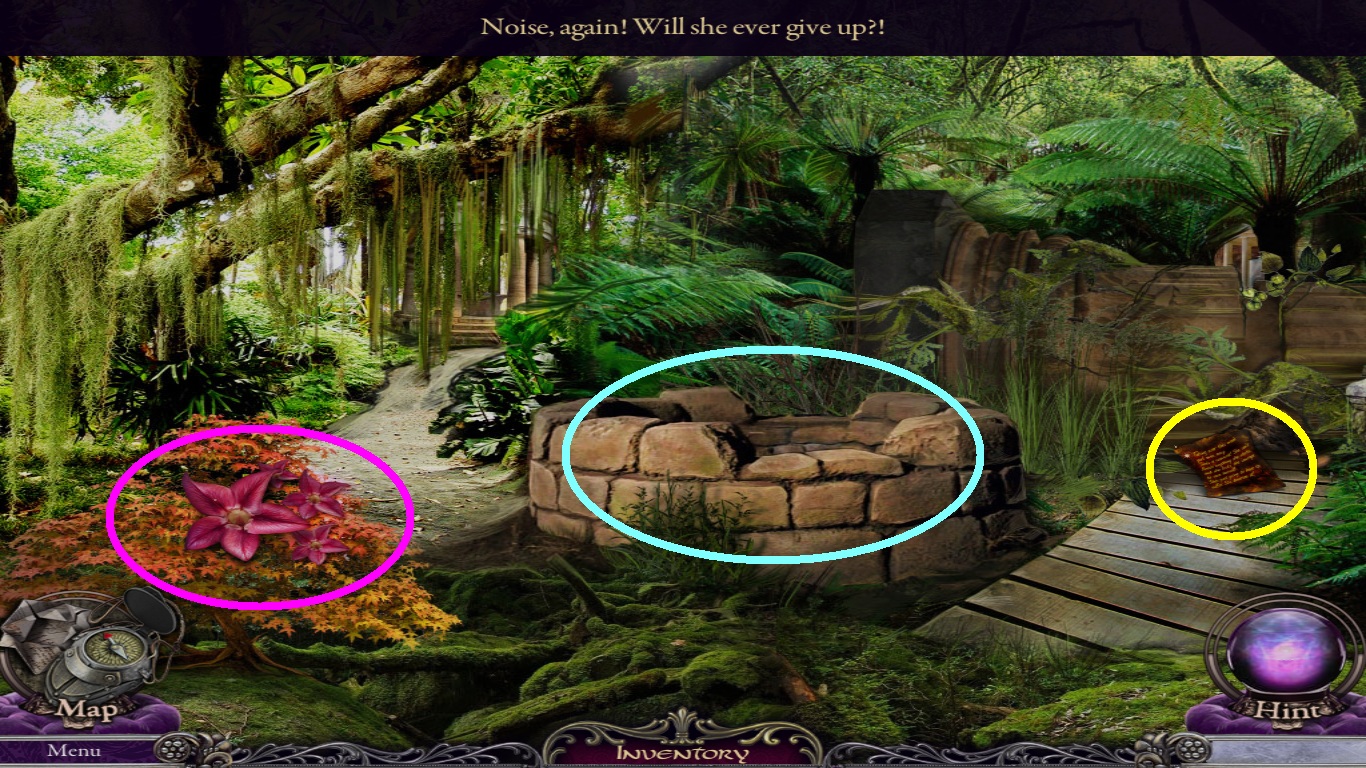
- Zoom into the flowers (pink circle).
- Select the smoke bomb from the inventory; use it to remove the bees.
- Pick up the flower.
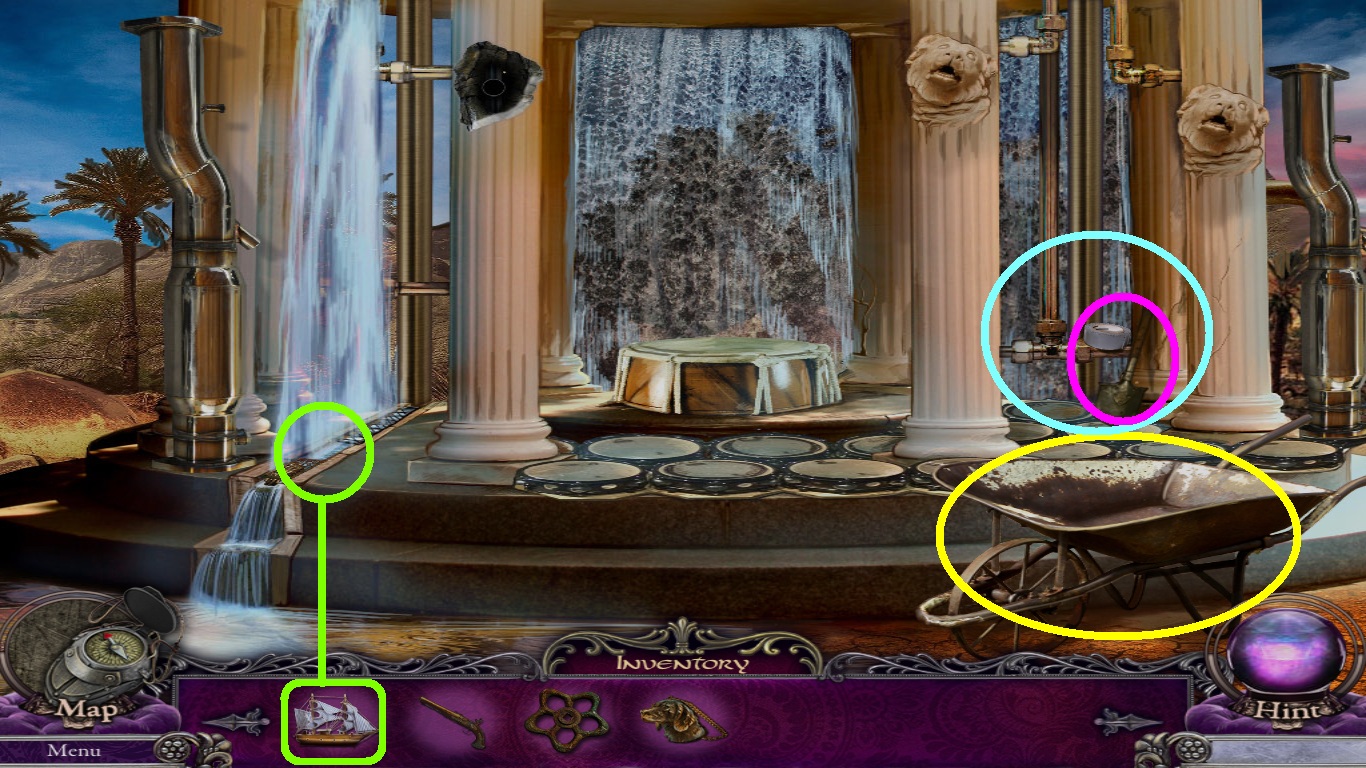
- Zoom into the well (aqua circle).
- Pick up the valve.
- Zoom into the page (yellow circle) and read it.
- Go to the hall of ropes.
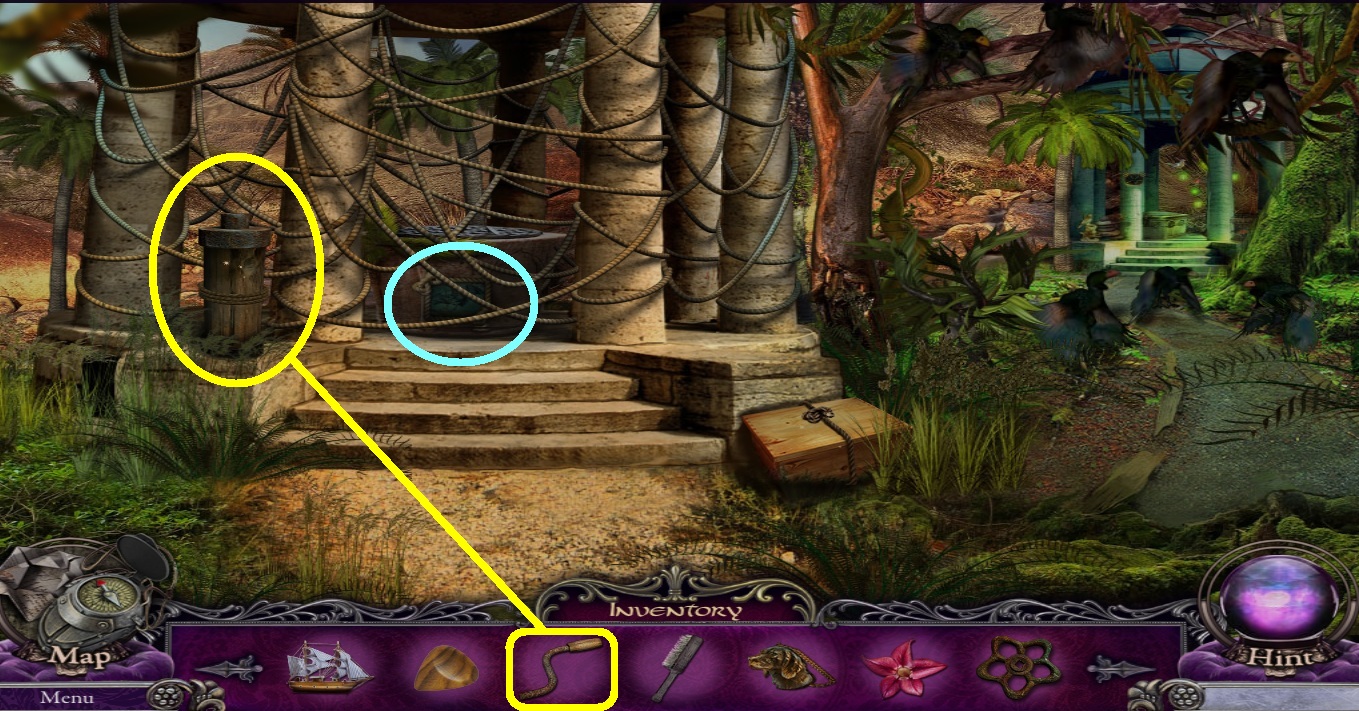
- Zoom into the winch (yellow circle).
- Select the lever from the inventory (yellow square); place it on the top of the winch.
- Click the platform base (aqua circle) to trigger a mini game.

- Solve this puzzle by using the rope to trace all the lines without retracing your path.
- Use the following sequence: 7 – 5 – 8- 7- 6- 3- 7- 4- 3 -1 -4 -5 -1 -2 -5.
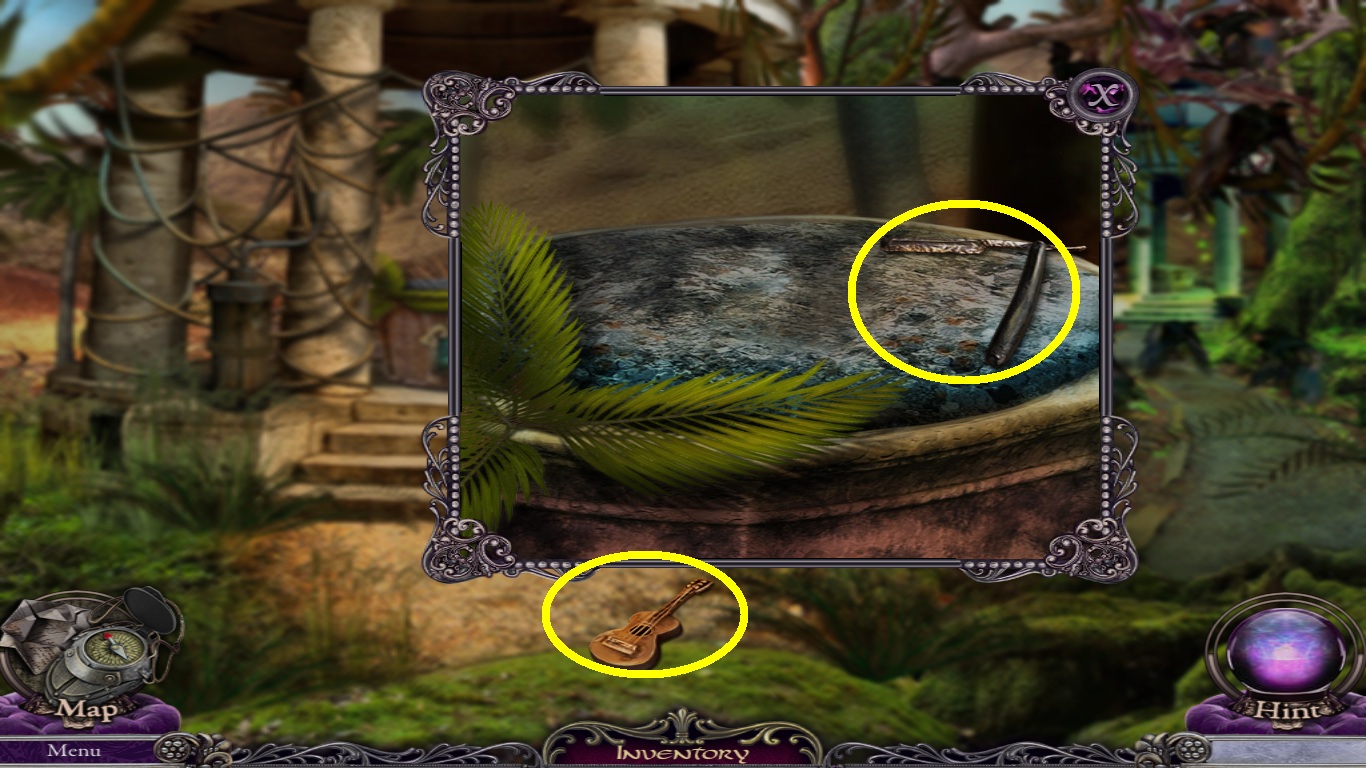
- Zoom into the platform.
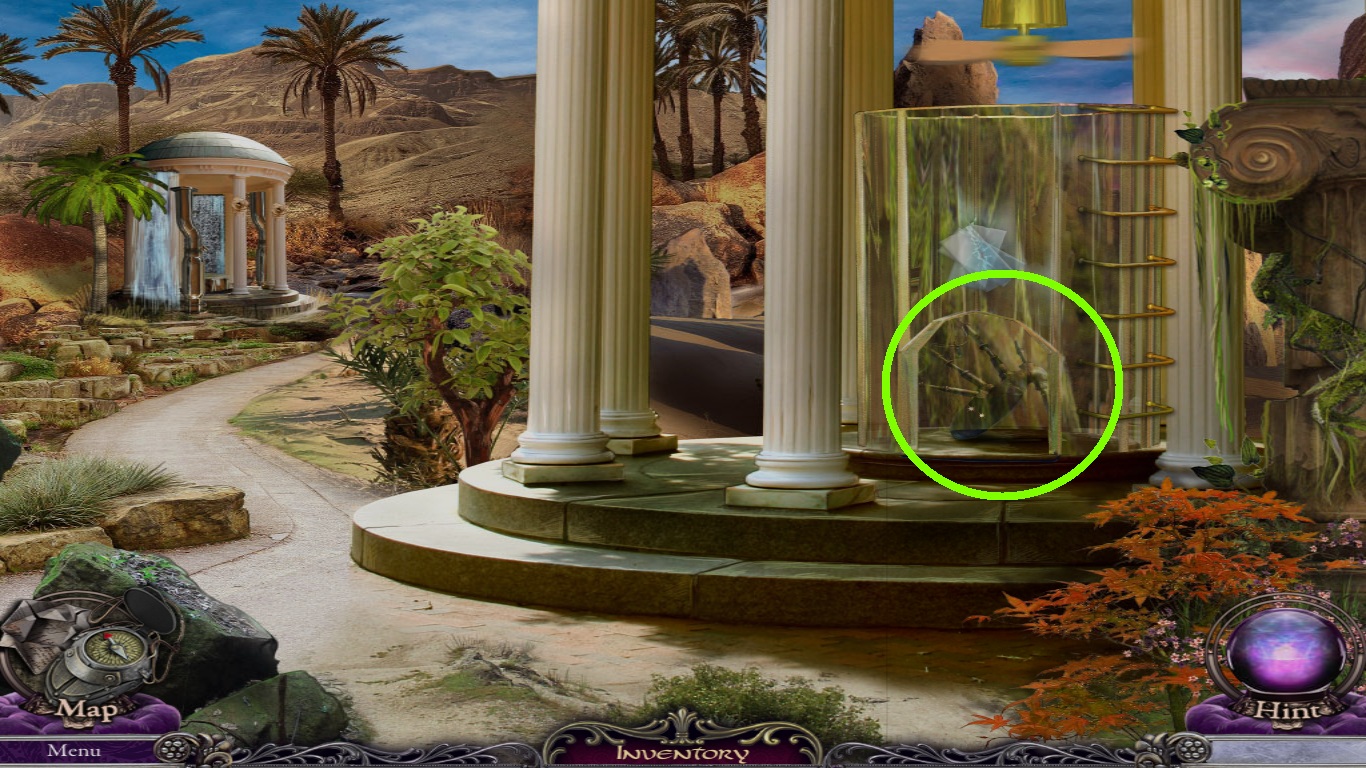
- Pick up the guitar and the blade (yellow circles).
- Go to the desert.
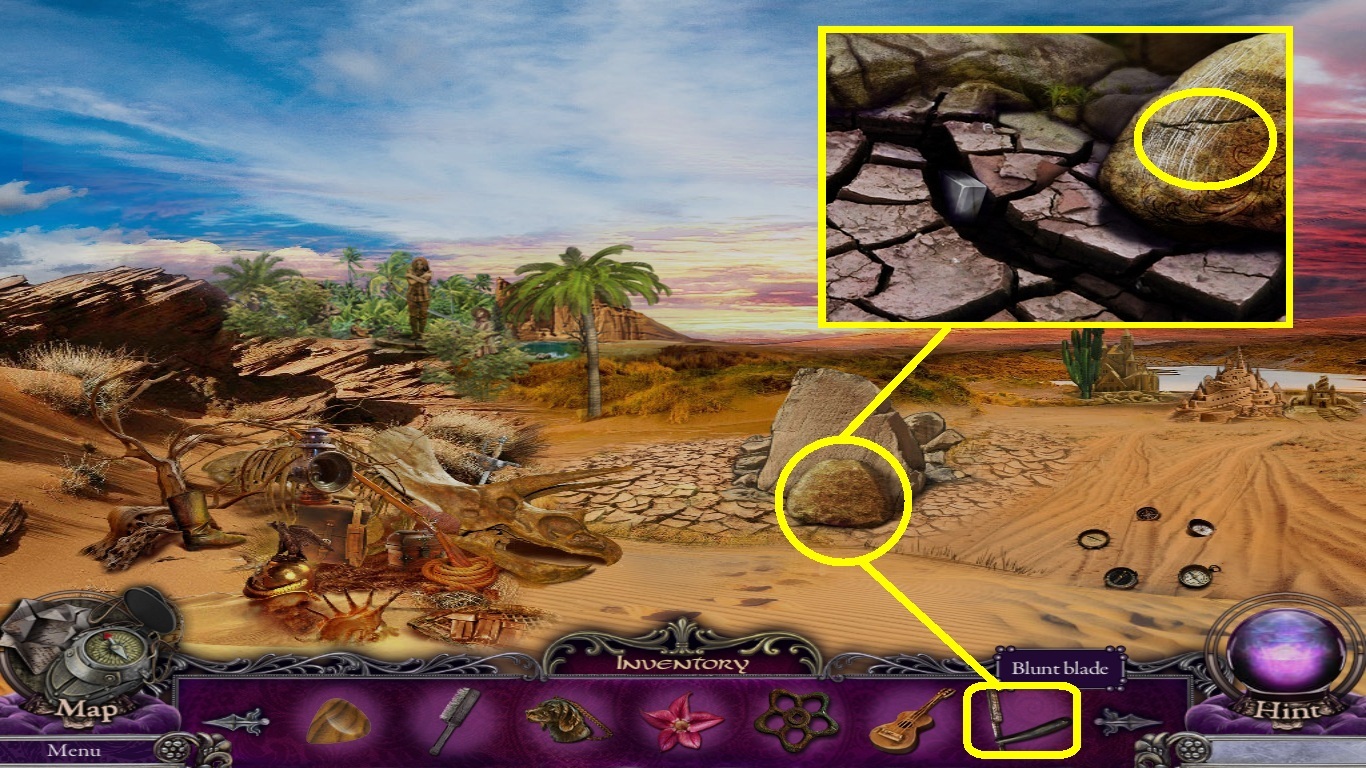
- Zoom into the rock (yellow circle).
- Select the blade from the inventory (yellow square); use the rock to create a sharp blade.
- Pick up the blade.
- Go to the hall of ropes.
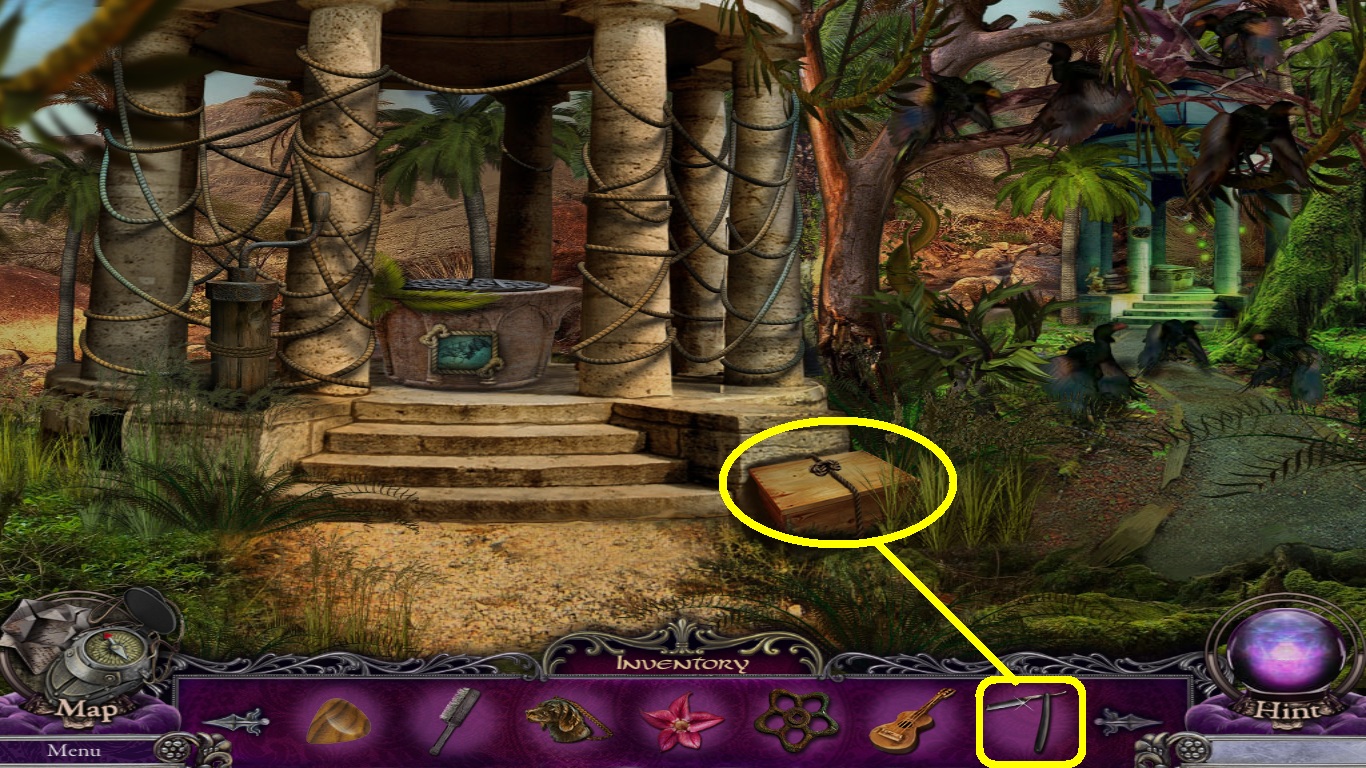
- Zoom into the box (yellow circle).
- Select the sharp blade (yellow square) from the inventory; use it to cut the rope.
- Pick up the rake.
- Go to the oasis.

- Zoom into the soldier.
- Select the flower (yellow square) from the inventory; put it into the vase (yellow circle).
- Pick up the musket.
- Open the bag, pick up the pipe brush.
- Go to the fork in the road.
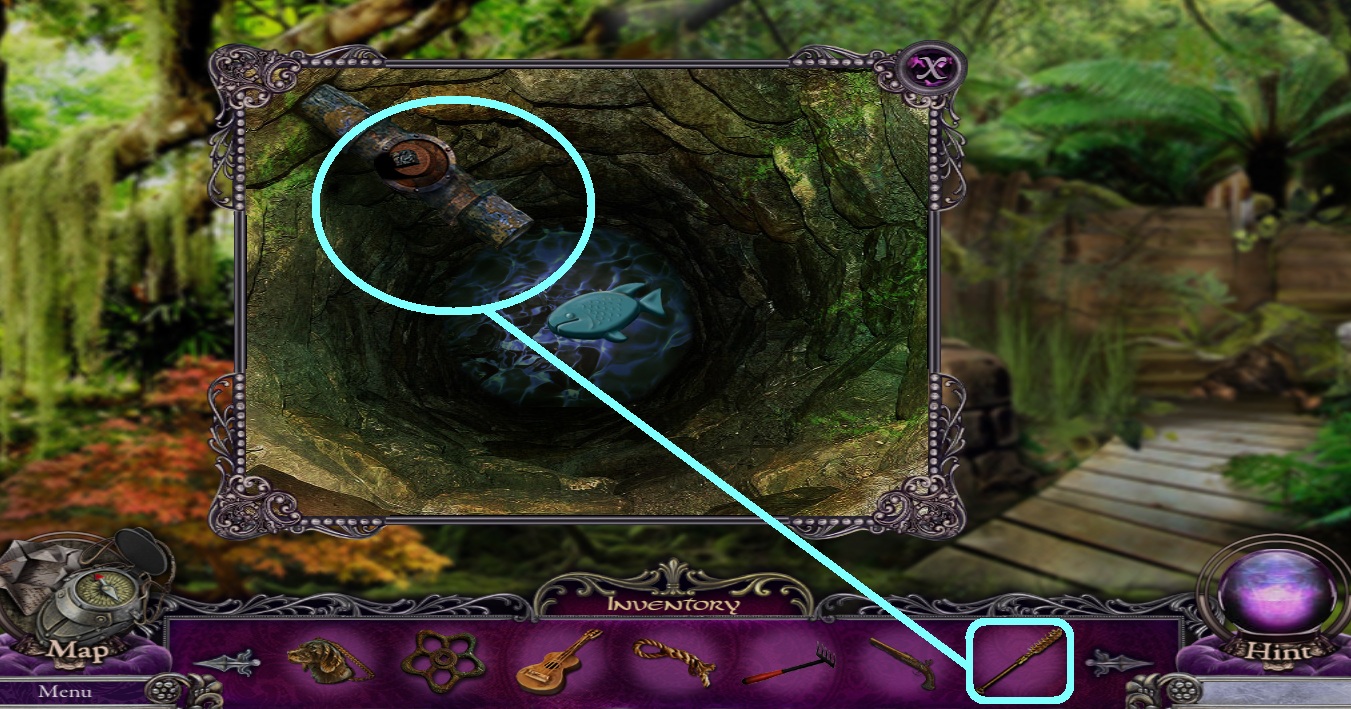
- Zoom into the well (aqua circle).
- Select the pipe brush from the inventory; use it in the pipe.
- Pick up the form.
- Go back to the oasis.
- Zoom into the sand.
- Select the rake from the inventory; use it to rake the sand.
- Select the fish form from the inventory; put it onto the raked sand (yellow circle).
- Take the mold off and pick up the sand fish.
- Go to the sand river.
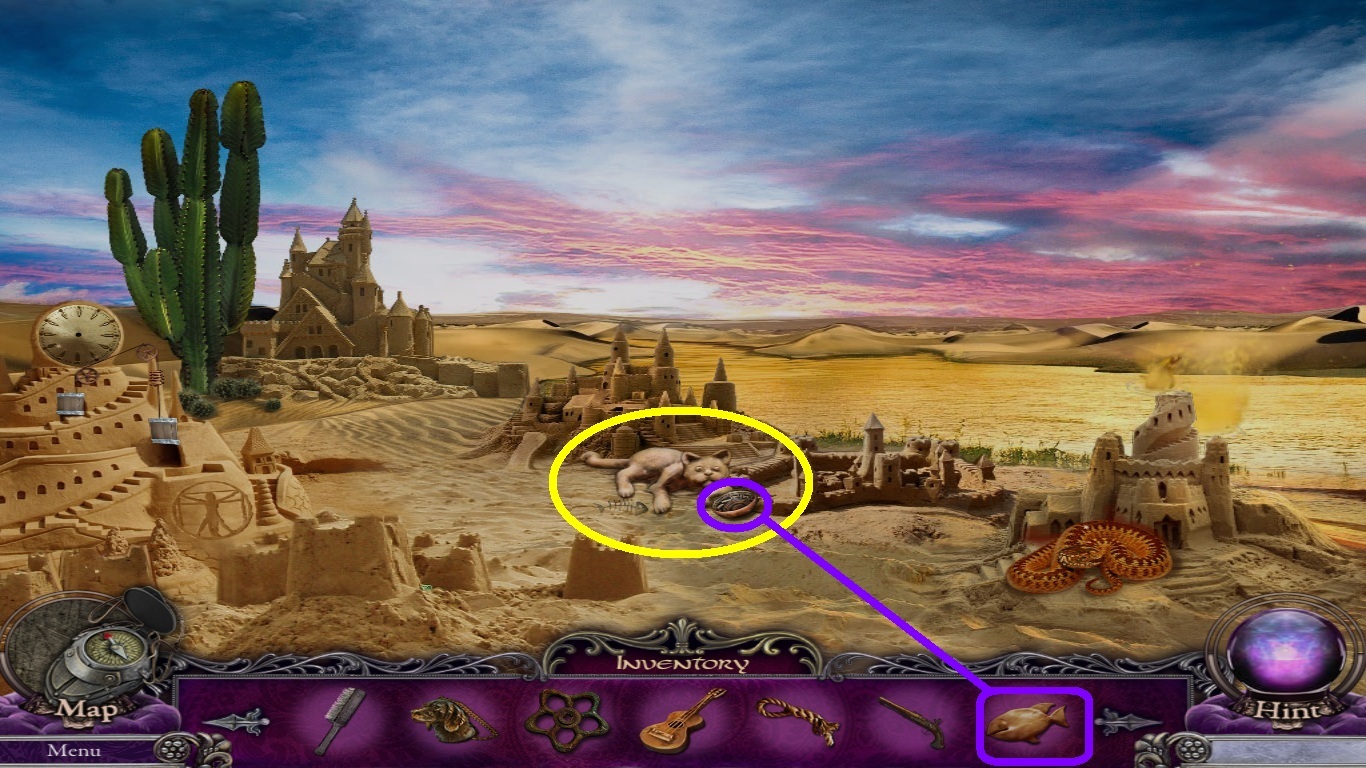
- Zoom into the cat (yellow circle).
- Select the sand fish (purple square) from the inventory; put it into the bowl (purple circle).
- Pick up the sand cat.
- Go to the hall of ropes.
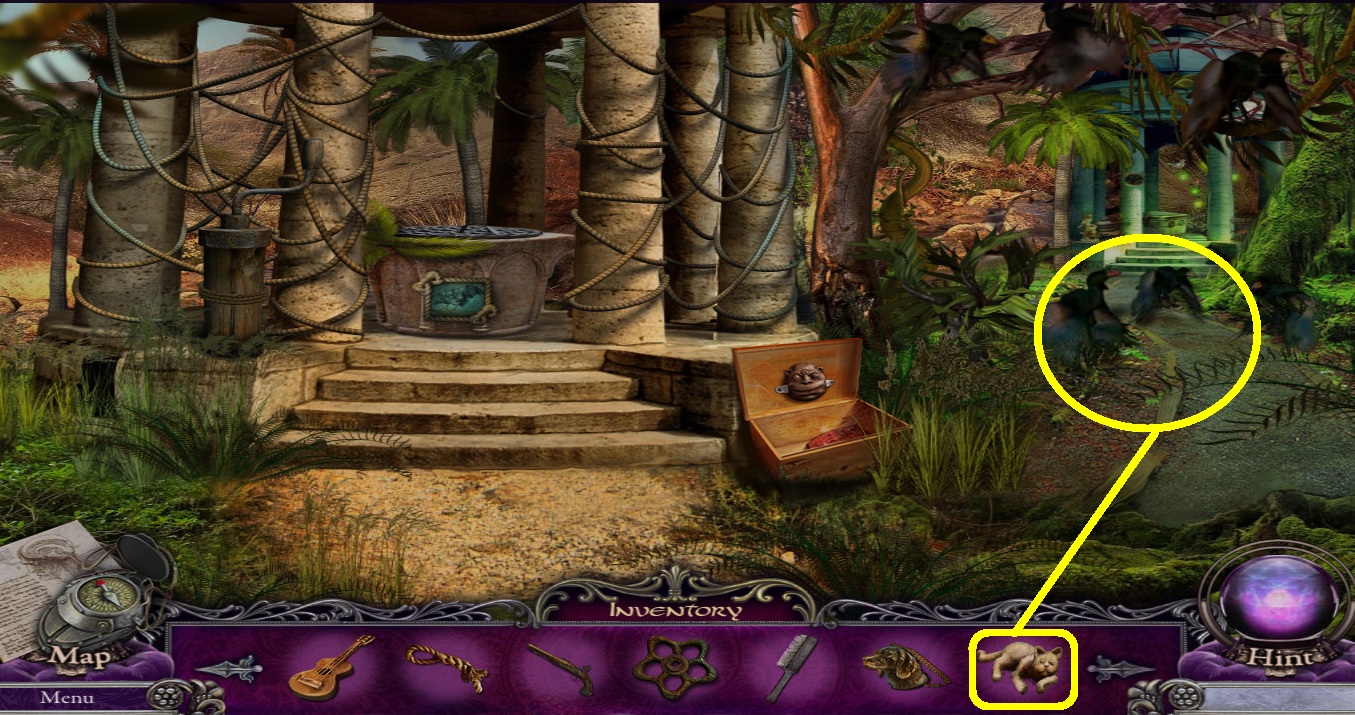
- Select the sand cat (yellow square) from the inventory.
- Use the sand cat on the birds (yellow circle).
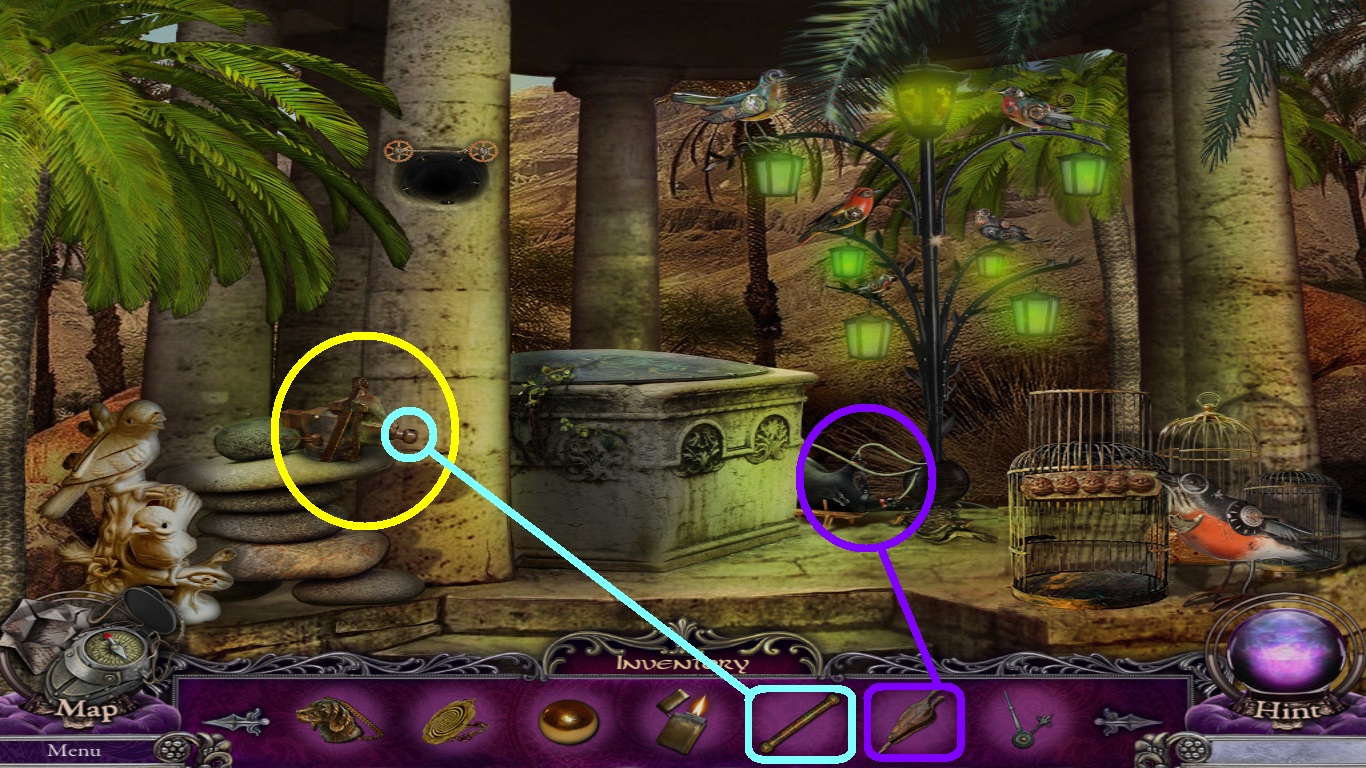
- Go into the hall of birds.
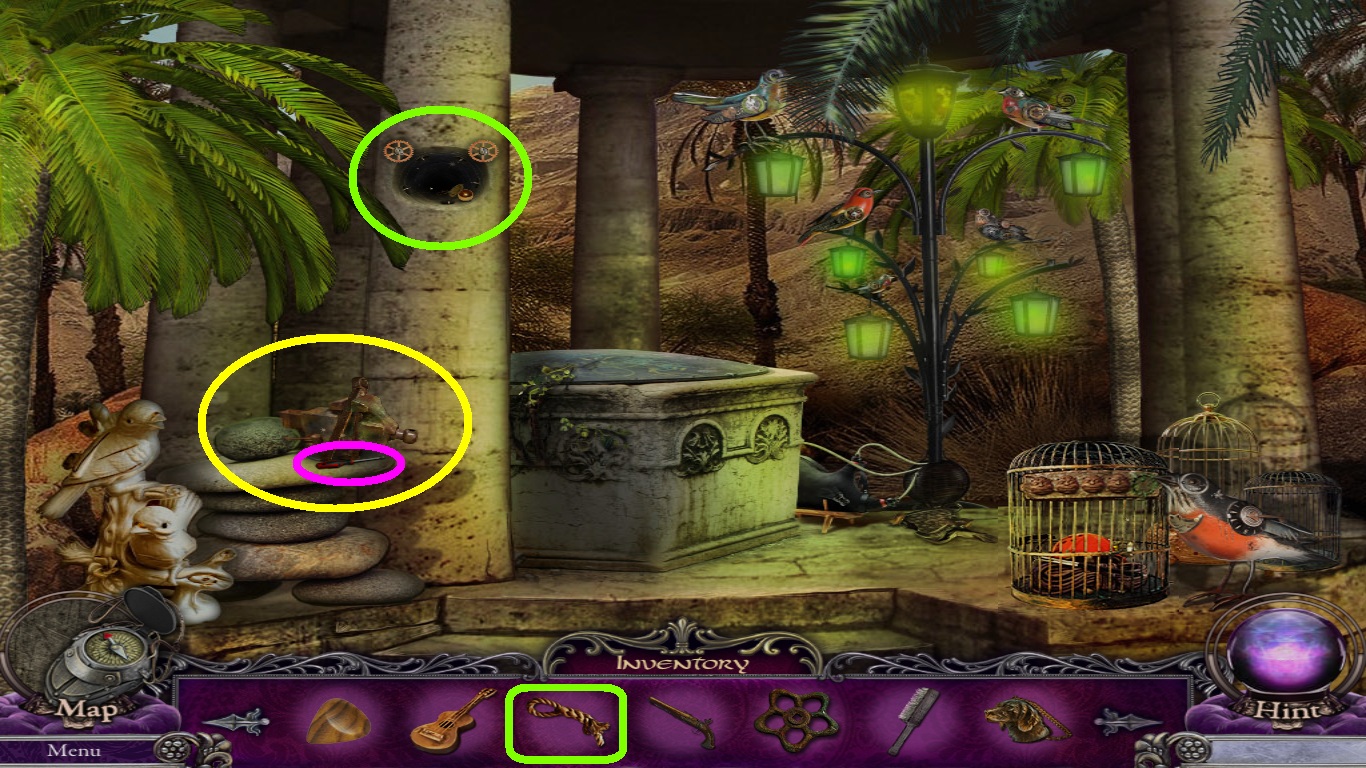
- Zoom into the tools (yellow circle).
- Pick up the screwdriver (pink circle).
- Zoom into the hole in the column (green circle).
- Select the rope (green square) from the inventory and place it onto the gears.
- Pick up the iron ball and the hypnotic medallion.
- Go to the entrance of the hall of birds.
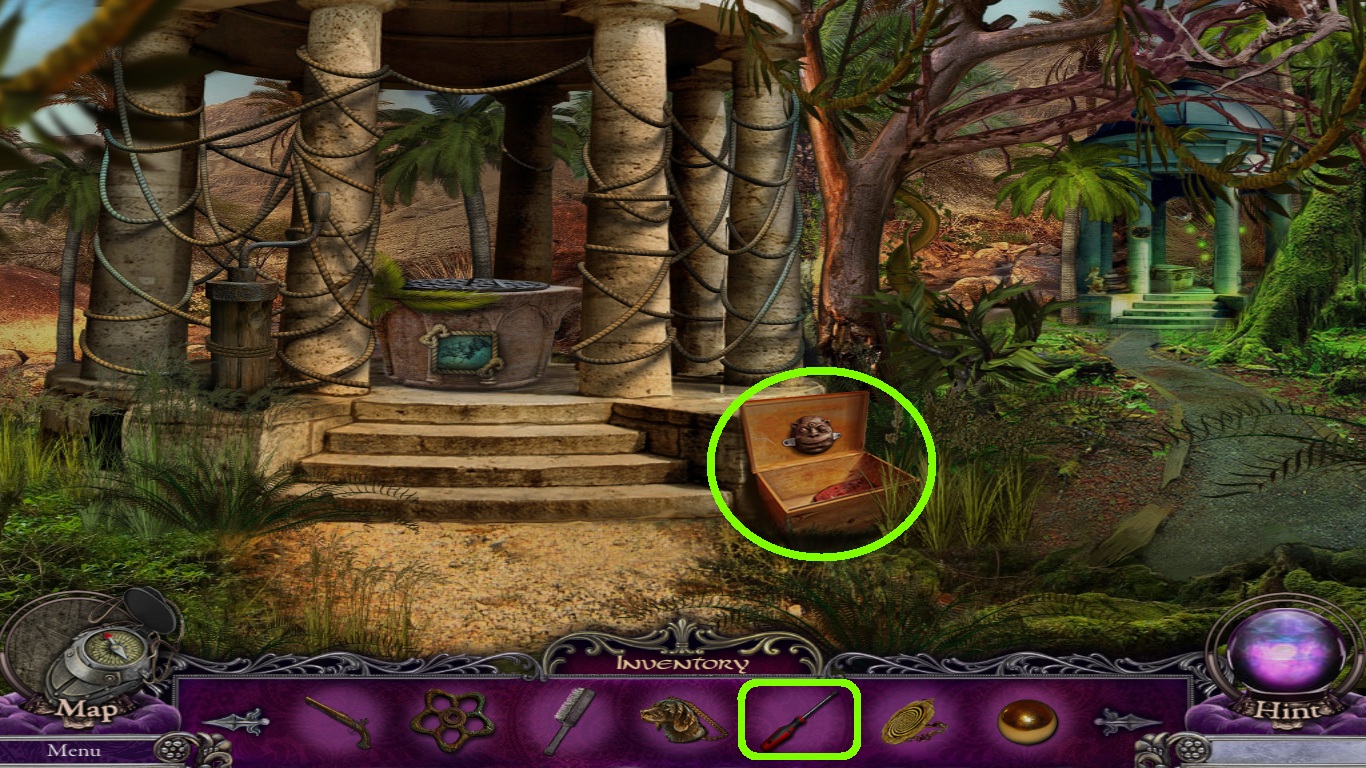
- Zoom into the box (green circle).
- Select the screwdriver (green square) from the inventory; use it to remove the clamp.
- Pick up the three eyed muzzle.
- Go to the hall of birds.
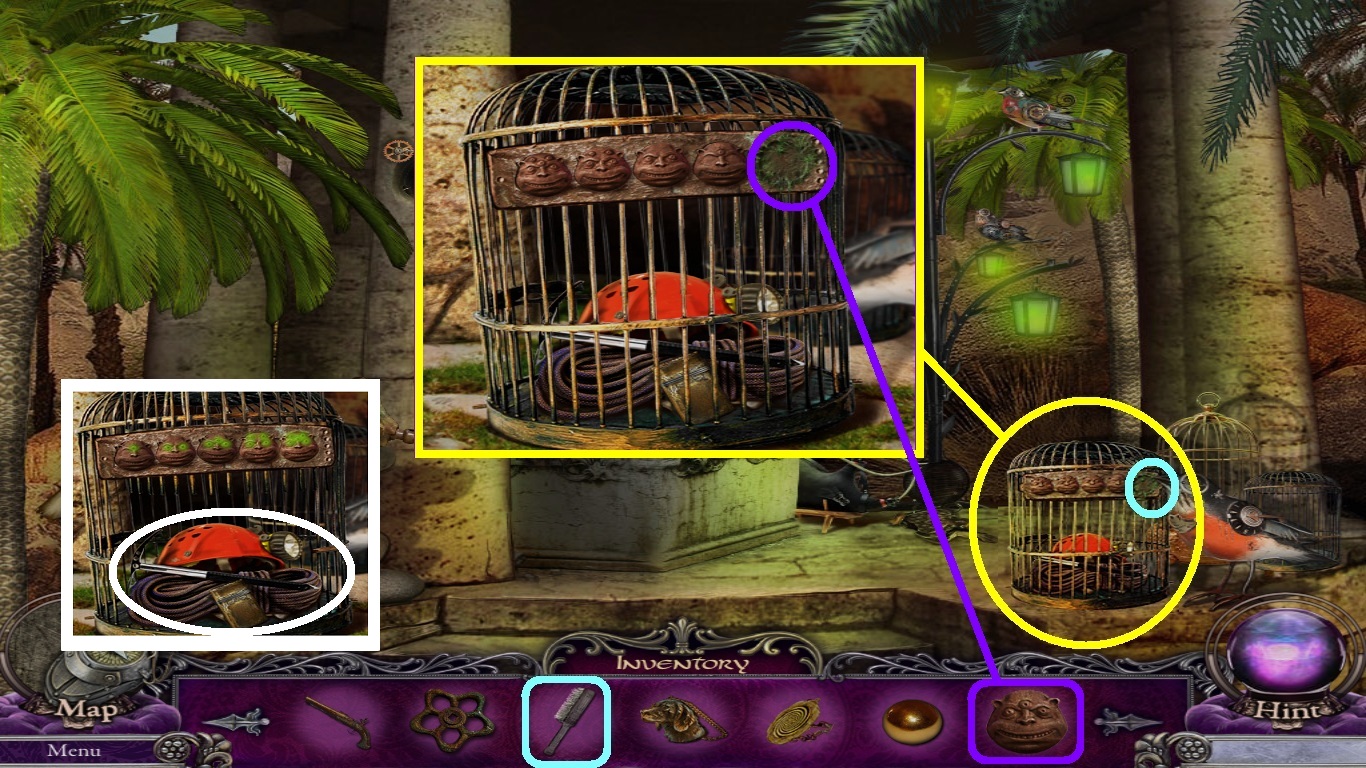
- Zoom into the cage (yellow circle).
- Select the brush (aqua square) from the inventory; use it on the final space where a face is missing (aqua circle).
- Select the three eyed muzzle (purple square) from the inventory; place it in the final space where the face is missing (purple circle).
- Arrange the faces according to the number of eyes from least to greatest.
- Follow the pattern shown above (white square), if done correctly the eyes will glow green.
- Pick up the climbing equipment and the lighter (white circle).
- Go to the oasis.
- Zoom into the wall (yellow circle).
- Select the climbing equipment (yellow square) from the inventory; use it on the gear embedded in the rock.
- Go to the rocky slope.
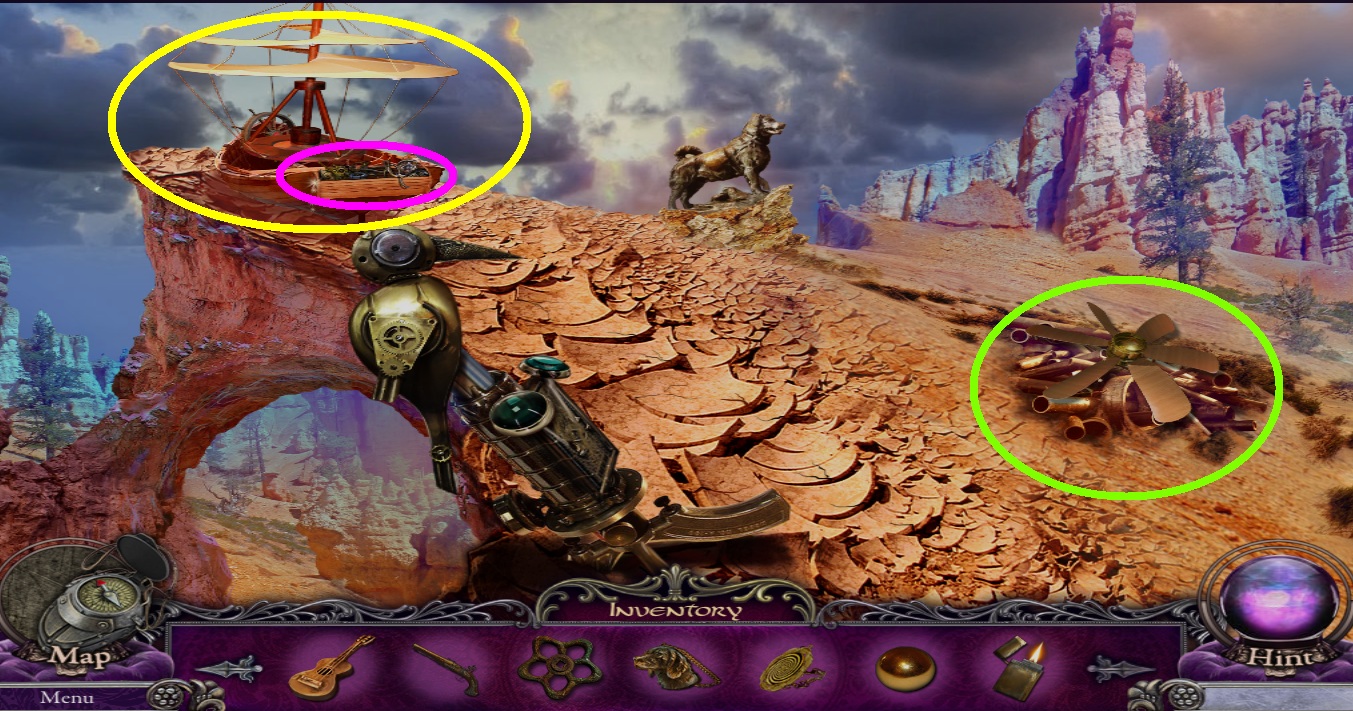
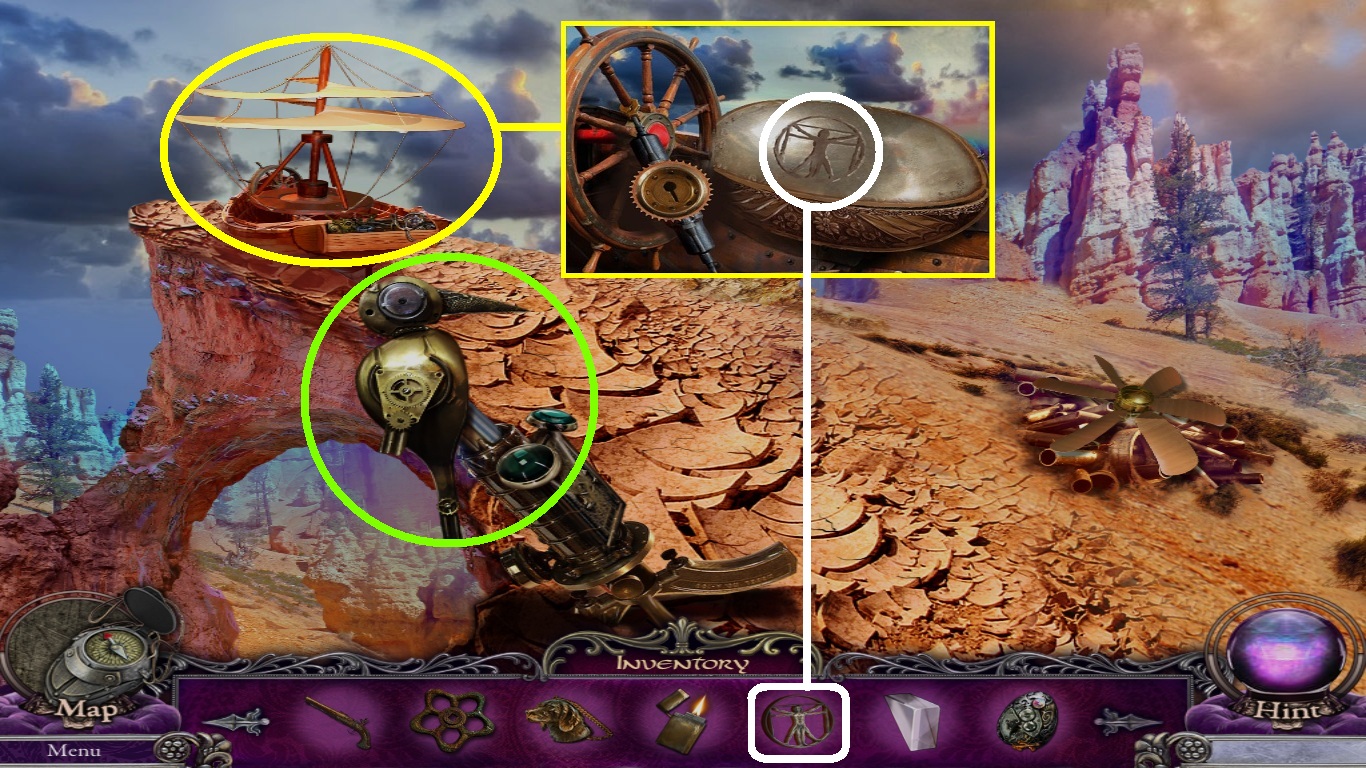
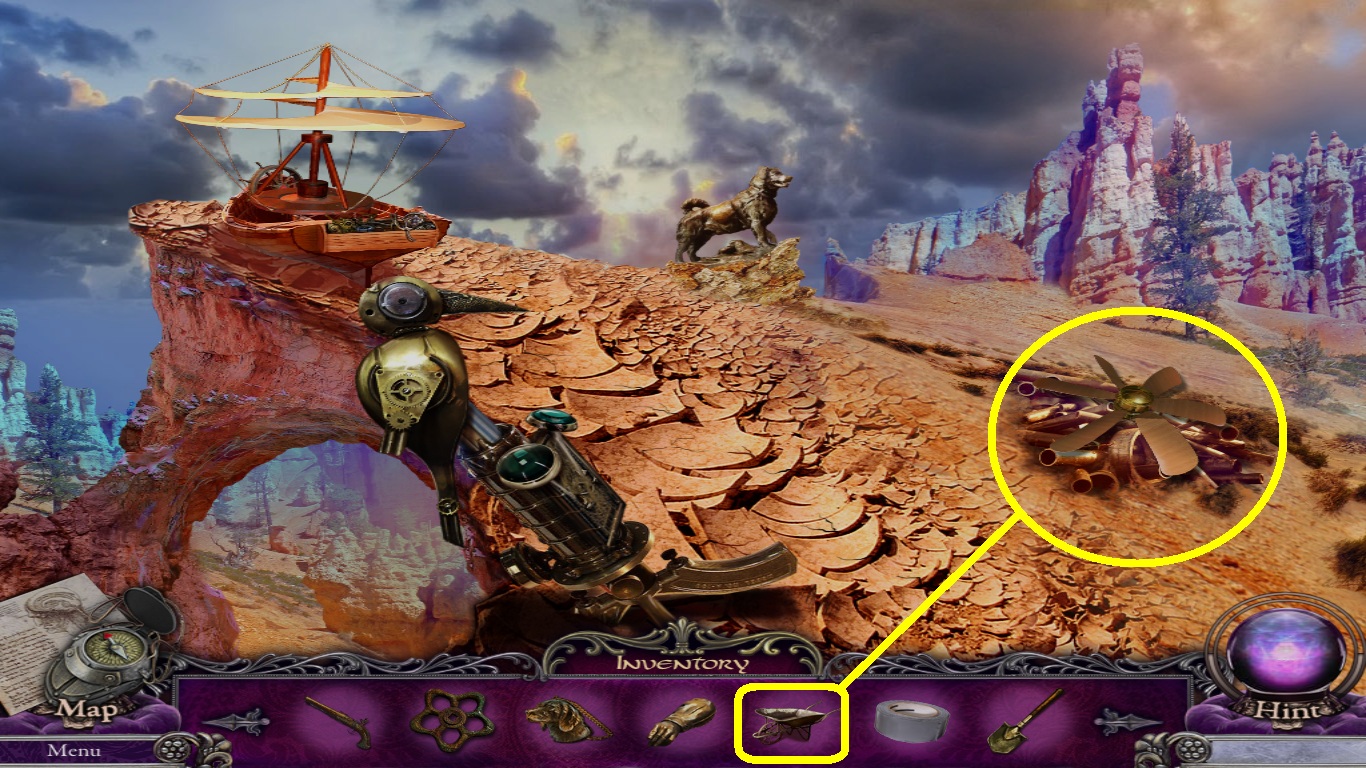
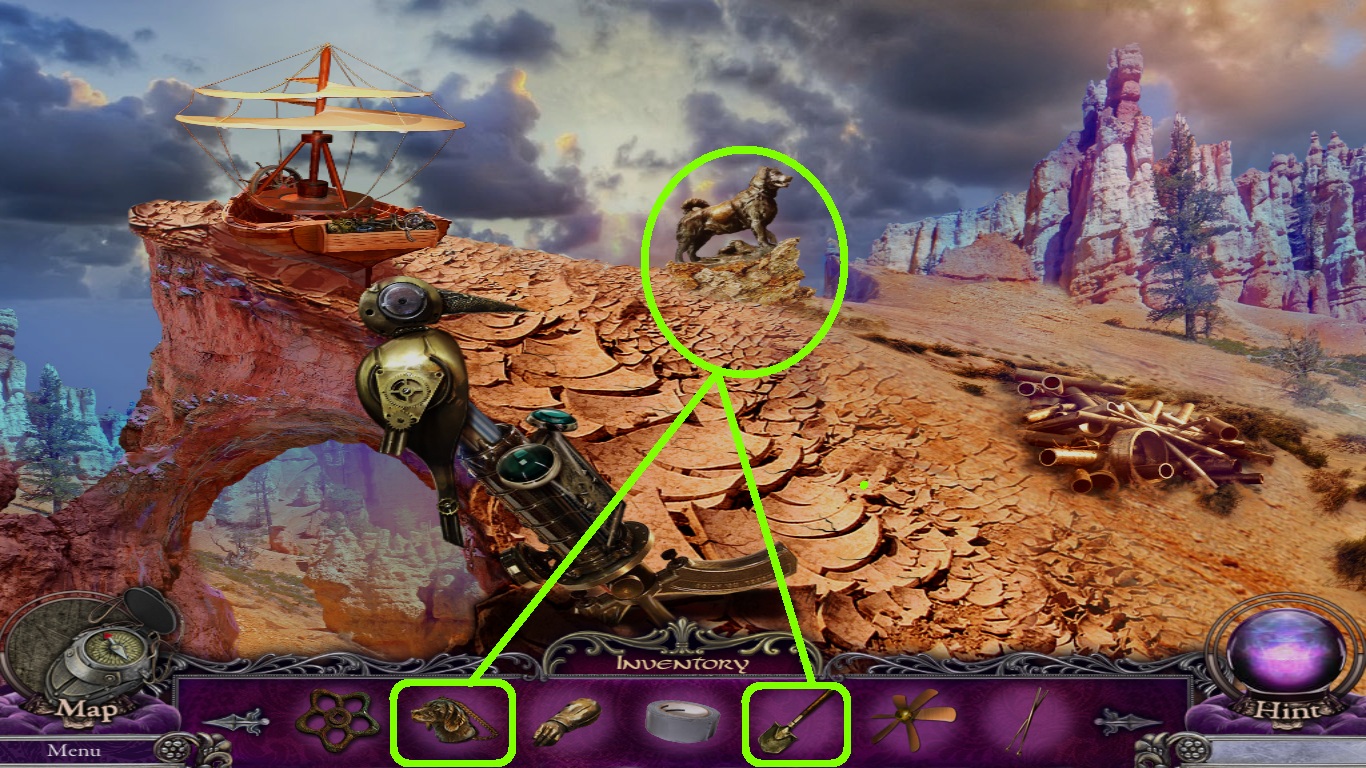
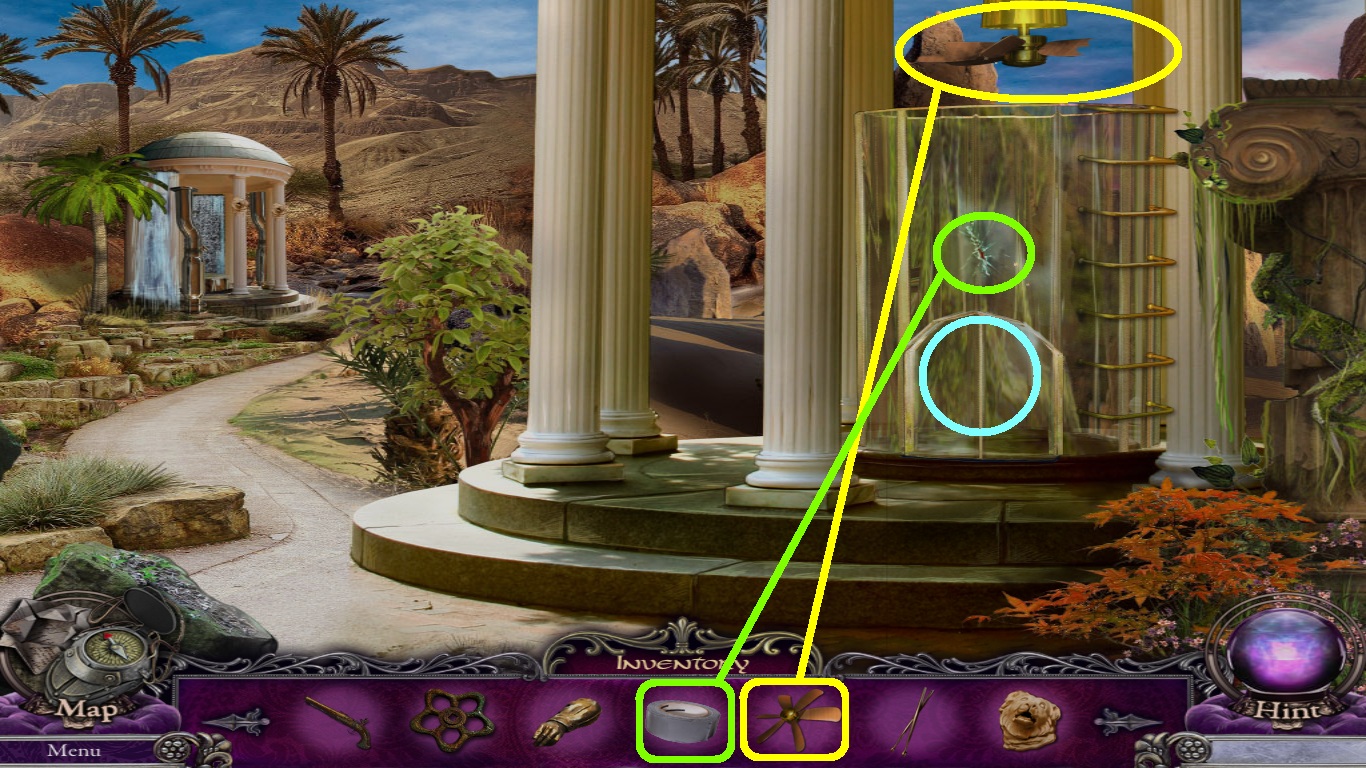
- Zoom into the flying machine (yellow circle).
- Pick up the lever.
- Zoom into the fan (green circle).
- Pick up the bellows.
- Click the base of the flying machine (pink circle) for a hidden object area.
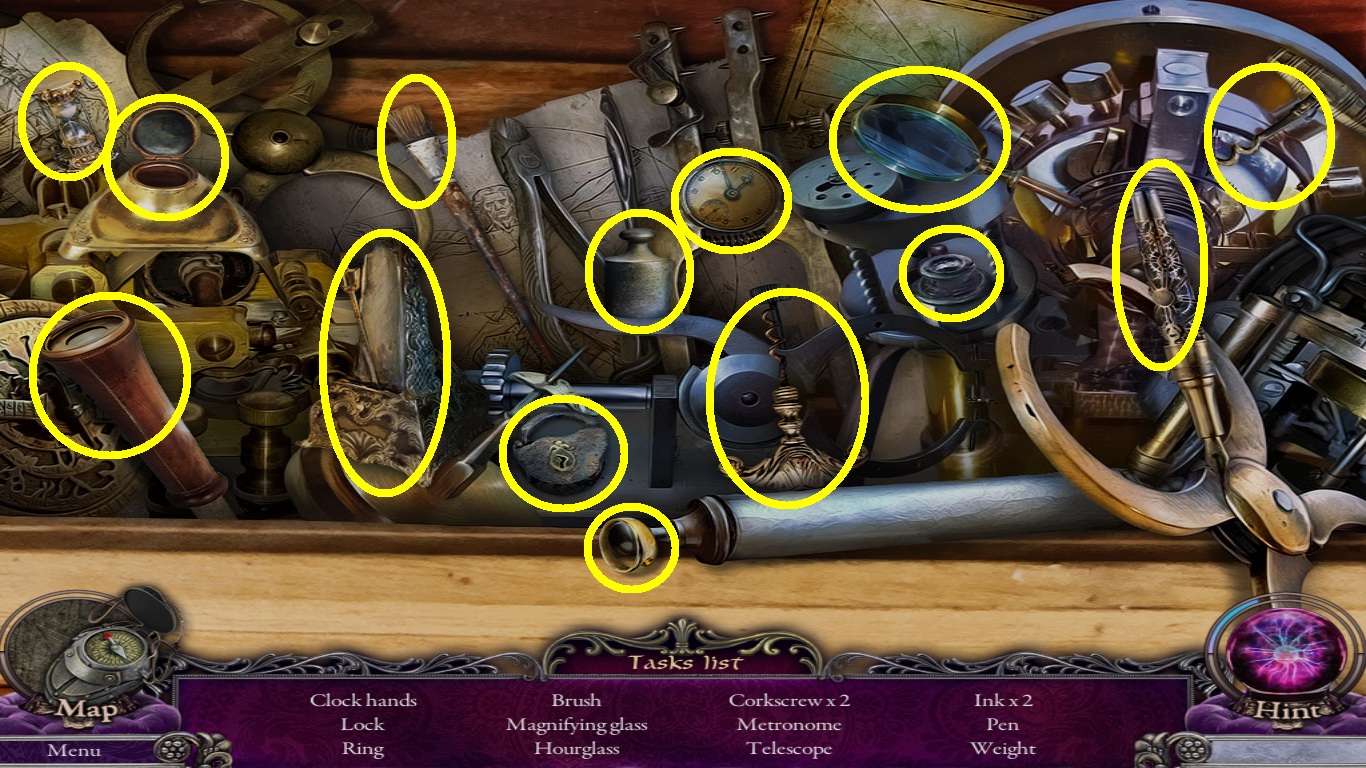
- Find all the objects on the list (yellow circles).
- Pick up the clock hands.
- Go to the hall of birds.
- Zoom into the tools (yellow circle).
- Select the lever (aqua square) from the inventory; use it on the vice (aqua circle).
- Click the lever to open the vice; pick up the tongs.
- Select the bellows (purple square) from the inventory; zoom into the airbag (purple circle) and use the bellow on it.
- Go to the sand river.
- Zoom into the sand castle (yellow circle).
- Select the clock hands (pink square) from the inventory; put them on the clock face (pink circle).
- Select the iron ball (aqua square) from the inventory; put it into opening behind the clock face and click.
- Pick up the Vitruvian man (purple circle).
- Zoom into the snake (green circle).
- Select the hypnotic medallion (green square) from the inventory; use it on the snake.
- Pick up the snake.
- Go to the sand desert.
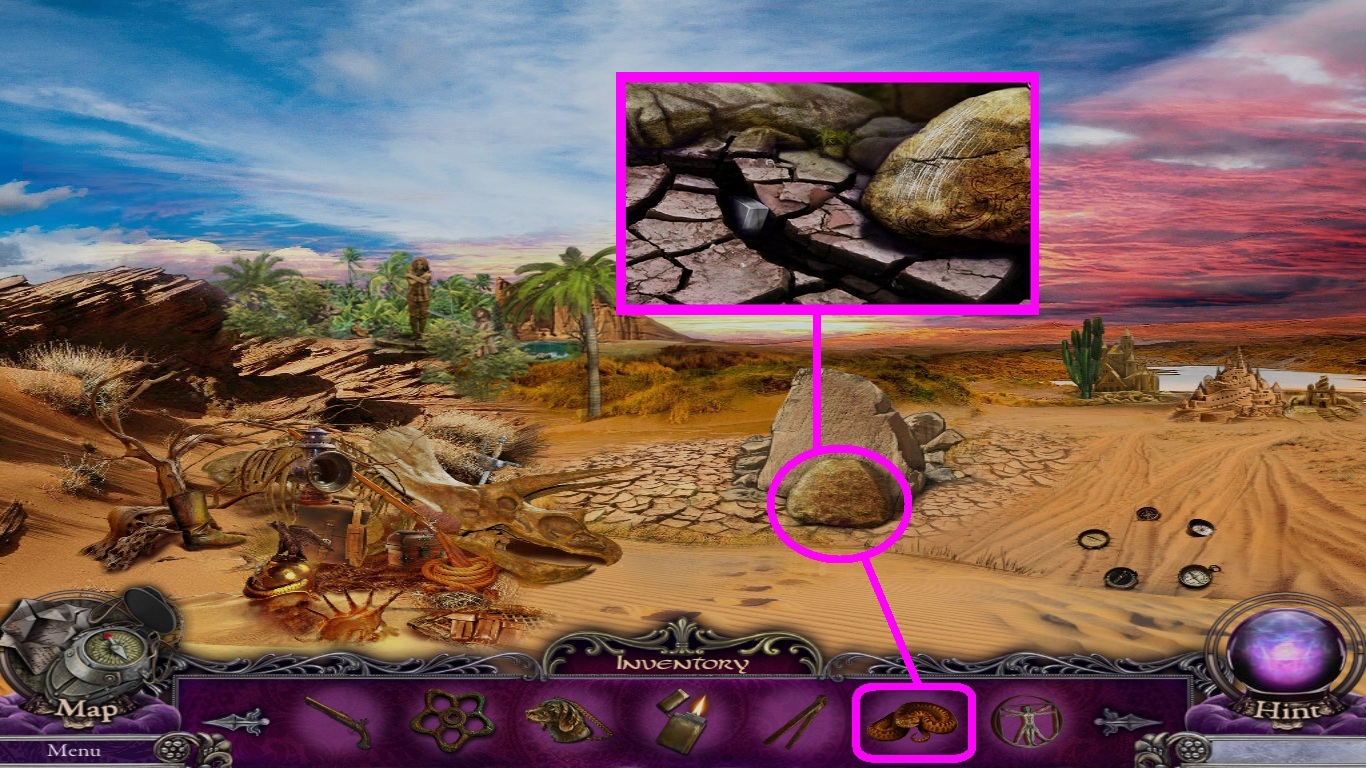
- Zoom into the rock (pink circle).
- Select the snake (pink square) from the inventory; use it to get the prism.
- Go back to the oasis.
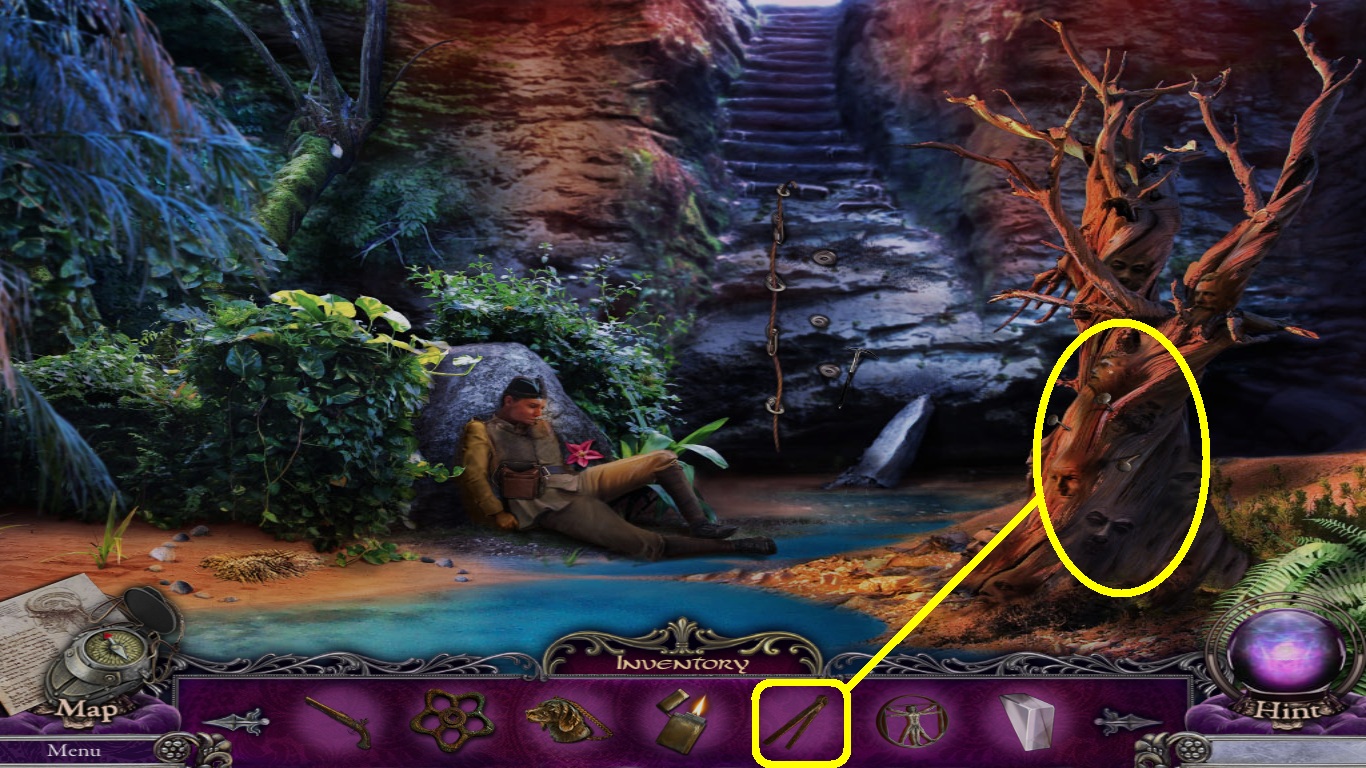
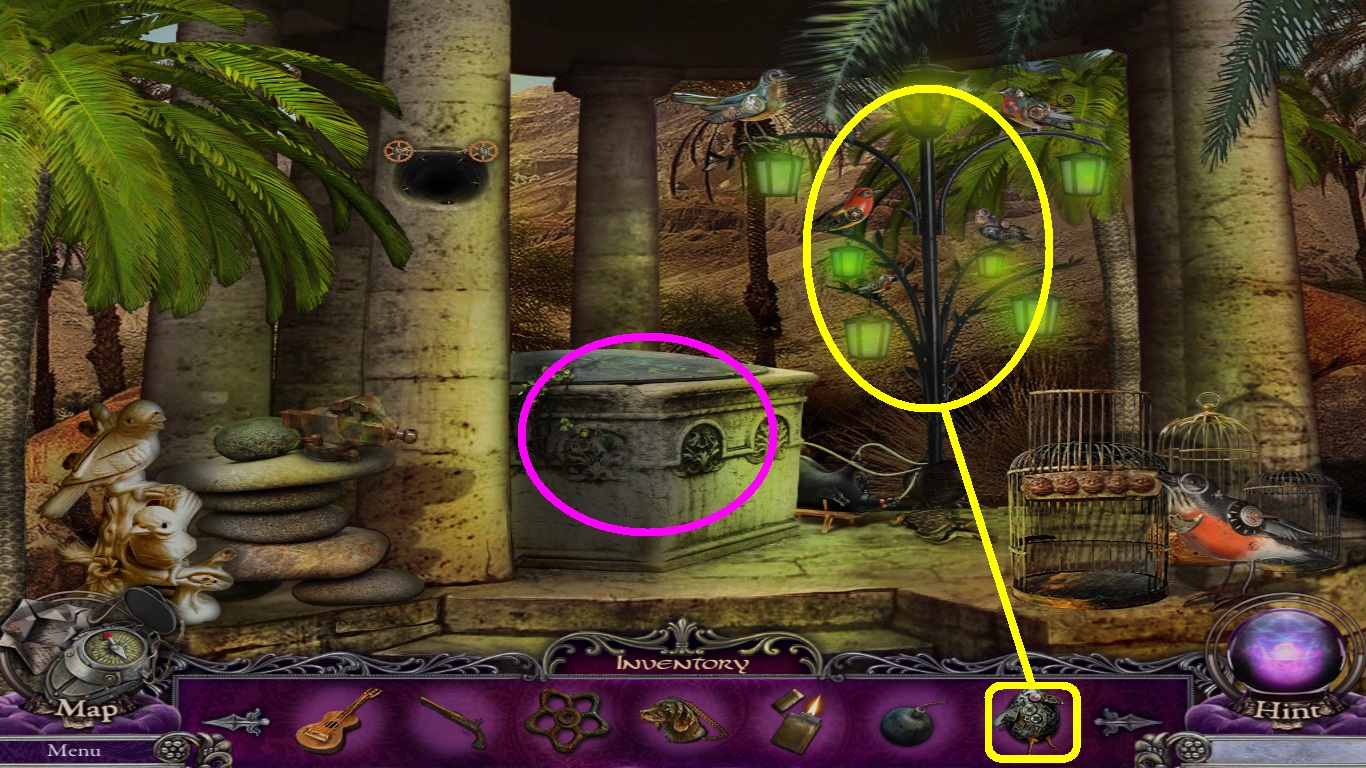
- Zoom into the tree (yellow circle).
- Select the tongs (yellow square) from the inventory; use them to remove the nails.
- Pick up the mechanical egg.
- Go to the rocky slope.
- Zoom into the flying machine (yellow circle).
- Select the Vitruvian man (white square) from the inventory; place him on the case (white circle).
- Click the case to open it; pick up the bomb.
- Click the bird mechanism (green circle) to open a mini game.
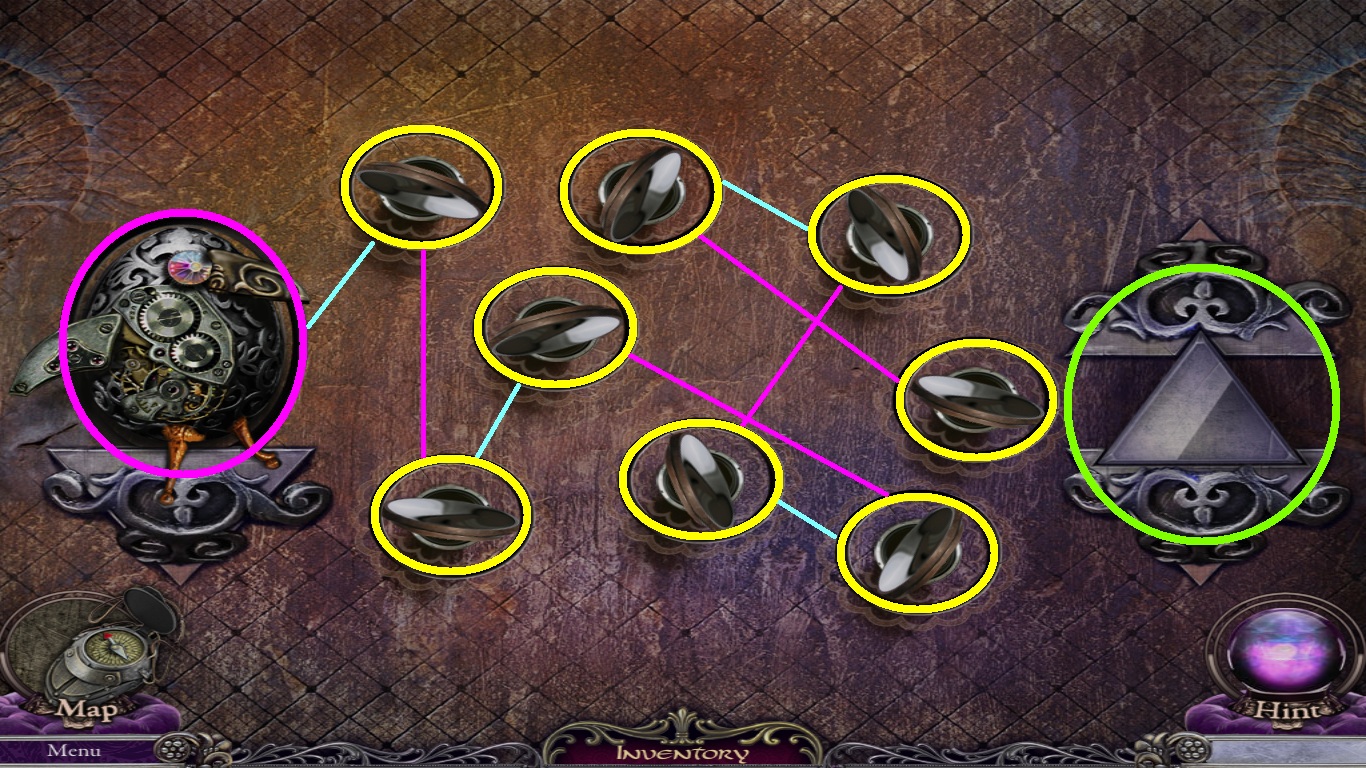
- Select the mechanical egg from the inventory.
- Place the egg into the holder (pink circle).
- Select the prism from the inventory.
- Place the prism into the holder (green circle).
- Adjust the mirrors to catch the middle of the egg.
- Follow the pattern and direction of the mirrors (yellow circles) to unlock the puzzle.
- Pick up the bird (pink circle)
- Go back to the hall of birds.
- Zoom into the metal tree (yellow circle).
- Select the mechanical bird (yellow square) from the inventory; place it on the branch.
- Zoom into the pedestal (pink circle).
- Pick up the flute.
- Go to the statue.
- Zoom into the piper (yellow circle).
- Select the flute (yellow square) from the inventory; place it with the piper.
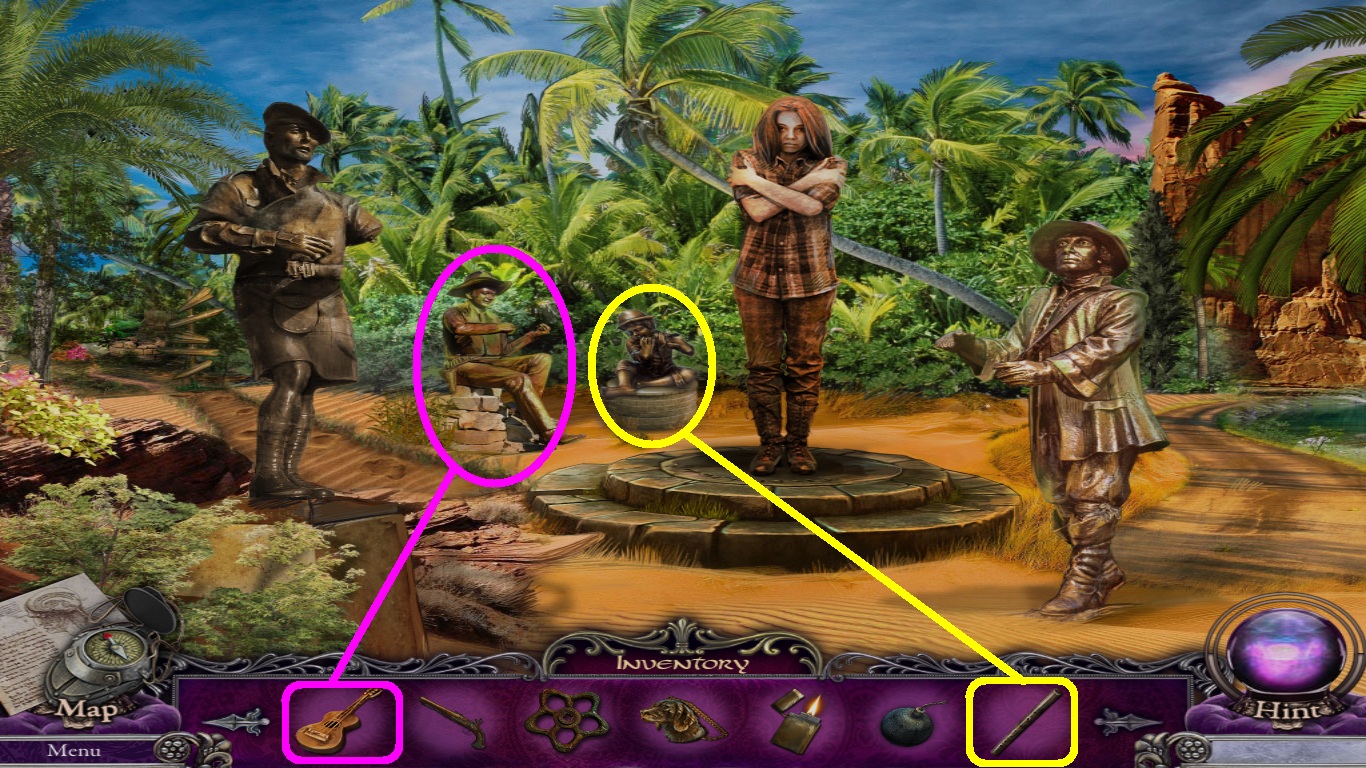
- Zoom into the guitarist (pink circle).
- Select the guitar and pick (pink square) from the inventory.
- Place them with the guitarist.
- Go to the fork in the road.
- Zoom into the column (green circle).
- Select the bomb (green square) from the inventory; put it into the columns crack.
- Select the lighter (green square) from the inventory; use it to light the fuse.
- Go down the newly opened path to the hall of wind and continue on to the hall of rain.
- Zoom into the drain (green circle).
- Select the ship (green square) from the inventory; place it in the drain.
- Pick up the hand.
- Pick up the cart (yellow circle).
- Zoom into the pipes (aqua circle).
- Pick up the spade and the tape (pink circle).
- Go to the rocky slope.
- Zoom into the fan (yellow circle).
- Select the cart (yellow square) from the inventory; use it on the fan blade.
- Pick up the fan and the drum sticks.
- Zoom into the dog grave (green circle).
- Select the spade (green square) from the inventory; use it to create a hole.
- Select the dog medallion (green square) from the inventory; place it on the lid.
- Open the box and pick up the bone.
- Pick up the plaster head.
- Go to the hall of wind.
- Zoom into the broken fan (yellow circle).
- Select the fan blade from the inventory; use it to fix the fan.
- Zoom into the glass crack (green circle).
- Select the tape from the inventory to seal the crack.
- Click the doors (aqua circle) for a mini game to open.
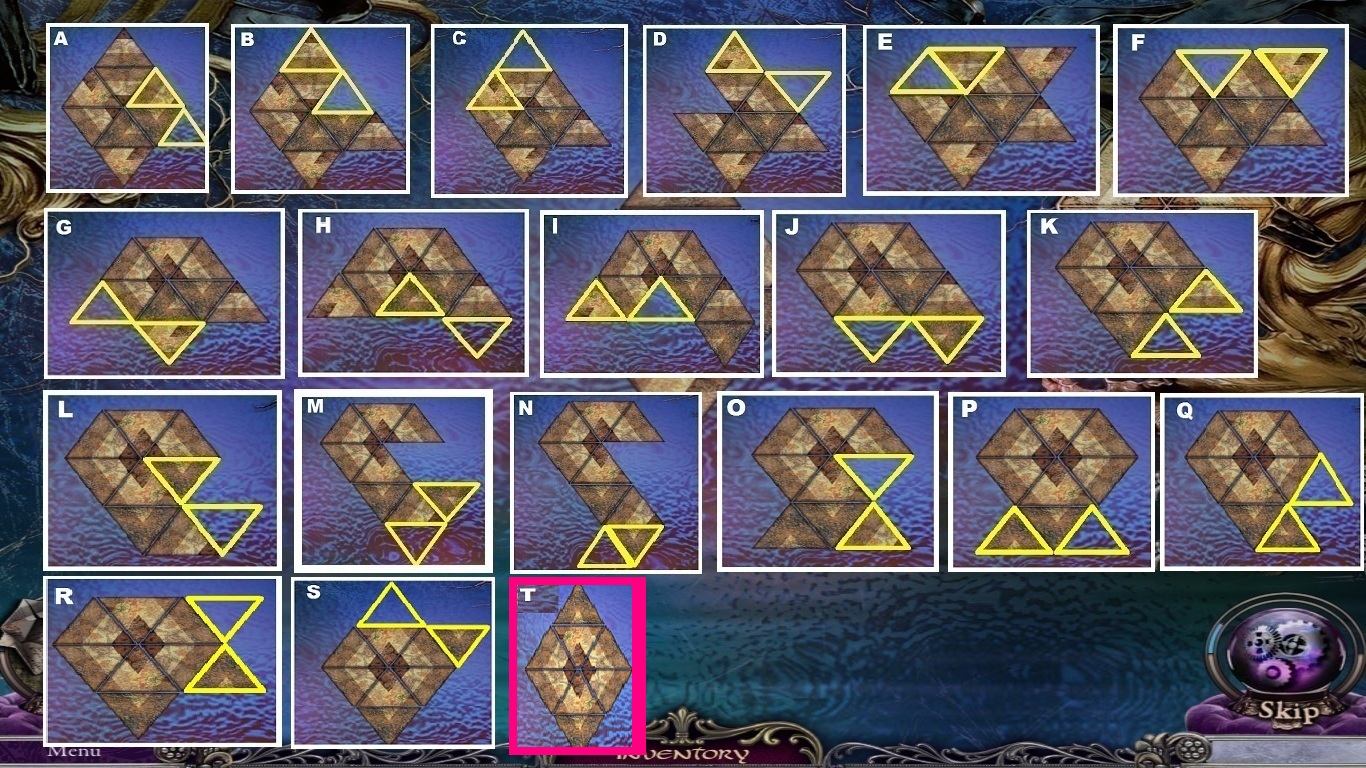
- Follow the patterns as shown in the pictures.
- Move the solid triangles outlined in yellow to the area of the hollow yellow triangles to solve the puzzle.
- The patterns are as follows: A-T
- The final outcome is shown in the pink square, letter T.
- Zoom into the door (green circle).
- Pick up the bagpipe.
- Go to the hall of rain.
- Zoom into the hole in the column (yellow circle).
- Select the ceramic head (yellow square) from the inventory to fix the column.
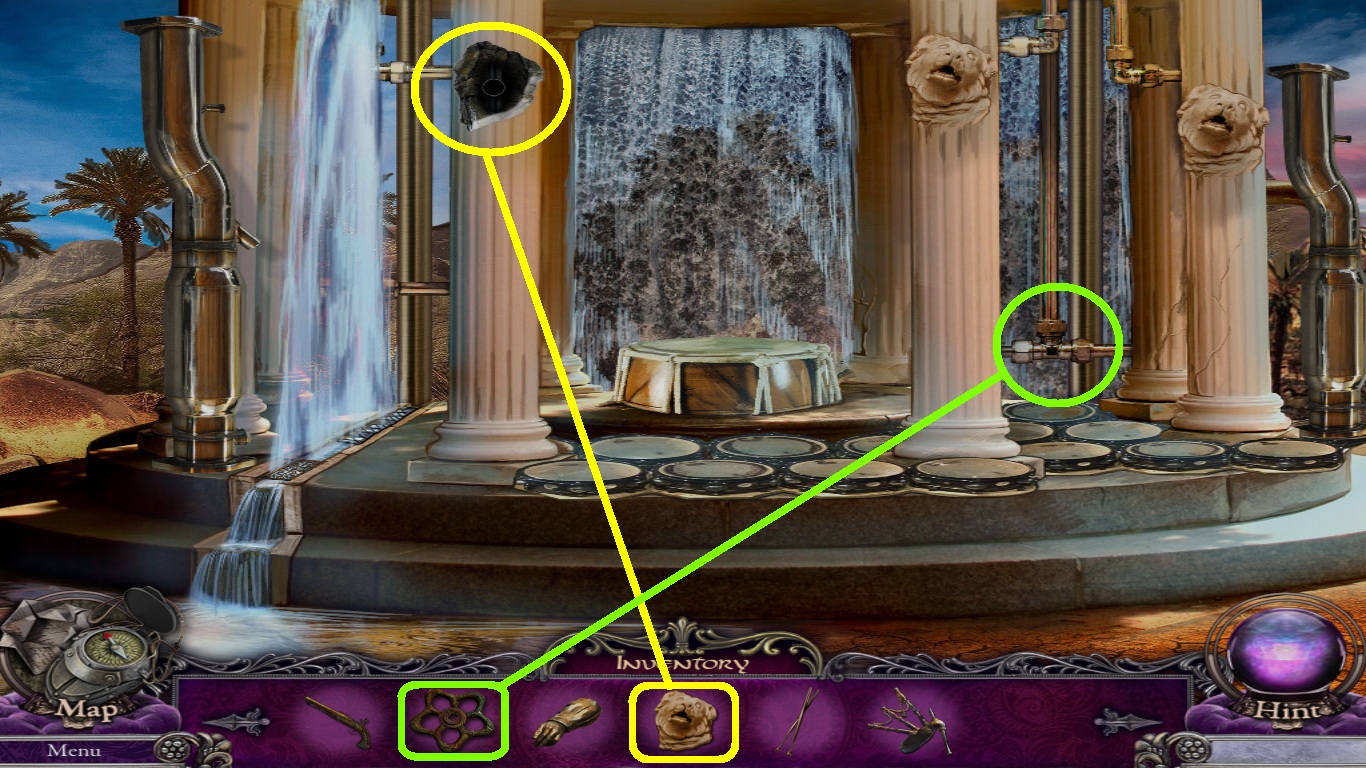
- Zoom into the pipes (green circle).
- Select the valve (green square) from the inventory; use the on the pipe stem.
- Click the valve a few times to tighten.
- Pick up the drum.
- Go to the statue.
- Zoom into the bagpiper (yellow circle).
- Select the hand (yellow square) from the inventory; place the hand onto his arm.
- Select the bagpipes (yellow square) from the inventory; place it into his arms.
- Zoom into the drummer (pink circle).
- Select the drum and drum sticks (pink squares) from the inventory; place them with the drummer.
- Zoom into the platform (green circle).
- Pick up the memory page.
- Pick up the signal key.
- Go to the rocky slope.
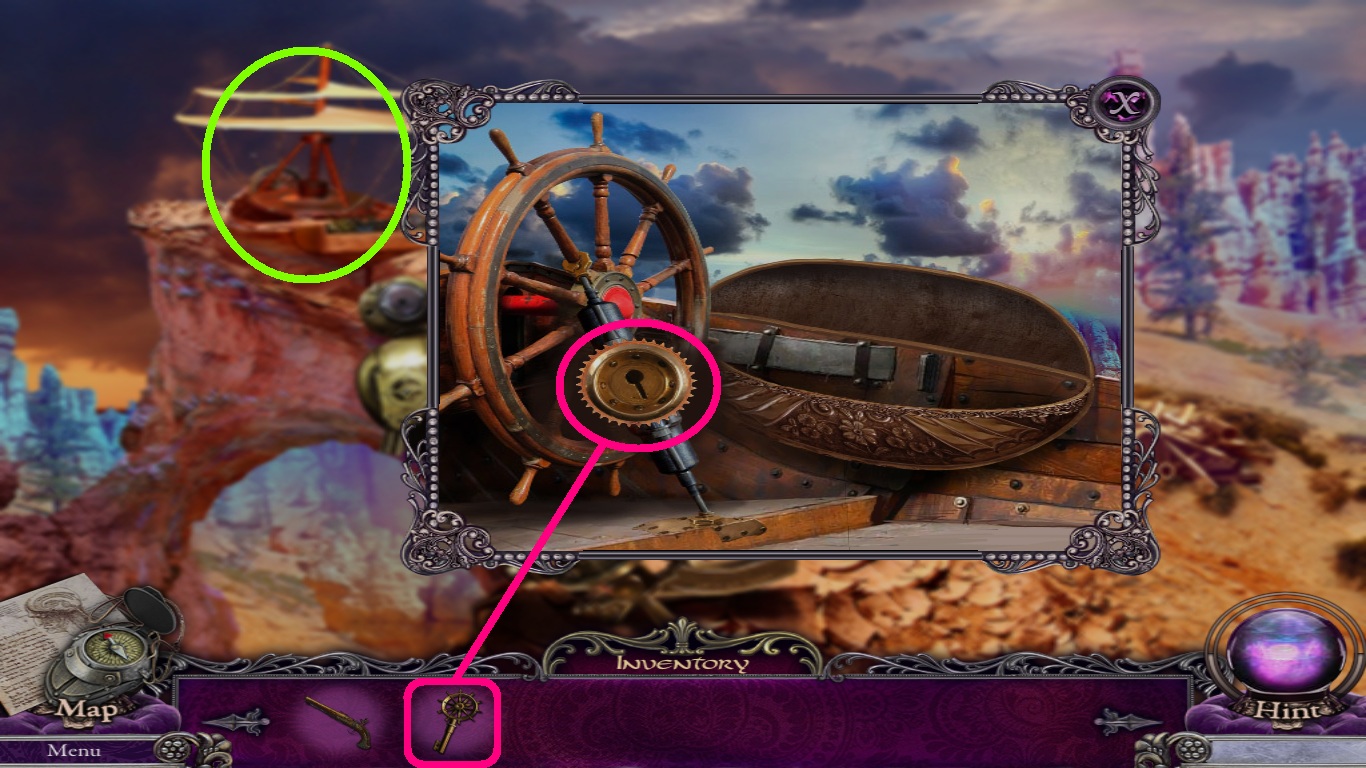
- Zoom into the flying machine (green circle).
- Select the signal key (pink square) from the inventory; place it into the lock (pink circle).
Comments will load when you reach this part of the walkthrough.