
Chapter 1: Temperature Rising
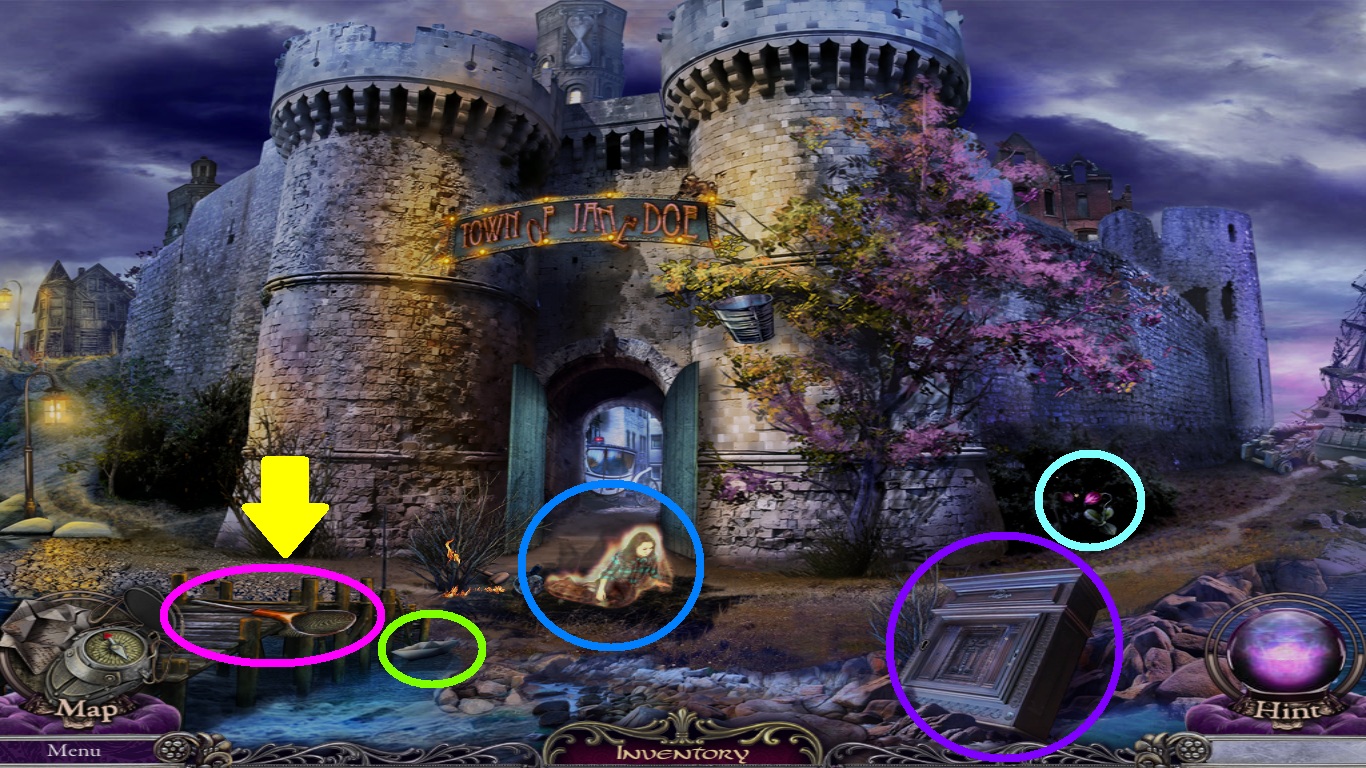
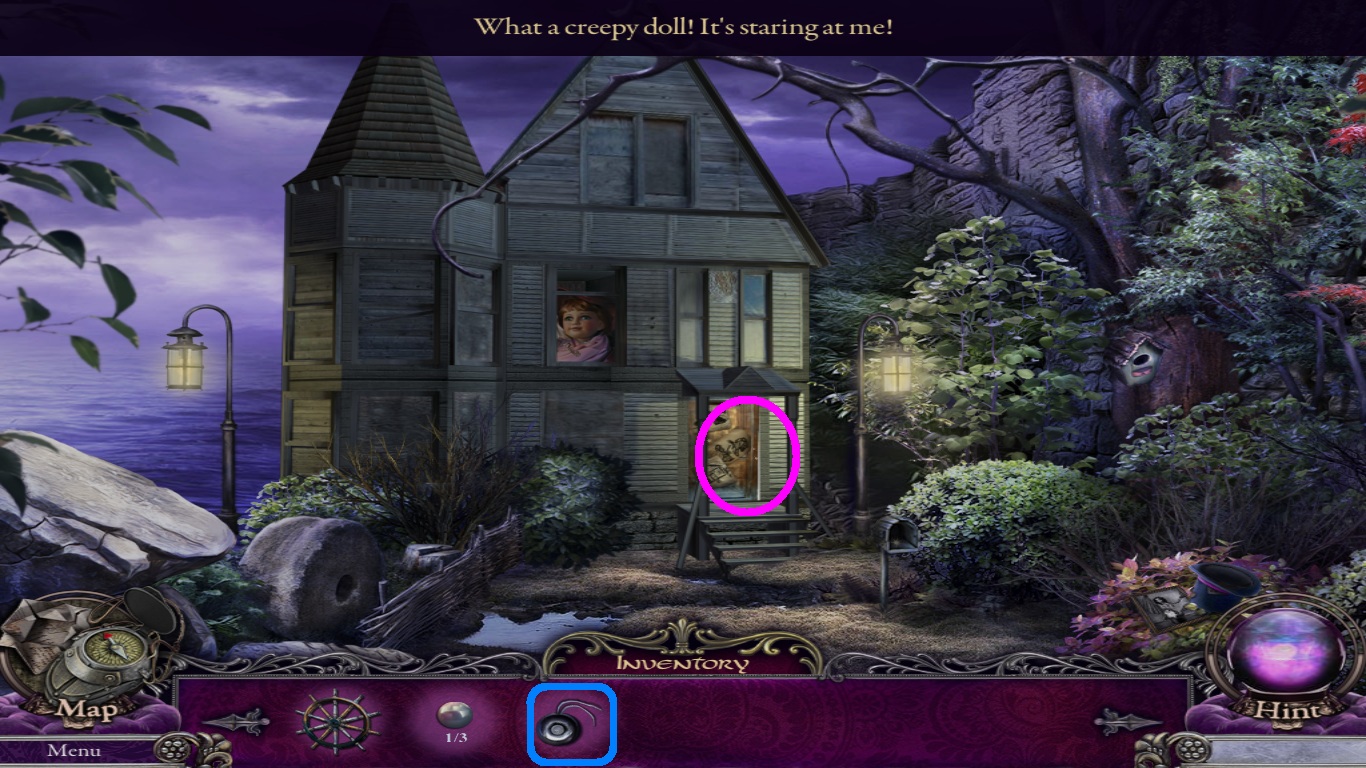
- Jane (blue circle) has a temperature.
- Your goal is to put out the fire that symbolizes her temperature.
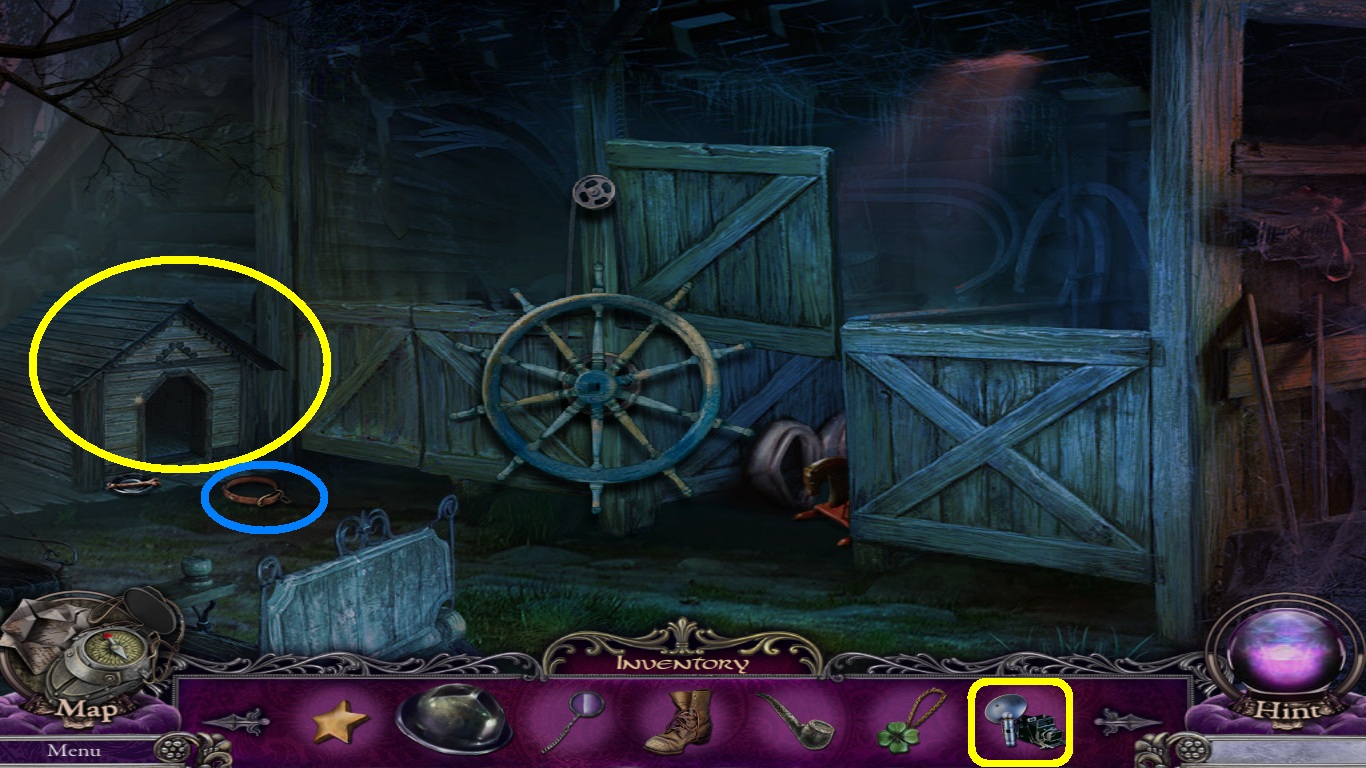
- Zoom into the dock (yellow arrow).
- Pick up the net (pink circle).
- Select the net from the inventory.
- Use it to pick up the paper boat (green circle).
- Zoom into the flower (aqua circle).
- Pick up the key.
- Zoom into the wardrobe (purple circle).
- Select the key from the inventory to unlock it.
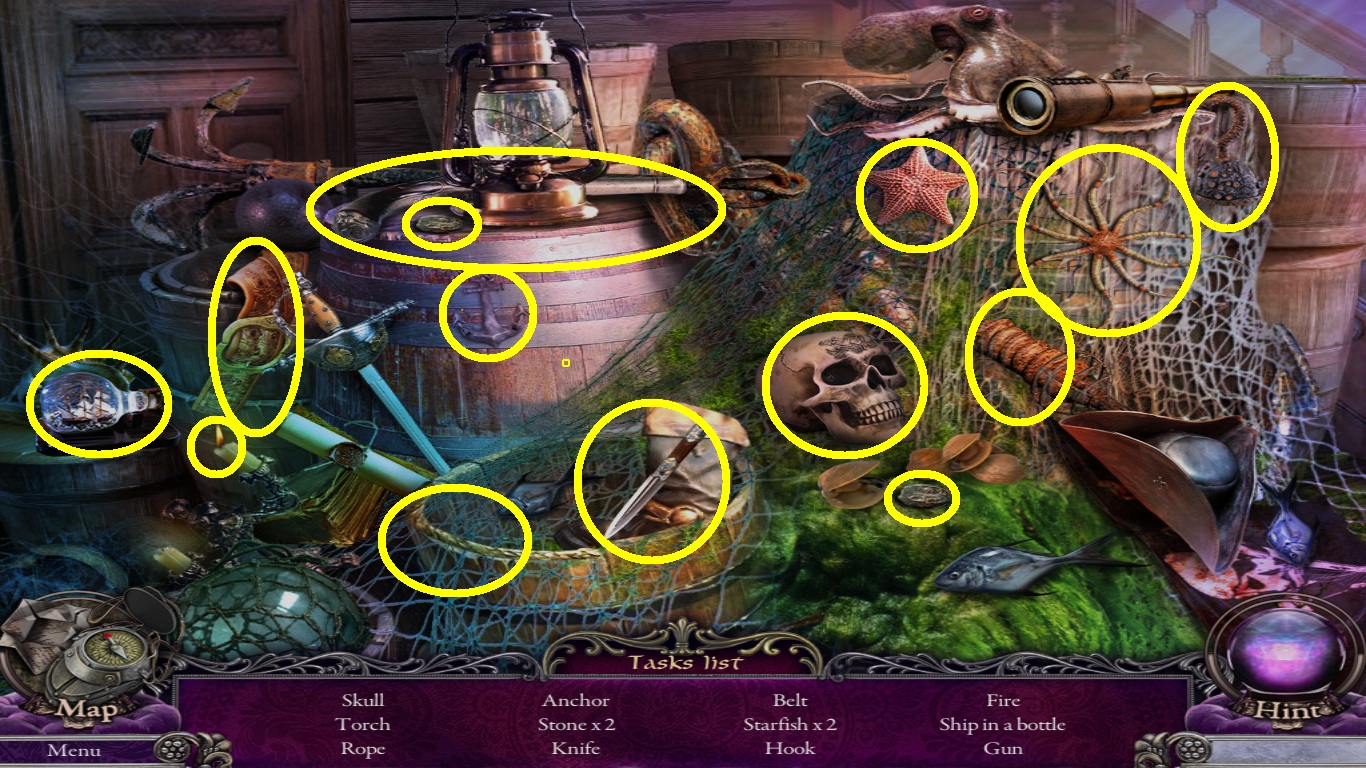
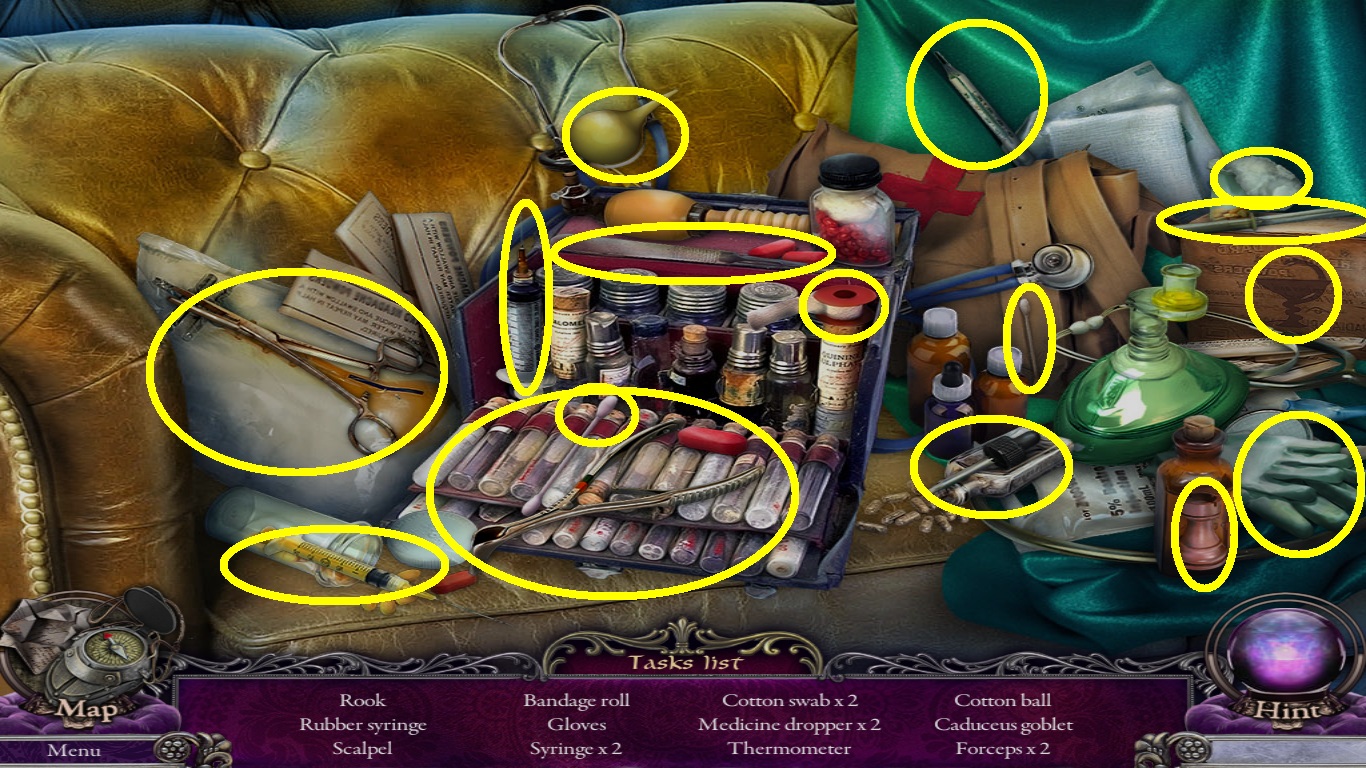
- Click the wardrobe to enter into a hidden object area.
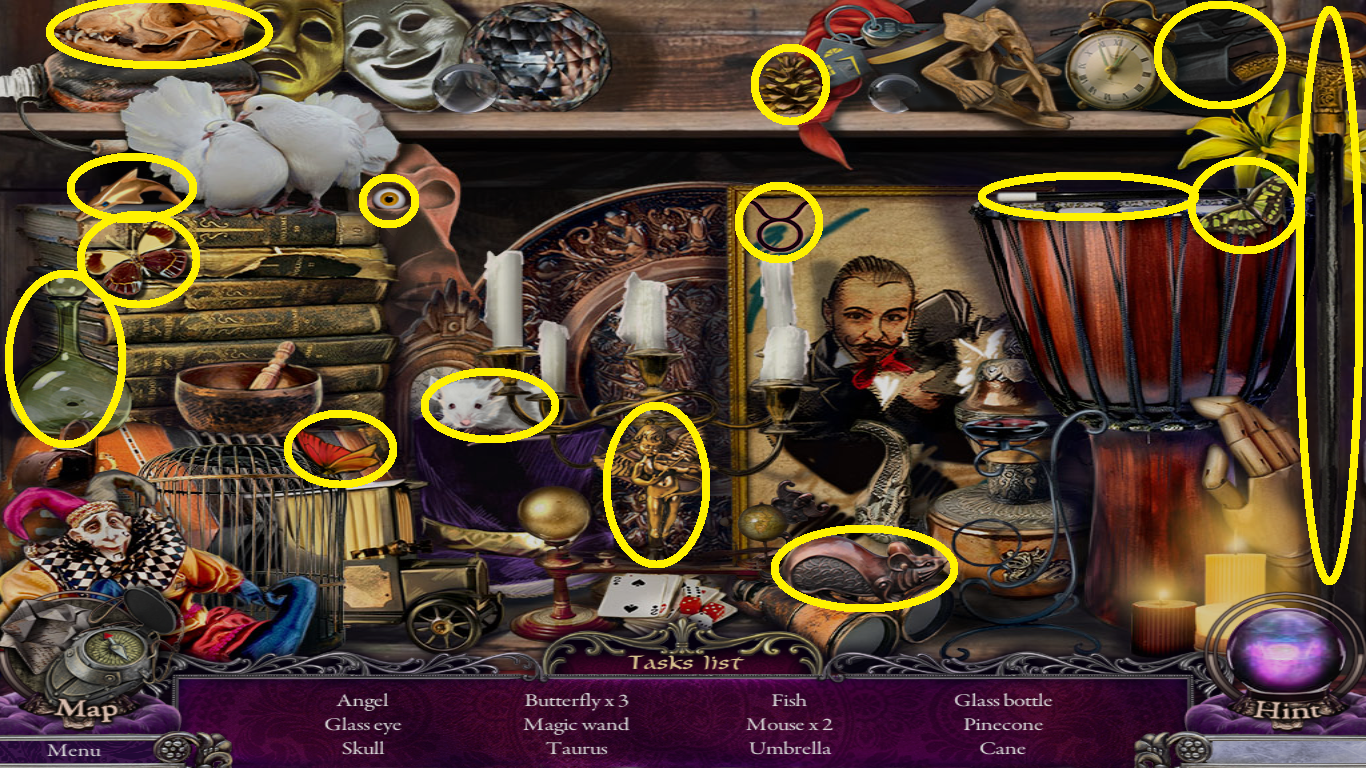
- Find all the listed objects (yellow circles).
- Pick up the magicians wand.
- Go to the ship wreck area.
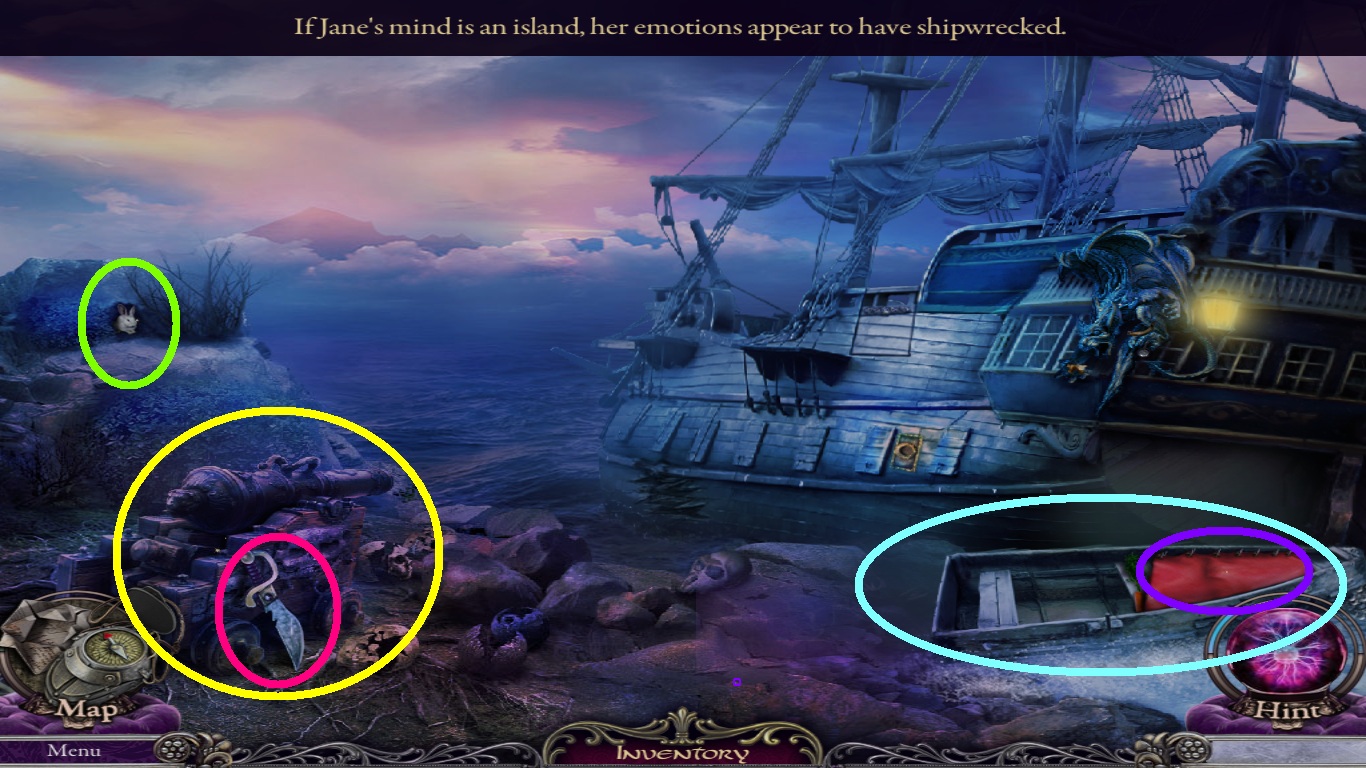
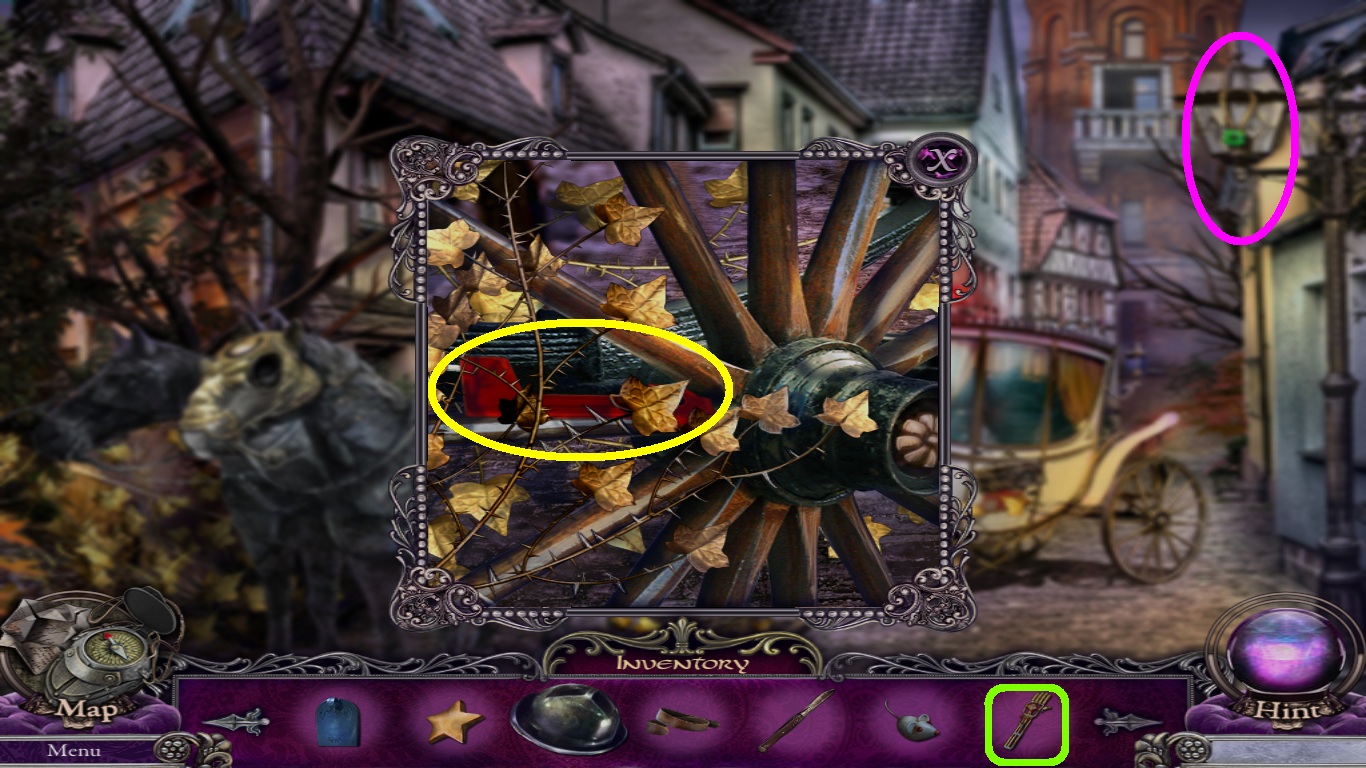
- Zoom into the cannon (yellow circle).
- Pick up the knife (pink circle).
- Zoom into the boat (aqua circle).
- Pick up the carrot.
- Use the knife in the inventory to cut the red cloth (purple circle).
- Pick up the cut cloth.
- Zoom into the rabbit hole (green circle).
- Select the carrot from the inventory; give it to the rabbit.
- Pick up the rabbit.
- Go to the decrepit house.
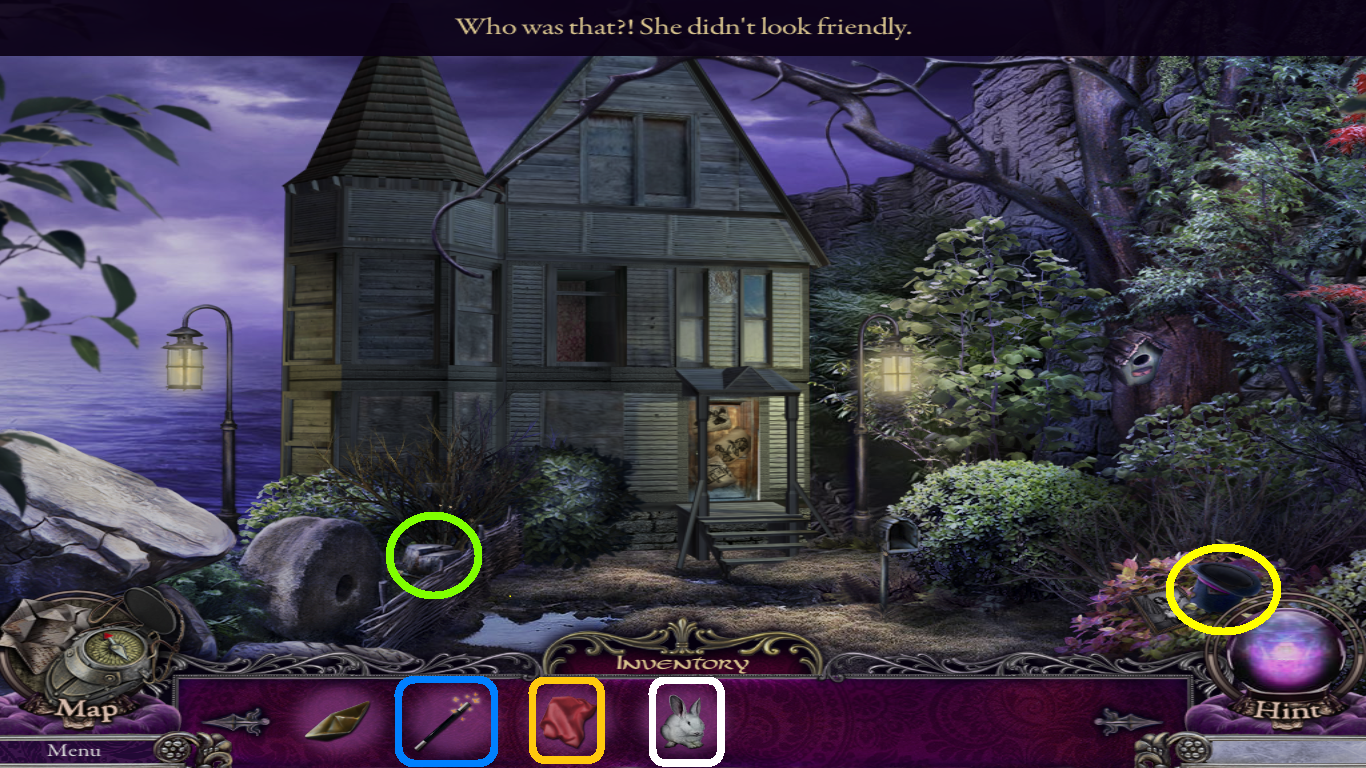
- Zoom into the top hat (yellow circle).
- Pick the rabbit (white square) from the inventory and put it into the top hat.
- Pick the cloth (orange square) from the inventory; place it over the hat.
- Pick the magicians wand (blue square) from the inventory; use it on the top hat.
- Click the piece of cloth.
- Pick up the magicians scarves.
- Zoom into the stump (green circle).
- Pick up the torch.
- Use the map to return to the shipwreck.
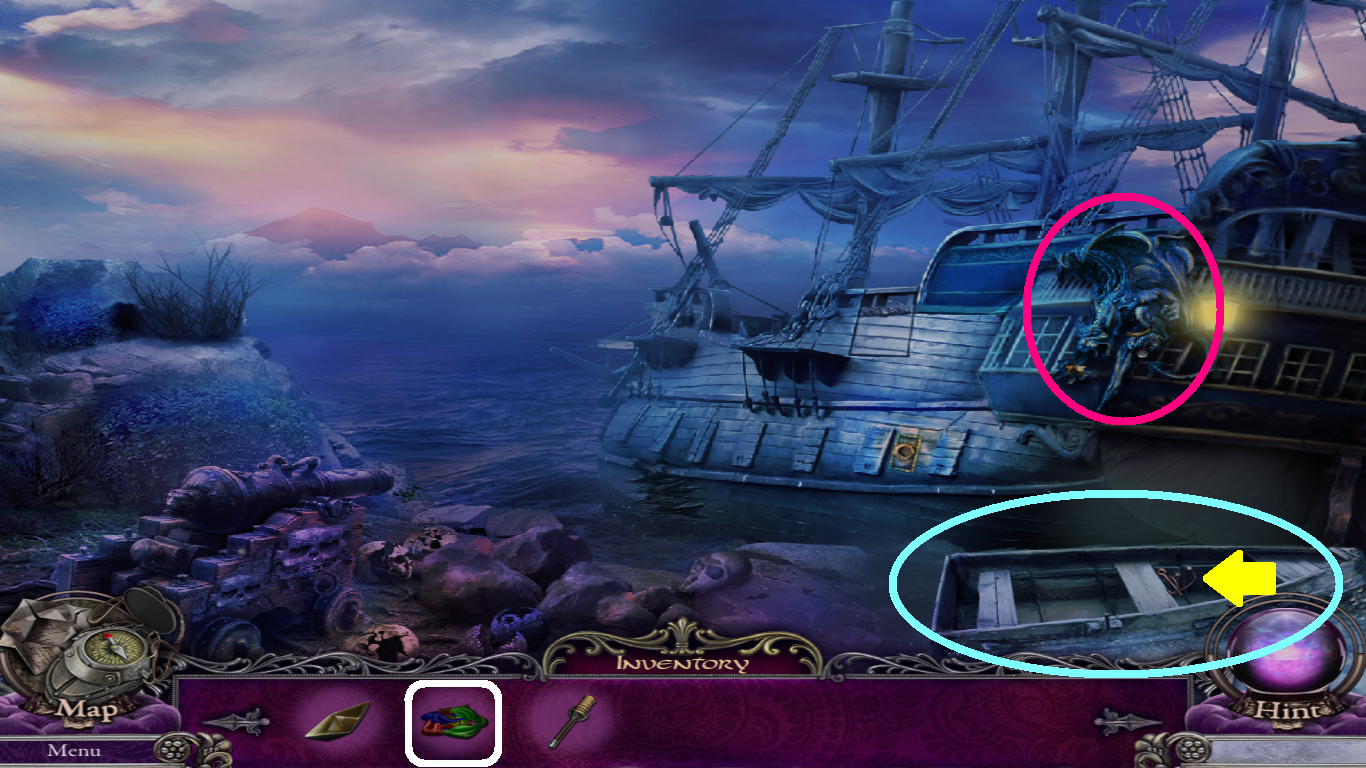
- Zoom into the boat (aqua circle).
- Pick the magicians scarves (white square) from the inventory; use it on the hook (yellow arrow) to make a grappling hook.
- Zoom into the gargoyle (pink circle).
- Pick up the gun powder.
- Go to the town gate.
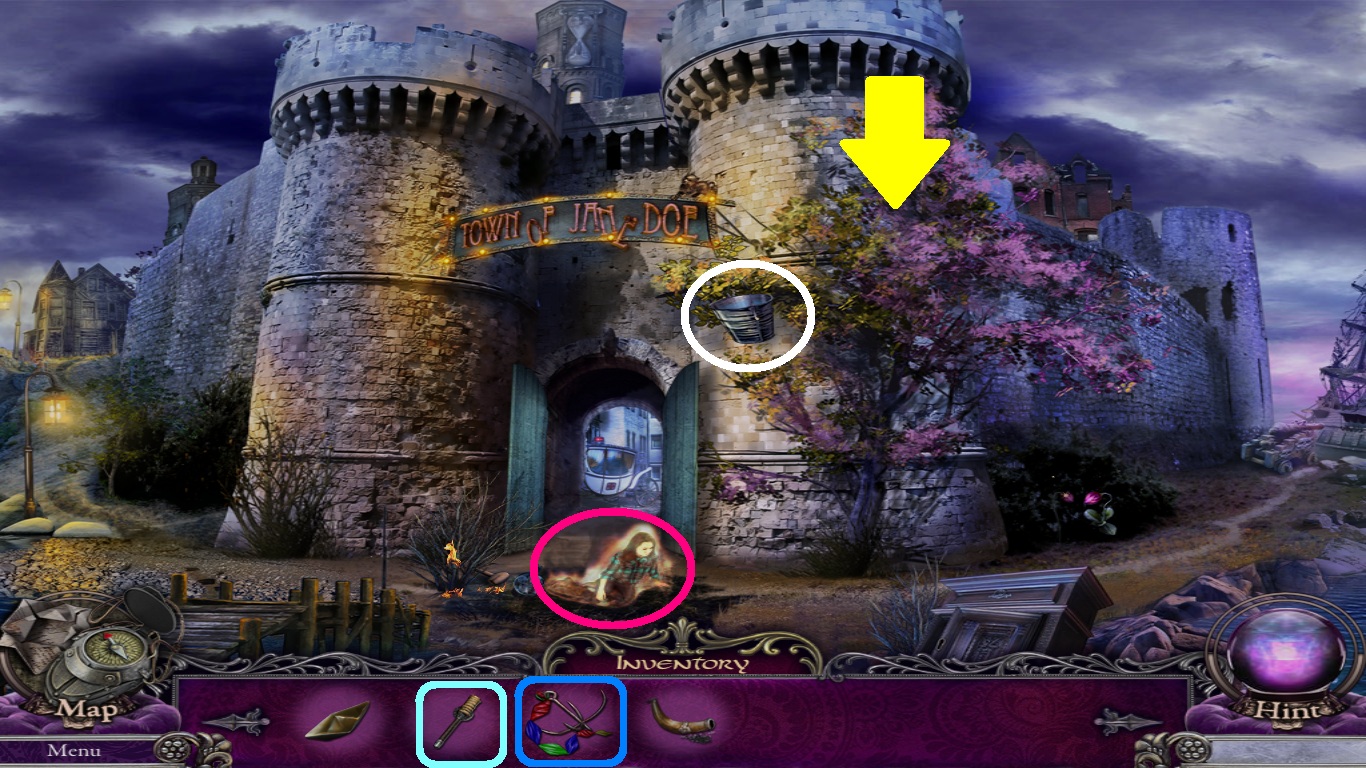
- Pick the grappling hook (blue square) from the inventory; place it on the tree (yellow arrow).
- Click the end of the scarves.
- Pick up the bucket of water (white circle).
- Zoom into Jane (pink circle).
- Throw the bucket of water on her to break her temperature.
- Pick the torch (aqua square) from the inventory.
- Use it on the still burning flame to create a burning torch; pick it up.
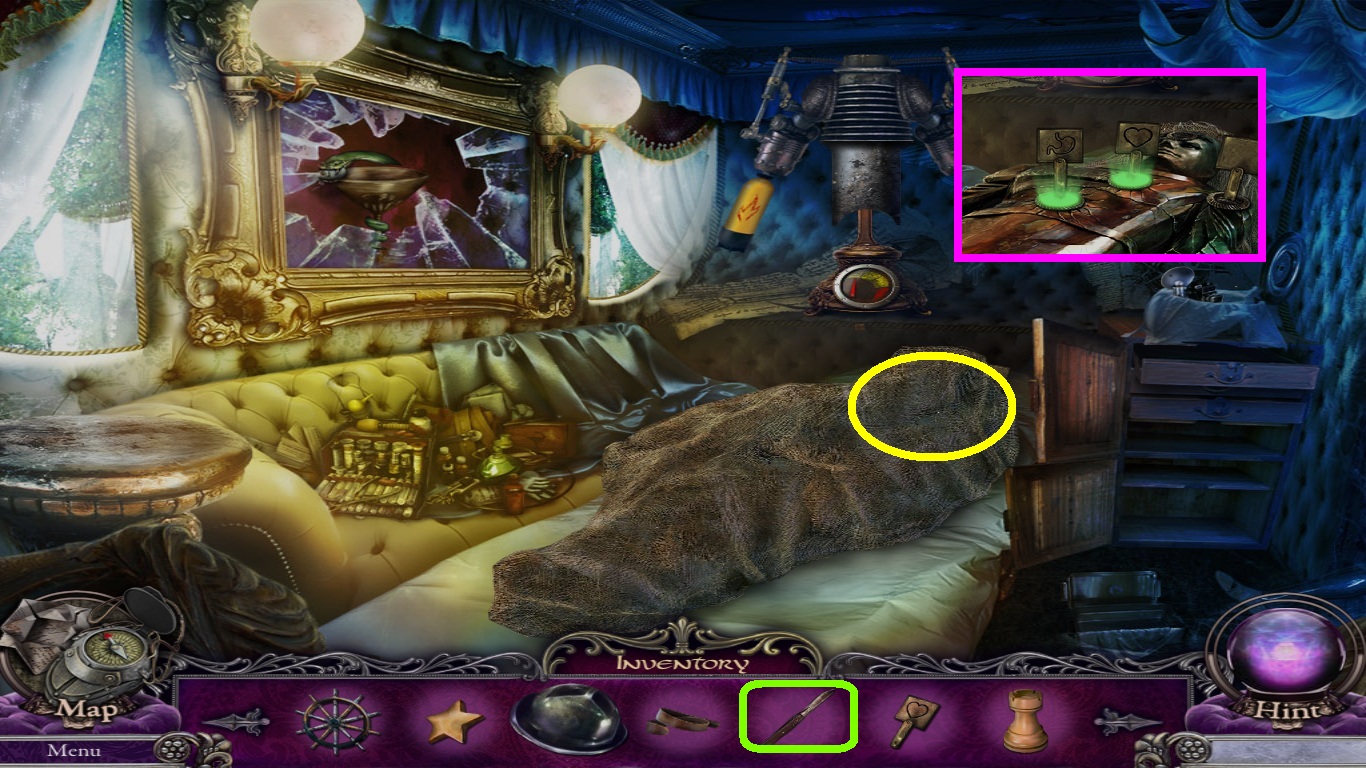
- Pick up the hammer, glass globe and the lever.
- Go to the shipwreck.
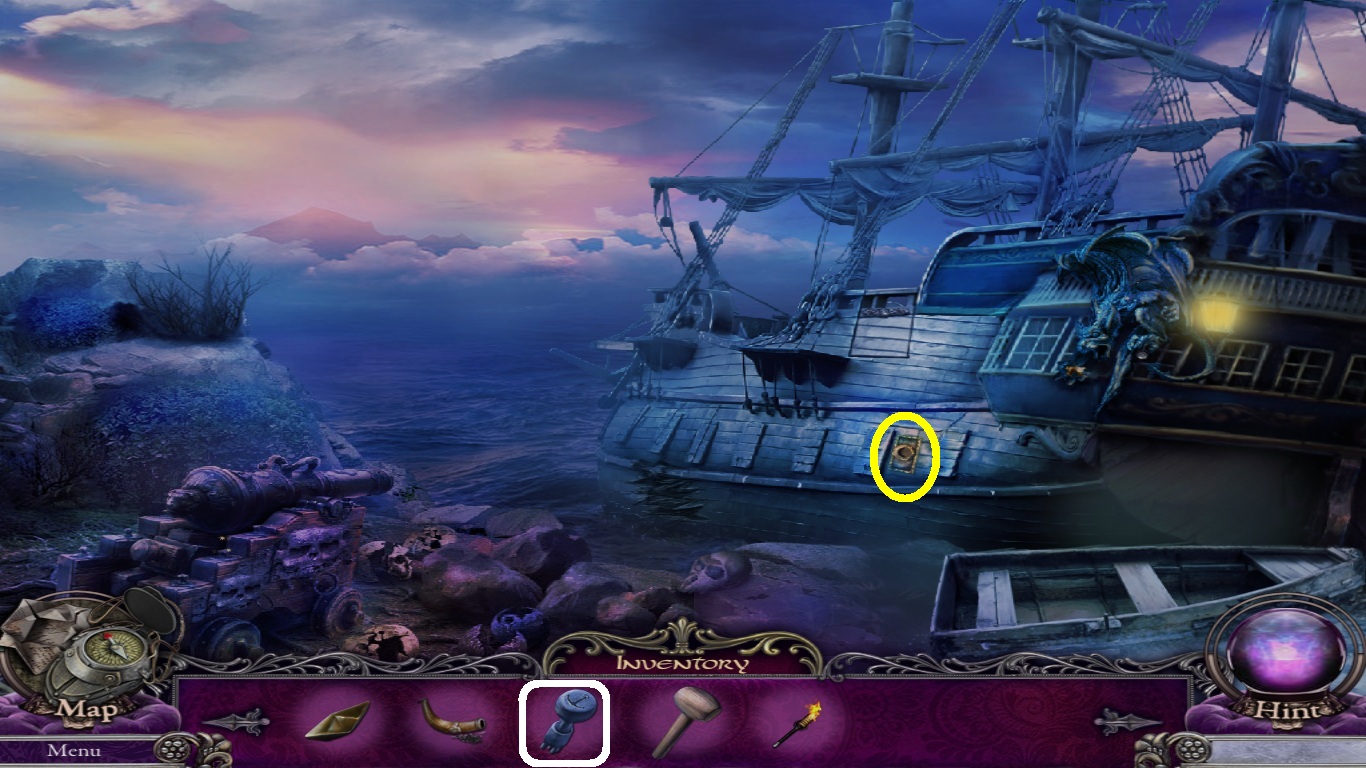
- Zoom into the ladder control socket (yellow circle).
- Select the lever (white square) from the inventory; place it in the ladder control socket.
- Click the lever; a ladder will unfurl, go up the ladder.
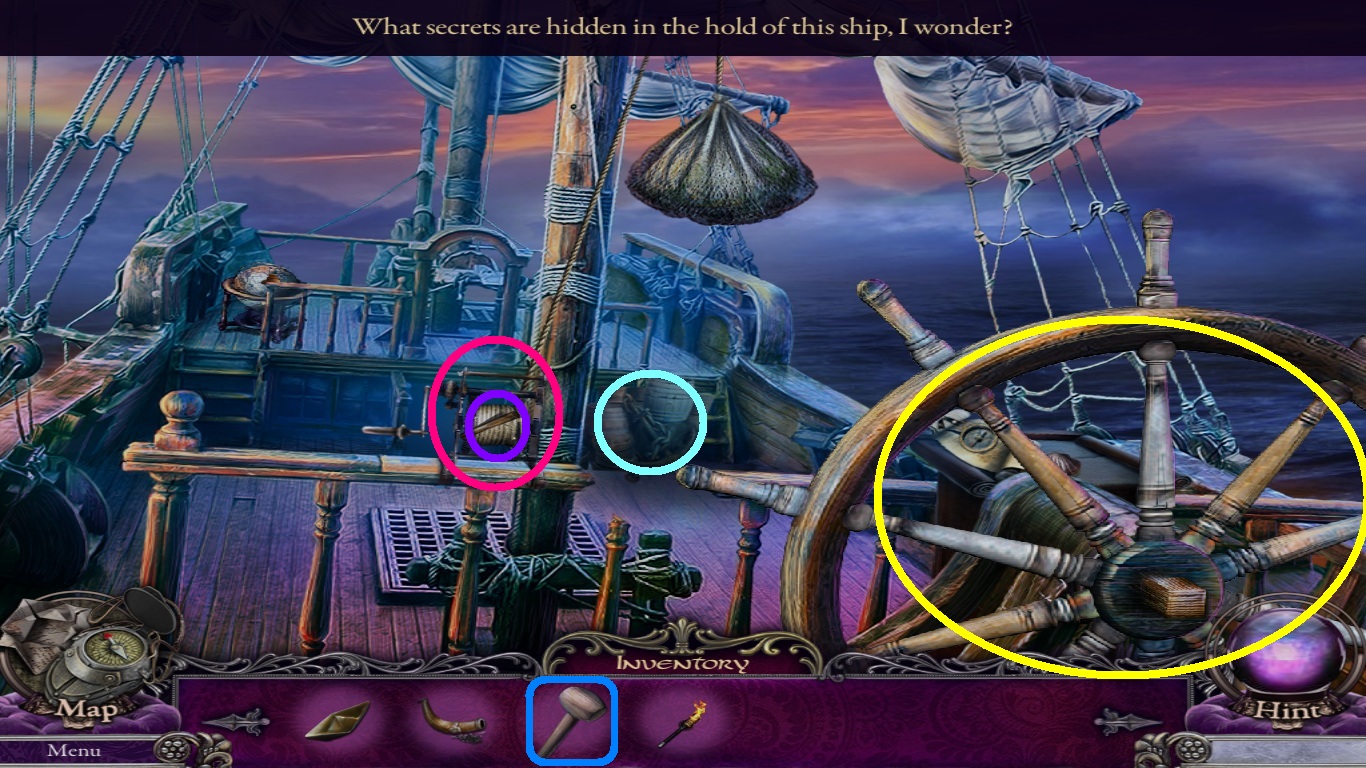
- Click the ships wheel (yellow circle).
- Zoom into the winch (pink circle).
- Pick the hammer (blue square) from the inventory and place it on the wedge (purple circle).
- Click the net (aqua circle) to enter the hidden object area.
- Find all the listed objects (yellow circles).
- Pick up the skull.
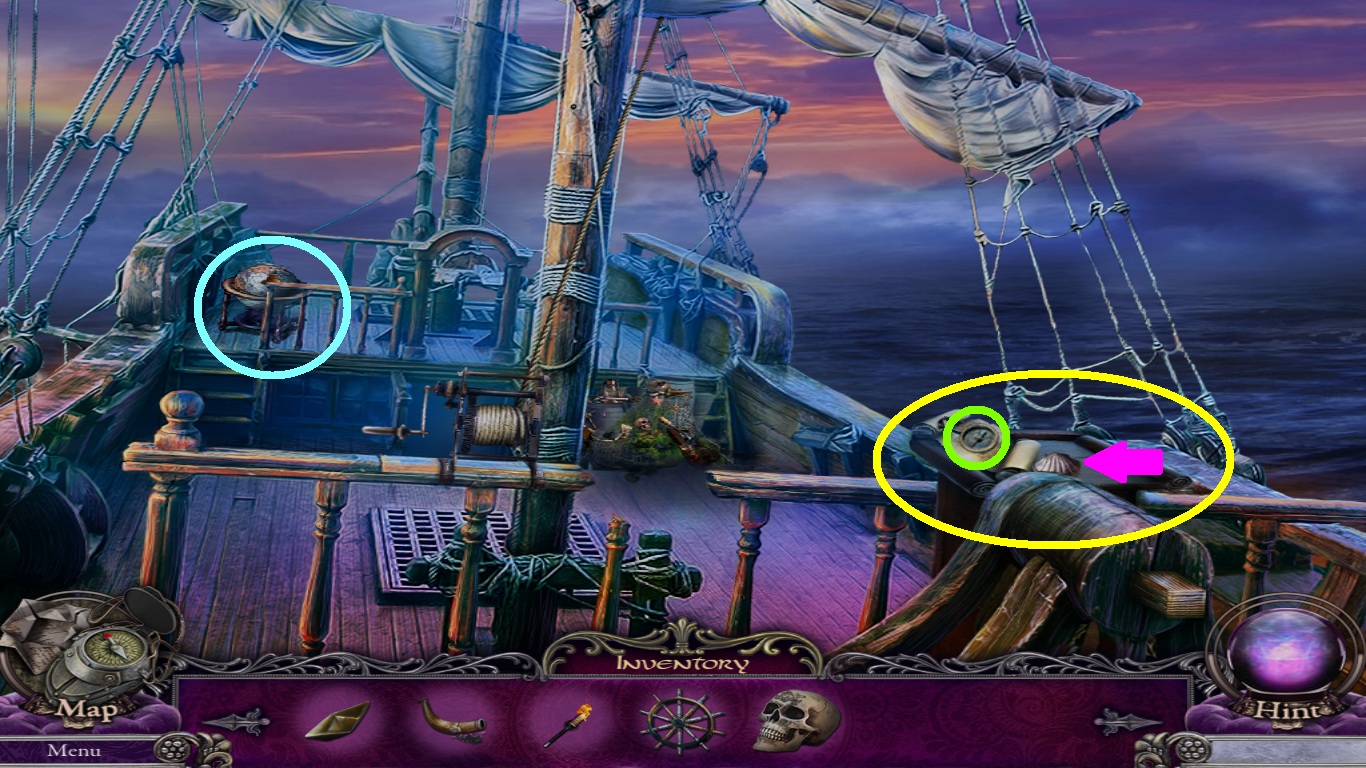
- Zoom into the map table (yellow circle).
- Pick up the compass (green circle).
- Click the shell (pink arrow) and pick up the pearl.
- Zoom into the globe (aqua circle).
- Select the compass from the inventory and place it into the missing space for a mini game.
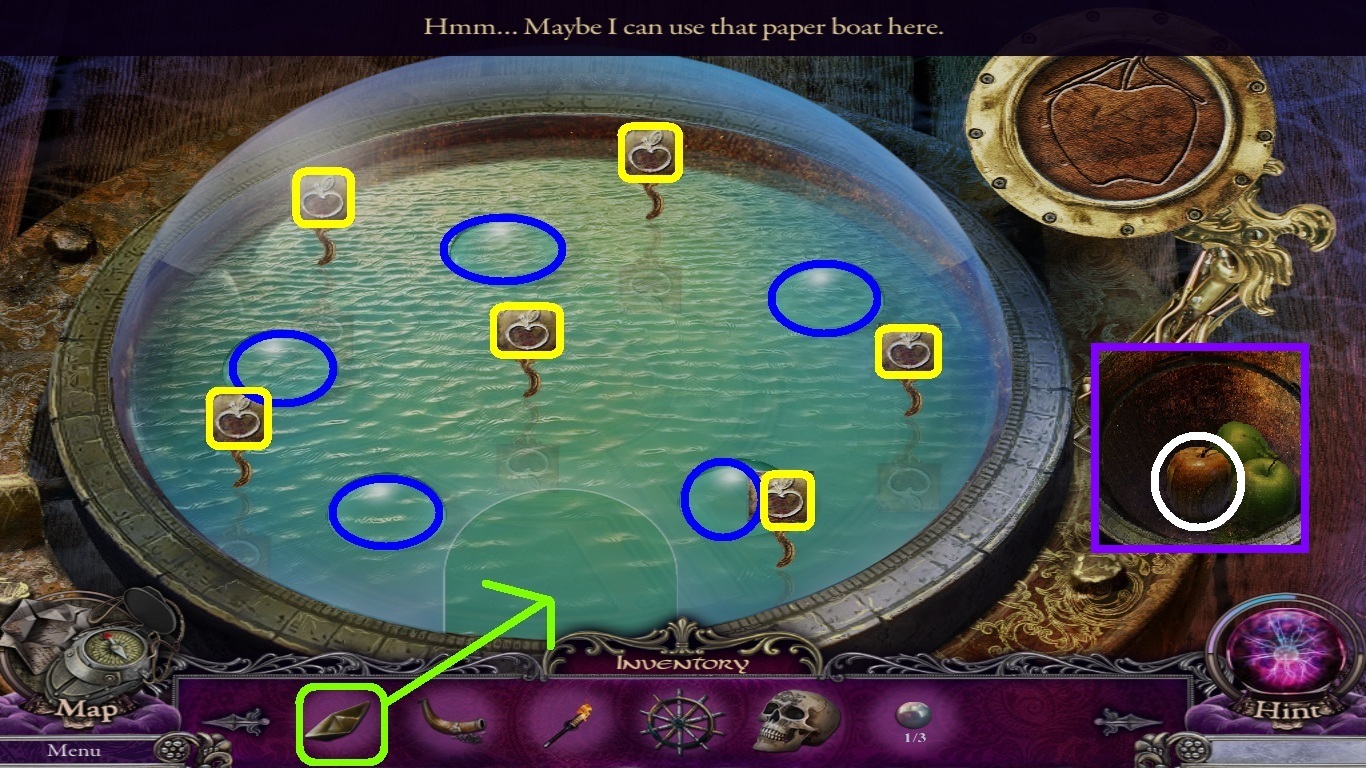
- Select the paper boat (green square) from inventory; place it into the opening.
- Use the bubbles (blue circles) to push the paper boat into the apple flags (yellow squares).
- Pressing the bubbles propels the boat.
- You may need to press the bubbles many times to move the boat.
- Play will be randomized.
- When the basin opens, pick up the wooden apple (white circle) as shown in the (purple square).
- Go back to the shipwreck.
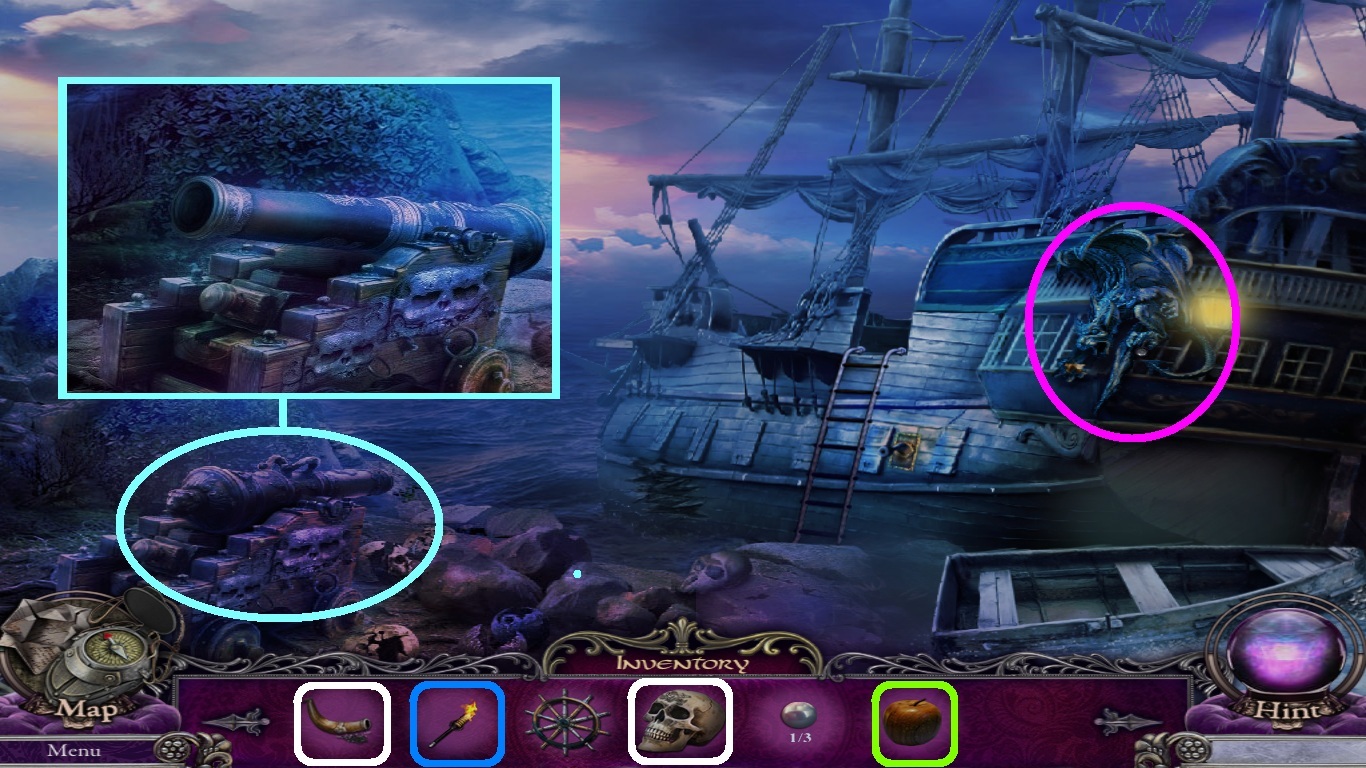
- Zoom into the cannon (aqua circle).
- Turn the barrel left by clicking the cannon.
- Select the gun powder and the skull (white squares) from the inventory; place them into the opening of the cannon.
- Click the cannon again to turn it around for lighting.
- Select the burning torch (blue square) from the inventory and light the end of the cannon.
- Zoom into the gargoyle (pink circle).
- Select the wooden apple (green square) from the inventory and place it with the gargoyle.
- Pick up the doorbell.
- Go to the decrepit house.
- Zoom into the front door (pink circle).
- Select the doorbell (blue square) from the inventory; place it on the wires at on the door front.
- Ring the bell.
- Enter and go toward the dollhouse.
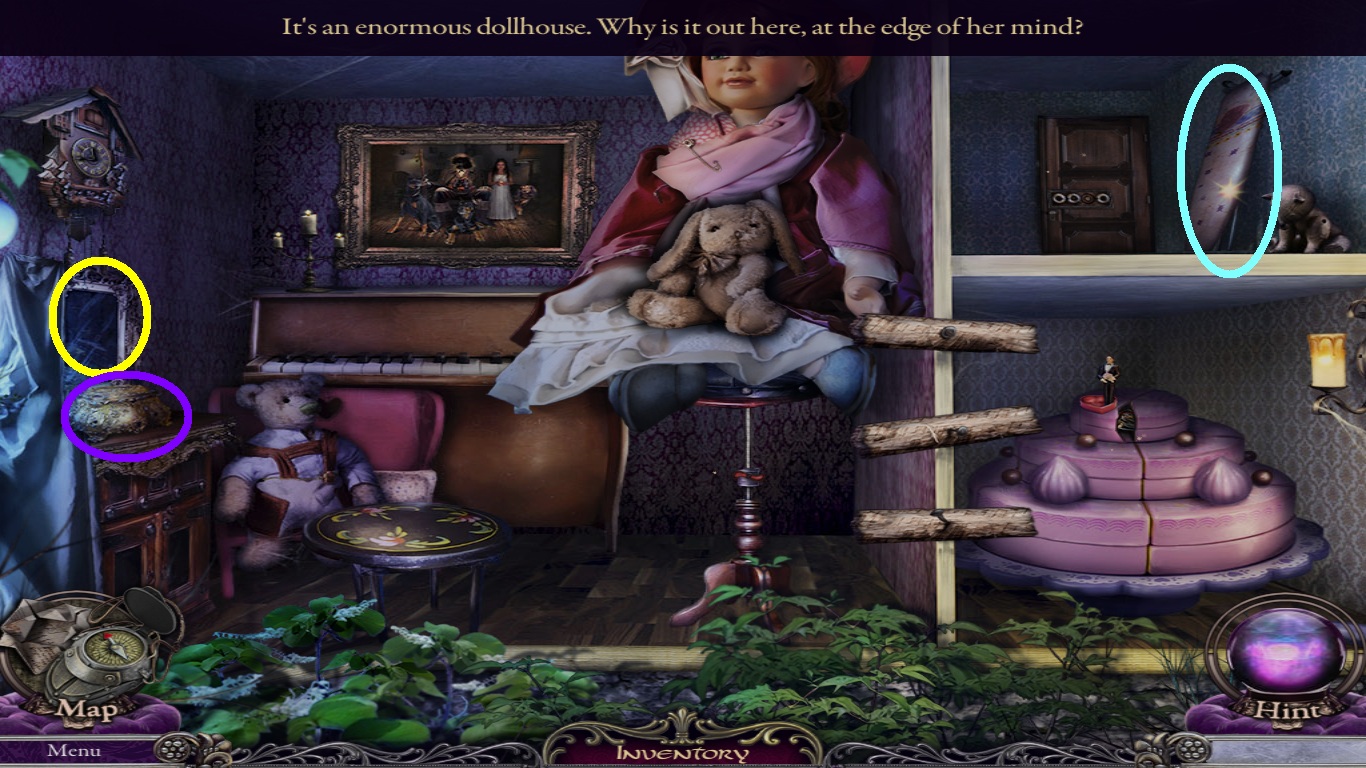
- Zoom into the mirror (yellow circle).
- Zoom into the music box (purple circle); pick up the mirror shard.
- Pick up the ironing board (aqua circle).
- Go back to the shipwreck.

- Zoom into the hole (yellow circle) in the ship.
- Select the ironing board (blue square) from the inventory; place it across the boulders and the hole in the ship (blue circle).
- Enter into the ships hold.
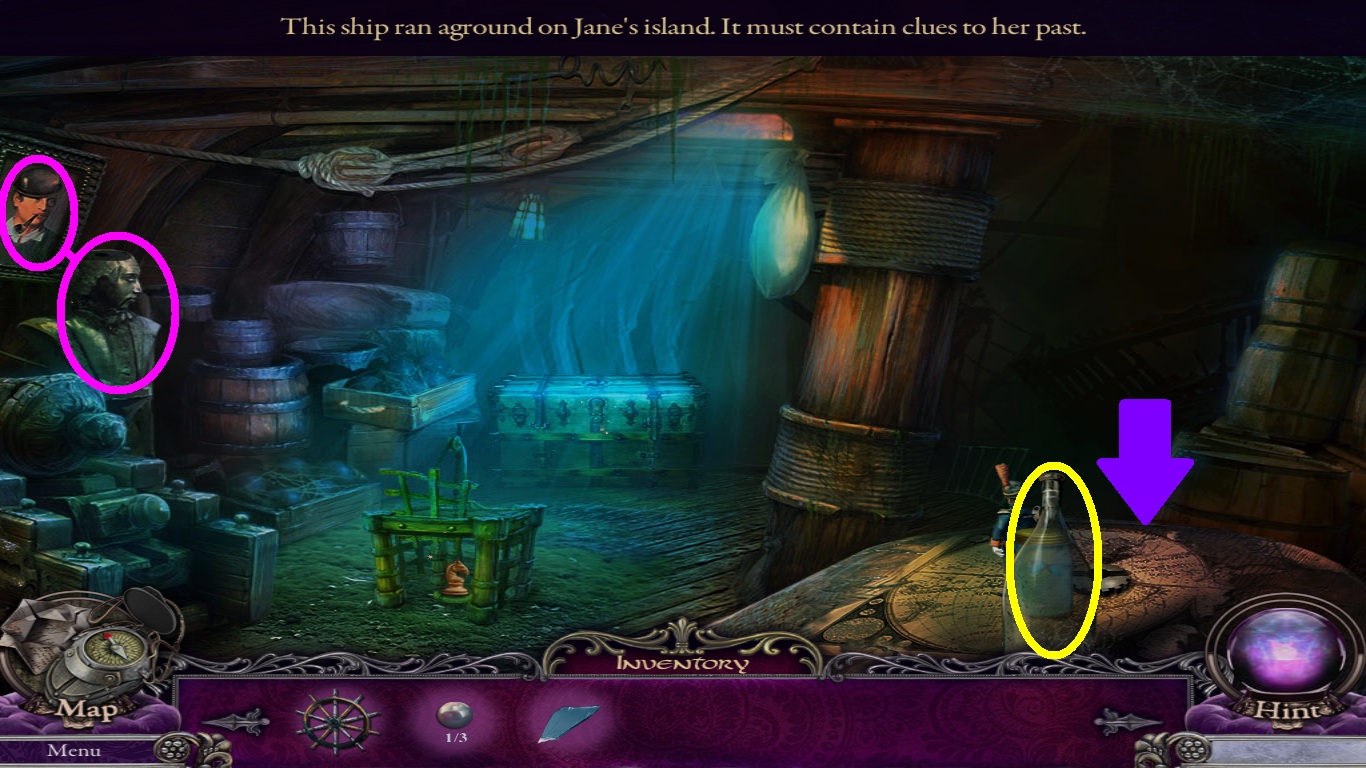
- Click the bottle (yellow circle).
- Zoom into the table (purple arrow).
- Pick up the gear and the butterfly in the jar.
- Look at the portrait (pink circle).
- Zoom into the statue (pink circle); notice they are different by 3 different items.
- Go to the town gate.
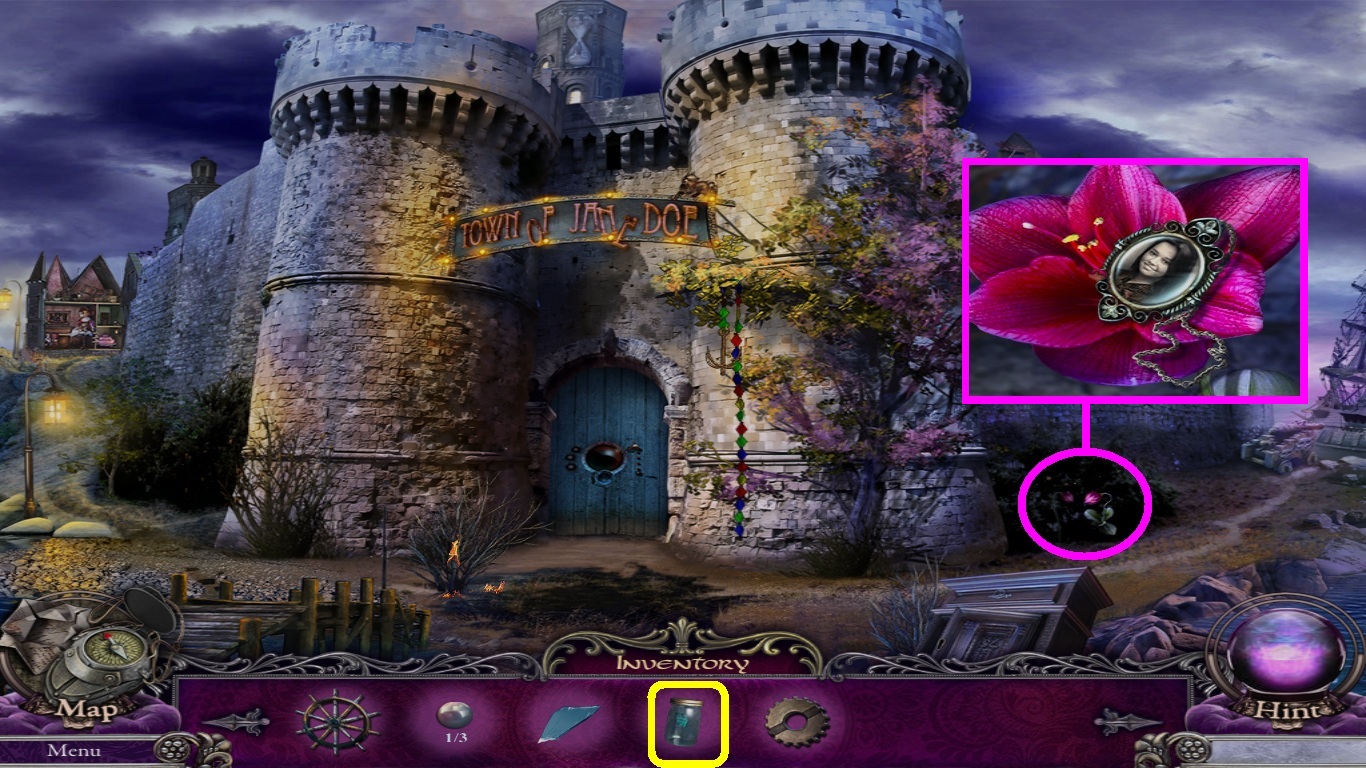
- Zoom into the flower (pink circle).
- Select the butterfly in the jar (yellow square) from the inventory; use it on the flower.
- Pick up the medallion as shown in the (pink square).
- Go to the wrecked ships hold.
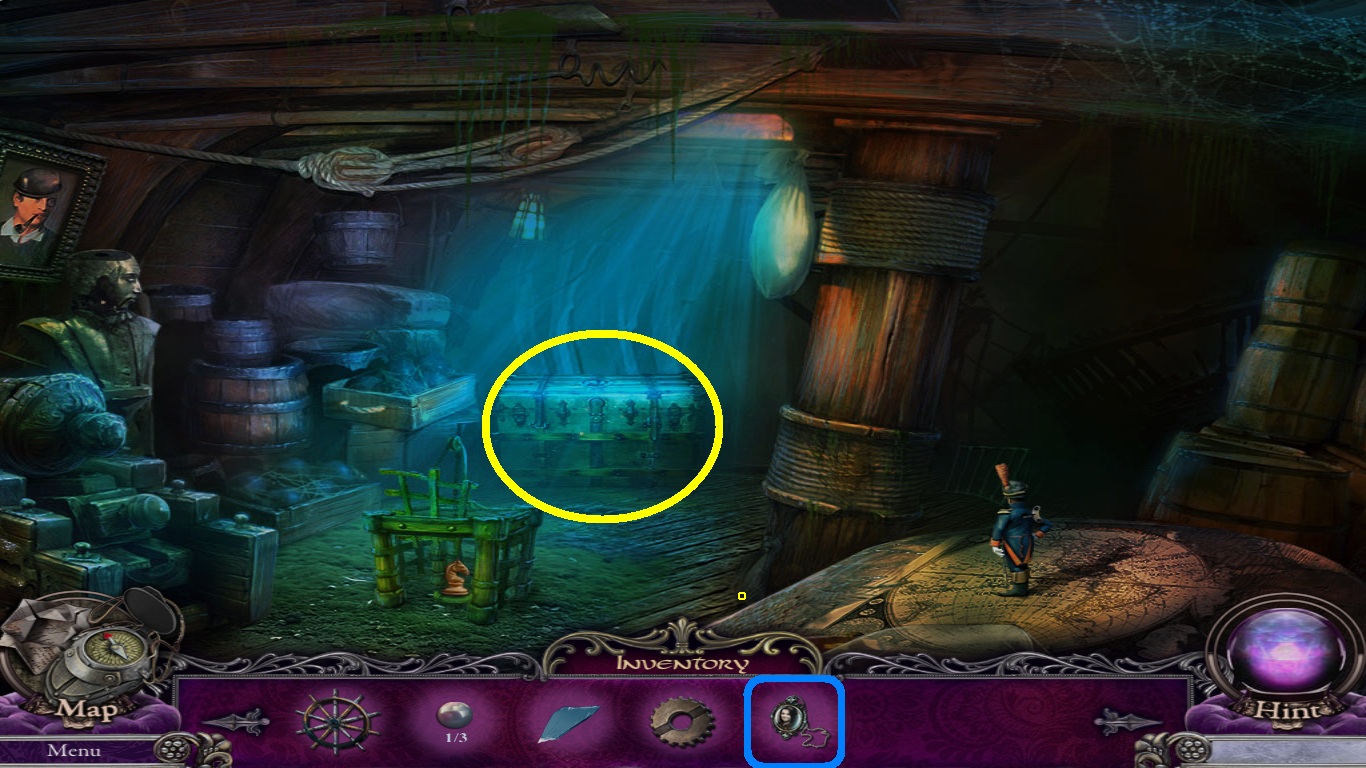
- Zoom into the chest (yellow circle).
- Select the medallion (blue square) from the inventory.
- Place it into the groove.
- A game will open.
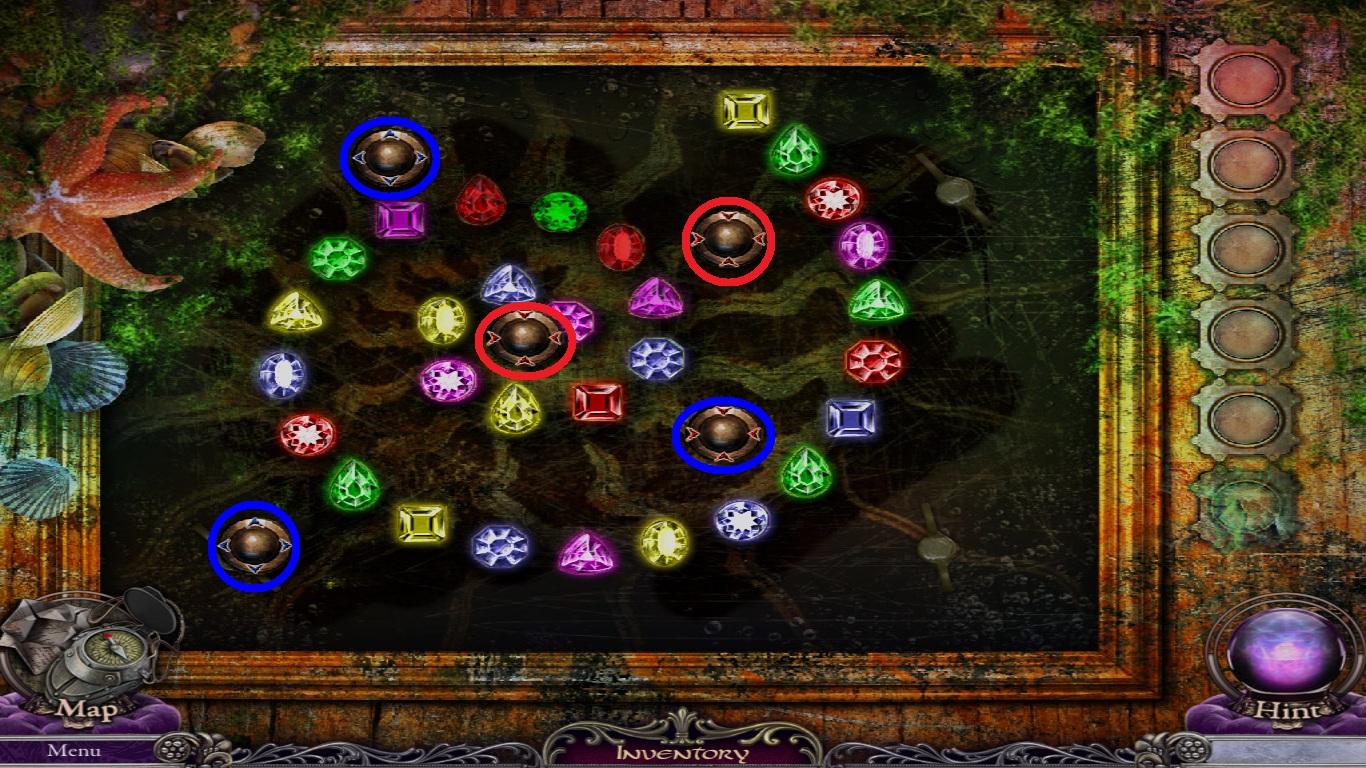
- Using the magnets, move the gemstones around so they fit into their grooves and glow.
- Follow the magnet placement as shown above to solve the puzzle.
- Red magnets are outlined in (red).
- Blue magnets are outlined in (blue).
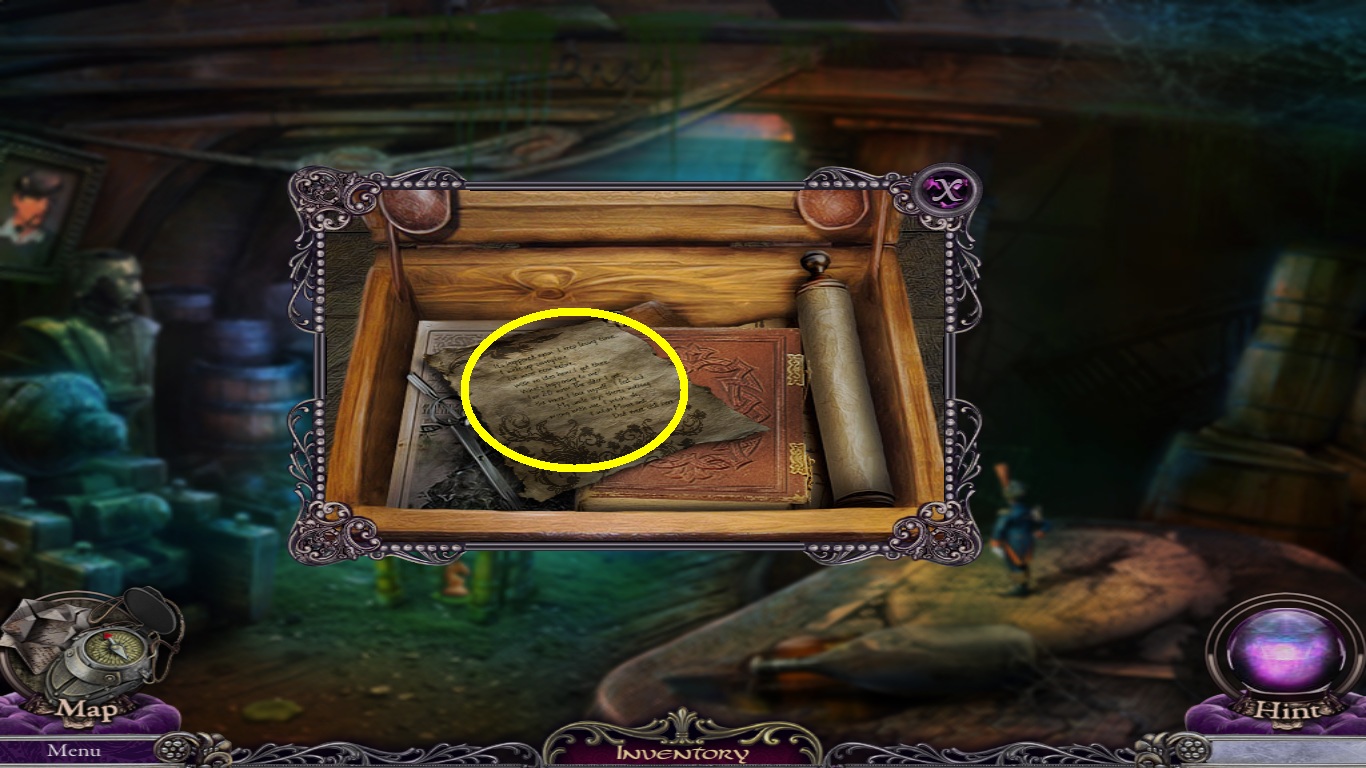
- Zoom into the chest.
- Pick up the page out of Jane’s memory (yellow circle).
- Pick up the pearl.
- Go to the dollhouse.
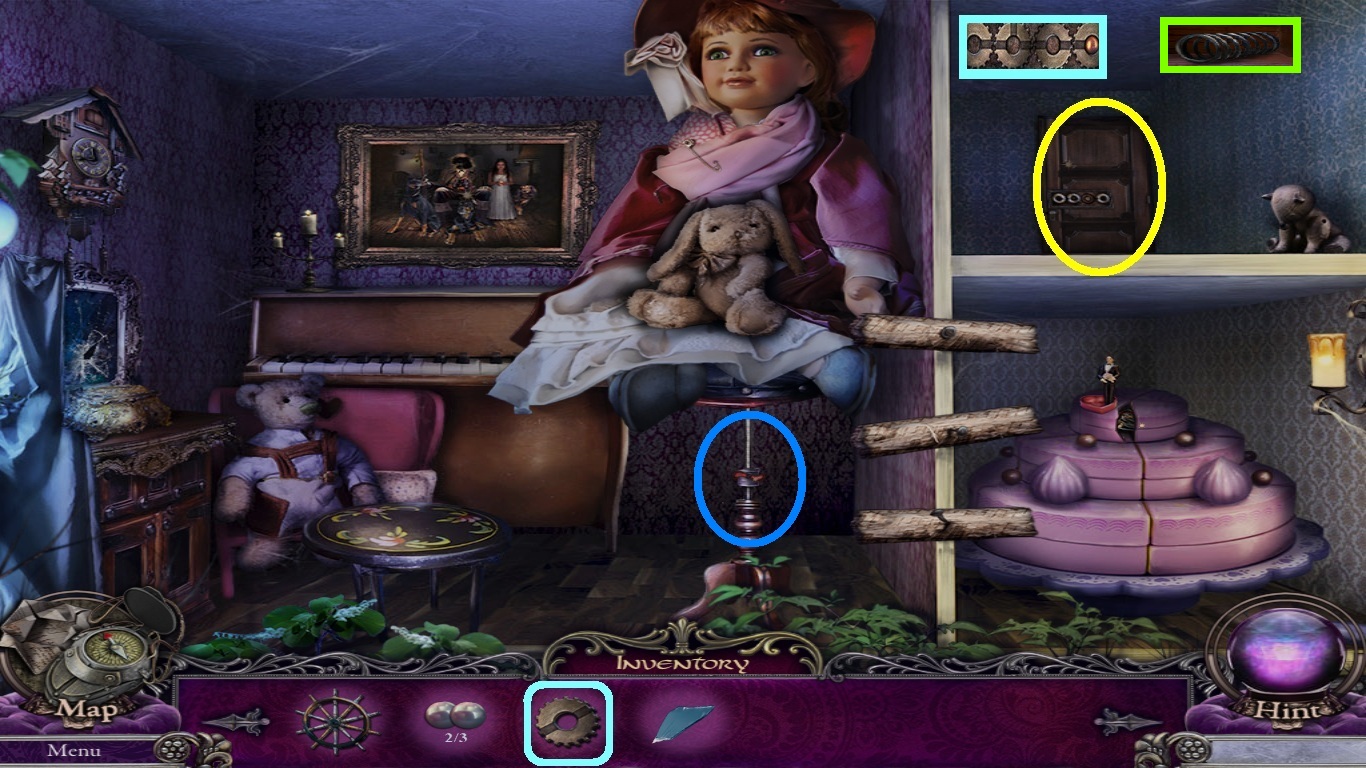
- Zoom into the cabinet (yellow circle).
- Select the gear (aqua square) from the inventory; place it into the mechanism.
- Click each gear to rotate as shown in the (aqua square).
- Pick up the spring as shown in the (green square).
- Notice the stool (blue circle).
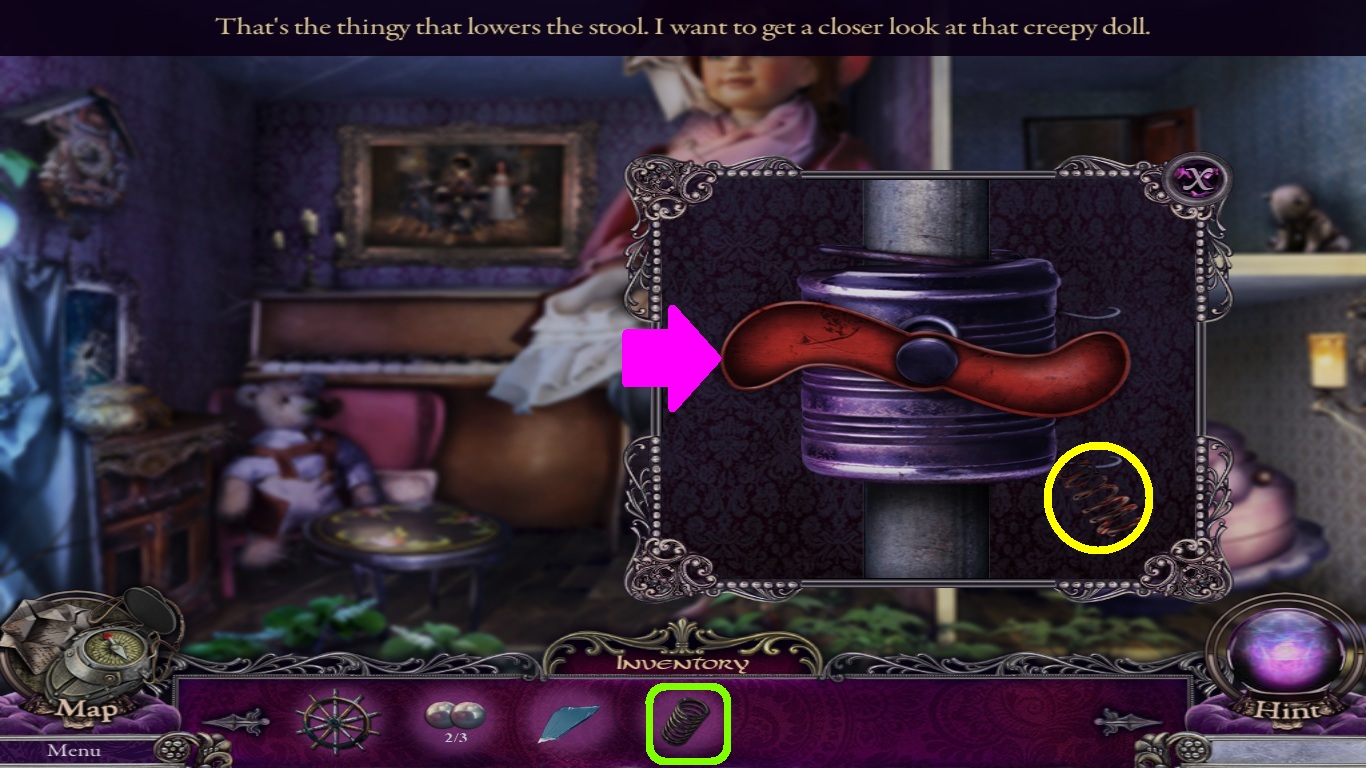
- Zoom into the stool; select the spring (green square) from the inventory and replace it (yellow circle).
- Click the handle (pink arrow) 3 times to lower the stool.
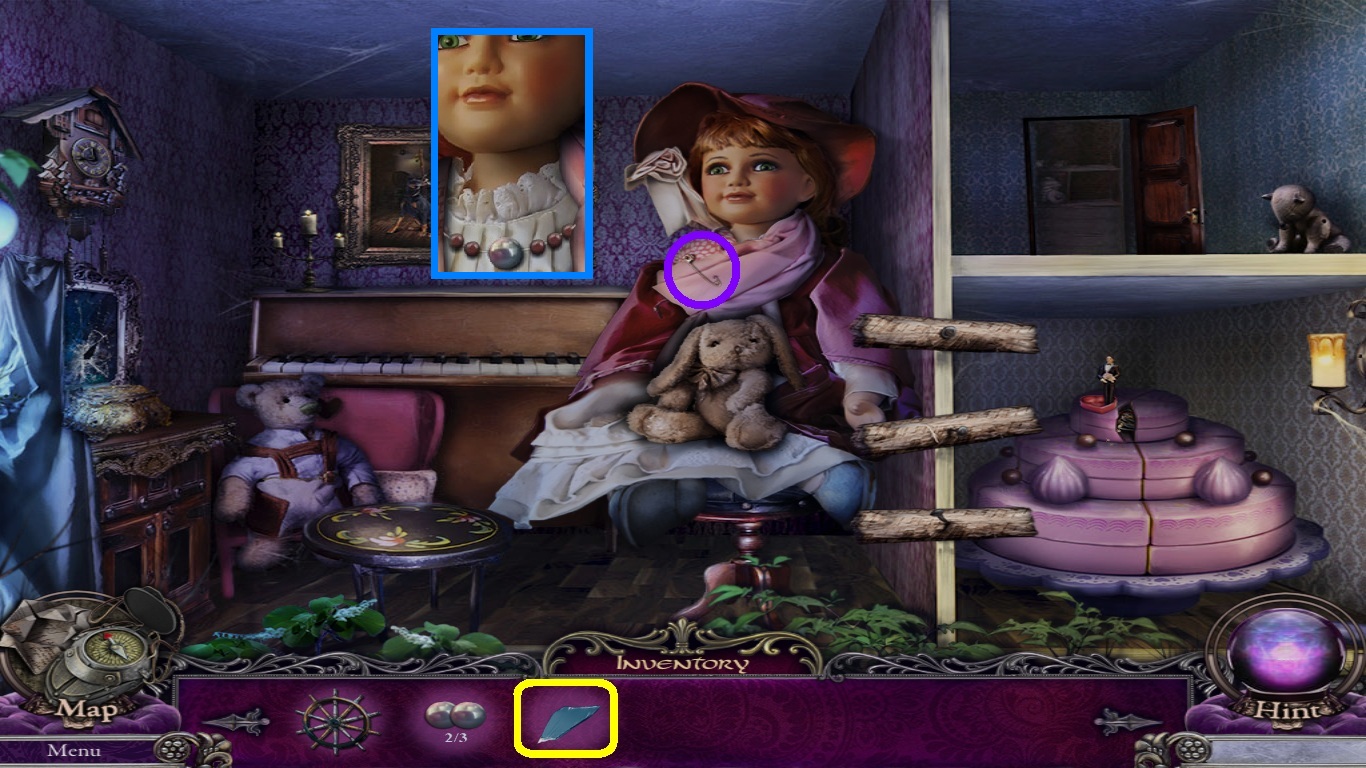
- Zoom into the doll.
- Click the safety pin (purple circle) from her scarf.
- Pick the mirror shard (yellow square) from the inventory; use it to cut the necklace and take the pearl (as shown in the blue square).
- Go to the town gate.
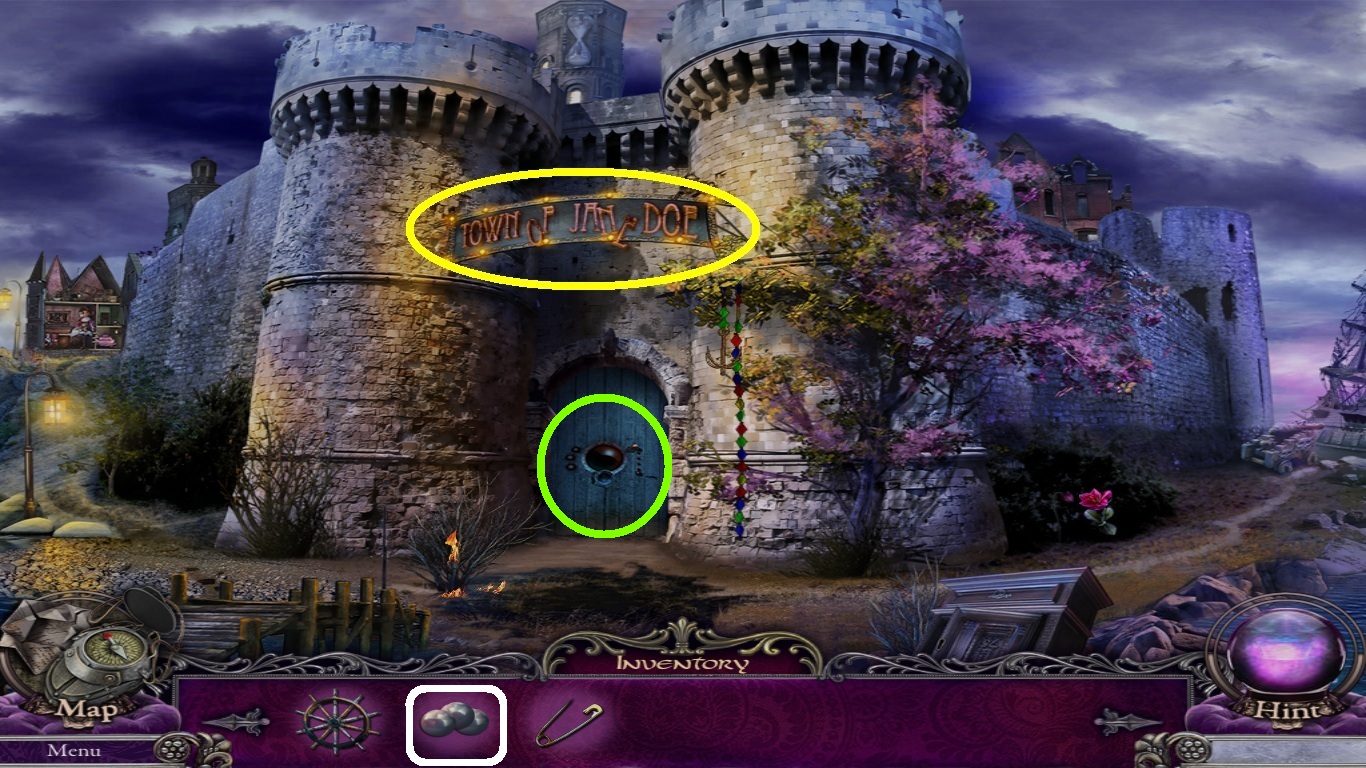
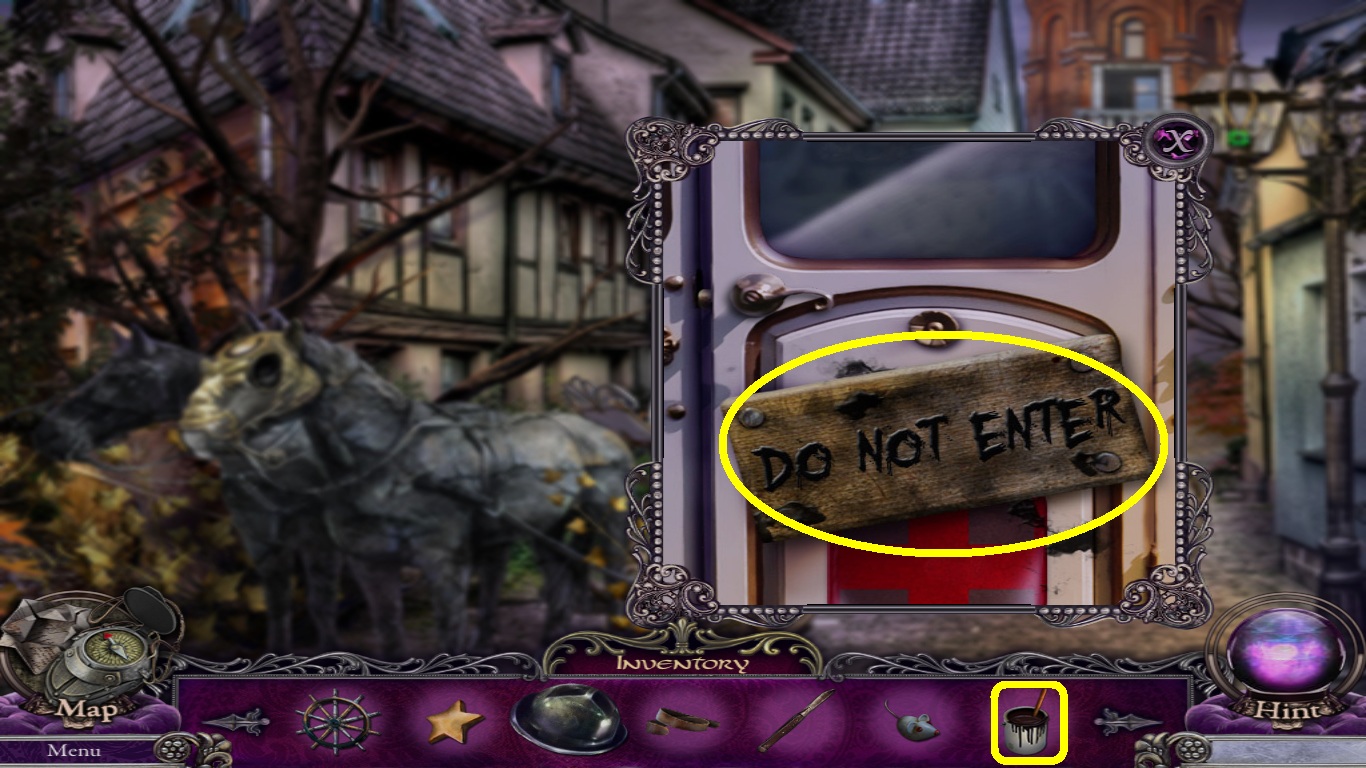
- Notice into the sign (yellow circle).
- Zoom into the door (green circle).
- Place the 3 pearls (white square) from the inventory into the slots to open a mini-game.
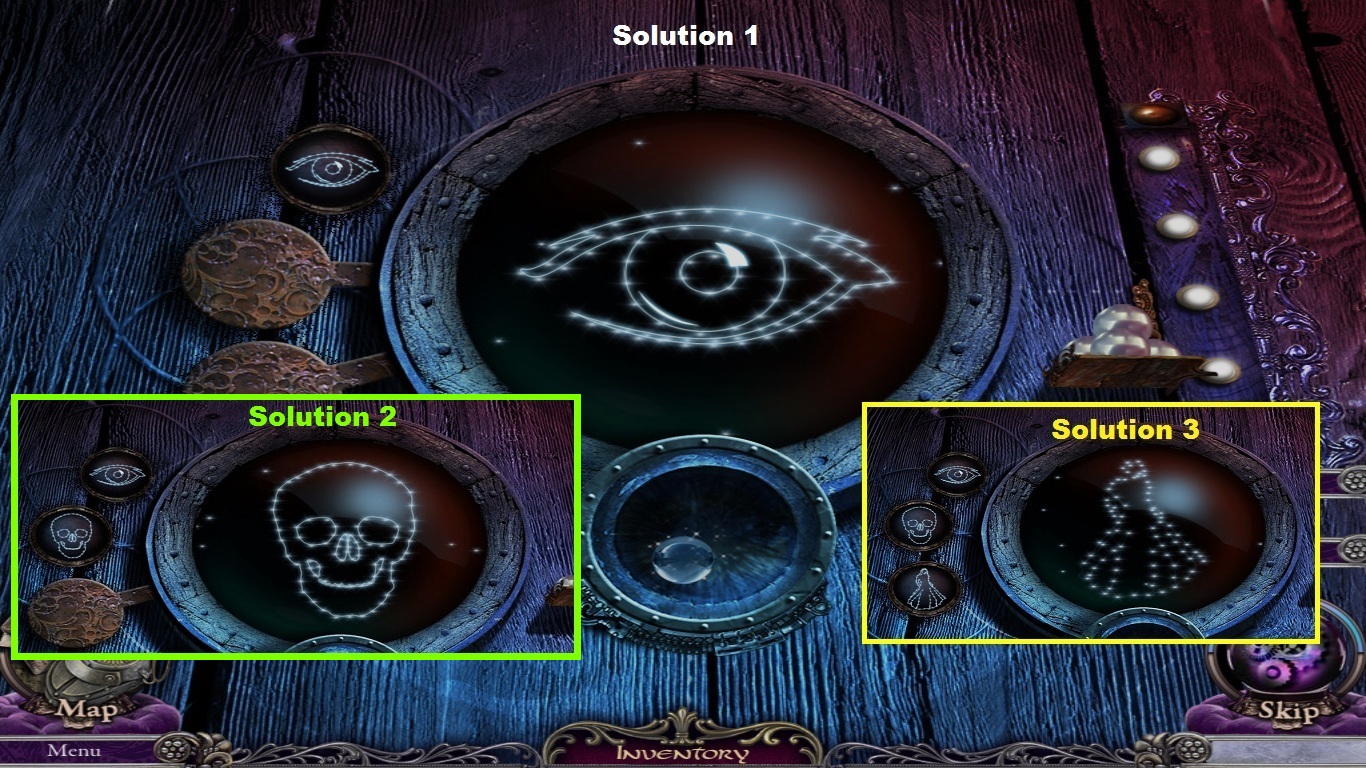
- Use the controls to match the symbols on the right (yellow circle).
- When complete; go to Main Street.
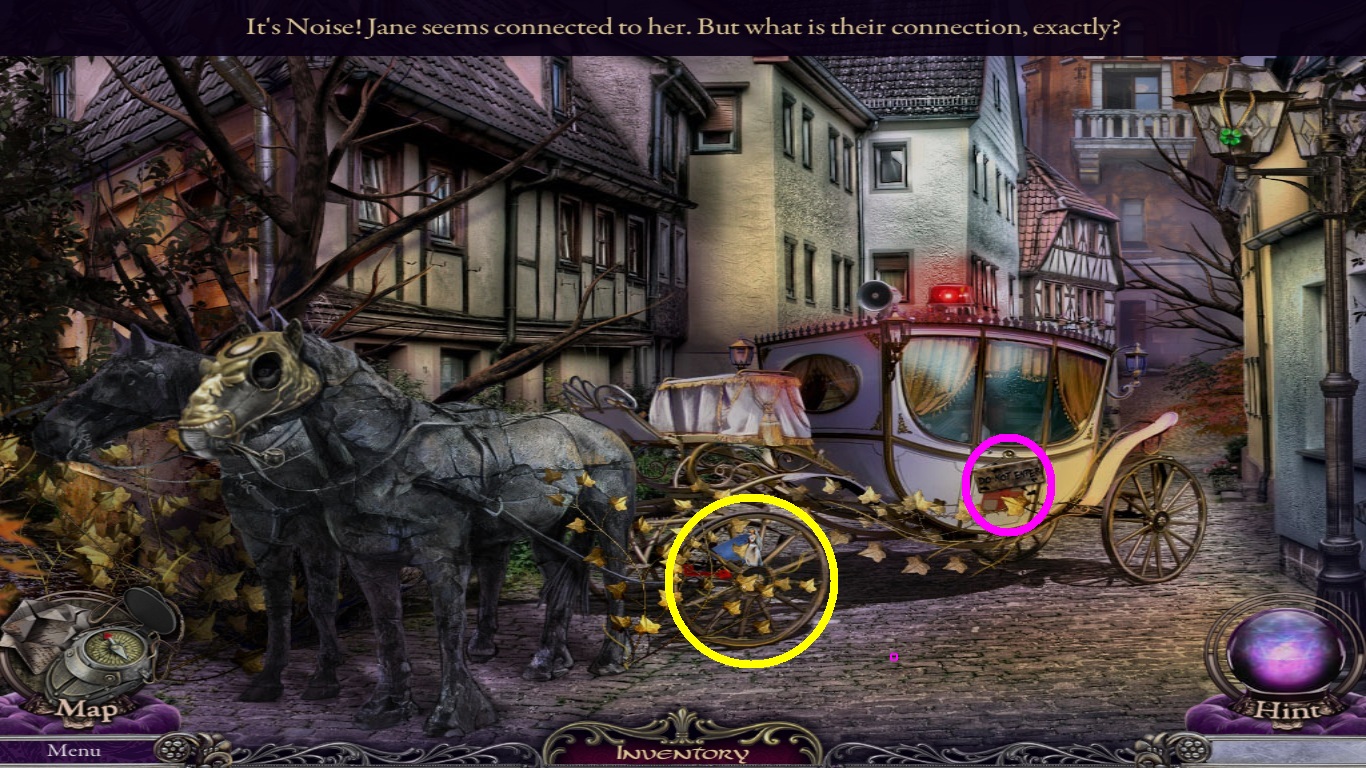
- Zoom into the carriage wheel (yellow circle).
- Pick up the bride figure and mailbox door.
- Notice the sign on the carriage door (pink circle).
- Go to the tower gate.
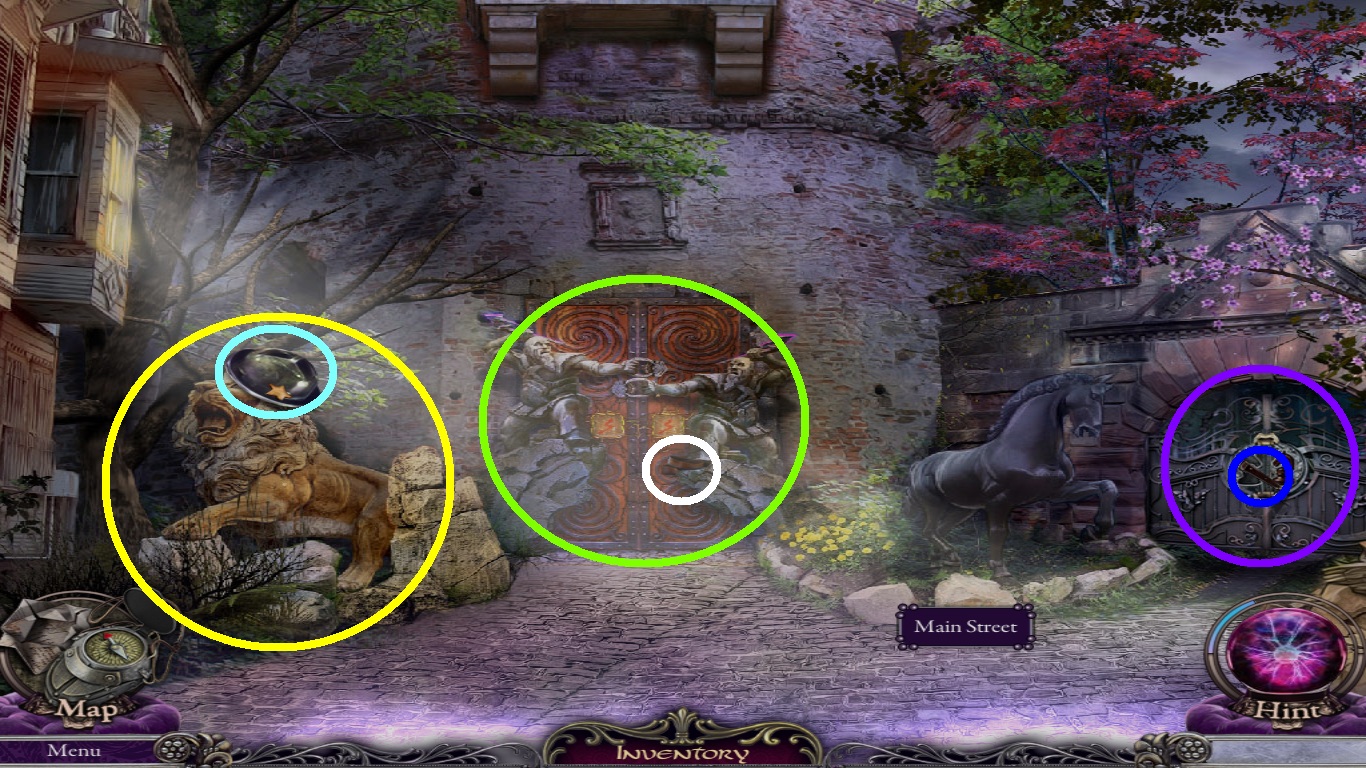
- Zoom into the lion (yellow circle) statue.
- Pick up then star and the hat (aqua circle).
- Zoom into the gate (green circle).
- Pick up the belt (white circle).
- Zoom into the stable gate (purple circle).
- Pick up the scalpel (blue circle).
- Use the map to go to the wrecked ships hold.
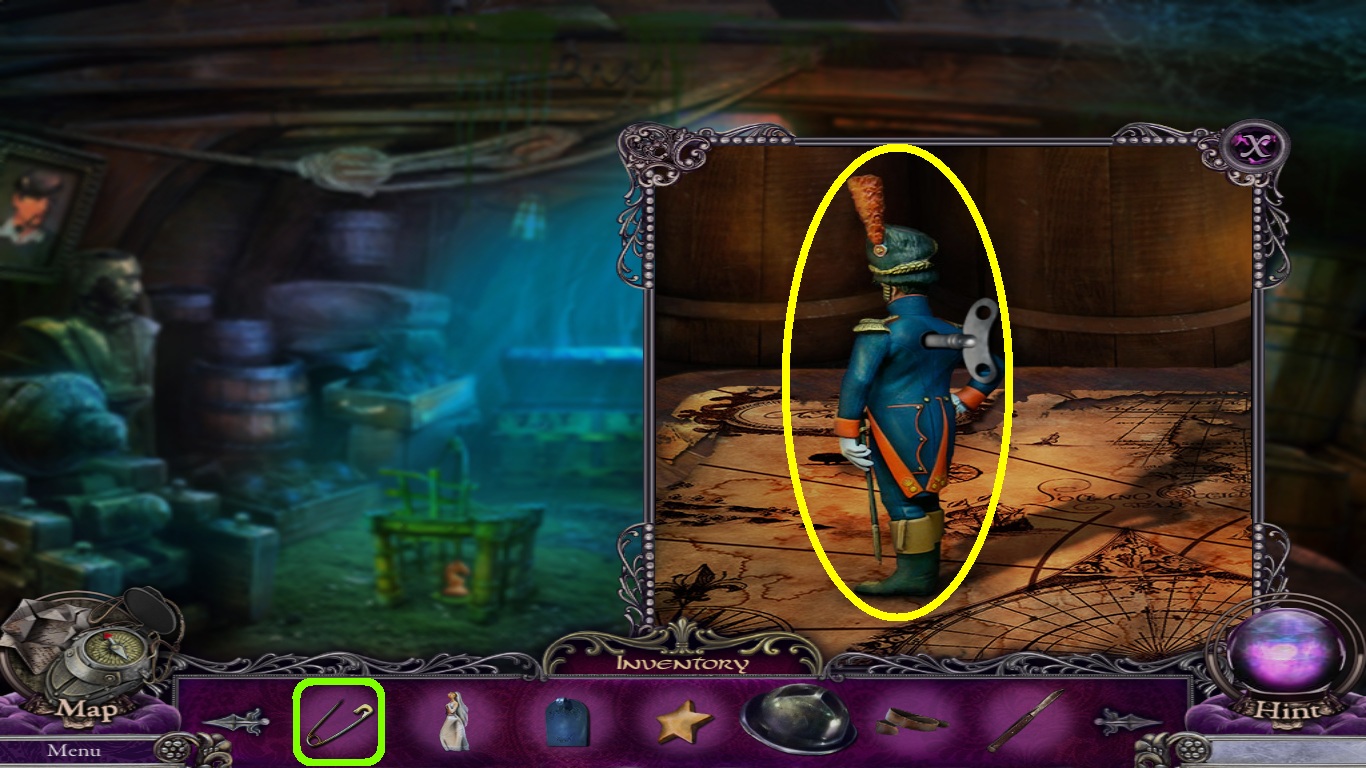
- Zoom into the soldier (yellow circle).
- Select the pin (green square) from the inventory; use it on the key in his back.
- Pick up the wind up key.
- Go to the dollhouse.
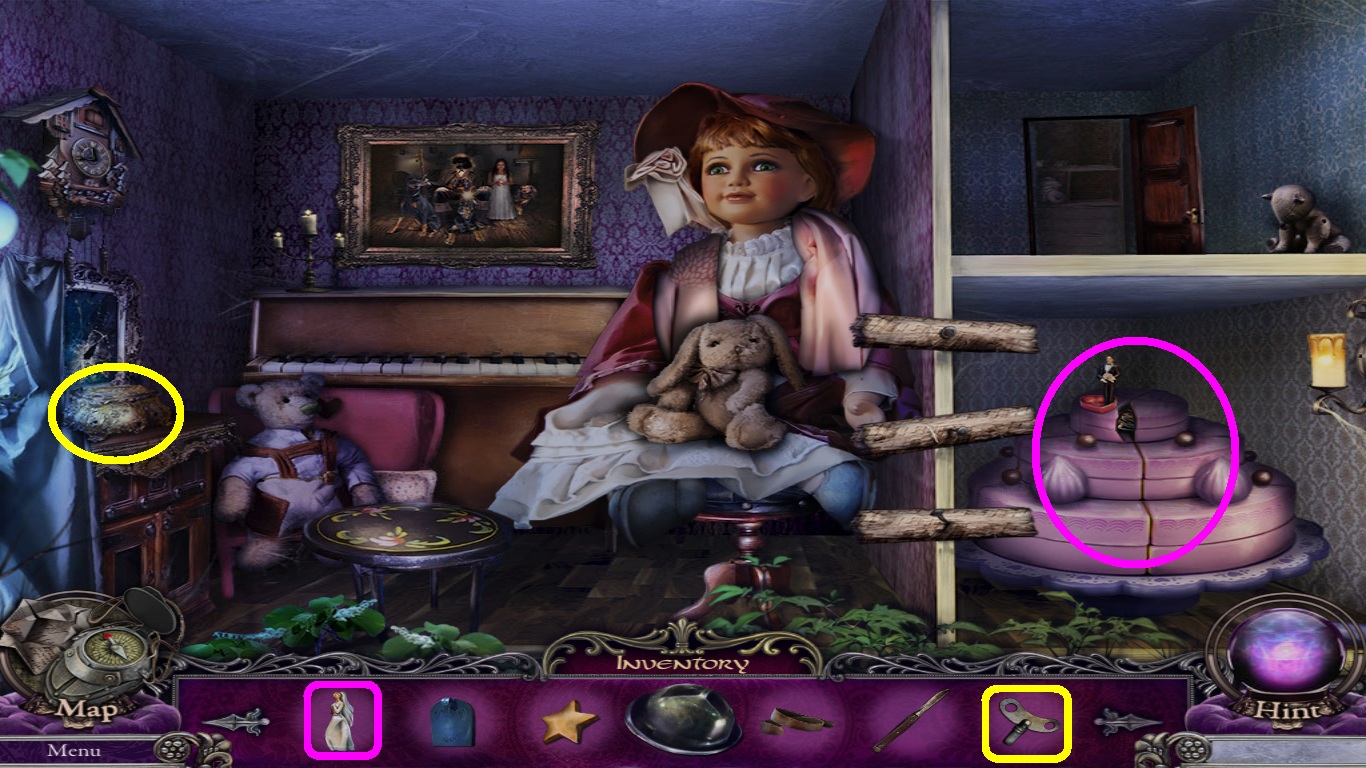
- Zoom into the music box (yellow circle).
- Pick the wind up key (yellow square) from the inventory; use it on the lock.
- Pick up the mouse.
- Zoom into the wedding cake (pink circle); pick the bride figure (pink square) from the inventory and put it next to the groom.
- Pick up the flower and the mechanical hand.
- Go to Main Street.
- Zoom into the carriage wheel.
- Select the mechanical hand (green square) from the inventory to pick up the mailbox flag (yellow circle).
- Notice the object hanging on the lamp (pink circle).
- Go to the decrepit house.
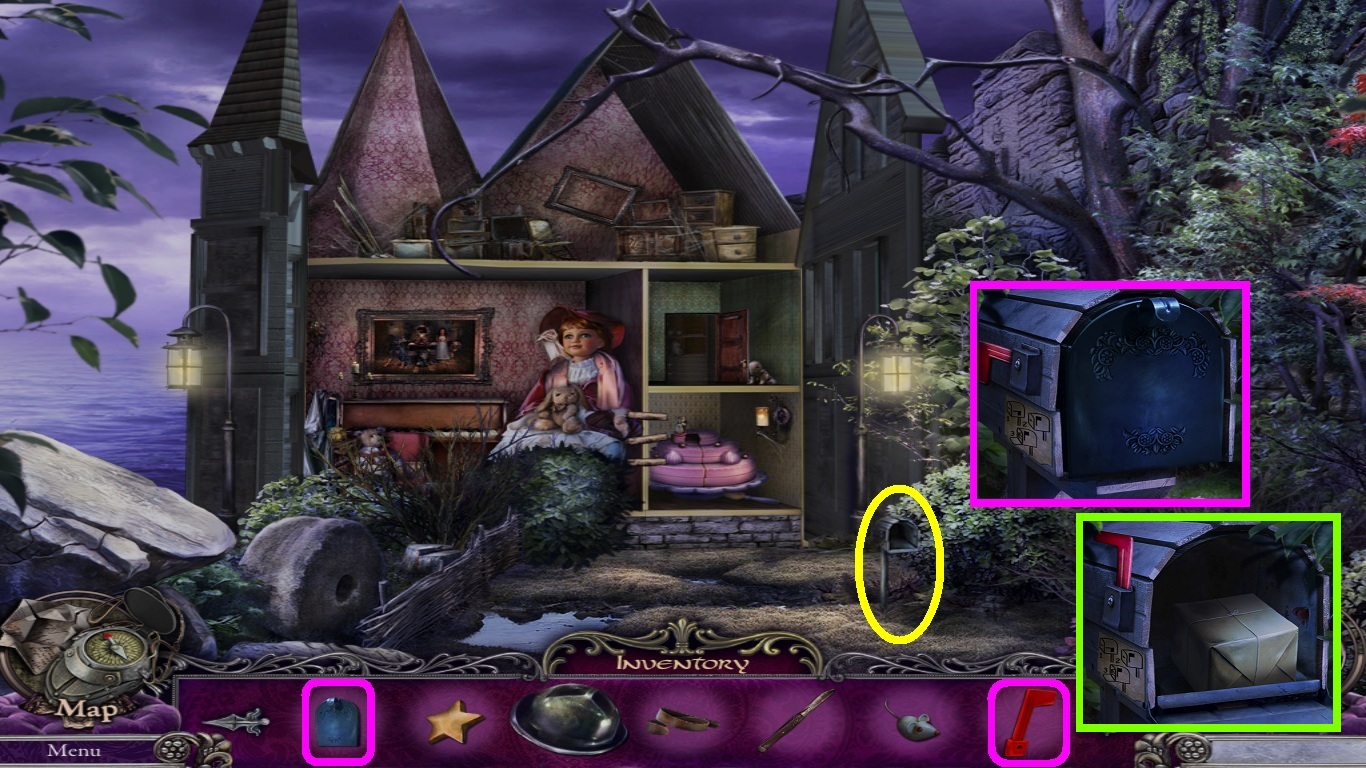
- Zoom into the mailbox missing the door (yellow circle).
- Select the mailbox door and flag (pink squares) from the inventory; place both items on the mailbox (pink square).
- Close the mailbox and lift the flag.
- Open the mailbox; pick up the package (green square).
- Open the package; pick up the black paint.
- Go to Main Street.
- Zoom into the carriage door.
- Select the black paint (yellow square) from the inventory; use it on the sign (yellow circle).
- Go inside the carriage.
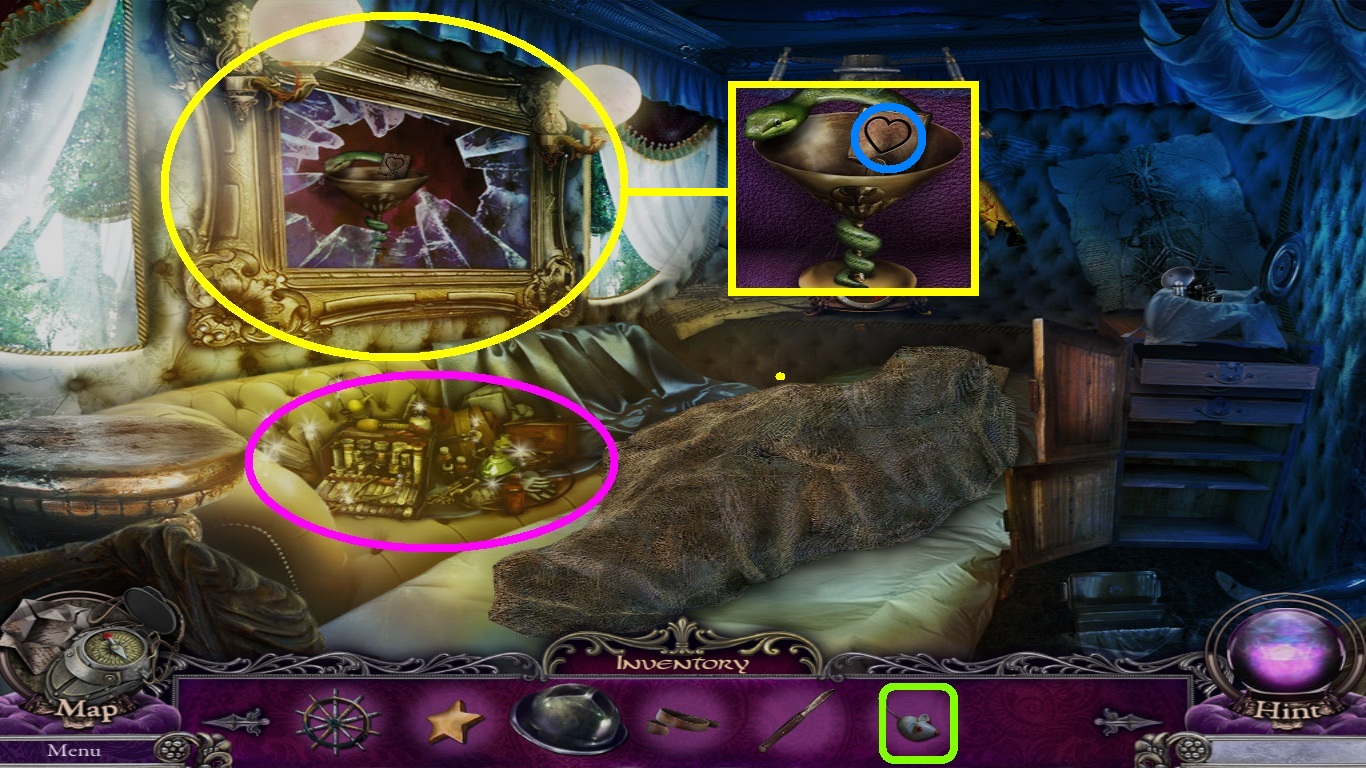
- Zoom into the frame (yellow circle).
- Pick the mouse (green square) from the inventory; give it to the snake (yellow square).
- Pick up the heart (blue circle).
- Click the hidden object area (pink circle).
- Find all the listed objects (yellow circles).
- Pick up the rook.
- Zoom into the burlap (yellow circle).
- Select the scalpel (green square) from the inventory to cut and open it.
- Pick up the monocle.
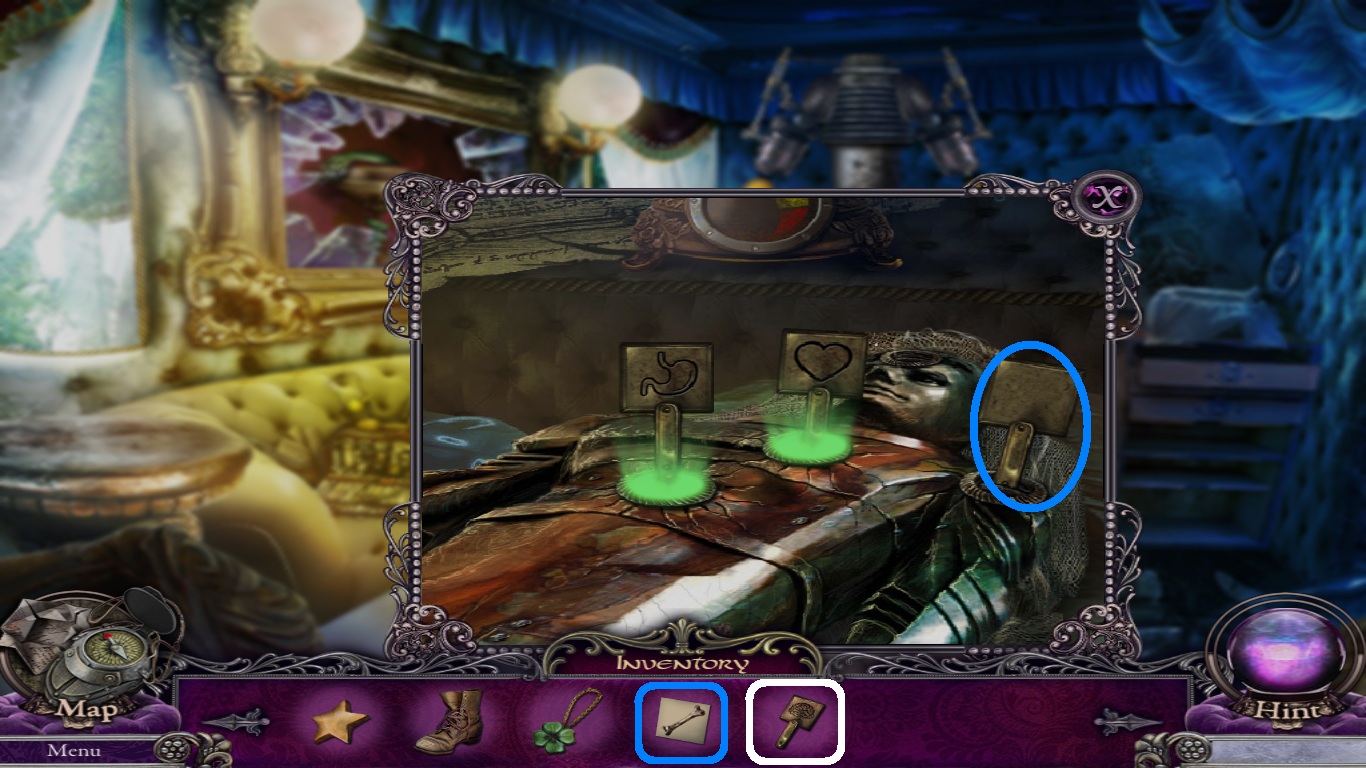
- Move the stomach symbol to the left slot; pick the heart symbol from the inventory and place it in the open slot (shown in the pink square).
- Go to the hold of the wrecked ship.
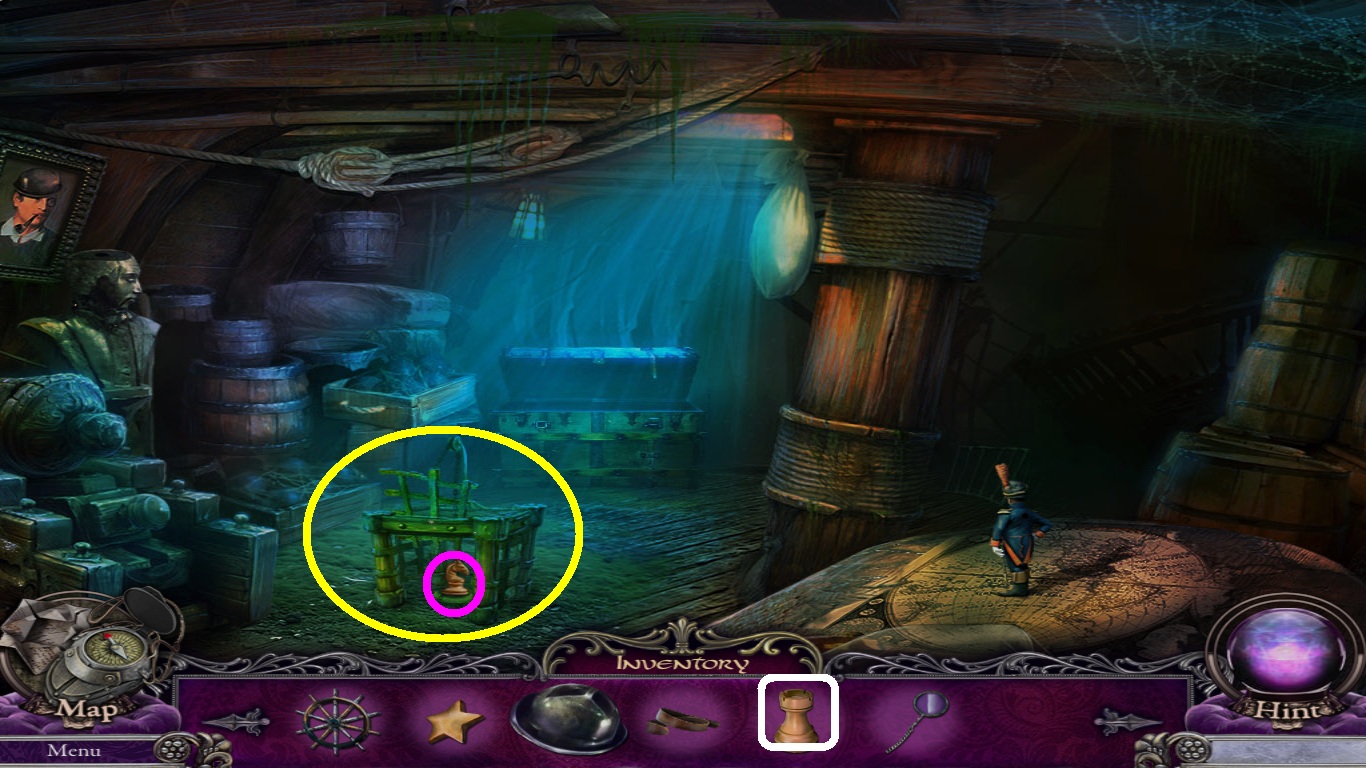
- Zoom into the cage (yellow circle).
- Select the rook (white square) from the inventory; switch it with the knight (pink circle) in the cage.
- Go to the stable doorway.
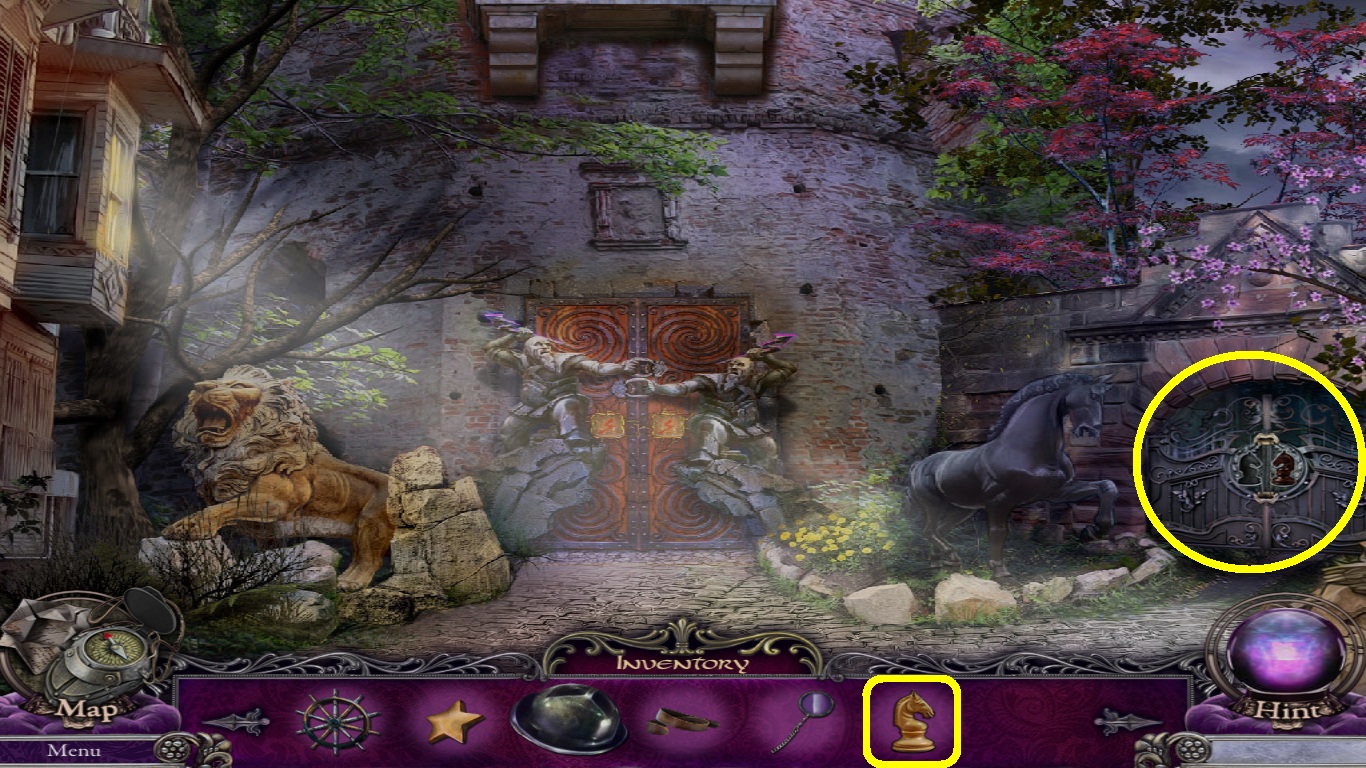
- Zoom into the stable door (yellow circle).
- Place the knight (yellow square) from the inventory into the open slot.
- Go into the stables.
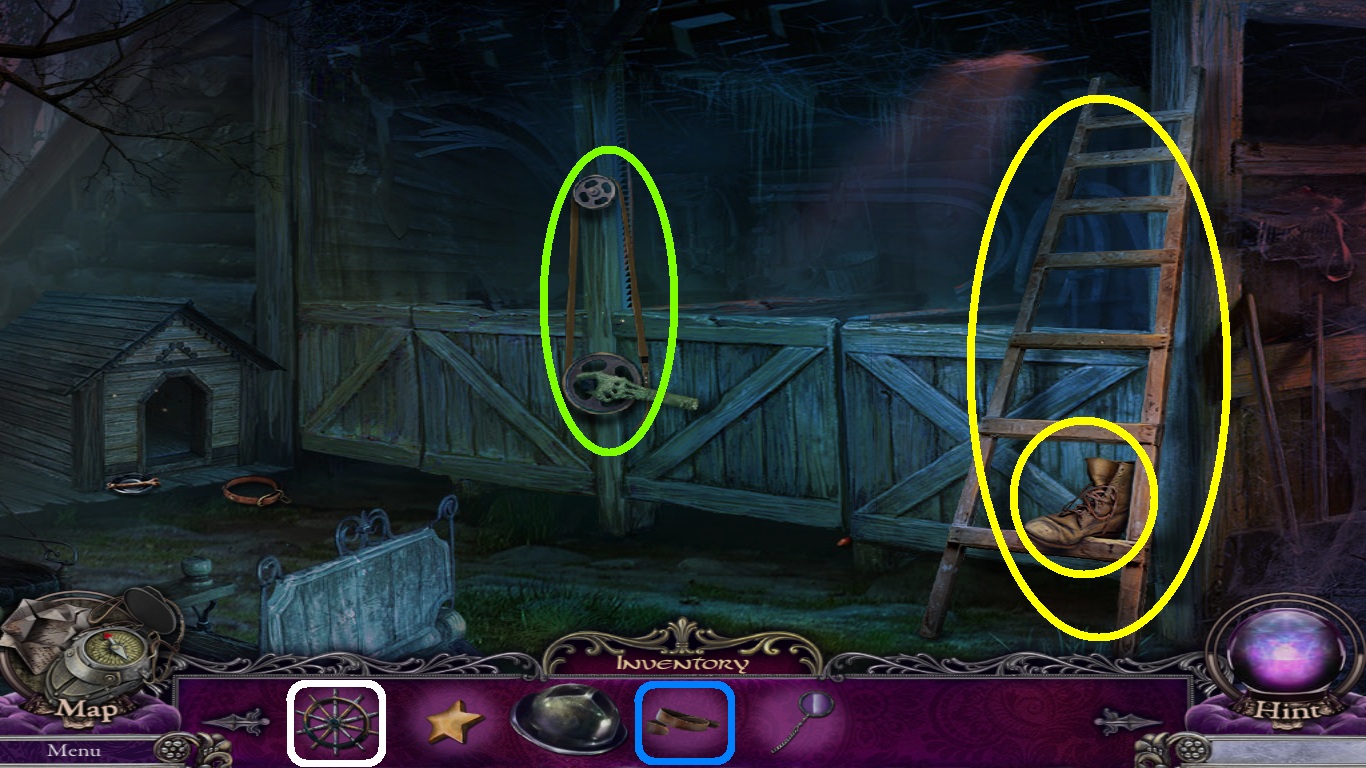
- Pick up the boot and the ladder (yellow circles).
- Zoom into the stall control (green circle).
- Select the belt (blue square) from the inventory to replace the broken rope.
- Select the ship wheel (white square) from the inventory; place it on the control, use it to open the stall.
- Zoom into the stall for another hidden object area.
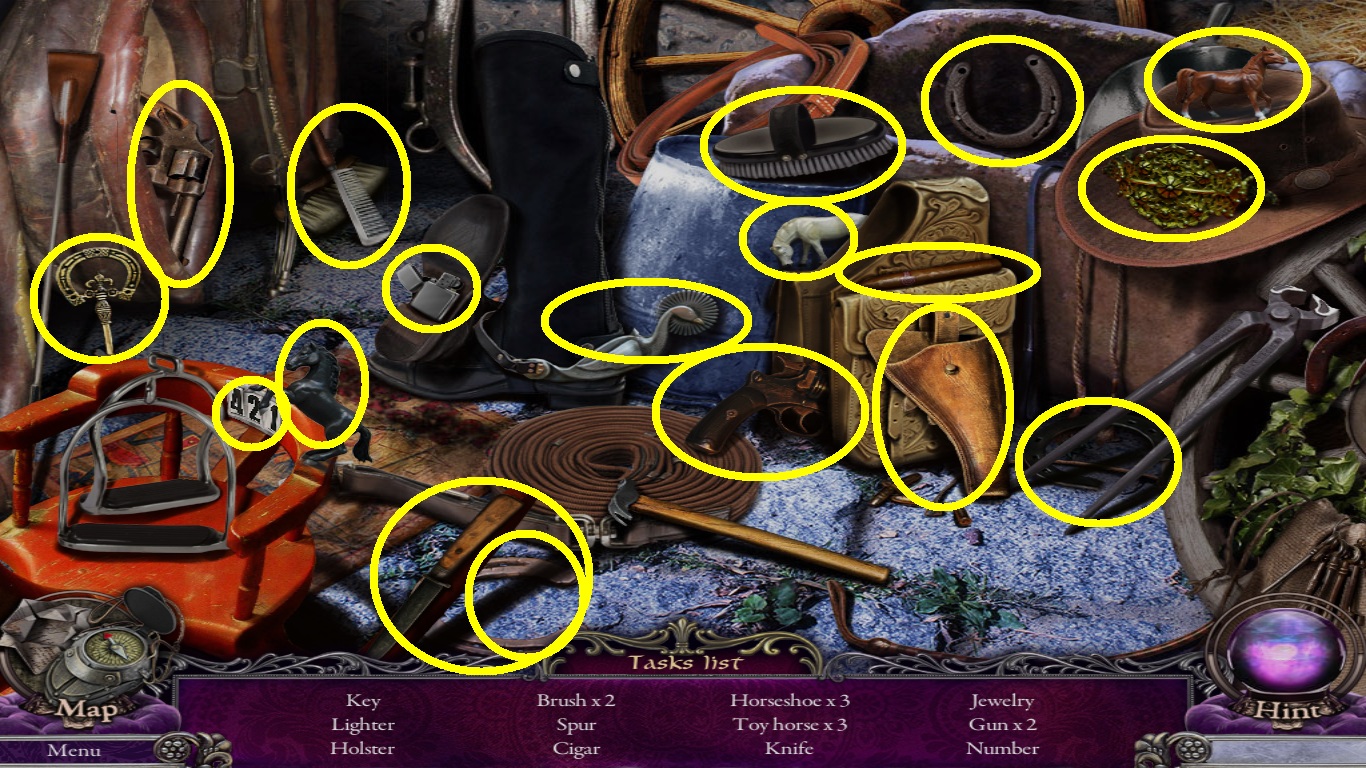
- Find all the listed objects (yellow circles).
- Pick up the horseshoe.
- Go to Main Street.
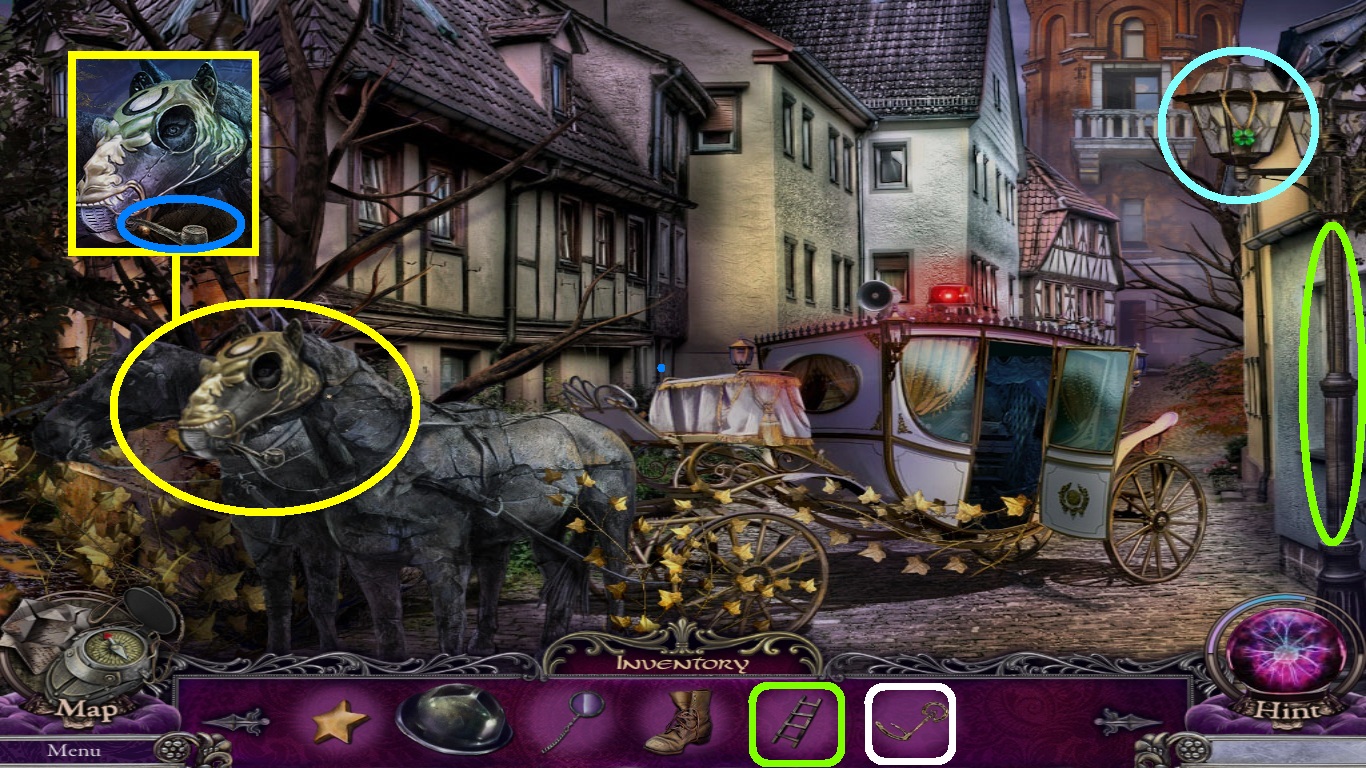
- Zoom into the horse head (yellow circle).
- Select the horseshoe (white square) from the inventory; place it into the groove (shown in yellow square).
- Pick up the stone pipe (blue circle).
- Select the ladder (green square) from the inventory; place it on the lamppost (green circle).
- Zoom into the street lamp (aqua circle); pick up the good luck medallion.
- Click on the street lamp to open it.
- Click the chain and pick up the bulb.
- Go into the carriage.
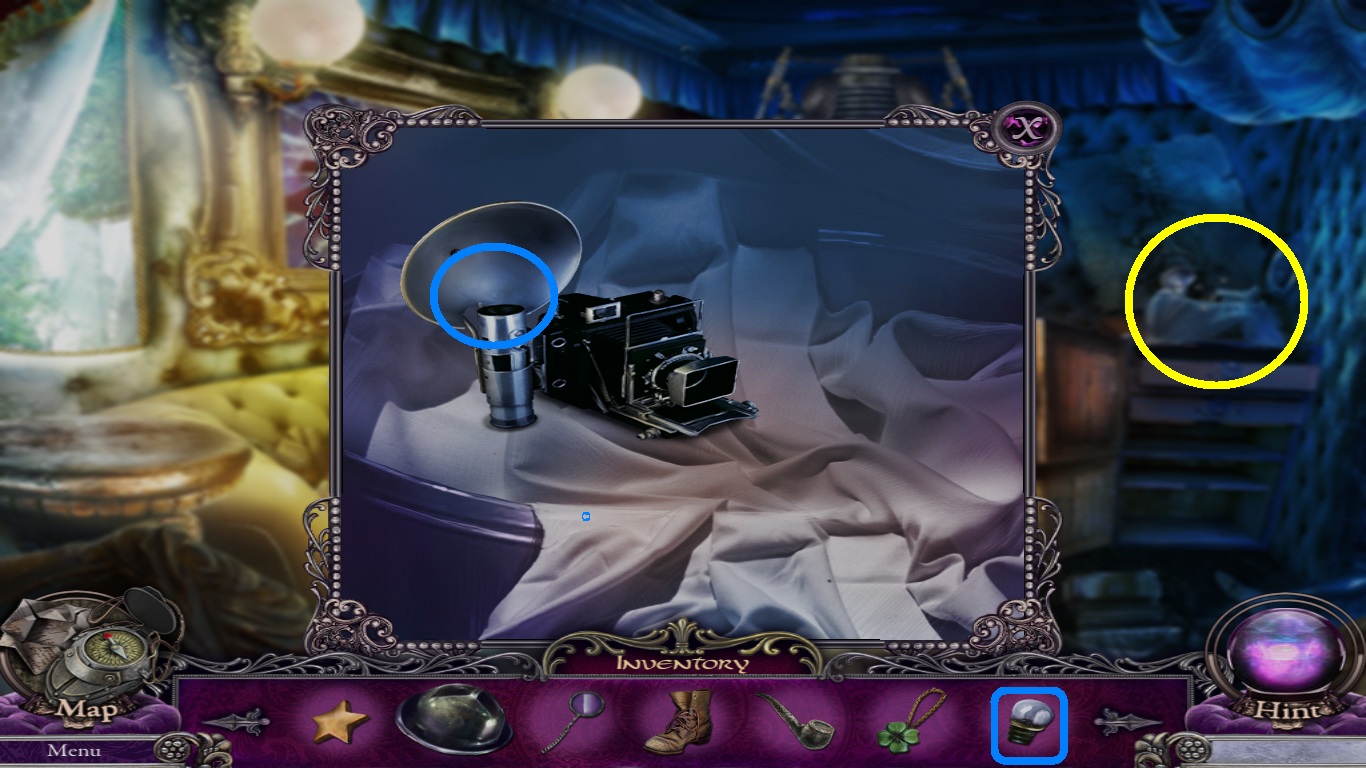
- Zoom into the camera (yellow circle).
- Select the bulb (blue square) from the inventory; place it into the flash (blue circle) and pick up the camera.
- Go inside of the stables.
- Zoom into the doghouse (yellow circle).
- Pick up the collar (blue circle).
- Select the camera (yellow square) from the inventory; place it in front of the doghouse, take a picture.
- Click the camera; pick up the picture of the bone,
- Go to the wrecked ships hold.
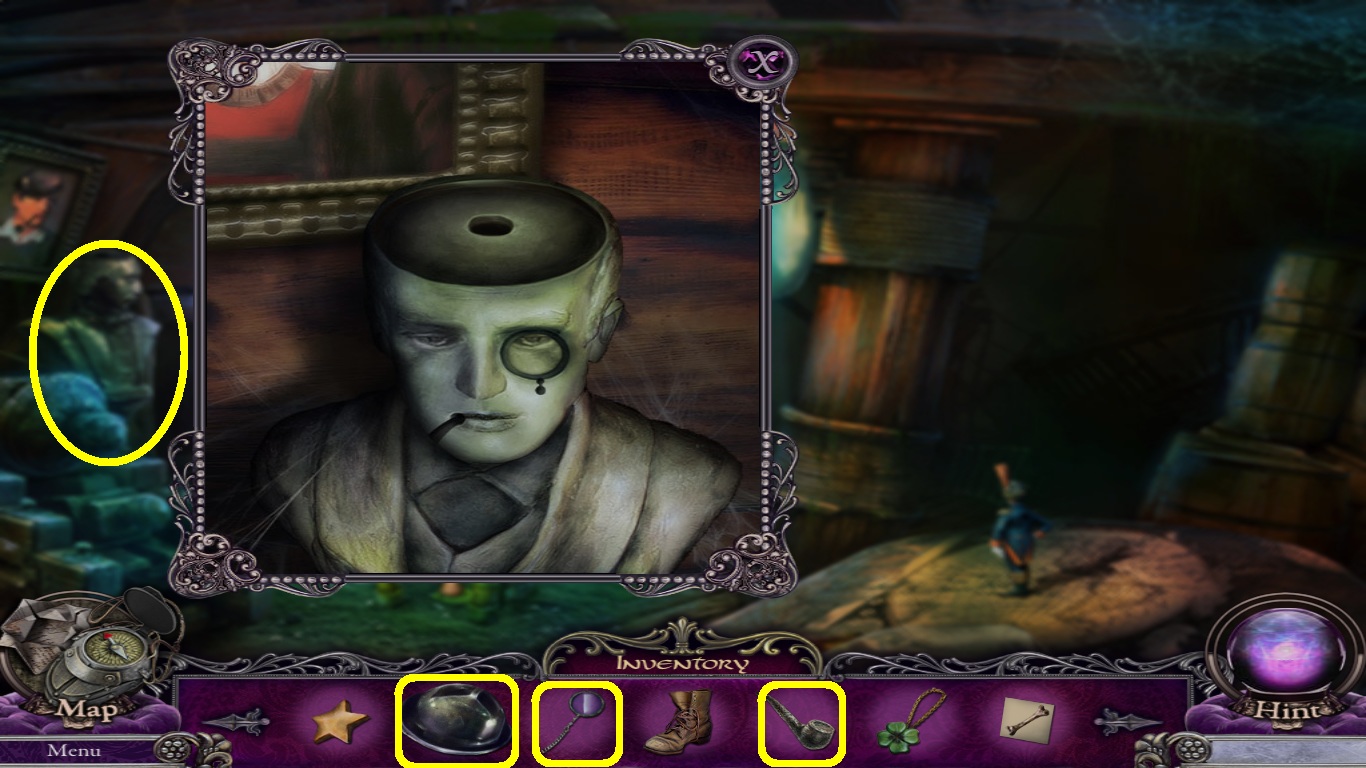
- Zoom into the statue (yellow circle).
- Select the stone pipe, monocle and hat (yellow squares) from the inventory; place them onto the statue.
- Pick up the brain.
- Go back to the carriage.
- Zoom into the metal man.
- Select the brain (white square) from the inventory; place it into his head.
- Select the bone picture (blue square) from the inventory; place it on the paddle on right side of his head (blue circle).
- Zoom into his mid-section to open a mini-game.
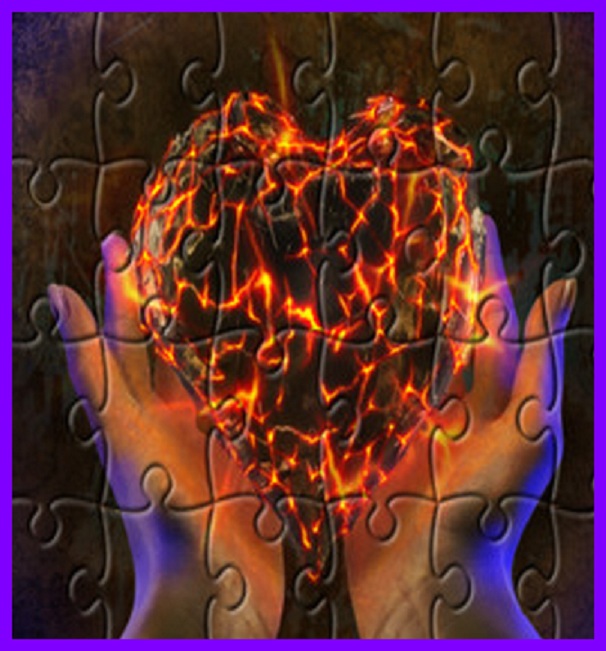
- Solve the puzzle as shown.
- Pick up the defibrillator.
- Go to the tower gate.
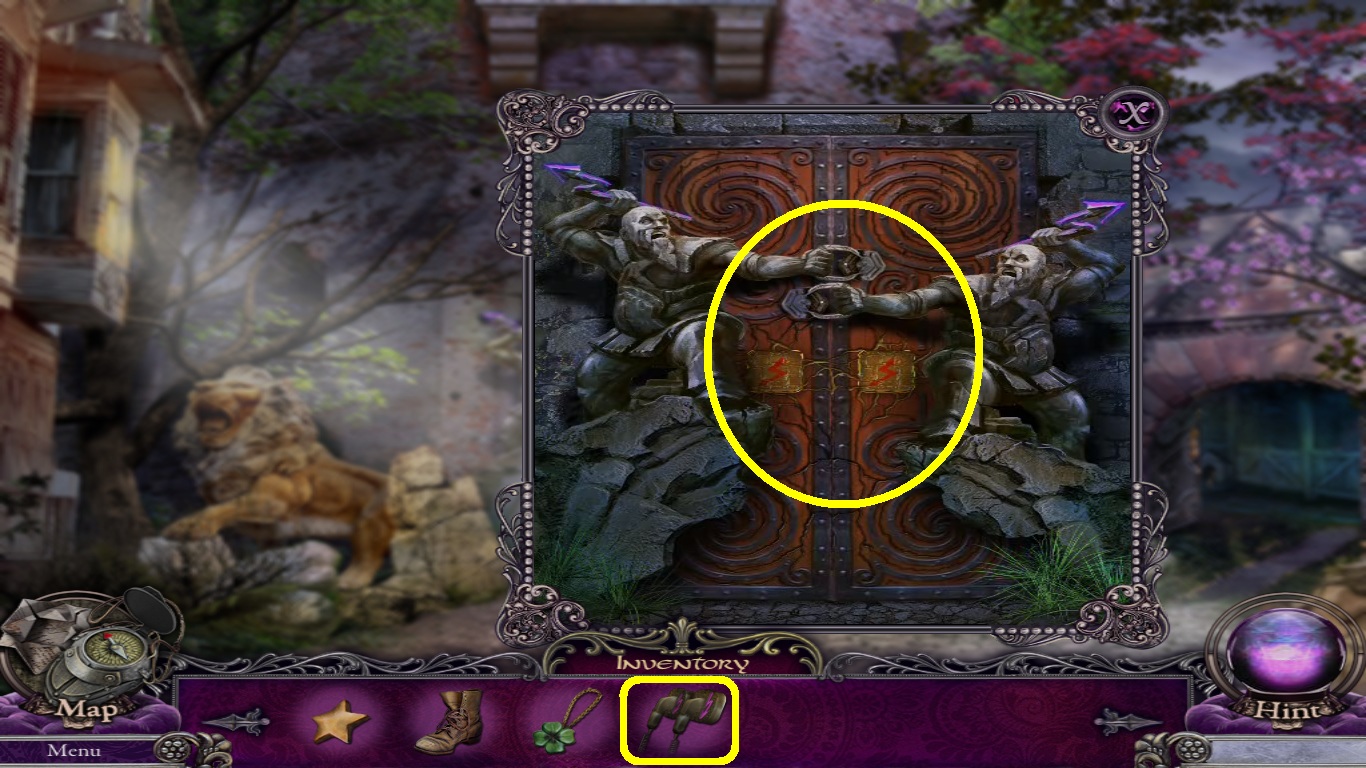
- Zoom into the tower door (yellow circle).
- Select the defibrillator (yellow square) from the inventory; use it on the door lock.
- Go into the throne room.
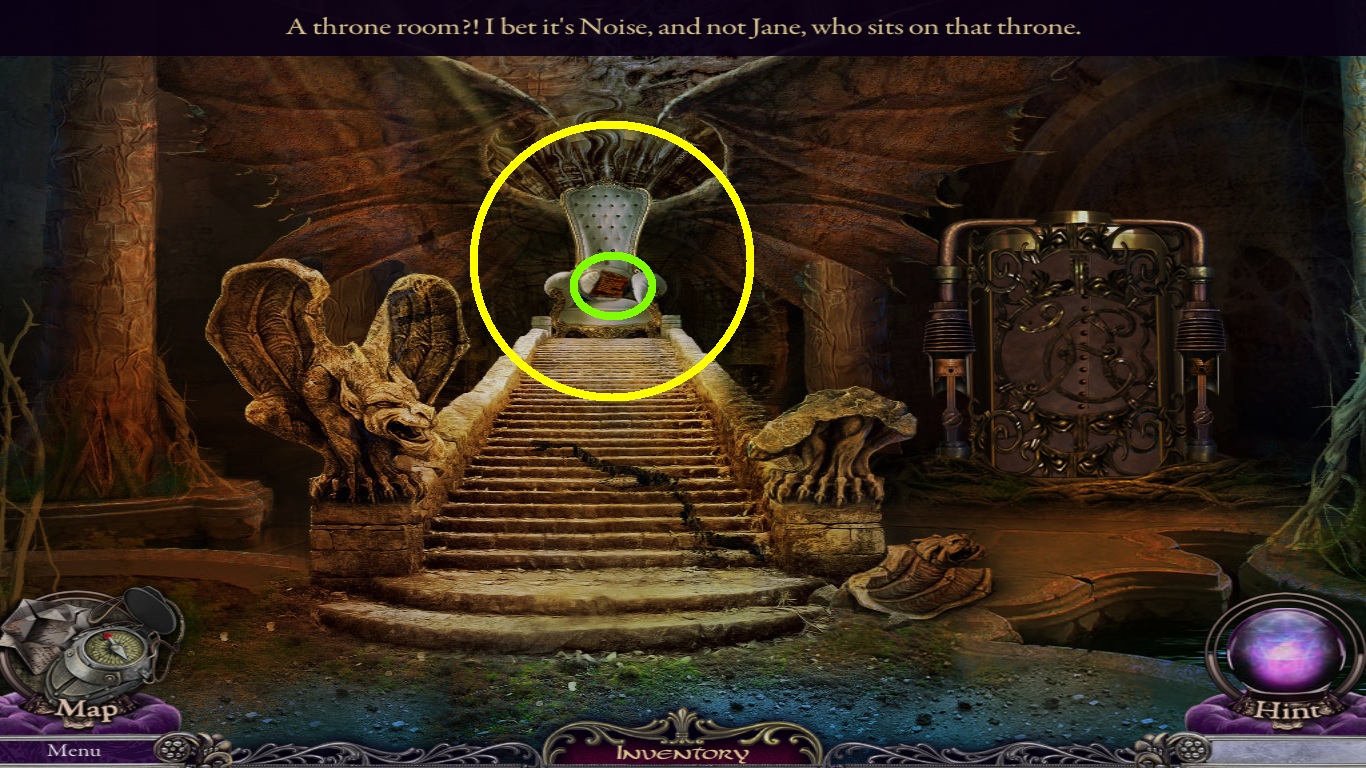
- Zoom into the throne (yellow circle).
- Pick up the memory page (green circle).
- Click the pillow, pick up the gas.
- Go back to the carriage.
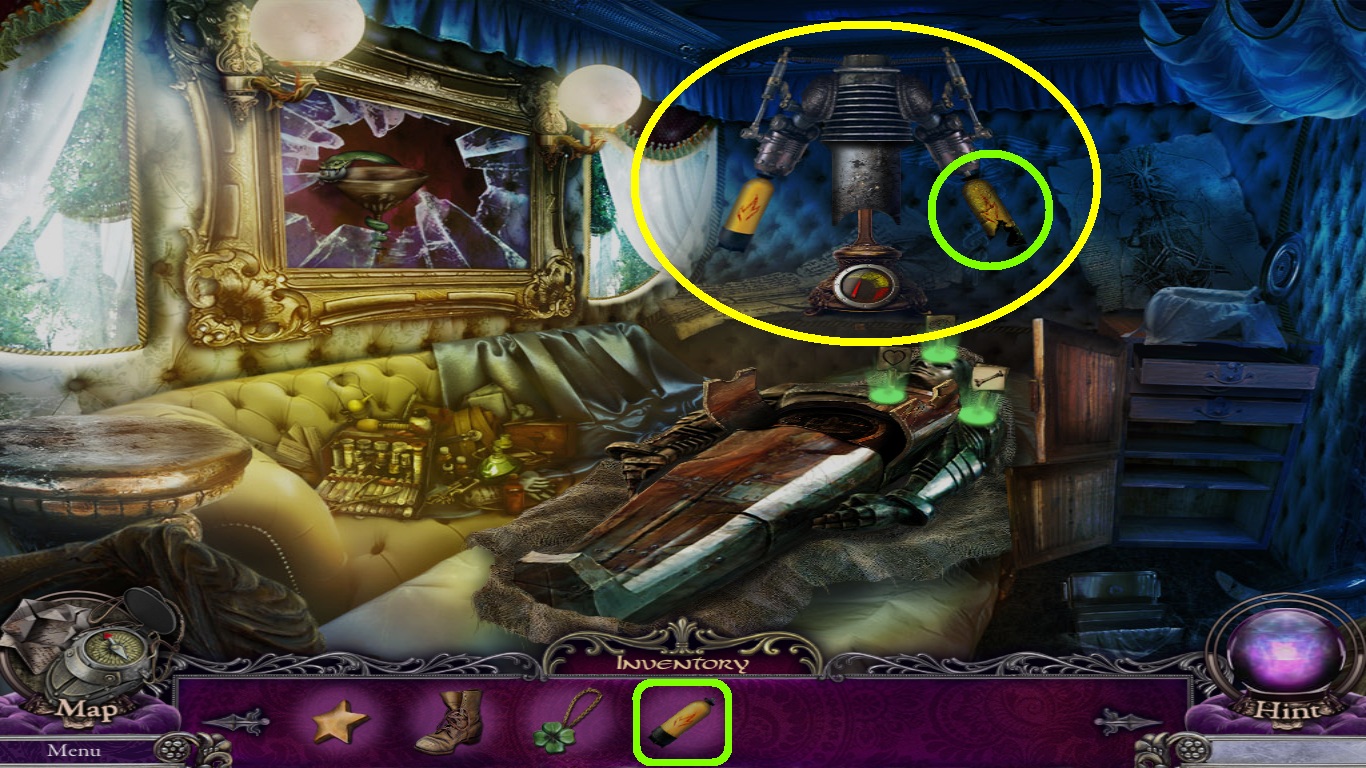
- Zoom into the hydraulics (yellow circle).
- Select the gas (green square) from the inventory and replace the broken tank (green circle).
- Pick up the plunger.
- Go back to the throne room.
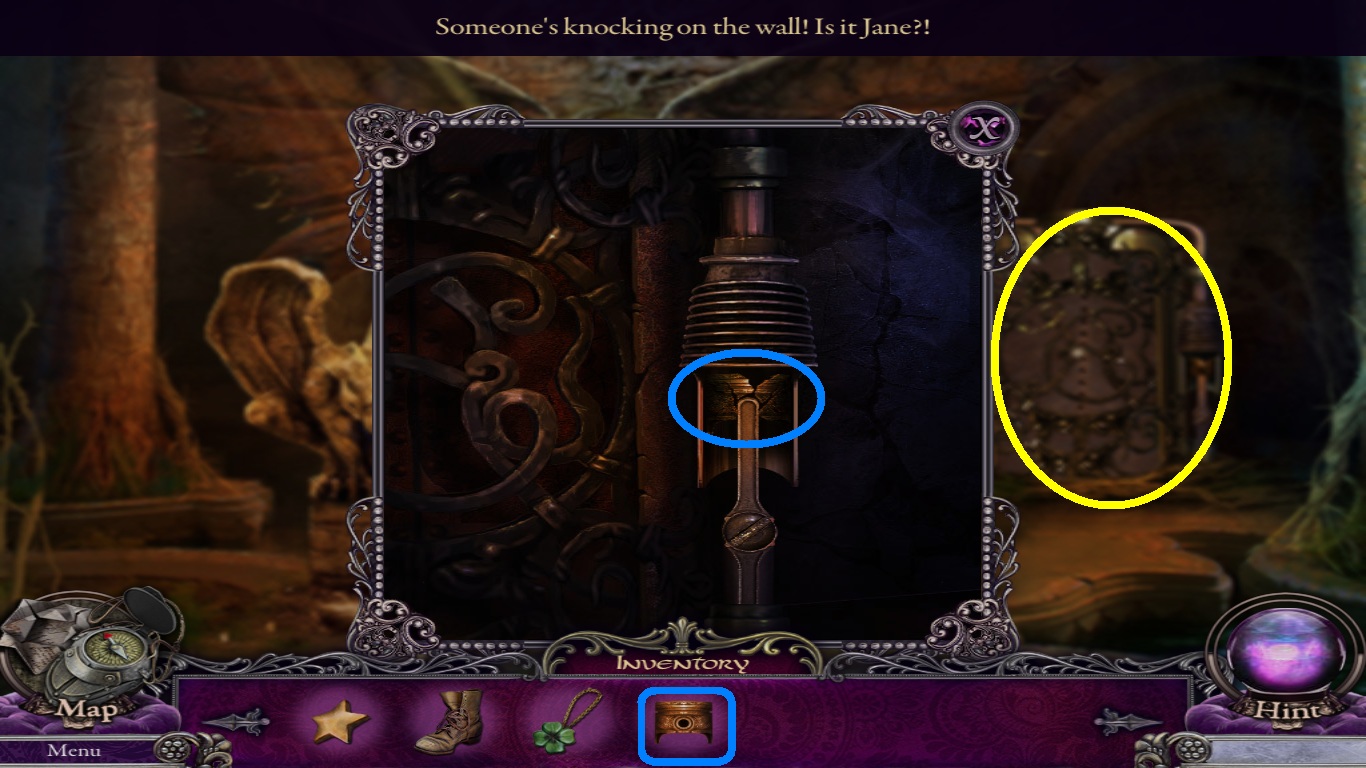
- Zoom into the metal door (yellow circle).
- Select the plunger (blue square) from the inventory; replace it (blue circle).
- Go into the reservoir.
Comments will load when you reach this part of the walkthrough.