
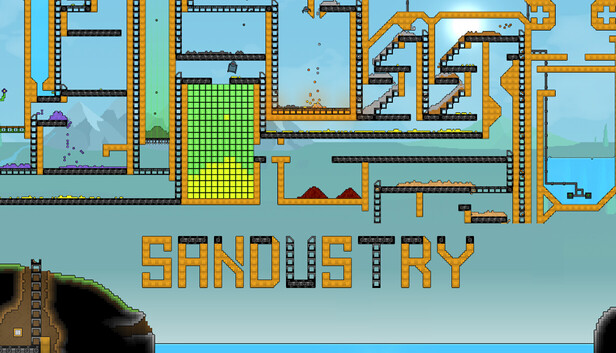
Material Physics: Density, Heat, and Phase Changes (v0.5.7)
Tested build: Early Access v0.5.7, vanilla. Treat every number here as an in-game value, not real-world physics. Thermal Buffer readings are heat or cold units, not degrees. Density values, reaction rules, and machine behavior may change after v0.5.7, so retest before rebuilding a large line.
You know the scene: the washer is quiet, Water is missing, and a fresh Ice plug has parked across the outlet like it pays rent. The factory has not betrayed you. Two materials met in the wrong place, which is Sandustry saying hello. Prove each reaction in a small cell first; then the same unruly pixels become useful factory parts.
Stage 1: Read Density Before Building a Sorter
Density is the relative in-game value used when materials move past one another. A higher-density material tends to settle below a lower-density material when both have room to move. The Material Scanner upgrade for the Grabber shows extra material information while you hover over a pixel.
Useful v0.5.7 order: Gold 300 → Copper 200 and Lava 200 → Redsand 160 → Sand, Snow, Wet Sand, and dry Seed 150 → Water and Wet Seed 100 → Cinder 50 → Steam 25.
Do not expect equal-density materials to make neat layers. Sand and Snow are both 150, for example. Use a Filter when the material name matters more than its weight. Pile shapes can also vary as pixels catch on one another, so density predicts a trend rather than a perfectly straight boundary.
Small Density Test Chamber
- Build a sealed chamber eight blocks wide and twelve blocks tall, with a solid floor and at least six empty blocks above the test pile.
- Add 16 dry Seed pixels, density 150, and 16 Wet Seed pixels, density 100, through the top. Use no Water, Fire, Snow, or Thermal Buffer.
- Seal the opening and leave the chamber undisturbed for 15 seconds.
- Expect dry Seed to work downward while Wet Seed gathers higher in the pile. A few trapped pixels or a wobbly boundary are normal.
- Repeat with the loading order reversed. Put the dry-seed outlet low and the wet-seed outlet high only after both runs show the same broad split.
Test flow: 16 Seed at 150 + 16 Wet Seed at 100 → unheated 15-second settling jar → Seed lower, Wet Seed higher.
A packed tube cannot sort well because pixels have little room to trade places. Give the chamber headroom and a broad floor. Wet Seed also shares Water's density of 100, so it can remain suspended when Water is present.
Stage 2: Run the Thermal Bench Tests
A Thermal Buffer stores heat or cold for nearby thermal machines. Pause each test after its listed exposure, inspect the displayed value, and clear the cell before changing materials.
| Test | Exact load and Buffer reading | Contact, orientation, and exposure | Expected result |
|---|---|---|---|
| Hot calibration | Thermal Buffer at 0 + a small Lava patch | Give Lava direct edge contact. Stop at the first transfer, with a 10-second observation cap. | The first contact adds 250 heat and consumes the contacting Lava. |
| Cold calibration | Thermal Buffer at 0 + a small Snow patch | Put Snow directly against one edge. Stop at the first transfer, with a 10-second cap. | The Buffer receives -20 cold and much of the contacting Snow is consumed. |
| Cold-Lava check | Thermal Buffer at exactly -20 + a small Lava drop | Use direct edge contact and inspect after the first reaction or 10 seconds. | The Lava becomes Cinder. Because the Buffer was negative, the Lava adds less heat than the normal 250 transfer. |
| Fire check | Thermal Buffer at 0 + rising Fire | Use a roofed firebox and expose the Buffer for 10 seconds. | Each Fire contact has a 40% chance to add 1 heat, so the final reading can vary. The Fire's generating material is not consumed by the transfer. |
Direct Lava is the fast charge; rising Fire is the slow, uneven charge. If the Buffer stays at 0, inspect the contact line. Lava beside a one-pixel air gap is scenery, not fuel.
Stage 3: Vaporize Water and Condense Steam
Build a narrow sealed tower with a Water basin below and a Steam hood above. Close diagonal corners as well as flat seams because Water can slip through a corner gap. Keep Sand out: one Sand pixel touching one Water pixel becomes two Wet Sand pixels.
| Test | Exact load and Buffer reading | Contact, orientation, and exposure | Expected result |
|---|---|---|---|
| Vaporization | 16 Water pixels; no Buffer reading used | Keep the pool contained with six empty blocks overhead. Apply direct Flamethrower Fire for 5 seconds, then watch for 5 seconds. | Water that meets Fire becomes Steam. Steam, density 25, rises into the closed hood. Leftover Water usually means the flame missed part of the pool. |
| Condensation | Captured Steam + one Condenser + Thermal Buffer at -20 | Steam must touch the Condenser's bottom face while the cold Buffer touches its top face. Run for 10 seconds. | Contacting Steam becomes Water and falls into the basin. Each conversion powered by the Buffer uses 2 cold. |
Flow: Water + direct Fire → Steam rises → Steam below Condenser + cold above → Water falls.
If Steam escapes upward to the sky, it returns as rain instead. That can move Water toward the surface, but it is poor recovery-cell behavior because the rain may land outside the basin. Cap the tower before lighting the fire.
Stage 4: Freeze Water and Melt the Ice
| Test | Exact load and Buffer reading | Contact, orientation, and exposure | Expected result |
|---|---|---|---|
| Water freezing | 16 Water pixels at least two pixels deep + 1 Snow pixel; no Buffer used | Drop Snow onto the top surface and wait 10 seconds. | The Snow is consumed and can replace several Water pixels with solid Ice. A one-pixel-deep Water film can consume Snow without making Ice. |
| Ice melting | Ice from the first test; no Buffer used | Stop the Snow feed. Aim the Flamethrower or Laser directly at the Ice. Use 2-second Flamethrower bursts or inspect after 5 seconds of Laser contact. | Ice melts into Water. When using the Flamethrower, stop when Water appears or continued Fire can turn it into Steam. |
Flow: deep Water + Snow → Ice → Flamethrower or Laser → Water.
This is why stray Snow can cork a washer. Snow and Sand both have density 150, but Snow touching a deep Water pool makes solid Ice. Stop the feed, melt the plug, drain the catch area, and restart with one small Sand batch before restoring full flow.
Stage 5: Turn Lava into a Portable Solid
v0.5.7 Lava warning: Lava has density 200, cannot travel through Pipes, and destroys Fluxite, Redsoil, and Strataform terrain. Use factory structures or another tested barrier around the cell. Advanced Filter Walls received a Lava-leak fix in v0.5.7, but ordinary gaps and bad corners can still release the liquid.
| Test | Exact load and Buffer reading | Contact, orientation, and exposure | Expected result |
|---|---|---|---|
| Lava freezing | 16 Lava pixels at least two pixels deep + 1 Snow pixel; no Buffer used | Use a roofed pocket. Drop Snow from above and wait 10 seconds. | The Snow is consumed and can turn several Lava pixels into solid Scoria. A one-pixel Lava film may consume Snow without producing Scoria. |
| Cinder ignition | 8 Cinder pixels; no Buffer used | Break the Scoria, move the loose Cinder into a second sealed pocket, and apply direct Flamethrower fire for up to 5 seconds. | Cinder touched by the direct flame turns back into Lava. Passive heat does not perform this conversion. |
Flow: deep Lava + Snow → Scoria → break → Cinder on belts or Launchers → direct Flamethrower → Lava.
Close the destination pocket before ignition because the new Lava immediately seeks low space. Keep Water away unless Steam is the intended output, and place an empty catch pocket below the test cell.
Stage 6: Melt Copper and Gold in a Catch Cell
Loose Fire does not replace a Smelter. The input metal must touch the machine's top face, while a hot Thermal Buffer touches the left, right, or bottom face. Lava directly below is another valid heat input, but the Buffer makes this test easier to measure.
| Test | Exact load and Buffer reading | Contact, orientation, and exposure | Expected result |
|---|---|---|---|
| Copper melting | 8 Copper pixels + Smelter + Thermal Buffer starting at +250 | Put Copper on top and the Buffer against another side. Leave an open, sealed liquid basin beside and below the Smelter. Run for 10 seconds. | Contacting Copper becomes Liquid Copper. |
| Gold melting | 8 Gold pixels + Smelter + Thermal Buffer starting at +250 | Clear the cell, repeat the same orientation, and run for 10 seconds. | Contacting Gold becomes Liquid Gold. |
Flow: metal on top + Smelter + positive Buffer on another side → liquid metal into the catch basin.
Liquid Copper and Liquid Gold are inert in v0.5.7; Snow does not freeze them back into solids. Both can move through Pumps and Pipes. Send Liquid Copper to a Copper Mold, while Liquid Gold can be stored in Collectors as currency.
Containment Checklist
- Fire: Roof the test cell because Fire and hot sparks can rise.
- Lava: Avoid Fluxite, Redsoil, and Strataform walls; add a lower catch pocket.
- Steam: Seal the upward route or force it beneath a Condenser.
- Water: Close diagonal corners and keep Sand away from the basin.
- Snow: Isolate it from Water and Lava until the freezing cell is ready.
- Powders and slushy materials: Use thin feeds so inner pixels can reach the reacting face.
- New solids: Give Ice and Scoria their own removal space so they cannot plug the input throat.
Symptom-and-Fix Check
- Only the outer pixels change: The middle of the pile is not making contact. Thin the feed, widen the contact face, or stir the pile between five-second checks.
- The material looks insulated: Remove any powder layer, newly formed solid, or one-pixel air gap between the material and its reaction surface. Direct-contact reactions cannot cross an empty cell.
- The Buffer is charged but the machine is idle: Check orientation. The Condenser needs gas below and cold above; the Smelter needs metal above and heat on another side.
- The reaction begins and stops: Ice or Scoria may be blocking fresh input. Clear the solid and add a separate output pocket.
- A phase output is blocked: Make room above Water for Steam, below the Condenser for new Water, and around the Smelter for liquid metal.
- Water or Lava escapes: Stop the input, inspect every diagonal corner, and build a second wall below the leak. Restart with a tiny pour.
- Steam disappears: It found an open path upward. Cap the tower and place the Condenser where the Steam must touch its underside.
- The density jar stays mixed: Recheck the values. Equal-density materials need Filters, while packed piles need more space and settling time.
- A correctly supplied machine remains idle: Stop all feeds, clear both faces, add one test batch, and reload the save if it still does nothing. v0.5.7 fixes several building-stall bugs, but the update notes warn that related errors may remain.
Scale only after a chamber completes several clean cycles. More material changes contact time, heat use, exit pressure, and spill size. Copy the compact cell if you enjoy tidy modules, or wrap three walls around the glorious physics carnival. Both styles work; the sand merely requests containment paperwork.
Comments will load when you reach this part of the walkthrough.