
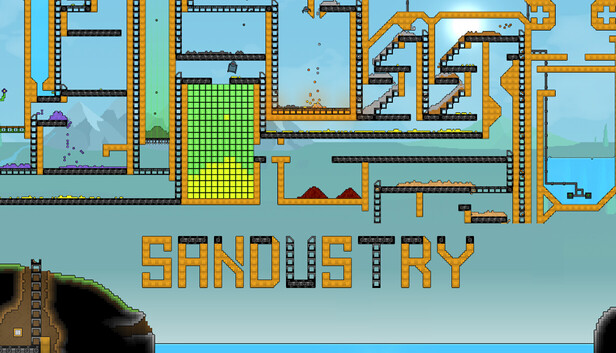
Beginner Route: First Gold and a Stable Shaker Line
Tested build: Early Access v0.5.7
Example world option: Standard new world with Tutorial On. Terrain and Water placement vary between worlds, so use the first safe Water pocket you can reach instead of hunting for one fixed pool.
You have a tidy pile of Sand, half a puddle of Water, and a Shaker doing a fine impression of patio furniture. Welcome to the first real factory inspection. The usual cause is physical: the Sand stayed dry, the Water escaped, Residue buried the working surface, or Gold missed its Collector. Build the small, visible route below and check every handoff before adding more sand to the sand problem.
What You Need
| Tool, building, or input | Job in this route |
|---|---|
| Shovel | The basic starting digging tool. Destroy Dirt to release loose Sand. |
| Grabber | Moves loose material by hand. It holds only one material type at a time. |
| Blocks or Foundations | Form the Water basin, support the machines, and keep the Gold and Residue paths apart. |
| Collector | Banks Gold for Research. Gold counts only while it remains inside a Collector. |
| Sand and Water | One Sand pixel touching one Water pixel makes two Wet Sand pixels. |
| Shaker Research | Costs 20 Gold in v0.5.7. The Shaker turns Wet Sand into Residue and sometimes Gold. |
| Logistics Research | Costs 30 Gold and unlocks Conveyor Belts and Launchers for steady feeding and output removal. |
| Two collection points | A Collector-lined Gold box below the Shakers and a separate Residue bunker beyond the side exit. |
Material flow: Sand → Water contact → Wet Sand → Shaker → Gold downward into Collectors + Residue across the top toward overflow.
Numbered Route to Your First Stable Gold
Release and Contain the Sand
Use the Shovel on nearby Dirt and let the loose Sand fall into a dry holding pocket. Keep it away from the main Water supply for now. Move only a small batch with the Grabber so the first test stays readable instead of becoming One Enormous Damp Hill.
Checkpoint: You have a reachable pile of dry Sand with enough open space to move a Grabber load.
Reserve a Small Water Supply
Find a surface pool or underground Water pocket and wall off a small working portion. Seal diagonal corners with Blocks because Water can slip between two touching corners. Keep the main pool behind a second wall so one bad cut cannot drain the whole supply into your Sand.
Checkpoint: Stop disturbing the basin and watch it settle. If Water keeps leaving, close the leak before adding Sand. A stray droplet on flat ground may disappear if it cannot settle into a depression.
Make Wet Sand at One Contact Edge
Drop a thin layer of Sand against one side of the Water. Direct contact is the recipe: 1 Sand + 1 Water → 2 Wet Sand. Do not bury the whole pool under a deep Sand column. A narrow edge lets you see the change and stop before the reservoir is eaten pixel by pixel.
Checkpoint: The material at the contact edge should change into Wet Sand. If dry Sand reaches the next stage unchanged, widen the Water contact instead of adding more Shakers.
Sift the Tutorial Gold and Unlock the Shaker
With Tutorial On, follow the on-screen sifting objective. Pick up Wet Sand with the Grabber and perform the prompted shaking action over a walled work pocket. The Wet Sand separates into Gold and Residue. Move the Gold into the starting Collector and repeat until the bank reaches 20 Gold, then buy Shaker Research.
Loose Gold is not spendable just because it looks shiny and important. It must stay inside a Collector. Keep the pale Residue in a different pocket; it becomes useful in a later production chain.
Build a Short Shaker Staircase
Place three Shakers in a descending diagonal from the Wet Sand inlet toward the Residue exit. Three is a clear starter example, not a permanent perfect ratio. Face each Shaker toward the low end of the staircase.
Wet Sand is denser than Residue. Fresh Wet Sand settles against the working surfaces while the lighter Residue rises and moves along the tops. Gold passes through the Shakers and drops from below. Build a square, Collector-lined box under the full staircase so every lower drop lands inside valid storage.
Checkpoint: The Shaker tops, the space below them, and the far side exit must all remain visible. If another solid gets dragged into a Shaker body, remove it by hand before testing again.
Add a Feed and a Separate Residue Exit
After earning another 30 Gold, buy Logistics. Use a Conveyor Belt when Wet Sand can approach on the same level, or a Launcher when it must be lifted to the high end of the staircase. Feed a thin stream first. A large pile can hide the exact point where the line stops.
Run the Shakers' upper output onto a Belt facing away from the Gold box. End that Belt over a downward drop into a separate Residue bunker. Before Logistics, the same side can use a short open drop chute for small hand-fed batches.
Build the One-Way Overflow
Place a solid divider between the side-running Residue route and the Collector box. Extend that divider from below the Shakers to above the Residue entry, leaving no side opening into the Gold storage area.
Put the Residue bunker's overflow lip on its far side and lower than every route back toward the Shakers. If the bunker fills, excess Residue spills outward and down instead of climbing back toward the working surfaces. The sealed divider keeps it out of the Gold path even if the Belt stops.
Checkpoint: Send one small Wet Sand batch through. Residue should cross the Shaker tops and leave sideways, while any Gold falls into the sealed Collector box below.
Feed Small Batches and Read the Result
Each Wet Sand pixel processed by a Shaker always becomes one Residue. It also has a 25% chance to produce one Gold. That is a one-in-four chance for each pixel, not a promise that every fourth pixel will pay.
If Wet Sand disappears and Residue keeps appearing, the Shaker is processing. No Gold from a short batch is bad luck, so keep the outputs clear and test more Wet Sand. If Wet Sand stays unchanged and no new Residue appears, stop feeding: the input is dry, the working surface lacks contact, or an output is blocked.
Stalled-Line Checks
| Symptom | Check and fix |
|---|---|
| Sand stays dry | Pause the Sand feed. Confirm Water reaches the mixing edge, remove any Block or pile between the materials, and spread the Sand into a thinner contact layer. |
| Water is missing | Inspect the basin corners and the floor below. Seal diagonal gaps, then bring Sand to another reachable pool. Water location varies by world, so there is no universal nearby source. |
| Wet Sand sits without changing | Stop input. Confirm the material is Wet Sand, clear Residue from the Shaker tops and exit, and clear the Gold drop space below. Remove any foreign solid trapped in a Shaker, then retest with one clean handful. |
| Residue appears but Gold does not | The Shaker is working. Keep both exits clear and run a larger sample; a one-in-four chance can still produce a dry streak. |
| Gold is visible but the total does not rise | The Gold is outside valid storage. Move it into a Collector and close any gap that lets it fall back out. |
| Residue backs toward the Shakers | Check the Shaker and Belt directions, clear the far bunker, and reopen the low outward overflow. Keep the divider beside the Gold Collectors fully sealed. |
First Research Purchases
For this v0.5.7 route, use Shaker for 20 Gold → Logistics for 30 Gold. The next purchase should solve the next real blockage. Filter costs 250 Gold and can let one selected solid fall through while carrying the other material onward, making it useful once mixed solids reach the same line. If locating more Water is slowing everything down, taking the Map before the Filter is a fair detour.
Keep this first module until it can receive Wet Sand, clear Residue, and bank Gold without rescue. Then copy it, widen it, or gleefully overbuild it. Later unlocks will change the best footprint, but the useful rule survives: every material needs the right contact surface and a clear place to leave.
Comments will load when you reach this part of the walkthrough.