
Chapter 9: The Ship
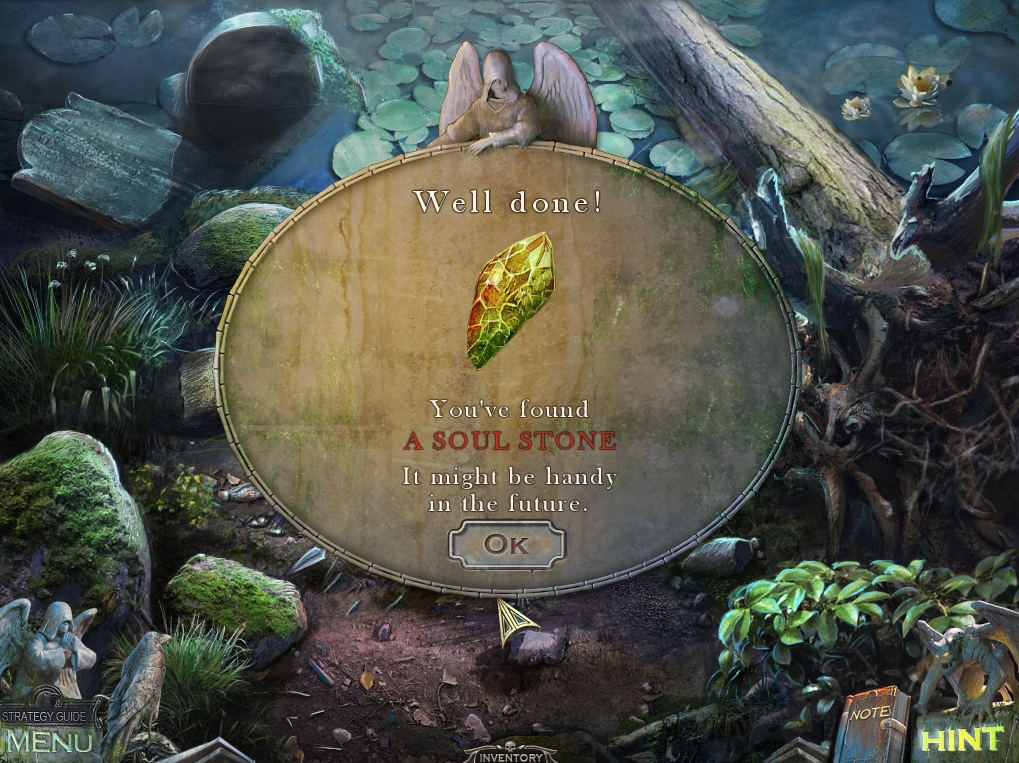
- Talk to the ghost in the water.
- Take the SOUL STONE that he leaves behind in the swamp.
-
Go back and right to the Lake of Death.
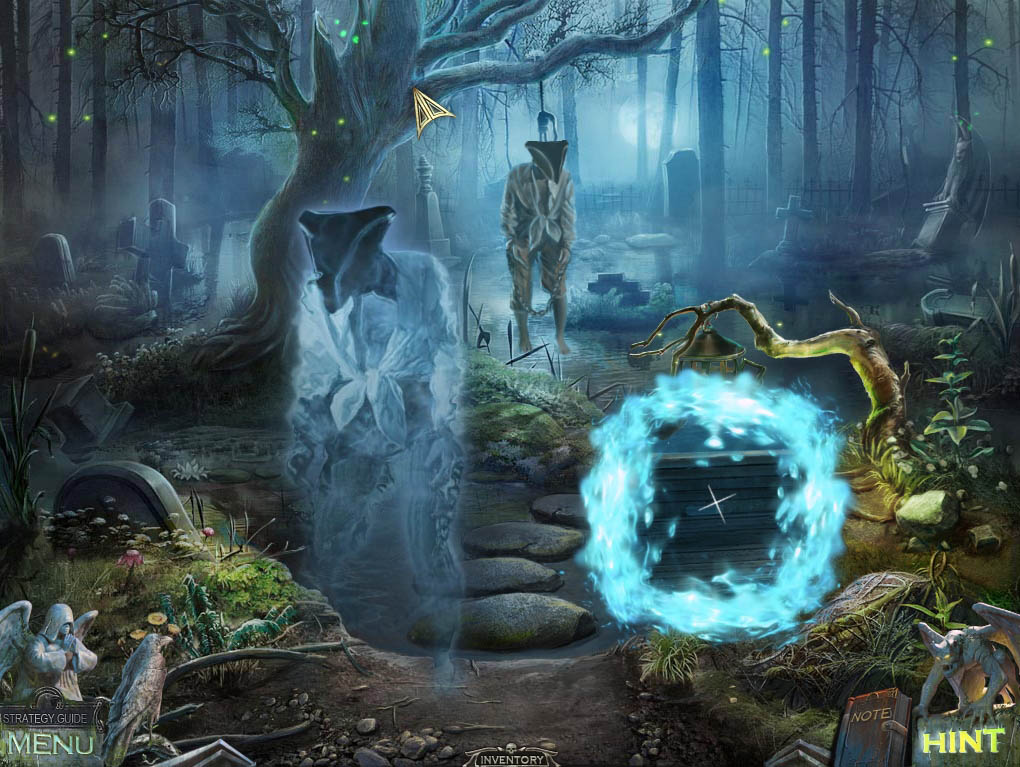
- Talk with the ghost here who will open a portal to the ship’s deck.
-
Go through the portal.
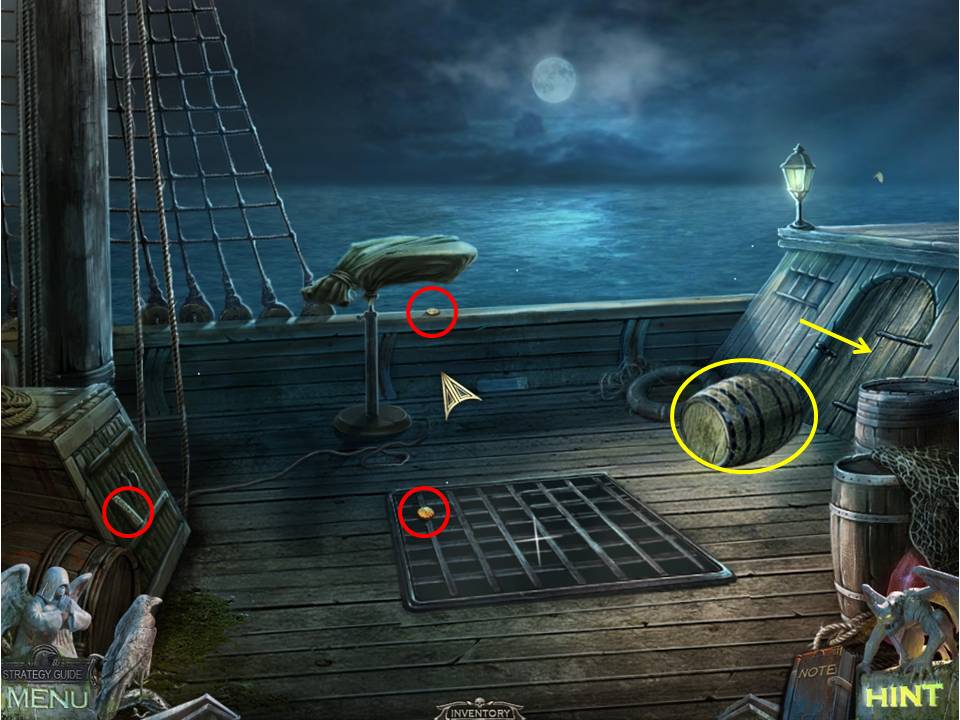
- Zoom into the grate in the deck.
- Take the COIN and note the sailor trapped below – listen to him or a key scene later will not play out.
- Zoom into the wooden hatch doors on the left. Take the WEDGE.
- Zoom into the bundle near the railing on the far edge.
- Take the COIN sitting on the railing. WEDGE the rolling barrel on the right.
-
Open the door at right and go inside.
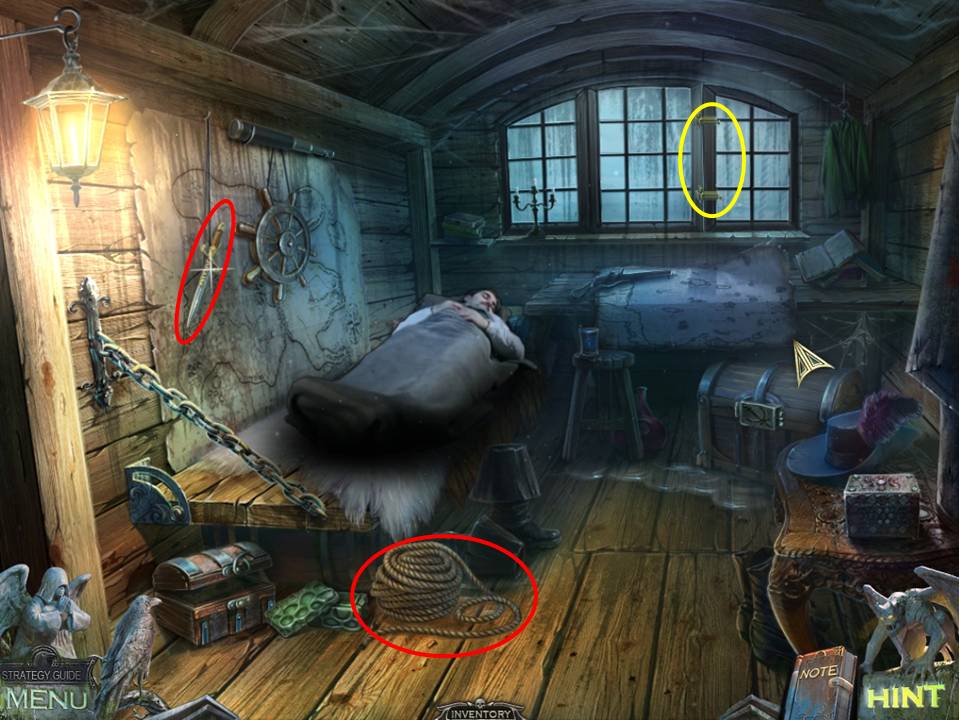
- Take the ROPE and DIRK.
- Talk to the man in the bed.
- Zoom into the window.
- Secure the latches with the two COINS.
-
Look outside the now-open window to initiate a puzzle.
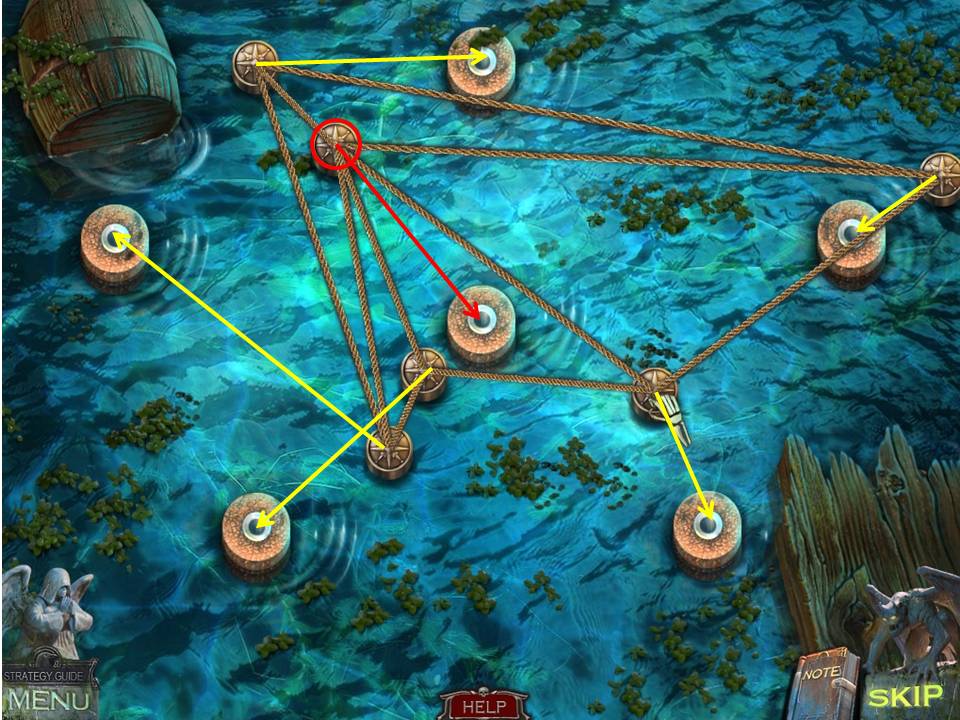
- The object of the puzzle is to retrieve the buoy with the medicine.
- Do this by untangling the ropes so none are crossing.
- The key is to move the ropes around a bit to make sure none are crossing, then place them on the platforms.
- Note the screenshot, which shows the ropes completely untangled and ready to place on the bases.
- Note the buoy circled in red, which has the most ropes attached to it and which will get placed in the center.
- Once in place, you’ll have a perfect pentagon, with all five corners leading to the middle.
-
When finished, take the MEDICINE.
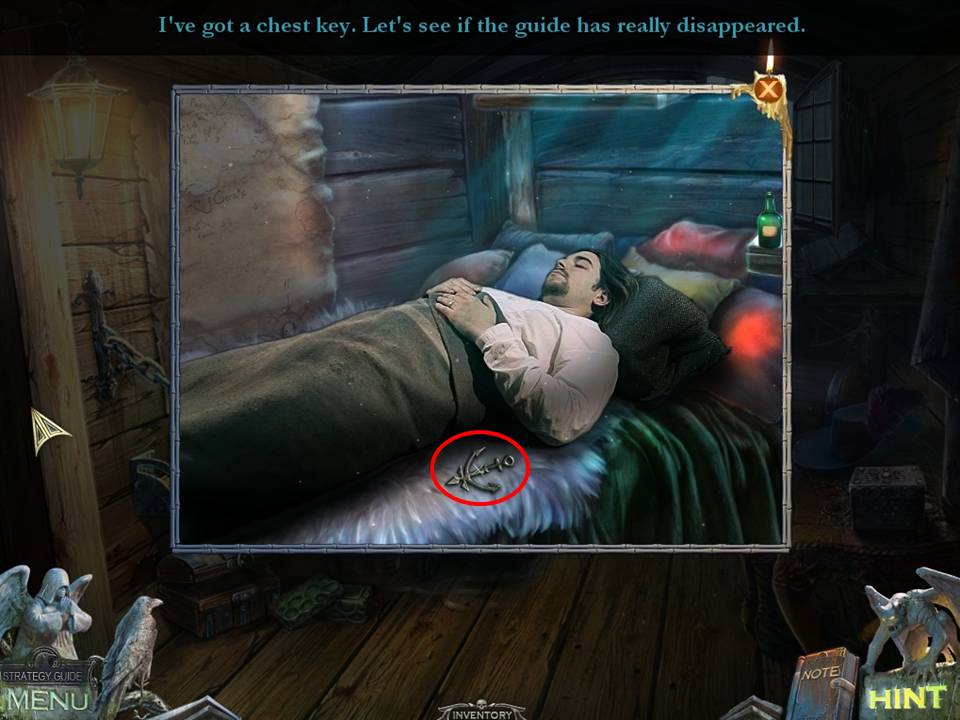
- Zoom into the sick man and give him the MEDICINE.
-
Receive the CHEST KEY.

- Zoom into the chest at right.
- Unlock it with the CHEST KEY.
-
Take the CROW RUNE and the OIL CAN.
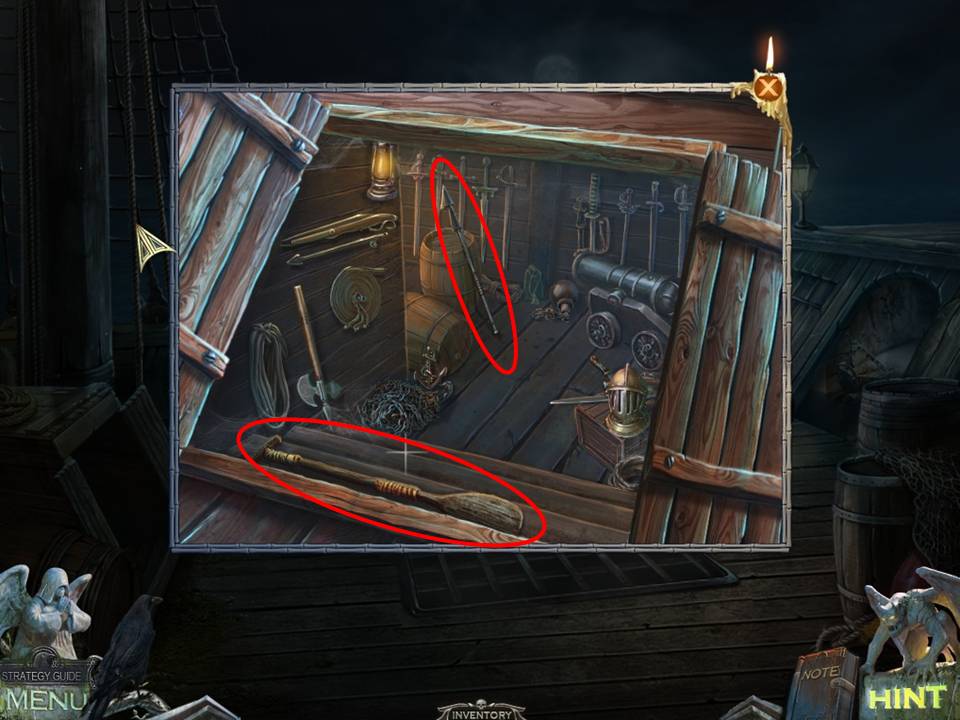
- Return to the deck.
- Zoom into and oil the hatch doors with the OIL CAN.
- Open the hatch doors.
-
Take the OAR and the HARPOON.
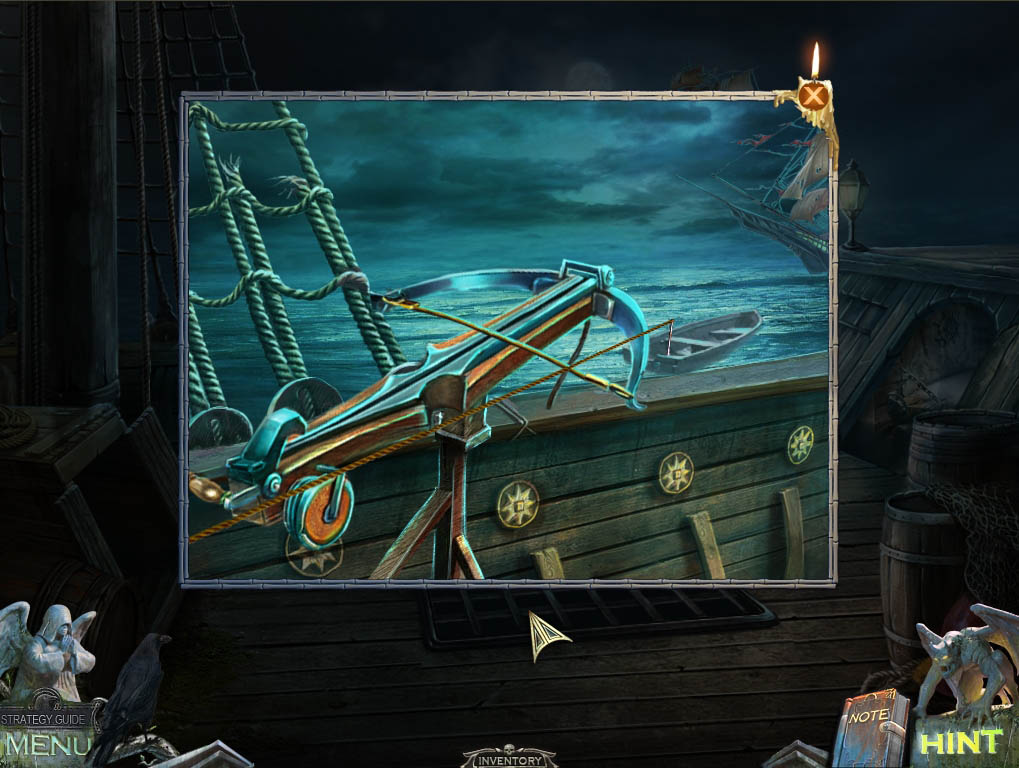
- Zoom into the bundled object by the railing.
- Cut the ropes with the DIRK.
- Combine the HARPOON and ROPE to get the HARPOON WITH ROPE.
- Use the HARPOON WITH ROPE on the spear gun to bring the boat closer, then use the OAR on the boat.
-
Move to the other ship.
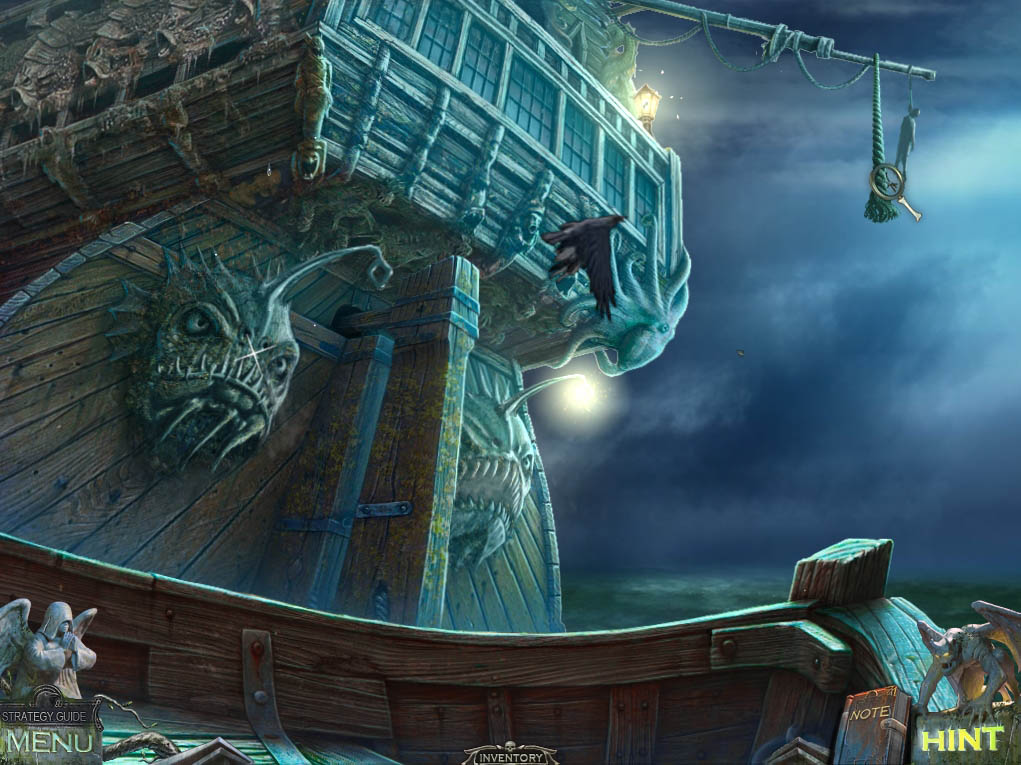
- Have the crow retrieve the rope, which you will use to move to the deck of the other ship.
-
Go up the rope.
- Zoom into the fish statue on the left.
- Slice the seaweed from the top of its head with the DIRK.
- Zoom into the figure above the doorway.
- Take the ANGLERFISH LIGHT.
-
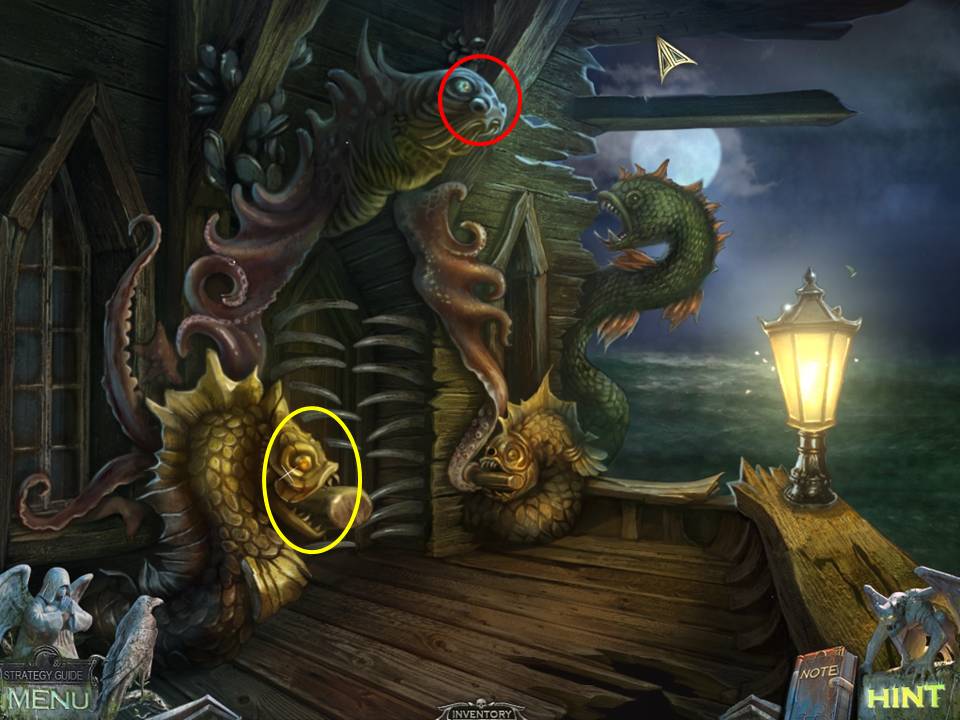
Go back down to the Boat.
- Zoom into the anglerfish statue at left.
- Use the ANGLERFISH LIGHT on the statue.
- Take the HORN from its mouth.
- Zoom into the anglerfish statue at right.
- Take the second HORN.
-
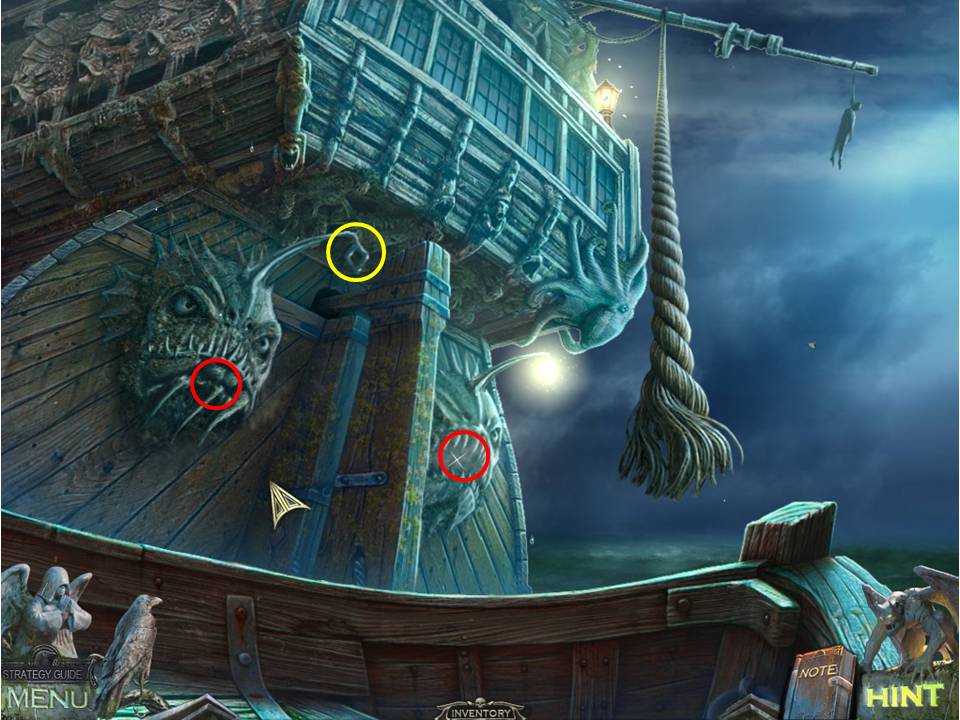
Return to the rear of the ship.
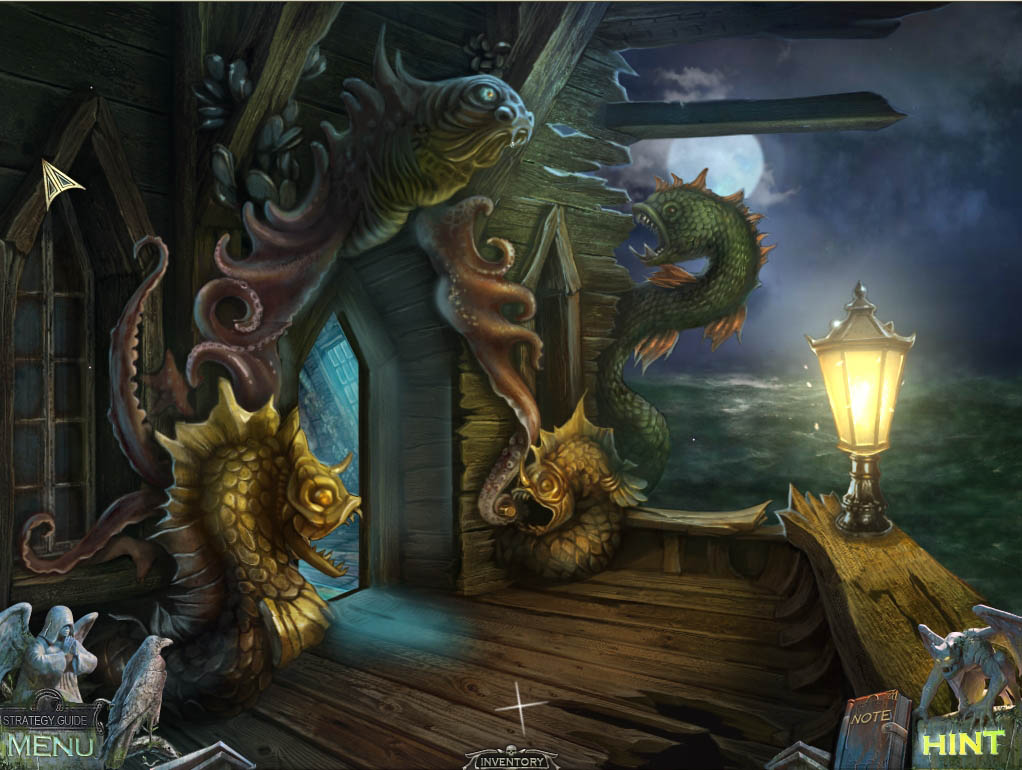
- Zoom into the fish on either side of the door.
- Place the HORNS on their respective statues to replace them, opening the way to the door.
-
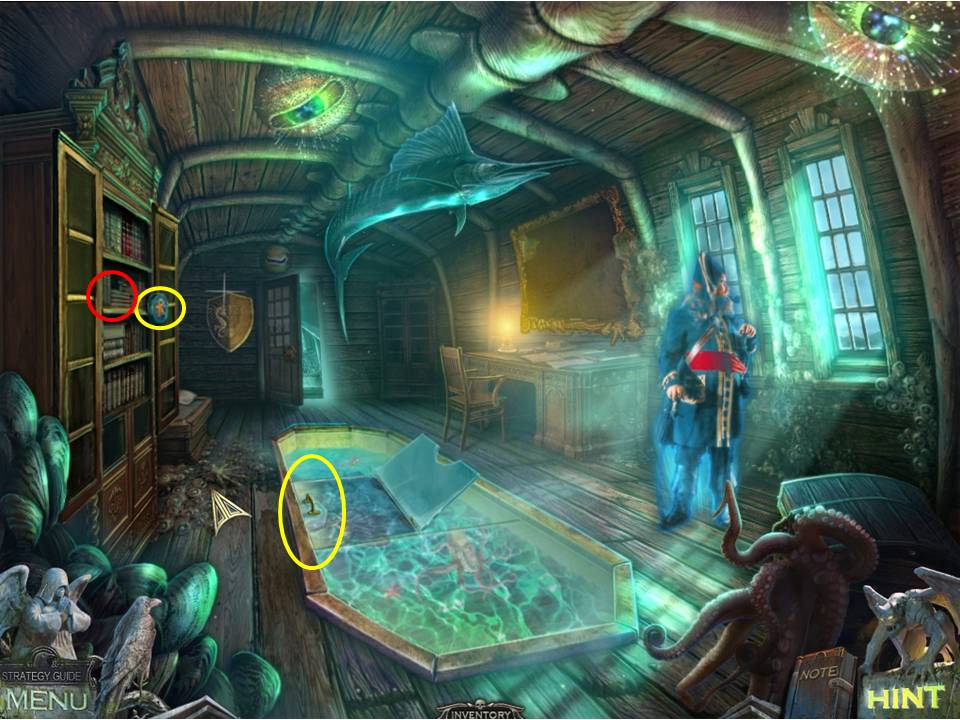
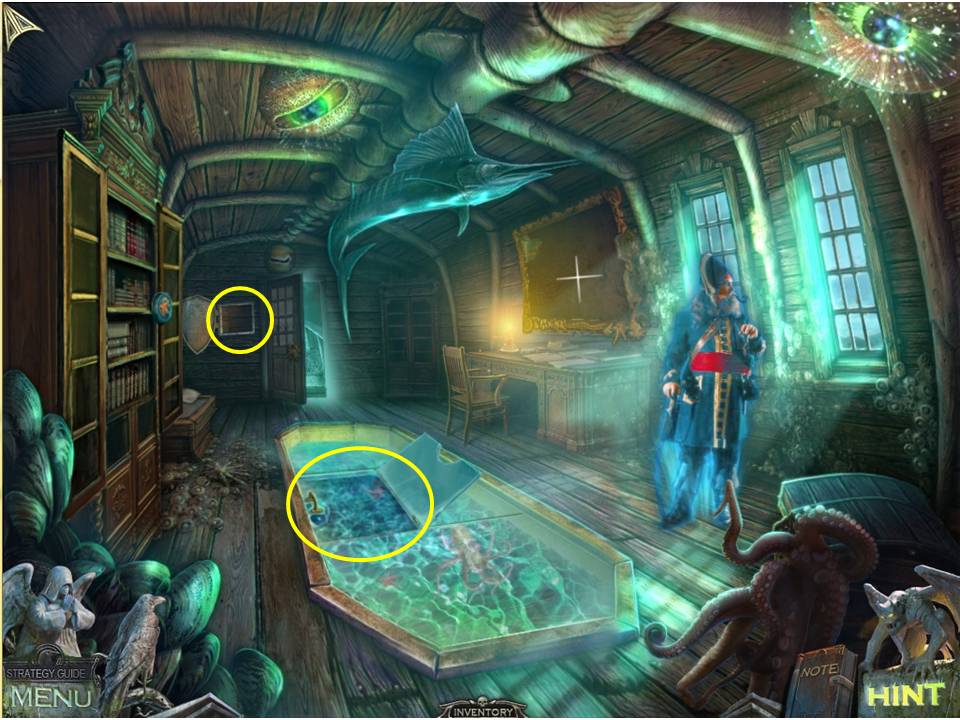
Go inside to the Captain’s quarters.
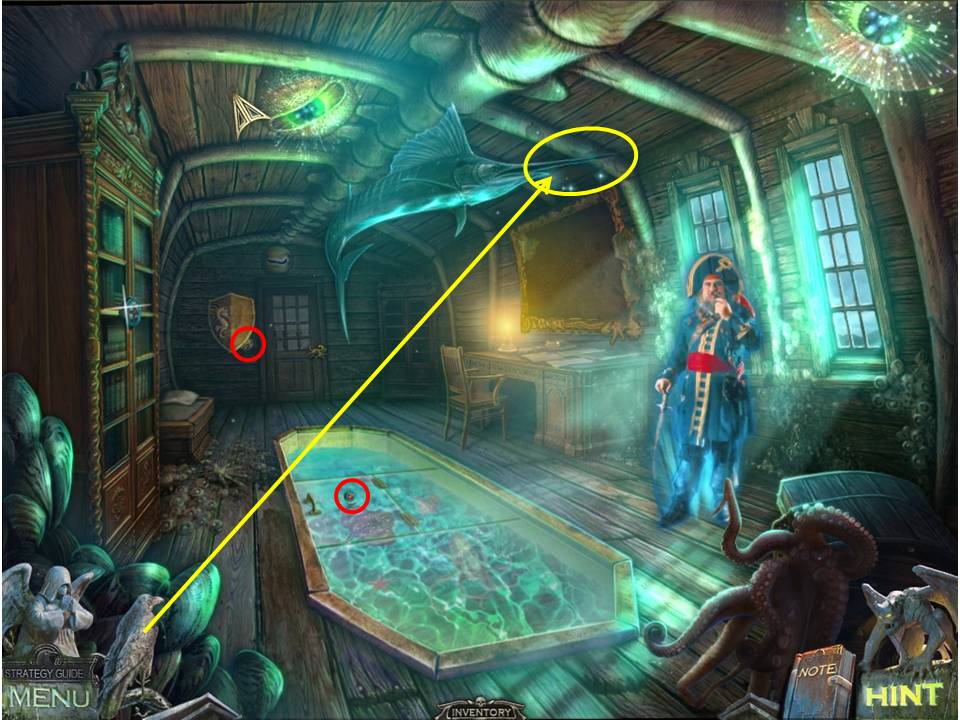
- Talk to the ghost.
- Zoom into the glass tank on the floor.
- Take the BEHEMOTH EYE.
- Examine the shield on the back wall at the far end of the room.
- Take the CROW RUNE.
- Have the crow knock down the FISH NOSE.
- Take the FISH NOSE.
-
Go back outside.
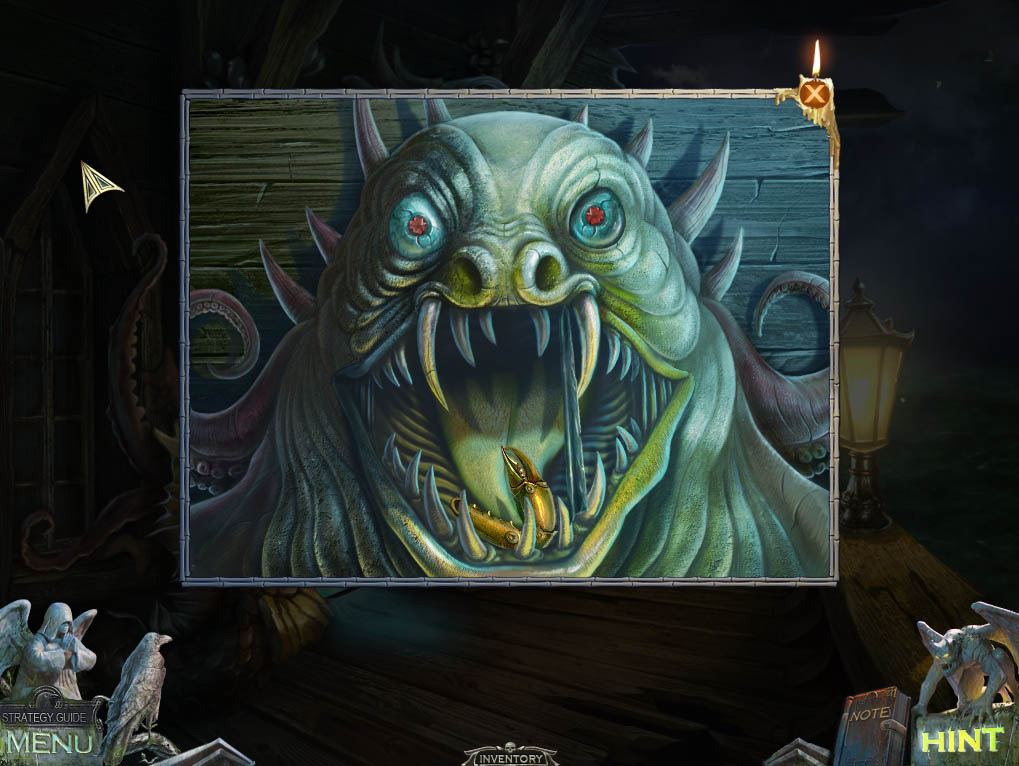
- Zoom into the monster above the door.
- Place the BEHEMOTH EYE in the empty socket. Click to open the mouth.
- Prop open the mouth with the FISH NOSE.
- Take the CRAB CLAW.
-
Return to the Captain's quarters.
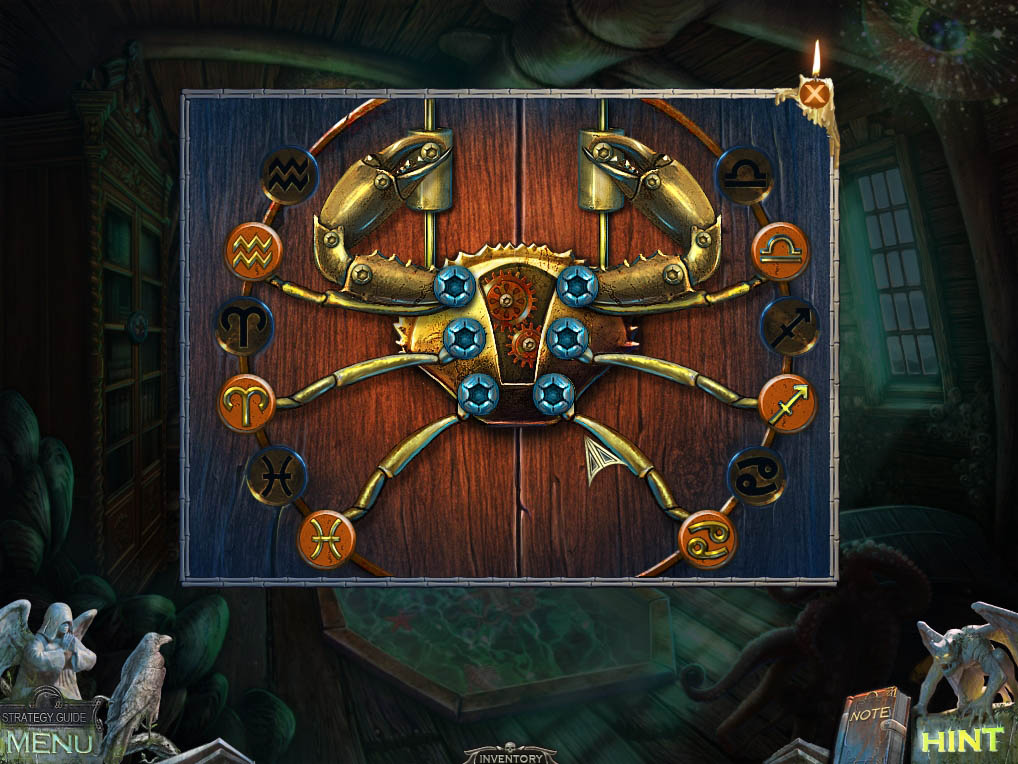
- Zoom into the door at the far end of the room.
- Use the CRAB CLAW on the crab mechanism to initiate a puzzle.
- The object of the puzzle is to arrange the crab's legs to match the darkened symbols above each leg.
- Click on the leg you wish to shift (it will be highlighted in blue) and then click on the leg where you want to shift it to – the legs will swap positions.
- See screenshot for solution.
-
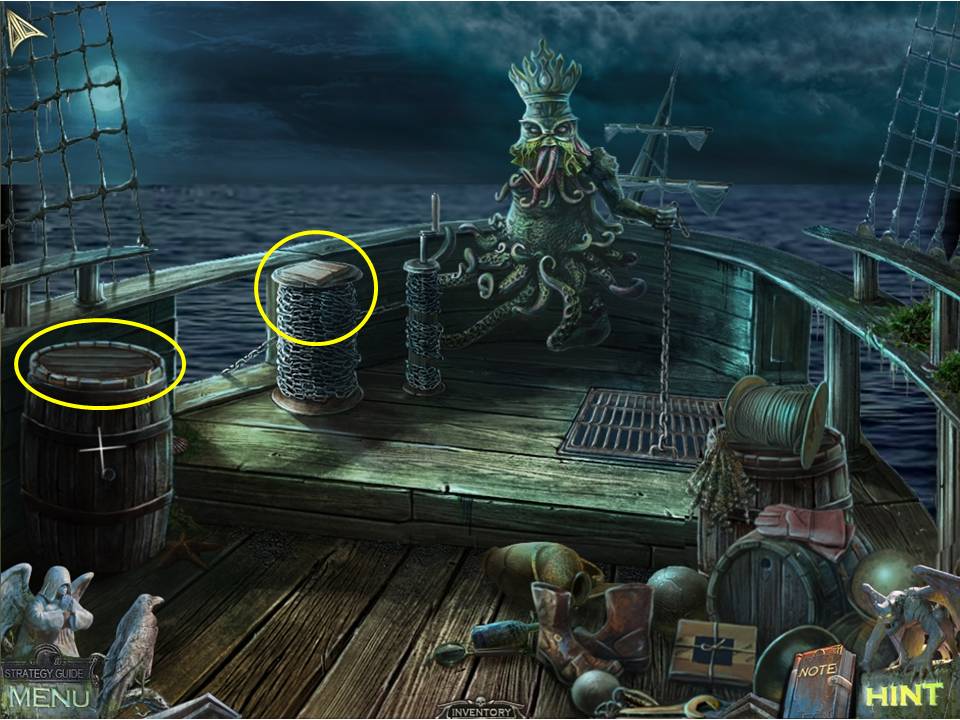
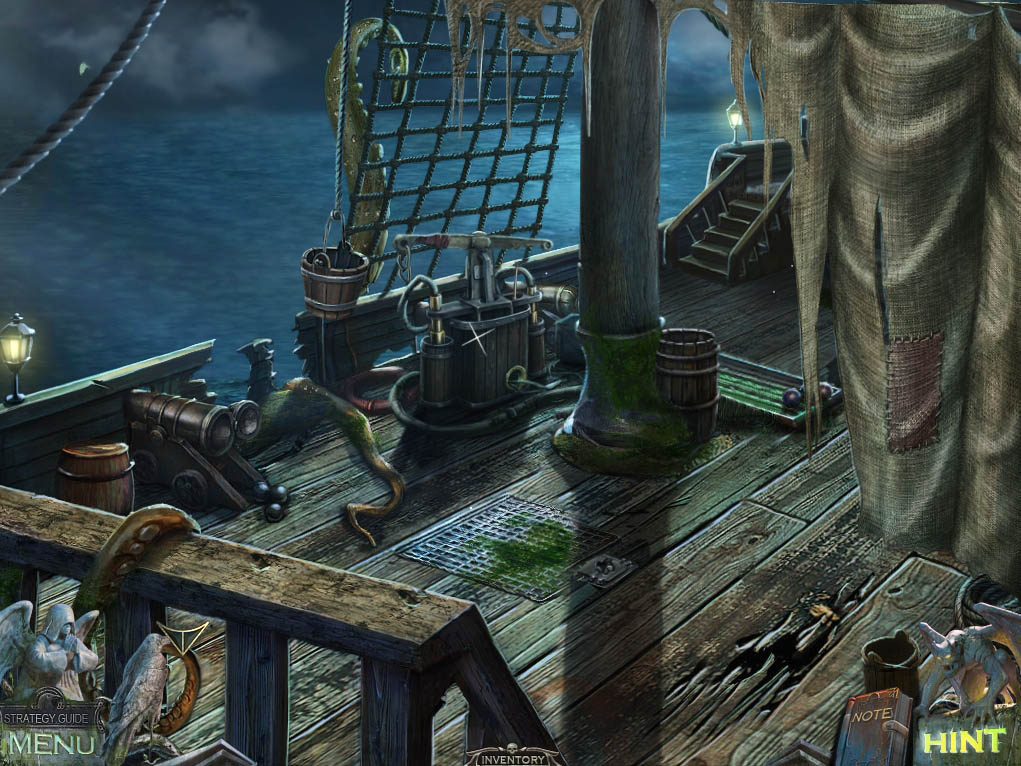
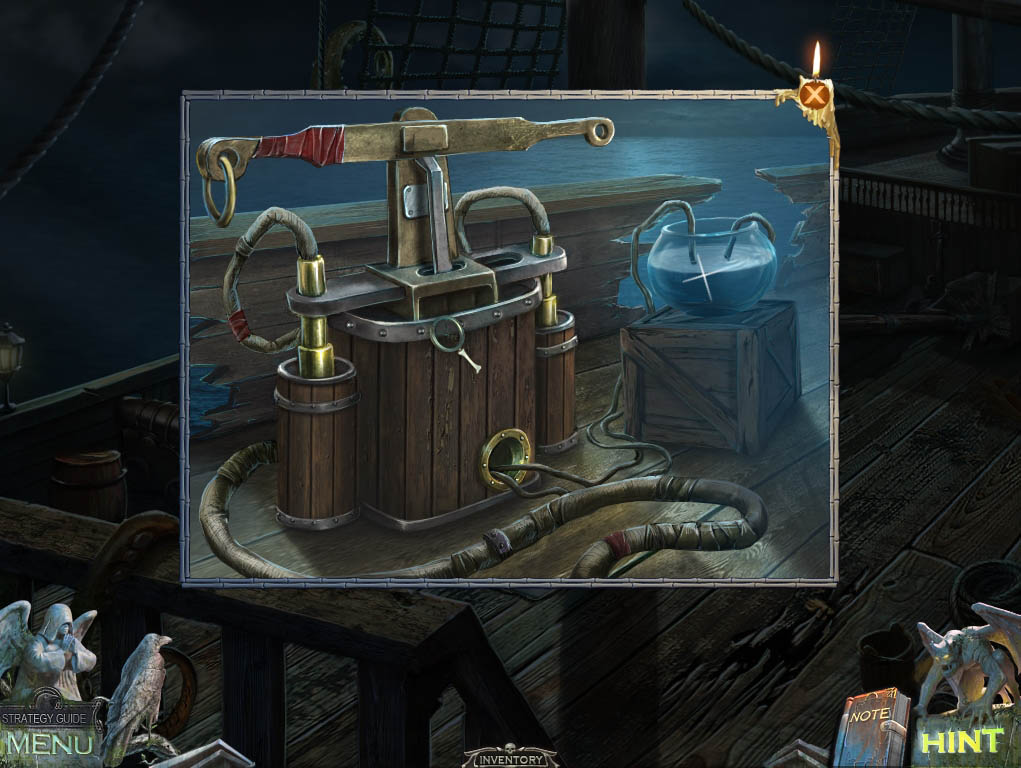
Go through the door to the deck.
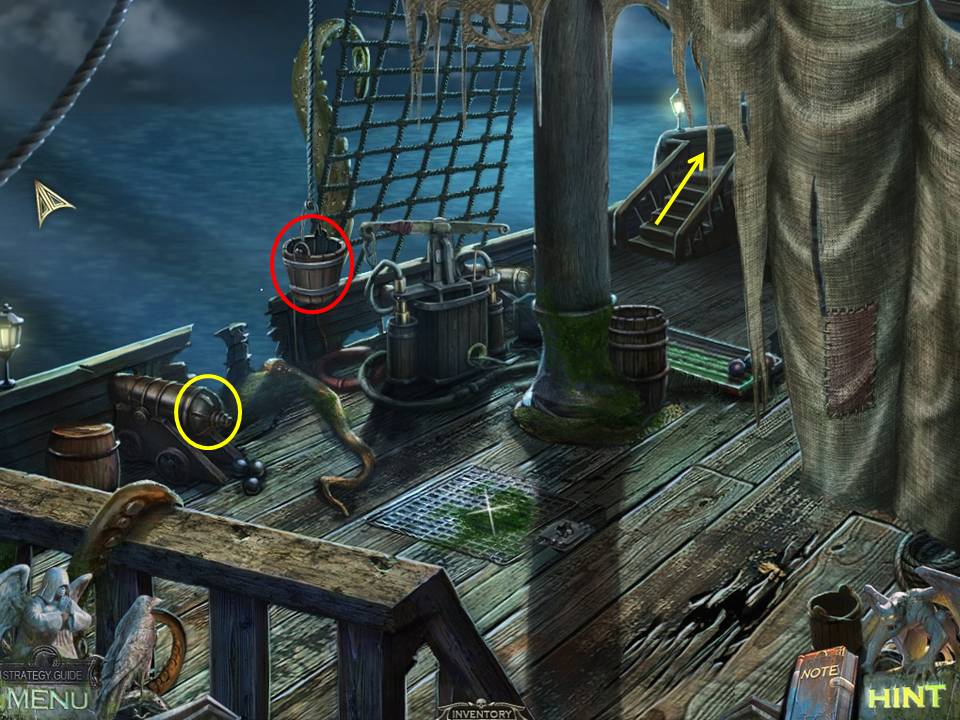
- Zoom into the cannon on the left.
- Click on the rear hatch to open it.
- Take the RAMROD.
- Zoom into the bucket hanging from the rope.
- Take the SCRAPER inside.
-
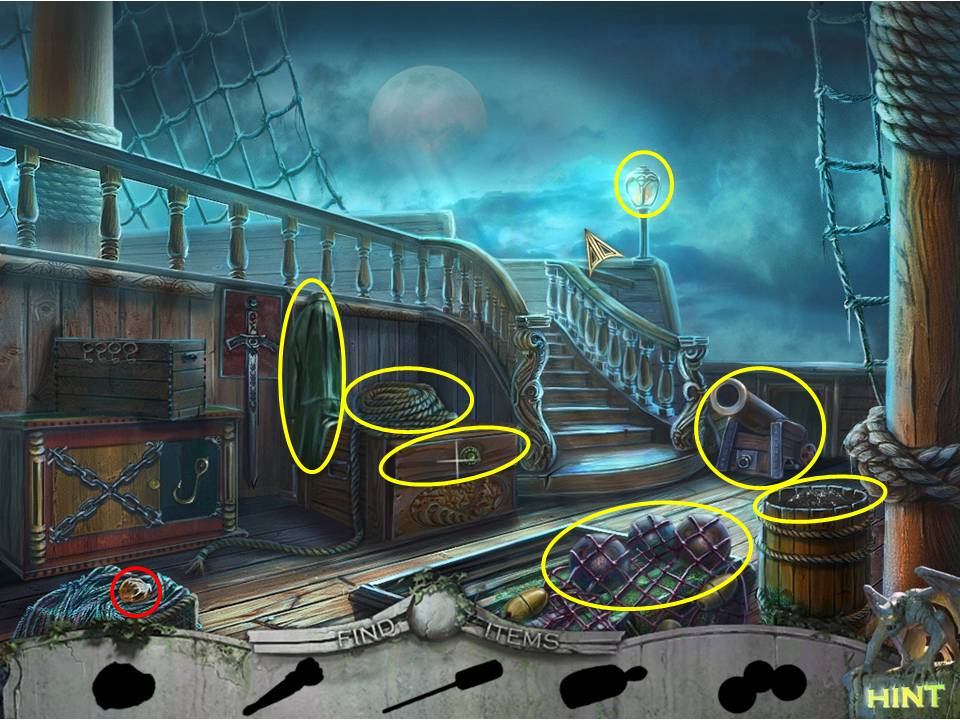
Go up the steps on the far end of the deck to the bow.
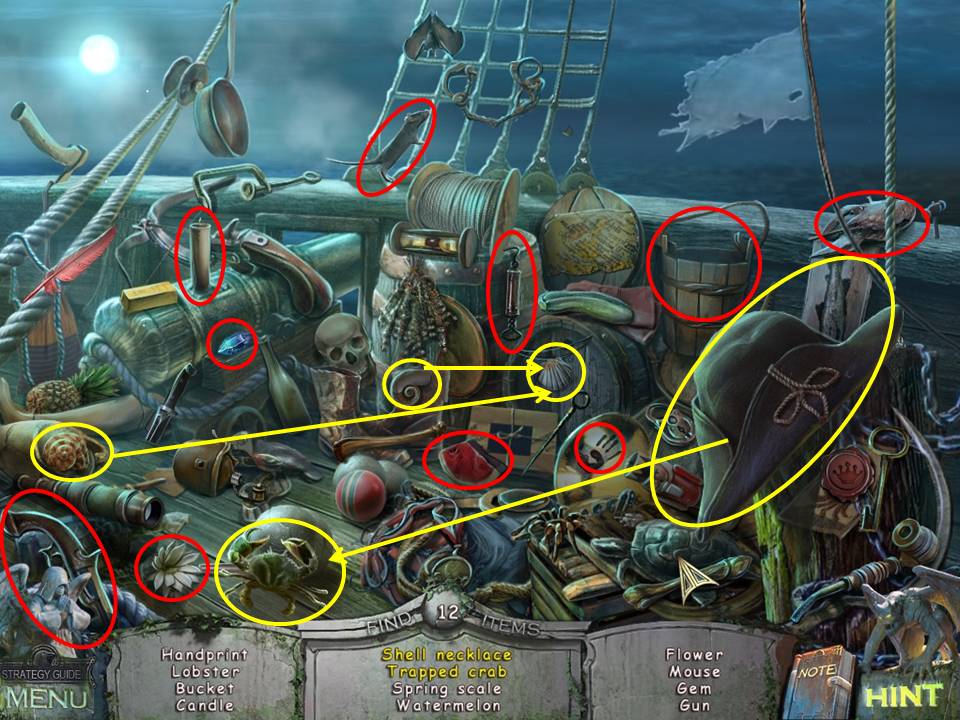
- Play the Hidden Object Area on the lower right.
- Find the items listed.
- Use the hat on the right to catch the crab.
- Move the shells to the left over to the one on the right to complete the shell necklace.
-
Gather the remaining objects, and receive the GEM.
- Take a look at the barrel to the left and retrieve the MAP on it.
- Use the DIRK to prize open the lid and collect the ring inside.
-
Click on the book on top of the roll of chain, and use the SCRAPER to pick up the STARFISH stuck to the side of the boat.
- Return to the Captain's quarters.
- Zoom into the bookcase at left.
- Use the STARFISH on the lock to open it.
- Take the GEM and the PIRATE HOOK.
- Combine the RAMROD with the PIRATE HOOK to get the RAMROD WITH HOOK.
- Zoom into the aquarium on the floor.
- Cut the glass with the RING.
-
Return to the bow.
- Zoom into the statue on the bow.
- Place the GEMS on the spaces in the crown which will open the nearby grate.
-
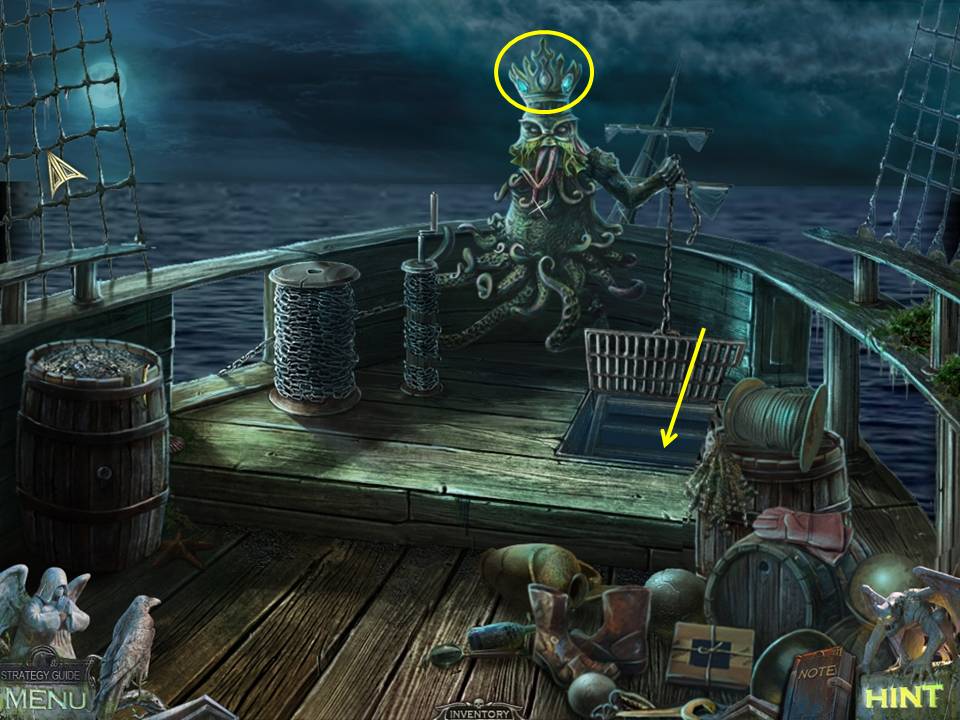
Go down the hatch to the below deck area.
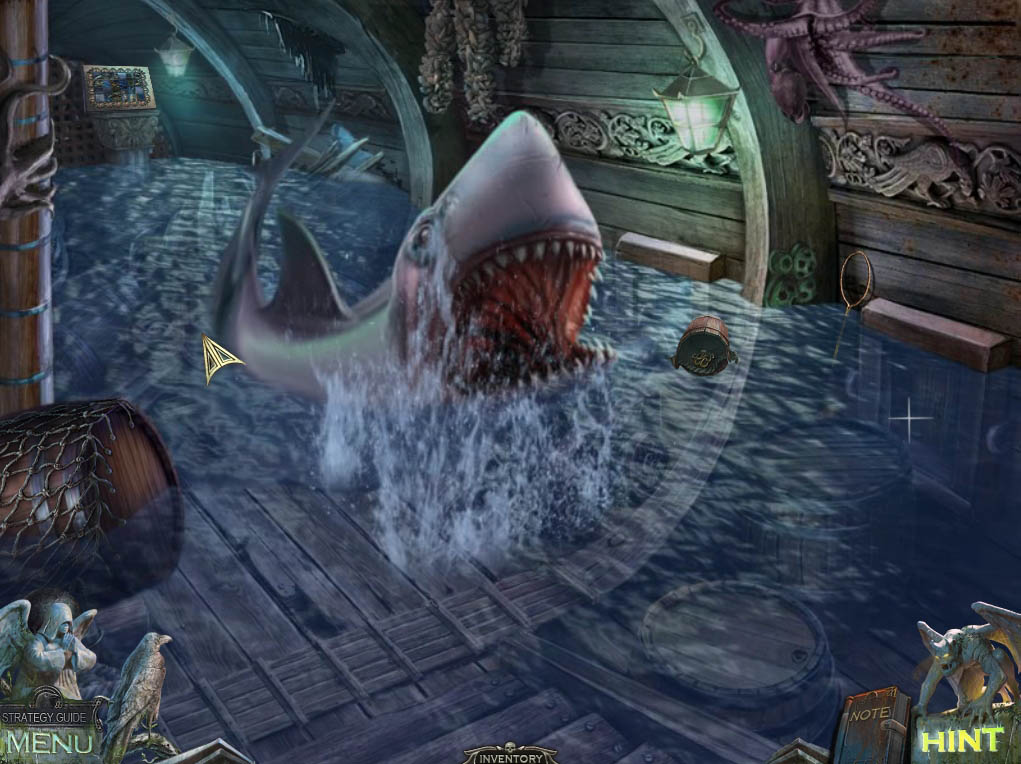
- Have a bit of fun with the shark by clicking on it to see what happens – this thing should have auditioned for Jaws!!
- Use the RAMROD WITH HOOK on the floating bucket to pull it closer.
-
Take the HATCH KEY inside it.
- Return to the Ship Deck.
- Zoom into the hatch grate and unlock it with the HATCH KEY.
- Take the BOARD inside – careful, the shark might be about down there!
-
Return below deck.
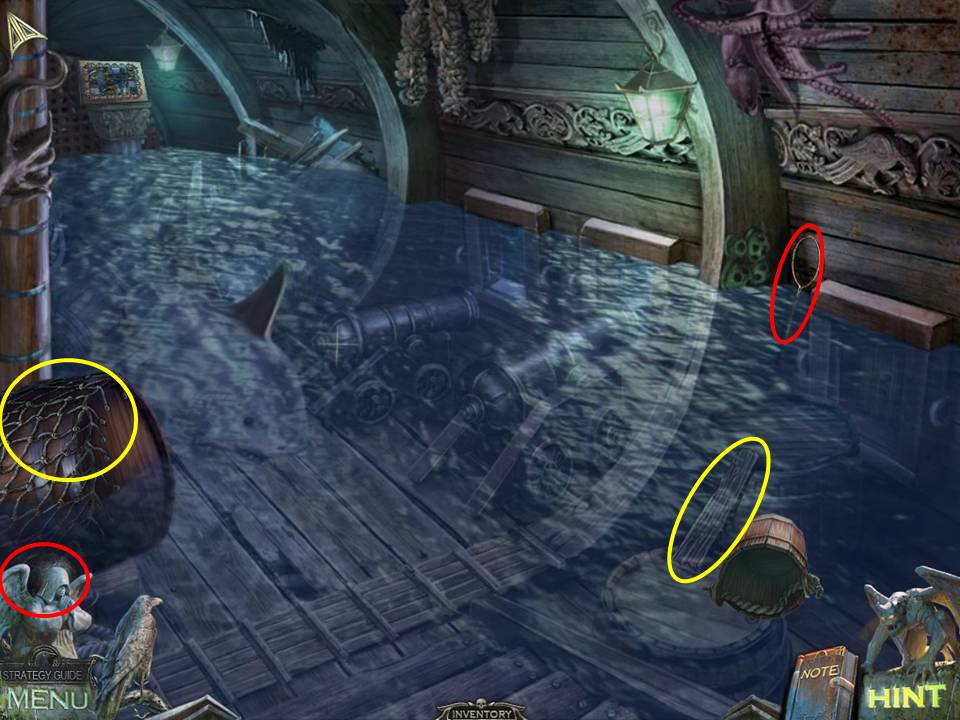
- Place the BOARD between the two barrels underwater on the right.
- Zoom into the far right side of the ship.
- Take the NET.
- Zoom into the barrel with the netting over it at left.
- Slice the FISHNET with the DIRK.
- Take the CANNONBALL.
-
Return to the main deck.
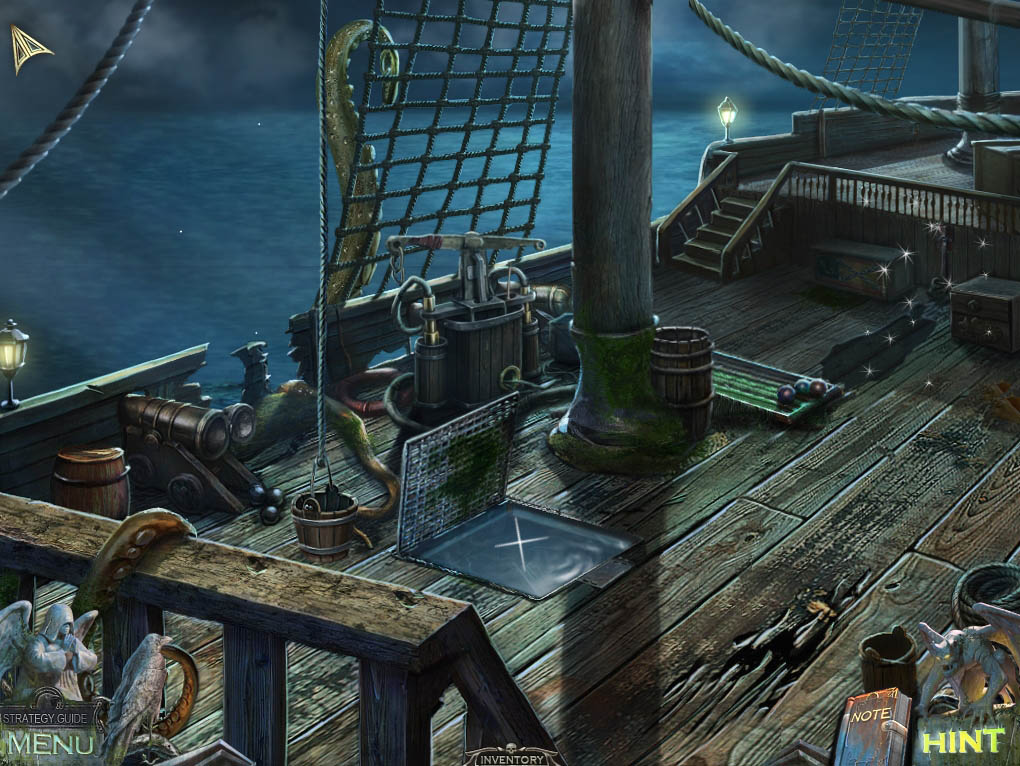
- Zoom into the suspended bucket on the left.
-
Weigh down the bucket with the CANNONBALL, which will move a sail and reveal a Hidden Object Area.
- Find the silhouetted objects in the scene, using them to obtain the rest of the items in the following order –
- Open the net to obtain the cannon balls
- Open the drawer under the roll of rope to get the scoop
- Scoop up the rock from the pile of rope on the left
- Click on the green coat and take the torch hidden behind
- Move the coil of rope to reveal a ramrod
- Scoop up some gunpowder from the barrel on the right and place it in the cannon
- Use the ramrod to pack the gunpowder down
- Place the cannon balls in the cannon
- Throw the rock at the lantern to break it open, then light the torch.
- Click on the cannon to aim it at the mast – look closely and you’ll see an ‘X’ underneath the crows nest to aim at.
- The mast will come crashing down. Examine the box and take the SEAHORSE inside to complete the puzzle.
- Return to the Captain’s quarters.
- Zoom into the shield to the left of the door at the far end of the room.
- Place the SEA HORSE on the right half.
- Take the MAP inside.
- Combine the FISHNET and the NET to get a better NET.
- Zoom into the aquarium.
-
Scoop the ELECTRIC RAY with the NET.
- Go back out to the deck.
- Zoom into the pump to the left of the mast.
- Place the ELETRIC RAY inside the bowl of water.
- The pump will work again, draining the water inside the nearby hatch.
- Go through the open hatch into the hold.
Comments will load when you reach this part of the walkthrough.