Van Layout, Storage, and Power Setup
There is a very Outbound moment where you roll back from a pretty little resource run, open the van door, and realize your mobile cabin has become a junk drawer with headlights. One storage unit blocks the path, one machine is eating the corner, and your power setup is doing the brave work of a candle in a windstorm. Fix the layout now. A tidy van saves more time than one extra gathering trip, especially while early progress still nudges you along a fairly set route.
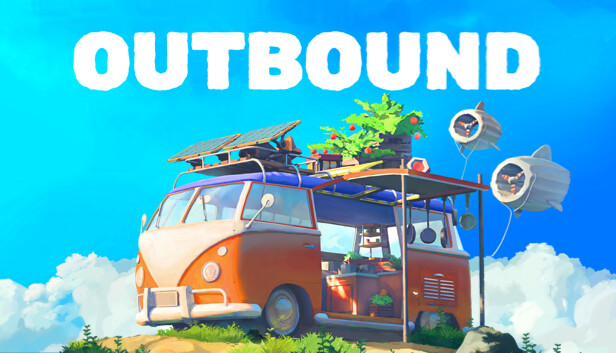
Think of the van as three zones: driving access, working, and living. The driving access zone is the front path and doors you keep clear so you can get moving without a furniture maze. The working zone is where you place crafting stations, storage access, and power gear. The living zone is your cozy corner for food, decor, and comfort once the basics are stable. Outbound is at its best when the plain electric camper starts to feel like a small cabin that happens to move through colorful biomes.
Step 1: Clear the Center Aisle
Open the build or placement menu, which is the mode where you move furniture, stations, and storage modules. Before adding anything new, make one clean walking lane from the rear doors toward the front. Do not place storage, benches, or power parts in that lane. If you have to wiggle around furniture every time you unload, the layout is already costing you time.
- Put main storage access or storage modules against one wall near the rear doors.
- Put crafting stations on the opposite wall, close enough that checking recipes, sorting parts, and building upgrades takes only a few steps.
- Keep food, comfort, and decor farther forward or in a quiet side corner.
- Leave space around anything that needs a clear interaction prompt.
If you are stuck because you cannot craft or use an upgrade, do a fast reset: move loose objects to the walls, empty your personal inventory into vehicle storage, then check the recipe and station again. Van crafting and world interactions do not always ask for items in the same place. If a repair or objective will not accept a part, move it from vehicle storage into your backpack and keep it there until the job is done.
Recommended Starter Layout
| Van Area | Best Use | Why It Works |
|---|---|---|
| Rear left wall | Main storage access | You can unload right after a trip without walking through the whole van. |
| Rear right wall | Crafting stations | Storage and crafting stay close, which cuts down on small repeat checks. |
| Middle floor | Clear aisle | You can reach doors, stations, and upgrades without bumping around like the van is a puzzle box. |
| Front or side corner | Food, comfort, decor | Cozy items stay out of the work path but still make the van feel like home. |
| Exterior or roof space, when unlocked | Renewable power parts | Power gear works best when it is planned as a system, not dropped wherever it fits. |
Step 2: Build Storage by Job, Not by Chaos
New players often make one big pile of everything. That works for one trip. Then recipes, repairs, and objectives start asking for different parts, and suddenly you are sorting through half the countryside to find one component. Use small storage habits instead. Storage sorting and search help, but a clean plan still saves your brain after a long drive.
- Build parts: common materials used for stations, van parts, and structure upgrades.
- Power parts: battery parts, wiring-style components, and anything tied to renewable energy upgrades.
- Crafting extras: parts that seem odd now but show up in blueprints later.
- Food and travel: items you use before long drives or repeated gathering routes.
- Decor and comfort: nice-to-have pieces that should not crowd the work zone.
Keep one empty storage module, or one clear chunk of vehicle storage, as an inbox for new loot. After each run, drop everything there first. Then sort it before you leave again. This gives you a clean recovery point when a route goes long, your bags are full, or you come home tired from driving the same road for the third time. Cozy does not have to mean messy. The socks can go somewhere.
Step 3: Make Power Boring on Purpose
Power in Outbound is part of the main van-life loop. Your electric camper needs energy to stay useful, and renewable power from the sun, wind, and water or rain helps you travel and craft with less panic. Passive power means energy you get from your setup and conditions while you are parked or working, not a magic fix for every bad route. Treat power like a pantry: enough stored energy for the next trip, enough generation to refill during downtime, and enough spare parts to expand when a blueprint asks for more.
Start with reserve before style. If you have a choice, a better battery or energy reserve is usually more helpful than adding several cute extras that all draw from the same weak pool. After that, add renewable generation as you unlock it. Solar, wind, and water or rain upgrades belong where they do not block movement, doors, or other van parts. Keep the inside of the van for actions you repeat by hand: crafting, sorting, cooking, resting, and planning the next route.
Power Upgrade Priority
- Reliable storage: improve battery capacity or energy reserve first so one long trip does not drain the van dry.
- Renewable generation: add solar, wind, or water-based sources as you unlock them, then plan around where and when they work best.
- Efficient stations: upgrade crafting or utility stations that reduce repeat errands or unlock better parts.
- Comfort and decor: add cozy pieces after the work loop is steady. A cute cabin is better when it still functions as a cabin.
Before leaving a biome, do a 30-second van check: storage has open space, key crafting parts are sorted, food or travel supplies are stocked, and the power reserve is not sitting near empty. If any one of those fails, fix it before the scenic drive. This small habit keeps a slow road trip from becoming a slow rescue mission.
Solo and Co-op Layout Notes
Solo players should keep everything closer together. The world can feel quiet when you are alone, so do not make yourself do extra laps inside the van too. Put your most-used storage access and crafting station within a few steps of each other. Save wide decorative layouts for later, once your upgrades are doing more of the work.
In online co-op, give each player a simple job during stops. One person unloads and sorts, one checks power and crafting, and one gathers nearby materials if the stop is useful. The van should support that flow. Keep the rear doors clear so players are not blocking each other, and do not stack every important station in one tiny corner. Multiplayer already had enough launch-week wiggle in some sessions; the floor plan does not need to join the comedy act.
Quick Pre-Drive Checklist
- Center aisle is clear from rear doors to front.
- Main storage has at least a little empty space.
- Power reserve is high enough for the next route.
- Crafting station is reachable and not blocked by decor.
- Food or travel supplies are in one known spot.
- New blueprint parts are stored together until you know what they build.
Once this setup is in place, the van stops fighting you. You gather, unload, craft, recharge, and roll out again with less fuss. That is the heart of Outbound: not beating the road into submission, but slowly turning a plain camper into a smart little home that knows where the spare parts live.
Comments will load when you reach this part of the walkthrough.