

Chapter Five: Last Step
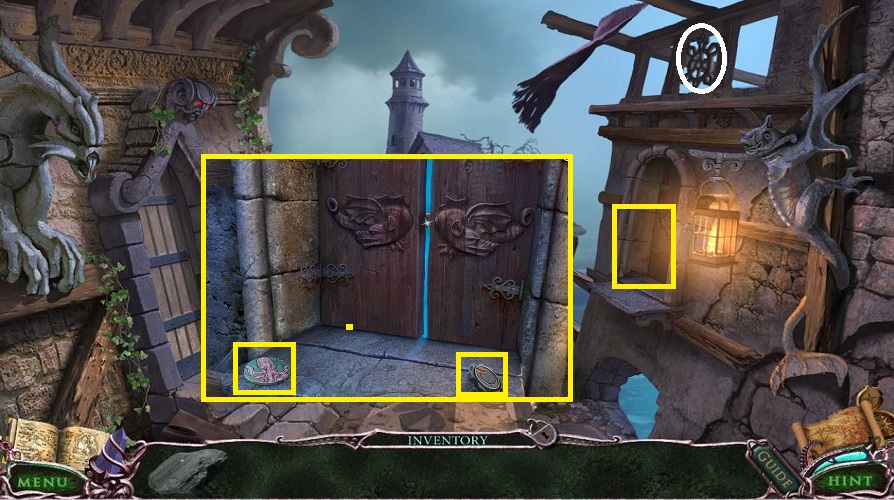
- Examine window to the right
- Pick up WOODEN OCTOPUS (1/3) and RADIO DIAL
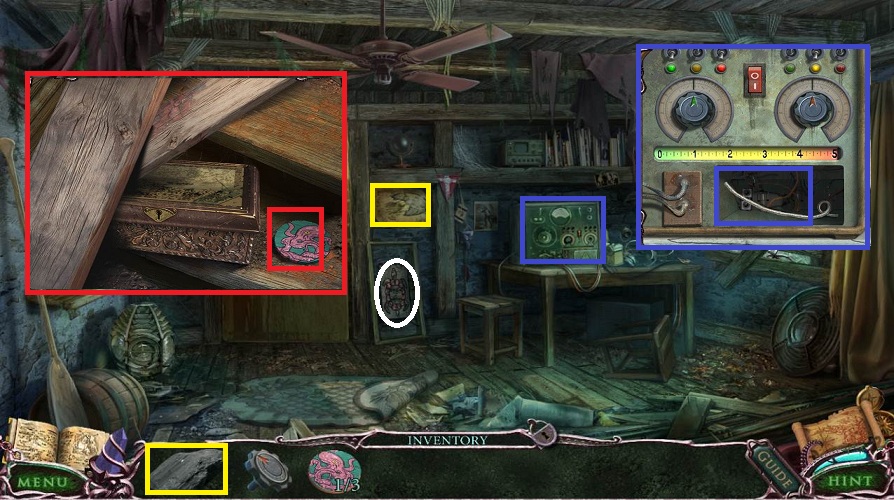
- Go forward twice into the house
- Try to go up the stairs
- Click on the wood
- Pick up WOODEN OCTOPUS (2/3)
- Examine the radio
- Pick up the CIRCULAR WOOD PIECE (1/2)
- Place the RADIO DIAL
- The goal here is to get up to 5
- Turn on the radio
- Twist the 2 knobs to the highest result
- Flip the switches and keep those that go high on
- Pick up the WIRE
- Examine the map on the wall
- Use the COAL to get a code
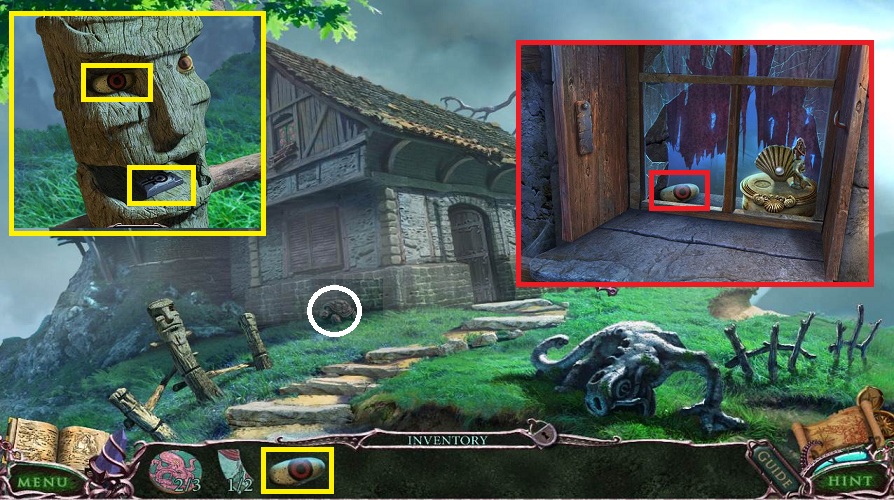
- Back up twice
- Examine the window
- Use the WIRE
- Pick up the WOODEN EYE
- Go forward
- Examine the fence post to the left
- Place the WOODEN EYE
- Pick up STONE TOOTH
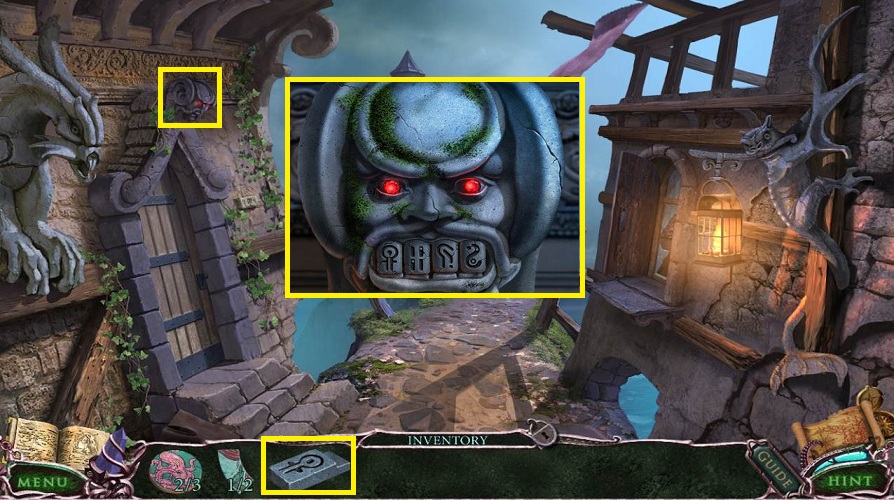
- Back up once
- Examine the carving over the door
- Place the STONE TOOTH
- Using the code from the map in the house, swap the teeth around
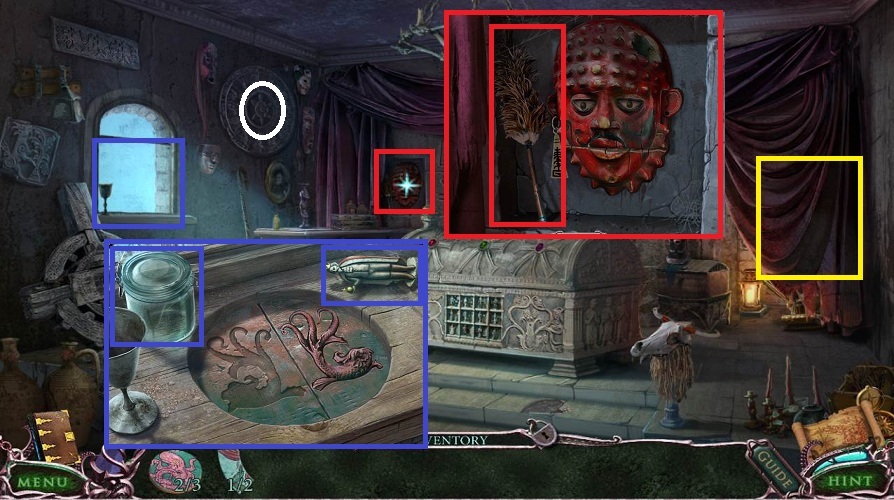
- Head left through the door
- Examine the red mask
- Pick up the BRUSH
- Examine the window
- Pick up the EMPTY JAR and KING
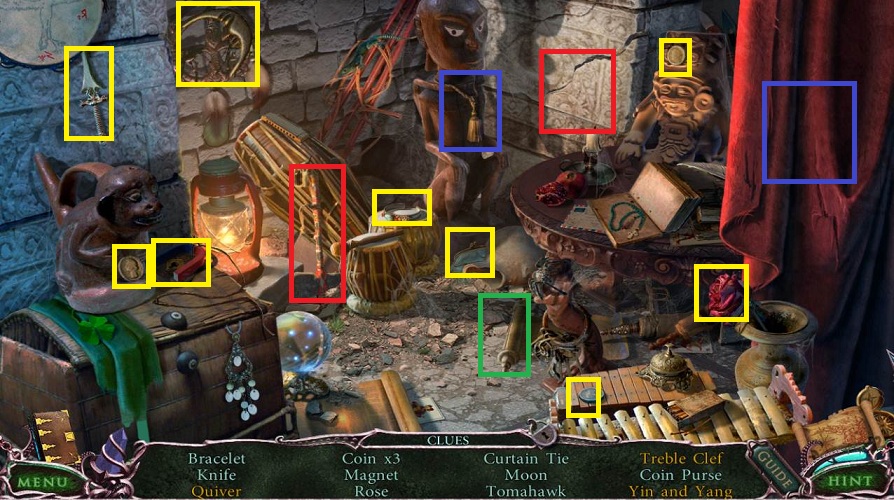
- Click on the curtain to the right
- Do the hidden object scene
- Quiver: Use the curtain tie on the curtain.
- Yin and Yang: Click on the scroll
- Treble clef: Use the tomahawk on the wall.
- Receive the MAGNET
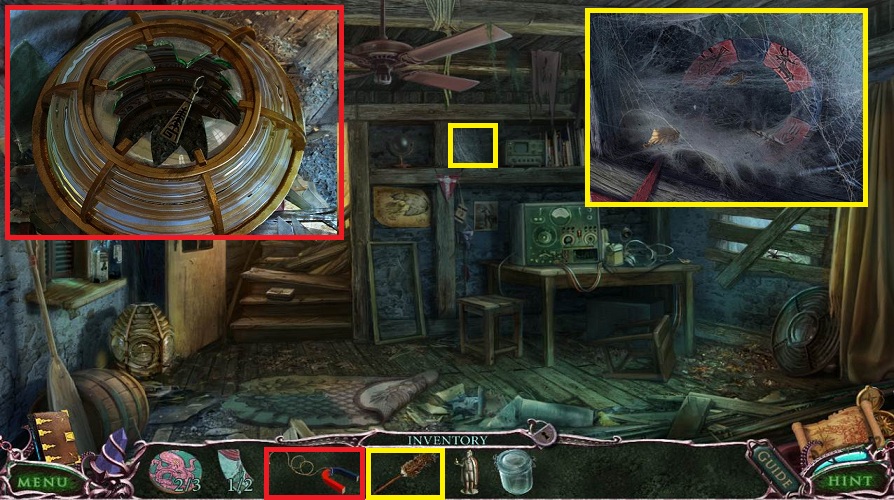
- Back up and forward twice into the house
- Examine the broken lantern to the left
- Use the MAGNET
- Receive the EARRING
- Examine the spider web in the shelves
- Use the BRUSH
- Pick up the WOODEN RING
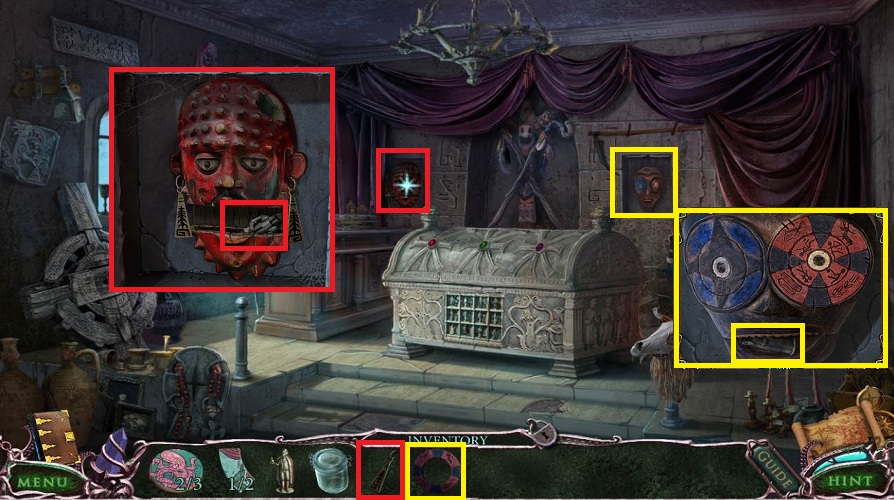
- Back up twice and go left
- Examine the red mask
- Place the EARRING
- Pick up the KNIGHT
- Examine the right mask
- Place the WOODEN RING
- Turn the outer ring to match the inner ring (three times)
- Pick up the WIZARD
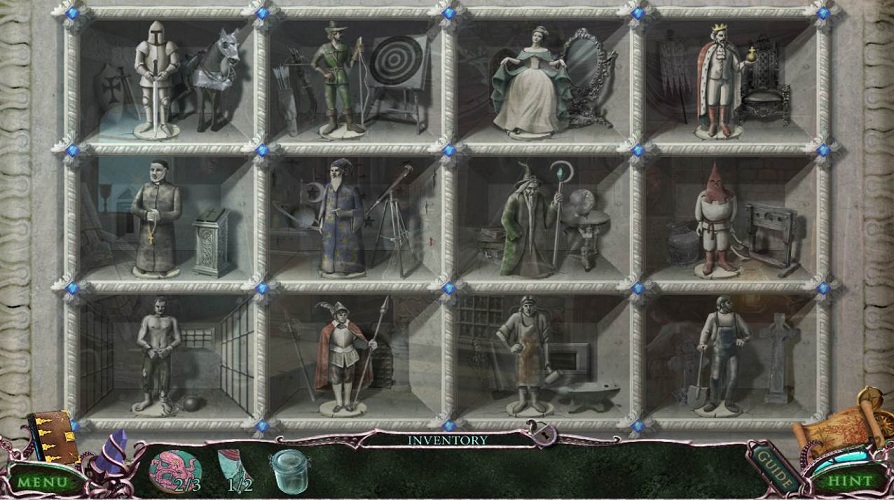
- Examine the chest
- Place the WIZARD, KNIGHT, and KING
- Swap the figures around to match the rooms
- Pick up the OCTOPUS
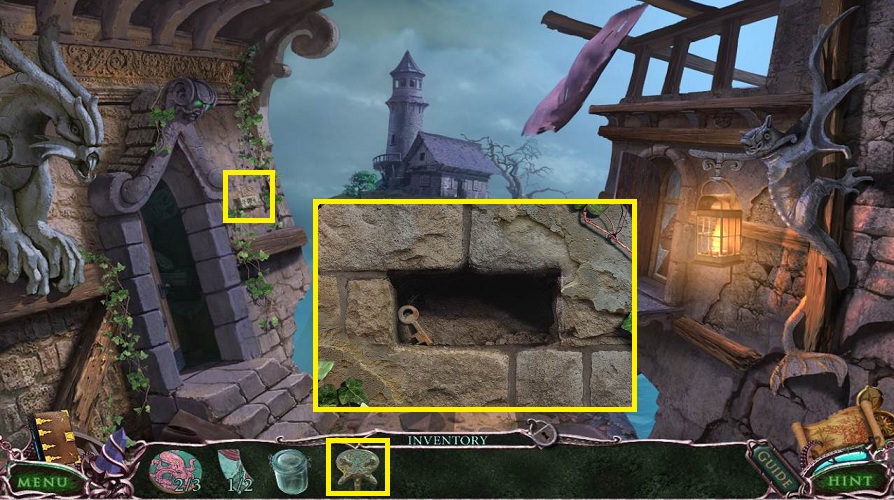
- Head back once
- Examine to the right of the door
- Place the OCTOPUS
- Pick up the KEY
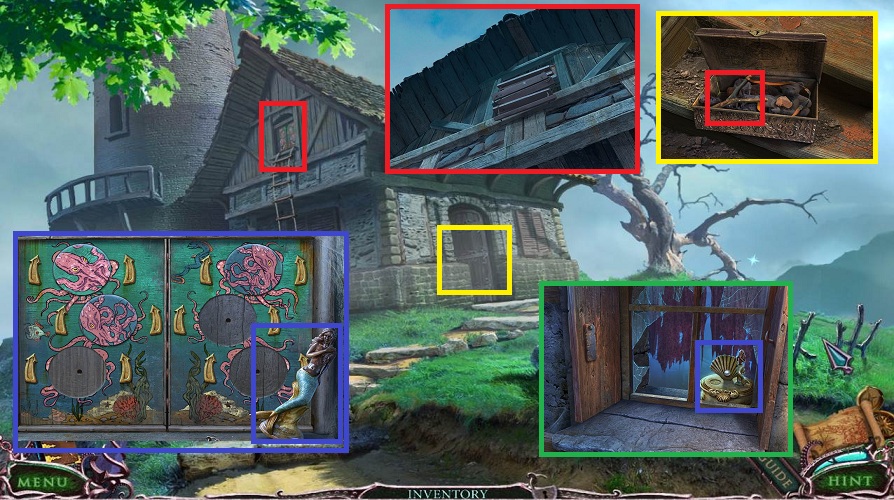
- Head forward twice
- Examine the box on the stairs
- Use the KEY
- Pick up the SLING SHOT
- Head back once
- Examine the upstairs window
- Use the SLING SHOT
- Examine the window again
- Pick up the MERMAID STATUE
- Go back twice
- Examine the window to the right
- Place the MERMAID STATUE on the box
- Click on the box
- Pick up the STONE HORN
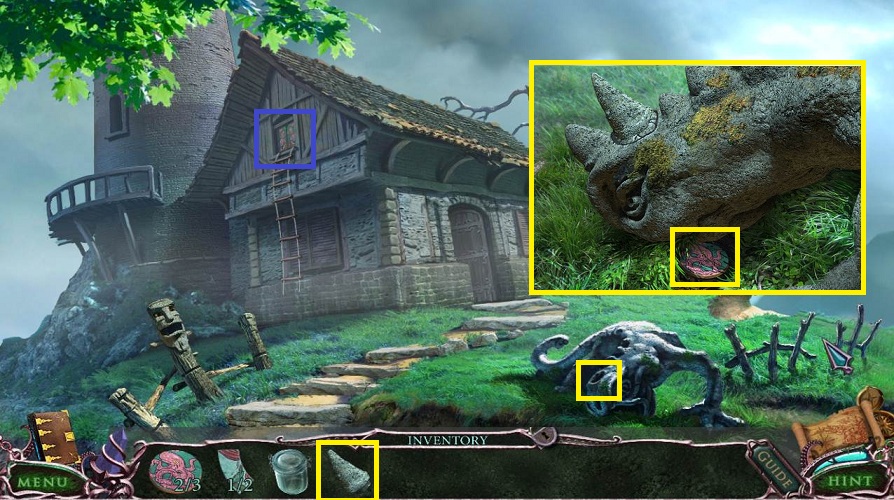
- Head forward once
- Examine the stone statue
- Place the STONE HORN
- Pick up the WOODEN OCTOPUS (3/3)
- Examine the upstairs window
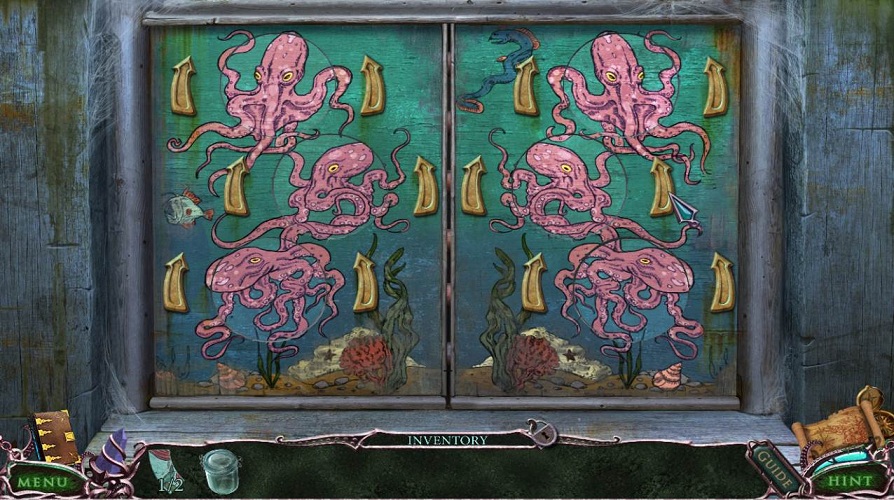
- Place the 3 WOODEN OCTOPI
- Switch the disks around and then rotate them with the arrows to get them to match the background
- Use the background colors to help
- They will lock when they are in place
- Pick up the ROPE
- Back out
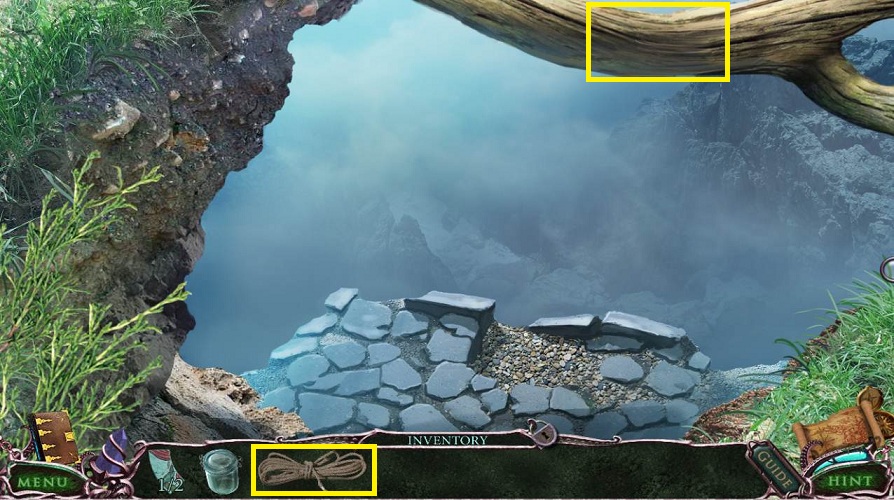
- Examine the cliff
- Use the ROPE on the branch
- Go down
- Examine the stone to the left
- Pick up the FISH
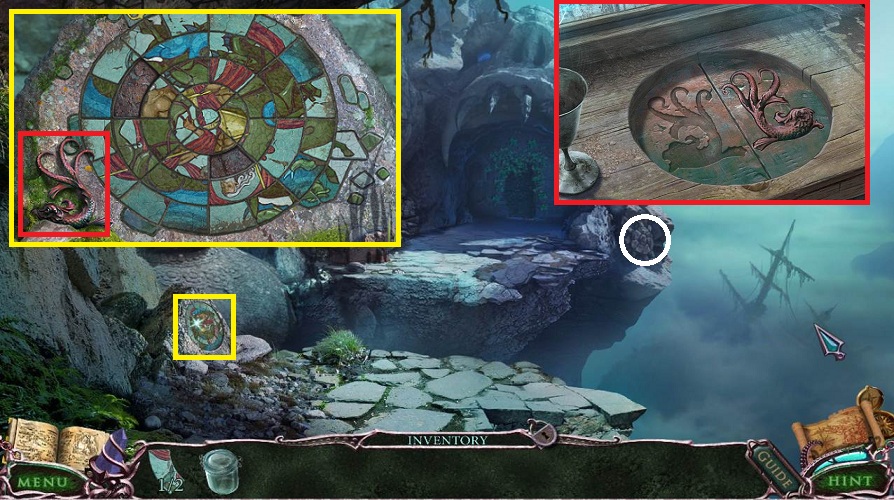
- Back up twice and head left
- Examine the window
- Place the FISH
- Pick up CIRCULAR PUZZLE PIECE (2/2)
- Back up once, go forward, and down the rope
- Examine the stone to the left
- Place the PUZZLE PIECES
- Trade the pieces within in each circle to match up with the outsides and complete the picture
- The bridge will go up
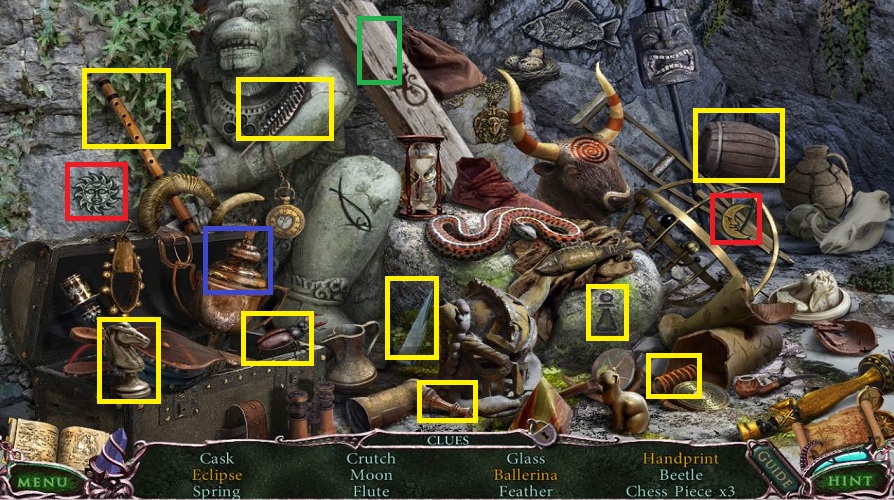
- Do the hidden object scene
- Eclipse: Place the moon on the sun
- Handprint: Click on the wooden beam
- Ballerina: Click on the lid of the cup
- Receive the GLASS
- Back up
- Examine the upstairs window
- Use the GLASS on the teddy bear
- Pick up the BUTTON
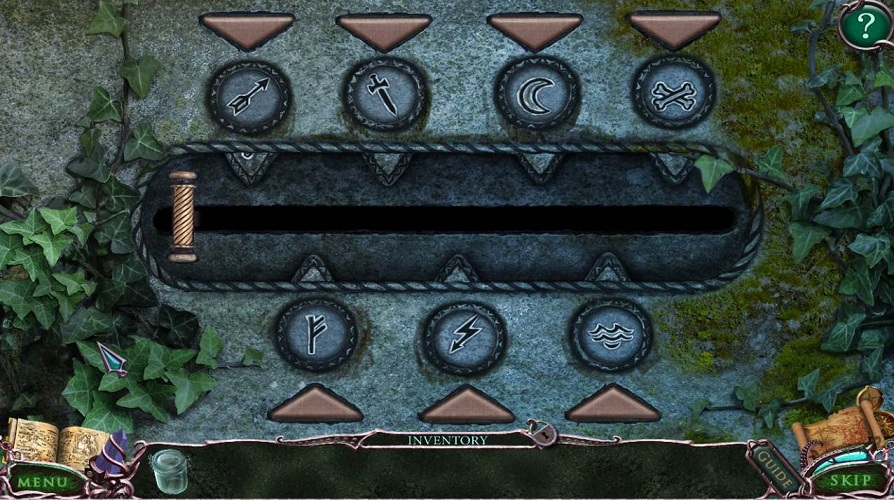
- Go down the rope again
- Examine the far door
- Place the BUTTON
- Click on the gold bar and see what pictures drop down
- Change the pictures above or below to match
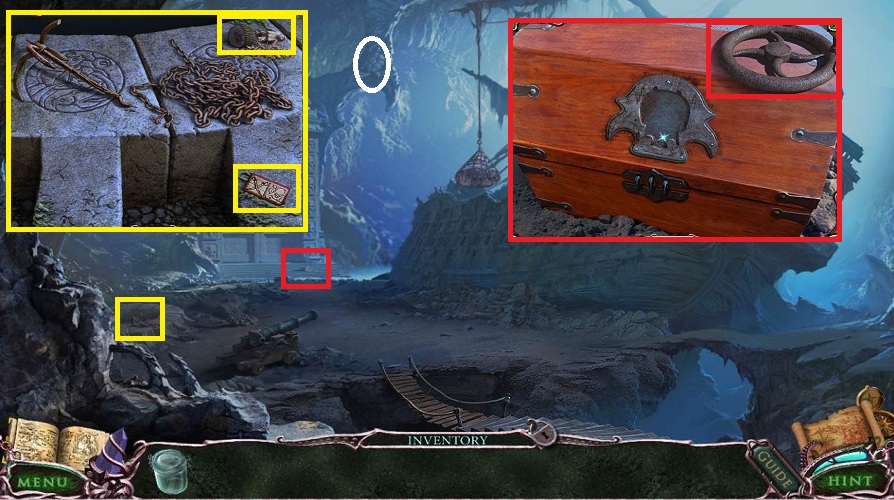
- Go through the door
- Examine the well edge to the left
- Pick up a DOMINO and WOODEN CARVING
- Examine the far door
- Examine the box
- Pick up the CANNON HANDLE
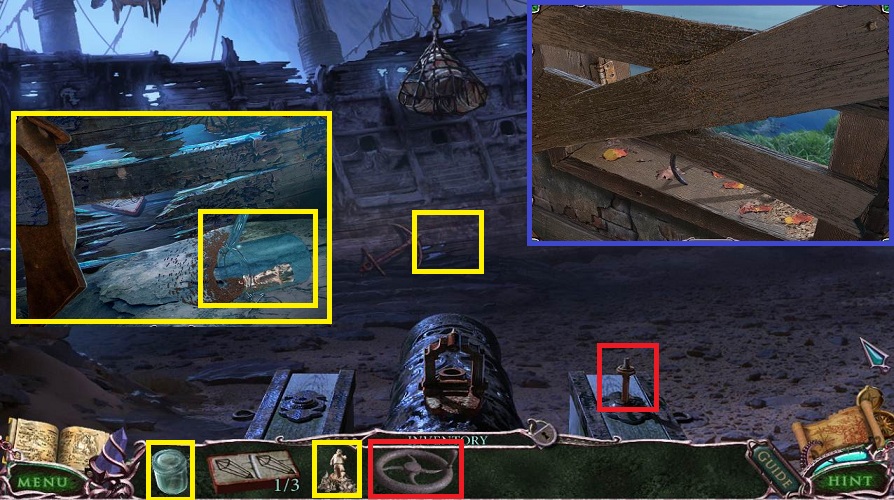
- Examine the cannon
- Place the CANNON HANDLE
- Examine the center of the ship near the anchor
- Place the EMPTY JAR down
- Place the WOODEN CARVING in the jar
- Receive the JAR WITH TERMITES
- Back up 3 times and enter the house
- Examine the boarded up window
- Use the JAR with TERMITES
- Pick up the HOOK
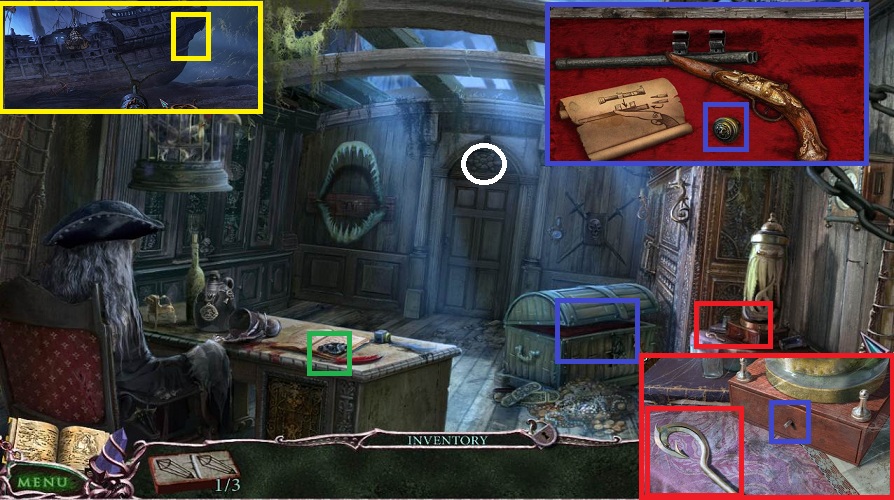
- Return to the cannon area
- Examine the well edge
- Use the HOOK on the chain
- Pick up the HOOK AND CHAIN
- Examine the cannon
- Place the HOOK and CHAIN in the cannon
- The cannon will move and shoot on its own
- Examine the stern and go up
- Examine the chest
- Pick up the KNOB
- Examine the jar to the right
- Pick up the HOOK
- Place the KNOB on the drawer and click
- Pick up DOMINO (2/3)
- Examine the desk
- Pick up the SKULL TOKEN
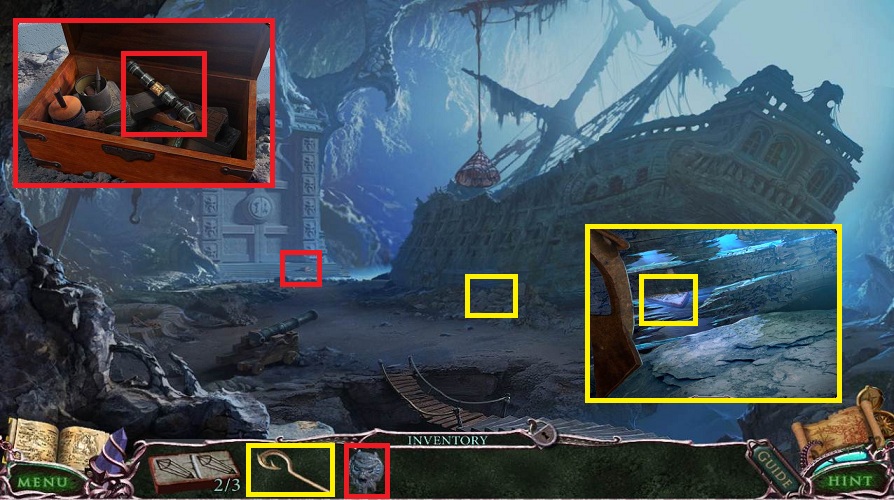
- Go down back to the cannon
- Examine the side of the ship
- Use the HOOK
- Pick up the DOMINO (3/3)
- Examine the door and the box
- Place the SKULL TOKEN
- Pick up the RIFLE SCOPE
- Go back up
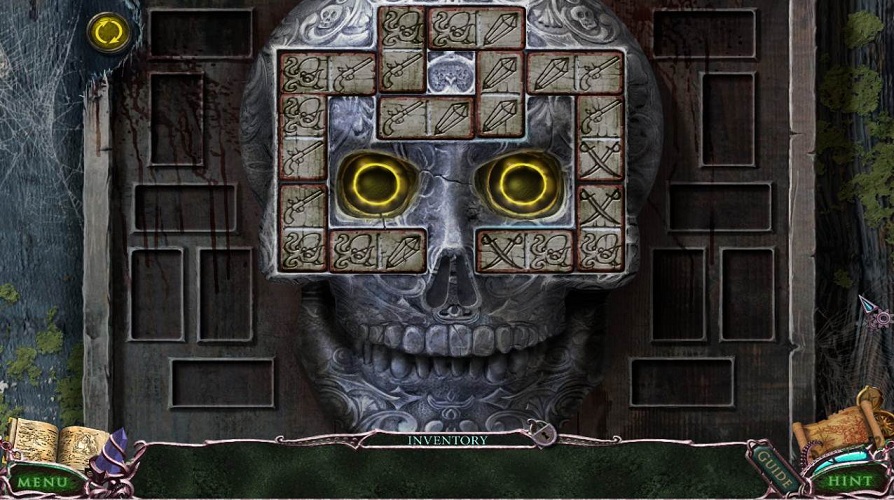
- Examine the skull and crossbones
- Place the 3 DOMINOES
- Hint: Place the double crystal domino on the right of the top square
- Pick up the BULLETS
- Examine the chest
- Place the RIFLE SCOPE and BULLETS
- Pick up the SNIPER RIFLE
- Go to the cannon
- Use the SNIPER RIFLE on the cargo net
- Shoot the cannon at the barrels
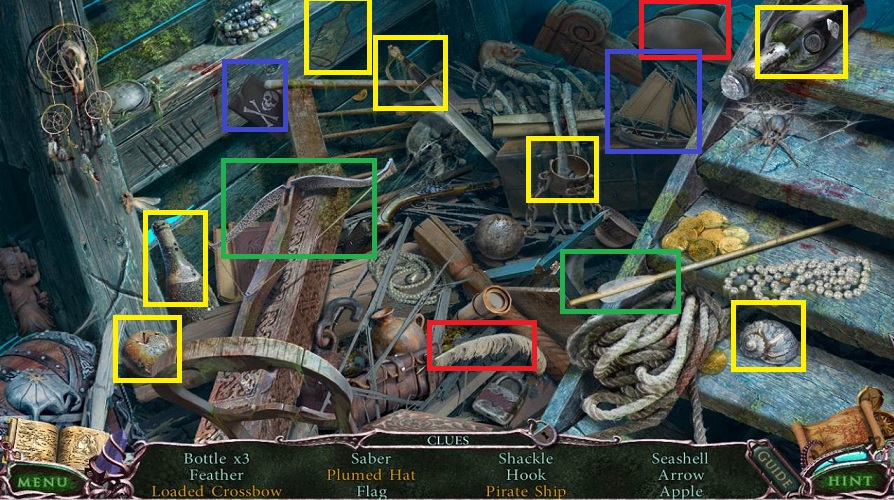
- Enter the side of the ship
- Loaded crossbow: Use arrow on crossbow
- Pirate ship: Use pirate flag on the ship
- Plumed hat: Use the feather on the hat
- Receive the SHACKLES
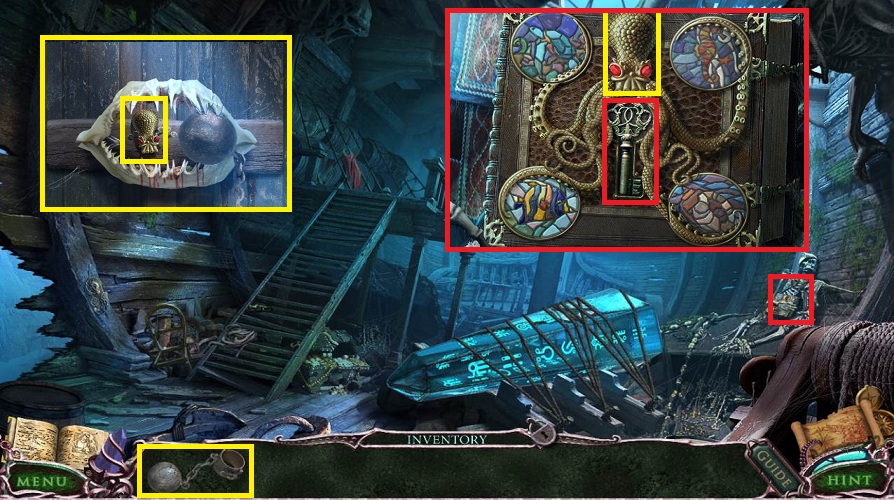
- Go back twice and up into the boat
- Examine the shark skull
- Use the SHACKLES
- Pick up the OCTOPUS
- Go back once and forward once
- Examine the skeleton to the right
- Click on the hand
- Place the OCTOPUS
- Turn each disk to match up the tentacles
- Pick up the KEY
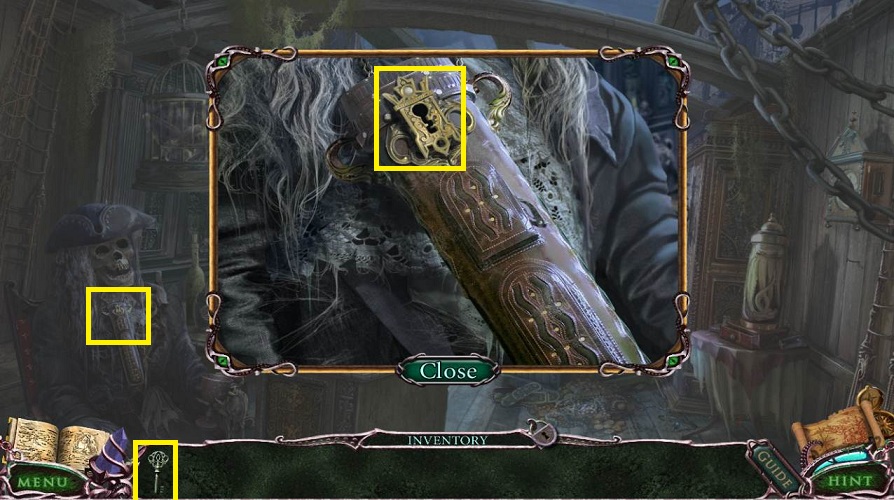
- Go back once and up
- Examine the skeleton
- Use the KEY on the container on its chest
- Pick up the TRIDENT
- Go back once and forward to the door
- Use the TRIDENT
- Enter the door to end the chapter
Comments will load when you reach this part of the walkthrough.