
Bonus Level
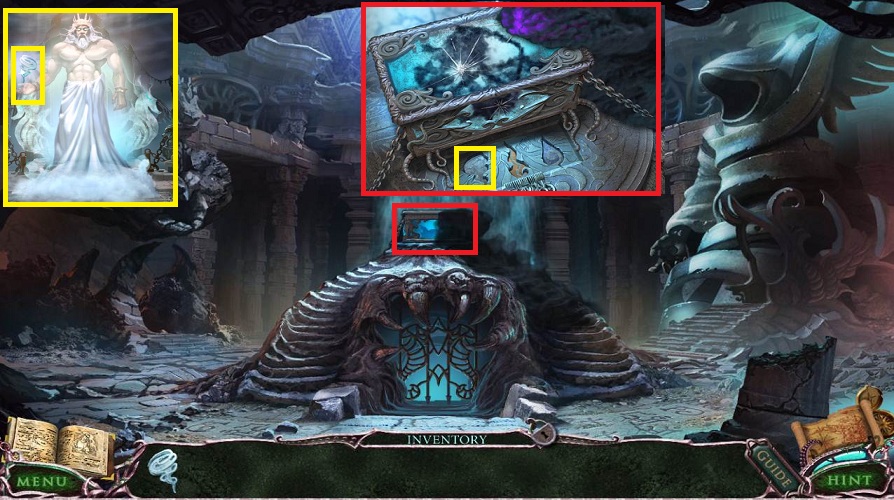
- Access the Bonus Level from the Extras button at the bot
- Pick up the AIR TEMPLE KEY from Poseidon
- Go forward twice
- Examine the top of the stairs
- Place the AIR TEMPLE KEY
- Head to the right
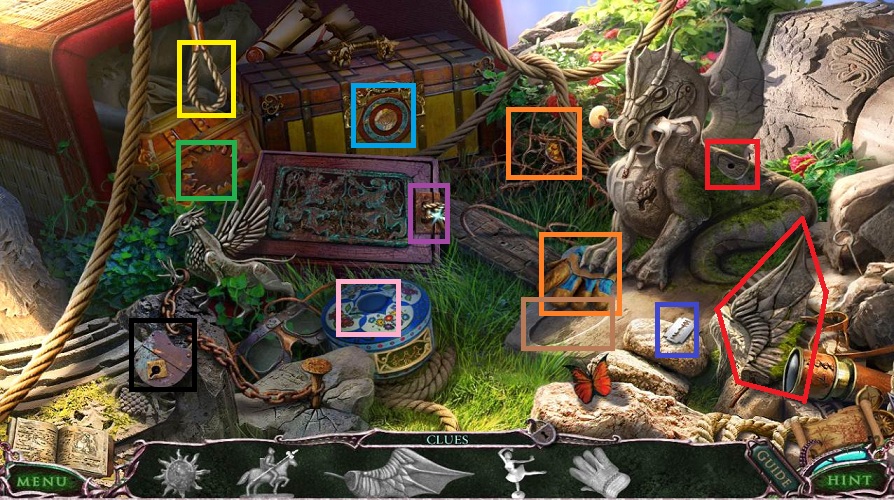
- Do the hidden object scene on the left
- Pick up the Wing and place it on the dragon (red)
- Pick up the Glove and use it on the brambles (orange)
- Pick up the Sun half
- Pull on the noose and the second Sun half drops (yellow)
- Place the Sun in the box (green)
- Pick up the Puzzle Ring and place it on the box (light blue)
- Pick up the Magnet
- Click on the Razor Blade (dark blue)
- Use the Magnet on the Razor Blade
- Use the Razor Blade on the Book (purple)
- Pick up the Knight
- Use the Knight on the indentation in front of the dragon (tan)
- Pick up the dropped Ballerina
- Place the Ballerina on the music box (pink)
- Pick up the Key
- Use the Key on the padlock (black)
- Pick up the GRIFFIN
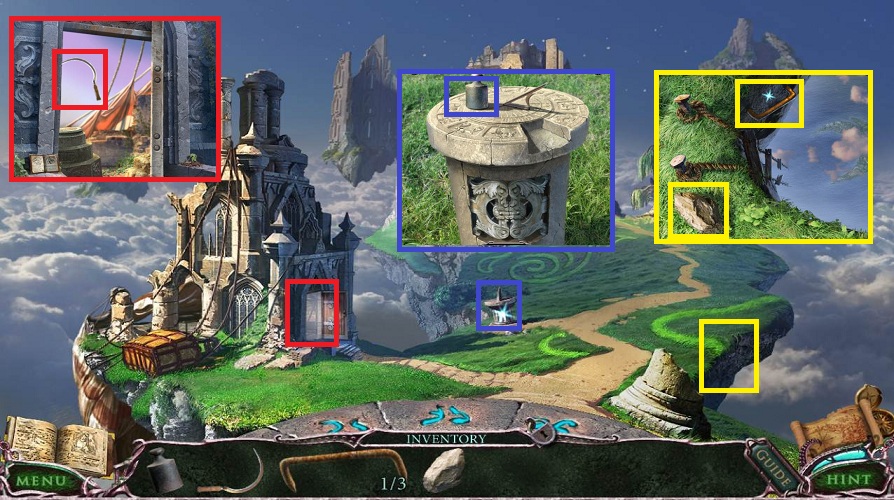
- Examine the door to left
- Place the GRIFFIN
- Pick up a SICKLE
- Examine the sun dial
- Pick up a WEIGHT (1/2)
- Examine the ladder to the right
- Pick up the STEP (1/3) and STONE
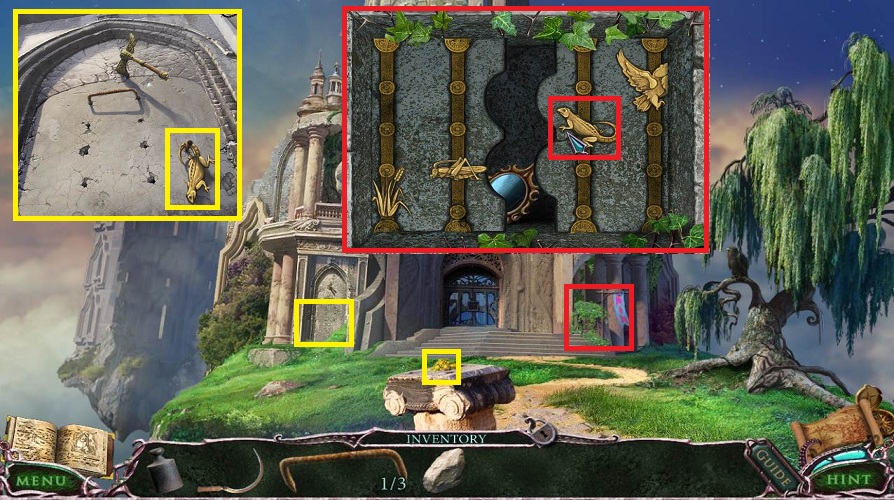
- Head forward
- Examine the pedestal
- Pick up the SULFUR
- Examine the left wall
- Pick up the LIZARD
- Examine the vines to the left of the flag
- Use the SICKLE
- Pick up the STEP (2/3)
- Place the LIZARD
- Move the pieces with the predator on the top and prey at the bottom
- Pick up the MIRROR
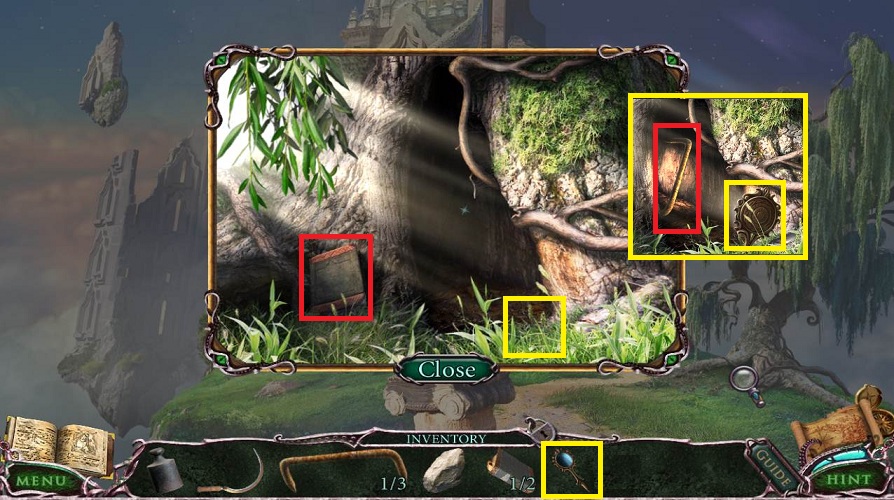
- Examine the hole in the tree
- Pick up the BOOK (1/2)
- Place the MIRROR in the light
- Pick up the STEP (3/3)
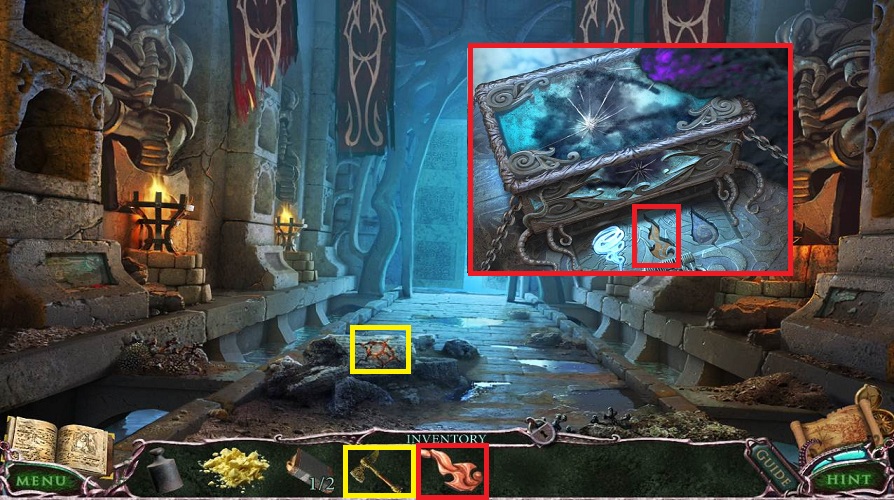
- Examine the wall again
- Place the 3 STEPS
- Use the STONE
- Pick up the AXE
- Back up 4 times
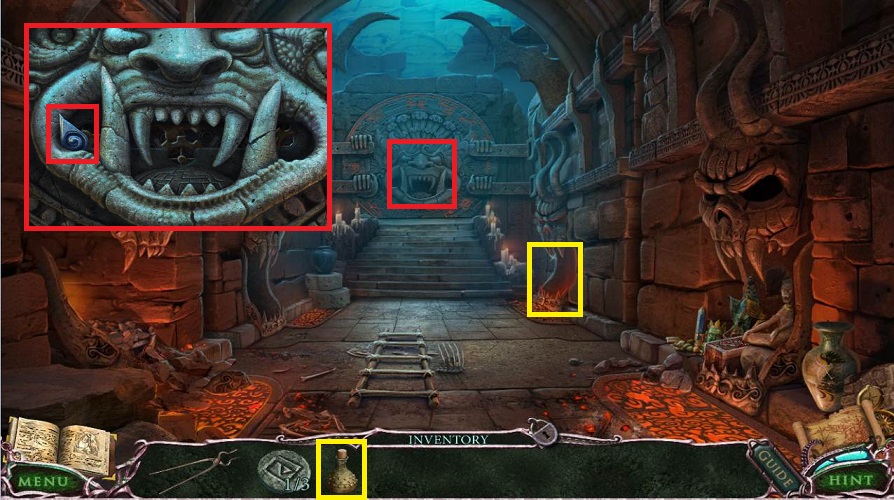
- Examine the burning column
- Use the AXE
- Pick up the FIRE TEMPLE KEY
- Go forward and examine the case
- Place the FIRE TEMPLE KEY
- Head left
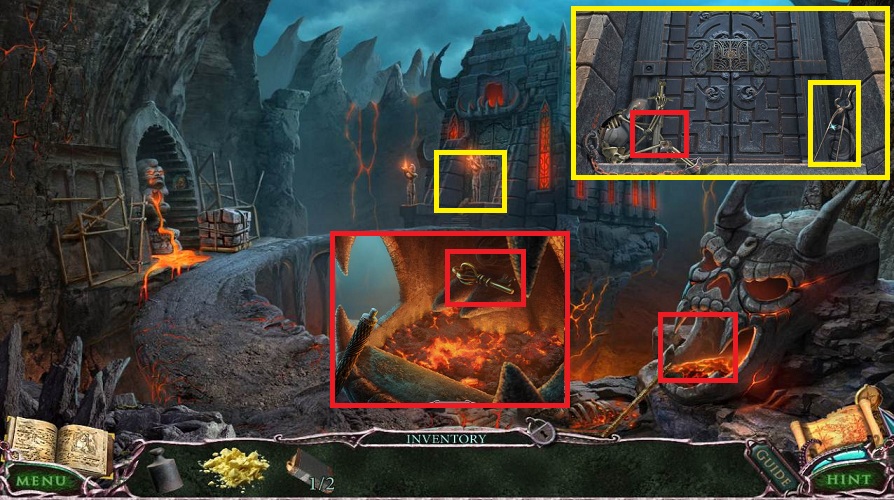
- Examine the fire temple entrance
- Pick up the PLIERS
- Examine the fire to the right
- Use the PLIERS to pick up the KEY
- Examine the temple entrance again
- Examine the skeleton
- Use the KEY on the manacles
- Pick up the SWORD
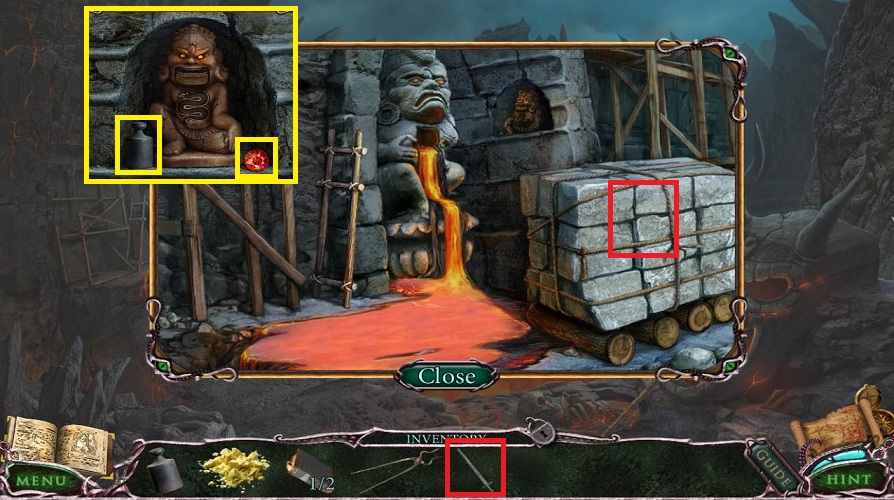
- Examine the scaffolding to the left
- Use the SWORD on the rocks
- Pick up ROPE
- Examine the small statue
- Pick up the WEIGHT and RUBY
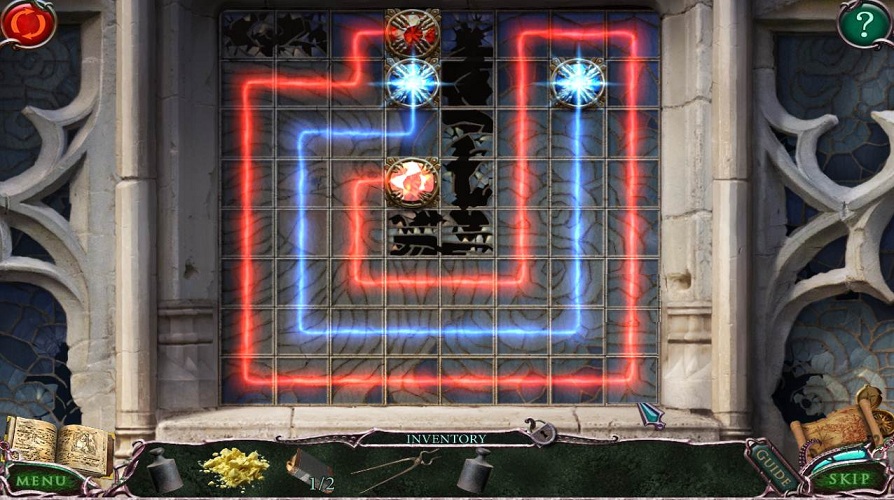
- Use the map to return to the air temple entrance
- Examine the entrance
- Place the RUBY
- Solve the puzzle by creating between similar color gems
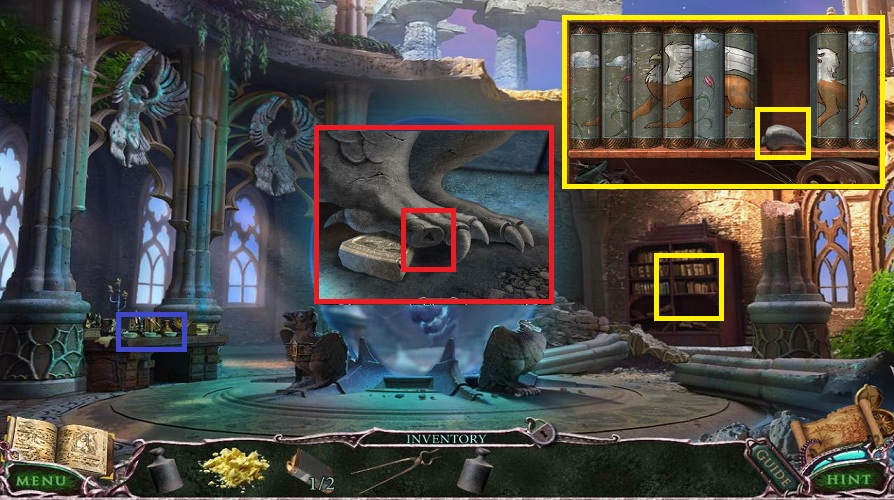
- Examine the book shelves
- Pick up the STONE CLAW
- Examine the right statue
- Place the STONE CLAW
- Pick up the STONE ZODIAC SIGN
- Examine the table on the left
- Pick up the BRUSH
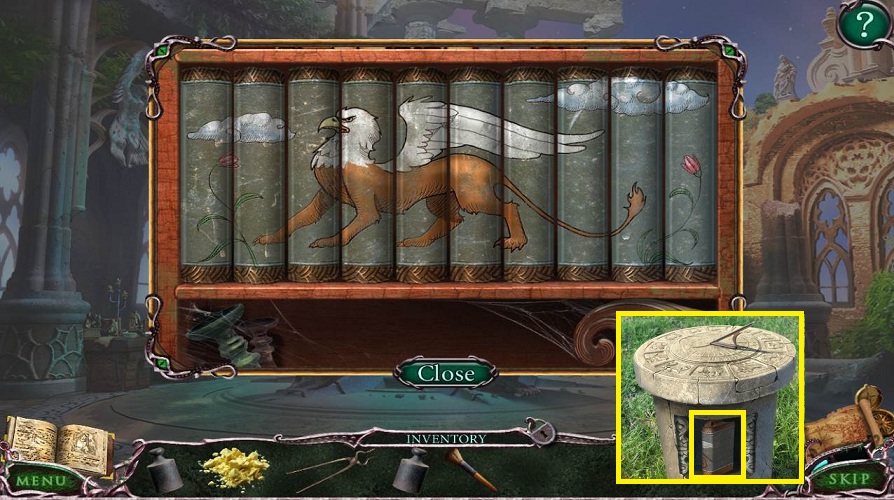
- Back up twice
- Examine the sundial
- Place the STONE ZODIAC SIGN
- Pick up the BOOK (2/2)
- Go forward twice
- Examine the book shelves
- Place the 2 BOOKS
- Arrange the books
- Pick up the PAPER
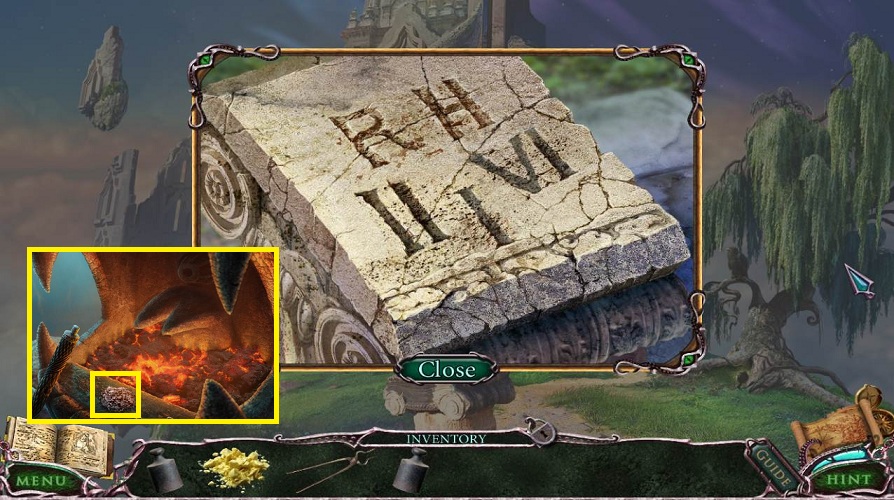
- Use the MAP; return to outside the fire temple
- Examine the fire
- Place the PAPER
- Pick up the ASH
- Return to outside the air temple
- Examine the pedestal
- Use the ASH and then the BRUSH
- Note the code
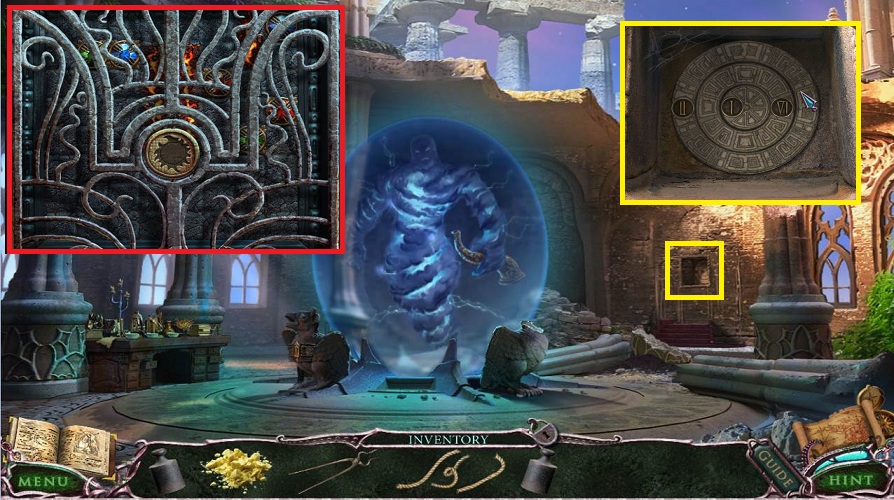
- Enter the temple
- Examine the alcove
- Use the numbers from the pedestal, II, I, VI
- Pick up the SUN
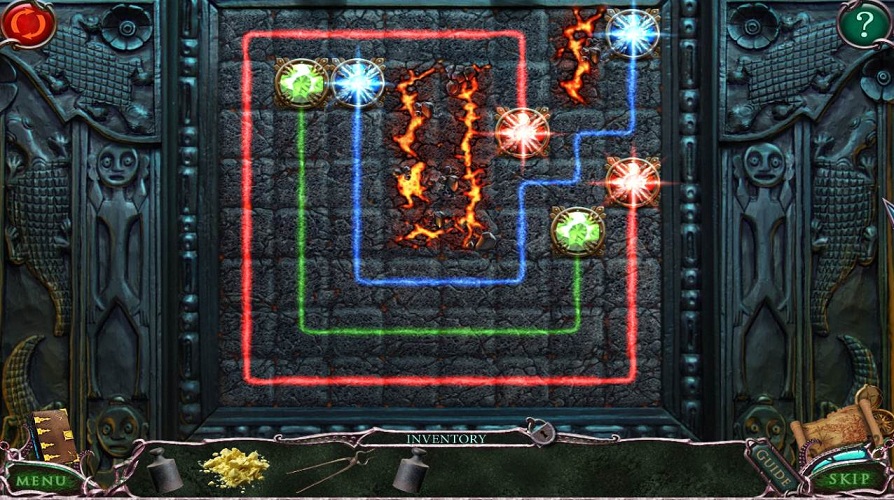
- Return to the fire temple entrance
- Examine the door
- Place the SUN
- Solve the puzzle by creating between similar color gems
- Enter the fire temple
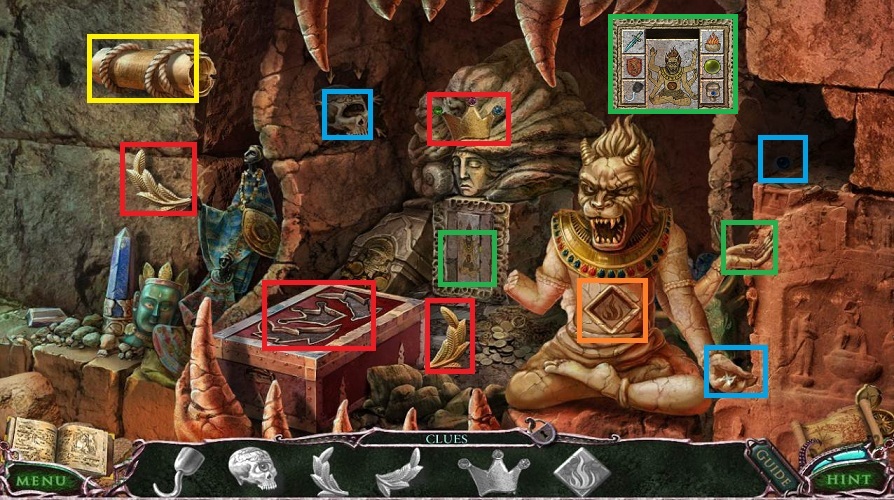
- Do the hidden object scene
- Pick up Crown and 2 Oliver Branches (red)
- Place on chest
- Pick up Fire Tile
- Place on statue (orange)
- Pick up now exposed Knife
- Use on ropes (yellow)
- Pick up Hook Plate
- Examine center statue
- Place the Hook Plate (green)
- Match the plates to the drawing to the left
- Pick up Green Ball
- Place Green Ball in statue's hand
- Pick up the now illuminated Blue Eye and place it in the skull (blue)
- Pick up the Skull and place it in a hand
- Pick up the HOOK
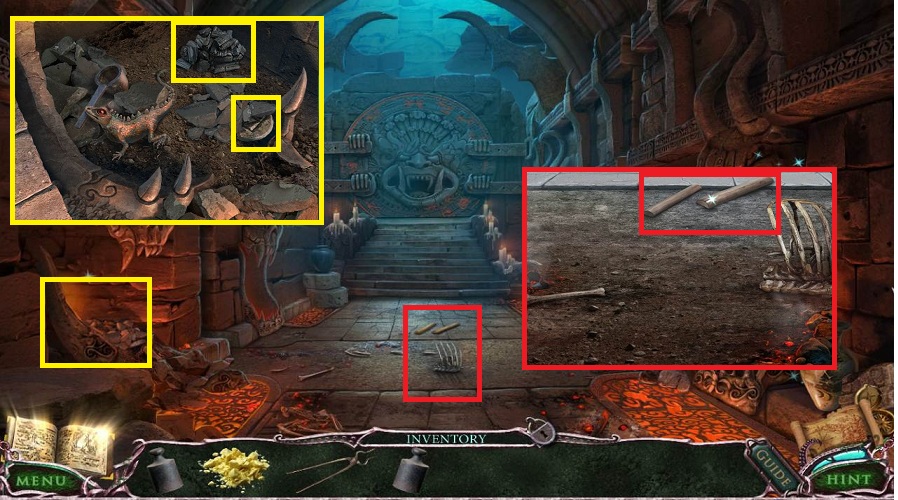
- Return outside
- Examine the fire
- Place the HOOK on the handle and pick it up
- Go back inside
- Examine the floor
- Use the HOOK on the BOARDS
- Examine the fireplace to the left
- Pick up the COAL
- Click on the ashes
- Pick up the RUNE STONE (1/3)
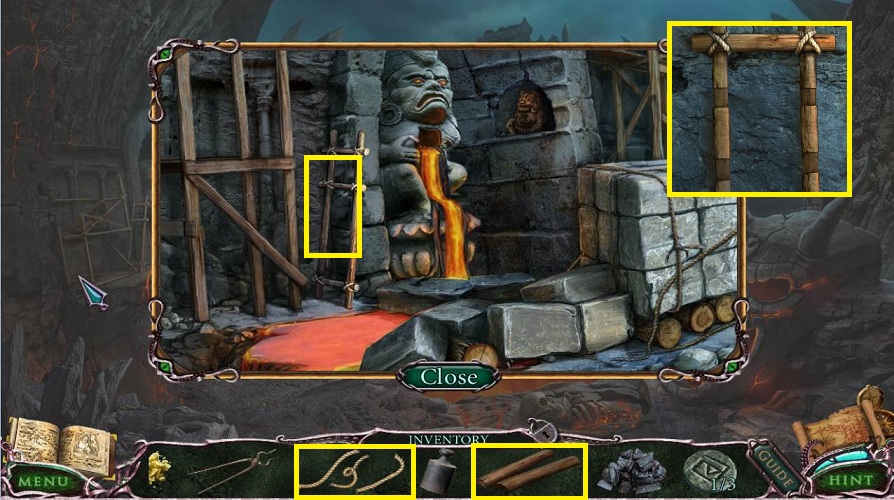
- Return outside
- Examine the scaffolding
- Examine the ladder
- Use the BOARDS and then the ROPE
- Pick up the LADDER
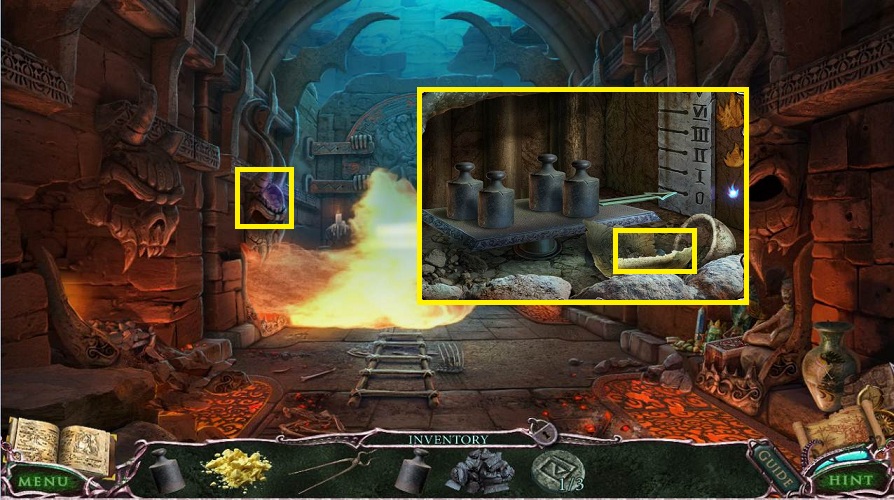
- Go back inside
- Place the LADDER over the pressure plate
- Examine the fire to the left
- Place the 2 WEIGHTS
- Pick up the PESTLE under the paper
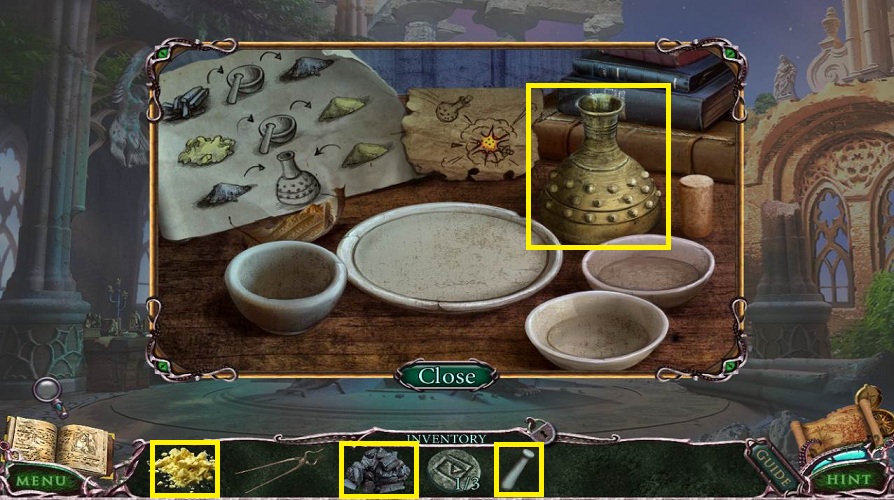
- Return to the air temple
- Examine the table
- Place the COAL in the mortar
- Place the PESTLE
- Click on the COAL to grind it
- Click again to place on the plate
- Place the SULFUR and click on it
- Click again to place on the plate
- Click on the SULFUR and COAL again
- Click on the container twice
- Receive a HANDMADE BOMB
- Return to the fire temple
- Use the HANDMADE BOMB on the last fire
- Examine the door
- Pick up the WATER KEY
- Back up twice
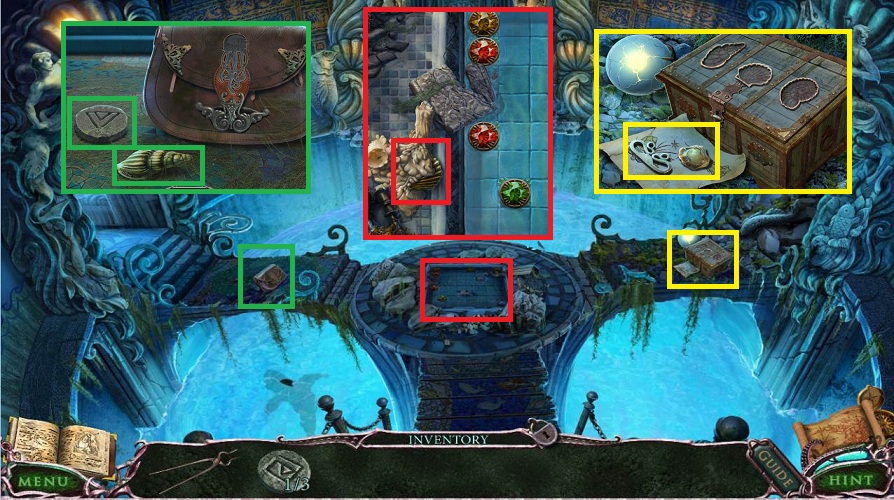
- Place the WATER KEY
- Go straight forward
- Examine the chest to the right
- Pick up the FLINT
- Examine the center pool
- Pick up the wax encrusted SHELL
- Examine the bag to the left
- Pick up the SHELL and STONE TOKEN (2/3)
- Head left
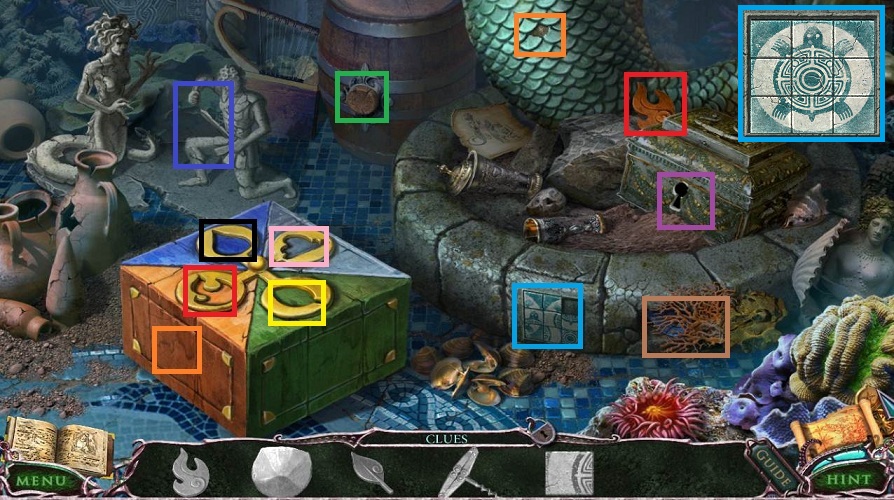
- Do the hidden object scene to the right
- Pick up the Flame and place on the box (red)
- Pick up the Fish Scale and place on the fish (orange)
- Pick up the Leaf and place on the box (yellow)
- Pick up the Corkscrew (green)
- Use the Corkscrew on the barrel
- Pick up the Puzzle Piece
- Examine the tile puzzle (light blue)
- Place the piece and arrange to make a turtle
- Pick up the Cloud and place on the box (pink)
- Place the Shield and place it on the Knight (dark blue)
- Pick up a Key
- Use Key in the locked box and pick up the Scraper (purple)
- Use Scraper on coral (tan)
- Pick up Water Drop and place on the box (black)
- Pick up the SHELL
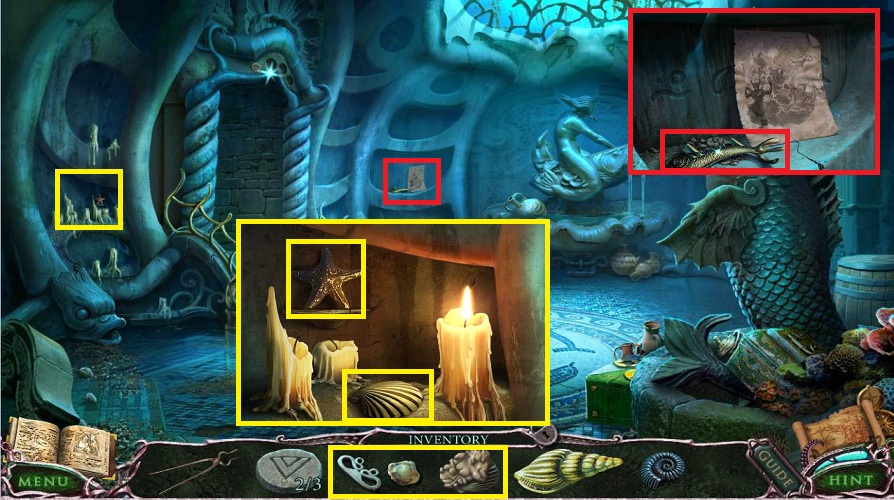
- Examine the left shelf
- Use the FLINT to light the right candle
- Place the SHELL with wax in the flame
- Pick up the clean SHELL
- Pick up the STAR (1/3)
- Examine the center shelf
- Pick up the HANDLE
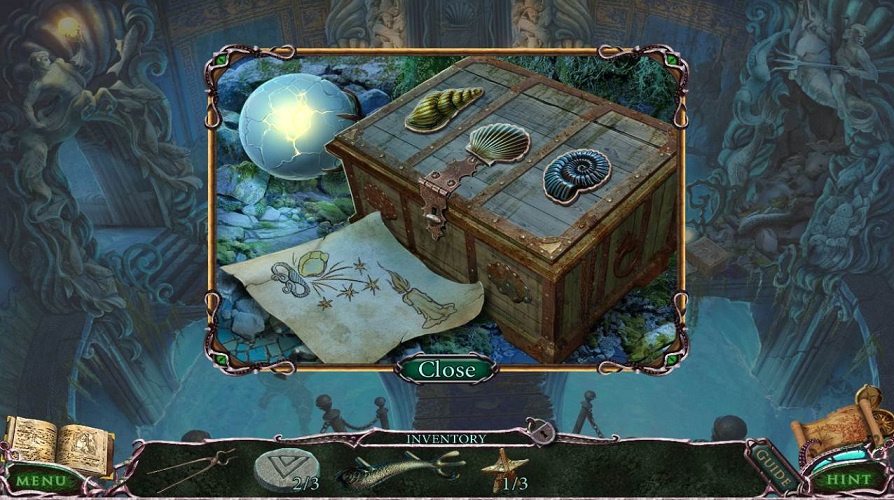
- Back up once
- Examine the chest to the right
- Place the SHELLS
- Pick up the paper and then the STONE TOKEN (3/3)
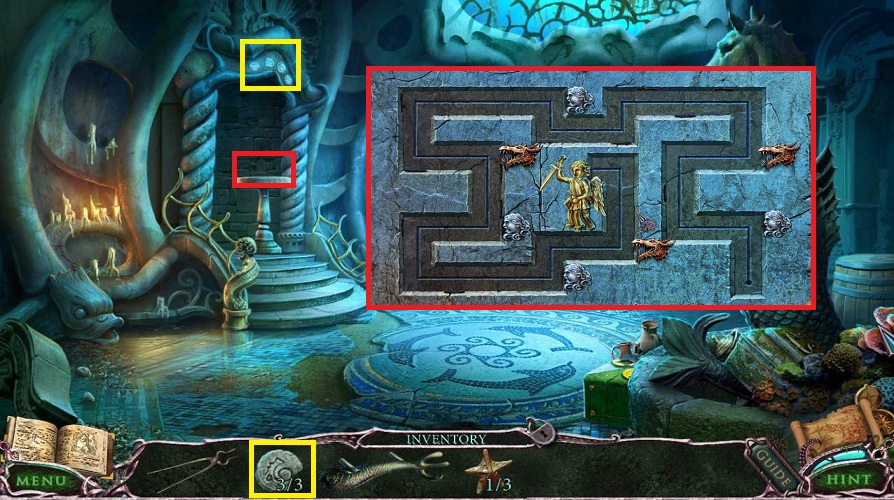
- Return left
- Examine the archway
- Place the 3 STONE TOKENS
- Examine the table
- Move your angel head along the path waiting for obstructions to clear
- Pick up the JELLYFISH
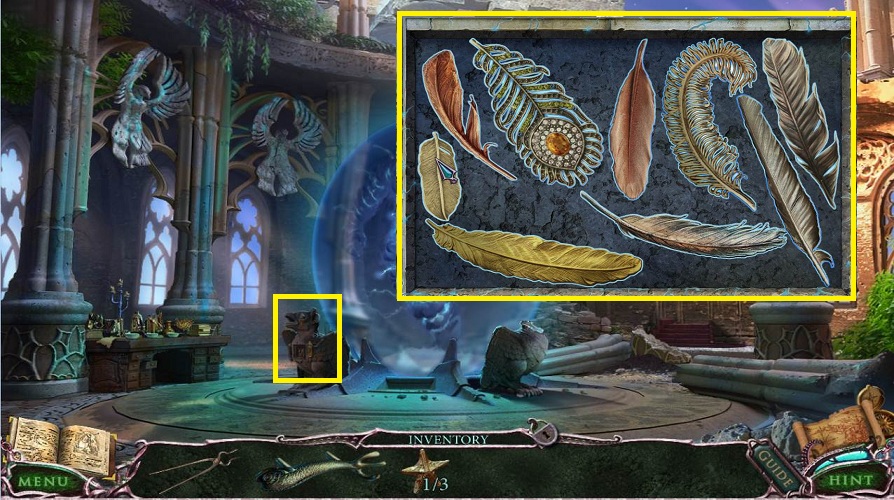
- Back up once
- Examine the bag
- Place the JELLYFISH
- Pick up the FEATHER
- Use the map to return to the air temple
- Examine the left statue
- Place the FEATHER
- Move the feathers around so they do not touch each other
- You will release the air god
- Pick up the AIR SPHERE and HORN
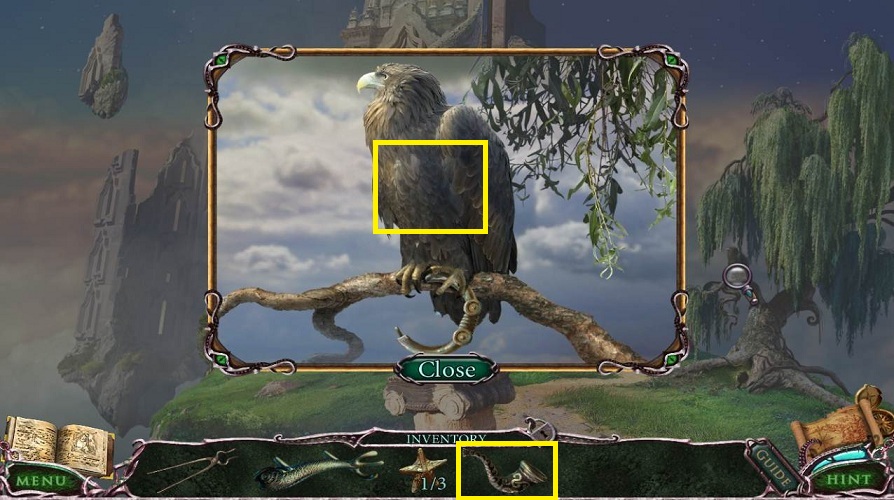
- Back up once
- Examine the tree branch
- Use the HORN on the owl
- Receive the RING
- Use the map to return to the fire temple door
- Examine the door
- Place the RING
- Go forward
- Examine the runes on the floor
- Pick up the STAR (2/3)
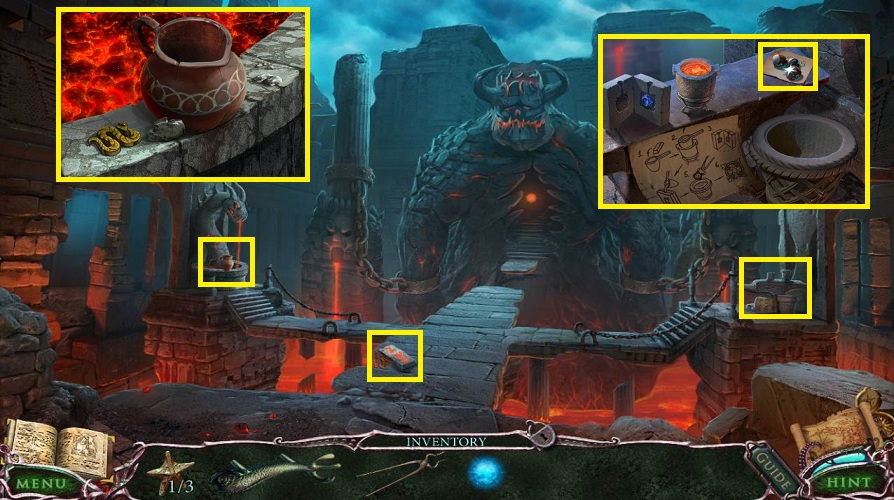
- Examine the lava fountain to the left
- Pick up the SNAKE and the PITCHER
- Examine the work bench to the right
- Pick up the NUTS
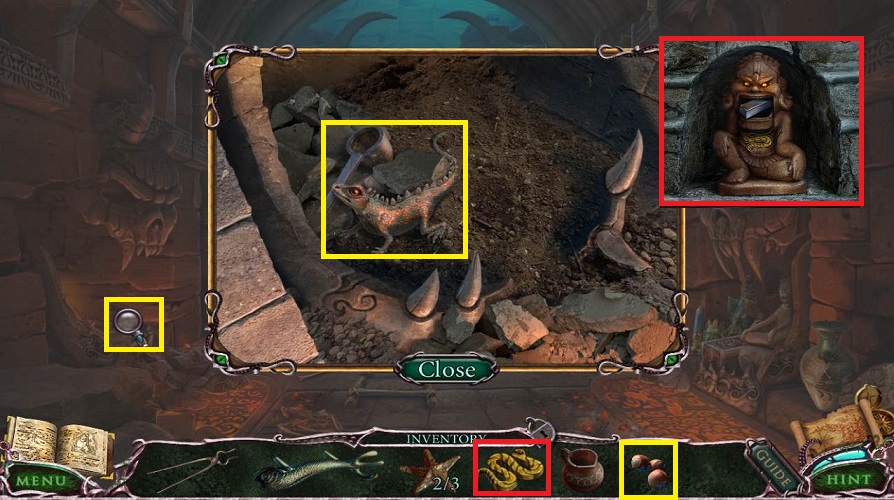
- Back up once and examine the fireplace to the left
- Give the lizard the NUTS
- Pick up the CRUCIBLE
- Back up once
- Examine the statue to the left
- Place the SNAKE
- Pick up the bar of TIN
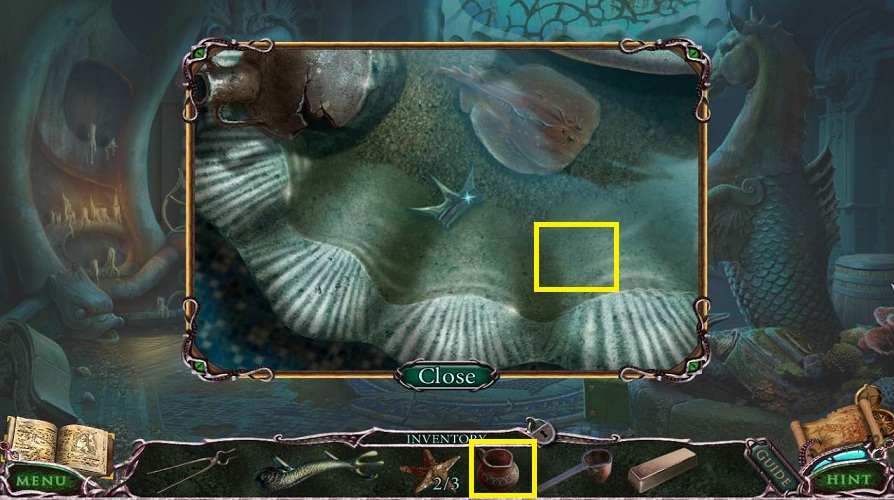
- Use the map and go to the second room of the water temple
- Examine the fountain
- Use the PITCHER on the water
- Return to the 3rd room of the fire temple
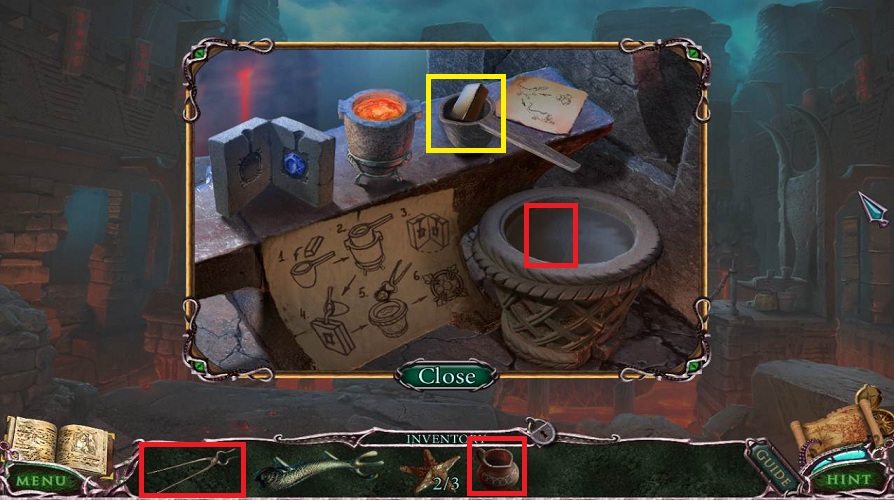
- Examine the work bench
- Place the CRUCIBLE on the bench.
- Place the TIN in the crucible
- Pick it up and place it in the lava bowl and then the mold
- Pour the WATER in the bucket
- Use the PLIERS on the GEM
- Receive up the GEM
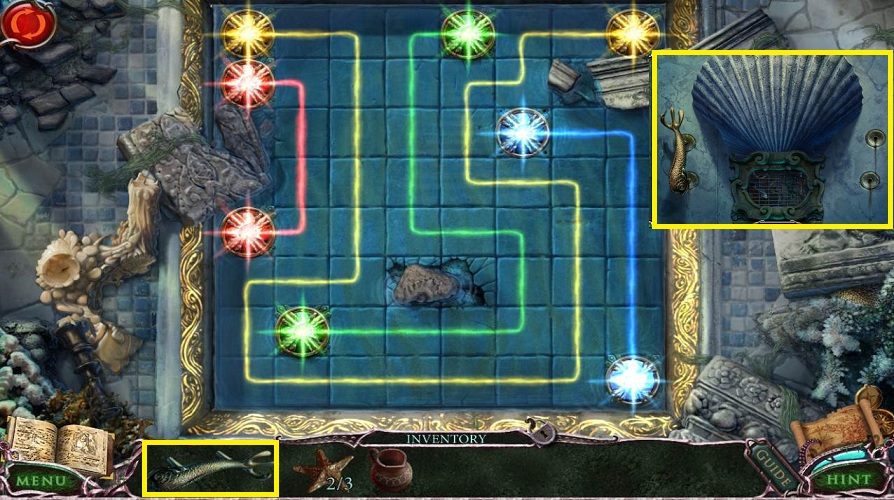
- Return to the water temple pool
- Place the GEM and connect the gems
- Examine the water temple door that is straight ahead
- Place the HANDLE
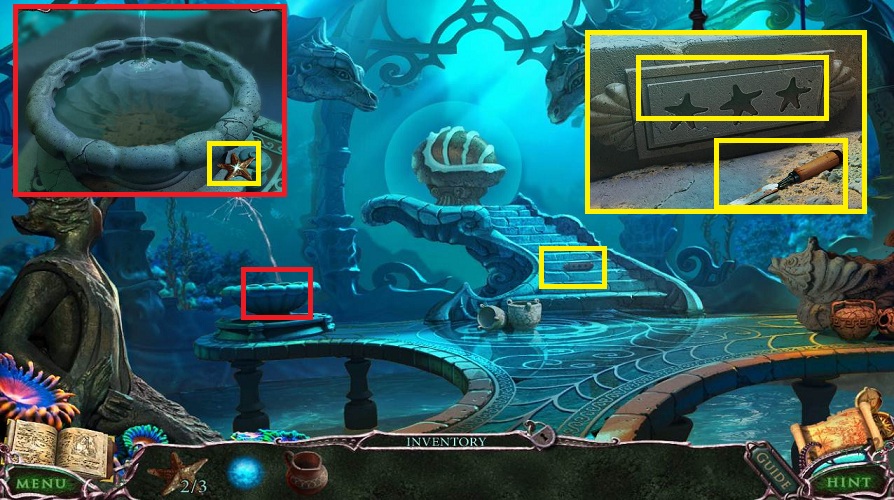
- Go forward
- Examine the basin
- Pick up the STAR (3/3)
- Examine the steps
- Place the 3 STARS
- Pick up the CHISEL and RUNE PATH
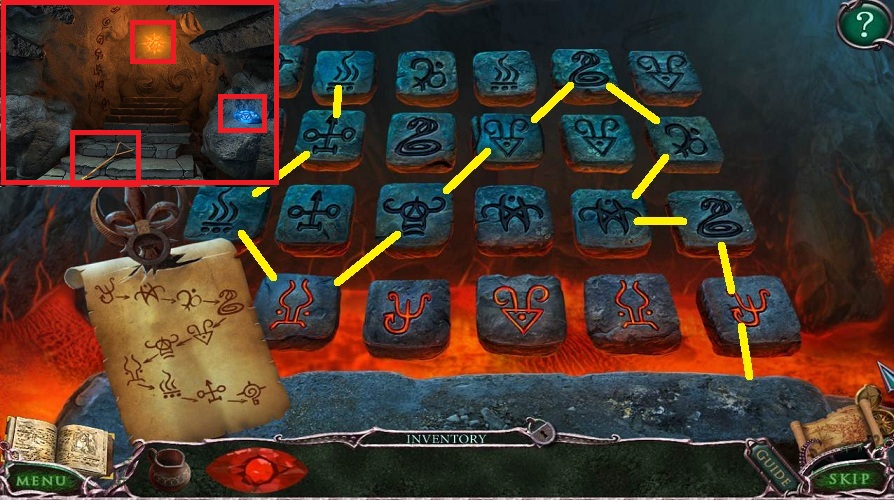
- Go to the fire temple
- Examine the rune bridge
- Place the RUNE PATH on the stand
- Press the runes in the correct order to cross
- Pick up the NET, BLUE EYE and the FIRE SPHERE
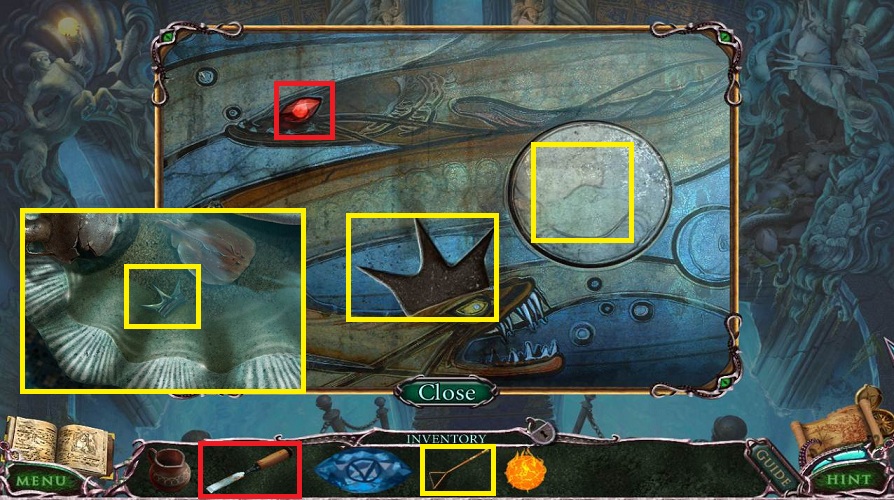
- Return to the left room of the water temple
- Examine the fountain
- Use the NET to pick up the CROWN
- Back up once and examine the wall
- Use the CHISEL on the RED EYE
- Place the CROWN
- Pick up the exposed RING
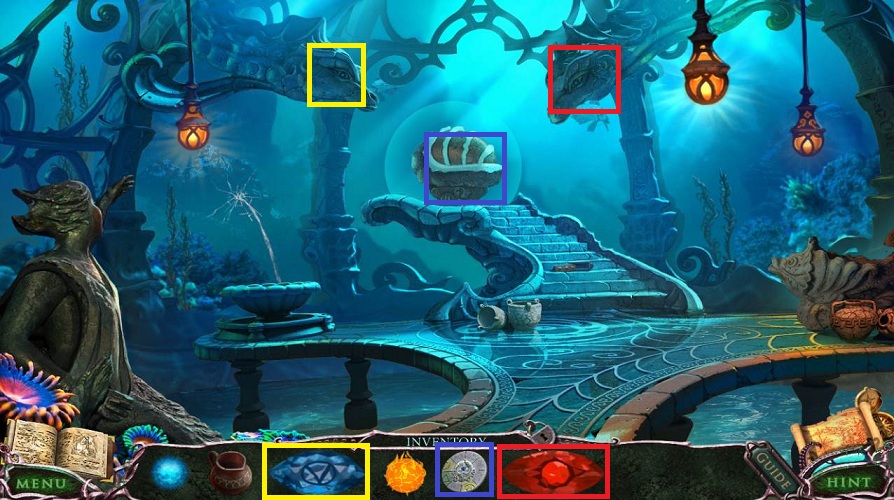
- Go forward
- Place the RED and BLUE EYES
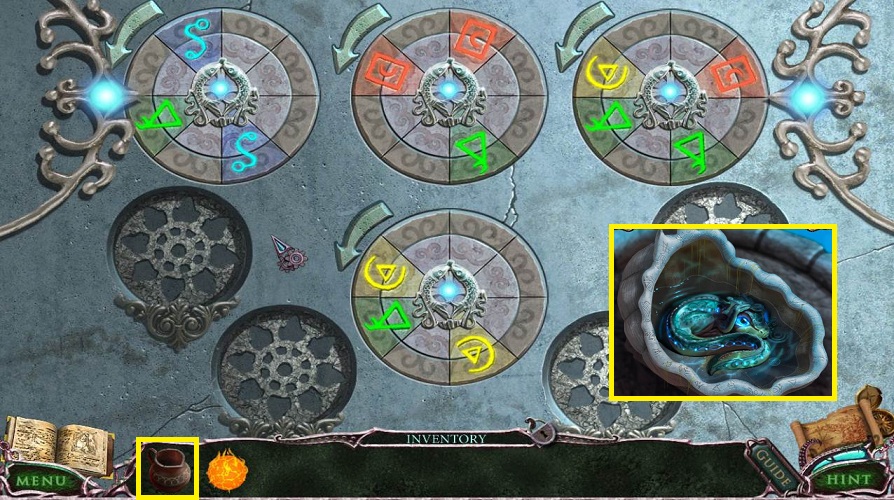
- Examine the container the baby is trapped in
- Place the RING, and then place all he rings according to the colors, and turn them using the arrows
- Use the PITCHER on the water spirit baby
- Examine the fountain
- Place the BABY WATER SPIRIT in the fountain
- Pick up the WATER SPHERE from the fountain
- Back up twice and watch the cut scenes to end
Comments will load when you reach this part of the walkthrough.